|
[#1]
When you guys bevel out the trigger guard, what are you using to smooth it out? It doesn't even look like you hit it
|
|
|
|
KY, USA
|
[#2]
Originally Posted By scoutfsu99:
When you guys bevel out the trigger guard, what are you using to smooth it out? It doesn't even look like you hit it Dremel with fine grit sanding drum, then wet sand with 200 grit sandpaper on up to 800. Then I hit it with a few coats of duracoat. All that and a lot of patience... |
|
|
|
[#3]
Originally Posted By micah197:
Originally Posted By scoutfsu99:
When you guys bevel out the trigger guard, what are you using to smooth it out? It doesn't even look like you hit it Dremel with fine grit sanding drum, then wet sand with 200 grit sandpaper on up to 800. Then I hit it with a few coats of duracoat. All that and a lot of patience... I finished mine with a craytex polishing drum. |
|
|
|
KY, USA
|
[#4]
The mag release bevel isn't as particular, but the trigger guard you have to do more work on so it looks good.
|
|
|
OH, USA
|
[#5]
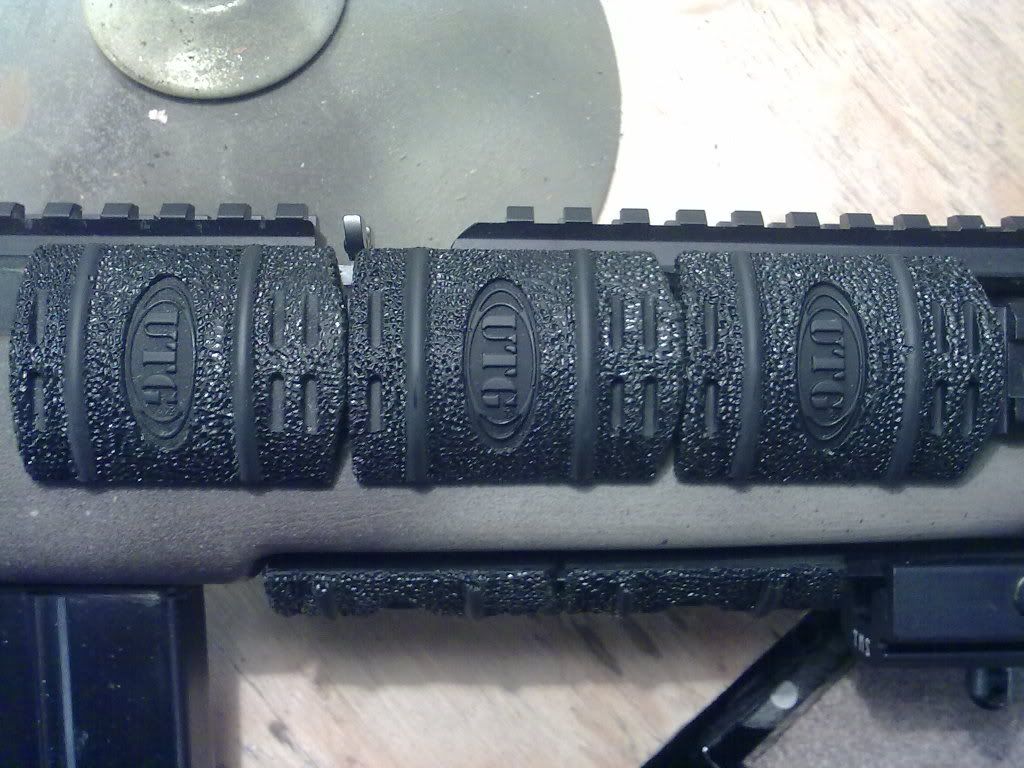
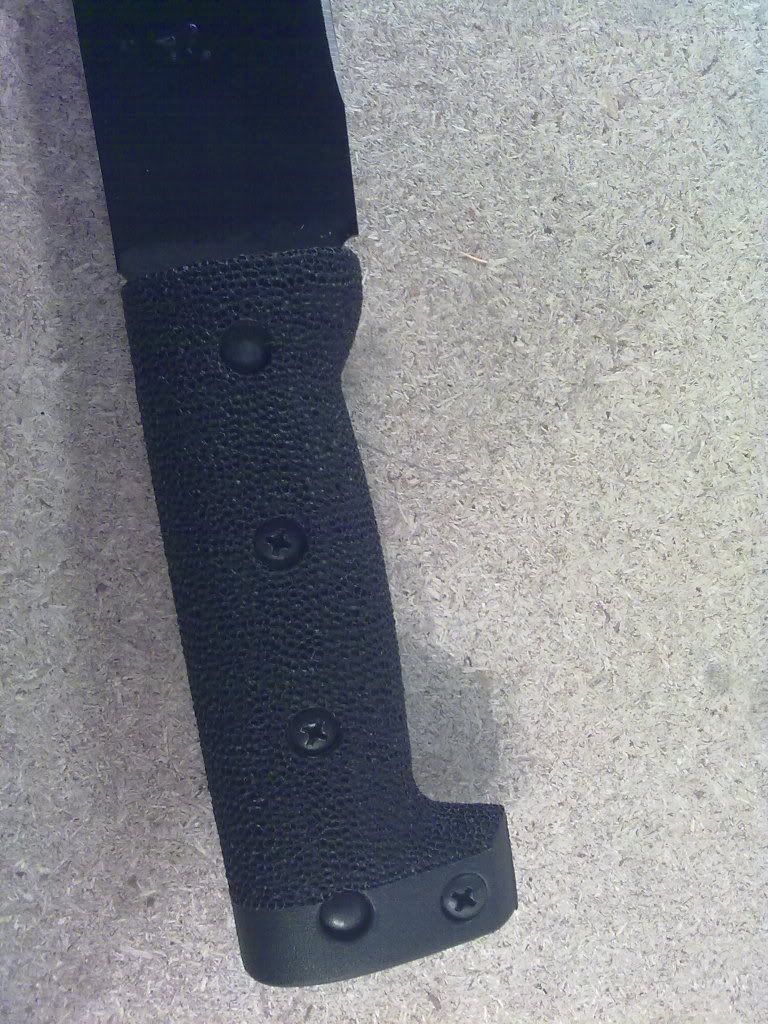
Since I'm not a football fan, I had alot of time tonight during the Super Bowl to add some grip to some cheap rail covers on one of my 10/22's and a machete handle. I love how it turned out, very functional...


|
|
|
PA, USA
|
[#6]
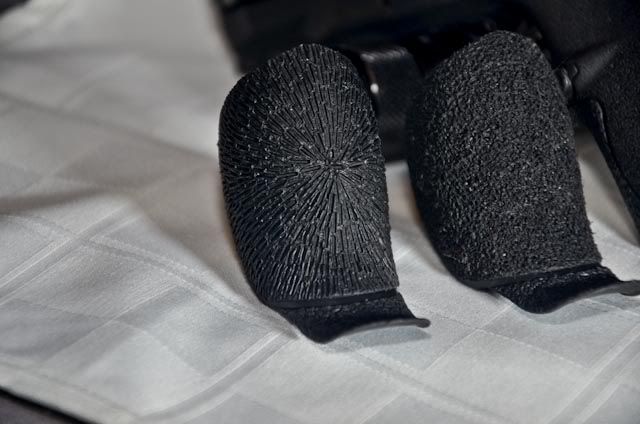
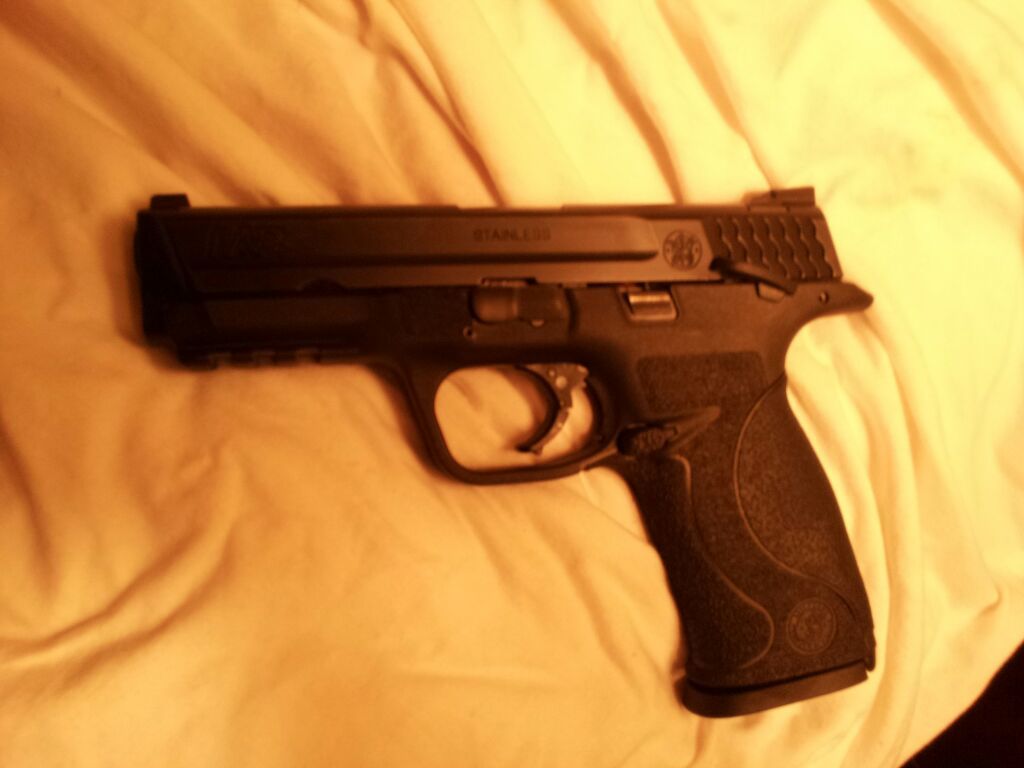
tried this out on the Large back strap on my M&P 9. it's a bit too large to use so i thought i would see what it would look like. i think it turned out pretty good. i may have to give it a shot on the Medium which is the one i like but haven't decided yet.
i used an 8D 2-1/2" nail that i cut some grooves into the head. then after i spent a while covering the strap i went back to the regular pointed tip that came with my soldering iron that i stoned into a sharper point and tapping the strap very light up and down over the entire strap again hitting the spots that the nail missed, touching the edges, and blending it all together. took probably an hour or so to complete. it didn't come out to rough, and is much better than the factory. 


i doubt that i will do the front strap, though i think it would look really good. i only did the rear because they are easy and cheap to replace. |
|
|
|
[#7]
Originally Posted By Wils91:
tried this out on the Large back strap on my M&P 9. it's a bit too large to use so i thought i would see what it would look like. i think it turned out pretty good. i may have to give it a shot on the Medium which is the one i like but haven't decided yet. i used an 8D 2-1/2" nail that i cut some grooves into the head. then after i spent a while covering the strap i went back to the regular pointed tip that came with my soldering iron that i stoned into a sharper point and tapping the strap very light up and down over the entire strap again hitting the spots that the nail missed, touching the edges, and blending it all together. took probably an hour or so to complete. it didn't come out to rough, and is much better than the factory. <a href="http://img832.imageshack.us/i/img1138tq.jpg/" target="_blank">http://img832.imageshack.us/img832/8004/img1138tq.jpg</a> <a href="http://img844.imageshack.us/i/img1139hz.jpg/" target="_blank">http://img844.imageshack.us/img844/1826/img1139hz.jpg</a> <a href="http://img16.imageshack.us/i/img1140t.jpg/" target="_blank">http://img16.imageshack.us/img16/8850/img1140t.jpg</a> i doubt that i will do the front strap, though i think it would look really good. i only did the rear because they are easy and cheap to replace. Looks like it came out nice. |
|
|
|
|
[#8]
I like it. Looks nice and random. Very similar to the job Boresight Solution did on my M&P.
|
|
|
|
|
[#9]
Originally Posted By Wils91:
tried this out on the Large back strap on my M&P 9. it's a bit too large to use so i thought i would see what it would look like. i think it turned out pretty good. i may have to give it a shot on the Medium which is the one i like but haven't decided yet. i used an 8D 2-1/2" nail that i cut some grooves into the head. then after i spent a while covering the strap i went back to the regular pointed tip that came with my soldering iron that i stoned into a sharper point and tapping the strap very light up and down over the entire strap again hitting the spots that the nail missed, touching the edges, and blending it all together. took probably an hour or so to complete. it didn't come out to rough, and is much better than the factory. <a href="http://img832.imageshack.us/i/img1138tq.jpg/" target="_blank">http://img832.imageshack.us/img832/8004/img1138tq.jpg</a> <a href="http://img844.imageshack.us/i/img1139hz.jpg/" target="_blank">http://img844.imageshack.us/img844/1826/img1139hz.jpg</a> <a href="http://img16.imageshack.us/i/img1140t.jpg/" target="_blank">http://img16.imageshack.us/img16/8850/img1140t.jpg</a> i doubt that i will do the front strap, though i think it would look really good. i only did the rear because they are easy and cheap to replace. I did my M&P tonight with the diced up brass screw in the OP. It turned out NICE! I did the backstrap first and liked it... ALOT. I then did the front strap and now the M&P is GLUED to my hands!!! AWESOME! I also hit the front of the trigger guard b/c that's where I place the index finger of my support hand... it works awesome. Thanks for all the tips guys! -ZA |
|
|
|
KY, USA
|
[#10]
Been wanting to try this out for quite a while, and ofcourse why not paint it too. I used the plain tip supplied with the soldering iron, slightly rounded down with a file.


|
|
|
LA, USA
|
[#11]
These all look really nice I know this is a bit off topic but was wondering if anyone has tried filling the empty space on the back of the glock grip and then recontouring or cutting the grip down to a more grip friendly size.
|
|
|
NY, USA
|
[#12]
|
|
|
|
[#13]
Originally Posted By fnub315: My first whack at it.... http://img196.imageshack.us/img196/3954/74112756.jpg Uploaded with ImageShack.us http://img819.imageshack.us/img819/2986/71151040.jpg Uploaded with ImageShack.us I really like that. |
|
|
|
TX, USA
|
[#14]
Originally Posted By topgunpilot20:
Originally Posted By fnub315:
My first whack at it.... http://img196.imageshack.us/img196/3954/74112756.jpg Uploaded with ImageShack.us http://img819.imageshack.us/img819/2986/71151040.jpg Uploaded with ImageShack.us I really like that. +1 hell of a job there. |
|
|
NV, USA
|
[#15]
Looks like I have a project or three for next weekend. Very cool guys.
Robert |
|
|
NV, USA
|
[Last Edit: thearmedrebel]
[#16]
Well, I checkered a brass machine screw and screwed it into my soldering iron this week. Figured I'd start on a part I could replace first, so I worked over the large backstrap from my M&P (I use the medium and small). Once I was okay with what I was doing I hit the front strap as well. Much better.
http://gallery.me.com/themacdaddy/100087/IMG_5018/web.jpg?ver=13097435690001 http://gallery.me.com/themacdaddy/100087/IMG_5023/web.jpg?ver=13097435720001 http://gallery.me.com/themacdaddy/100087/IMG_5024/web.jpg?ver=13097435730001 http://gallery.me.com/themacdaddy/100087/IMG_5028/web.jpg?ver=13097435730001 The backstrap on the M&P is much softer than the front and easier to work with. I also did the rear of the grip area on my Kahr MK-9. Did the front strap in stippling as well, with an electric pencil and a hammer and punch. Have a couple of Glocks that will get worked on later too. Very cool AEnemaBay, thanks for sharing. When I do the Glocks I'll take a couple of pics of the modified brass machine screws. I used a 30LPI checkering file on mine as well as a few done the dremel/needle file route. Those are much coarser. Maybe the Magpul AFG needs some work... Robert |
|
|
PA, USA
|
[Last Edit: SGT45]
[#17]
The OP's stippling job is the best I have seen! I am not fond of the circles, crackled, or line stippling. Very nice!!!!!!!!!!!!!! Wonderful Job on the ruger pistol!!!!
|
|
|
HI, USA
|
[#18]
Here's my attempt, and wow what a difference. I didn't bother with the making of the stippling head and just dab-dab-dabbed with the point of the soldering iron. 1 second for a deep pockmark, and .5 seconds for a small one. I traced a pencil line and just went at it in a random pattern until it looked right.

|
|
|
FL, USA
|
[Last Edit: jrn156]
[#19]
Glock 27


|
|
|
|
[Last Edit: AllAmerican2000]
[#20]
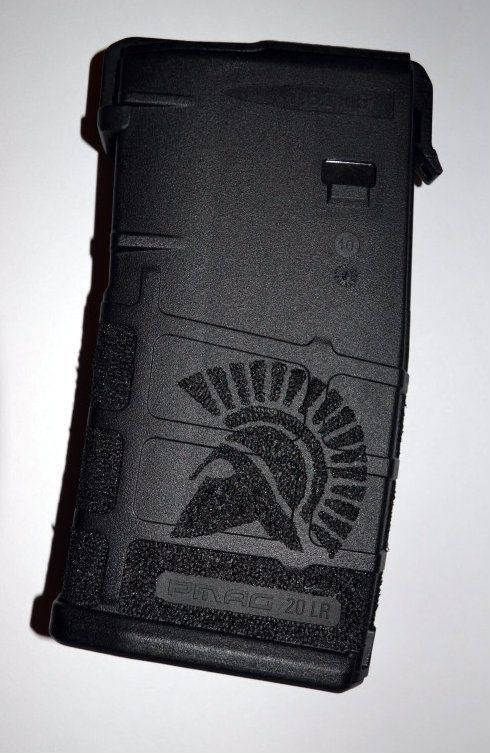
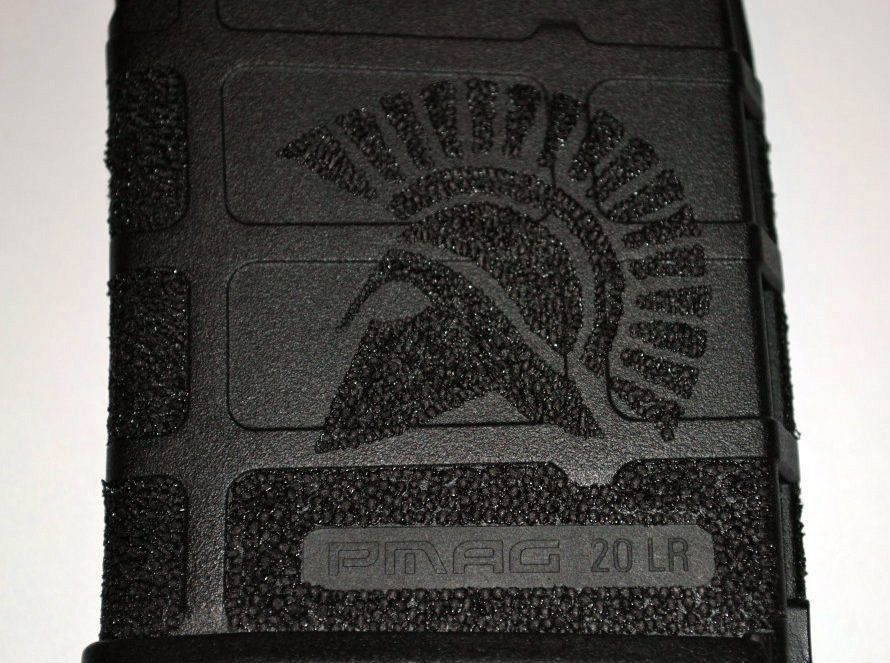
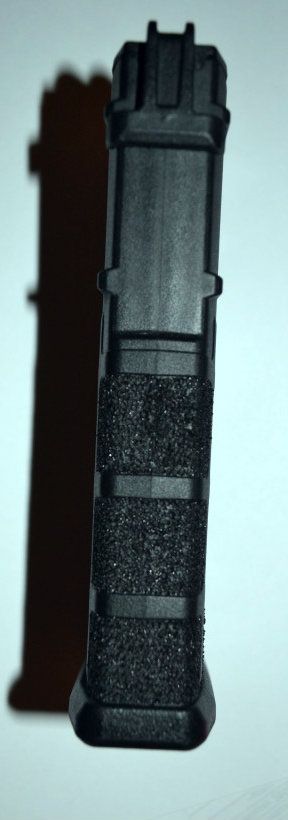
Well I tried the cut machine screw like the OP first. I really liked it, so then I hit the flat tip that came with the soldering iron. I think they turned out kickass. Much better then factory, without being overly rough.
I practiced on a PMAG and that turned out my favorite I think 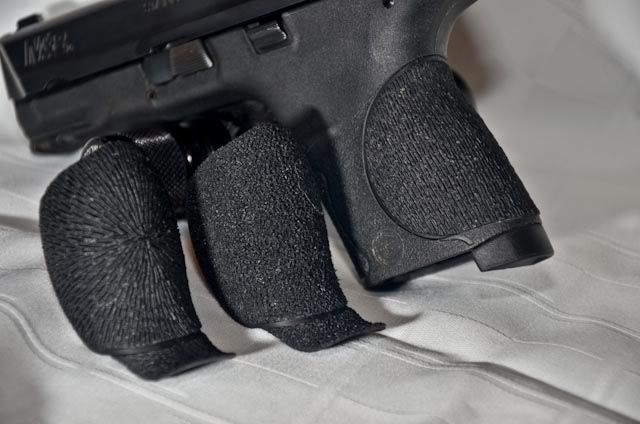

|
|
|
|
USA
|
[#21]
Originally Posted By Colt45guy:
works for other things too http://i172.photobucket.com/albums/w19/Colt45guy/pics/shooter008.jpg oh i'm so doing this to my xbox remotes!!!! if i get good enough maybe my HK or m&p may get a little treatment. |
|
|
|
[#22]
Ya know how those A2 grips just keep accumulating when you have the BRD? Great fodder to play around with stippling on:


|
|
|
|
|
[#23]
Yes they do...
ARKAR |
|
|
|
|
[#24]
The old Glock "tupperware" boxes are made from the same polymer as are the Glock pistols. So are the Glock brand holsters and mag pouches. Those can offer plenty of places to practice.
|
|
|
|
RI, USA
|
[#25]
Anybody interested in selling the checkered brass screw tip?
I do not have the proper tools to make the tip but I do have a soldering iron available. Would probably be a good small project and make some cash o the side. |
|
|
|
[#26]
Did the butt plate on my 10/22, I am going to be doing an Appleseed shoot with it and found it to slip off my shoulder too much.
Just used the small divot method before I actually read this thread. Either way I am happy with it. 

|
|
|
|
MO, USA
|
[Last Edit: AstartesXI]
[#27]
Not to piss anyone off, but IMO this is hideous. Why would you pay good money for a firearm and then do your best to destroy it?
|
|
|
|
[#28]
Are you trolling?
|
|
|
|
|
[#29]
Originally Posted By AstartesXI:
Not to piss anyone off, but IMO this is hideous. Why would you pay good money for a firearm and then do your best to destroy it? Because some view a firearm as a tool and treat it as such. Make modifications as needed to best suit their needs. |
|
|
|
|
[#30]
Originally Posted By AstartesXI: Not to piss anyone off, but IMO this is hideous. Why would you pay good money for a firearm and then do your best to destroy it? Function over form. |
|
|
|
AR, USA
|
[#31]
Just playing around with a soldering iron.


|
|
|
HI, USA
|
[#32]
I've done patters too, but nothing as intricate as that. But it is totally doable. I labled some of my brothers' stuff when he went to Asscrackistan.
Stippling on a cheek piece? That's be like putting grip tape on our cheek riser, yikes. It's bad enough that that little slit pulls your facial hair. now it will rub your cheek raw. |
|
|
AR, USA
|
[#33]
Originally Posted By Dragonfly228:
I've done patters too, but nothing as intricate as that. But it is totally doable. I labled some of my brothers' stuff when he went to Asscrackistan. Stippling on a cheek piece? That's be like putting grip tape on our cheek riser, yikes. It's bad enough that that little slit pulls your facial hair. now it will rub your cheek raw. Nah, my beard scratches the plastic. |
|
|
|
[#34]
Sitting here on the couch, looking at the mossberg 500 I keep nearby, thinking, "Ii wonder if I can stipple parts of the stock on this thing"
I google "stipple", and find this thread. I guess it's time to break out the soldering iron. Pics to come soon- |
|
|
|
|
[#35]
Ok, I went ahead and gave it a try.
I had an old (1960's model) soldering iron, that had a flat tip (sort of like a small flat tip screw driver). I took a small triangle shaped file, and filed a small "V" into the center of it, and went to work. Here is the blank stock: 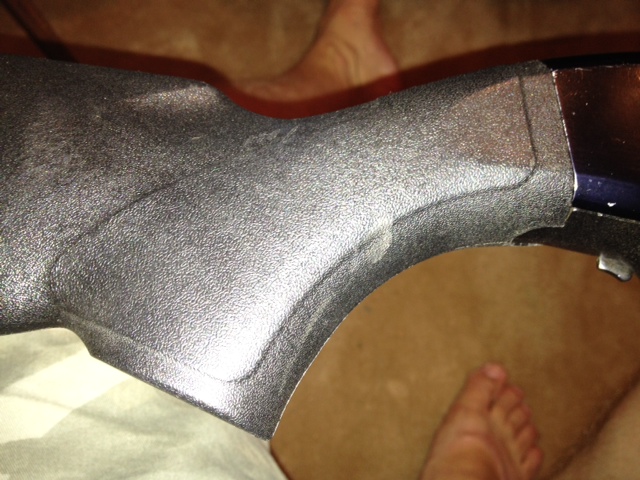

And after a few minutes: 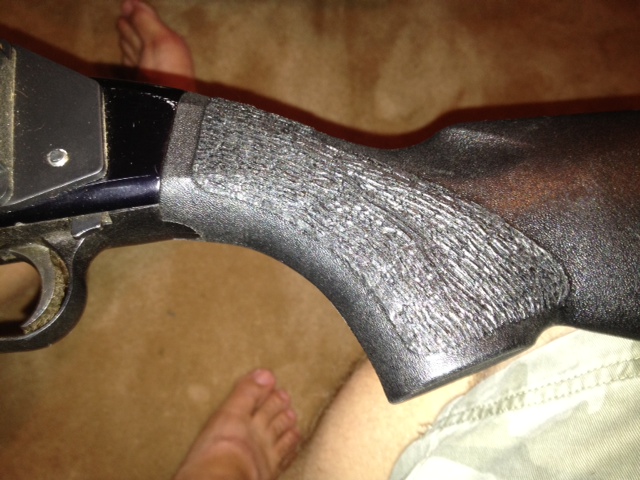
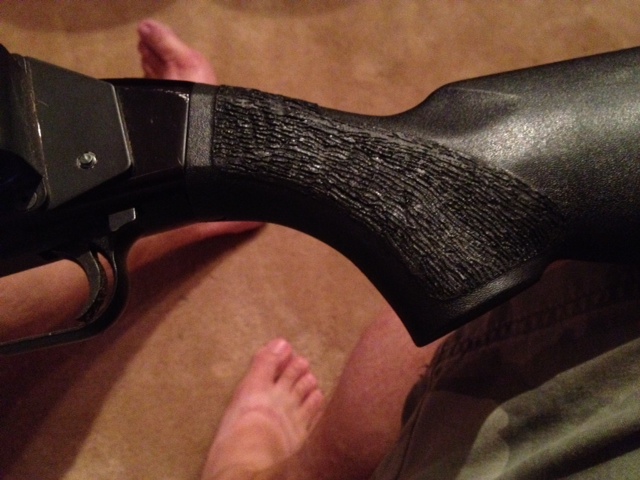

I decided I couldn't stop there, so...: 
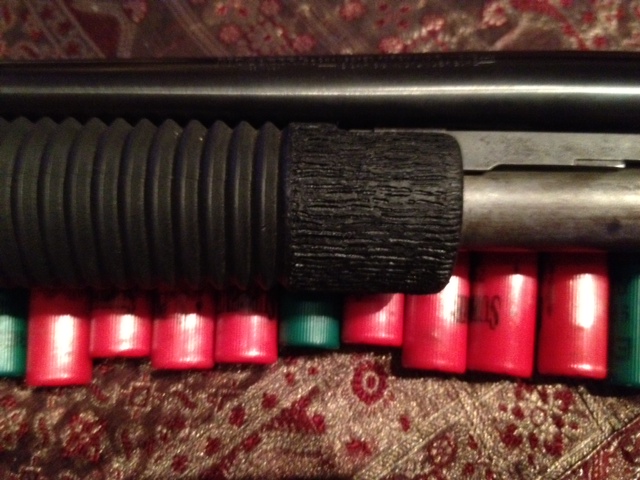


At first the texture was pretty rough (sharp), so I went back over everything with the soldering iron held a real low angle, and "smoothed" everything out, and that made a BIG difference. I have to say that I'm happy with it. YMMV 
|
|
|
|
|
[#36]
So I decided to try it out. Here's my first attempt. The shield is one of my carry guns, so I wanted more grip without killing my skin when I carry it.
I used the fine point tip that came with the soldering iron. 

I need more practice on some pmags to try out different textures. |
|
|
|
|
[#37]
Originally Posted By TRUST8383:
So I decided to try it out. Here's my first attempt. The shield is one of my carry guns, so I wanted more grip without killing my skin when I carry it. I used the fine point tip that came with the soldering iron. http://i977.photobucket.com/albums/ae253/JFLOINDUSTRIES/MP9/bc77f07e.jpg http://i977.photobucket.com/albums/ae253/JFLOINDUSTRIES/MP9/3100ec25.jpg I need more practice on some pmags to try out different textures. Looks great! |
|
|
|
|
[#38]
Does anyone know of a set of dies one can purchase on the cheap?
|
|
|
|
|
[#39]
Tag
|
|
|
|
|
[#40]
stippling looks good under cerakote.


|
|
|
|
|
[#41]
I have a Glock that I want to stipple, but I also have some dura coat planned for it, what do I do first? Paint or stipple?
|
|
|
|
|
[#42]
Originally Posted By ab_cartman:
I have a Glock that I want to stipple, but I also have some dura coat planned for it, what do I do first? Paint or stipple? Stipple then paint. |
|
|
|
|
[#43]
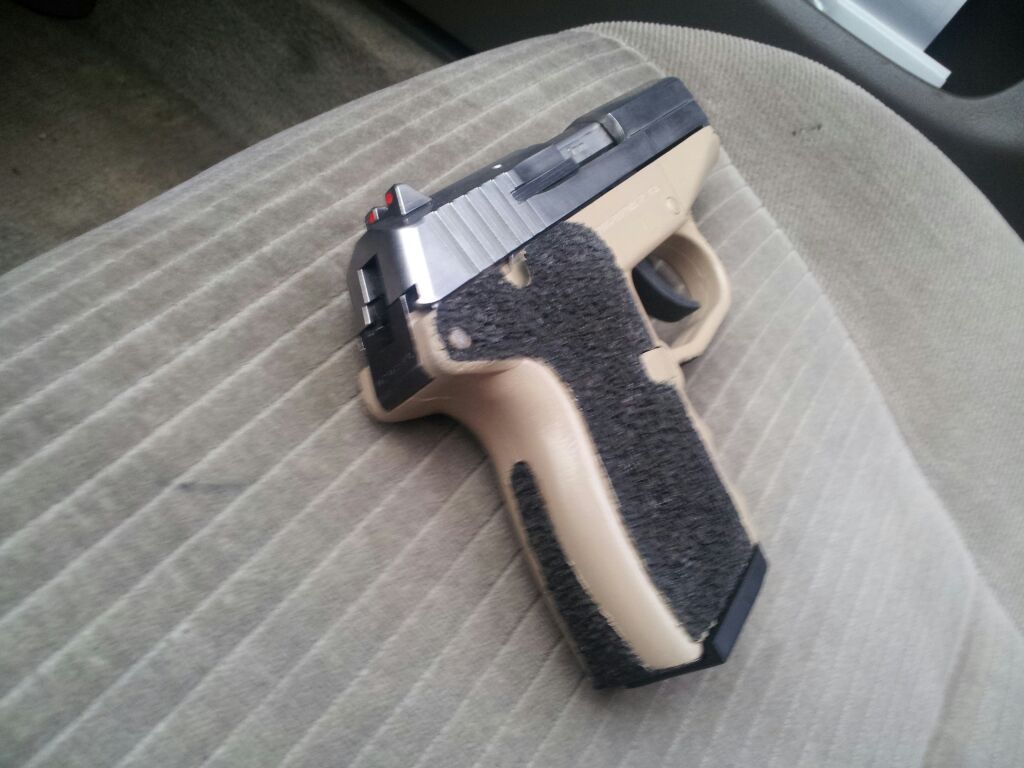
I did some stippling and paint on my SCCY CP-X 1 (KelTec P11 Knockoff). I removed the safety and filled in the impressions where the safety was with material from the grip. I also drilled out the rear sights and added fiber optics. I didn't know the front was plastic so needless to say I have a new set of sights on the way.
Heres what it looked like before. Generic pic. 
Heres mine. 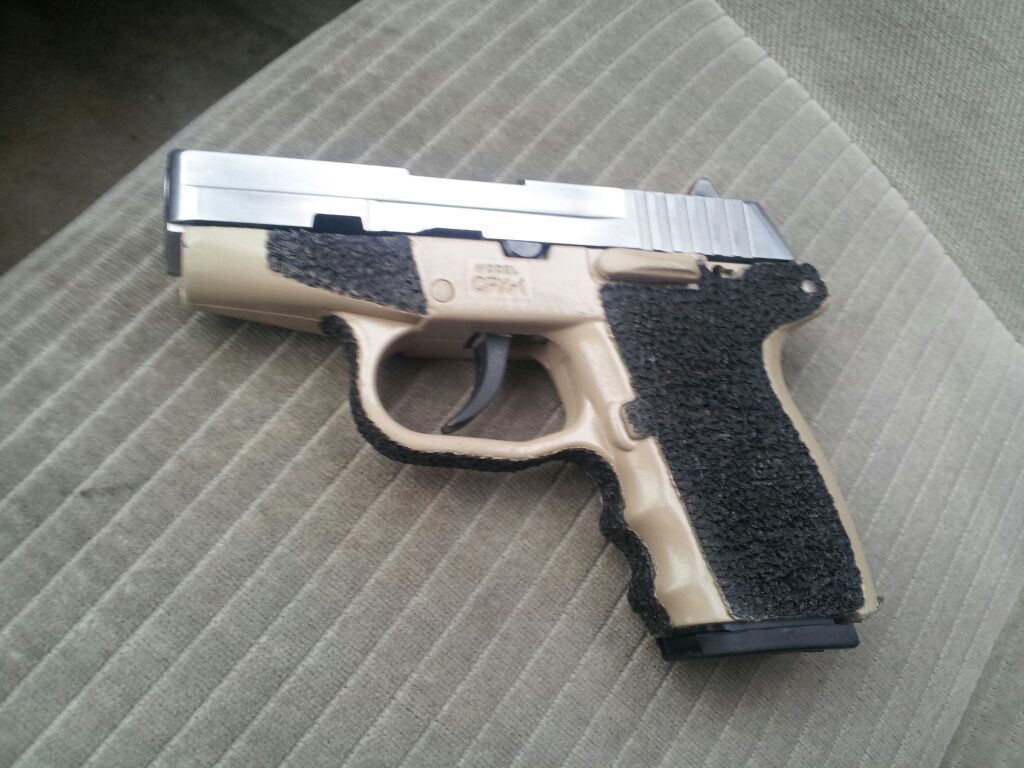
|
|
|
|
|
[#44]
Originally Posted By 23pistol23:
I did some stippling and paint on my SCCY CP-X 1 (KelTec P11 Knockoff). I removed the safety and filled in the impressions where the safety was with material from the grip. I also drilled out the rear sights and added fiber optics. I didn't know the front was plastic so needless to say I have a new set of sights on the way.
Heres what it looked like before. Generic pic. http://www.genitron.com/HandgunDB/DBImages/sccy-cpx1-tt.gif Heres mine. http://i187.photobucket.com/albums/x287/23PISTOL23/2012-10-08_071908.jpg http://i187.photobucket.com/albums/x287/23PISTOL23/2012-10-08_071929.jpg How reliable has your pistol been? |
|
|
|
|
[#45]
Originally Posted By TheTacticalCoyote:
Originally Posted By 23pistol23:
I did some stippling and paint on my SCCY CP-X 1 (KelTec P11 Knockoff). I removed the safety and filled in the impressions where the safety was with material from the grip. I also drilled out the rear sights and added fiber optics. I didn't know the front was plastic so needless to say I have a new set of sights on the way.
Heres what it looked like before. Generic pic. http://www.genitron.com/HandgunDB/DBImages/sccy-cpx1-tt.gif Heres mine. http://i187.photobucket.com/albums/x287/23PISTOL23/2012-10-08_071908.jpg http://i187.photobucket.com/albums/x287/23PISTOL23/2012-10-08_071929.jpg How reliable has your pistol been? Well it was my first pistol and I bought it for cheap back in the 2008 craze. So far it has... Split one of the mags on the seam. I think the metal had a defect because it is rusting too while the others are not. They sent me a new mag. I tig welded it back together and use it as a spare at the range. The little screw on the recoil spring/guide rod backed out and bent under pressure after about 400 rounds. To quick fix it I flipped the guide rod around and put a little washer on the end that locks into the barrel. It worked until they could send me another. The safety kept engaging when shooting, I filed it down, but it eventually broke off. They offered a replacement safety or a block off. I opted for the block off but you would need a working safety assembly to use it. It was basically a left side safety switch that locked in one place. The safety also keeps one of the dis-assembly pins in place. So I took the safety completely out and made a screw to keep the pin in. It was ugly hence the stippling job to cover it up and keep the pin in even better. The mag release would also engage while shooting so I filed it down and it works fine now. I basically use it as a last resort BUG and just leave it in the car. If I'm carrying I'll have my M&P on me. Can't say I really trust the SCCY but I know it will fire atleast once. It has ate any and every ammo though, so that is a positive. |
|
|
|
|
[#46]
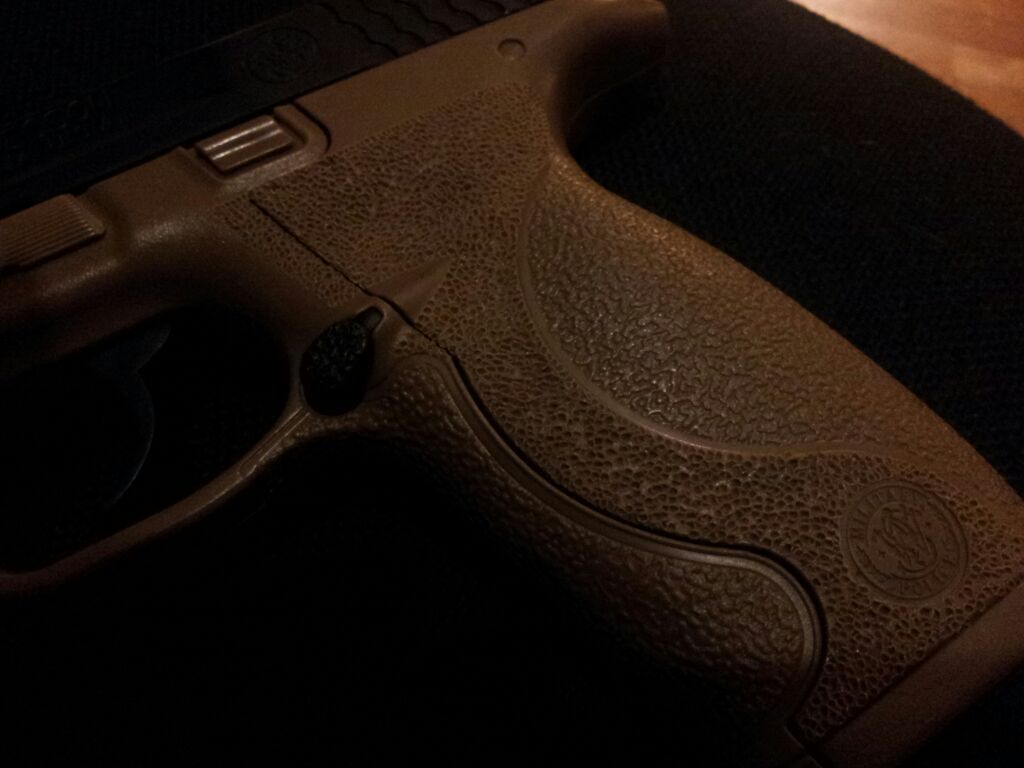
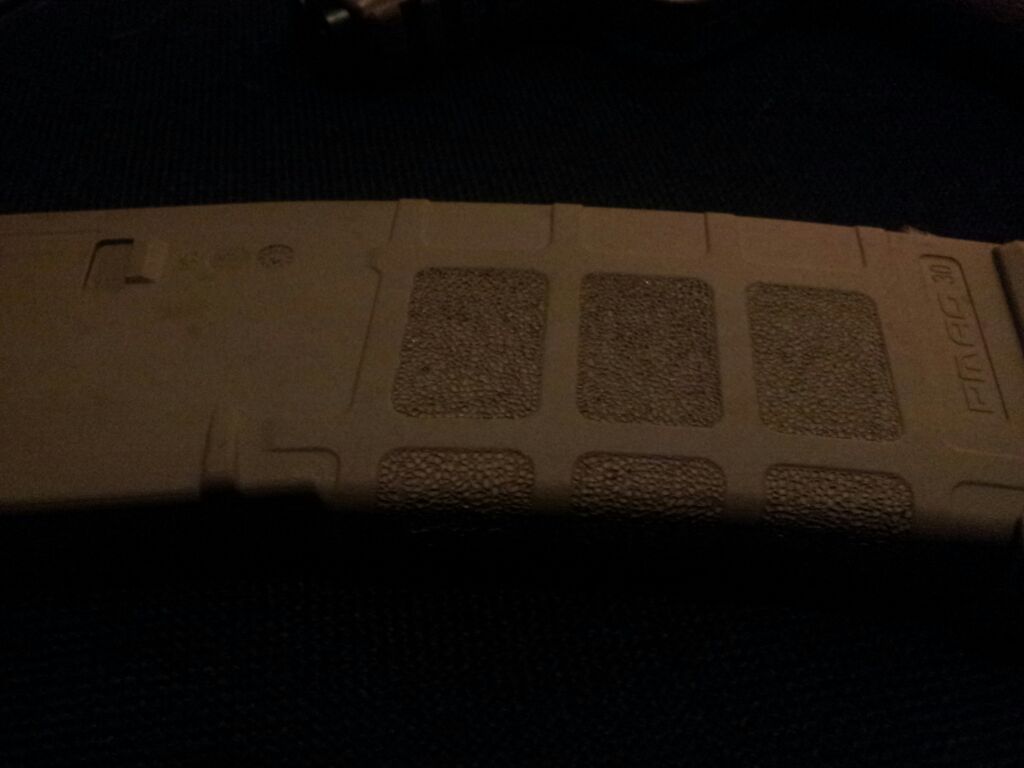
I decided to practice some more on pmags, and my M&P bb pistol, and as much other stuff as I can before getting the balls up to do my M&P9.
The plastic on the pistol is definitely different. It melts a lot faster but atleast it will make me familiar with the pattern I want. I used the pointy tip on these. Sorry for the crappy pics, couldn't get the light right. 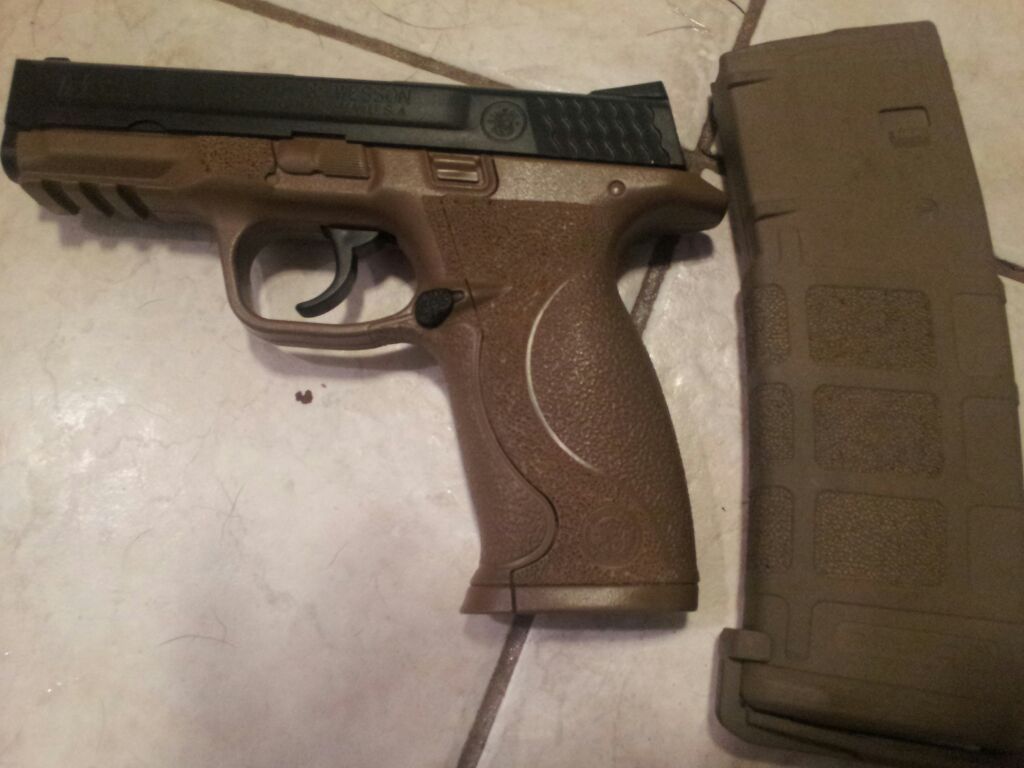

|
|
|
|
|
[#47]
Well I finally got the balls up to do my M&P9. Couldn't get any good pics from the lighting. Since these pics I have followed the line around the back of the grip.


|
|
|
|
|
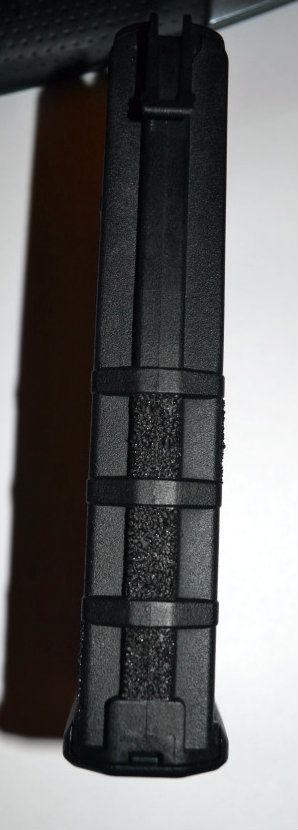
[Last Edit: AceV]
[#48]
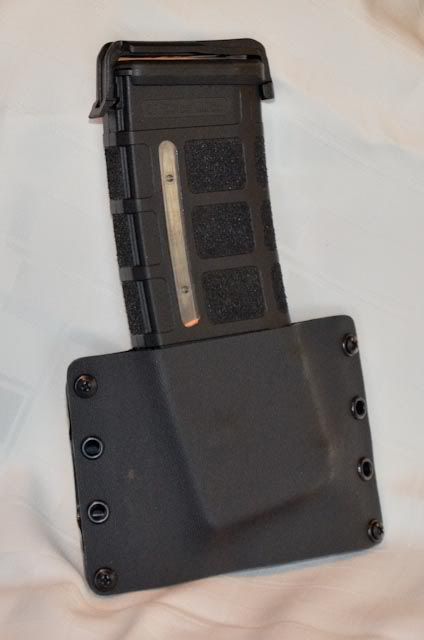
Played around with a 308 PMAG and a little heat...I need to post some pics of my G34 I carry daily - spent a lot of time stippling that.
|
|
|
|
|
[#49]
Originally Posted By AceV:
Played around with a 308 PMAG and a little heat...I need to post some pics of my G34 I carry daily - spent a lot of time stippling that. http://i175.photobucket.com/albums/w129/KojakTPD/Guns/DSC_0032-e.jpg http://i175.photobucket.com/albums/w129/KojakTPD/Guns/DSC_0031-e.jpg http://i175.photobucket.com/albums/w129/KojakTPD/Guns/DSC_0033-e.jpg http://i175.photobucket.com/albums/w129/KojakTPD/Guns/DSC_0034-e.jpg Nice Work!! |
|
|
|
|
[Last Edit: AceV]
[#50]
Originally Posted By Gr8Santini:
Originally Posted By AceV:
Played around with a 308 PMAG and a little heat...I need to post some pics of my G34 I carry daily - spent a lot of time stippling that. http://i175.photobucket.com/albums/w129/KojakTPD/Guns/DSC_0032-e.jpg http://i175.photobucket.com/albums/w129/KojakTPD/Guns/DSC_0031-e.jpg http://i175.photobucket.com/albums/w129/KojakTPD/Guns/DSC_0033-e.jpg http://i175.photobucket.com/albums/w129/KojakTPD/Guns/DSC_0034-e.jpg Nice Work!! Coming from you that is a compliment of the highest order! Thanks I've been drooling over your work for quite some time! |
|
|
|
 Win a FREE Membership!
Sign up for the ARFCOM weekly newsletter and be entered to win a free ARFCOM membership. One new winner* is announced every week!
You will receive an email every Friday morning featuring the latest chatter from the hottest topics, breaking news surrounding legislation, as well as exclusive deals only available to ARFCOM email subscribers.

AR15.COM is the world's largest firearm community and is a gathering place for firearm enthusiasts of all types.
From hunters and military members, to competition shooters and general firearm enthusiasts, we welcome anyone who values and respects the way of the firearm.

Subscribe to our monthly Newsletter to receive firearm news, product discounts from your favorite Industry Partners, and more.
Copyright © 1996-2024 AR15.COM LLC. All Rights Reserved.
Any use of this content without express written consent is prohibited.
AR15.Com reserves the right to overwrite or replace any affiliate, commercial, or monetizable links, posted by users, with our own.


