


Armory Sponsor

DIY Annealing Machine (Page 16 of 17)

|
Thanks to everyone who contributed to this thread. I went with 1/2" Birch plywood throughout. No innovations in this one, I just copied what others did. Still have a few tweaks to do on it but it's working nicely. I still need to change the torch holder for easier adjustment and find a hose so the bottle can be relocated. Other than that it's pretty much done. A couple of issues I ran into: Cases would skew immediately after dropping from the feed roll. This was caused by the painted plywood surface, it was pretty smooth but still caused issues. Easiest fix for me was to cut out the plywood ramp section out and use a piece of scrap PVC sheet recessed about 1/16" from the hopper surface. That got the cases rolling smoothly. If doing over again I'd probably use PVC for the entire hopper section. It's not expensive and easy to work with. I was too aggressive cutting the pan for 300 blk. I cut it at about 7/8" deep and, when cases hit the pan, they would skew and not fall in. Cut a new one at 1' and all works fine. I started out using a hub to mount the pans. When I had to redo the pan I switched to an an 8mm coupling and tapped threads on one end. Much easier to change the pan when you don't have to mess with a tiny set screw. Also had to add some spacers to stand the motor back a little bit. Laying out the face.   Testing the motors and sensor.  Original pan setup.  Revised pan setup.  Here is a case skewed from hitting the pan.  Here it is cooking 300 blk. 
|
"The continued use of shallow, radically ethnocentric literalism has made this thread what it is." 2minkey
|
Originally Posted By SubQ: Thanks to everyone who contributed to this thread. I went with 1/2" Birch plywood throughout. No innovations in this one, I just copied what others did. Still have a few tweaks to do on it but it's working nicely. I still need to change the torch holder for easier adjustment and find a hose so the bottle can be relocated. Other than that it's pretty much done. A couple of issues I ran into: Cases would skew immediately after dropping from the feed roll. This was caused by the painted plywood surface, it was pretty smooth but still caused issues. Easiest fix for me was to cut out the plywood ramp section out and use a piece of scrap PVC sheet recessed about 1/16" from the hopper surface. That got the cases rolling smoothly. If doing over again I'd probably use PVC for the entire hopper section. It's not expensive and easy to work with. I was too aggressive cutting the pan for 300 blk. I cut it at about 7/8" deep and, when cases hit the pan, they would skew and not fall in. Cut a new one at 1' and all works fine. I started out using a hub to mount the pans. When I had to redo the pan I switched to an an 8mm coupling and tapped threads on one end. Much easier to change the pan when you don't have to mess with a tiny set screw. Also had to add some spacers to stand the motor back a little bit. Laying out the face. https://photos.smugmug.com/photos/i-xzZbTpm/0/2579cf24/L/i-xzZbTpm-L.jpg https://photos.smugmug.com/photos/i-zNnk9V7/0/5eb67f94/L/i-zNnk9V7-L.jpg Testing the motors and sensor. https://photos.smugmug.com/photos/i-CqxXJMn/0/debdcc5e/L/i-CqxXJMn-L.jpg Original pan setup. https://photos.smugmug.com/photos/i-FnzkzHN/0/5ebe1bdc/L/i-FnzkzHN-L.jpg Revised pan setup. https://photos.smugmug.com/photos/i-Lnq5WNw/0/8148627c/L/i-Lnq5WNw-L.jpg Here is a case skewed from hitting the pan. https://photos.smugmug.com/photos/i-W4H9Sbw/0/0f71bf21/L/i-W4H9Sbw-L.jpg Here it is cooking 300 blk. https://photos.smugmug.com/photos/i-mbGk98J/0/a120e9f9/L/i-mbGk98J-L.jpg Looks great. I wanted to use those motors but I could not find the hubs. These machines make great projects. I like the power supply you used. If I were to build another one, I would use one like it. I used a 30 amp one like it on my case prep machine project. |



|
Thought showing the correct flame location for maximum heat transfer would add to this thread. If the flame isn't in this position when your annealing, it will take longer to reach your target annealing temperature. The longer the case is in the flame, the more heat will migrate down the case. I went from 6 seconds at 20psi to 4 seconds at 50psi to anneal a 223 case to 750F. This video is annealing at 6 seconds because I was annealing over 750F.  Flame position when annealing |

Global Warming Hoax Skeptic before it was cool
Joined:
Jun 2007
Posts:
62868
EE: 100% (1)
 WA, USA
|
Originally Posted By Blowout: Thought showing the correct flame location for maximum heat transfer would add to this thread. If the flame isn't in this position when your annealing, then it will take longer to reach your target annealing temperature. The longer the case is in the flame, the more heat will migrate down the case. I went from 6 seconds at 20psi to 4 seconds at 50psi to anneal a 223 case to 750F. This video is annealing at 6 seconds because I was annealing over 750F.  https://www.youtube.com/watch?v=E_StLpebals https://www.youtube.com/watch?v=E_StLpebalsI have been trying to find this thread for several days. Well done. 
|
Selling agent for Algores carbon credit scam.
Shooting and Reloading, one hobby feeds the other.
Shooting and Reloading, one hobby feeds the other.
Global Warming Hoax Skeptic before it was cool
Joined:
Jun 2007
Posts:
62873
EE: 100% (1)
WA, USA
|
Originally Posted By Blowout: With annealing threads popping up lately, thought it might be useful for folks looking to DIY something.  |
Selling agent for Algores carbon credit scam.
Shooting and Reloading, one hobby feeds the other.
Shooting and Reloading, one hobby feeds the other.
|
Giving this thread a bump because I'm on the fence about building one. The old drill & socket method isn't as consistent as I'd like it to be, and doing batches of 50-200 pieces should be much easier with one of these. Anyone care to give a long term review on some of the cheaper parts used? Still working/not working? Most of the old ebay part links are dead, so if I go through with this I'll post item #'s and descriptions of what parts I used. |

|
Originally Posted By ws-6: I have used mine a dozen times or so. In the end, me personally, while I had fun building it I wish I got an electric annealed instead of gas. Also I keep having issues going from something like 300 blk to 300 prc. I'm mostly going to do 223, 7.62x39, 6.5 Grendel, 6.5 Creedmoor, and 308. |
|
Originally Posted By Sebspeed: I'm mostly going to do 223, 7.62x39, 6.5 Grendel, 6.5 Creedmoor, and 308. I just posted those since they are the shortest and longest I do. Bulk of that I run is 223 and 308. With this design, you will probably either need 2 separate drums (or something to fit inside the drum) for the 7.62x39 cases due to how short they are. I did make my primary drum a little long due to 300 prc and 30-06 but it will run 223 fine. |
|
Originally Posted By ws-6: I just posted those since they are the shortest and longest I do. Bulk of that I run is 223 and 308. With this design, you will probably either need 2 separate drums (or something to fit inside the drum) for the 7.62x39 cases due to how short they are. I did make my primary drum a little long due to 300 prc and 30-06 but it will run 223 fine. Originally Posted By ws-6: Originally Posted By Sebspeed: I'm mostly going to do 223, 7.62x39, 6.5 Grendel, 6.5 Creedmoor, and 308. I just posted those since they are the shortest and longest I do. Bulk of that I run is 223 and 308. With this design, you will probably either need 2 separate drums (or something to fit inside the drum) for the 7.62x39 cases due to how short they are. I did make my primary drum a little long due to 300 prc and 30-06 but it will run 223 fine. I built mine with two pans. One for .223 and smaller and one for .308 and larger. This led to needing three feed drums to handle cases up to .45-70. The flame needs adjustment to align properly on the case neck. I’ve used mine many times and it’s always fun to operate. It took a while to get it built and running but during COVID there wasn’t much to do anyway. |
|
Originally Posted By SuperEighteen: I built mine with two pans. One for .223 and smaller and one for .308 and larger. This led to needing three feed drums to handle cases up to .45-70. The flame needs adjustment to align properly on the case neck. I’ve used mine many times and it’s always fun to operate. It took a while to get it built and running but during COVID there wasn’t much to do anyway. @SuperEighteen Would you mind sharing your pan depths for the 3 you made? |

|
It looks like any annealing machine decision is going to be dependent on how often you anneal, and how many pieces you anneal at a time. My personal annealing has been limited to the middle step in converting .223/5.56 brass to 300 Blackout brass, and that's been only a couple of hundred at a time. I've used the torch-and-electric-screwdriver method, and for that quantity of cases, it was tedious, but doable. If I had a) the space to store and operate an annealing machine and b) the volume of brass to justify setup, cleanup and tear down, and c) the time to do all of the above, I'd certainly build one. I'm happy that this thread is still alive, and thriving. Because there may come a time when I DO have what I need for a machine to make sense. It's not like I don't have big piles of 5.56, 7.62, and other calibers of brass that could benefit from annealing. Those pesky other things, especially time, are what get in my way.  I do have one question though. Once you get the "time in flame" figured out, how consistent are the DIY machines at maintaining that time? Do folks spot check that time, like with a dot of Tempilaq in a random case now and then? Since annealing is all about brass consistency, I'd think that consistent annealing time would be super important to maintain. |
"--you can't conquer a free man; the most you can do is kill him."
Heinlein
NRA Life Member
Glock Certified Armorer
Certified AR15 Armorer
Certified M1911 Armorer
Heinlein
NRA Life Member
Glock Certified Armorer
Certified AR15 Armorer
Certified M1911 Armorer
|
Originally Posted By Sebspeed: @SuperEighteen Would you mind sharing your pan depths for the 3 you made? Originally Posted By Sebspeed: Originally Posted By SuperEighteen: I built mine with two pans. One for .223 and smaller and one for .308 and larger. This led to needing three feed drums to handle cases up to .45-70. The flame needs adjustment to align properly on the case neck. I’ve used mine many times and it’s always fun to operate. It took a while to get it built and running but during COVID there wasn’t much to do anyway. @SuperEighteen Would you mind sharing your pan depths for the 3 you made? I made two pans for the machine. The shallow pan is right at 1” the deep pan is 1.25”. I have quite a lot of tilt to the machine and the deep pan works with .308 and up cases. I built three feed drums to handle the cases from the hopper to the feed ramp for the pans. This was necessary to keep cases from double feeding. |
|
Originally Posted By GHPorter: It looks like any annealing machine decision is going to be dependent on how often you anneal, and how many pieces you anneal at a time. My personal annealing has been limited to the middle step in converting .223/5.56 brass to 300 Blackout brass, and that's been only a couple of hundred at a time. I've used the torch-and-electric-screwdriver method, and for that quantity of cases, it was tedious, but doable. If I had a) the space to store and operate an annealing machine and b) the volume of brass to justify setup, cleanup and tear down, and c) the time to do all of the above, I'd certainly build one. I'm happy that this thread is still alive, and thriving. Because there may come a time when I DO have what I need for a machine to make sense. It's not like I don't have big piles of 5.56, 7.62, and other calibers of brass that could benefit from annealing. Those pesky other things, especially time, are what get in my way. I do have one question though. Once you get the "time in flame" figured out, how consistent are the DIY machines at maintaining that time? Do folks spot check that time, like with a dot of Tempilaq in a random case now and then? Since annealing is all about brass consistency, I'd think that consistent annealing time would be super important to maintain. I set the machine each use using the tempilaq. I do keep a few cases with the tempilaq and check at random during a long run of over a hundred cases or so. It’s consistent. I sometimes have to tweak the flame if the bottle is getting low. A regulator would likely cure that. |
|
Originally Posted By SuperEighteen: I made two pans for the machine. The shallow pan is right at 1” the deep pan is 1.25”. I have quite a lot of tilt to the machine and the deep pan works with .308 and up cases. I built three feed drums to handle the cases from the hopper to the feed ramp for the pans. This was necessary to keep cases from double feeding. Thank you |
|
Originally Posted By Sebspeed: Thank you Originally Posted By Sebspeed: Originally Posted By SuperEighteen: I made two pans for the machine. The shallow pan is right at 1” the deep pan is 1.25”. I have quite a lot of tilt to the machine and the deep pan works with .308 and up cases. I built three feed drums to handle the cases from the hopper to the feed ramp for the pans. This was necessary to keep cases from double feeding. Thank you You’re welcome |
|
Originally Posted By SuperEighteen: I set the machine each use using the tempilaq. I do keep a few cases with the tempilaq and check at random during a long run of over a hundred cases or so. It’s consistent. I sometimes have to tweak the flame if the bottle is getting low. A regulator would likely cure that. A “per session” check, then spot checking makes sense to my QA brain. As does using a regulator instead of just straight from the bottle. That would also let you use any size bottle; my Coleman stove bottles have the same fitting as a standard plumber’s propane bottle… |
"--you can't conquer a free man; the most you can do is kill him."
Heinlein
NRA Life Member
Glock Certified Armorer
Certified AR15 Armorer
Certified M1911 Armorer
Heinlein
NRA Life Member
Glock Certified Armorer
Certified AR15 Armorer
Certified M1911 Armorer
|
Originally Posted By GHPorter: A “per session” check, then spot checking makes sense to my QA brain. As does using a regulator instead of just straight from the bottle. That would also let you use any size bottle; my Coleman stove bottles have the same fitting as a standard plumber’s propane bottle… Originally Posted By GHPorter: Originally Posted By SuperEighteen: I set the machine each use using the tempilaq. I do keep a few cases with the tempilaq and check at random during a long run of over a hundred cases or so. It’s consistent. I sometimes have to tweak the flame if the bottle is getting low. A regulator would likely cure that. A “per session” check, then spot checking makes sense to my QA brain. As does using a regulator instead of just straight from the bottle. That would also let you use any size bottle; my Coleman stove bottles have the same fitting as a standard plumber’s propane bottle… I’ll have to look into a regulator. They aren’t expensive. I have about a month of weekends in this build. It was challenging and fun. Annealing cases is icing on the cake. I bought backups for the motors, proximity switch, and the motor controller. That way I have spares in case one of them becomes unavailable. |
|
I've been using a bake pan 3/4" deep for 300blk, 30 carbine and even 44 mag cases. 30-06, 223, 308, 7.62x39 and 6.8spc uses a 1 1/4" deep pan. Changed from a 20psi regulator to a 60 psi on a bbq 20lb tank. The flame was pretty low at 20psi and wanted to reduce the annealing time. 223 at 50psi has about a 4 sec anneal time to get to 750 degrees. |
|
Originally Posted By SuperEighteen: I’ll have to look into a regulator. They aren’t expensive. I have about a month of weekends in this build. It was challenging and fun. Annealing cases is icing on the cake. I bought backups for the motors, proximity switch, and the motor controller. That way I have spares in case one of them becomes unavailable. The first of my parts orders for the annealer build arrived today. I am going to implement a cheap regulator. My total with the 2 adapter fittings and the regulator kit was about $40. If it turns into something I use a lot more, I may upgrade the regulator later. I wanted to at least get a hose to link the bottle and torch, to keep the bottle upright and off to the side. A plain hose would have been almost $20, so stepping up to the cheap regulator kinda made sense. |
|
Originally Posted By Sebspeed: The first of my parts orders for the annealer build arrived today. I am going to implement a cheap regulator. My total with the 2 adapter fittings and the regulator kit was about $40. If it turns into something I use a lot more, I may upgrade the regulator later. I wanted to at least get a hose to link the bottle and torch, to keep the bottle upright and off to the side. A plain hose would have been almost $20, so stepping up to the cheap regulator kinda made sense. Originally Posted By Sebspeed: Originally Posted By SuperEighteen: I’ll have to look into a regulator. They aren’t expensive. I have about a month of weekends in this build. It was challenging and fun. Annealing cases is icing on the cake. I bought backups for the motors, proximity switch, and the motor controller. That way I have spares in case one of them becomes unavailable. The first of my parts orders for the annealer build arrived today. I am going to implement a cheap regulator. My total with the 2 adapter fittings and the regulator kit was about $40. If it turns into something I use a lot more, I may upgrade the regulator later. I wanted to at least get a hose to link the bottle and torch, to keep the bottle upright and off to the side. A plain hose would have been almost $20, so stepping up to the cheap regulator kinda made sense. I have a hose as well. Didn’t want the bottle hanging off the side either. This is a fun project. It took a while to get it working. I totally rebuilt it once. |
| You know, it's so easy to overthink this stuff. I watched a video by Erik Cortina yesterday on annealing. He's a pro long range shooter, spends a ton of $ on gear and does a ton of brass prep beyond what I'm likely to bother with, and he doesn't use a regulator on his torches. |
|
Originally Posted By Sebspeed: You know, it's so easy to overthink this stuff. I watched a video by Erik Cortina yesterday on annealing. He's a pro long range shooter, spends a ton of $ on gear and does a ton of brass prep beyond what I'm likely to bother with, and he doesn't use a regulator on his torches. How many cases does he do in a sitting? Small runs shouldn't be a problem. Doing 500 cases in a sitting and it becomes a problem. |

|
1st off, thanks to everyone that contributed to this thread. I've had this thing half built for over a year. Finally got off my butt and finished it this weekend. 3d printed drum that feeds 5.56, .308 and 6.5 Grendel. I used micarta for the torch and brass stop clamps. Testing it on 5.56.  Failed To Load Title I don't have any tempilac but think I have it dialed in for 5.56. Still need to cut a pan for 6.5 Grendel.  Using the cheap motors with a small computer fan to keep it cool. Ran 200 cases and the motor isn't even a bit warm. |
|
Originally Posted By GRENDEL87: 1st off, thanks to everyone that contributed to this thread. I've had this thing half built for over a year. Finally got off my butt and finished it this weekend. 3d printed drum that feeds 5.56, .308 and 6.5 Grendel. I used micarta for the torch and brass stop clamps. Testing it on 5.56. https://www.youtube.com/watch?v=keJTh3knAXsI don't have any tempilac but think I have it dialed in for 5.56. Still need to cut a pan for 6.5 Grendel. https://www.ar15.com/media/mediaFiles/17506/20230219_161921-2717395.jpg Using the cheap motors with a small computer fan to keep it cool. Ran 200 cases and the motor isn't even a bit warm. Haven’t checked this thread in a while. I’d get the tempilaq as you will know for sure. Your video isn’t available any longer so I couldn’t see your machine run. The pic looks great |
Global Warming Hoax Skeptic before it was cool
Joined:
Jun 2007
Posts:
66801
EE: 100% (1)
WA, USA
Global Warming Hoax Skeptic before it was cool
Joined:
Jun 2007
Posts:
66804
EE: 100% (1)
WA, USA
|
Originally Posted By SuperEighteen: Thank you. I have an update to my machine that I'll post later this week. Originally Posted By SuperEighteen: Originally Posted By dryflash3: Glad to see this thread is still some use.  That's why I "toggled" it to keep it out of the archives. Thank you. I have an update to my machine that I'll post later this week.  |
Selling agent for Algores carbon credit scam.
Shooting and Reloading, one hobby feeds the other.
Shooting and Reloading, one hobby feeds the other.

If you want the schnitz for an outstanding DIY annealing machine, check this out: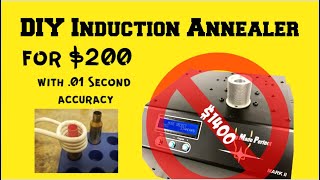 DIY Induction Annealing Brass with .01 second accuracy for $200 Inexpensive, quick and easy to put together, fast and easy to use, very accurate. And not only does this work great as an annealer, it is also excellent for doing what it was made for - heating up stuck nuts and the like. And no flames in your reloading area. |
“As long as none of us gets hurt, we’re making memories.” - one GA trooper to another after shooting HOSTAGE 9 times
Their SHAME has become their PRIDE
Their SHAME has become their PRIDE
|
Originally Posted By Jodan1776: If you want the schnitz for an outstanding DIY annealing machine, check this out: https://www.youtube.com/watch?v=jLRgDZeYQ-MInexpensive, quick and easy to put together, fast and easy to use, very accurate. And not only does this work great as an annealer, it is also excellent for doing what it was made for - heating up stuck nuts and the like. And no flames in your reloading area. Looks good to me. I'm not a believer in annealing but that looks like a good way to go, as far as I am concerned. The idea of paying $1500 for an annealer does not make any sense to me. For $200 it begins to make some sense, if you want to tinker/experiment with annealing. P.S. - the white sleeving over the coils is just a woven bare, fiberglass tube (NOT epoxyglass). It is used with heater coils. Home Depot will have that, too. |
|
Originally Posted By Jodan1776: If you want the schnitz for an outstanding DIY annealing machine, check this out: https://www.youtube.com/watch?v=jLRgDZeYQ-MInexpensive, quick and easy to put together, fast and easy to use, very accurate. And not only does this work great as an annealer, it is also excellent for doing what it was made for - heating up stuck nuts and the like. And no flames in your reloading area. If this device was incorporated into some sort of automated case feeder it would be more desirable. If only a few cases are annealed at a time then it should be ok. 500 cases, no way... A trap door seems to be the easiest method to incorporate with an induction coil to add some automation. Would still need a case feeder. I'll stick to my flame setup for now. It's already built.
|
|
Originally Posted By SuperEighteen: I tried to add a regulator to the propane hose but it wouldn’t provide enough pressure to work with the torch. Which regulator is everyone using? @SuperEighteen First try removing the inside stem on the torch head and see if that works. - See post #43 on page 15 on this thread. A 20psi regulator worked pretty good, but to reduce time and increase flame intensity switched to an adjustable 60psi. Mine happens to be a Marshall Excelsior brand regulator. This is the same brand I now use but this goes to 100psi. eBay You'll also need an adapter to connect the hose to the torch head. |
|
Originally Posted By Blowout: @SuperEighteen First try removing the inside stem on the torch head and see if that works. - See post #43 on page 15 on this thread. A 20psi regulator worked pretty good, but to reduce time and increase flame intensity switched to an adjustable 60psi. Mine happens to be a Marshall Excelsior brand regulator. This is the same brand I now use but this goes to 100psi. eBay You'll also need an adapter to connect the hose to the torch head. Thank you. I tried taking the filter and pressure valve out and using my 0 to 20 lb regulator. It worked but the torch body got very hot and the valve seized up. I’ll have to try something else. |
|
Originally Posted By SuperEighteen: Thank you. I tried taking the filter and pressure valve out and using my 0 to 20 lb regulator. It worked but the torch body got very hot and the valve seized up. I’ll have to try something else. Not sure how your attaching the torch to the machine, but having the mounting clamp on the tube between the business end of the torch and the valve should act as a heat sink to minimize heat back to the valve. |
|
Originally Posted By Blowout: Not sure how your attaching the torch to the machine, but having the mounting clamp on the tube between the business end of the torch and the valve should act as a heat sink to minimize heat back to the valve. I have it in an aluminum block but it’s too far up to be a heat sink. I have some fittings ordered and another regulator to try. If it works out, I’ll post pictures. |
@Blowout I may have it working. It ran on 20 pounds for several minutes without any variation in the flame. The torch head was getting hot when I ran it not attached to the machine. Attached the aluminum heats up but dissipated and the torch doesn’t get hot near the valve. I’m running it without the valve and filter. Tomorrow I’ll run a batch of .223 to get it dialed in. Blowout, thanks for the advice. |
|
Originally Posted By SuperEighteen: @Blowout https://www.ar15.com/media/mediaFiles/88016/717087419_286041public-2962394.jpg I may have it working. It ran on 20 pounds for several minutes without any variation in the flame. The torch head was getting hot when I ran it not attached to the machine. Attached the aluminum heats up but dissipated and the torch doesn’t get hot near the valve. I’m running it without the valve and filter. Tomorrow I’ll run a batch of .223 to get it dialed in. Blowout, thanks for the advice. Good to hear its working out. Once you mount the pan, check the location of the torch head from the case that's being annealed. At 20psi the flame is small so the distance needs to be short enough the inner white part of the flame is licking at the shoulder/neck of the case. It appears you might have to reposition the torch in the clamp to get it closer to the case. You might end up with the clamp on the tube itself and not the burn tip. The burn tip gets the hottest and the tube is cooler. BTW, I like the way you bent the rod that the case spins on while annealing. If the rod is in the path of the flame it heats up and holds the heat against the case body where it's not wanted. I made 2 rods, one shorter than the other to go with a shallower pan for shorter cases and bent somewhat similar to yours. Post a pic of your unit in action if possible.
|
|
Originally Posted By Blowout: Good to hear its working out. Once you mount the pan, check the location of the torch head from the case that's being annealed. At 20psi the flame is small so the distance needs to be short enough the inner white part of the flame is licking at the shoulder/neck of the case. It appears you might have to reposition the torch in the clamp to get it closer to the case. You might end up with the clamp on the tube itself and not the burn tip. The burn tip gets the hottest and the tube is cooler. BTW, I like the way you bent the rod that the case spins on while annealing. If the rod is in the path of the flame it heats up and holds the heat against the case body where it's not wanted. I made 2 rods, one shorter than the other to go with a shallower pan for shorter cases and bent somewhat similar to yours. Post a pic of your unit in action if possible. The torch will need adjustment once the pan is installed. I just had it in place on the clamp for testing. I’ve usually had the flame fairly short and the tempilaq melted and the discoloration of the case matches the lake city brass I’ve seen. If you have a coppery color on the case, it’s probably gotten too hot as the copper is leaching out. The case support rod bend was difficult to get right. It gets warm in use but it shouldn’t be transferring heat to the case. On 300 BO cases I use 450 tempilaq on the case head to ensure it’s not getting hot. If the tempilaq doesn’t melt the case isn’t overheating. |
|
I ran several hundred 223 cases through my annealing machine today using a regulator on the torch. I would highly recommend using a regulator. The flame was consistent throughout the session. This will also aid in future setup as the pan speed and propane pressure is easily replicated. Here is the flame setup using 25 psi. I’m using 750 degree tempilaq on the inside of the case mouth.  Here is a shot of the machine and the regulator. The regulator was made in ‘78. In the past I’ve used it for an airbrush.  I’m using a 16 ounce propane bottle. The box has a removable insert with holes cut to hold the bottle upright. I was going to store the hose and regulator in the box but the regulator is too bulky. I can use a 20 tank as well.  Edit: I took the valve and filter out of the torch to allow it to work with this setup. Blowout has this shown on page 15 of this thread. If you run too little pressure, the torch will overheat. The mount on my machine is aluminum and acts as a heat sink. During use the torch body got warm but never too hot to touch. |
Joined:
Jan 2025
Posts:
1
EE: 0% (0)
WA, USA
|
I see nobody has posted to this in quite awhile so hopefully somebody sees this. I recently built an annealer based off the information posted on this thread and it works pretty darn good. I am having one problem though and I didn't see it addressed anywhere, The displays on my motor controllers are all but unreadable the numbers look like they are changing back and forth very rapidly and makes it hard to set the correct speed. Anyone else have this problem and know of any possible solutions or causes? |
Global Warming Hoax Skeptic before it was cool
Joined:
Jun 2007
Posts:
70372
EE: 100% (1)
WA, USA
|
Originally Posted By Johrichal: I see nobody has posted to this in quite awhile so hopefully somebody sees this. I recently built an annealer based off the information posted on this thread and it works pretty darn good. I am having one problem though and I didn't see it addressed anywhere, The displays on my motor controllers are all but unreadable the numbers look like they are changing back and forth very rapidly and makes it hard to set the correct speed. Anyone else have this problem and know of any possible solutions or causes? This thread has value and as such I have set the archive toggle to keep out of the archives. That way someone searching google or whatever, can find it. I'm thinking that's what you did, as this is your first post. So now that you posted in the thread, this thread is back on page one, where it can be seen by all. Be patient, I'm sure you will get some help. |
Selling agent for Algores carbon credit scam.
Shooting and Reloading, one hobby feeds the other.
Shooting and Reloading, one hobby feeds the other.
Joined:
Jan 2025
Posts:
2
EE: 0% (0)
WA, USA
|
I see nobody has posted to this in quite awhile so hopefully somebody sees this. I recently built an annealer based off the information posted on this thread and it works pretty darn good. I am having one problem though and I didn't see it addressed anywhere, The displays on my motor controllers are all but unreadable the numbers look like they are changing back and forth very rapidly and makes it hard to set the correct speed. Anyone else have this problem and know of any possible solutions or causes? |
Joined:
Jan 2025
Posts:
3
EE: 0% (0)
WA, USA
Global Warming Hoax Skeptic before it was cool
Joined:
Jun 2007
Posts:
70377
EE: 100% (1)
WA, USA
DIY Annealing Machine (Page 16 of 17)
Armory Sponsor