|
Posted: 7/31/2022 4:27:29 PM EDT
Gents,
A while back a @johnparker55 posted a thread about a 3D printed enbloc loader. In that thread was a link to a youtube video showing the loader in use. I was intrigued as I have always wanted one but could not afford an original metal one so I emailed the gentleman making them with a bunch of questions. ([email protected]) Jim promptly responded back answering all of my questions and concerns. After a few emails we ended up talking on the phone I acquired one to do some testing with. I will use this thread as a guide for anyone who is interested in buying one. Let's start with packaging and unboxing. The enbloc loader came well packaged in a USPS priority box. Individual sections were carefully wrapped and already put together awaiting final installation.   After removing the bubble wrap from each section I opened up the manual and followed along. It was very well written and easy to follow. 95% of the work is already done for you as screws and nuts are pre-installed and all you need to do is figure out how the sections fit together. 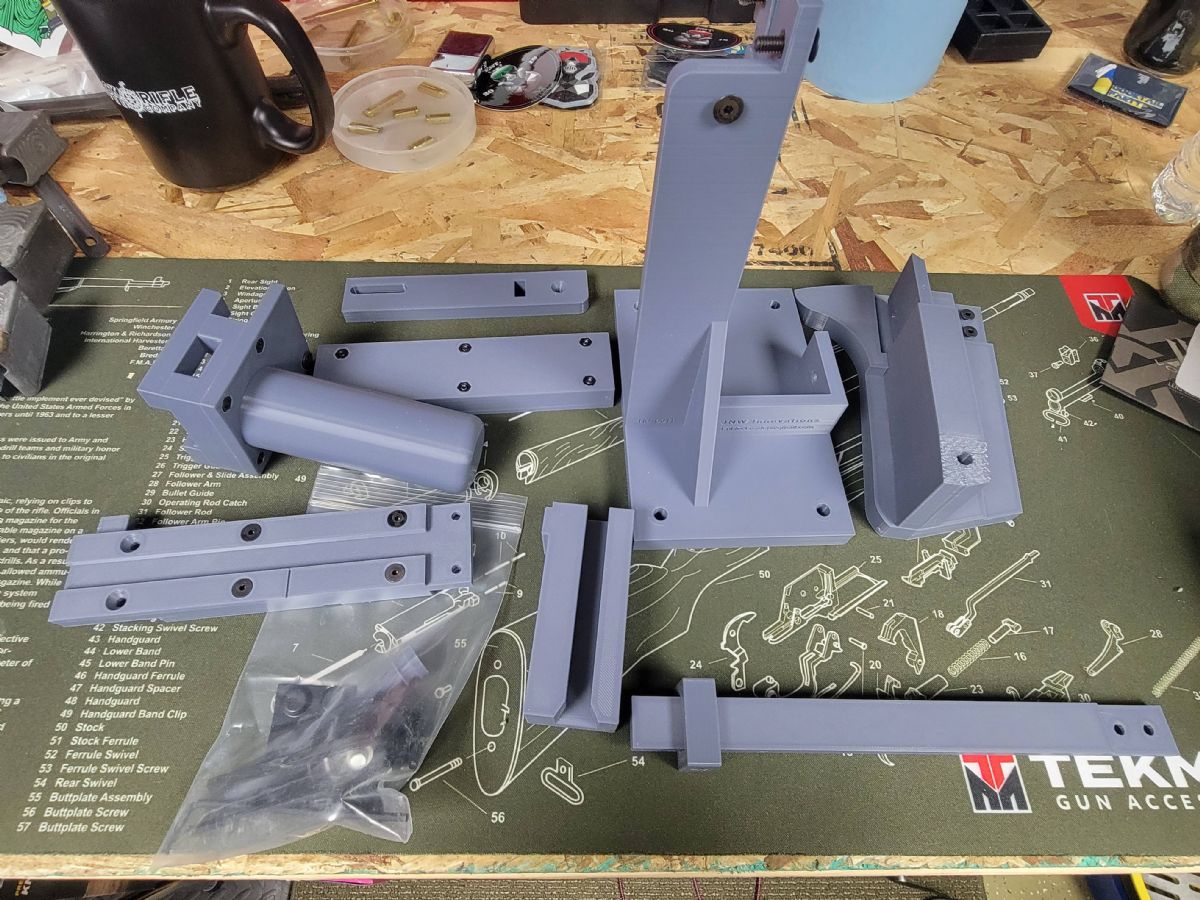  The channel the bullets ride in. You can see marks on the right side that designate between 8 rounds. 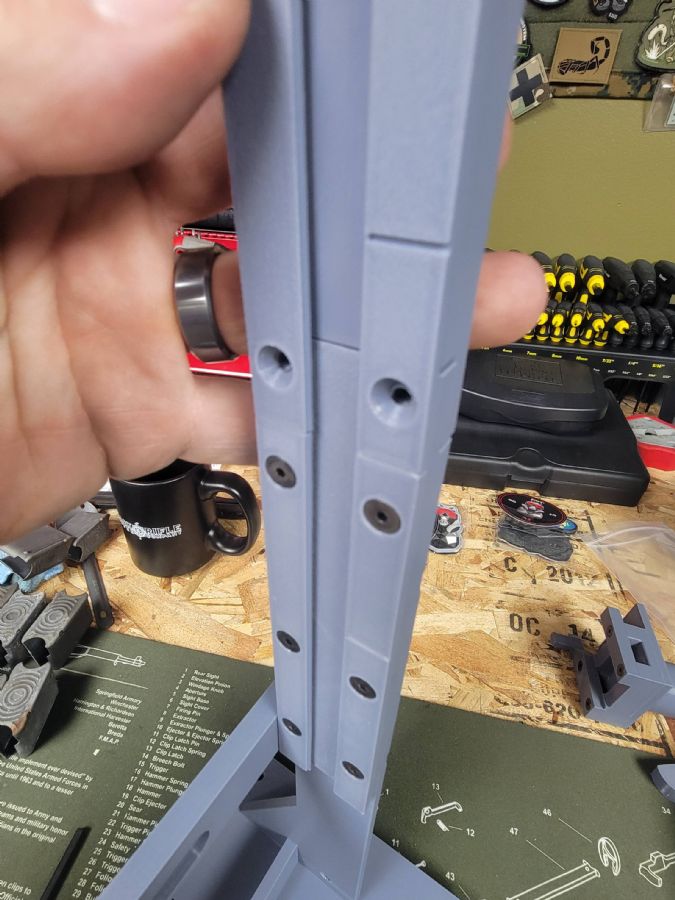 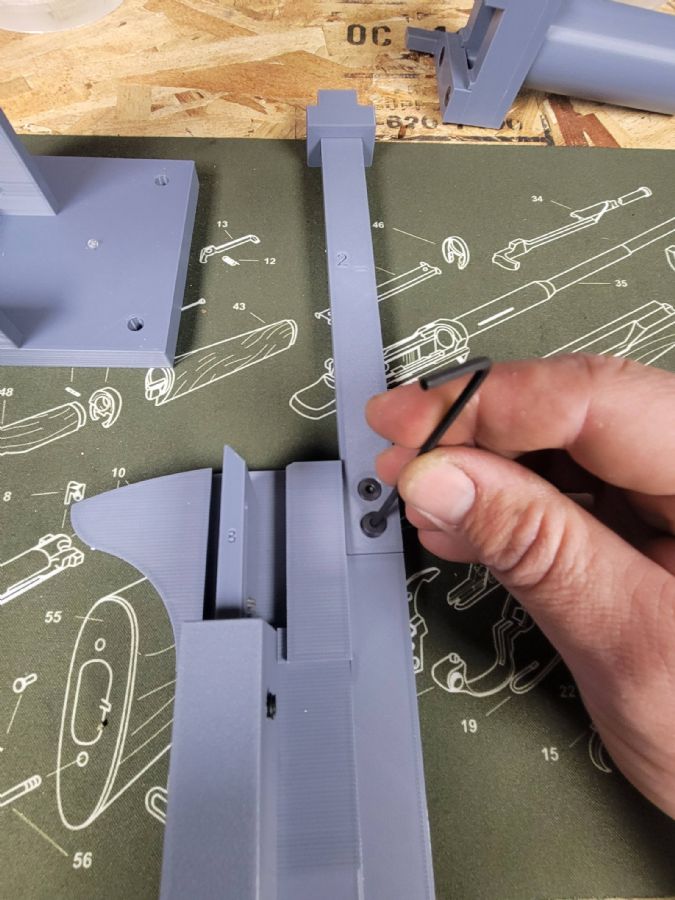   This is a picture of the bullet guide. You set the depth of the guide using the knob to the bullet length.  Clip inserted and ready to go. 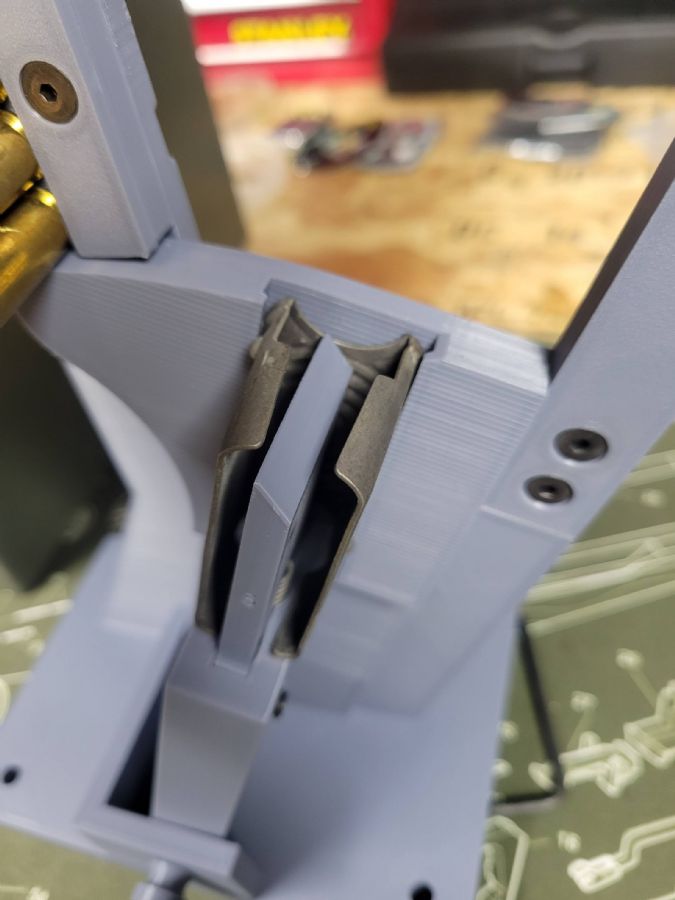 Freshly loaded clip. I forgot to take a picture of the clip being pushed up and out once loaded and the arm is moved back to its starting position.  This shows the channel that the arm rides in to push the bullets down into the clip. 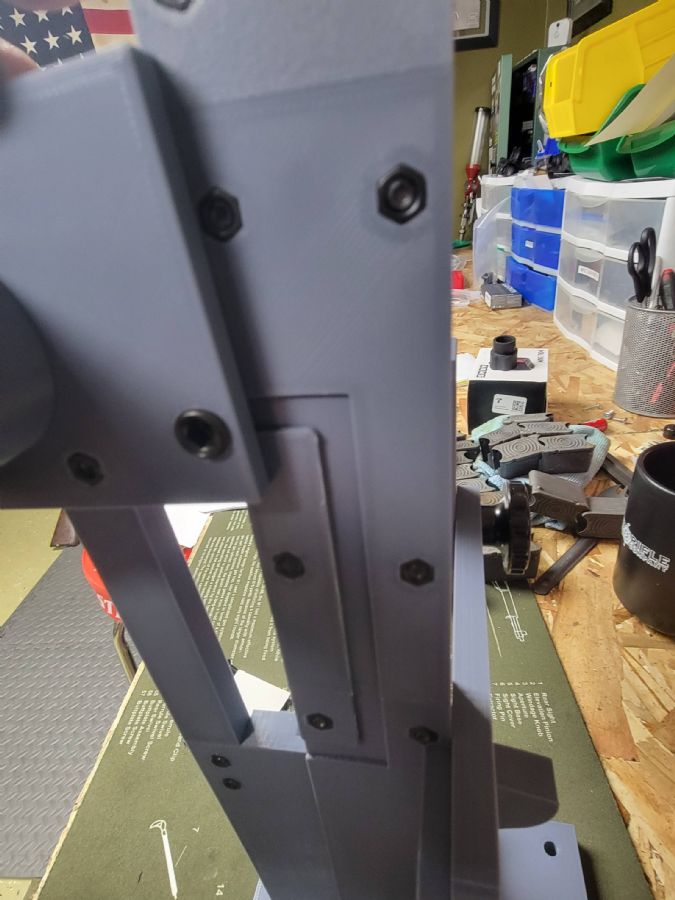 The entire build took less than 10 mins. Again, Jim has all of the hard work done for you and you are just mating the sections together. You can mount this to a bench using the 4 holes in the base, or attach rubber pads that are supplied in the kit to help keep the loader from moving around on your bench. First impressions. I am not going to lie, I was hesitant when I first saw it. I have experience with 3d printers and I know some quality can be so so. I figured with the amount of force needed to load 3006 into a clip something would inherently break but Jim has done his homework on this. His printer is dialed in and the design is great. The best part is it's almost completely assembled right out of the box. In 10 mins and you can be set up and loading en blocs. The only issue I ran into while loading was some of the bullets were getting stuck about halfway up the bullet channel. I just pushed them down and they continued to fall. I would imagine a slight adjustment in that area and it will be fine. I loaded 10 or so en blocs with no other issues with many more to come. Another major advantage is the fact that you can swap out parts if needed due to wear. Jim states he has over 700 en blocs loaded with no failures so the chances of needing to swap parts seem to be very low but that option is very handy. He uses PLA pro (+) filament so it is much stronger and more durable than a standard PLA material. For $150. 20-30 of that is shipping, you are getting a rock solid, cost-effective solution to enbloc loading. This is a fun tool to have in your arsenal. If you are interested in one email jim @ [email protected] . I will keep this updated as I go. |
|
|
|
[#1]
Thank you very much, both for being the guinea pig and for posting a nicely detailed review!
I guess this place is going to cost me more money (again!). |
|
|
|
[#2]
Quoted: Thank you very much, both for being the guinea pig and for posting a nicely detailed review! I guess this place is going to cost me more money (again!). You are welcome. If there is anything else you guys would like to know or that I can take a picture of, please let me know. |
|
|
|
[#3]
Thanks for taking the time to post all these pics and the great write up.
I suspect Jim is about to get some more orders. 
|
|
|
|
[#4]
Quoted: Thanks for taking the time to post all these pics and the great write up. I suspect Jim is about to get some more orders. You are welcome. |
|
|
|
[#5]
I can confirm it works with 308 cartridges as well. :)
|
|
|
|
[#6]
Nice write up. I might have to pick one up to use as a model. Looks great
|
|
|
|
[#7]
Quoted: Nice write up. I might have to pick one up to use as a model. Looks great Thanks :) |
|
|
|
[#8]
I talked to Jim and he instructed me to loosen up some of the screws on the bullet feeder . After doing so the bullets Slide down the feeder much easier.
|
|
|
|
[#9]
Video in the works perhaps?
Like to see it in action. EDIT I found one, apparently the exact one. Looks awesome!  M1 Garand Enbloc Loader |
|
|
|
[#10]
Quoted: Video in the works perhaps? Like to see it in action. EDIT I found one, apparently the exact one. Looks awesome! Correct. I linked the original thread in my op which had that video. |
|
|
|
[#11]
Quoted: Correct. I linked the original thread in my op which had that video. Quoted: Quoted: Video in the works perhaps? Like to see it in action. EDIT I found one, apparently the exact one. Looks awesome! Correct. I linked the original thread in my op which had that video. @TOTHEMAX … Great review and pics! Thank you! |
|
|
|
[#12]
Quoted: @TOTHEMAX … Great review and pics! Thank you! Quoted: Quoted: Quoted: Video in the works perhaps? Like to see it in action. EDIT I found one, apparently the exact one. Looks awesome! Correct. I linked the original thread in my op which had that video. @TOTHEMAX … Great review and pics! Thank you! You are welcome. |
|
|
|
[#13]
Punched out 96 rounds of AP in well under 5 mins. I love this thing.

|
|
|
 Win a FREE Membership!
Sign up for the ARFCOM weekly newsletter and be entered to win a free ARFCOM membership. One new winner* is announced every week!
You will receive an email every Friday morning featuring the latest chatter from the hottest topics, breaking news surrounding legislation, as well as exclusive deals only available to ARFCOM email subscribers.

AR15.COM is the world's largest firearm community and is a gathering place for firearm enthusiasts of all types.
From hunters and military members, to competition shooters and general firearm enthusiasts, we welcome anyone who values and respects the way of the firearm.

Subscribe to our monthly Newsletter to receive firearm news, product discounts from your favorite Industry Partners, and more.
Copyright © 1996-2024 AR15.COM LLC. All Rights Reserved.
Any use of this content without express written consent is prohibited.
AR15.Com reserves the right to overwrite or replace any affiliate, commercial, or monetizable links, posted by users, with our own.


