|
[#1]
Did you put the trigger spring in, correctly oriented?

|
|
|
|
[#2]
Quoted:
Did you put the trigger spring in upside down?  |
|
|
|
[#3]
|
|
|
|
[#4]
Thanks for the link, Dano.
I pulled it apart tonight, verified springs were oriented correctly, and checked the sear surfaces. I couldnt find any burrs or noticeable issues with the geometry, but I ran a dremel polishing wheel over everything anyway. I'll probably shoot again this weekend and see if it runs any better. |
|
|
|
[#5]
Quoted:
Thanks for the link, Dano. I pulled it apart tonight, verified springs were oriented correctly, and checked the sear surfaces. I couldnt find any burrs or noticeable issues with the geometry, but I ran a dremel polishing wheel over everything anyway. I'll probably shoot again this weekend and see if it runs any better. Can you dry fire it and see if it works? |
|
|
|
[#6]
Quoted:
That was weird seeing that. Can you dry fire it and see if it works? Quoted:
Quoted:
Thanks for the link, Dano. I pulled it apart tonight, verified springs were oriented correctly, and checked the sear surfaces. I couldnt find any burrs or noticeable issues with the geometry, but I ran a dremel polishing wheel over everything anyway. I'll probably shoot again this weekend and see if it runs any better. Can you dry fire it and see if it works? I only did a couple dry fires by actually running the charging handle back. Old wives tale about not dry firing rimfires? I should do that a few more times, probably won't hurt it. |
|
|
|
[#7]
Little update. I dry fired another 20ish times, tried holding trigger through charging, and then tried releasing trigger then racking.
Couldn't duplicate the issue, so I'll try shooting it this weekend. |
|
|
|
[#8]
Pull FCG one more time, then install the pistol grip with grip bolt and head washer.
Make dam sure that the tip of the grip bolt is not protruding into the bottom of the receiver void. If protruding, then shorten the tip of the grip bolt or add another washer to the head of the bolt. Also, when installing the FCG, lube the piss out of the parts to make sure that the burless trigger channel is not binding on the trigger pin, and that you don't have something funky going on like the selector U notch too narrow for the width of the trigger. Also, with disco in hand, check the sides of both the through pin channel in the disco, and even the U slot for the disco in the trigger for side burs there. Bottom line, switching the selector from fire to safe will force the back of the trigger down so the disco releases the hammer from it, and something is going on that the trigger is not coming all the way back to allow the same on trigger release as well on its own. And yes, trigger pin should be tight in the receiver channel holes for the pin, and its the trigger with Disco in tow that should be slipping on the fixed trigger pin when you release finger pressure off the trigger to allow the trigger to come all the way back. Sometimes its too long of a grip bolt protruding into the lower receiver void under the trigger that does not allow the tail of the trigger to come all the way down (after market grip with it bolt channel shallower), while other times its a Bur or wedging problem in the FCG that causes the bind so the trigger tail does not come all the way down on trigger finger release instead. |
|
|
|
[#9]
Quoted:
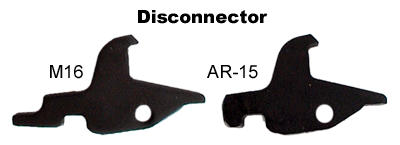
Pull FCG one more time, then install the pistol grip with grip bolt and head washer. Make dam sure that the tip of the grip bolt is not protruding into the bottom of the receiver void. If protruding, then shorten the tip of the grip bolt or add another washer to the head of the bolt. Also, when installing the FCG, lube the piss out of the parts to make sure that the burless trigger channel is not binding on the trigger pin, and that you don't have something funky going on like the selector U notch too narrow for the width of the trigger. Also, with disco in hand, check the sides of both the through pin channel in the disco, and even the U slot for the disco in the trigger for side burs there. Bottom line, switching the selector from fire to safe will force the back of the trigger down so the disco releases the hammer from it, and something is going on that the trigger is not coming all the way back to allow the same on trigger release as well on its own. And yes, trigger pin should be tight in the receiver channel holes for the pin, and its the trigger with Disco in tow that should be slipping on the fixed trigger pin when you release finger pressure off the trigger to allow the trigger to come all the way back. Sometimes its too long of a grip bolt protruding into the lower receiver void under the trigger that does not allow the tail of the trigger to come all the way down (after market grip with it bolt channel shallower), while other times its a Bur or wedging problem in the FCG that causes the bind so the trigger tail does not come all the way down on trigger finger release instead. Grip bolt is good, recessed well within the receiver. I pulled it anyway and cleaned the safety selector, and used compressed air to blow everything completely out of the receiver, then lubed and reinstalled. Notch seemed fine and fit the trigger. Put a little touch of grease in the groove and the u-notch anyway. I polished surfaces on the trigger and hammer with a wheel and polishing compound with the dremel. The machining on the sear wasn't very high-end but nothing really bad I could see. Pin holes all good. The disconnecter is pretty shoddy though now that I look closer. I polished all surfaces S best I could, but there are some marks on the edges, almost like casting voids? I'm not sure. I also compared against another disco. This one is shorter on the back end by the 'u' but not sure if that would be an issue? Here it is layed over a good disco. It's hard to get a good measurement with calipers due to the lower edge near the 'u' but this disco appears to be about 0.005-0.01" taller where I marked. I reinstalled and lubed the hell out of it anyway. Cleaned everything super well. Too wet to shoot today but hopefully tomorrow I can get out and test it. |
|
|
|
[#10]
On the disco's, will take a counter sink by hand to both sides of the pin channel on them to knock off any burs that may bind on the trigger pin/lightly chamber the side channel edges. On the trigger, will go after the ID of the U channel at the pin channel to knock off any burs from the inside edges with a small jewelers file. Also, will check the outside of the C slots, since when these are machined, can leave burs as well. Also, since the ID of the trigger channel ends up be parkerized/will cause a gritty feeling in the trigger as the trigger rotates on the pin, will take a Q tip on a drill with some valve lapping compound to knock off the parkerizing in the trigger pin channel. Same for the disco channel so it not going to bind to the trigger pin as well. Not only does this help with trigger pull, but the trigger rotate back cleanly as you release the trigger as well. Note, will do this as well with the hammer pin channel as well. As for wide of trigger in lower receiver slot, really only need .003" free play between the sides, but most triggers will have more lash side to side than this. I bring this up, since if you trigger is binding on the sides of the receiver cavity walls when installed, then will need to lap the sides of the trigger C faces inwards a touch so the sides of the trigger are not biding on the side walls of the lower receiver. As for once the FCG has been installed, double check the free gap of the disco sear to the back hammer sear. Hence do not touch the trigger, cock the hammer back until you can get the disco sear and hammer rear sear as close to each other, and the two sears should miss each other by .001"~.003" (thickness of a sheet of copier paper). 
If the two sears make contact, and again without you touching the trigger, then push the trigger forward by hand, and check again. If pushing the trigger forward solves the small gap problem, then pull the FCG one more time to find out what is binding up the trigger moving all the way back forward. If pushing the trigger forward does not solve the problem, then break out a file to slightly shorten the Disco sear hook edge until you do get the correct free gap. If you find that the free gap is too wide instead, then you can remove the disco to remove metal on the bottom/front of it, when it seats against the front/top of the trigger, so the disco can cam more forwards at rest, to make the free gap smaller instead. On this disco, we can see the extra metal on the bottom/front of the disco caused during stamp cutting the part, which will cause the front of the disco to sit a little higher against the trigger front top, and would cause the free gap to be increased over the ideal setting.  As for your disco, yours looks to be semi crap with a lot of stamping over fold when produced, but if burs only on the top, and not the front/bottom or side edges, should not be a problem. Hence do the basic channel clean ups, and with the trigger outside the rifle drop the disco into the trigger with disco spring installed large coil side down, stick the tripper pin in, and make sure that you don't feel any binding as you cam the disco back in the trigger by hand. Normally the slot in the disco is wide enough for the spring/you get the correct stacking alignment of the spring in trigger slot to disco U groove, but helps to check if you are getting a binding problem there as well. |
|
|
|
[#11]
Quoted:
Yes, seems to work fine. I pulled the upper off and ran the hammer back manually, couldn't recreate the issue. Did maybe 20-30 like that. I only did a couple dry fires by actually running the charging handle back. Old wives tale about not dry firing rimfires? I should do that a few more times, probably won't hurt it. |
|
|
|
[#12]
Quoted:
Actually, most rimfires should not be dry fired because the firing pin can easily be damaged. Some are designed to allow dry firing, but they are the exception, not the rule. Quoted:
Quoted:
Yes, seems to work fine. I pulled the upper off and ran the hammer back manually, couldn't recreate the issue. Did maybe 20-30 like that. I only did a couple dry fires by actually running the charging handle back. Old wives tale about not dry firing rimfires? I should do that a few more times, probably won't hurt it. Sorry for no updates, it has continued to rain this week and my truck won't even make it to my shooting spot right now. Maybe by Sunday if we get some sun. |
|
|
|
[#13]
Just a FYI, but if the action is not glass smooth, don't be surprised if you need to install a reduced tension disco spring on most 22lr kits.
Hence buffer does not come in play, and it only the distance of the barrel to face of the buffer that the action cycles on a 22lr. On some kits, and some weaker ammo, just not enough rear speed on the bolt cycle to get the bolt back enough to cock the hammer to the disco, and this is the reason for the reduced tension on the disco spring instead. Also, if you are using this type kit on a gas ported 223 barrel, keep in mind that the lead 22lr bullet is going to get shaved at the gas port, ending up with the gas port lead clogged as some point. And by lead clogged, it not just the barrel gas port that is going to be clogged solid, but the gas block/FSB larger port between the barrel gas port and gas tube that will clog as well. Its not the end of the world, but does require that you pull the gas tube/FSB to get to all the ports to pick/heat the lead out before the barrel will cycle with 223 ammo again. Really, for a AR-15 dedicated upper, better off with a entire 22lr upper, since you have a barrel that is correctly twisted rifled to spin the bullets correctly (223 barrel has faster rifling and over spins the bullets), as well as an upper barrel that is portless that you don't have to worry about leading up the gas port as well. |
|
|
|
[#14]
Quoted:
Just a FYI, but if the action is not glass smooth, don't be surprised if you need to install a reduced tension disco spring on most 22lr kits. Hence buffer does not come in play, and it only the distance of the barrel to face of the buffer that the action cycles on a 22lr. On some kits, and some weaker ammo, just not enough rear speed on the bolt cycle to get the bolt back enough to cock the hammer to the disco, and this is the reason for the reduced tension on the disco spring instead. Also, if you are using this type kit on a gas ported 223 barrel, keep in mind that the lead 22lr bullet is going to get shaved at the gas port, ending up with the gas port lead clogged as some point. And by lead clogged, it not just the barrel gas port that is going to be clogged solid, but the gas block/FSB larger port between the barrel gas port and gas tube that will clog as well. Its not the end of the world, but does require that you pull the gas tube/FSB to get to all the ports to pick/heat the lead out before the barrel will cycle with 223 ammo again. Really, for a AR-15 dedicated upper, better off with a entire 22lr upper, since you have a barrel that is correctly twisted rifled to spin the bullets correctly (223 barrel has faster rifling and over spins the bullets), as well as an upper barrel that is portless that you don't have to worry about leading up the gas port as well. I didn't think of the reduced power disco spring. |
|
|
|
[#15]
Maybe that reduced tension disco spring is the ticket.
I shot 50 rds or so just now (finally) and all good except 1 round ejected and another chambered properly but bolt didn't reset trigger. I'll have time tomorrow to do a couple hundred rounds and we'll see how it does then. |
|
|
|
[#16]
I'd go after polishing the bcg long before I started swapping springs. I've run cci standards before. Anything lower powered than that doesn't belong in a semi auto unless it's purpose built for it.
|
|
|
|
[#17]
Quoted:
I'd go after polishing the bcg long before I started swapping springs. I've run cci standards before. Anything lower powered than that doesn't belong in a semi auto unless it's purpose built for it. I'll do one or two hundred of each tomorrow. |
|
|
|
[#18]
Probably final update for anyone interested. Shot another ~150 rounds Saturday. Had one fail to reset the trigger completely, but no more of the safety-reset thing since my Bubba dremel gunsmith polishing.
I'll probably pull the bolt next weekend and polish it up in effort to eliminate the no-reset issue. If that doesn't work I'll start changing out springs. |
|
|
 Win a FREE Membership!
Sign up for the ARFCOM weekly newsletter and be entered to win a free ARFCOM membership. One new winner* is announced every week!
You will receive an email every Friday morning featuring the latest chatter from the hottest topics, breaking news surrounding legislation, as well as exclusive deals only available to ARFCOM email subscribers.

AR15.COM is the world's largest firearm community and is a gathering place for firearm enthusiasts of all types.
From hunters and military members, to competition shooters and general firearm enthusiasts, we welcome anyone who values and respects the way of the firearm.

Subscribe to our monthly Newsletter to receive firearm news, product discounts from your favorite Industry Partners, and more.
Copyright © 1996-2024 AR15.COM LLC. All Rights Reserved.
Any use of this content without express written consent is prohibited.
AR15.Com reserves the right to overwrite or replace any affiliate, commercial, or monetizable links, posted by users, with our own.


