|
Posted: 10/20/2019 11:50:27 AM EDT
I bought a previously owned DPMS Gen 2 light Hunter this past weekend.
From the slight wear on the bolt and carrier it looks as if only a couple hundred rounds have been fired on it previously. I fired 60 rounds through it yesterday, 20 Federal 168gr GMM and 40 Aguila 150gr FMJ. I collected all my brass and noticed every single one had a cratered primer. there are no other signs of over pressure as the brass has no ejector swipes or extractor swipes on them and no signs of case head separation starting. I compared the fired cases from the DPMS to fired cases from an M14 in a Dillon case gauge and the DPMS cases seem to stick out from the maximum step quite a bit more than the fired ones from my M14. I noticed on the bolt where the firing pin protrudes through the firing pin hole it has a slight cup machined into it which looks like that is where the craters are being formed on the brass. Don't understand why they would do this? I'm thinking excessive head space is the issue, no? I hope I'm wrong. I have been thinking of re-barreling it with a Rainier arms SS gen 2 style from the get go anyway and getting a new bolt from DPMS being there are no aftermarket bolts for the gen 2's yet. I am also thinking of getting a headspace gage set to check this before I fire it again with it's current barrel. I will say that the stock barrel did get a decent 1.5" group at 140 yds. Below are the pics of the brass sitting in my case cage. The first three pics from top to bottom are showing the brass fired from the DPMS and how high they protrude past the grooves of the case gauge which makes me think there may be excessive head space, maybe? You can also see the cratering. The last pick is a once fired case from my M14 for comparison. |
|
|
|
[#1]
Walk in the park to fix.
Pull the bolt off the carrier. Now take some 400 sand paper and spin sand the tail of the bolt against the paper on your thumb to break any sharp edges to give the FP stop collar a clean surface to seat against. Now chuck the FP tail end up in a drill, and spin the FP so you can use the 400 sand paper to clean the surface that the collar is going to set against the tail of the bolt. Hence we want to clean up these two surfaces so we can get a correct reading next, but also to get the surfaces so they will hold their face dimensions long term as well. Clean the parts up, and using a caliper tail end, measure the amount that the FP tip will protrude out the face of the bolt when the collar is seated all the way against the tail of the bolt.  Now protrusion of the tip of the FP should be in the .028"~.032" range, and since we do have the drill handy, not a problem to reduce the tip of the FP with a file (while spin filing), then coming back with the sand paper to polish the shortened reshaped tip of the FP. And truth is, even though I have a lathe, most of the time is just the FP protruding a few thousands long, and the drill with sand paper and file really make short work of initial set. Hell, when a FP does get tip eroded slightly, will use the same method to clean up the tip, then set the face of the stop collar back file spin filing to get me to the needed protrusion in the end. |
|
|
|
[#2]
Dano thanks for the detailed directions. Appreciate it very much.

So you are saying the firing pin is not protruding enough or too much? Causing the craters to be there? Also do I correctly understand from the 7th line in your instructions that I would be spin filing the FP tip square to the file and then re-rounding the tip with the 400 grit if it is still too long? Thanks again and sorry if I am misunderstanding your directions. |
|
|
|
[#3]
Quoted:
Walk in the park to fix. Pull the bolt off the carrier. Now take some 400 sand paper and spin sand the tail of the bolt against the paper on your thumb to break any sharp edges to give the FP stop collar a clean surface to seat against. Now chuck the FP tail end up in a drill, and spin the FP so you can use the 400 sand paper to clean the surface that the collar is going to set against the tail of the bolt. Hence we want to clean up these two surfaces so we can get a correct reading next, but also to get the surfaces so they will hold their face dimensions long term as well. Clean the parts up, and using a caliper tail end, measure the amount that the FP tip will protrude out the face of the bolt when the collar is seated all the way against the tail of the bolt. https://archive.proscitech.com/img/s/scaldraw2.jpg Now protrusion of the tip of the FP should be in the .028"~.032" range, and since we do have the drill handy, not a problem to reduce the tip of the FP with a file (while spin filing), then coming back with the sand paper to polish the shortened reshaped tip of the FP. And truth is, even though I have a lathe, most of the time is just the FP protruding a few thousands long, and the drill with sand paper and file really make short work of initial set. Hell, when a FP does get tip eroded slightly, will use the same method to clean up the tip, then set the face of the stop collar back file spin filing to get me to the needed protrusion in the end. Went ahead and cleaned up the two surfice areas you explained above, and removed the two ejactors, and extractor from the bolt to measure the FP protrusion. I got .052 Got it down to .031 and stopped there, cleaned up the tip so it would be round again. Going to try it out this weekend and I'll update here how it went. I also ordered a new bolt from DPMS to compare. I believe mine may have been an earlier model as my rifle still had DPMS's older address ( ST Cloud MN.) on the lower stamp. I read that they supposedly addressed this issue in their newer bolts making the hole smaller? Fingers crossed!! |
|
|
|
[#4]
I had the same cratering and beat up brass as the OP.
At the time when the DPMS GII's were first showing up in the wild, everybody and their brother had the same problems and once an adjustable gas block and a heavier buffer was installed on the rifles, the problems pretty much disappeared. The GII's were so overgassed people were ripping the rims off their brass due to the rifle unlocking under high pressure. I purchased an adjustable gas block and without me knowing, my children went half and half on a heavy buffer for me. I didn't want to be a jerk and not use the heavy buffer (at the time, the gift was pretty darn expensive for my kids) so I installed both. What I ended up getting was a well behaved, easy shooting, low recoil rifle that was so accurate it was impressive. After following the advice above, I recommend installing some king of device to limit the overgassed problem and using a heavy buffer to keep your action closed long enough so the pressure drops to an acceptable level. Good luck OP. |
|
|
|
[#5]
Quoted:
I had the same cratering and beat up brass as the OP. At the time when the DPMS GII's were first showing up in the wild, everybody and their brother had the same problems and once an adjustable gas block and a heavier buffer was installed on the rifles, the problems pretty much disappeared. The GII's were so overgassed people were ripping the rims off their brass due to the rifle unlocking under high pressure. I purchased an adjustable gas block and without me knowing, my children went half and half on a heavy buffer for me. I didn't want to be a jerk and not use the heavy buffer (at the time, the gift was pretty darn expensive for my kids) so I installed both. What I ended up getting was a well behaved, easy shooting, low recoil rifle that was so accurate it was impressive. After following the advice above, I recommend installing some king of device to limit the overgassed problem and using a heavy buffer to keep your action closed long enough so the pressure drops to an acceptable level. Good luck OP. I may just try a adjustable GB. Also. |
|
|
|
[#6]
The firing pin protrusion you originally posted does not appear to be unusual for a 308 type rifle if you search around the net. The 308 Ar I have is .050 and I have no issues. My cousins gen II early DPMS craters a little also. I think it may have been talked about in some post in the past.
|
|
|
|
[#7]
Quoted:
The firing pin protrusion you originally posted does not appear to be unusual for a 308 type rifle if you search around the net. The 308 Ar I have is .050 and I have no issues. My cousins gen II early DPMS craters a little also. I think it may have been talked about in some post in the past. |
|
|
|
[#8]
I look up a few different 308 firearms on line and came up with .050 in the mid range for their min and max. Measured my 308 AR and it was.050. Did not see the actual drawings but seems not to be uncommon. Best I could tell it was mentioned the width has something to do with it.
I have a spare bolt and two pins I will check it and see what I get on it. New spare DPMS gen1 bolt two pin one PSA and one DPMS I got .053" with one pin and .052" with the other. The .050" was on a PSA bolt and pin. |
|
|
|
[#9]
Quoted:
I look up a few different 308 firearms on line and came up with .050 in the mid range for their min and max. Measured my 308 AR and it was.050. Did not see the actual drawings but seems not to be uncommon. Best I could tell it was mentioned the width has something to do with it. I have a spare bolt and two pins I will check it and see what I get on it. In my own research of mostly early gen 2's some have said yes and no. I was thinking of re-barreling it anyway with a Rainier arms Gen II barrel but the stock SS hunter barrel seems to have some potential to go moa or sub with hand loads. I'm going to work some up once I get this issue under control if possible, and if all goes well and I get some good accuracy I may just be wasting my time re-barreling it and end up leaving it alone. |
|
|
|
[#10]
Have tried DPMS to see if they would swap the bolt out for you?
|
|
|
|
[#11]
Quoted:
Have tried DPMS to see if they would swap the bolt out for you? Their processing takes forever even though it was in stock 
I'm also really curious to see if Dano's method made any difference. |
|
|
|
[#12]
The rifle I was writing about above is a DPMS GII Hunter.
Most of the people compaining about the rifle were having problems with the cratering and beat up brass. I changed from FGGM to reloads using military weight brass and H4895. I also used military primers (41's I think) I installed an ODIN AGB and a heavy buffer from a guy whose name I don't remember now. With the addition of about 8 ounces total, I ended up with an extremely accurate 308 gas gun. The most weight I put on the rifle was the 20MOA scope mount and the dialable scope. The idea at the time was the rifle was terribly over gassed and the bolt was unlocking while the brass was still under high pressure. I had no plans to put a heavy buffer on the rifle at the time that I installed the AGB, like I wrote before, it was just because the heavy buffer was a gift. I went to my local range to get the AGB tuned for my loads and started at full open, I was amazed the brass wasn't beat up at all. Then I started closing the AGB click by click. I got to 8 closed on the adjustment and had the most self behaved fully functional gasser I have owned to date. I will suggest to add an AGB and install a heavy buffer ( 10 ounces I believe) and your DPMS GII Lite Hunter will be a completely comfortable, well behaved rifle. Like I wrote earlier, I went through the same circumstances as the OP is right now. I'm just posting this to help out a little. Good luck OP. |
|
|
|
[#13]
Quoted:
The rifle I was writing about above is a DPMS GII Hunter. Most of the people compaining about the rifle were having problems with the cratering and beat up brass. I changed from FGGM to reloads using military weight brass and H4895. I also used military primers (41's I think) I installed an ODIN AGB and a heavy buffer from a guy whose name I don't remember now. With the addition of about 8 ounces total, I ended up with an extremely accurate 308 gas gun. The most weight I put on the rifle was the 20MOA scope mount and the dialable scope. The idea at the time was the rifle was terribly over gassed and the bolt was unlocking while the brass was still under high pressure. I had no plans to put a heavy buffer on the rifle at the time that I installed the AGB, like I wrote before, it was just because the heavy buffer was a gift. I went to my local range to get the AGB tuned for my loads and started at full open, I was amazed the brass wasn't beat up at all. Then I started closing the AGB click by click. I got to 8 closed on the adjustment and had the most self behaved fully functional gasser I have owned to date. I will suggest to add an AGB and install a heavy buffer ( 10 ounces I believe) and your DPMS GII Lite Hunter will be a completely comfortable, well behaved rifle. Like I wrote earlier, I went through the same circumstances as the OP is right now. I'm just posting this to help out a little. Good luck OP.
Right now my rifle buffer in my Magpul MOE rifle stock weighs 5.4oz. I'm going to look for a heavier one, and maybe try an adjustable GB. No biggie, I like to experiment and tinker anyways. I'll try and keep this thread updated as I go. Hopefully this weekend I can try the above option Dano mentioned that I did and see how far it may mor may not get me.. |
|
|
|
[#14]
@mtwarych
This rifle buffer that weighs 8oz you got. Is it a hydraulic buffer? https://www.nokick.com/KynShot_Hydraulic_Recoil_Buffer_AR15_Fixed_Stock_p/kyn-rb5001.htm That is the only rifle buffer that is 8oz I can find other than a 9mm pistol buffer which wouldn't work in a rifle length tube. |
|
|
|
[#15]
Update.
Fired 40 rds today of Aguila and FGMM. Same cratering results with less FP depth is all that was acomplished. Once again I don't see any over pressure signs. The slight shiny swipes a little way from the case head are from contact with the deflector. Looks like I will be also ordering another FP as I don't really like the shallower depth created by the mods I followed in this thread.
Might be ok but I can't trust it anymore. Going to order an adjustable GB along with the heavier buffer I have on the way. They should be here this coming week and I give it a try again. On a positive note I was able to get a 1/2" 4 shot group with the 168gr FGMM. I think I may just keep this barrel until I shoot it out. |
|
|
|
[#16]
Gman556,
I had to look it up but the heavy buffer I am firing is from heavybuffers.com. I am firing the 10oz. buffer with the heavy spring that is sold with it. I'm having problems with my old, old laptop so I can't supply a link. (no right clip copy, paste right now). |
|
|
|
[#17]
Quoted:
Gman556, I had to look it up but the heavy buffer I am firing is from heavybuffers.com. I am firing the 10oz. buffer with the heavy spring that is sold with it. I'm having problems with my old, old laptop so I can't supply a link. (no right clip copy, paste right now). I forgot about heavybuffers.com and I ended up ordering a kyn-shot hyd buffer from Brownells at 8 oz. They have a no bs return policy if it ends up being not enough and then I'll try the 11oz heavybuffers rifle buffer next. Not sure I want to trust a hyd buffer anyway but it was all I cold find as far as rifle buffers go at above the 5.4oz that I already am using. |
|
|
|
[#18]
Does the Gen II use a standard ar15 rifle length buffer instead of the shortened one like some AR 308s use?
|
|
|
|
[#19]
Quoted:
Does the Gen II use a standard ar15 rifle length buffer instead of the shortened one like some AR 308s use? I think the other Gen II's not mentioned above use a standard Comercial spec AR15 carbine tube and use regular buffers. My rifle stocked MOE uses a standard AR15 rifle buffer. |
|
|
|
[#20]
Never saw my cousins apart to see what buffer it used and was curious if the Gen II shorten everything enough to use the same length buffers as an AR with rifle and collapsible type tubes.
The PSA on I bought came with a collapsible stock but on mine it had a lengthened tube so a normal AR carbine buffer can be used. Since it has the old DPMS style carrier when I swapped it to a full length stock and tube I had to use the shorten rifle buffer and spring for it. |
|
|
|
[#21]
A coworker of mine was having identical problems with the same rifle, DPMS sent him an updated bolt that solved the common problems you are having.
|
|
|
|
[#22]
Quoted:
A coworker of mine was having identical problems with the same rifle, DPMS sent him an updated bolt that solved the common problems you are having. I have one on order but I am going to give them a call and see if I can get a free replacement from them also. I have read this more than once in my research about an updated bolt. I just wish I didn't heed the earlier idea of reducing the FP because now I need a new one of those also. A $35 mistake that I deserve for following advice on the internet. |
|
|
|
[#23]
Called DPMS and they wouldn't do a bolt swap. Build date was 2015.
Had to purchase one on my own dime but it's stripped and I will need rings/ejectors and an extractor for it. They are at least sending me a new firing pin. I have a buffer from heavy buffers.com on the way. I ordered the wrong Kynshot buffer from Brownells. It is an AR15 buffer and they told me I should of got the 308 one. I thought the 308 one looked larger, being the Gen ll's ar15 sized. I figured since I'm going to be messing with this rifle this weekend, I went ahead and ordered a Midwest Gen 2 rail for it to install being I'm not really fond of the smooth and slippery carbon fiber Tube. I'll update as soon as I get out and shoot it again. This thread may be dead soon but I'm going to go ahead and post updates anyhow just in case anyone else ever needs this info. I'm pretty confident I'll get this nipped in the bud using a couple of the options that have been posted by others in this thread. I also forgot to mention that DPMS did mention there wasn't any need to worry about primer cratering, but it still bothers me and I'd like to try to make it stop. |
|
|
|
[#24]
Quoted: Thanks for the reply. I have one on order but I am going to give them a call and see if I can get a free replacement from them also. I have read this more than once in my research about an updated bolt. I just wish I didn't heed the earlier idea of reducing the FP because now I need a new one of those also. A $35 mistake that I deserve for following advice on the internet. Dano is very knowledgeable with ARs, possibly the most knowledgeable person that can be found anywhere. Your original concern was about cratered primers. The information he gave you to shorten the protrusion and 'clean up the tip' is correct. I think the cratering has to do with your firing pin tip having a blunt surface, the depth only exaggerated the craters. Is the original .052 too long or the current .031 is too short, depends on how much primer impact you want and if function issues occur with either? Notice how the head of this pin has a narrow point. The pin marks on your primers look much wider. The refined tip allows the pin to hit the primer harder and deeper while still causing less cratering. 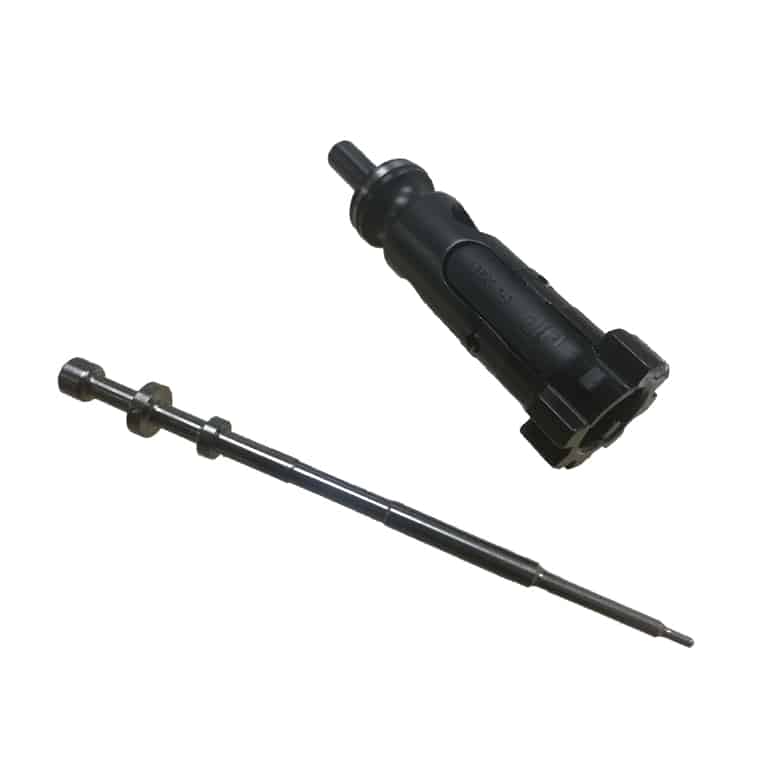
|
|
|
|
[#25]
Quoted:
Did you ruin the pin somehow? You can adjust the firing pin protrusion shorter and longer as Dano523 briefly explained. If you shortened the pin too far you can still thin the front of the stop ring on the pin or even shorten the bolt tail to add length again. Preferably you would adjust the stop ring rather than altering the bolt. Dano is very knowledgeable with ARs, possibly the most knowledgeable person that can be found anywhere. Your original concern was about cratered primers. The information he gave you to shorten the protrusion and 'clean up the tip' is correct. I think the cratering has to do with your firing pin tip having a blunt surface, the depth only exaggerated the craters. Is the original .052 too long or the current .031 is too short, depends on how much primer impact you want and if function issues occur with either? Notice how the head of this pin has a narrow point. The pin marks on your primers look much wider. The refined tip allows the pin to hit the primer harder and deeper while still causing less cratering. https://criterionbarrels.com/wp-content/uploads/2018/11/jphighpressure308bolt.jpg Quoted:
Quoted: Thanks for the reply. I have one on order but I am going to give them a call and see if I can get a free replacement from them also. I have read this more than once in my research about an updated bolt. I just wish I didn't heed the earlier idea of reducing the FP because now I need a new one of those also. A $35 mistake that I deserve for following advice on the internet. Dano is very knowledgeable with ARs, possibly the most knowledgeable person that can be found anywhere. Your original concern was about cratered primers. The information he gave you to shorten the protrusion and 'clean up the tip' is correct. I think the cratering has to do with your firing pin tip having a blunt surface, the depth only exaggerated the craters. Is the original .052 too long or the current .031 is too short, depends on how much primer impact you want and if function issues occur with either? Notice how the head of this pin has a narrow point. The pin marks on your primers look much wider. The refined tip allows the pin to hit the primer harder and deeper while still causing less cratering. https://criterionbarrels.com/wp-content/uploads/2018/11/jphighpressure308bolt.jpg Thanks. Dano said between 032 & 028. I got it to 031. I believe like you said it’s probably too blunt now. It never dawned on me too make it less blunt than it already was. I just tried to bring it back as close to its original contour as I could. And yes I agree Dano is very knowledgeable here on quite a bit. I should have this corrected eventually I’m sure. Going to try and recontour the pin again and also try a couple of heavier weight buffers. I like this rifle enough that I’ll keep plugging away at it. Thanks again to Dano all the others here for the input. I’ll update again if I get out with it this weekend. |
|
|
|
[#26]
Those protrusion numbers are for a 223 firing pin and one of them is not even the correct number.
The gen II pin appears to be different also and the only one on their site shows a titanium pin. When you get your new bolt and pin measure it. Let us know what it measures. I would guess it is going to be close to what you had originally. If they send you one of the newer bolts it should cut back on what you see as a problem with normal factory ammo. |
|
|
|
[#27]
Quoted:
Those protrusion numbers are for a 223 firing pin and one of them is not even the correct number. The gen II pin appears to be different also and the only one on their site shows a titanium pin. When you get your new bolt and pin measure it. Let us know what it measures. I would guess it is going to be close to what you had originally. If they send you one of the newer bolts it should cut back on what you see as a problem with normal factory ammo. Maybe I should have mentioned it is an AR10 gen II in my original post. I assumed being there are no “Gen 2 AR 223’s. Probably my bad. |
|
|
|
[#28]
Here is an example of how the firing pins tip can effect the strike. Reducing the diameter/reshaping the tip of the pin should give the results your looking for. You only need the protruding length of the pin tip to be reshaped.
.082'' DPMS firing pin tip diameter. 
.062'' JP enterprises pin tip diameter. 
Top row fired with the DPMS factory pin. Bottom row fired with the JP pin. 
|
|
|
|
[#29]
Quoted:
Here is an example of how the firing pins tip can effect the strike. Reducing the diameter/reshaping the tip of the pin should give the results your looking for. You only need the protruding length of the pin tip to be reshaped. .082'' DPMS firing pin tip diameter. http://ar15xtreme.com/store/wp-content/uploads/2018/02/T2eC16hHJF8FFp0mFur9BR-8B49S-60_57.jpg .062'' JP enterprises pin tip diameter. https://www.primaryarms.com/SSP%20Applications/NetSuite%20Inc.%20-%20SCA%20Mont%20Blanc/Development/img/JPFP-308T_00.jpg?resizeid=2&resizeh=0&resizew=555 Top row fired with the DPMS factory pin. Bottom row fired with the JP pin. http://blog.westernpowders.com/wp-content/uploads/2019/02/fired-case-heads727272.jpg The way I read Danos post is I was to shorten the firing pin a few thousands which I did. It started out at 052 and I shortened it to 031 which were close to his instructions telling me it should be either 0 32 or 0 28 at the shortest. So what you're telling me is that I didn't also take into consideration the width of the firing pin? From the sounds of your post it also looks like I can correct this. I think I will go ahead and reduce the collar of the firing pin to bring it back close to its original protrusion and this time instead reduce the width of the very tip. Correct? |
|
|
|
[#30]
Quoted:
Here is an example of how the firing pins tip can effect the strike. Reducing the diameter/reshaping the tip of the pin should give the results your looking for. You only need the protruding length of the pin tip to be reshaped. .082'' DPMS firing pin tip diameter. http://ar15xtreme.com/store/wp-content/uploads/2018/02/T2eC16hHJF8FFp0mFur9BR-8B49S-60_57.jpg .062'' JP enterprises pin tip diameter. https://www.primaryarms.com/SSP%20Applications/NetSuite%20Inc.%20-%20SCA%20Mont%20Blanc/Development/img/JPFP-308T_00.jpg?resizeid=2&resizeh=0&resizew=555 Top row fired with the DPMS factory pin. Bottom row fired with the JP pin. http://blog.westernpowders.com/wp-content/uploads/2019/02/fired-case-heads727272.jpg I thought the some of the gap was closed up some between the pin and orifice diameters to help eliminate the perceive problem on the GENII? Some common gun pin diameters I measured in guns I have no cratering problem ever noticed PSA 308 .077" FAL L1A1 .078" AK47 .077" |
|
|
|
[#31]
Quoted:
If I put both of yours and Danos post together I think I understand now what needs to be done. The way I read Danos post is I was to shorten the firing pin a few thousands which I did. It started out at 052 and I shortened it to 031 which were close to his instructions telling me it should be either 0 32 or 0 28 at the shortest. So what you're telling me is that I didn't also take into consideration the width of the firing pin? From the sounds of your post it also looks like I can correct this. I think I will go ahead and reduce the collar of the firing pin to bring it back close to its original protrusion and this time instead reduce the width of the very tip. Correct? Quoted:
Quoted:
Here is an example of how the firing pins tip can effect the strike. Reducing the diameter/reshaping the tip of the pin should give the results your looking for. You only need the protruding length of the pin tip to be reshaped. .082'' DPMS firing pin tip diameter. http://ar15xtreme.com/store/wp-content/uploads/2018/02/T2eC16hHJF8FFp0mFur9BR-8B49S-60_57.jpg .062'' JP enterprises pin tip diameter. https://www.primaryarms.com/SSP%20Applications/NetSuite%20Inc.%20-%20SCA%20Mont%20Blanc/Development/img/JPFP-308T_00.jpg?resizeid=2&resizeh=0&resizew=555 Top row fired with the DPMS factory pin. Bottom row fired with the JP pin. http://blog.westernpowders.com/wp-content/uploads/2019/02/fired-case-heads727272.jpg The way I read Danos post is I was to shorten the firing pin a few thousands which I did. It started out at 052 and I shortened it to 031 which were close to his instructions telling me it should be either 0 32 or 0 28 at the shortest. So what you're telling me is that I didn't also take into consideration the width of the firing pin? From the sounds of your post it also looks like I can correct this. I think I will go ahead and reduce the collar of the firing pin to bring it back close to its original protrusion and this time instead reduce the width of the very tip. Correct? Reducing the pins tip diameter will cause less material to impact the primer and cause less cratering. Reducing the protrusion distance of the pin also helps stop cratering. Getting the perfect mix of depth, width and tip shape is the trick. You want reliable detonation but you don't want pierced primers or slam discharges. |
|
|
|
[#32]
Quoted:
Yes. Both shortening the protrusion distance and reshaping the pins tip both help with cratering. Reducing the pins tip diameter will cause less material to impact the primer and cause less cratering. Reducing the protrusion distance of the pin also helps stop cratering. Getting the perfect mix of depth, width and tip shape is the trick. You want reliable detonation but you don't want pierced primers or slam discharges. |
|
|
|
[#33]
ETA:
Replacement bolt came it today with a firing pin, and the hole in the new bolt is smaller as is the firing pin tip. There is also no more beveling around the hole. DPMS CS made it sound like I already had an updated version and had me pay out of pocket for the newer stripped bolt and FP. I think this will make the cratering issue go away all together I'm sure. Just going to keep the old bolt as a spare. I'm still going to try the original bolt and FP next time to see if narrowing the tip and taking down the FP shoulder will mitigate the cratering somewhat. Below is a pic of the two bolt faces and it's obvious which one is the updated bolt. |
|
|
|
[#34]
Quoted:
ETA: Replacement bolt came it today with a firing pin, and the hole in the new bolt is smaller as is the firing pin tip. There is also no more beveling around the hole. DPMS CS made it sound like I already had an updated version and had me pay out of pocket for the newer stripped bolt and FP. I think this will make the cratering issue go away all together I'm sure. Just going to keep the old bolt as a spare. I'm still going to try the original bolt and FP next time to see if narrowing the tip and taking down the FP shoulder will mitigate the cratering somewhat. Below is a pic of the two bolt faces and it's obvious which one is the updated bolt. https://www.AR15.Com/media/mediaFiles/133585/IMG_0224_jpg-1150463.JPG |
|
|
|
[#35]
Quoted:
LOL, that's a huge difference. It's a good thing I asked them to send me a FP with it or I would have been screwed
I asked the Remington rep if I needed an updated bolt like I have read a shitload of times in my research, but he acted like mine was ok because of the 2015 date. Going to try it with the new bolt today, and also a couple of heavier buffers. One 7oz hyd from kynshot and a 10oz from heavy buffers. The factory buffer is 5.3oz. This has been kind of an expensive endeavor, but I'm really digging this platform over my M14. I spent quite a bit of time and $ on that rifle trying to get it just to be more consistently accurate. At least the DPMS has that going for it, and the cratering will be an easy fix. Not sure I'm going to do an adjustable gas block or not as I measured the port to be .096 The DPMS also has two nicely machined dimples on the opposite side that match up to it's factory GB. |
|
|
|
[#36]
Got out today with some handloads of HDY 155 amax and some Speer 168 gr BTHP.
No more cratered primers! Got some decent groups with the handloads around 1-1.5" at 100 yds. Matter of fact just about every charge I tried was within that range adding a couple of fliers which I'm sure were me. As far as useing the heavier buffers it didn't lock back with the kyn-shot hydraulic and the 10oz from heavybuffers.com cut way down on recoil but ejection was not good Some casings would eject straight back at me at 5-5:30. Went back to the factory buffer and ejection was normal 3 o'clock ish again. Not sure what I'm going to do there so just keeping the factory buffer for now. Pic of the brass fired with the new updated bolt and FP. |
|
|
|
[#37]
Quoted:
Those protrusion numbers are for a 223 firing pin and one of them is not even the correct number. The gen II pin appears to be different also and the only one on their site shows a titanium pin. When you get your new bolt and pin measure it. Let us know what it measures. I would guess it is going to be close to what you had originally. If they send you one of the newer bolts it should cut back on what you see as a problem with normal factory ammo. |
|
|
|
[#38]
Quoted:
 CY6 Greg Sullivan "Sully" SLR15 Rifles TheDefensiveEdge.com (763) 712-0123 |
|
|
|
[#39]
Quoted: Any chance you could take a measurement on the diameter of each firing pin hole on both bolts? Along with a measurement of the firing pin tip diameter? CY6 Greg Sullivan "Sully" SLR15 Rifles TheDefensiveEdge.com (763) 712-0123 As soon as I get a chance I'll get a measurement for you. |
|
|
|
[#40]
Quoted:
ETA: Replacement bolt came it today with a firing pin, and the hole in the new bolt is smaller as is the firing pin tip. There is also no more beveling around the hole. DPMS CS made it sound like I already had an updated version and had me pay out of pocket for the newer stripped bolt and FP. I think this will make the cratering issue go away all together I'm sure. Just going to keep the old bolt as a spare. I'm still going to try the original bolt and FP next time to see if narrowing the tip and taking down the FP shoulder will mitigate the cratering somewhat. Below is a pic of the two bolt faces and it's obvious which one is the updated bolt. https://www.AR15.Com/media/mediaFiles/133585/IMG_0224_jpg-1150463.JPG |
|
|
|
[#41]
Quoted: That is a dramatic difference in size for the FP hole.... DPMS contacted me here asking for my info and said they want to make it right. That was a few days ago and they have yet to read my reply. I also forgot to mention that the cases from this last firing with the new bolt do not sit way above the higher step on my dillion case gauge like the ones in my first pic do. |
|
|
|
[#42]
Quoted:
ETA: Replacement bolt came it today with a firing pin, and the hole in the new bolt is smaller as is the firing pin tip. There is also no more beveling around the hole. DPMS CS made it sound like I already had an updated version and had me pay out of pocket for the newer stripped bolt and FP. I think this will make the cratering issue go away all together I'm sure. Just going to keep the old bolt as a spare. I'm still going to try the original bolt and FP next time to see if narrowing the tip and taking down the FP shoulder will mitigate the cratering somewhat. Below is a pic of the two bolt faces and it's obvious which one is the updated bolt. https://www.AR15.Com/media/mediaFiles/133585/IMG_0224_jpg-1150463.JPG 
And also an lol to DPMS CS. |
|
|
|
[#43]
Quoted:
Goddamn, no wonder you were cratering primers.
And also an lol to DPMS CS. DPMS CS IM'ed 5 days ago asking for my info address ect: and said they were going to "make it right" so we'll see what happens? My reply hasn't been read yet though. Sent another duplicate reply yesterday just in case my first one got bumped to the bottom of the pile. I'm probably on my own but everything is running great now, and as long as the upper and lower receiver don't crack or something I figure there are enough compatible parts out there now to rebuild or re-barrel. |
|
|
|
[#44]
I finally got a call from DPMS CS and was told that yes I should have gotten a new updated bolt at no charge.
Everything is still working fine so far. Rep gave me his personal email address at Remington if I have any problems in the future. Hopefully I won't need it. |
|
|
|
[#45]
Great you got it running correctly!!!
CY6 Greg Sullivan "Sully" SLR15 Rifles TheDefensiveEdge.com (763) 712-0123 |
|
|
|
[#46]
Got some measurements for Sully
First the new bolt. New Bolt FP tip diameter is .059 New Bolt FP hole is .063 / Only .004 larger than the FP tip There is no more bevel around the edge of the newer FP hole like on the old bolt. Now the old bolt. Old Bolt FP tip diameter is .075 Old bolt FP hole is .086 .011 larger than the FP tip. Bellow is a close up pic of the bevel that you see around the edge of the old bolts firing pin hole. I believe this bevel as slight as it is, was also attributing to the primer cratering |
|
|
|
[#47]
So glad I saw this post. This has been my biggest gripe with my early GII Hunter. I had read somewhere that DPMS updated the bolt with a smaller firing pin hole, but I was under the assumption that the firing pin diameter had remained the same. I need to contact them and see if I can get a new bolt and firing pin coming for mine.
|
|
|
|
[#48]
Quoted:
So glad I saw this post. This has been my biggest gripe with my early GII Hunter. I had read somewhere that DPMS updated the bolt with a smaller firing pin hole, but I was under the assumption that the firing pin diameter had remained the same. I need to contact them and see if I can get a new bolt and firing pin coming for mine. Try really hard to not pay out of pocket for a new one. I was told by a rep themselves that I should have received a new bolt. Don't be like me and get impatient. I should have just hung up on that first rep that I spoke with over the phone and tried it again until I received a new bolt free of charge, but I got impatient and didn't want to spend whole bunch of time on the phone re explaining everything. Worst case scenario you can go right directly to the DPMS site and they have a new complete Bolt in stock there, but you're going to end up paying $168 + shipping for that bad boy. I think I paid $143 plus shipping for a stripped bolt and firing pin, then I just switched over the extractor and double ejectors. It's a good thing I also asked for a firing pin because the rep wasn't even thinking about shipping one along with the newer Bolt. as you can see from my measurements above there is no way the old firing pin will work in the newer updated Bolt. I would have been screwed |
|
|
|
[#49]
So do the G
|
|
|
|
[#50]
Quoted:
So do the Gen II original bolts use the same firing pin as the Gen I bolts? They don't list two different pins for the Gen II on the DPMS website. Seems strange that they would have two diameter pins for two diameter bolts for the same gun and at least not note the difference on the site store. |
|
|
 Win a FREE Membership!
Sign up for the ARFCOM weekly newsletter and be entered to win a free ARFCOM membership. One new winner* is announced every week!
You will receive an email every Friday morning featuring the latest chatter from the hottest topics, breaking news surrounding legislation, as well as exclusive deals only available to ARFCOM email subscribers.

AR15.COM is the world's largest firearm community and is a gathering place for firearm enthusiasts of all types.
From hunters and military members, to competition shooters and general firearm enthusiasts, we welcome anyone who values and respects the way of the firearm.

Subscribe to our monthly Newsletter to receive firearm news, product discounts from your favorite Industry Partners, and more.
Copyright © 1996-2024 AR15.COM LLC. All Rights Reserved.
Any use of this content without express written consent is prohibited.
AR15.Com reserves the right to overwrite or replace any affiliate, commercial, or monetizable links, posted by users, with our own.


