


AR Sponsor


Posted: 4/6/2016 2:25:47 PM EDT
| I'm building a prototype butt stock and I bought a couple of type D stocks to play around with. I was just going to send one to JT to make me a type A, but after studying a real prototype butt stock, I want to play first. I know Carbinekid did a thread a couple years ago, but I don't see pictures or real step by step instructions. Does anyone know of a thread with pictures on how this is done? I know that the cut requires filling and shaping. I would rather not waste a stock figuring this out. |
|
Thanks, I can't remember if I made a post before this one you posted or not.
|

|
I have a template for the shape. Shoot me an email and I'll send you a paper copy.
I cut mine down into the foam more than necessary so I'd get a good thick base to work on. Then it was sanded to rough shape, primed, sanded, primed, finish coated. If you are half decent at body work or drywall it isn't hard. |
| Well, I finished the conversion and it is ready for paint. I forgot to take in progress pictures to post. I need to do a little research on what finish to use before a dip in weave pattern. I'm going to try to dye the butt a brownish shade to get it a little closer to the prototype color. No solution for the Armalite stamp yet. Thought of having a medal stamp made and branding it, but it would be inset instead of raised. I made the front flat and modified a carbine ring to look like the front of the prototype stock. |
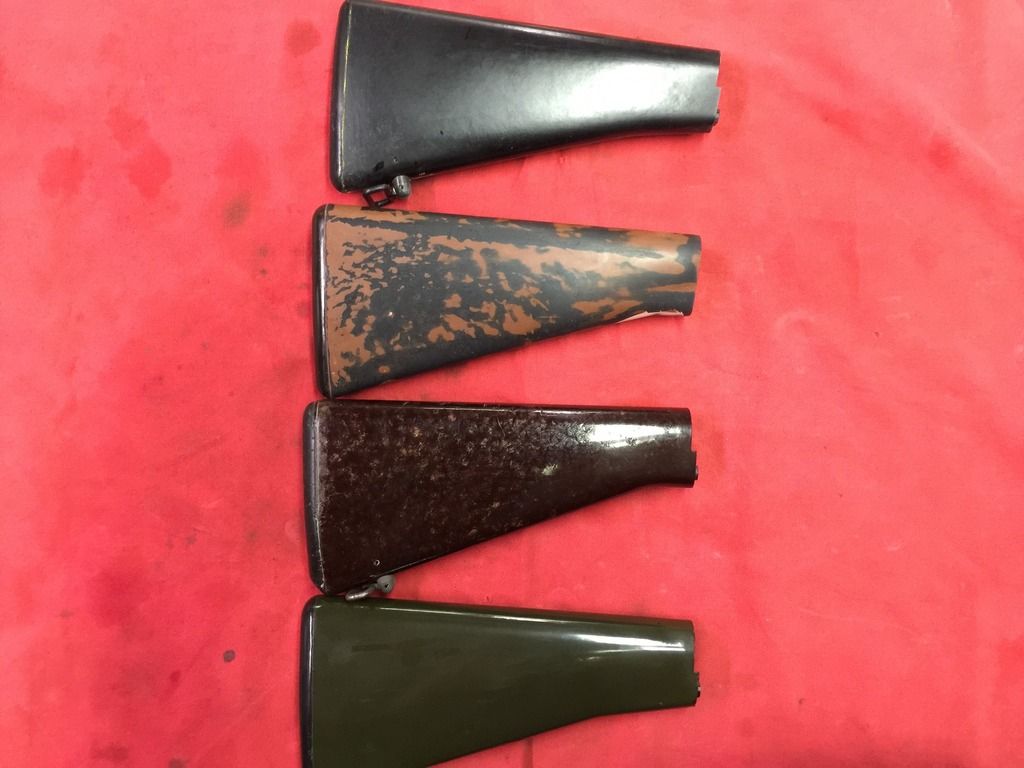
Ok, took a couple. This one is a type D, home made prototype needing a final coat of primer, but had been wet sanded, type A in brown and a type B in green.
Type A and the prototype end to end. Note that I cut the end flat and it makes the strigh look shorter. I also thinned out the stock. 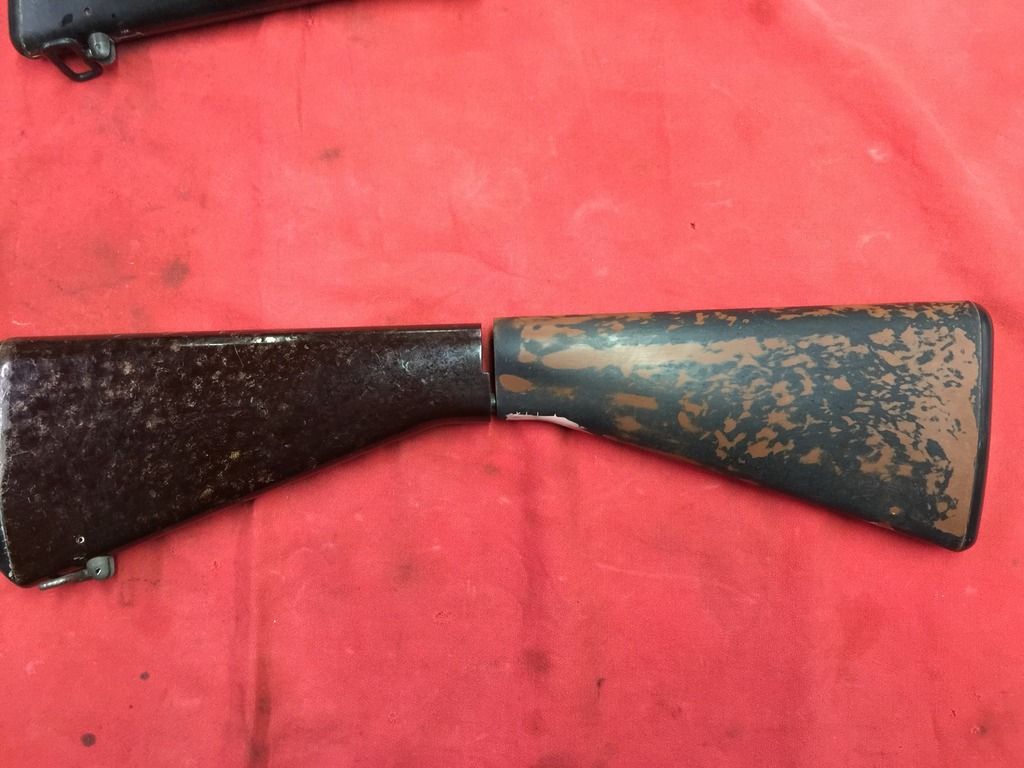
I took a carbine ring and cut it down to mimic the original prototype stocks. 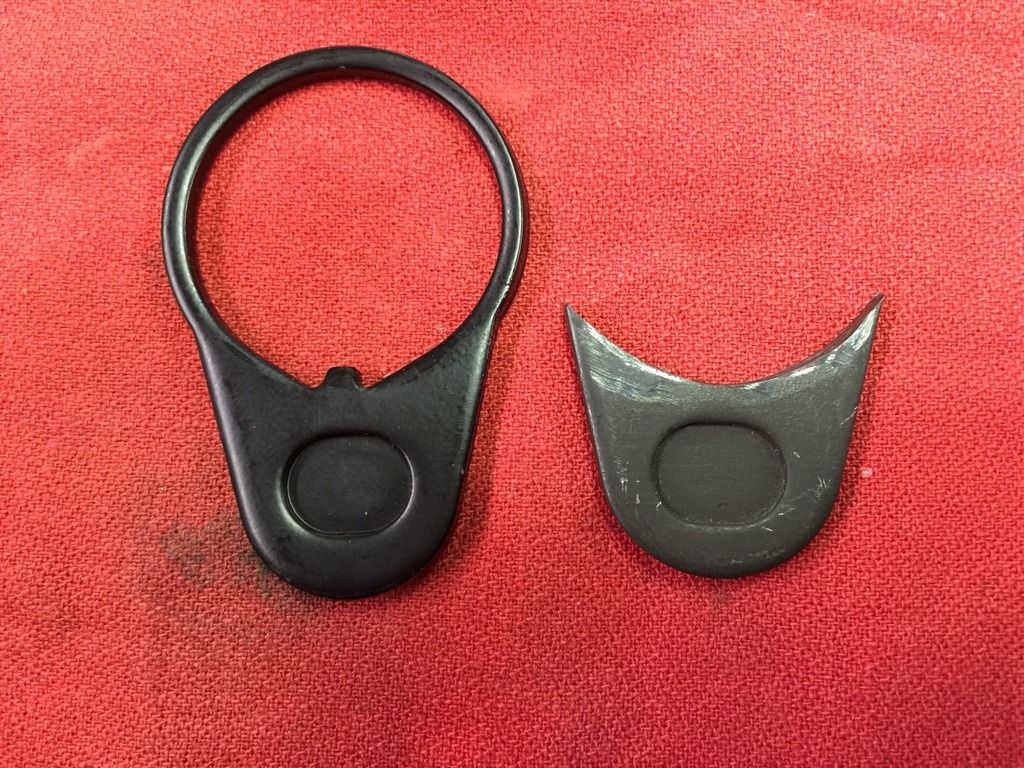
Here is everything mocked up for a test fit. 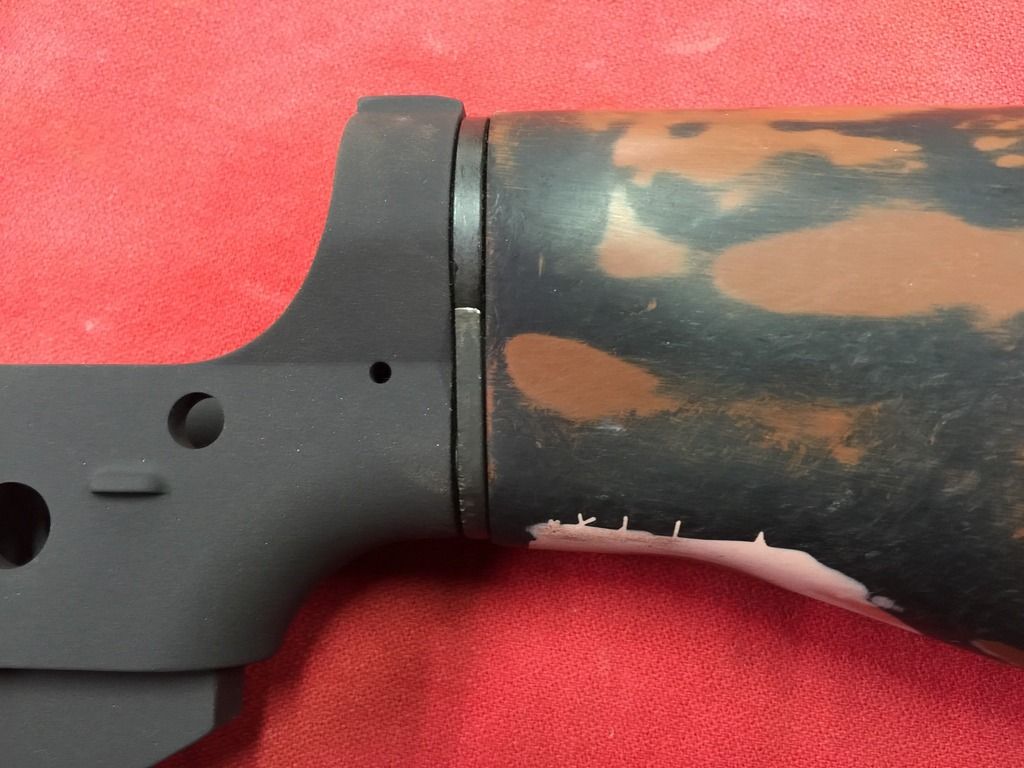
Another view. 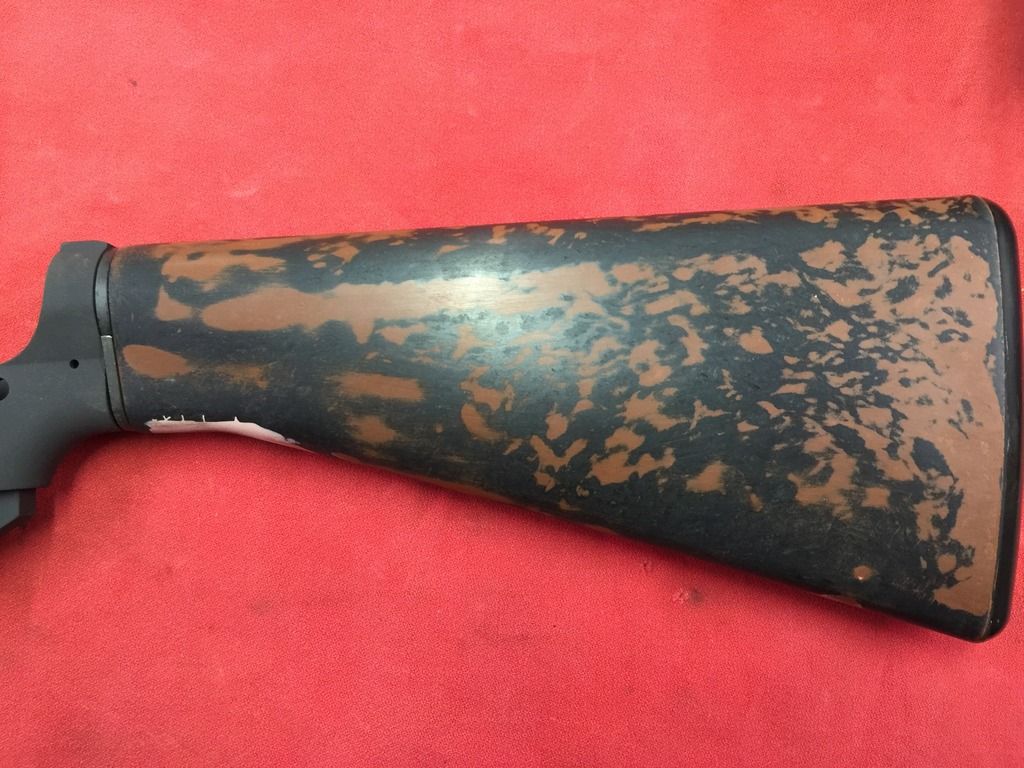
Here is a original brown grip with the sling swivel installed, prototype one piece hand guards and the stock. 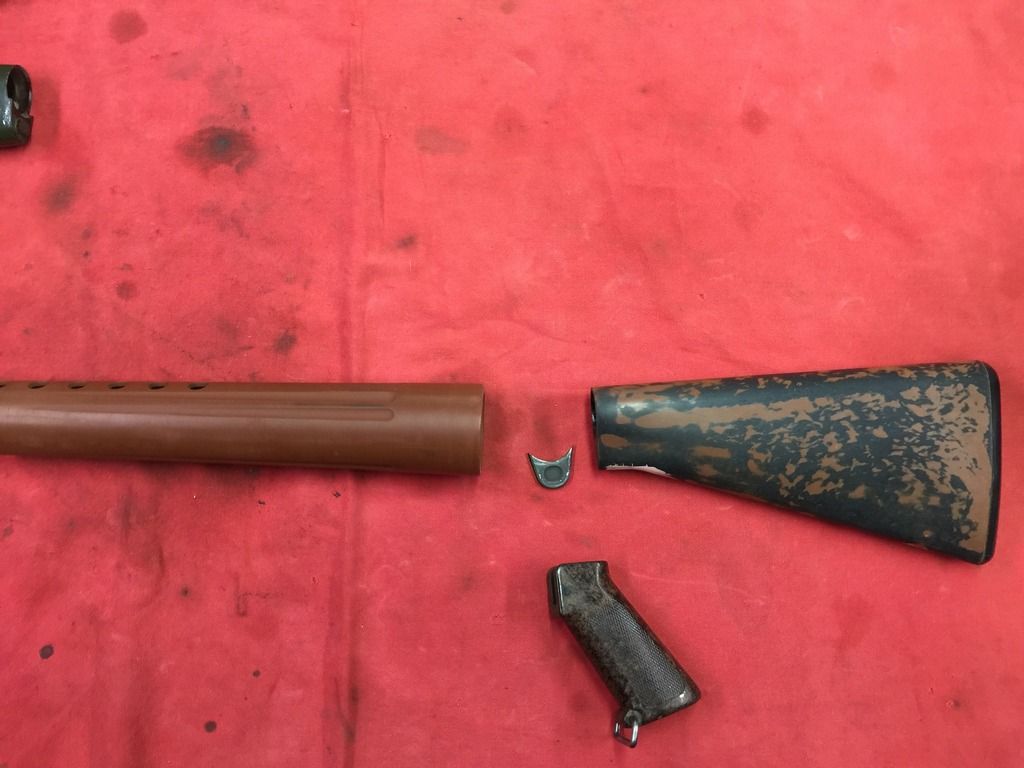
Now for the prep to get them wrapped in a weave pattern and the attempt to dye the pad brownish. |
|
Quoted:
Ok, took a couple. This one is a type D, home made prototype needing a final coat of primer, but had been wet sanded, type A in brown and a type B in green. http://i1302.photobucket.com/albums/ag132/58Bisc/guns/E0246F4A-B6D5-475C-97F9-14331D164958_zpszoqdoddu.jpg Type A and the prototype end to end. Note that I cut the end flat and it makes the strigh look shorter. I also thinned out the stock. http://i1302.photobucket.com/albums/ag132/58Bisc/guns/0AFB652D-196D-4CD5-BCCC-D736F340A65F_zpss6lovl6r.jpg I took a carbine ring and cut it down to mimic the original prototype stocks. http://i1302.photobucket.com/albums/ag132/58Bisc/guns/28AA4A43-B2C3-4845-A2B5-57638F56F353_zpslujgye5i.jpg Here is everything mocked up for a test fit. http://i1302.photobucket.com/albums/ag132/58Bisc/guns/BBD67662-1E01-498E-9144-8F071E513EC4_zpsdsho9ii4.jpg Another view. http://i1302.photobucket.com/albums/ag132/58Bisc/guns/C6E46565-0075-444D-B71F-CA32A2EEFB51_zpsum77hip0.jpg Here is a original brown grip with the sling swivel installed, prototype one piece hand guards and the stock. http://i1302.photobucket.com/albums/ag132/58Bisc/guns/4229E0D5-3D43-4F82-9930-A7E650833920_zpsbyey1std.jpg Now for the prep to get them wrapped in a weave pattern and the attempt to dye the pad brownish. Wow,,now that's anal, matching the ring area. I never thought anything about that. Good job! |
| I have an old type D rubber butt plate that I cut off a 607 stock years ago. I intend on burning that one first. If it turns out well, I intend to try to cut it out as a raised emblem and attempt to epoxy it to the stock. That of course would be best case. Worse case I'm hoping the brand is clean and I can at least try that on a stock. It will be about another week before the seal comes in. |
|
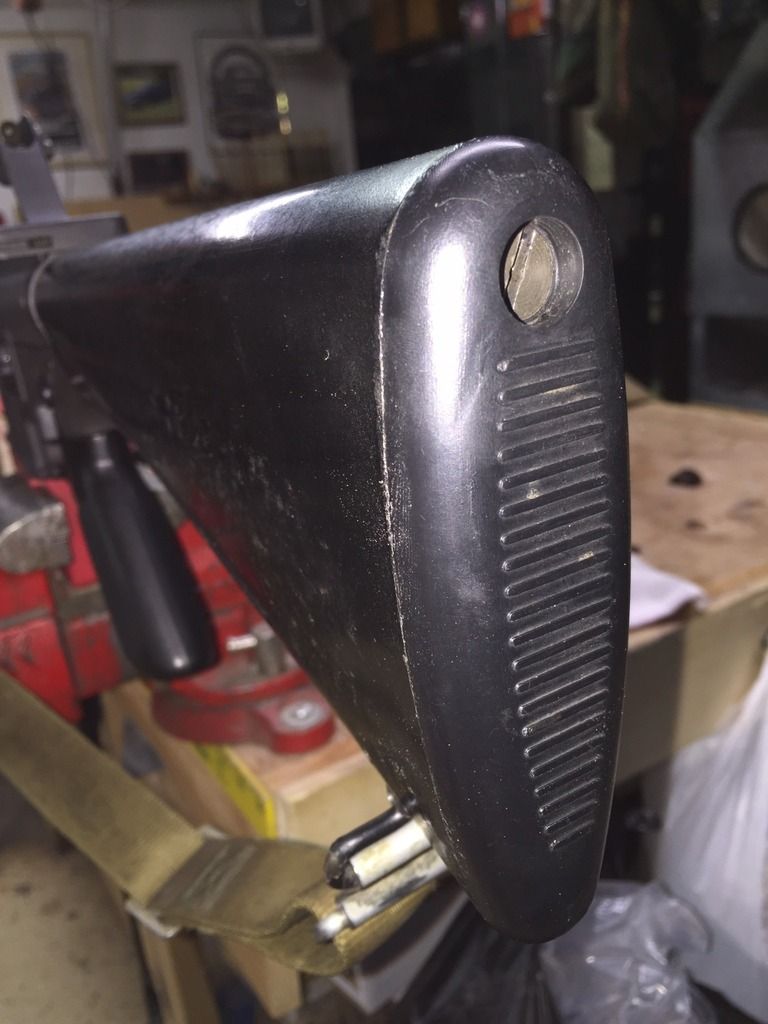
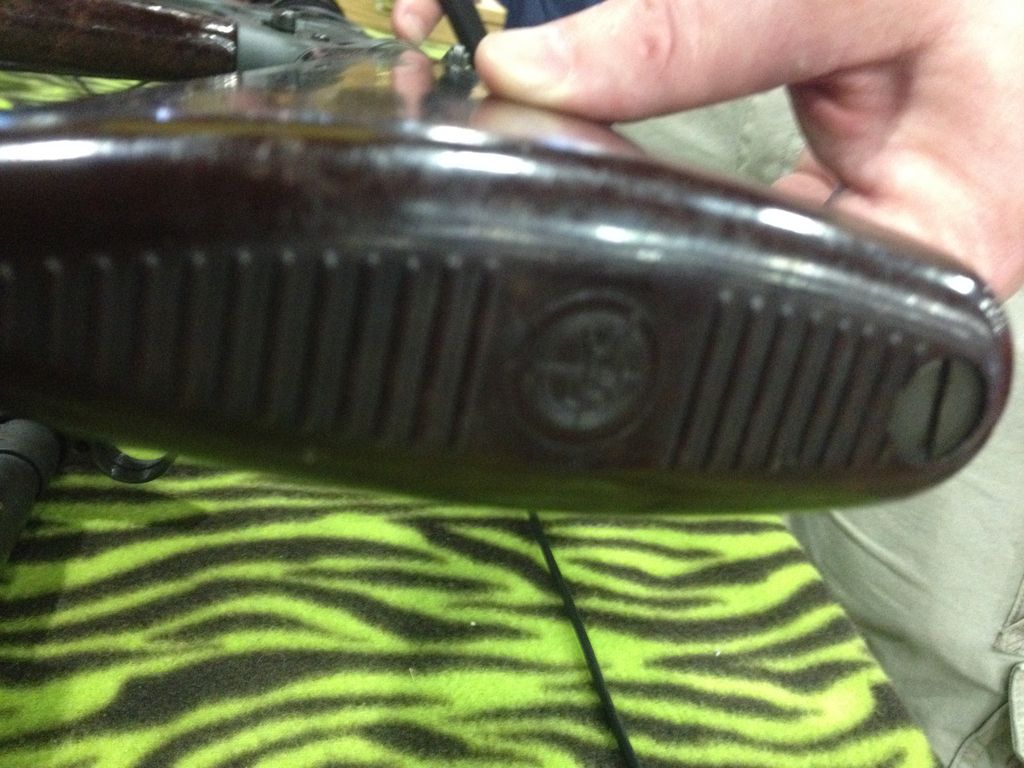
Quoted: Measuring and counting lines on the butt plate so I can remove the correct amount of lines. The prototype has more lines, covering more length, thinner and closer together then the type D. At some point it will never be exact, but what can you do. |
|
Quoted:
...try making a silicone mold of that original Armalite butt pad. Then pour your own butt pad. Presto, you have an exact replica Quoted:
Quoted:
Measuring and counting lines on the butt plate so I can remove the correct amount of lines. The prototype has more lines, covering more length, thinner and closer together then the type D. At some point it will never be exact, but what can you do. No one has access to an original butt pad. We just got pictures of one for the first time. I doubt even if we had access that anyone would let you mold one. |
|
OH, I thought that you had access to that one in the pic. I still think you could do it since we know the shape of the overall butt is the same, lines are easy enough to make and you will have the emblem. Don't rule it out. RTV (room Temp Vulcanizing) molding is a great tool. I used it often in model building. The butt stock shown in the pic appears to be molded from fiberglass? Doesnt look like rubber? |
I believe you are correct that it is a hard rosin with mat in it. It is brownish in color. I thought of making a mold and attempting to make one from scratch. My issue is that I no experience with mold making.i may progress to that point, but let's see how bad my first attempt comes out.
|
|
Quoted:
I have plenty of type D cut off ends with but pads for you to practice on. If you want them you can have them. Just send me an email. Matt Thanks Matt, I'll let you know if I need to take you up on that. I made a flat spot on the stock butt pad after I practiced on the cut off. I'll post a picture later. |
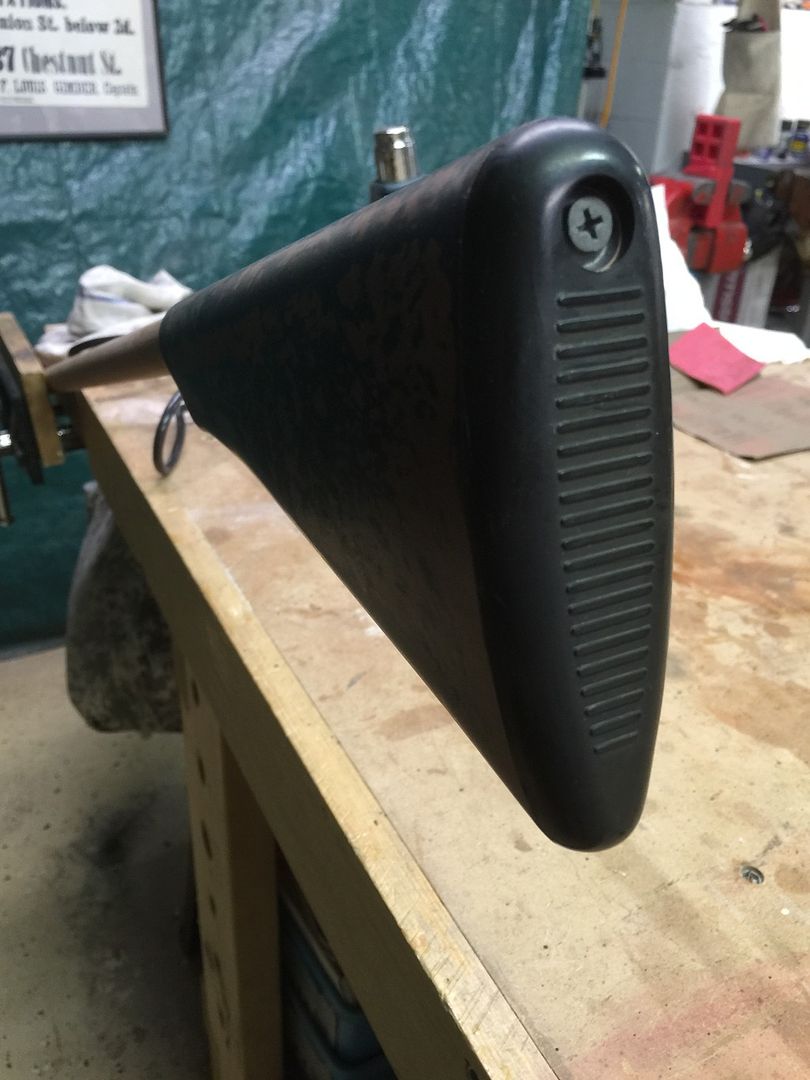
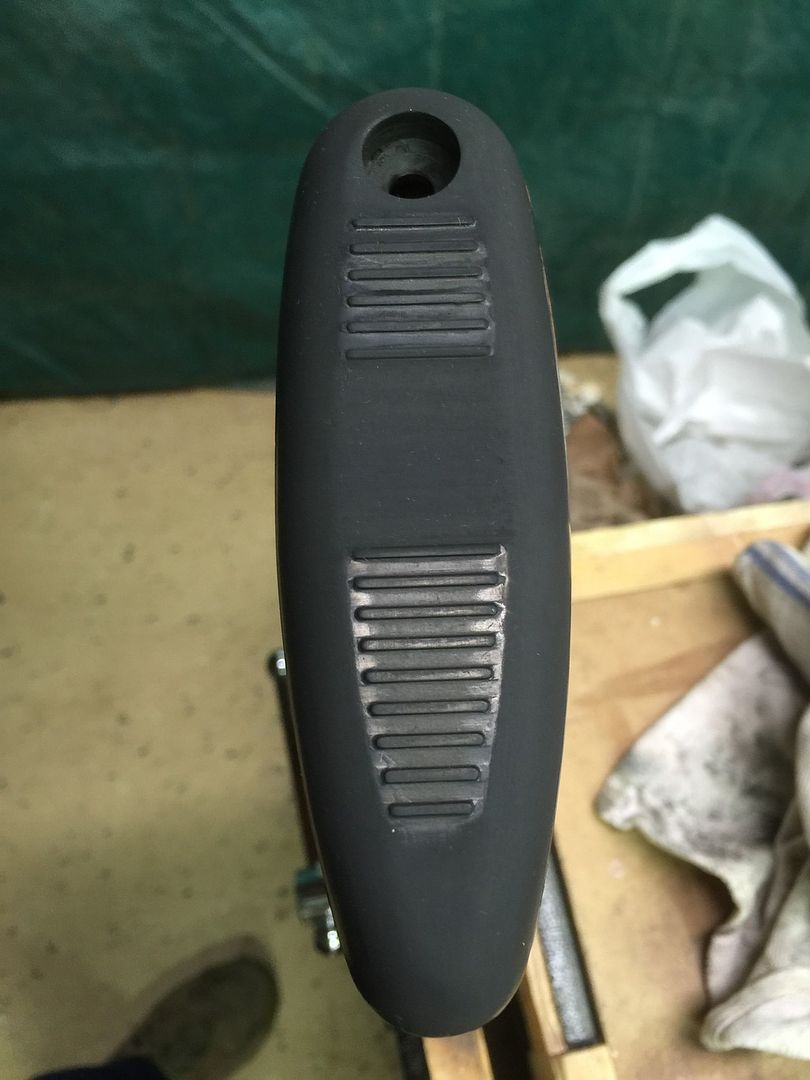
|
Basicly you build a tray around the pad on your rifle or better yet get some from Matt. Build a small tray and set the pad in it face up and secured to the tray. Get a tube of silicone and squirt it in, on, and around the pad making sure to get all the detail of the pad. Let it cure then remove the silicone from the tray and gently pull the pad from the mold. Now you have the negative. Figure out what you want the new pad to be made from and pour it into the negative mold. Let that dry, then remove. There it is, short of maybe some clean up or paint. |
Couple of items in the works on this. First the branding stamp came. Very surprised at how well it turned out. I experimented with it free hand on a scarp butt plate I had. It worked pretty good. It made the rubber very dull, which would not be an issue if I paint it or make a mold. I buffed the spot to see what would happen and as expected it removed some of the detail. I also cut a couple of the fins off the scrap butt to epoxy on to the model to extend them in the same way as the prototype. Next is to get the courage up to burn it into the stock I made. Then I will try to make a mold.
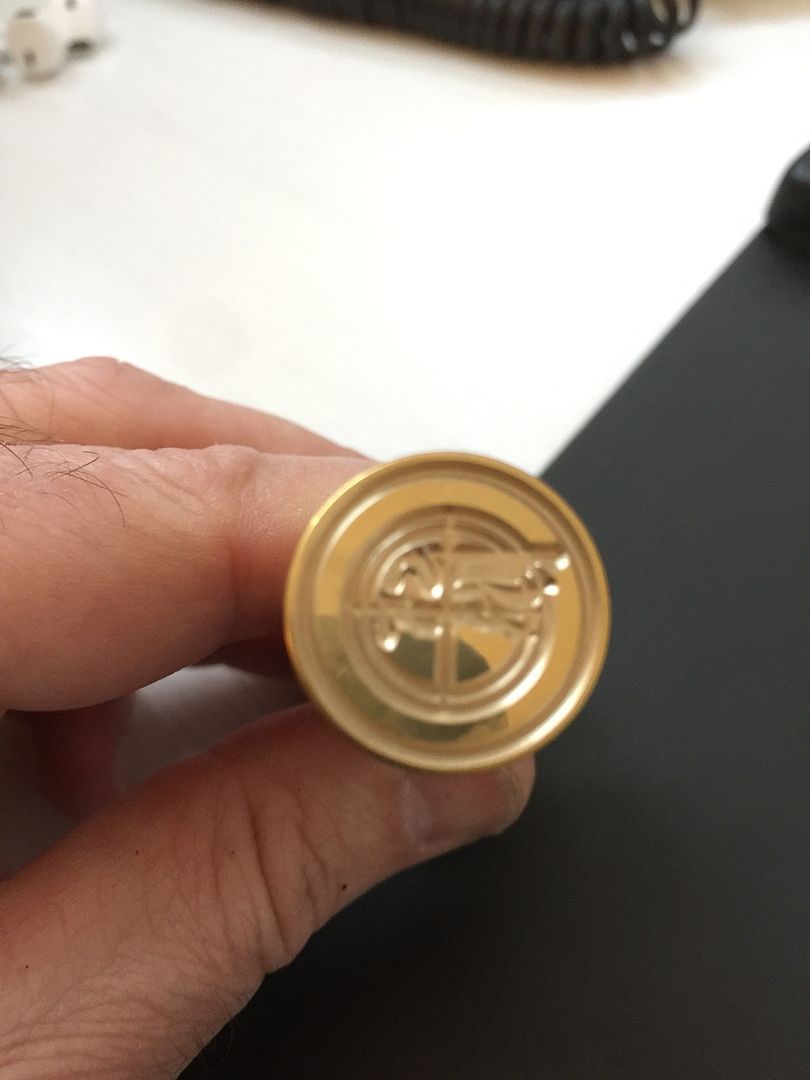
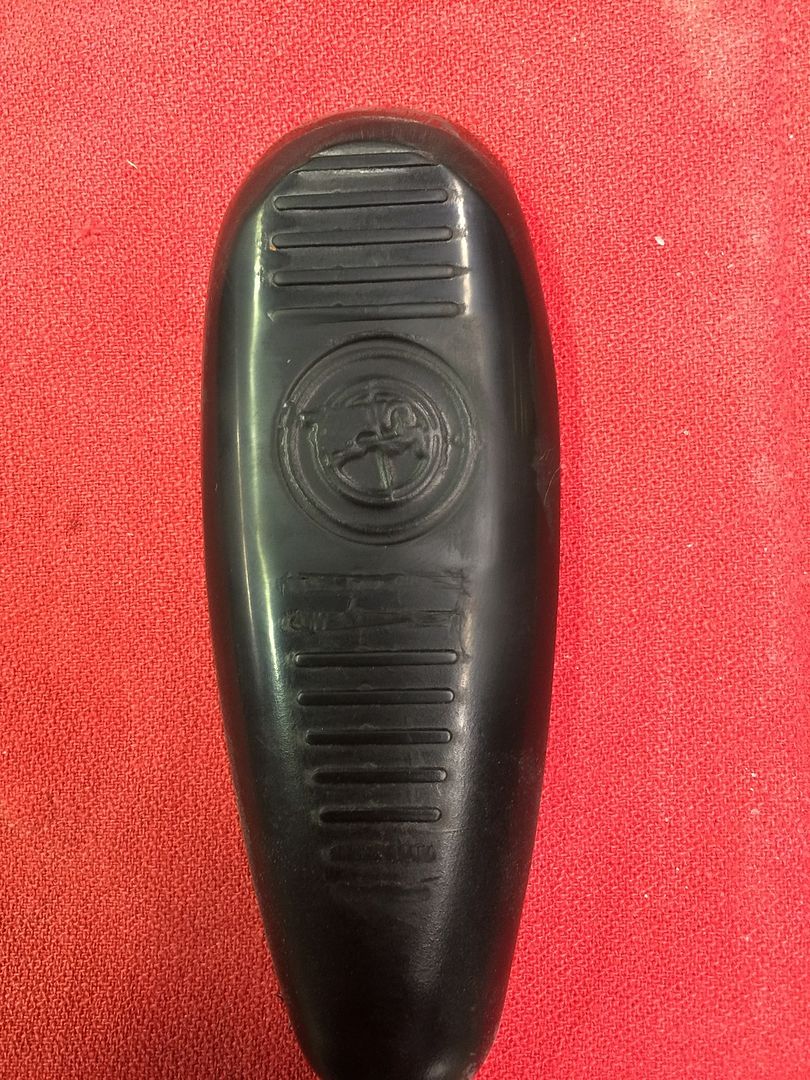
|
|
I don't know if many of you are tracking my progress on this, but I do know a couple of you are, so here is an update. I could not get the branding done correctly, so I removed the butt pad from the stock. I think this will make for a cleaner finish when I have the stock dipped as well. Liv4nov sent me a half dozen cut off type D stocks and I was able to get a near perfect one off to make a mold of. Thanks Liv4nov! I filed a flat spot on it for the emblem. I brought two part mold rubber to make an emblem from the stamp. I also cut a couple of extra vains off the old pads. I epoxied everything to the good butt plate and I am waiting for it to dry. Then I will attempt to make a mold from it. If the mold works, I will use fiberglass rosin and small pieces of glass mat to see if I can get a working version. If not, I can always flux paint up the model and try that.
I bought two part pourable mold maker to try. If does not work, I will attempt to try the silicon method. Butt pad removed, turned out not to be such an easy task, as the old one was on quite tight: 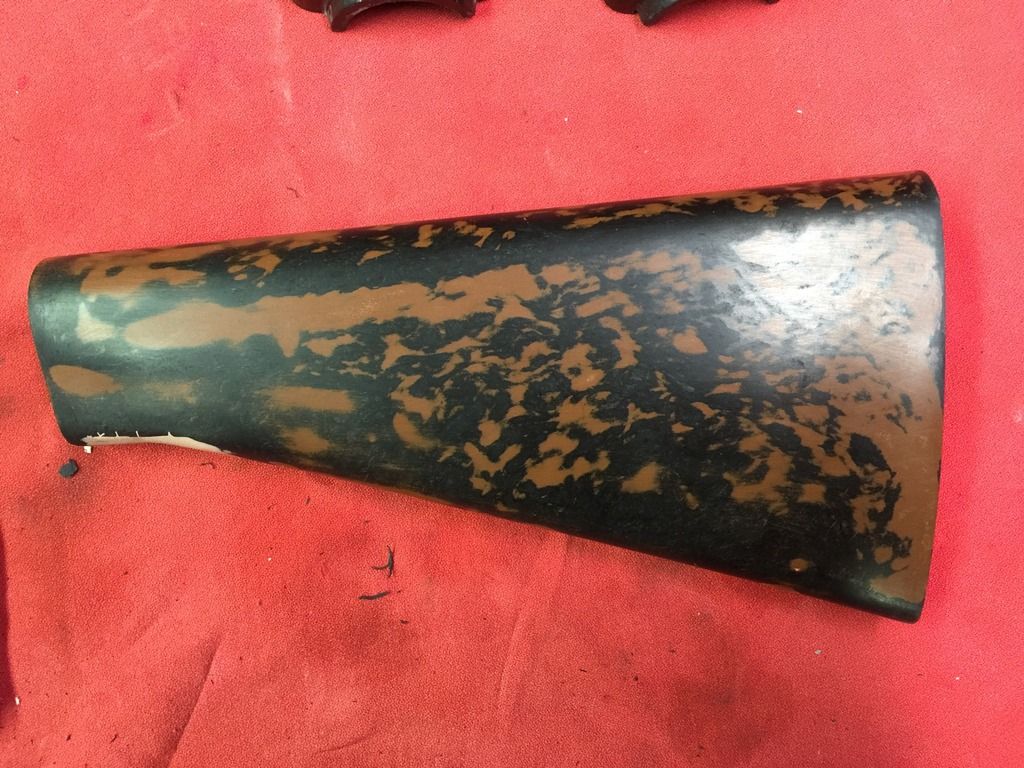
The cleaned up new butt plate filed flat: 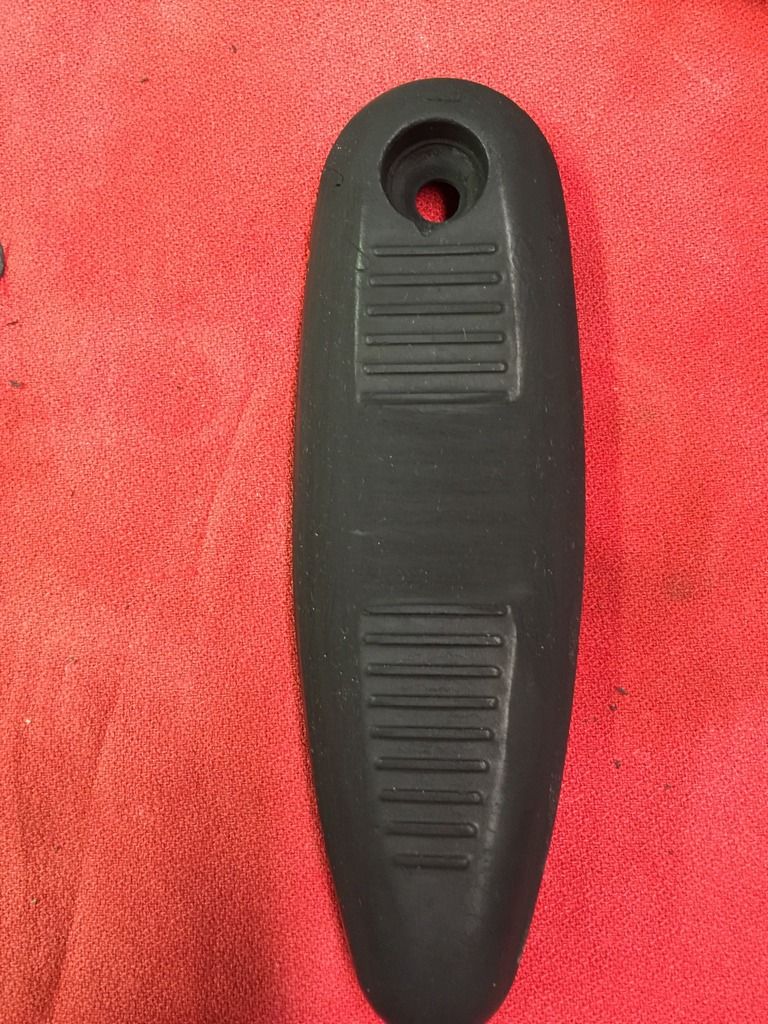
The back side is clean as well: 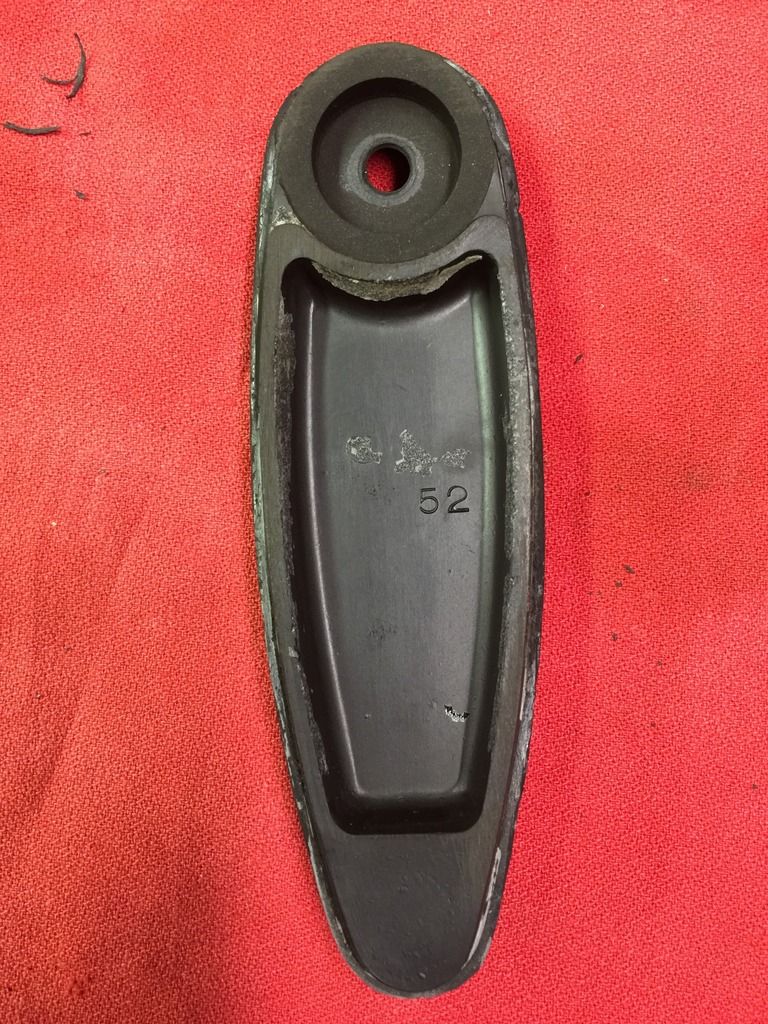
It only took me six attempts to get a good mold of the emblem, I had not gotten one at this point...: 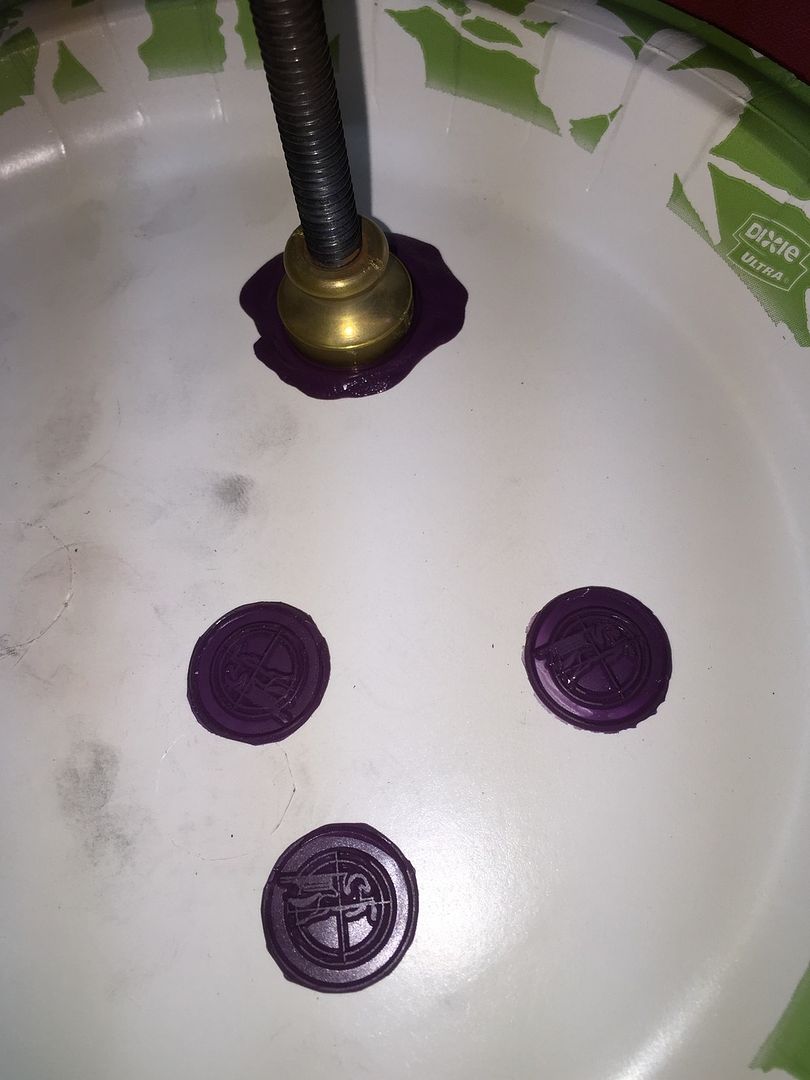
The epoxy is setting , but note the extra vains in this shot: 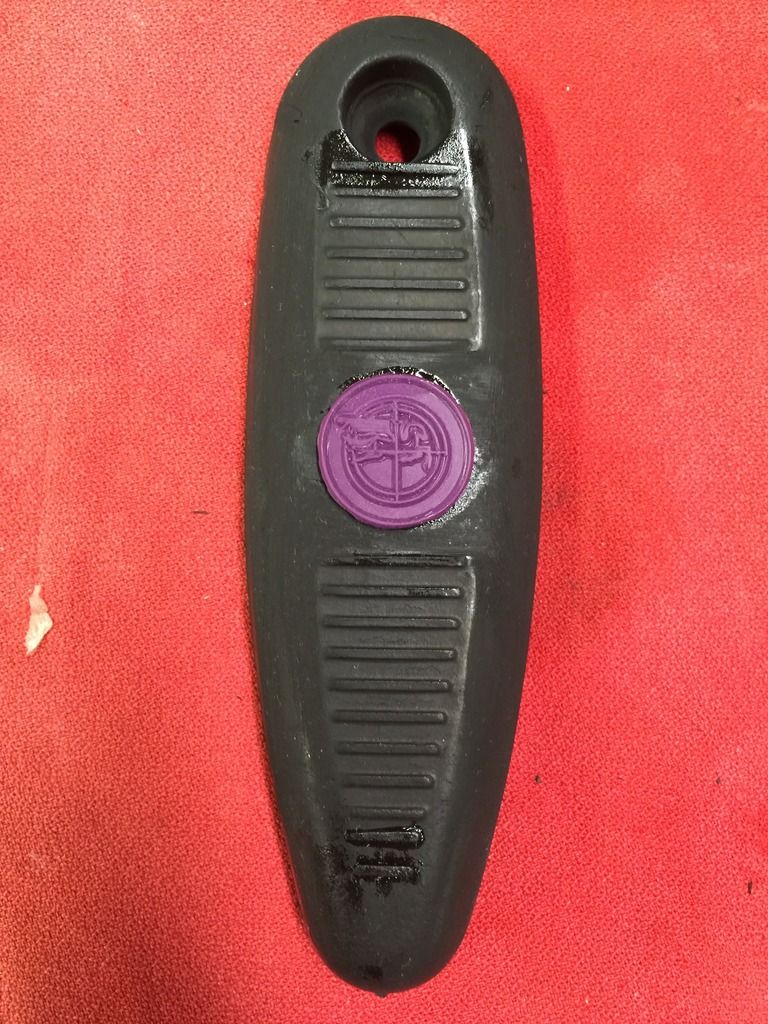
And finally a side shot. I'm not sure if the emblem is sitting too high or not: 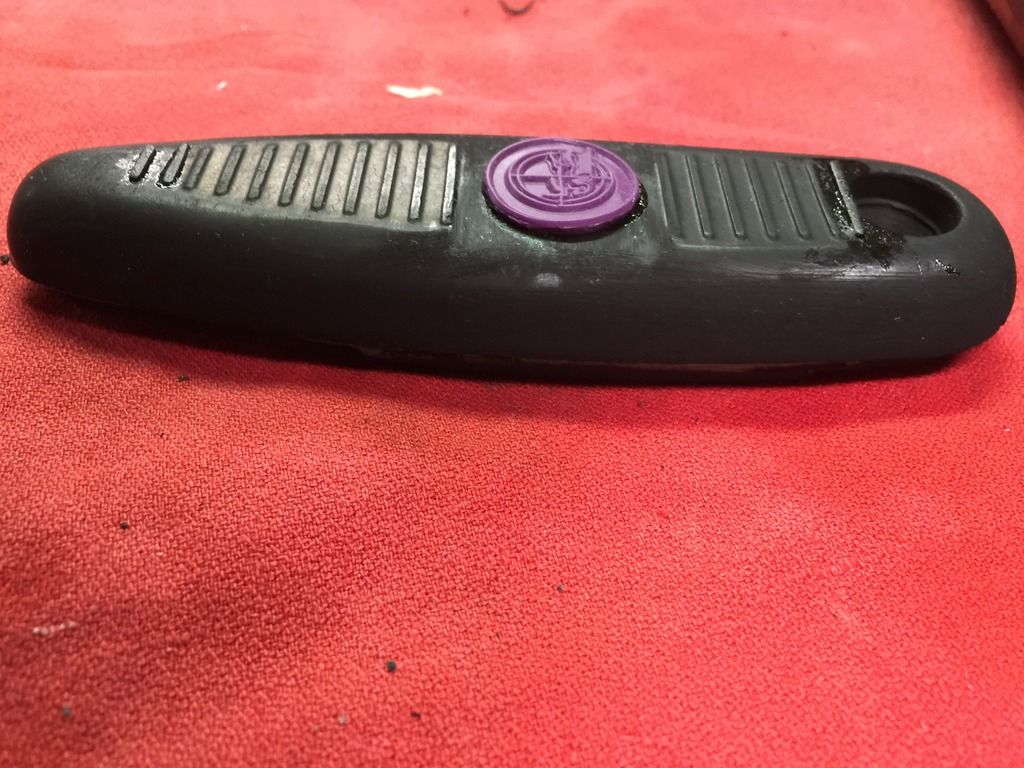
|
|
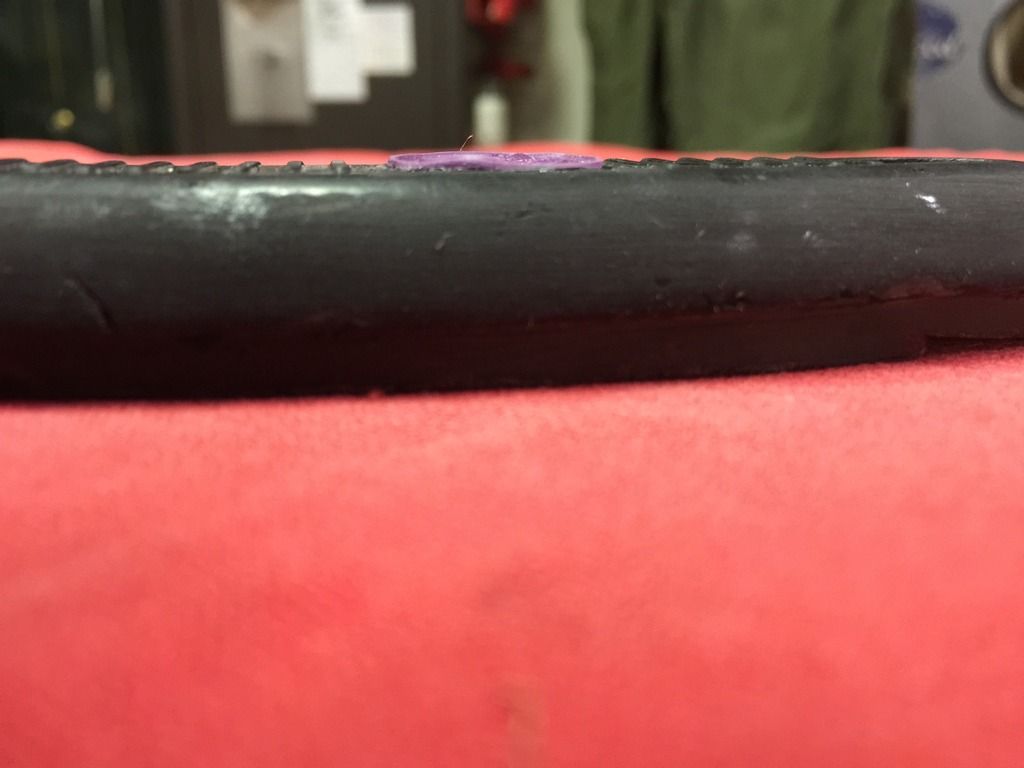
I sprayed it with some paint to get a sense of prospective and I agree it is too high. I've tried to make them lower, but they loose detail. I thought about drilling, but what stopped me is that the center of the butt plates is a little lower then the sides. To remove the vains completely, it creates a low spot.
What will really need to be done is to fill in the flat between the vains. Then drill it out, then file it flat, but not low. The next problem I have is that most of the butt blanks I have are not in great shape. I have to attempt to repair them before I start the process over again. |
|
Quoted:
Measuring and counting lines on the butt plate so I can remove the correct amount of lines. The prototype has more lines, covering more length, thinner and closer together then the type D. At some point it will never be exact, but what can you do. http://i1302.photobucket.com/albums/ag132/58Bisc/guns/62714C7B-8B7F-4102-B264-134E23C48DEC_zps3dzfq8pt.jpg http://i1302.photobucket.com/albums/ag132/58Bisc/guns/216CD09A-656F-46AD-AF04-BC6BAE257AB1_zpsj21pv63a.jpg http://i1302.photobucket.com/albums/ag132/58Bisc/guns/92251F23-F7EA-41CF-A341-14E6B2CE2174_zpslpagrfrv.jpg Shouldn't the Pegasus be to the left, not the right???????? |
|
Quoted:
Shouldn't the Pegasus be to the left, not the right???????? Quoted:
Quoted:
Measuring and counting lines on the butt plate so I can remove the correct amount of lines. The prototype has more lines, covering more length, thinner and closer together then the type D. At some point it will never be exact, but what can you do. http://i1302.photobucket.com/albums/ag132/58Bisc/guns/62714C7B-8B7F-4102-B264-134E23C48DEC_zps3dzfq8pt.jpg http://i1302.photobucket.com/albums/ag132/58Bisc/guns/216CD09A-656F-46AD-AF04-BC6BAE257AB1_zpsj21pv63a.jpg http://i1302.photobucket.com/albums/ag132/58Bisc/guns/92251F23-F7EA-41CF-A341-14E6B2CE2174_zpslpagrfrv.jpg Shouldn't the Pegasus be to the left, not the right???????? 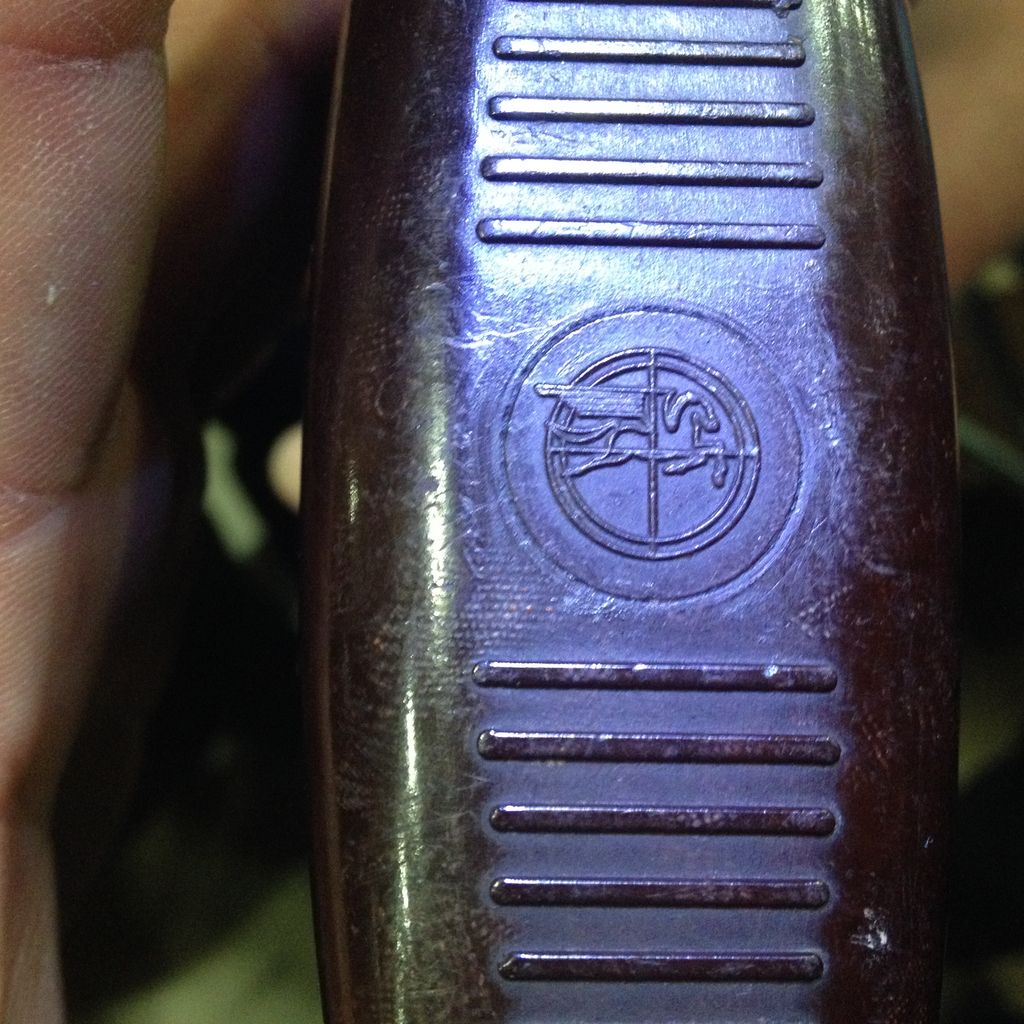
I'm going by the pictures I took |
| Agreed, I thought the same thing at first. I used this picture to get the stamp made. I think this clear picture came from Imarangemaster, but I have a bunch showing the same thing. I just need to get a model that looks correct to create the mold. The problem is I don't have an artist's eye, it is an engineers. The views are different. My eyes see the different prices very clearly, but bringing them together is much harder for me. I see the tiny details, but when I step back in view they get lost. That forces me to make the smaller pieces and bring them together. |
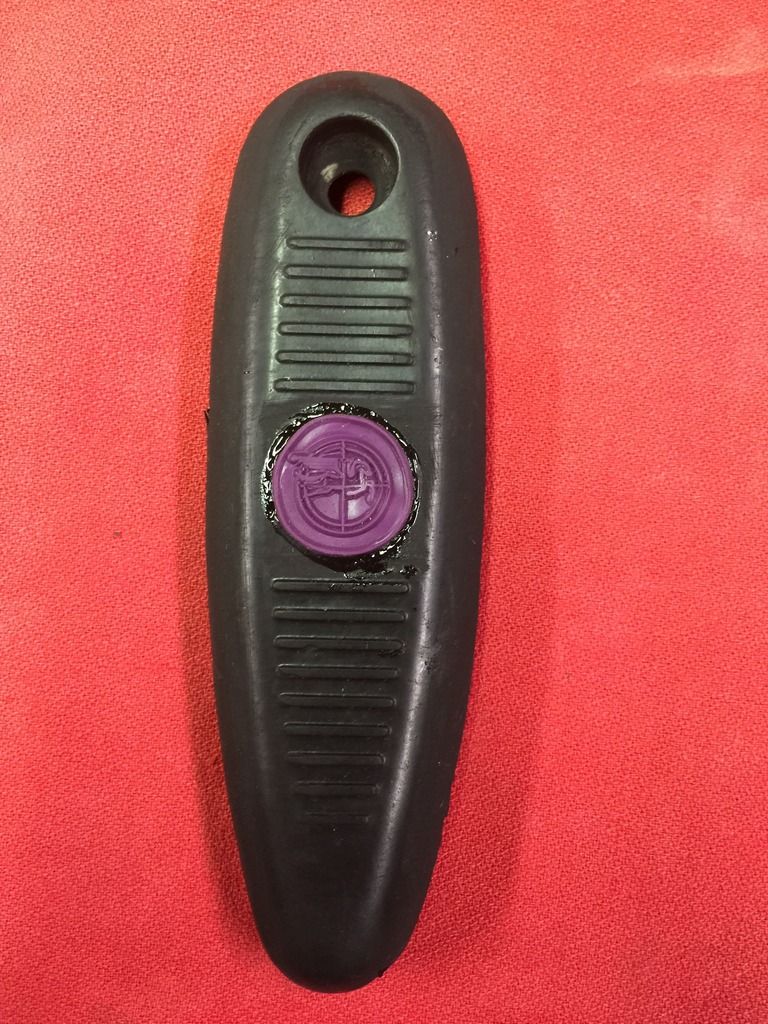
I think I got it figured out. This pad was really cracked up, so I epoxied it back together to test. I drilled it as suggested and inlaid the emblem. On this one I did not bother to finish it as I am waiting for a couple of better butt pad examples to use. I also used a 3/4 inch bit and I need to go a 1/16 bigger. The 3/4 cause a little distortion of the emblem, because the emblem and hole are the same size. Using a larger bit and this method should yield a mold able version, we will see.
|
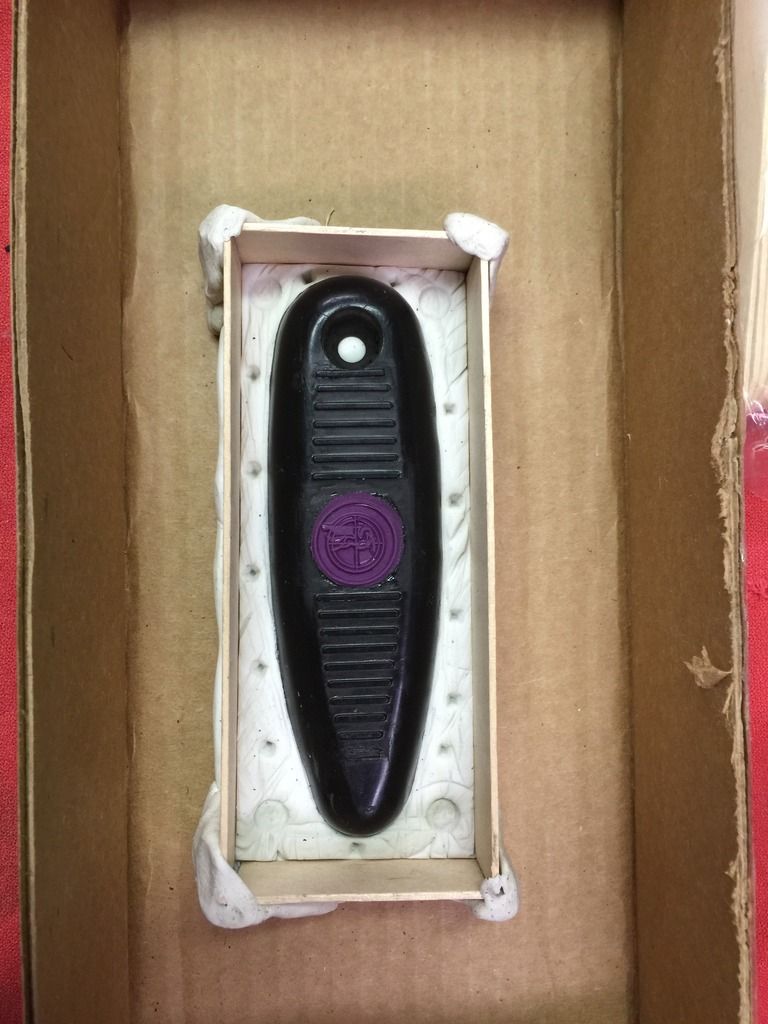
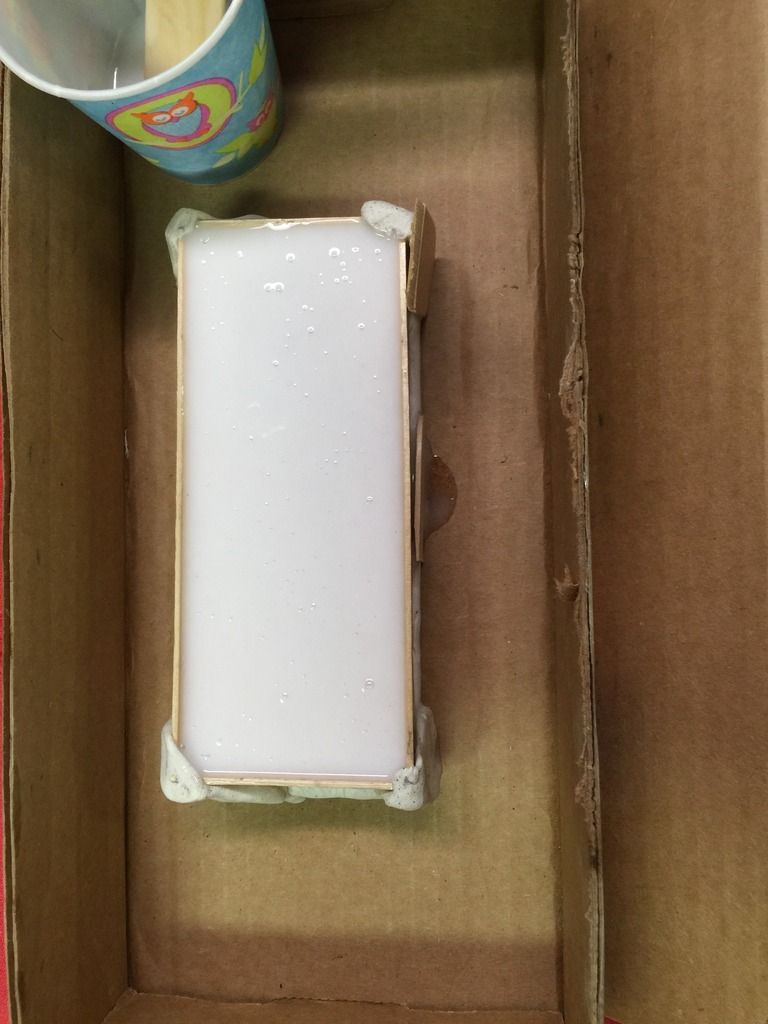
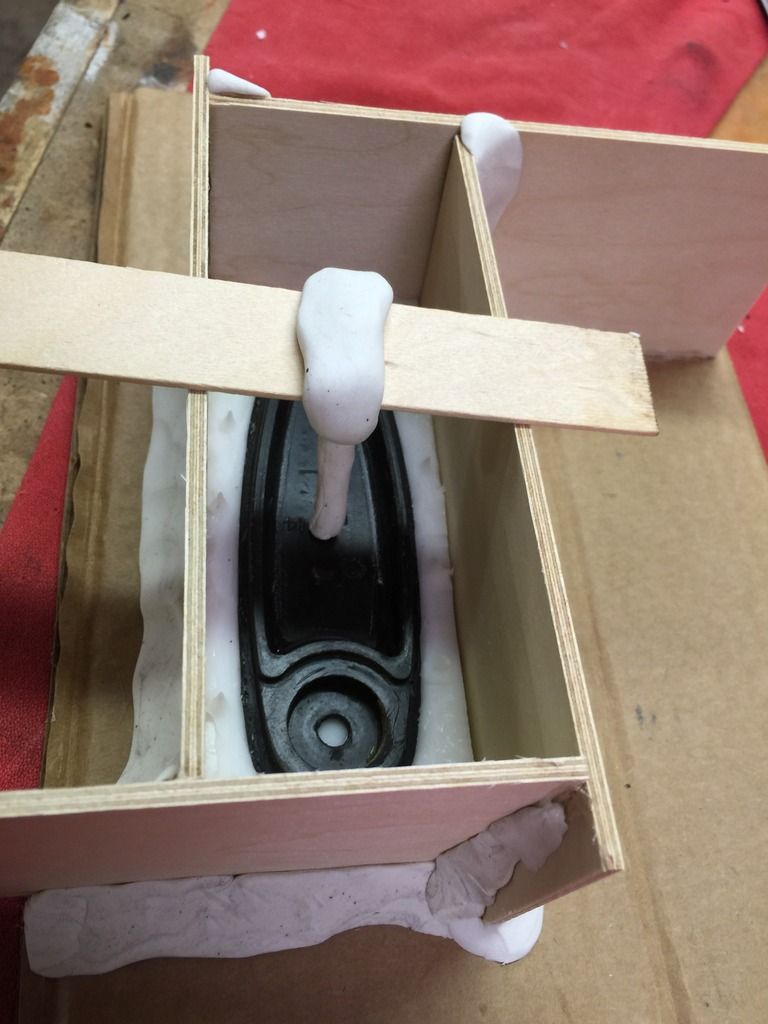
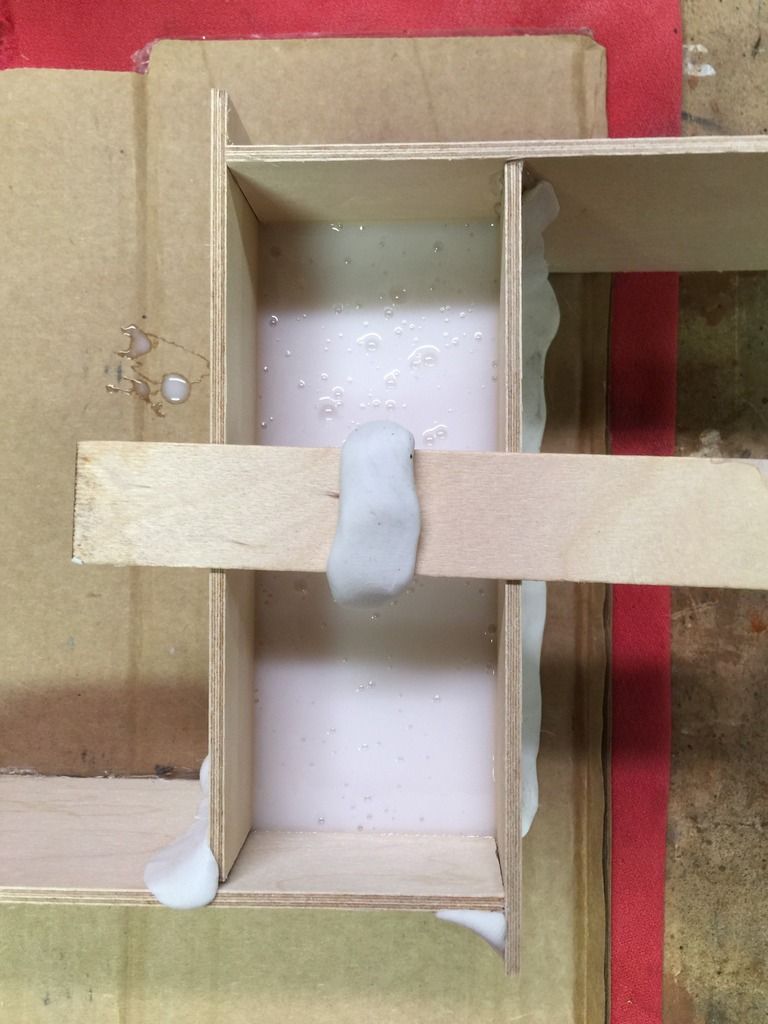
Well, I finally have what I hope is a good model to cast a mold on. I've been watching lots of videos on mold making and what would be best for this type of project. I decided to make the mold in two halves using clay as the place holder to while I make the top half out of silicon. The idea is that when it dries, I remove the clay and pour the bottom half. The keys I made in the clay should keep everything lined up. Well that is the plan anyway... Anything and everything can go wrong and probably will. Here are a couple of pictures of my learning process. My fingers are crossed, but I expect the worst at this point. Time will tell...
|
I should have used a release agent on the emblem. It stuck and broke apart. I think I make try to clean it up as best I can and continue through the process. I'm sure I will make other mistakes along the way at least I can see what the final product will look like.


|
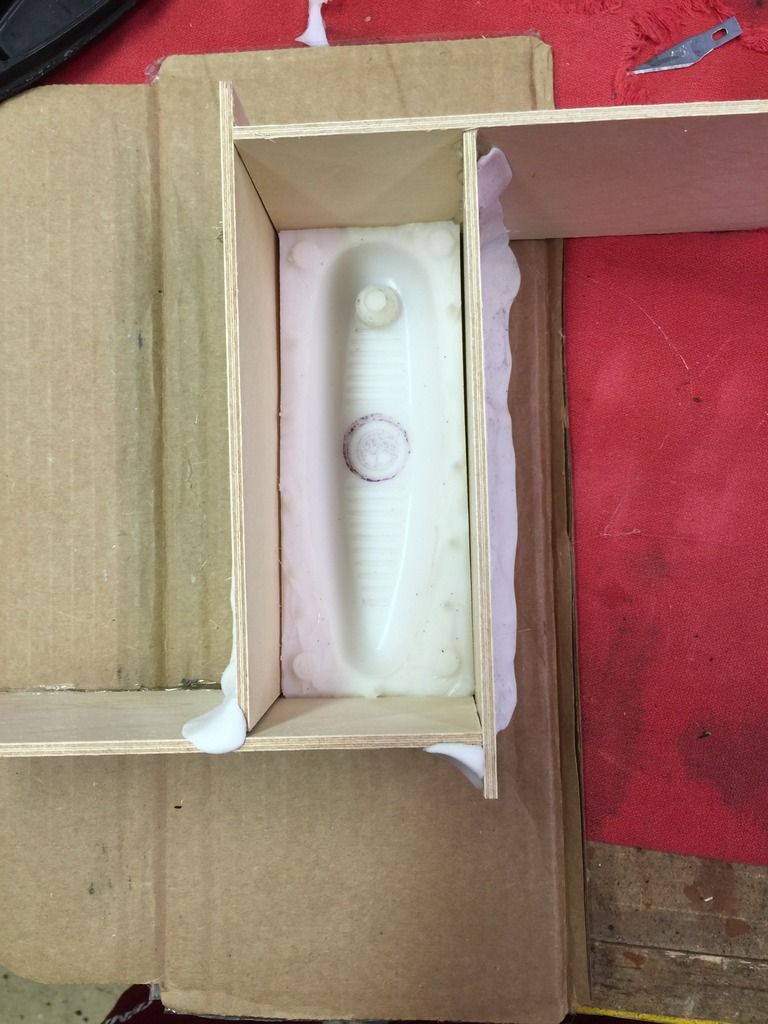
Today's progress. I was able to get all of the purple out of the emblem area, then used releasing agent on everything. Built my form and pored the top half of the mold. The bubbles will settle out and I will see how this process works. If all goes well, I will pore a butt plate and see how it comes out. Then I'm guess I will start all over with the lessons I have learned to see if I can make an acceptable and useable one.
|
AR Sponsor