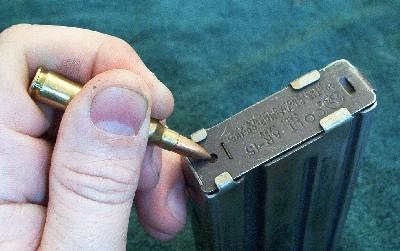
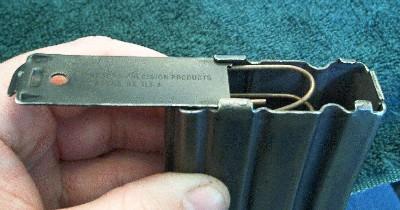
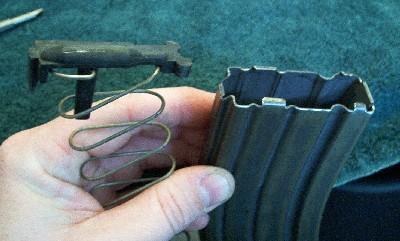
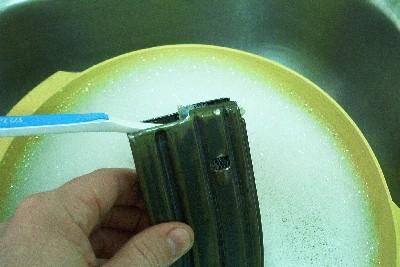
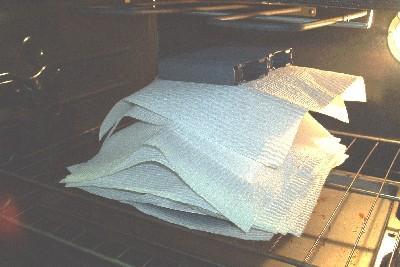
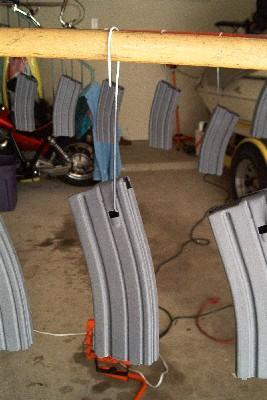
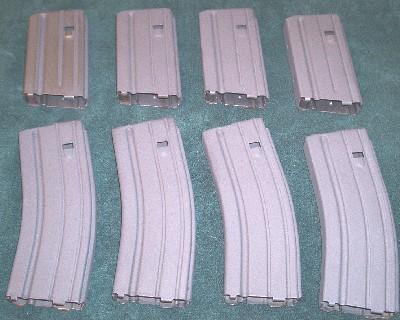
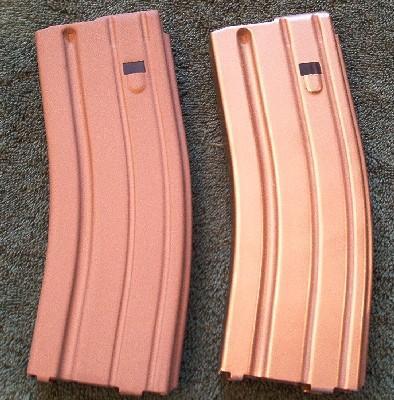
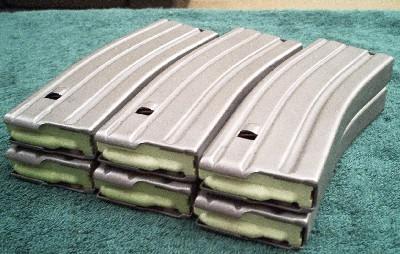
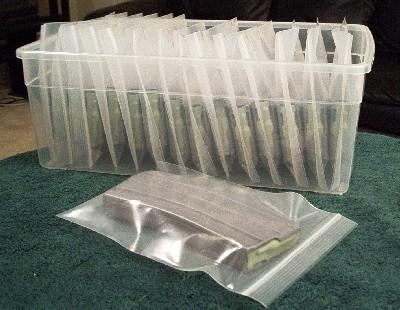
| Originally Posted By -edgecrusher-: Well I own about 20 PMAGs and was contemplating buying some windowed ones when i decided to try making my own version of a windowed PMAG. This modification takes about 15 minutes total. Here is a brief tutorial on how to make your own: Items needed - -PMAG magazine (any color, disassembled) -drill -dremel tool -1/8" Carbide flat cutter/endmill -1/4" drill bit -1/4" half round hobby file -1" flat, fine tooth file -3"x1/16"x1" aluminum flat stock -beeswax -a 4-5" vise -a pad for the vise to prevent damage to the magazine (i used a piece of scrap rubber matting) -a 1-2" C-clamp -Devcon 5 minute Epoxy (buy the bottled stuff, it lasts a lot longer than the syringe type) -something to mix the epoxy with, i used a hobby paintbrush, a popsicle stick works too. -a small piece of cardboard to mix the epoxy on. Here are the steps: 1. There are three index holes in the non-windowed PMAG where the window would normally be. I'm not sure if these were part of the die process or for other reasons, regardless they make great pilots for the cutting. Take your drill and chuck up the 1/4" bit and center over these three pilots, drill them out slowly, speed isn't needed. 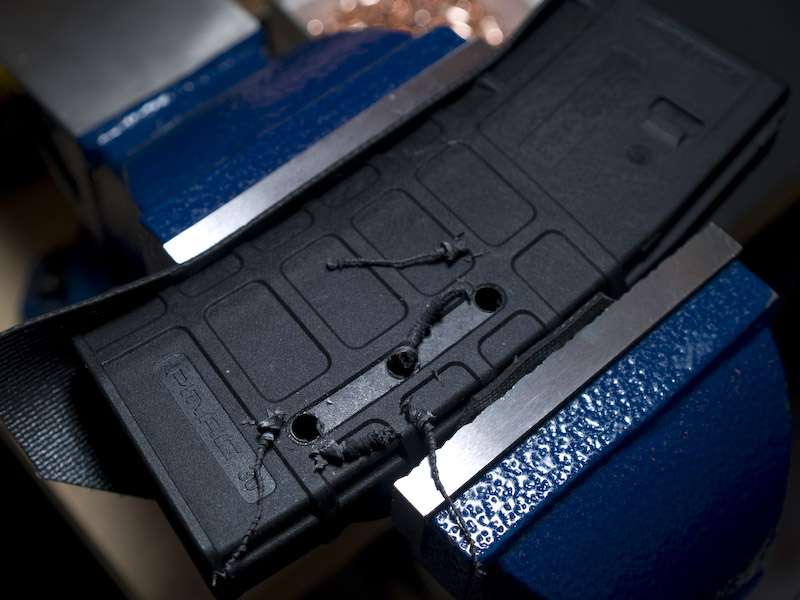 2. Plug in the dremel and attach the endmill. I use a higher speed setting on this to prevent chatter, this bit will destroy a magazine quickly, so move slowly and deliberately. Make your way from one hole to another trying to stay as close as possible to the lower edge of the outside chamfer. 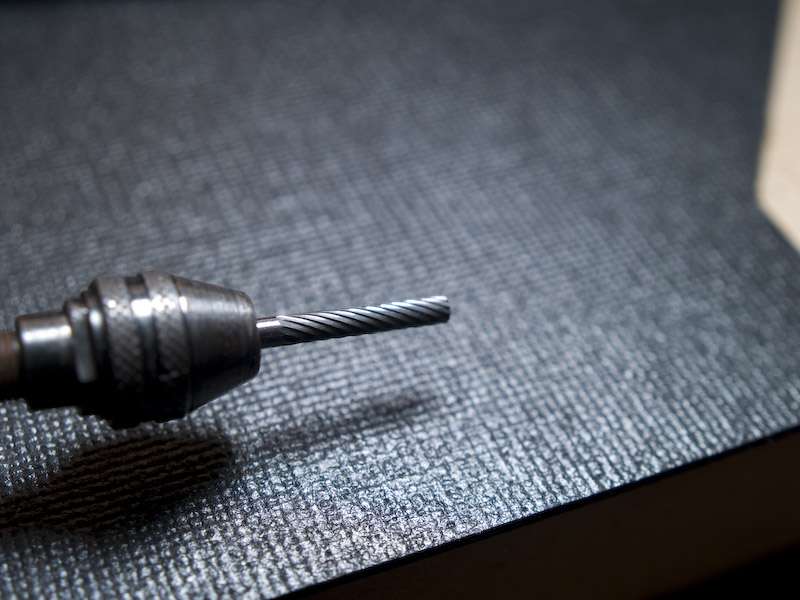 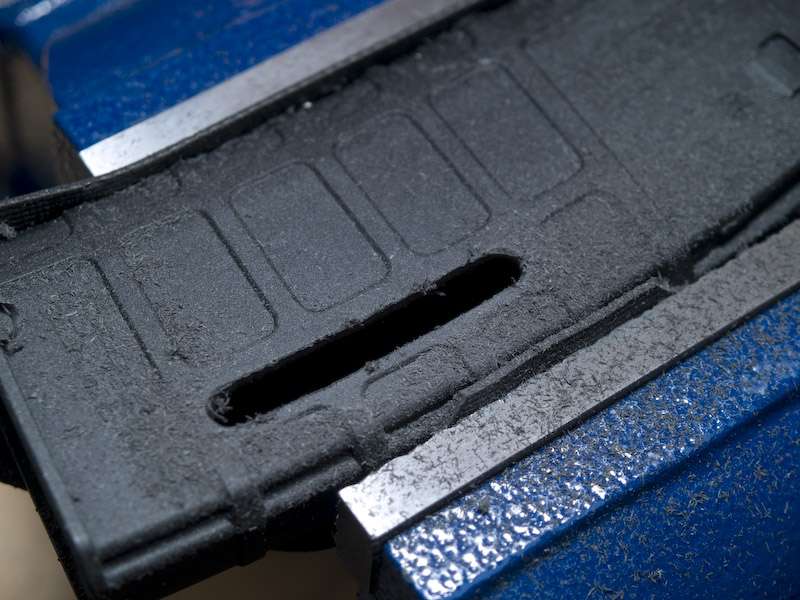 3. Once you have the window cut out and relatively cleaned up you can dress up any bumps or chatter marks with the flat file.   4. After cleaning the edges up well enough you can begin the process of creating an inner and outer chamfer along the edge of the new window. This creates a tapered edge allowing the epoxy to lock up with the magazine and prevent it from breaking free. 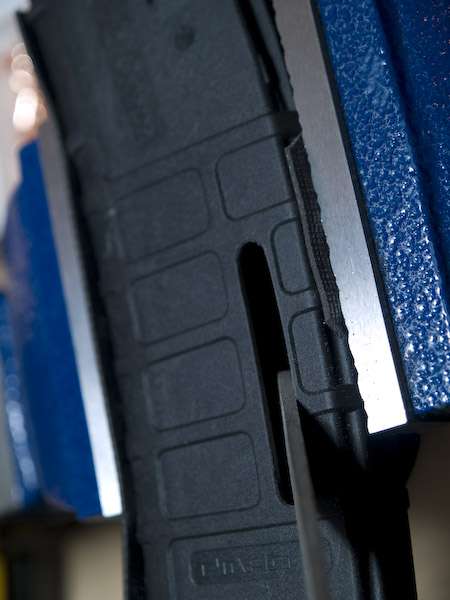 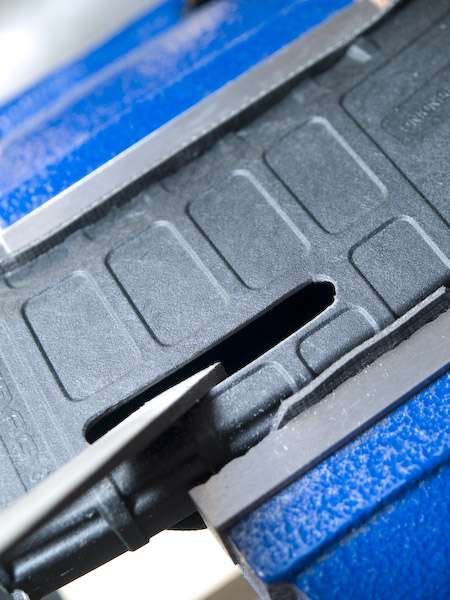 5. On the radius ends i use the 1/4" half round file to smooth out the edges and create a nice transition on the chamfers. 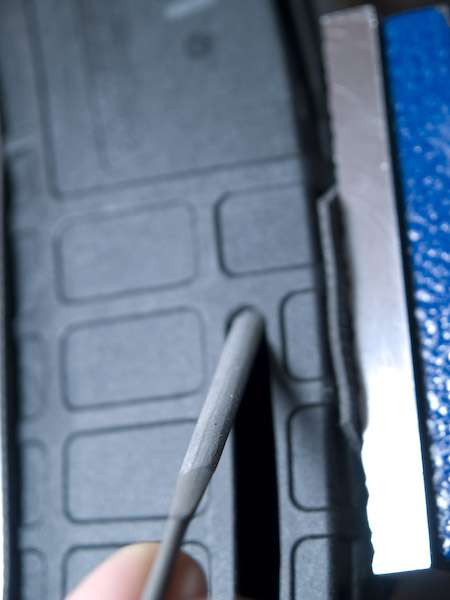  6. Once the edges are clean and smooth you can setup for the epoxy. first you want to use the aluminum flat stock for a backing plate, so the epoxy doesn't creep into the follower's ways. It is important that you smear a thin coat of beeswax across the aluminum so the epoxy won't stick to the aluminum...otherwise you'll end up with a non-functional and useless PMAG. here is a pic of the beeswax, flat stock, C-Clamp and PMAG ready to go:  7. when applying the beeswax try using some rubber or nitrile gloves, as your fingerprint will leave striations in the epoxy (you can see these striations in the final pics). If you don't have gloves a piece of saran wrap stretched across you finger will do the trick. You don't want the beeswax too thick, it may prevent thorough coverage of the epoxy and cause adhesion problems. here is the beeswax coated aluminum flatstock loosely fit in the magazine:  8. Once you have the magazine completely setup for the epoxy you can prepare it for mixing. good stuff right here:  9. cut the caps and break the seals:  10. dispense even amounts of epoxy and hardener, mix thoroughly for 30 seconds and use your paintbrush or other applicator to fill in the window area of the PMAG, being careful not to put too much on at once (it can get messy and overflow onto the magazine)  11. window has been filled in with an ideal amount of epoxy:  Now this is labeled as 5 minute epoxy, but i would wait at least 1 hour for cure time. Once cured the C-Clamp and flatstock can be removed, then you can wipe off the beeswax from inside the window...here are some pics of the end result: you can see the fingerprint striations real well in this one... 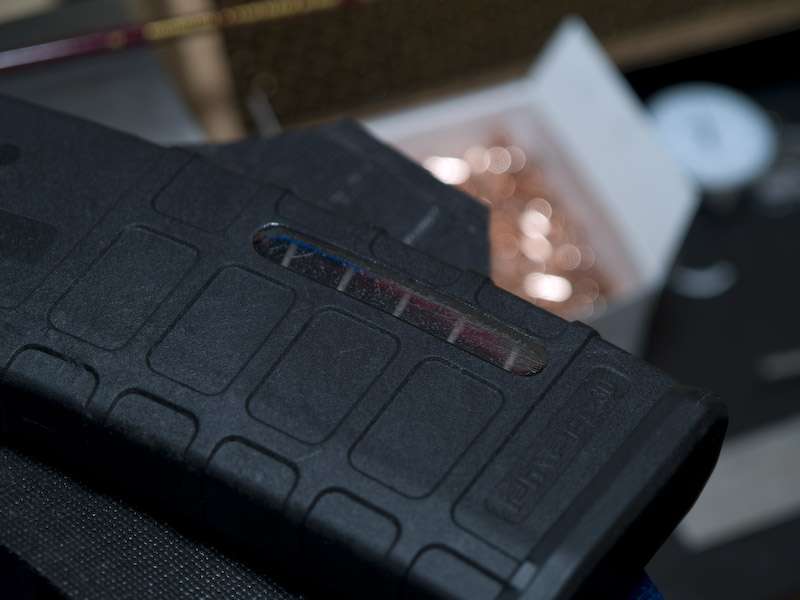 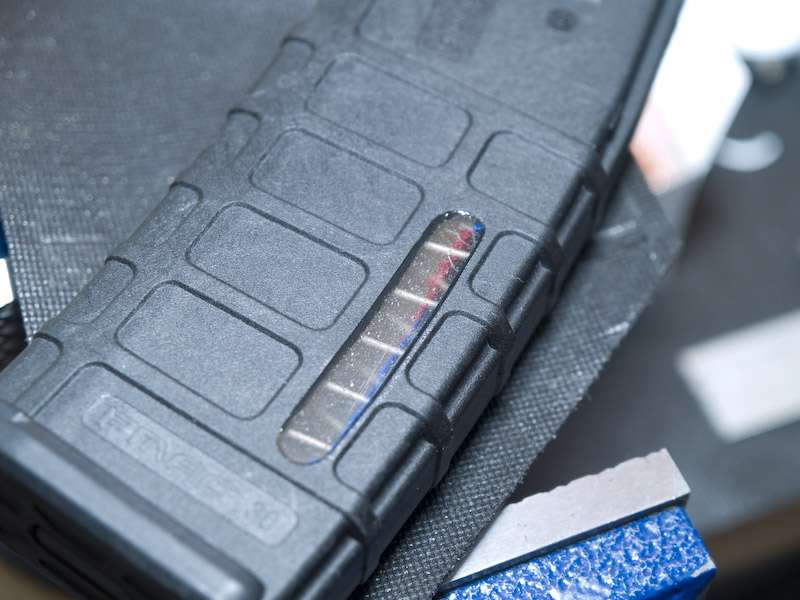 Loaded: 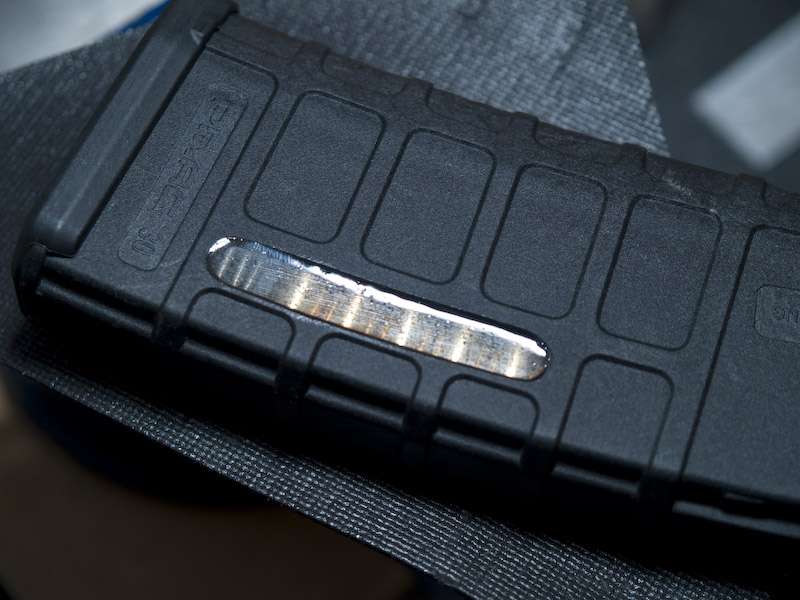 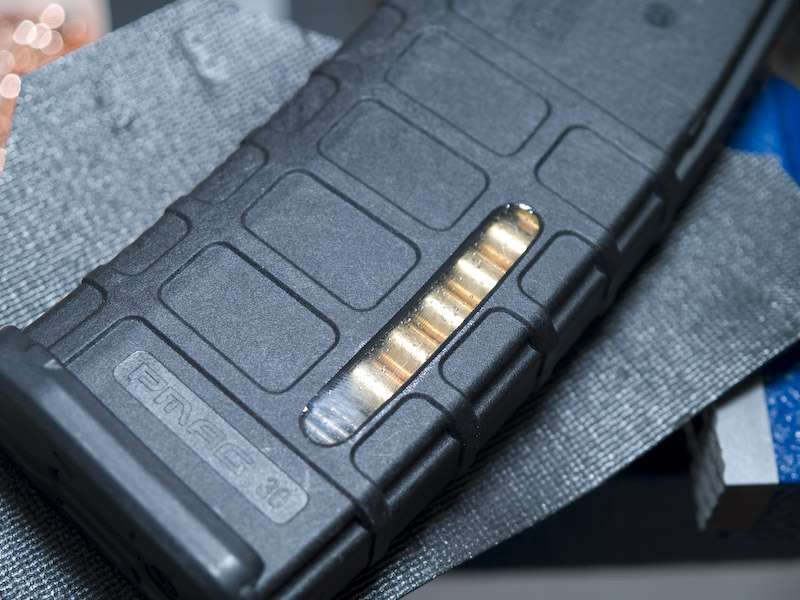 Overall, i think it's a viable solution to those who don't want to spend the extra few dollars on windowed PMAGs. Also note that in the long run the materials purchased for this will be way cheaper than choosing to upgrade. The modification is stable and simple. I only did one side of the magazine as a personal choice more than anything. |

 Win a FREE Membership!
Sign up for the ARFCOM weekly newsletter and be entered to win a free ARFCOM membership. One new winner* is announced every week!
You will receive an email every Friday morning featuring the latest chatter from the hottest topics, breaking news surrounding legislation, as well as exclusive deals only available to ARFCOM email subscribers.

AR15.COM is the world's largest firearm community and is a gathering place for firearm enthusiasts of all types.
From hunters and military members, to competition shooters and general firearm enthusiasts, we welcome anyone who values and respects the way of the firearm.

Subscribe to our monthly Newsletter to receive firearm news, product discounts from your favorite Industry Partners, and more.
Copyright © 1996-2024 AR15.COM LLC. All Rights Reserved.
Any use of this content without express written consent is prohibited.
AR15.Com reserves the right to overwrite or replace any affiliate, commercial, or monetizable links, posted by users, with our own.


