


Armory Sponsor

Posted: 11/16/2013 4:51:09 AM EDT
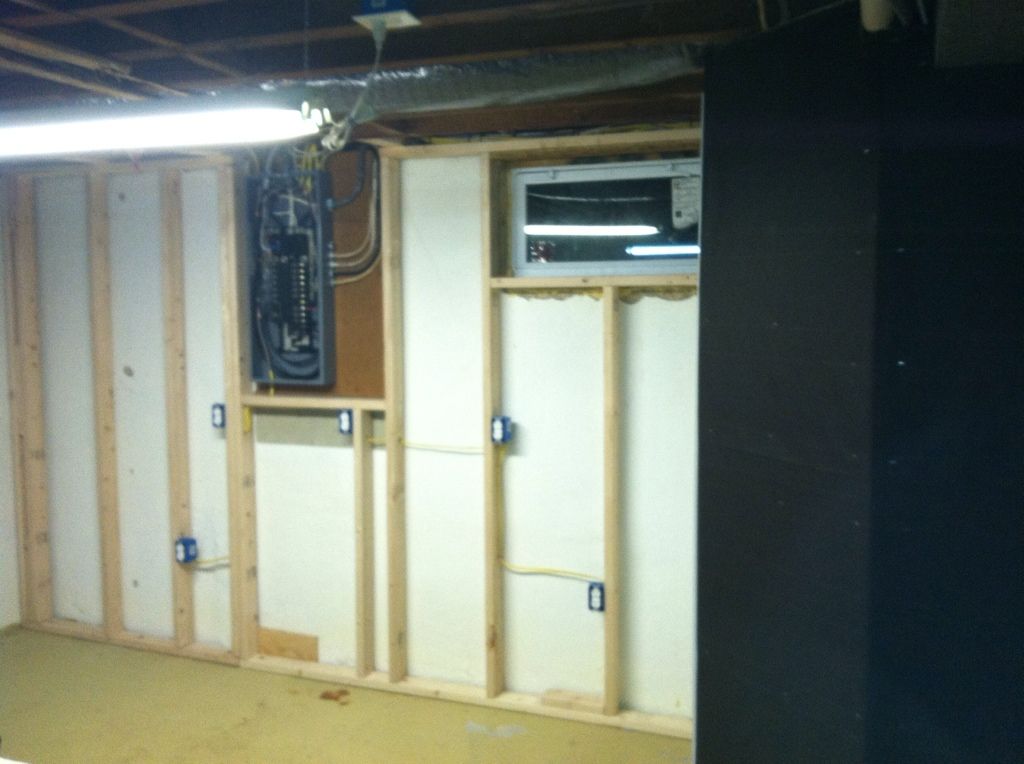
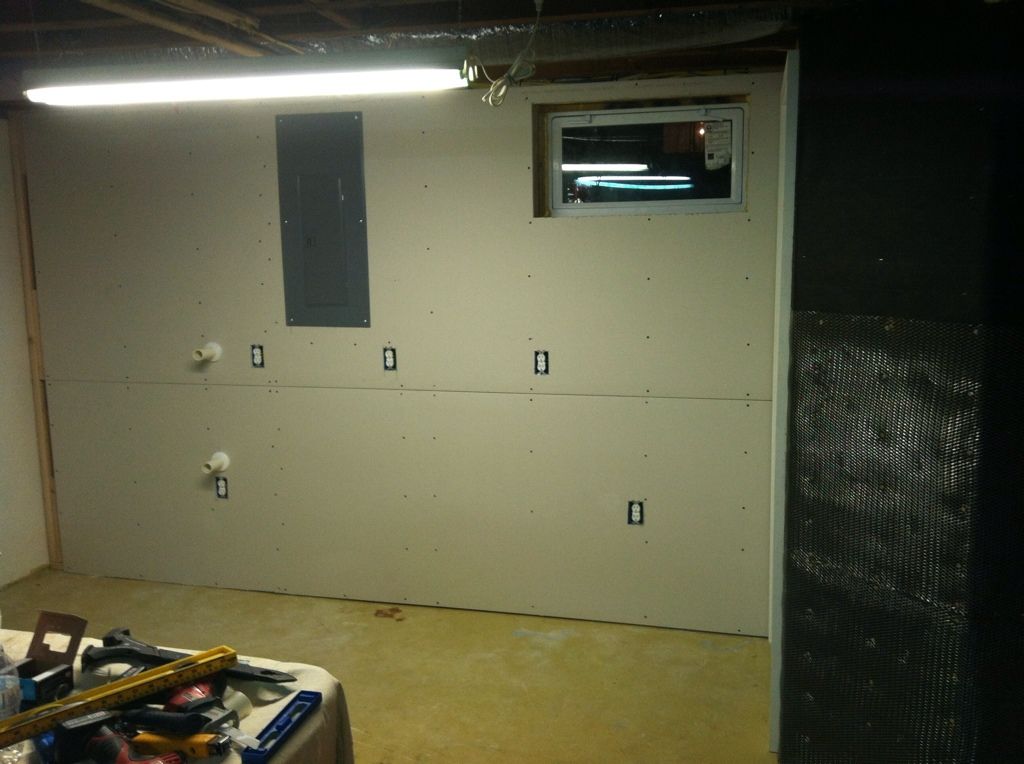
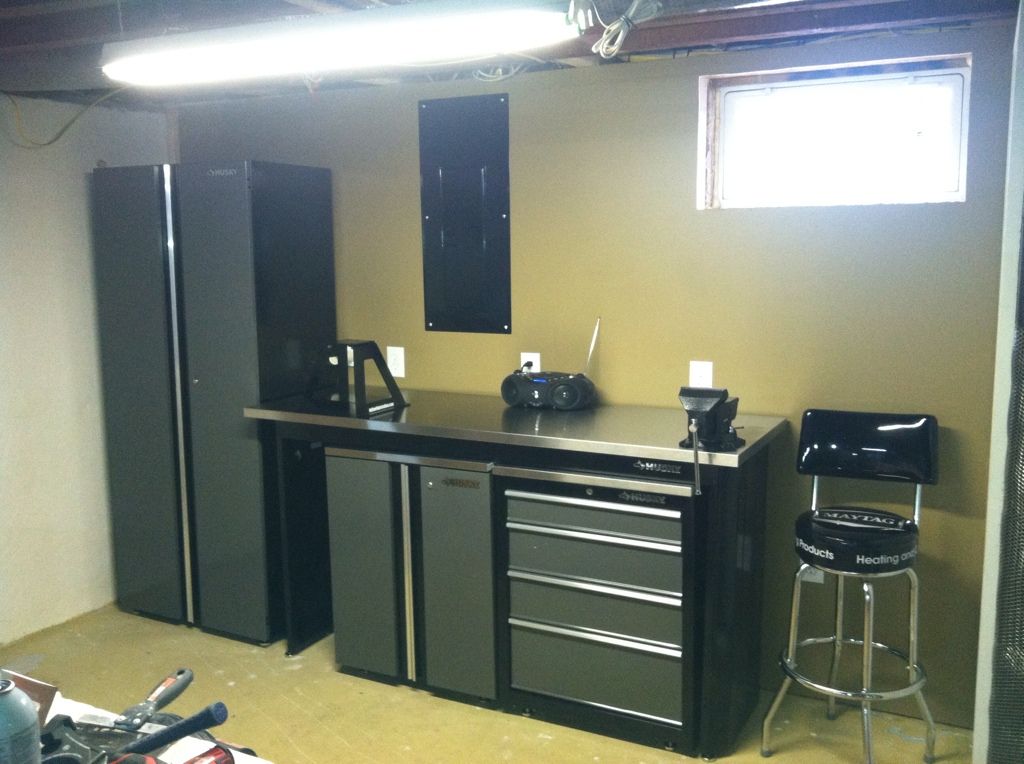
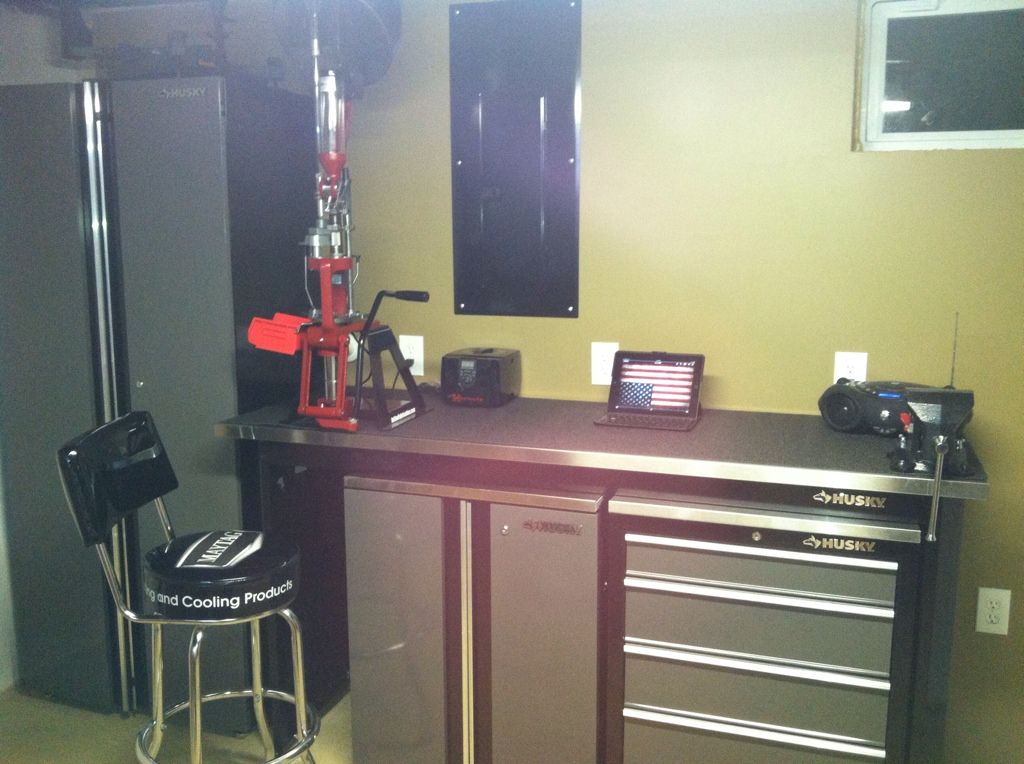
Well, for the last year I have been collecting reloading equipment and parts, built an area just for reloading, new cabinets and a bench, and finally today I started to do something with it other than build rifles on it.
Alright, so I opened the reloading cabinet... 
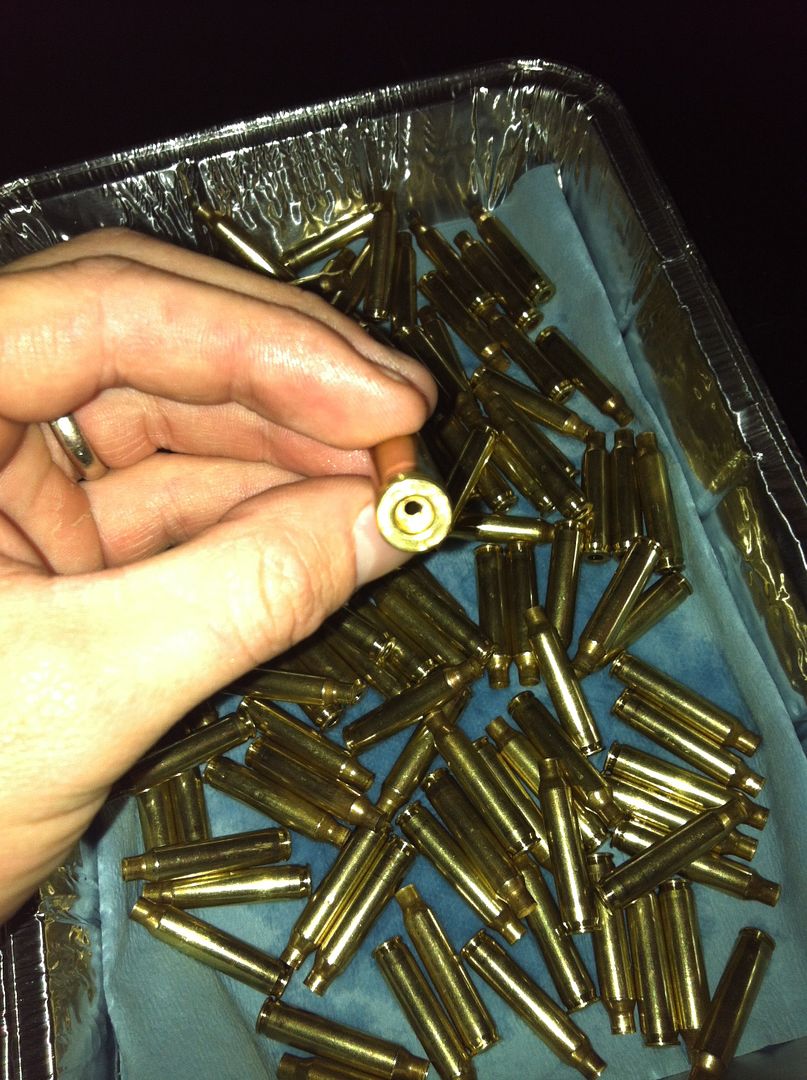
I had to assemble the tumbler, which the media bag had a whole in it, so that was fun... Next, I added the liquid to the media and tumbled it for a few while I separated and roughly inspected 100 pieces of brass. 
Found a few live round, and one really cracked piece of brass.... 
Then it was into the tumbler they go... 
So then I played with the dies and trimmer on the press a bit. 
And deprimmed my first piece of brass... 
Waiting for the brass in the tumbler now... Looks pretty good after 2 hrs. 

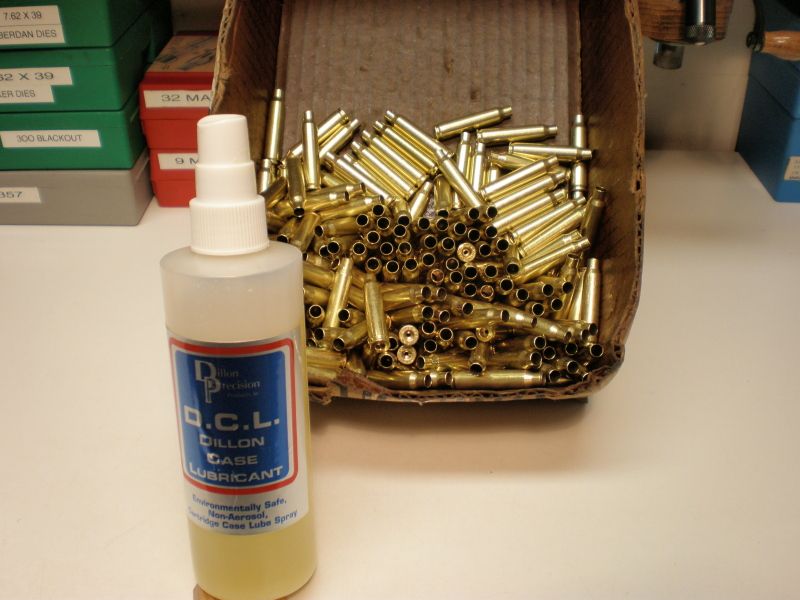
Then I lubed some cases, I may not have used enough, but we will come back to that... 
Let dry and then into the case feeder. 
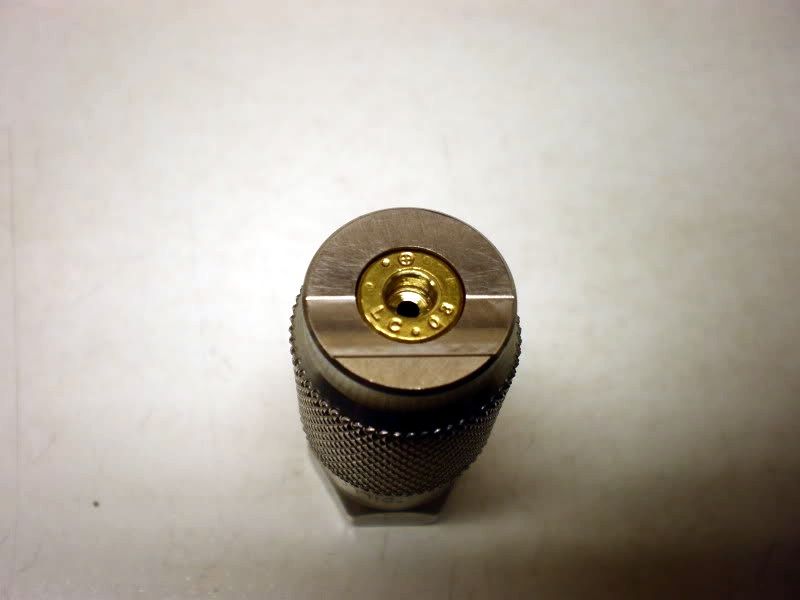
After depriming but before hitting the trimmer I want to check the sizing. 
Left the trimmer off as I don't believe I have the die set right to do some checks. 


Maybe a two part problem, sizing die is not set correctly, and or not enough lube. And then I had the expander get stuck in a case. Again lube issue, or maybe I didn't have it tight enough as I was able to pull it out be hand no problem out of the press. 
And the other issue I had was a few pieces of brass would not decap. The have a different head stamp, and must be range pick up. Are these crimped primers? 
|
|
There was two other issues that came up.
Every once in a while the cases would not feed into the shell plate correctly. They would tip over or only enter half way. The other issue didn't come up until after a half the brass went through the press. On the last station the case would go up slightly on an angle and not feed into the die. I could see that it was not straight and could straighten it with my finger, but what could be causing that? Not coming out of the previous die smoothly causing it to misalign? |
|
First inspect your brass again. As the previous said, make sure there are no berdan primed, 2 little pin holes inside. Got to be rare, but apparently it exists. If so, discard.
I think you do have some military crimped brass if you have a mixed bag with range brass, very possible. In that event you have to decap and swage pockets to remove crimp first. Looks to me like sizing die not set up correctly, need to work that per instructions and press instructions. Case should go into gage and be within specs. Ensure decaping pin / expander are centered properly, and pin is about 3/16" below bottom of die. When you size correctly, then you will find you may have to do the trimmer. For rifle reloading, need to have some small amt of case lube inside the necks with spray at a slight angle, or some use a .224 plastic brush or bore mop with a little lube on it, replenish occasionally. Cases crooked or tipping, means your shell holder may not be set up correctly, but I am not familiar with this type of progressive. Again instructions should tell how to adjust shell holder plate. Some work to do here before ready. Do you have a reloading manual and are you read up on it? There are stickys at top of this forum that can help too. |
|
Quoted: On those I need to use the dillon super swagger? No Quoted: Quoted: Look inside the case, is there 2 holes on the bottom? If so, you can't deprime them with your set up. On those I need to use the dillon super swagger? No  Look down in the case, you will need a flashlight, and determine if you have Boxer, left, or Berdan primed brass, on the right. Boxer is what you want. Scrap the Berdan cases, you need special tools and techniques to reload these. To remove primer crimp, you can either ream or swage the crimp away. Look for a swaged circle around the primer, that's a crimped primer pocket. Your sizing die is way too high, need to be lowered to fix. Adjust sizing die until your cases look like this in your case gauge. End of case below end of gauge, but above the cut. Dillon case gauge shown. One stuck, I mean one shot has a bad rep. Because it is very easy to stick cases in sizing die if instructions are not followed exactly. And I mean exactly. I would toss it out myself. I recommend Dillon spray lube. Almost trouble free, and works very well. Almost part because some people can break anything. I use the box method because I think it's easier than a bag. Welcome to the reloading club, and good luck. Nice pics in your post. |

|
The brass that I can't seem to deprime, has a red ring around the primer. A guy on another forum says you can punch that out with the lee universal depriming die, but then it needs to be swagged.
I didn't want to force it, as it was a different feeling on the press compared to the other pieces of brass. |
|
A little more lube and more pressure on the press I was able to seat a case in the sizing die, with the trimmer off.
I can no see the neck of the case into the trim area. 


How far up should I set the trimmer from the flush part of the sizing die? I understand I'll need to adjust it to what I want it to trim to, but for a starting point should I go just about the flush part? |


|
That looks like a crimped primer, so you might have to work that. Looks like you have things working. The casehead should line up flush with or under the steps of the gage but above the bottom. If you are still having trouble getting within specifications, you can try a small base or competition sizing die. But looks like you might have things on track now.
The brass with the red ring is probably crimped. Where did you get it? Anyway, I use a Lyman decapper in a separate single stage press to decapp and then RCBS swager to fix primer pockets before going into the progressive. The decapper gets them all. Whatever works for you. |
|
Quoted:
That looks like a crimped primer, so you might have to work that. Looks like you have things working. The casehead should line up flush with or under the steps of the gage but above the bottom. If you are still having trouble getting within specifications, you can try a small base or competition sizing die. But looks like you might have things on track now. The brass with the red ring is probably crimped. Where did you get it? Anyway, I use a Lyman decapper in a separate single stage press to decapp and then RCBS swager to fix primer pockets before going into the progressive. The decapper gets them all. Whatever works for you. Not sure where those pieces came from, probably range pick up, as I mostly shoot umc. |
|
Ok, got the press going pretty well so I went full force on a 100 piece of brass with the setup and locked in position with it producing consistent measurements.
Hooked the vacuum up to the trimmer, and went to town. 

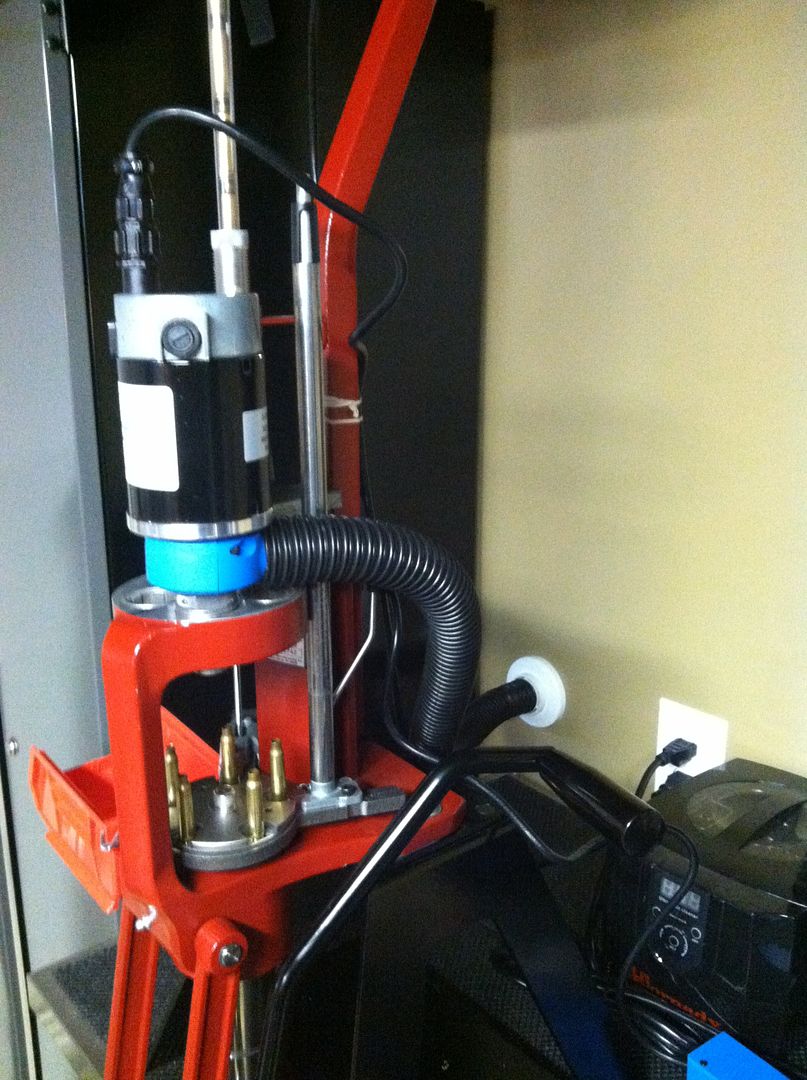
Started the process.. 
And then a primer broke the decapping pin. Not sure how it happened, but there was a spent primer in the case that broke the pin, and the primer was still in the case. So not sure how that happened. 
Luckily, I have spare pins, so I changed it out and got back to work. 100 rounds went really quick. 
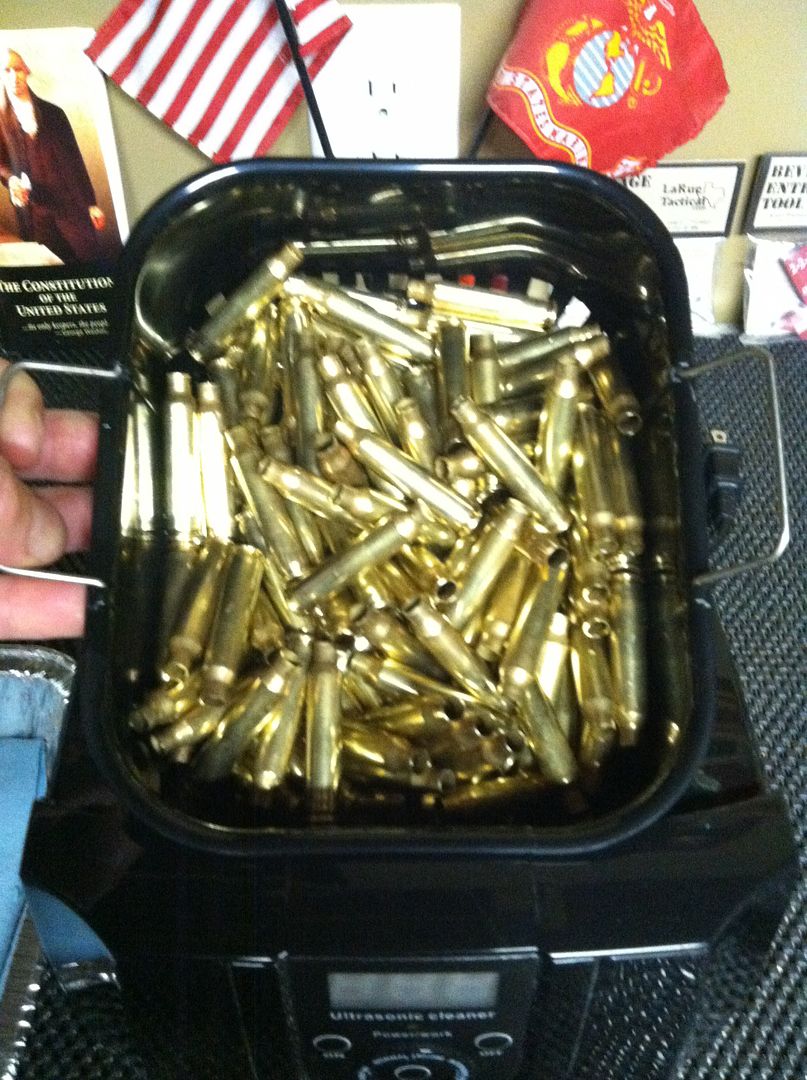
Then it's time to clean the lube off and clean the primer pockets. Filled the basket in the ultra sonic. 
Added 20oz of bottled water. 
I use a regular 3/4 dome top PVC cap to measure the ultra sonic cleaner. 1 cap full is 1/2 an once, so I added 2 cap fulls. 
Set the timer to 480, going to do 3 cycles at 480 each. 
|


|
After rinsing, try putting the shells on a large towel and grab two corners of the towel in each hand (like a hammock) and roll the brass in the towel (sorta like a reverse slinky). It will dry the brass 95% and will only take a few min in the oven, or just let them air dry over night. |
|
Quoted:
After rinsing, try putting the shells on a large towel and grab two corners of the towel in each hand (like a hammock) and roll the brass in the towel (sorta like a reverse slinky). It will dry the brass 95% and will only take a few min in the oven, or just let them air dry over night. Thanks for the tip. |
|
Quoted:
Crimped and sealed. Quoted:
Quoted:
Quoted:
Looking good so far. The brass you're having issues depriming is Winchester, and it does indeed require more pressure. Is it crimped or just harder to deprime? Crimped and sealed. Thanks, so I'll have to swag them. |
|
Quoted:
Thanks, so I'll have to swag them. Quoted:
Quoted:
Quoted:
Quoted:
Looking good so far. The brass you're having issues depriming is Winchester, and it does indeed require more pressure. Is it crimped or just harder to deprime? Crimped and sealed. Thanks, so I'll have to swag them. Correct. |

|
I think you had pic of an RP case that was definitely not crimped. Then you showed the WCC with a red ring that looked like they have definitely been crimped at one time.
One thing to try, but see my caution below. Get an OLD SPENT PRIMER from one of the non-military cases like the RP case that was decapped, i.e. one that was never crimped in place. Very gently try to seat the old spent primer. If it will not go then you have a better idea that you are dealing with crimped brass. If you are not careful you could deform the primer in the pocket. Normal solution is just put in the decapper in and decap it, or remove shell holder with the case in it, and punch out the deformed spend primer with a slender punch. If there is any chance of getting a case stuck in your press without it being easy to remove, do not try this. |
|
When I first started reloading I was so happy to just get some brass to use. Little did I know how much more a pain it was to deal with crimped brass and I was having seizures like you are, dealing with it. Do yourself a favor and learn how to identify it and put it inside a coffee can to be dealt with later after you gain some experience. Now that I have managed to collect more brass than I know what to do with, I just don't deal with crimped brass at all. I pick it up at the range, and when I get home I separate and inspect all my brass, at that time I put my crimped brass into a coffee can and give it to my reloading friends who are short. |
|
Good advice there - if you can afford to do without the crimped brass.
I get .223 range brass from club shooters and law enforcement mostly. So the milspec headstamp brass must have been once fired and crimp removed. Regardless, I never have to bother with removing crimps on that stuff, just lucky perhaps. |
|
Quoted:
Will the primer pocket go/no go gauges help identifying crimped brass? Meaning will the go gauge not go in until its been crimped? If you have a primer pocket uniformer, which are supposed to cut pockets to a std depth and not widen the pockets, that might work to test for a crimp. |
|
Quoted:
Will the primer pocket go/no go gauges help identifying crimped brass? Meaning will the go gauge not go in until its been crimped? Yes, and no.... Sorry to sound wishy washy. You can still have a case where the diameter is within spec, but the burr is going to cause a primer feed problem. Best explanation I can give is that a diameter isn't the same as a chamfer radius. A sharp edge can still be a problem when auto-feeding a primer. You still want that edge broken into a chamfer or radius even if it is within the correct diameter. |
|
Quoted:
The dillon sizes and trims at the same time. Quoted:
Quoted:
I found things worked better not using a sizing before trimming , IIRC thats what Dillon recomends also The dillon sizes and trims at the same time. With 71K through my first Dillon trimmer I kinda got that |
|
Quoted:
With 71K through my first Dillon trimmer I kinda got that Quoted:
Quoted:
Quoted:
I found things worked better not using a sizing before trimming , IIRC thats what Dillon recomends also The dillon sizes and trims at the same time. With 71K through my first Dillon trimmer I kinda got that I use the second sizing die just for the expander. It is adjusted up to not size. |
|
A few quick comments - assume anything with a red ring (sealant) on the primer is crimped, plus the usual suspects - anything with a NATO 'cross' like (+) but with a full circle. Pull them aside for the time being.
Hornady Zip spindle 'custom grade' dies for .223...I like them, but: a. They're not really up to de-capping military primers, IMO. Get a Lee or other universal de-capping die (~$20), and use that separately; you can still use the Hornady to then resize in another station (or use the Dillon die if you'd like in the RT1200..) b. I think they did a silent model change, no more zip spindle for some calibers and back to a non-threaded shaft. I'm guessing b/c too many people were breaking the zip spindles or decapping pins. Was going to mention being way off on resizing and some other bits, but seems like you got it sorted through the rest of the thread. One thing worth noting - some brass, especially mil. brass, may not meet your min trim length even after resizing..I'm pretty sure I'm not alone in considering it still generally fine to size and reload assuming no other issues exist. |
|
Thanks for the info.
I'm using the lee universal decapping die for all my brass. So far the hornady die is just being used to expand the neck after sizing and trim. I have processed all the 223/556 brass, and went back and swagged all the questionable brass with dillon 600. I have now changed everything over to 308, and working on prepping it. |
|
Alright, so today I moved into more uncharted waters and on to the next step of reloading.
It took me awhile to get everything going as this was my first time and I made some mistakes along the way that I had to figure out not only what the issue was, but what I did wrong as well. Then there were a few manufacture issues, that I had to fix. So, I started by converting the press from brass prep for 300blkout, to prime, powder, bullet seat for 223. I cleaned the powder drop, and bullet seating die. Then I figured I would get the priming station up and running. Opened a new box of primers. 
Then flipped the ones that were upside down over using a little screwdriver. 
Then into the dish and picked up with the primer tube. 
And down the chute by pulling the pin. 
Then moved onto setting the powder drop station up. Put some H335 in the tube, and started getting some drops to adjust the charge and check consistency. 
Adjusted... 
Moving in the right direction, and double checking each one on the beam scale to verify accuracy of the scales. Found the beam scale was missing a magnet, that was not glued in properly. Fixed that, but still was getting inconsistent drops. Took it apart and found the powder was clumping together. You can see in this picture that the powder is stuck inside, this was after trying to get it out. 
So it took it all apart again, cleaned with the brake cleaner and then used one shot as directed. Finally after cleaning it multiple times I was getting consistent drops that were verfied on both the digital scale and beam. 

With that problem fixed I moved on to bullet seating, but found that I had an issue with the primer set up after I stopped doing one case at a time. I found I had the large primer parts installed and needed the small primer parts, fixed that and reloaded the primer tube and it still would not pick the next primer everytime. After trying to adjust the primer system, I found the adjustment slot was not fully cut out to allow full adjustment. A drill bit took care of that, and it was working flawlessly. Since I have no reloading experience, I read the directions on how the bullet seating works, and gave it a go with some trial and error. 
First bullet did not seat fully, so I adjusted it and tried again. Much better, but still to high. Then, some how this happened. 
Not sure what happened, but tried again and was able to get it seating properly. 
Little more fine tuning and we were set. 
After triple checking everything and making sure everything was consistent, I knocked 20 out in no time. 
So here they are, 223 Hornady 55gr sp, cci primer 400, 21.6 gr of H335, at 2.200 COL. 
|
|
Update:
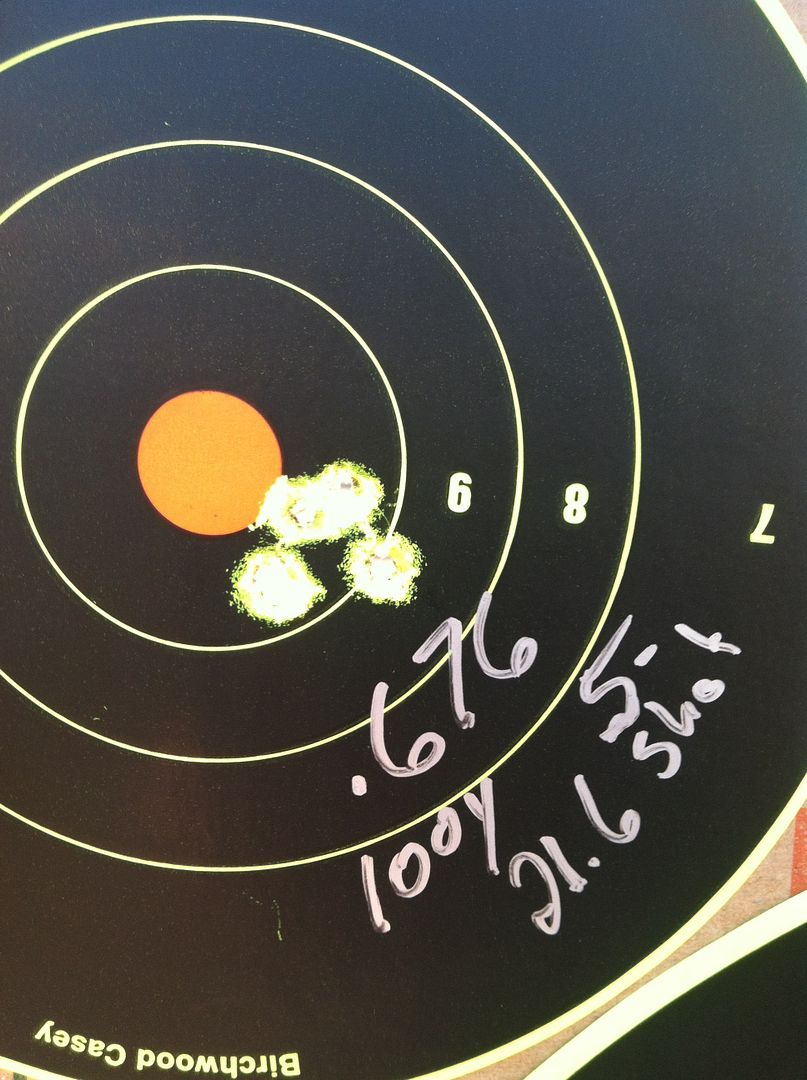
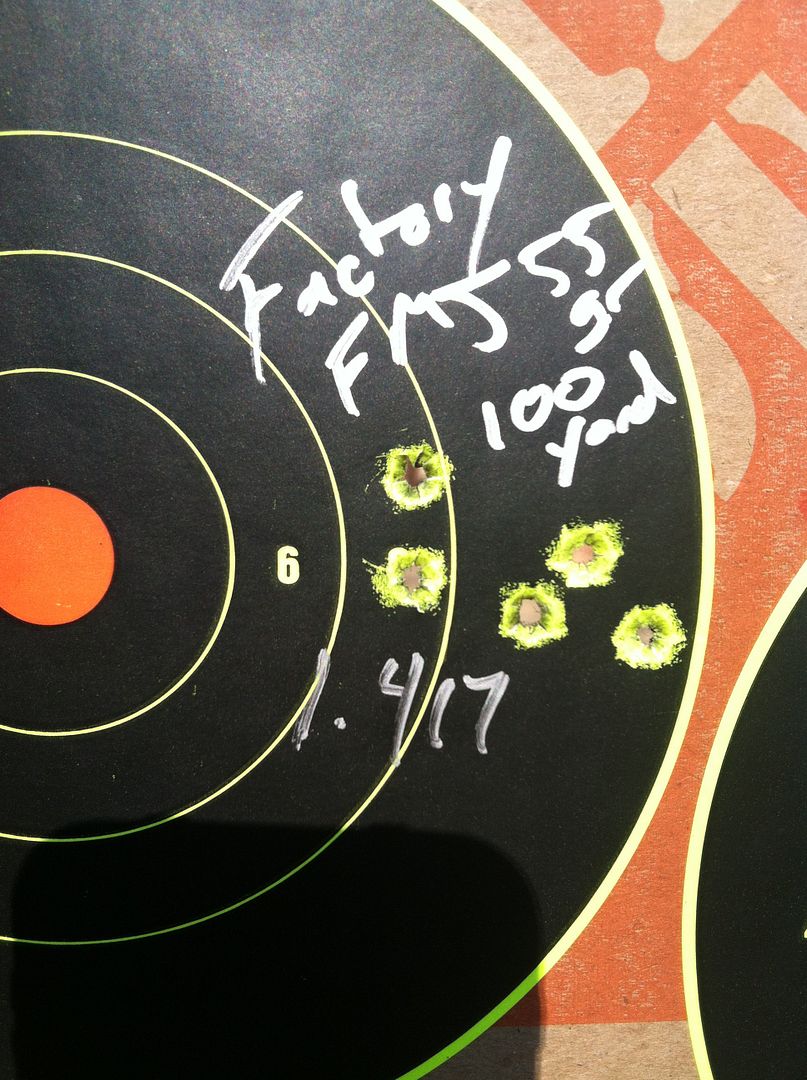
Went to the range today with my 1st set of reloads and they did excellent! Out performed factory ammo I normally shoot. 5 shot group, 100 yards, 55gr sp hornady 21.6 of h335 COL of 2.200, out of an ar15 I just finished building 16" 1:9 barrel. 
Factory UMC 55gr FMJ 
|
|
you see, that's why we reload!! Factory ammo stinks comparatively and we can make it at a better price. I see all those dudes in the where to buy ammo threads paying top rate and scrounging around for ammo that shoots 2 inch groups and I'm just glad I'm not one of them. Great Job Weber!! |
|
Quoted:
you see, that's why we reload!! Factory ammo stinks comparatively and we can make it at a better price. I see all those dudes in the where to buy ammo threads paying top rate and scrounging around for ammo that shoots 2 inch groups and I'm just glad I'm not one of them. Great Job Weber!! It was great to see these results, as I was just hoping to not blow up my AR. A year in the making, but it was great to learn the process, build it and shoot it, and then achieve an excellent result. |
 Sweet!
|
You should also look at the Hodgdon reloading data
http://data.hodgdon.com/main_menu.asp 55 GR. SPR SP Hodgdon H335 .224" 2.200" min 23.0 3018fps 40,800 CUP max 25.3 3203fps 49,300 CUP |
Armory Sponsor