


AR Sponsor

Posted: 4/23/2012 11:12:42 AM EDT
|
I'm going to Gun-Kote my upper and lower receivers, my barrel, bolt carrier, maybe the bolt, and maybe my ff rails... however first I have to get the thing into pieces so I'm not spraying springs or binding anything up.
Here's my problem: There's about 1000 video's on assembling your own stripped lower... but I haven't found anything on taking it all down to a stripped lower. Anyone have a video tutorial like this? How about some guidance on what can stay and what should be taken out? I'm guessing the fire control group should come out if I plan on coating the interior, but could the take down pins and magazine catch stay put with no ill effects? What about the upper? I've seen a couple install video's on rails but no one taking everything down to individual parts. Could the dust cover and forward assist stay on? Could I simply plug the barrel and gas tube? Does the charging handle latch have to be removed or should it be ok to be coated with the charging handle? I've got paint arriving today, punches, and vice block later this week  Any help is appreciated or else I'll just have to wing it and figure it out from the available assembly videos. Any help is appreciated or else I'll just have to wing it and figure it out from the available assembly videos. 
|
|
Any video showing how to assemble a stripped lower receiver is also a video on how to disassemble it. It's the same thing only in reverse.
Same with a upper receiver. I see no reason to leave anything installed on an upper or lower. I'd just strip it all down. If any part overlaps (like a dust cover) then that could play hell with the coating. Strip it down, paint it and reassemble. For the charging handle ... do you care if the latch is not painted? If so then punch out the pin, remove the latch and paint only the charging handle. Once you reassemble it your latch will not be painted. Brownells How to Build An AR-15 Video you can watch them for free online. You can buy the DVD if you want to or you can also download the DVD for free if you know how to do it. |
|
Quoted:
Any video showing how to assemble a stripped lower receiver is also a video on how to disassemble it. It's the same thing only in reverse. I figured this is the route I would end up at but I like to be thorough. I'd be kicking myself for days if I found out there was a step by step disassemble video floating out there right after I took the time to watch the video's in reverse.
I will probably fully disassemble the receivers and the charging handle. I will also coat some of the small bits with a contrasting color to give it, what I hope will be, a very unique and cool look. Thanks for the link! |
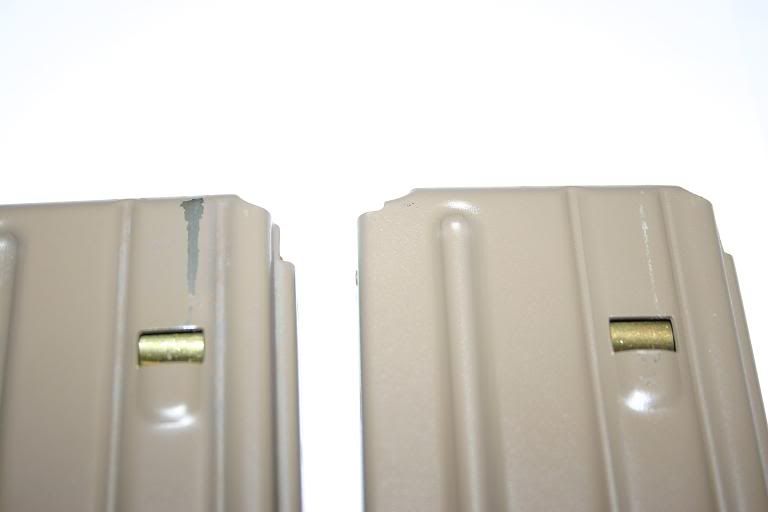
If you're using real GunKote, then media blasting is important to consider. I tried to coat a mag without blasting (left) and the finish wore off almost instantly. I did another one after blasting (right)and the finish has lasted over 100 insertions so far.
I did not blast my upper or lower and I've had no problems. I didn't coat my charging handle, barrel, or hand guard, so I can't speak from experience there. Overall I really like the way the finish went on and how it turned out. 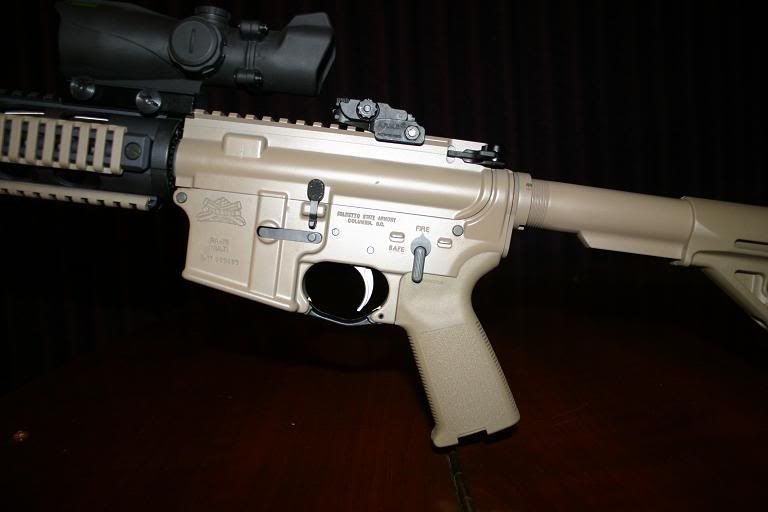
|
AR Sponsor