


Armory Sponsor

How i built my own rotary tumbler (Page 29 of 31)

|
Originally Posted By BIGGDAWG:
using an 8-9" section of 6" pipe and then your fittings will make a 1-1.2 gallon drum your total height of drum will be 11-12" they will do roughly what a thumbler will do. you could put 7 or so lbs of media and 3-4lbs of brass in each drum. Originally Posted By BIGGDAWG:
Originally Posted By Kaldor:
Heya gents Ive looked thru this thread a couple of times but I cant find what Im looking for. How much 6" pipe would yield about the same size as a Thumler Tumbler B. Id like to build something that would hold a pair of drums roughly about that size so I can do different sizes of brass or one drum double sized for doing large lots. Thanks using an 8-9" section of 6" pipe and then your fittings will make a 1-1.2 gallon drum your total height of drum will be 11-12" they will do roughly what a thumbler will do. you could put 7 or so lbs of media and 3-4lbs of brass in each drum. Thanks! |
|
Finally got the first prototype of my brass processing machine done. It's fully automated (except loading the brass) from washing to separating/rinsing/drying, with 4 stages of programmable timing control and a few other goodies.
Lot's of overkill, but a really fun project! 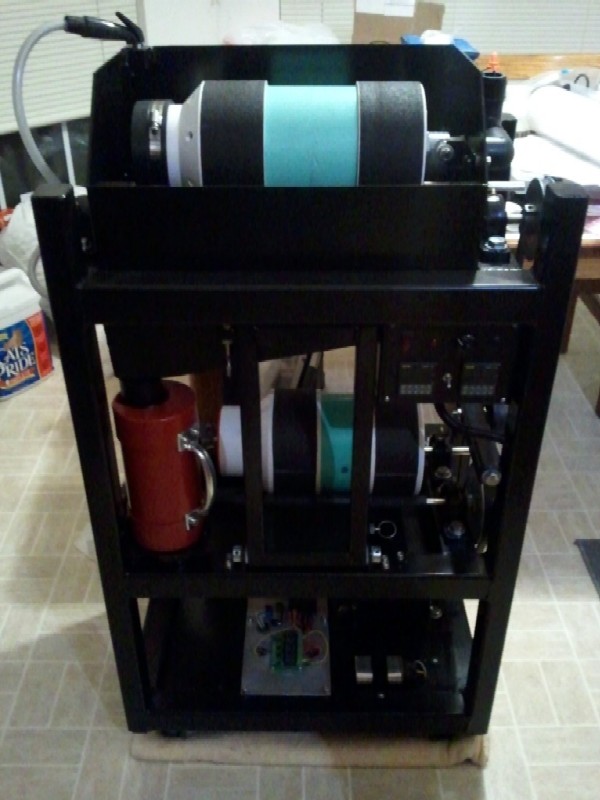
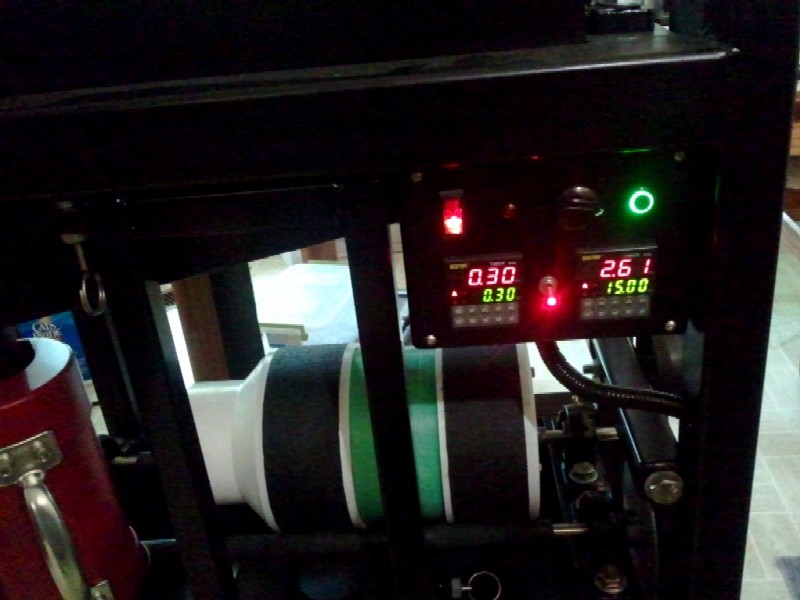
https://www.youtube.com/watch?v=9BXZ-iRuwA8 I still have some odds and ends, painting, and a bit of legal stuff to tie up, but the machine itself is mostly finished. Just waiting on some parts for an upgraded tumbler drum that will handle all the cycles so I don't have to switch drums between washing and rinsing/drying. |
| I am going to jump in the bandwagon and build one of these. I have access to a 1/6hp motor. I am concerned that this is not going to be big enough?? I am planning on building a jug that will hold about 200 223 so about 3 lbs of brass. From what I have gathered reading some of the pages this needs to be a 1 gallon drum?? Also are the fin agitators needed or can I run without would like to keep things as simple as possible? |

Global Warming Hoax Skeptic before it was cool
Joined:
Jun 2007
Posts:
31271
EE: 100% (1)
 WA, USA
|
Originally Posted By tstuart34: I am going to jump in the bandwagon and build one of these. I have access to a 1/6hp motor. I am concerned that this is not going to be big enough?? I am planning on building a jug that will hold about 200 223 so about 3 lbs of brass. From what I have gathered reading some of the pages this needs to be a 1 gallon drum?? Also are the fin agitators needed or can I run without would like to keep things as simple as possible? Also good if your drum is big enough for 1 gallon of water + cases + media. (what the store bought Thumblers run for a load)
Yes you will need agitators. Either glue them in or bolt in using RTV between the drum/agitators/bolts to seal. |
Selling agent for Algores carbon credit scam.
Shooting and Reloading, one hobby feeds the other.
Shooting and Reloading, one hobby feeds the other.
|
Originally Posted By dryflash3:
Your motor will be fine for a 1 gallon drum. Also good if your drum is big enough for 1 gallon of water + cases + media. (what the store bought Thumblers run for a load) Yes you will need agitators. Either glue them in or bolt in using RTV between the drum/agitators/bolts to seal. Originally Posted By dryflash3:
Originally Posted By tstuart34:
I am going to jump in the bandwagon and build one of these. I have access to a 1/6hp motor. I am concerned that this is not going to be big enough?? I am planning on building a jug that will hold about 200 223 so about 3 lbs of brass. From what I have gathered reading some of the pages this needs to be a 1 gallon drum?? Also are the fin agitators needed or can I run without would like to keep things as simple as possible? Also good if your drum is big enough for 1 gallon of water + cases + media. (what the store bought Thumblers run for a load) Yes you will need agitators. Either glue them in or bolt in using RTV between the drum/agitators/bolts to seal. 1 gal is large enough for 3 lbs of 223 correct? Thank you for the help. Always very helpful. |
Global Warming Hoax Skeptic before it was cool
Joined:
Jun 2007
Posts:
31273
EE: 100% (1)
WA, USA
|
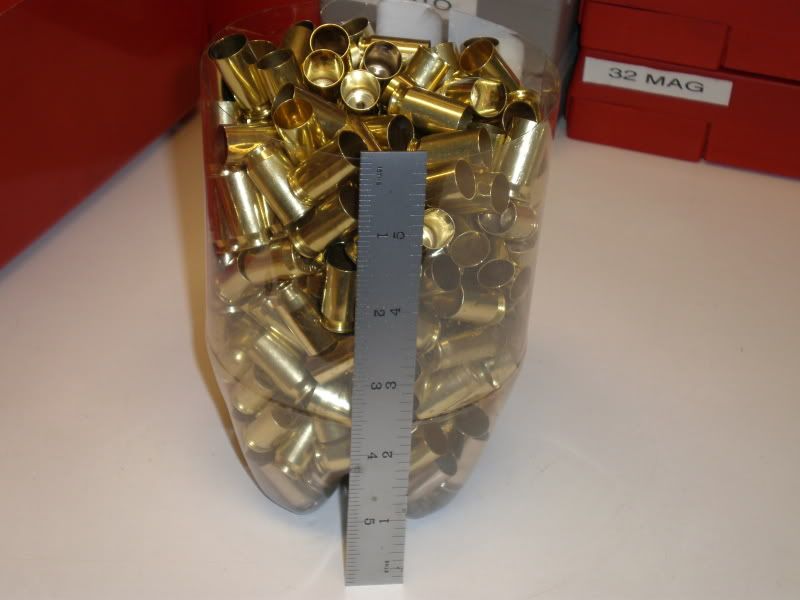
Originally Posted By tstuart34: 1 gal is large enough for 3 lbs of 223 correct? Thank you for the help. Always very helpful. Originally Posted By tstuart34: Originally Posted By dryflash3: Originally Posted By tstuart34: I am going to jump in the bandwagon and build one of these. I have access to a 1/6hp motor. I am concerned that this is not going to be big enough?? I am planning on building a jug that will hold about 200 223 so about 3 lbs of brass. From what I have gathered reading some of the pages this needs to be a 1 gallon drum?? Also are the fin agitators needed or can I run without would like to keep things as simple as possible? Also good if your drum is big enough for 1 gallon of water + cases + media. (what the store bought Thumblers run for a load) Yes you will need agitators. Either glue them in or bolt in using RTV between the drum/agitators/bolts to seal. 1 gal is large enough for 3 lbs of 223 correct? Thank you for the help. Always very helpful. The Thumbler brand tumbler I use which I mentioned above does 175 to 200 cases in a load. Never weighted them. This is how I measure a load. A 2 liter pop bottle cut to 6 inches. What ever fits in the bottle is the load.
|
Selling agent for Algores carbon credit scam.
Shooting and Reloading, one hobby feeds the other.
Shooting and Reloading, one hobby feeds the other.
|
Originally Posted By criio1:
I had jb weld turn my brass dark. It has metal in it and it'll act just like having a steel case in the load. Originally Posted By criio1:
Originally Posted By Vinny302:
Originally Posted By tbravo30:
I had leaks in mine initially, then I just put silicone around it. No more leaks. Just as a test I made a 6" drum from the PVC pipe I had left over. I used JB Weld to attach the agitators to the inside of the PVC pipe. To date it has held up perfectly. Vince I had jb weld turn my brass dark. It has metal in it and it'll act just like having a steel case in the load. I can find no literature that says JB weld contains metal. I find lots of literature that says it is non conductive and is listed as an insulator. My test drum with baffles secured with JB weld is holding up very well and the brass cleaned in it comes out just a shiny as the brass cleaned in my other drum. Vince |
|
I've been using my tumbler for about 8 months so far and I'll never go back. I started with a 6" drum and moved to an 8" drum when I could find the pipe and fittings. Mine holds 3 gal water and I usually do 1000 .223 or 300 BLK (or approx 2500 9mm) in a load.
I use HOT water filled to the neck 20 lbs stainless media 1/2 TBSP Lemishine 6-8 TBSP Dawn (depending on how dirty I think the brass is or how much lube I used when resizing) 2.5 hours tumble time I use one of the HF dehydration units to dry the brass overnight. My $0.02 I started out using friction tape wrapped around my drum. I have removed this as all it did was to rapidly wear out the hose that covered my 1/2" roller shafts. There is plenty of friction between the hose and the drum that there is no slippage and now the hose lasts much longer. I saw the friction tape suggested in a post in this thread (not from BIGDAWG, but another user), and wanted to share my experience with using it. I suggest not using it. |
|
Originally Posted By JMF1968:
I've been using my tumbler for about 8 months so far and I'll never go back. I started with a 6" drum and moved to an 8" drum when I could find the pipe and fittings. Mine holds 3 gal water and I usually do 1000 .223 or 300 BLK (or approx 2500 9mm) in a load. I use HOT water filled to the neck 20 lbs stainless media 1/2 TBSP Lemishine 6-8 TBSP Dawn (depending on how dirty I think the brass is or how much lube I used when resizing) 2.5 hours tumble time I use one of the HF dehydration units to dry the brass overnight. My $0.02 I started out using friction tape wrapped around my drum. I have removed this as all it did was to rapidly wear out the hose that covered my 1/2" roller shafts. There is plenty of friction between the hose and the drum that there is no slippage and now the hose lasts much longer. I saw the friction tape suggested in a post in this thread (not from BIGDAWG, but another user), and wanted to share my experience with using it. I suggest not using it. How long is the 8" |

|
How much leeway do these machines have as far as weight goes?
I've got some spare 220 volt, 1/2 hp motors I'd like to use up. Would make the drum out of 10" sch 10 stainless. I'm worried the motor might not be quite enough but it's stuff that's been sitting forever, can't sell, would like to use them up. Opinions? |

|
Originally Posted By Fella:
How much leeway do these machines have as far as weight goes? I've got some spare 220 volt, 1/2 hp motors I'd like to use up. Would make the drum out of 10" sch 10 stainless. I'm worried the motor might not be quite enough but it's stuff that's been sitting forever, can't sell, would like to use them up. Opinions? I would go with a PVC drum rather than stainless. Much lighter, quieter, and easier to work with. |
| I'm sick of looking locally for steel rods that are straight enough for my build. Online sources offer metal alloy options but I'm not sure what will be best. Is 1018 steel strong enough or should I go with 4130 or something similar? I know very little about metal alloys. The 4130 is only a few dollars more. So price isn't an issue. |
|
Originally Posted By jgieske:
I'm sick of looking locally for steel rods that are straight enough for my build. Online sources offer metal alloy options but I'm not sure what will be best. Is 1018 steel strong enough or should I go with 4130 or something similar? I know very little about metal alloys. The 4130 is only a few dollars more. So price isn't an issue. 1018 is fine. Not sure what part of ohio your in but check out a local machine shop they should have it on the shelf. Ohio seems to be full of machine shops. |
|
I'm attempting to copy BigDawg's design but am stuck on the paddle agitators. I cut them out and was originally going to put one rivet on each end that would be hidden by the caps, and would be water tight in all the pvc cement holding on the caps. Put one paddle on with two rivets (one on each end), and tested the caps, and they are such a tight slip fit, that the rivet heads bulge the cap.
The drums that BigDawg sells on his site has bolts, which I am fine with, but they seem to be hidden under the caps too. He looks to be using counter sunk screws to make the outer pipe flush to fit the caps, but this picture is on the much thicker green pvc. My 6" DWV pipe is much thinner and I'm not sure how much I can countersink. |

|
Thank you, I found your answer on page 30 as well, I get the prize for re-asking questions today:
Originally Posted By cybermech: For those of you who made the 6" pvc drums, what size stainless screws/nuts did you use to secure the pvc pieces internally (the paddles), size 8, or 10? I'm slowly gathering pieces to make several drums and a tumbler. Thanks! Originally Posted By BIGGDAWG: i use #10 x 3/4 stainless screws on mine with nyloc nuts Originally Posted By cybermech: BIGGDAWG, thought of one more question along this line. What size countersink is used with the #10 bolts? Originally Posted By BIGGDAWG: i use a 1/2 counter sink and go just deep enuff that the head is just slightly bellow flush |
|
Id like to thank you guys for the info provided here. I was going to buy a Thumbler at one point in time, but now Im glad I didnt!
Some photos: 


I went with a square frame built on 1" angle iron. Takes a little more steel, and a little more fabrication know how than a flat version. For me its easier to store this setup than a flat setup would be as it takes up less shelf space. Im waiting on a 4 hour analog timer switch. The digital pushbutton version I bought didnt like being hooked up to a 1/4 hp motor and just about melted. The first run last night I did 5 lbs of media, a 3 lbs coffee can full of 40 S&W brass (all tarnished dirty range pickups), a .380 Auto case full of Lemishine, and a good healthy squirt of Dawn. I checked at 2 hours, and they we definitely loadable, but had some crap inside the case and primer pocket. Ran for another hour, and they are 98% clean and tarnish free. |
|
Just a quick note for guys looking to add a timer switch.
I didnt have any luck with the digital pushbutton type switches. I burnt the first one up pretty quickly. Buy this instead: http://www.amazon.com/gp/product/B002RMZ57W/ref=oh_aui_detailpage_o00_s00?ie=UTF8&psc=1 Works like a champ. |
|
Originally Posted By Cmatt:
I have this switch on my unit and it seems to work pretty good http://www.homedepot.com/p/Defiant-6-4-Amp-4-Hour-In-Wall-Digital-Countdown-Timer-with-No-Neutral-Wire-CFL-and-LED-49816/203678183 Thats exactly what I had the first time around as well. Same specs and everything, except mine was made by Woods. Didnt work for me. Timer was not functional, no lights would turn on. Ground was good. White wires are a pass thru, ground was hooked up properly, hot and load were hooked up right. Meh, it lasted about 10 minutes running, then shut off, permanently. :) The switch I posted is dummy proof, in other words even I cant ef it up. Doesnt require a ground either as its just a manual timer (you can hear it ticking) that kills the power after the timer stops. |
|
Just for those of you who are looking for motor, bearing pillow blocks, and frames, I came across something the other day that lit a bulb in my head. My friend just threw away his old motorized tread mill and I took it for parts. Everything worked and I modified some things and hooked it up to my meat grinder and it works great. The motor is a 2.25hp DC not AC and it has a speed control that allows variable speed (nice). The rollers (2 of them) about 1.75" -2" in diameter, have a ballbearing on both sides. The 1/2" shaft that runs down the middle is held ridgid and the roller spins on it making the rollers very ridgid and eliminates the need for pillow blocks. The rollers also have a rubber coating on them for traction and a pully already installed on one roller and the motor has a pully too (you could use the same belt from the machine). The framework of the tread mill can be cut down to be used as the frame for the setup. Just shorten the tread mill and you have a frame with two rollers and a motor already atached that already turns one of the shafts.
The only downside of all this is the electronics to power the DC variable motor are somewhat large and combersome. For the most part two of the electrical commponents are already mounted on the frame by the motor (good) and the only other piece of the puzzle is the control pannel that needs to be taken off the upright stand and mounted somewhere you can control the on/off and speed of the motor. It even has a speedometer that you could calibrate to know exacly how many revs you are doing. Now for the really good part. The machines sell at second hand stores for about $15.00 to $30.00. That is the total cost of all your frame work, rollers(heavy duty), pulleys, belts, pillow blocks, and anything else. All you need to do is modifiy it and build your canisters. |
|
I exceeded my 2000 limit on my previous post so here is the remaining comment:
The setup I put on my no 22 meat grinder was running about half speed and barely got warm after grinding 30 lbs of meat. If I had not yet built a tumbler setup, I would be a the good will store right now buying the 15 dollar tread mill setting their right now. Please let me know if anybody uses this idea or has any questions. Hope I wasn't missleading on my last post, but the motor assembly plugs into regular AC wall outlet power but the control panel converts it to DC power for the motor. |
|
Originally Posted By BIGGDAWG:
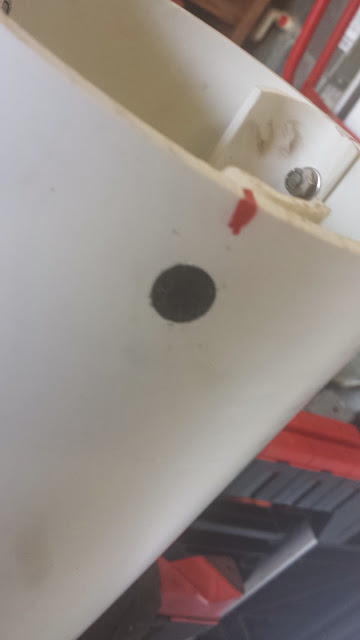
yes i countersink the screw heads Thank you BigDawg, my drums are complete (and hopefully water tight). Once I get a chance for my welding buddy to help with the actual tumbler, I'll post the finished project. As suggested I used #10 stainless screws, washers, and locknuts. I countersunk the screw heads. Probably over countersunk actually, it is very easy to go to far in pvc. I put some black rtv over the screw heads, let dry, then shaved the excess off. I don't think it was necessary looking back, and the pvc primer seemed to want the little black flaps to pull out, but I figure it didn't hurt anything. I used a right angle attachment on the dremel to saw off the extra protuding screw threads, and filed smooth to the top of the nut. I used clear pvc primer and clear heavy duty cement to put the cap and 6 -> 4 reducers on. Then oatey 4" clean out plugs for the access point. For my two drums, I used 1ft of 6" drain pipe, but with the cap and reducer, they come out to about 16" long 

|
Global Warming Hoax Skeptic before it was cool
Joined:
Jun 2007
Posts:
32108
EE: 100% (1)
WA, USA
|
Originally Posted By flybyjohn: http://www.youtube.com/watch?v=kZ7rqbyPQ9k Guess my idea wasn't original. here is what I was trying to explain in my previous posts.  |
Selling agent for Algores carbon credit scam.
Shooting and Reloading, one hobby feeds the other.
Shooting and Reloading, one hobby feeds the other.

|
Originally Posted By jgieske:
I'm sick of looking locally for steel rods that are straight enough for my build. Online sources offer metal alloy options but I'm not sure what will be best. Is 1018 steel strong enough or should I go with 4130 or something similar? I know very little about metal alloys. The 4130 is only a few dollars more. So price isn't an issue. I bought my rod at homedepot because i didn't feel like laying out the money for drill rod which is usually very straight and polished. I had to thump the rod in certain places to get it to true up and run straight  , that took awhile to bend it, a shop press works great but cheater bar and a receiver hitch work too. , that took awhile to bend it, a shop press works great but cheater bar and a receiver hitch work too.
|
One day I was at Costco and saw a fatass standing next to a tub of lard.....
|
FWIW it is much better to use JB Weld to seal the screw holes rather than RTV. In spite of what has been posted JB Weld contains zero metal and will not discolor brass. If you go to the JB Weld website it is actually listed as an insulator. Your will find that using RTV that over time it will come loose.
V |
|
Originally Posted By Vinny302:
FWIW it is much better to use JB Weld to seal the screw holes rather than RTV. In spite of what has been posted JB Weld contains zero metal and will not discolor brass. If you go to the JB Weld website it is actually listed as an insulator. Your will find that using RTV that over time it will come loose. V I just put my screw holes under the caps, and glued the crap out of them. No chance to leak when they embedded in the glue. |
| I just glued mine in with pvc cement. I lightly sanded the inside of the pipe and wiped it down with acetone ( I didnt have any primer on hand ) to remove any of the mold release agent left over for the pipe being extruded and spread a bunch of cement in and then clamped the cut pipe until it dried. I've run probably 40 batches through it and no problems so far. |
|
well I have had nothing but problems getting 6 inch PVC pipe and fittings to fit together. Lowes carries the green pipe and the fittings for it but I have to order online and take the chance that it will work. Well I have struck out twice. I have a section of green pipe and a cap with the paddles already made up, i glued on the reducer without checking for length first. I screwed that up and was able to cut off the reducer due to me not using enough glue.
So a few days later I bought a 6 inch PVC cleanout fast forward a week to- today after turning the ridges off it I put it on for a test fit and Its 6 inches just the wrong kind of 6 inch fitting. Lowes doesn't carry the white 6 inch pipe anywhere. Here I am stuck with a clean out & cap that doesnt work $27 for those 2, and a section of pipe and cap and less a reducer which was $35. I had hoped to have it done before I went back to work. |
One day I was at Costco and saw a fatass standing next to a tub of lard.....
|
Originally Posted By ChadG:
well I have had nothing but problems getting 6 inch PVC pipe and fittings to fit together. Lowes carries the green pipe and the fittings for it but I have to order online and take the chance that it will work. Well I have struck out twice. I have a section of green pipe and a cap with the paddles already made up, i glued on the reducer without checking for length first. I screwed that up and was able to cut off the reducer due to me not using enough glue. So a few days later I bought a 6 inch PVC cleanout fast forward a week to- today after turning the ridges off it I put it on for a test fit and Its 6 inches just the wrong kind of 6 inch fitting. Lowes doesn't carry the white 6 inch pipe anywhere. Here I am stuck with a clean out & cap that doesnt work $27 for those 2, and a section of pipe and cap and less a reducer which was $35. I had hoped to have it done before I went back to work. You need to look at the pipe and fittings that you're using. There are two different sizing's used in pvs pipe ( SDR and IPS ) Make sure everything is the same before you start. |
Global Warming Hoax Skeptic before it was cool
Joined:
Jun 2007
Posts:
32558
EE: 100% (1)
WA, USA
|
You're looking for 60 - 80 rpm, I have mine going faster, about 110 rpm. If you do the math, a 6" drum on 1" rollers will bring you from 3450 rpms down to 511 rpms( 6" is closeer to 7" diameter), then look at the pulleys. If you have a 1.5" motor pulley then the shaft pulley would need to be 9.58 inches diameter to get you to 80 rpms, 7.66" diameter to get you to 100 rpms.
I run faster rpms because I used different aggitators. Instead of the big paddle inside, I cut some strips of the 6" pipe and used pvc glue to glue them inside of the 6" drum, flat with the wall. This makes the end look like an inner cog gear with the gear teeth only the thickness of the 6" pipe. This creates a more constant river rappids like flow and allows me to run the machine faster. With the large paddles, the media and brass would sit stationary along the bottom next to the paddle until it got up to the point if fell over the paddle and then would fall like a waterfall until it was trapped next to the paddle again. More of a swash,,,swash,,,swash,,,swash action, intead of a swishshshshshshshshshshshhs action I get with mine. I don't use my paddle drum anymore because the newer one I made works so much faster. The reason I am telling you this is because you might be able to use your motor with a smaller shaft pulley if you use a different aggitator than the paddle approach. I made a 1.25" pulley for my motor because I couldn't find one that size, but if you can use a 1" pulley on your motor, then you would only need about a 5" pulley on the shaft to get 100 rpms on the drum with a 1" shaft diameter and using a 6" drum. I hope this helps you out. |
Thought I'd share my ghetto version inspired by this thread. Took me about an hour to throw together, only thing I bought was the pillow block bearings and the metal rods, happened to have everything else laying around. Used a simple 5 gallon water cooler jug that I screwed some pieces of angle aluminum into as agitators. Simply wrap the top in plastic wrap and electrical tape and haven't had any issues with leaking so far (about 12 hour of tumbling). Motor is from an old furnace, I think 1/2 hp?


I was surprised by the results. I ran it with way too much brass for the 10# of media I bought, around a 1:1 ratio. Ended up having to put one end up on wood so the container put more weight on the driven rod, but it worked perfectly after that. Container was over 40# with SS media, brass, and water. Need to change my pulley sizes, was spinning at only 22 RPM (I did the math for a much smaller container originally). I think more media/less brass these things will come out beautifully. |
|
Thought Id put a link up to the finished product, as well as a thread on my Google+ account discussing building one of these.
Link to Google+ Thanks again. |
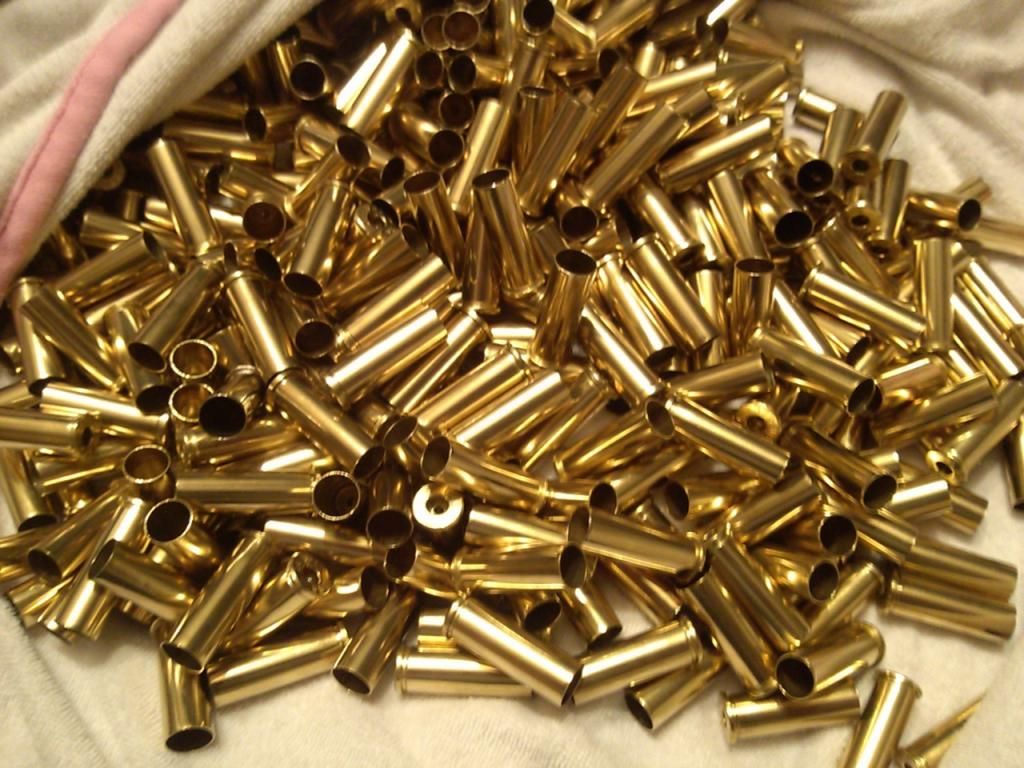
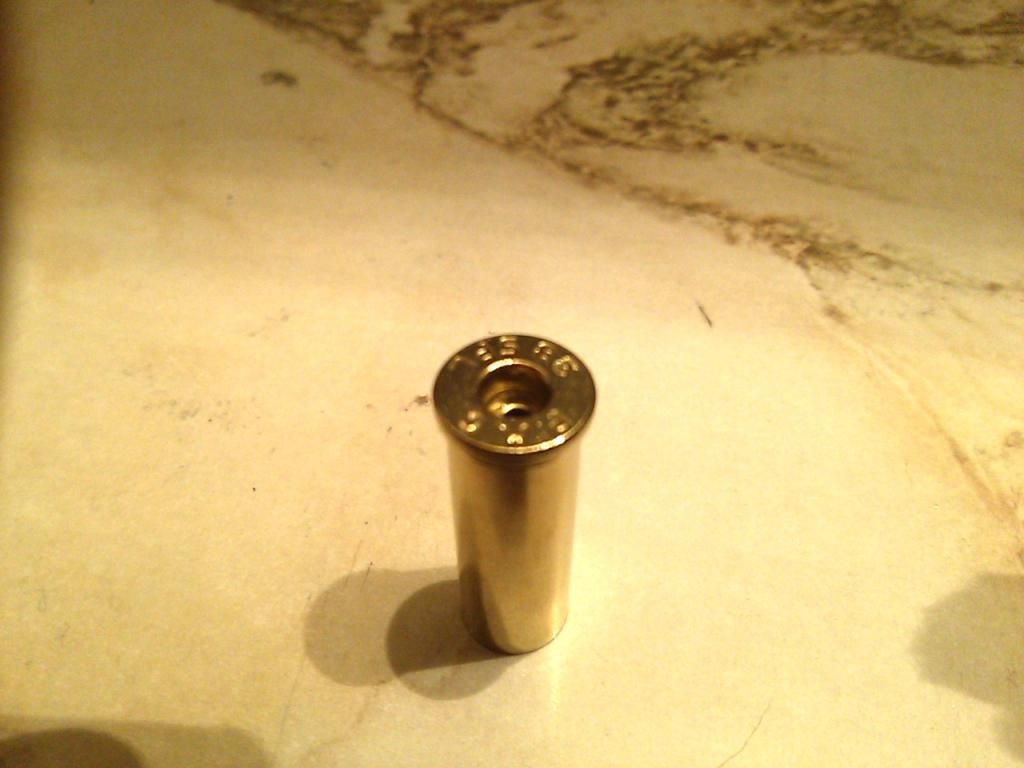
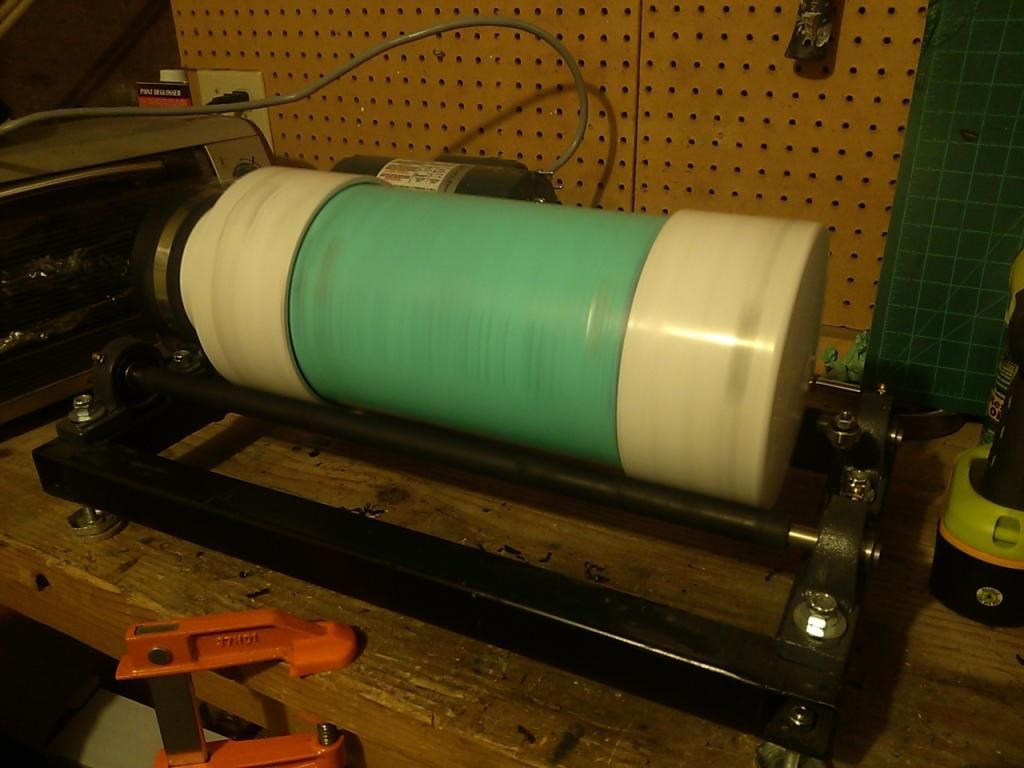
|
I see some folks are still having problems selecting the correct fittings to work with the SDR35 sewer & drain pipe. Here's the info from my Lowes receipt and is exactly what I bought with their item #'s and the actual manufacturer's part/model # (which is usually stamped on the pvc somewhere):
"6-3/4-in Dia PVC Sewer Drain Cap", Item #: 122863 Model #: 6P06 "6-in x 4-in Dia PVC Coupling Fitting", Item #: 182570 Model #: 6P07 "6-in x 2-ft Solid PVC Sewer Drain Pipe", Item #: 110875 Model #: S/M 06006 0200 "4-in Dia Flexible PVC Cap Fittings", Item #: 23493 Model #: RPC100 My total cost with NJ 7% tax was $34.94 Today I'm going to hopefully get my frame done. My question for everyone who has made a tumbler is does it matter what direction the shaft is rotating to have the drum stay down on it instead of lifting up? I've seen guys whose tumblers rotate the container one way, then there's others whose rotate the opposite. Thanks. |
Busy month. Looks like I need to upgrade to a bigger drum.

65 Lbs. of Lake City 5.56 brass 
49 Lbs. of 9mm and !K 7.62 Lake City 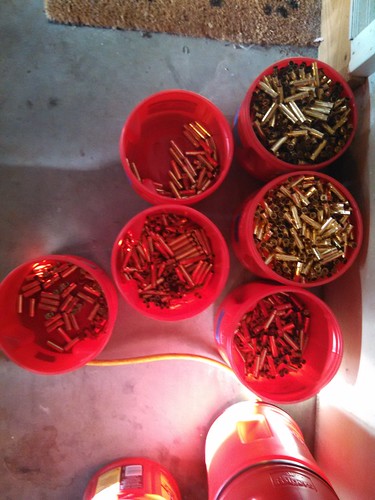
300BLK (Converted LC primed, converted FC, Converted mixed, coverted Barnes) Mixed .223/5.56 .38 spl mixed After doing all of this I am going ahead with my 3 gallon 8" drum. Should let me get more cleaned than my 1.5 gallon 6" drum. |

Just finished building two bigdawg tumblers. One is for me and another for a friend. The frame is aluminum and powder coated with a black wrinkle finish. I used a motor rated 6 hour timer switch and made a finger guard for the extra curious humans and animals. Also instead of the small bearings on each end to keep the drum centered I used some UHMW pieces instead. I used some velcro straps to secure up the electrical cord and to secure the drum for storage by hanging whole unit on the wall.
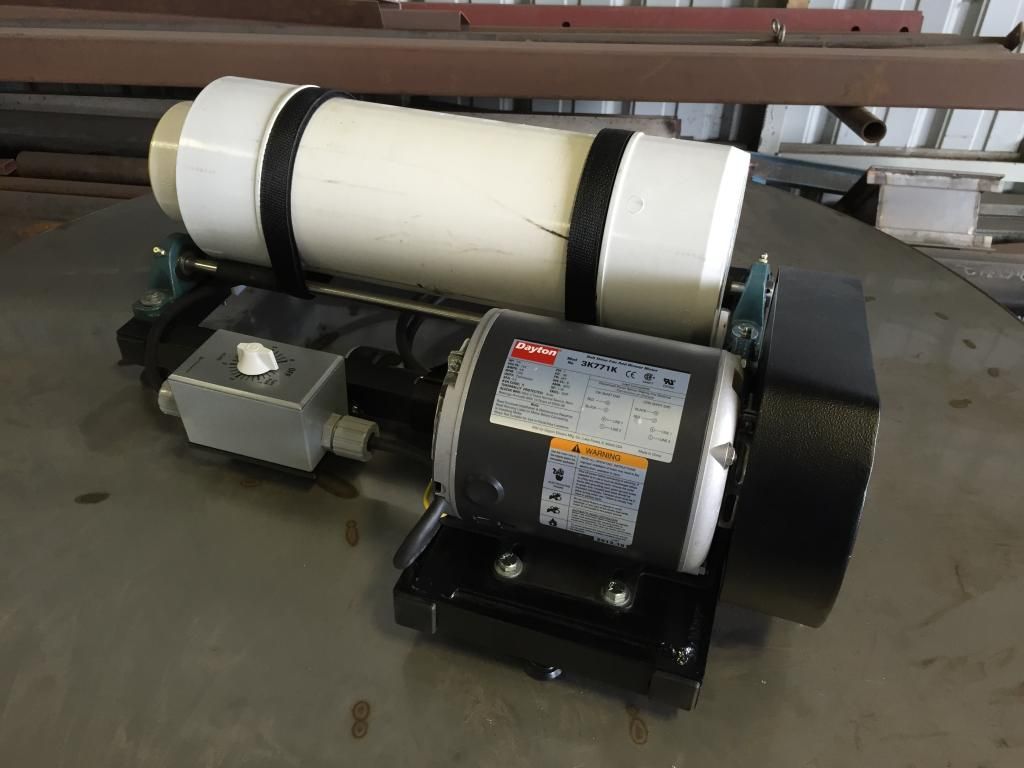
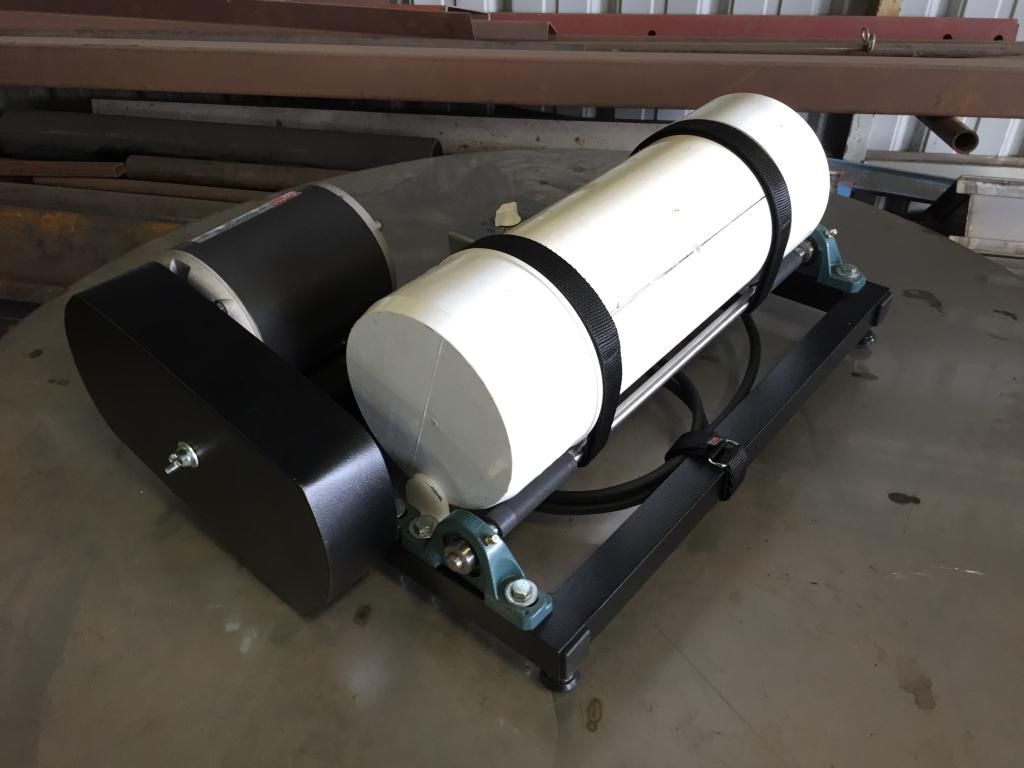
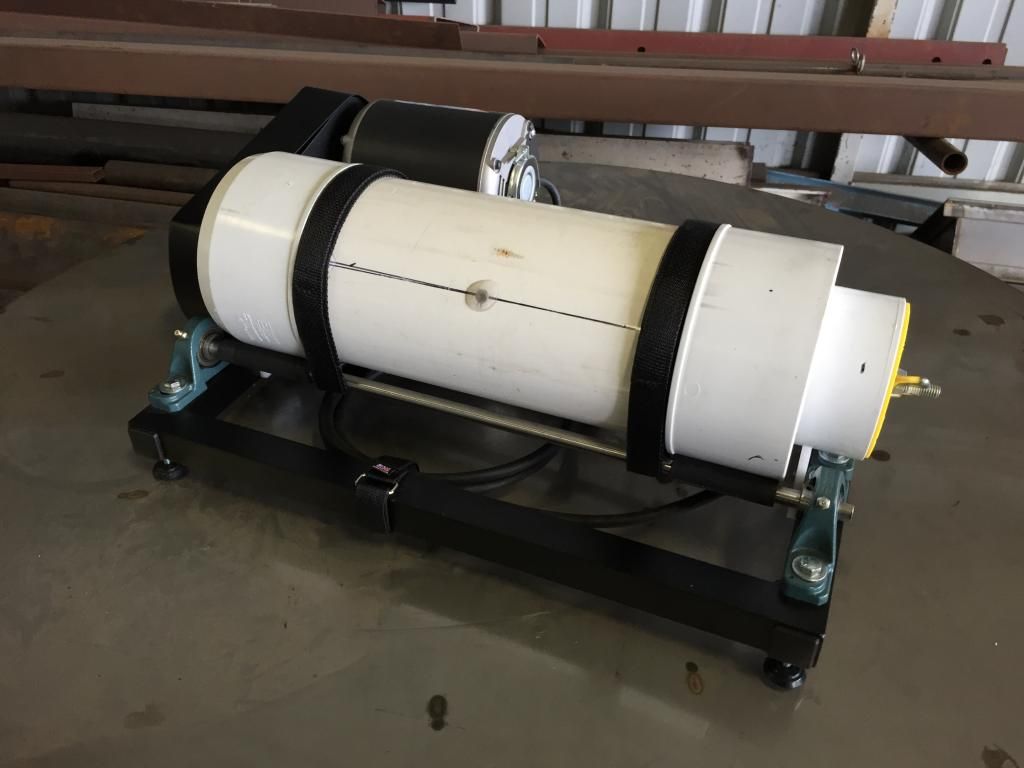
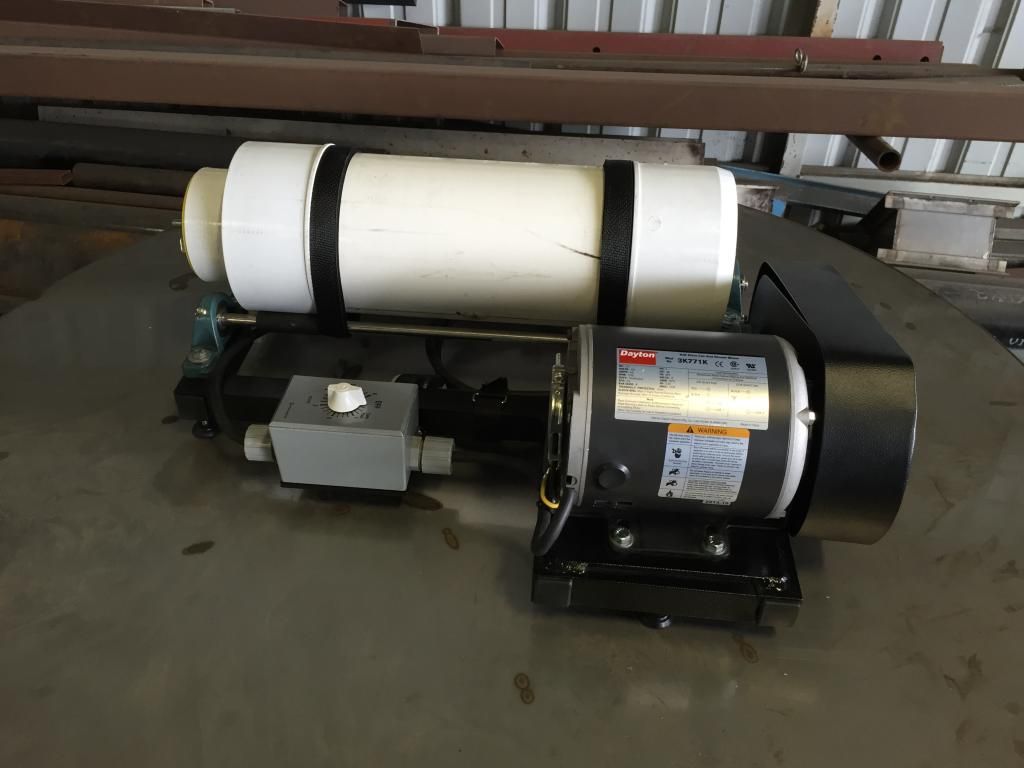
|
| Biggdawg and others that have built large drums I have a question for you guys, please. How well does a large drum work with smaller batches? Does the tumbling action work best when the drum is pretty full? I'm trying to decide what size to make my 6"diameter drum since I only have about 300 .45acp cases right now. Thanks. |
|
Thought I would show some pics of the biggdawg version tumbler that I built.
My frame is slightly larger. I used 1-1/2 inch tube. The overall frame size is slightly longer and wider. The rollers are 3/4 inch 303 TGP (turned, ground, polished) stainless steel shaft. The pulley`s are a 2 inch, and a 7 inch. The drum is 8 inches diameter. The motor is a used 1/4 HP, 1725 RPM motor that I got from work. I may buy a new 1/3 HP motor in the future. The drum stops are skate wheels. An idea I borrowed from another member here.  " /> " />
 " /> " />
 " /> " />
 " /> " />
|
Global Warming Hoax Skeptic before it was cool
Joined:
Jun 2007
Posts:
33710
EE: 100% (1)
WA, USA
|
Originally Posted By nfafun: +2 Yeah, very nice construction. But finding 8" PVC and fittings are difficult. Where's the magical place for this? Originally Posted By nfafun: Originally Posted By kaskillo: Originally Posted By ctrmass: Where are you guys finding 8" pipe locally? +1 +2 Yeah, very nice construction. But finding 8" PVC and fittings are difficult. Where's the magical place for this? I would check the first couple pages in this thread. The way these long threads go is 87% of the info is given out by the OP and the next couple of pages bring out the rest. Then the same questions are asked over and over. Good luck |
Selling agent for Algores carbon credit scam.
Shooting and Reloading, one hobby feeds the other.
Shooting and Reloading, one hobby feeds the other.
How i built my own rotary tumbler (Page 29 of 31)
Armory Sponsor