


AR Sponsor


|
Originally Posted By cbfurg:
I'm about to do my first lower. I might go with the single hole and router method. I don't have a drill press and that would save me from buying one and shop space. Looking forward to trying it out! If you were going to do the single hole method I would start with the hole for the trigger slot. Then I'd mill out the trigger slot all the way down like Modulus recommends... once you've got the trigger slot milled all the way down you can easily use that to start each pass milling out the whole FCG cavity. |

|
Originally Posted By SoftwareJanitor: If you were going to do the single hole method I would start with the hole for the trigger slot. Then I'd mill out the trigger slot all the way down like Modulus recommends... once you've got the trigger slot milled all the way down you can easily use that to start each pass milling out the whole FCG cavity. Originally Posted By SoftwareJanitor: Originally Posted By cbfurg: I'm about to do my first lower. I might go with the single hole and router method. I don't have a drill press and that would save me from buying one and shop space. Looking forward to trying it out! If you were going to do the single hole method I would start with the hole for the trigger slot. Then I'd mill out the trigger slot all the way down like Modulus recommends... once you've got the trigger slot milled all the way down you can easily use that to start each pass milling out the whole FCG cavity. Yup that's what I did. If you can drill one of the bigger holes it makes starting the router a bit safer and easier because there is more space for the end mil |
|
Originally Posted By K1rodeoboater:
Yup that's what I did. If you can drill one of the bigger holes it makes starting the router a bit safer and easier because there is more space for the end mil Originally Posted By K1rodeoboater:
Originally Posted By SoftwareJanitor:
Originally Posted By cbfurg:
I'm about to do my first lower. I might go with the single hole and router method. I don't have a drill press and that would save me from buying one and shop space. Looking forward to trying it out! If you were going to do the single hole method I would start with the hole for the trigger slot. Then I'd mill out the trigger slot all the way down like Modulus recommends... once you've got the trigger slot milled all the way down you can easily use that to start each pass milling out the whole FCG cavity. Yup that's what I did. If you can drill one of the bigger holes it makes starting the router a bit safer and easier because there is more space for the end mil The reason I suggest the trigger slot and then milling the trigger slot is it gives you a pretty large space to start the end mill for every pass. |
|
Originally Posted By SoftwareJanitor:
If you were going to do the single hole method I would start with the hole for the trigger slot. Then I'd mill out the trigger slot all the way down like Modulus recommends... once you've got the trigger slot milled all the way down you can easily use that to start each pass milling out the whole FCG cavity. Originally Posted By SoftwareJanitor:
Originally Posted By cbfurg:
I'm about to do my first lower. I might go with the single hole and router method. I don't have a drill press and that would save me from buying one and shop space. Looking forward to trying it out! If you were going to do the single hole method I would start with the hole for the trigger slot. Then I'd mill out the trigger slot all the way down like Modulus recommends... once you've got the trigger slot milled all the way down you can easily use that to start each pass milling out the whole FCG cavity. The HD jig is set up a little differently. There is only one trigger slot hole drilled initially and the trigger slot it'self is milled last. If you want to go with the one hole approach I would suggest starting with one of the FCG pocket holes. This will also give you a visual reference as to where the bottom of the pocket is located. |

|
You can't go wrong with the instructions either. That is the recommended way to go. If you decide to skip most of the drilling, then if you drill the trigger slot hole it will be the only one you NEED to drill. The order of the routering is done so you never need to start in any metal. Always in an open cavity whether its a drill hole or a previous routered area.
If you decide to try to "Single Drill Hole Method" I would recommend: 1. Drill the trigger slot hole with the 19/64" drill bit all the way through the lower 2. Router the Fire Control Group 3. Router the Rear Shelf 4. Router the Trigger Slot 5. Drill the Safety, Trigger and Hammer holes. That's obviously simplified but would be the way to go. Once again, we recommend following the instructions and drilling all the holes. For those of you who are using hand drills and not a drill press, we have a new product we are in the process of releasing that will make things faster and easier. It will be a separate item that can be used with any of our Jigs. Stay Tuned. |

|
Originally Posted By ModulusArms:
For those of you who are using hand drills and not a drill press, we have a new product we are in the process of releasing that will make things faster and easier. It will be a separate item that can be used with any of our Jigs. Stay Tuned. I am interested in this. |
NRA Life Member
|
Originally Posted By ModulusArms:
You can't go wrong with the instructions either. That is the recommended way to go. If you decide to skip most of the drilling, then if you drill the trigger slot hole it will be the only one you NEED to drill. The order of the routering is done so you never need to start in any metal. Always in an open cavity whether its a drill hole or a previous routered area. If you decide to try to "Single Drill Hole Method" I would recommend: 1. Drill the trigger slot hole with the 19/64" drill bit all the way through the lower 2. Router the Fire Control Group 3. Router the Rear Shelf 4. Router the Trigger Slot 5. Drill the Safety, Trigger and Hammer holes. That's obviously simplified but would be the way to go. Once again, we recommend following the instructions and drilling all the holes. For those of you who are using hand drills and not a drill press, we have a new product we are in the process of releasing that will make things faster and easier. It will be a separate item that can be used with any of our Jigs. Stay Tuned. That's what's motivating the single hole method for me. I'm worried that the hand drill won't be drilled completely straight and will cause (at best) finish issues. I figured a single hole near the center would be the safest method of procedure. |
|
No idea if this is any good...but you could get something like this to attach to your handheld drill |
|
Originally Posted By K1rodeoboater:
No idea if this is any good...but you could get something like this to attach to your handheld drill http://www.harborfreight.com/angle-drill-guide-95622.html That's cool. Never seen one of those. |
|
Originally Posted By ModulusArms: That's cool. Never seen one of those. Originally Posted By ModulusArms: Originally Posted By K1rodeoboater: No idea if this is any good...but you could get something like this to attach to your handheld drill http://www.harborfreight.com/angle-drill-guide-95622.html That's cool. Never seen one of those. They were a lot more prevalent back in the 50's and 60's, sometimes sold with the corded drills, and only for 90 degrees (not adjustable for 45's or anything). They sort of disappeared after that point. They're not super accurate but they're better than doing it free-hand so long as the locking mechanism doesn't slip. Alternatively if you place a 90 degree square on your object you're drilling you'll find it's a LOT easier to get a 90 degree hole. |
|
Originally Posted By K1rodeoboater:
No idea if this is any good...but you could get something like this to attach to your handheld drill http://www.harborfreight.com/angle-drill-guide-95622.html Now that looks handy as hell! Even though I have a drill press, sometimes I need to drill stuff that I can't easily move to the drill press... |
|
Originally Posted By troy_v:
I am interested in this. Originally Posted By troy_v:
Originally Posted By ModulusArms:
For those of you who are using hand drills and not a drill press, we have a new product we are in the process of releasing that will make things faster and easier. It will be a separate item that can be used with any of our Jigs. Stay Tuned. I am interested in this. Me too... anything that makes things faster and easier is good... |
| We should be releasing it soon. |
|
Originally Posted By ModulusArms:
You can't go wrong with the instructions either. That is the recommended way to go. If you decide to skip most of the drilling, then if you drill the trigger slot hole it will be the only one you NEED to drill. The order of the routering is done so you never need to start in any metal. Always in an open cavity whether its a drill hole or a previous routered area. If you decide to try to "Single Drill Hole Method" I would recommend: 1. Drill the trigger slot hole with the 19/64" drill bit all the way through the lower 2. Router the Fire Control Group 3. Router the Rear Shelf 4. Router the Trigger Slot 5. Drill the Safety, Trigger and Hammer holes. That's obviously simplified but would be the way to go. Once again, we recommend following the instructions and drilling all the holes. For those of you who are using hand drills and not a drill press, we have a new product we are in the process of releasing that will make things faster and easier. It will be a separate item that can be used with any of our Jigs. Stay Tuned. I just finished a billet lower using the above steps. It went fine and it looks beautiful. I haven't had a chance to put the LPK in it yet but the pocket milling is the nicest I've done yet. Of course part of that may be that I'm just more experienced now... This is my 2nd lower completed with the HD jig. I have the original jig that I'd used before. I have to say that the new HD jig just plain blows the old one away in convenience of the way it all goes together and the solidness of the feel. And don't get me wrong, the original jig is still a fine jig, as good if not better than probably any other router based jig on the market except the HD. |
|
Originally Posted By SoftwareJanitor:
Now that looks handy as hell! Even though I have a drill press, sometimes I need to drill stuff that I can't easily move to the drill press... Originally Posted By SoftwareJanitor:
Originally Posted By K1rodeoboater:
No idea if this is any good...but you could get something like this to attach to your handheld drill http://www.harborfreight.com/angle-drill-guide-95622.html Now that looks handy as hell! Even though I have a drill press, sometimes I need to drill stuff that I can't easily move to the drill press... I went to Harbor Freight but both of them in town were sold out... I did however find this. I had to order it because it isn't something they stock in the store... but it looks good. Probably more expensive than the Harbor Freight one, but available... http://www.homedepot.com/p/General-Tools-Drill-Guide-and-Chuck-36-37/100349264 |

|
Originally Posted By SoftwareJanitor:
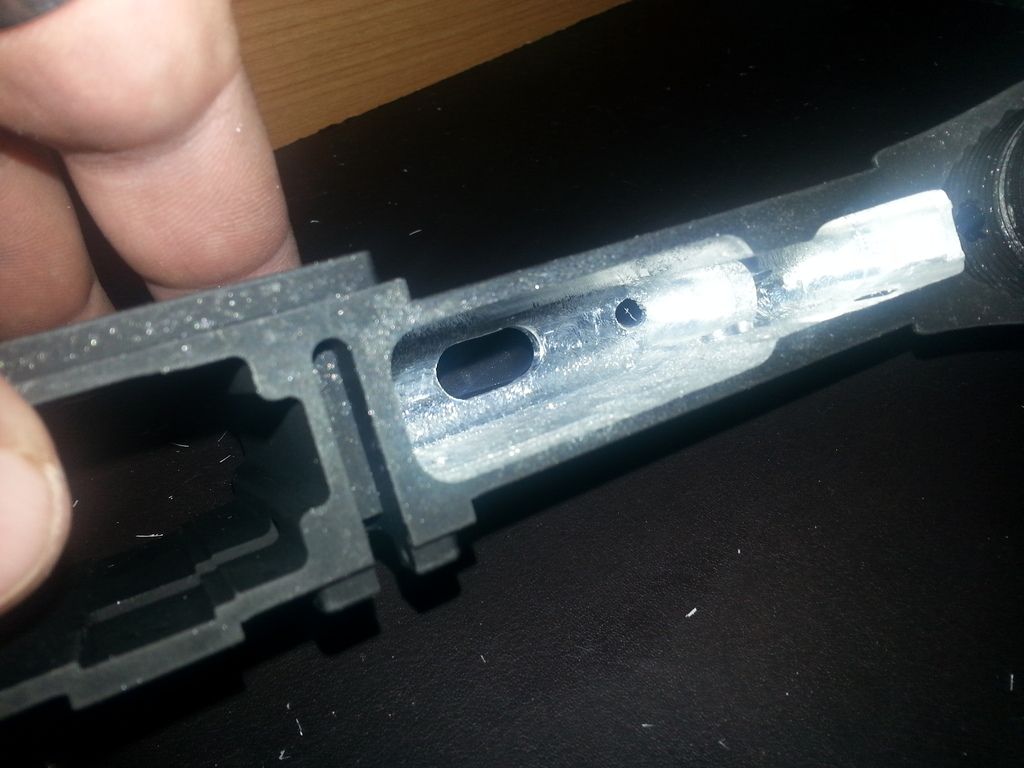
Here is a pic of the one I just completed... <a href="http://s914.photobucket.com/user/softwarejanitor/media/Mobile%20Uploads/20160211_084814_zpsv8o77am0.jpg.html" target="_blank">http://i914.photobucket.com/albums/ac341/softwarejanitor/Mobile%20Uploads/20160211_084814_zpsv8o77am0.jpg</a> Have you put LPK in it yet? It might be an illusion, but that trigger slot seems off |
|
Originally Posted By dfd277:
Have you put LPK in it yet? It might be an illusion, but that trigger slot seems off Originally Posted By dfd277:
Originally Posted By SoftwareJanitor:
Here is a pic of the one I just completed... <a href="http://s914.photobucket.com/user/softwarejanitor/media/Mobile%20Uploads/20160211_084814_zpsv8o77am0.jpg.html" target="_blank">http://i914.photobucket.com/albums/ac341/softwarejanitor/Mobile%20Uploads/20160211_084814_zpsv8o77am0.jpg</a> Have you put LPK in it yet? It might be an illusion, but that trigger slot seems off I test fitted a drop in trigger and it seemed fine. I think it may look a little off due to the angle I'm holding it at. I will be putting in an LPK with a mil-spec trigger tonight. The drop-in is going in an ar15mold poured polymer lower. |
|
Originally Posted By dfd277:
Yeah man it looked off in that pic. I can't wait to get mine going It might not be perfectly shaped but probably nothing that a little touch up with a small file can't fix. It is placed properly and is big enough to be functional from what I saw when I put the drop-in trigger in there. |
|
Originally Posted By dfd277:
Have you put LPK in it yet? It might be an illusion, but that trigger slot seems off Originally Posted By dfd277:
Originally Posted By SoftwareJanitor:
Here is a pic of the one I just completed... <a href="http://s914.photobucket.com/user/softwarejanitor/media/Mobile%20Uploads/20160211_084814_zpsv8o77am0.jpg.html" target="_blank">http://i914.photobucket.com/albums/ac341/softwarejanitor/Mobile%20Uploads/20160211_084814_zpsv8o77am0.jpg</a> Have you put LPK in it yet? It might be an illusion, but that trigger slot seems off I got it all assembled with LPK and butt stock. Passes all function tests. |
|
Originally Posted By SoftwareJanitor: I got it all assembled with LPK and butt stock. Passes all function tests. Originally Posted By SoftwareJanitor: Originally Posted By dfd277: Originally Posted By SoftwareJanitor: Here is a pic of the one I just completed... <a href="http://s914.photobucket.com/user/softwarejanitor/media/Mobile%20Uploads/20160211_084814_zpsv8o77am0.jpg.html" target="_blank">http://i914.photobucket.com/albums/ac341/softwarejanitor/Mobile%20Uploads/20160211_084814_zpsv8o77am0.jpg</a> Have you put LPK in it yet? It might be an illusion, but that trigger slot seems off I got it all assembled with LPK and butt stock. Passes all function tests. Did you use that drill guide with it or did you free-hand it? |
|
Originally Posted By K1rodeoboater:
Did you use that drill guide with it or did you free-hand it? Originally Posted By K1rodeoboater:
Originally Posted By SoftwareJanitor:
Originally Posted By dfd277:
Originally Posted By SoftwareJanitor:
Here is a pic of the one I just completed... <a href="http://s914.photobucket.com/user/softwarejanitor/media/Mobile%20Uploads/20160211_084814_zpsv8o77am0.jpg.html" target="_blank">http://i914.photobucket.com/albums/ac341/softwarejanitor/Mobile%20Uploads/20160211_084814_zpsv8o77am0.jpg</a> Have you put LPK in it yet? It might be an illusion, but that trigger slot seems off I got it all assembled with LPK and butt stock. Passes all function tests. Did you use that drill guide with it or did you free-hand it? It was done with the Modulus HD jig. Although the slot is a little sloppier than I'd like (my fault probably) I think it is mostly just an optical issue with the pic because the trigger fits fine in the slot. |
|
We just released the Patent Pending Modulus Arms Speed Drill. it is a drop in high-strength steel insert for all of the Modulus Arms Jigs designed to allow you to drill pilot holes. It is optimal for finishing lowers with hand drills and for people trying to save time and reduce any wear.
Instructions are located here. 
|
|
Originally Posted By SoftwareJanitor:
I just ordered one of the speed drill kits... anything that can make things faster and easier and save wear and tear on my jigs is a good thing... Let us know what you think when you take it for a ride. |
|
Originally Posted By ModulusArms:
Let us know what you think when you take it for a ride. Originally Posted By ModulusArms:
Originally Posted By SoftwareJanitor:
I just ordered one of the speed drill kits... anything that can make things faster and easier and save wear and tear on my jigs is a good thing... Let us know what you think when you take it for a ride. My order status changed to shipped this morning, so I am hoping to get it pretty soon. I have a billet lower all set up in my HD jig and ready to start drilling as soon as I get it. |
|
Originally Posted By ModulusArms:
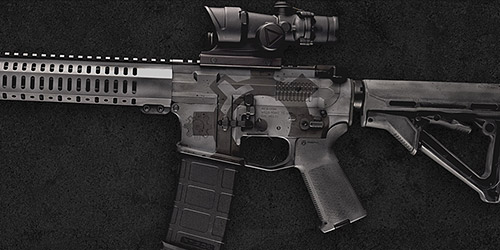
We just released the Patent Pending Modulus Arms Speed Drill. it is a drop in high-strength steel insert for all of the Modulus Arms Jigs designed to allow you to drill pilot holes. It is optimal for finishing lowers with hand drills and for people trying to save time and reduce any wear. Instructions are located here. http://cdn6.bigcommerce.com/s-vcwqbtp/products/160/images/731/DSC_0957__87928.1455587056.1280.844.JPG?c=2 Saw this on the 15th thought to myself hmm that may save some time and wear and tear so I ordered the kit and a few other tools/parts since I was paying the flat shipping either way, kit showed up today 
|
|
Originally Posted By zload:
Saw this on the 15th thought to myself hmm that may save some time and wear and tear so I ordered the kit and a few other tools/parts since I was paying the flat shipping either way, kit showed up today Originally Posted By zload:
Originally Posted By ModulusArms:
We just released the Patent Pending Modulus Arms Speed Drill. it is a drop in high-strength steel insert for all of the Modulus Arms Jigs designed to allow you to drill pilot holes. It is optimal for finishing lowers with hand drills and for people trying to save time and reduce any wear. Instructions are located here. http://cdn6.bigcommerce.com/s-vcwqbtp/products/160/images/731/DSC_0957__87928.1455587056.1280.844.JPG?c=2 Saw this on the 15th thought to myself hmm that may save some time and wear and tear so I ordered the kit and a few other tools/parts since I was paying the flat shipping either way, kit showed up today Excellent! Let us know how it works! I'm hoping mine is delivered soon because I have a lower all set up in my HD jig ready to go and a few more waiting... |
|
Originally Posted By SoftwareJanitor:
Excellent! Let us know how it works! I'm hoping mine is delivered soon because I have a lower all set up in my HD jig ready to go and a few more waiting... Originally Posted By SoftwareJanitor:
Originally Posted By zload:
Originally Posted By ModulusArms:
We just released the Patent Pending Modulus Arms Speed Drill. it is a drop in high-strength steel insert for all of the Modulus Arms Jigs designed to allow you to drill pilot holes. It is optimal for finishing lowers with hand drills and for people trying to save time and reduce any wear. Instructions are located here. http://cdn6.bigcommerce.com/s-vcwqbtp/products/160/images/731/DSC_0957__87928.1455587056.1280.844.JPG?c=2 Saw this on the 15th thought to myself hmm that may save some time and wear and tear so I ordered the kit and a few other tools/parts since I was paying the flat shipping either way, kit showed up today Excellent! Let us know how it works! I'm hoping mine is delivered soon because I have a lower all set up in my HD jig ready to go and a few more waiting... From our experience, it makes the wear basically non existent since you barely need to use any pressure and it takes 1/2 the time. If you are planning to use a hand held drill, this is really the way to go. |
|
Originally Posted By ModulusArms:
From our experience, it makes the wear basically non existent since you barely need to use any pressure and it takes 1/2 the time. If you are planning to use a hand held drill, this is really the way to go. Originally Posted By ModulusArms:
Originally Posted By SoftwareJanitor:
Originally Posted By zload:
Originally Posted By ModulusArms:
We just released the Patent Pending Modulus Arms Speed Drill. it is a drop in high-strength steel insert for all of the Modulus Arms Jigs designed to allow you to drill pilot holes. It is optimal for finishing lowers with hand drills and for people trying to save time and reduce any wear. Instructions are located here. http://cdn6.bigcommerce.com/s-vcwqbtp/products/160/images/731/DSC_0957__87928.1455587056.1280.844.JPG?c=2 Saw this on the 15th thought to myself hmm that may save some time and wear and tear so I ordered the kit and a few other tools/parts since I was paying the flat shipping either way, kit showed up today Excellent! Let us know how it works! I'm hoping mine is delivered soon because I have a lower all set up in my HD jig ready to go and a few more waiting... From our experience, it makes the wear basically non existent since you barely need to use any pressure and it takes 1/2 the time. If you are planning to use a hand held drill, this is really the way to go. My experience using the Speed Drill Kit is the same... 1/2 the time and the 3/8" drill cuts like butter. |
|
I've just finished my first of two the other night.
The drill template is thick enough that it works as a great guide to ensure you are drilling straight in to the pocket. I just used a standard corded hand drill and had no issues. Early on in the milling I did have the router jump on me since I wasn't accustom to this type of work yet. It ended up taking out three flutes forcing me to stop until I got more mill bits (Amazon has them as well). I think it took me around 4-5 hours total since I went pretty slowly and doing a 2-3 mill passes a night after getting off work. Not sure how you guys are doing this in two hours. The finished lower came out great. Now it's assembled and going to the range today. This one was built up with an ATI 5.56 upper and a standard parts kit. Next one may be a 300 blackout pistol (still deciding). |
|
Originally Posted By MMartian:
I've just finished my first of two the other night. The drill template is thick enough that it works as a great guide to ensure you are drilling straight in to the pocket. I just used a standard corded hand drill and had no issues. Early on in the milling I did have the router jump on me since I wasn't accustom to this type of work yet. It ended up taking out three flutes forcing me to stop until I got more mill bits (Amazon has them as well). I think it took me around 4-5 hours total since I went pretty slowly and doing a 2-3 mill passes a night after getting off work. Not sure how you guys are doing this in two hours. The finished lower came out great. Now it's assembled and going to the range today. This one was built up with an ATI 5.56 upper and a standard parts kit. Next one may be a 300 blackout pistol (still deciding). The first time I ever completed one it took 3.5-4hours. On your next one you will be under 3 hours. If you do as many as some of these guys you will get to 2 hours. :) |
|
Originally Posted By MMartian: I think it took me around 4-5 hours total since I went pretty slowly and doing a 2-3 mill passes a night after getting off work. Not sure how you guys are doing this in two hours. I'm down to around 1hr 15min now. I drill hole A and one of C, then go straight to the router. I also leave my jig partially assembled which helps to speed things up. |
|
Originally Posted By K1rodeoboater:
They were a lot more prevalent back in the 50's and 60's, sometimes sold with the corded drills, and only for 90 degrees (not adjustable for 45's or anything). They sort of disappeared after that point. They're not super accurate but they're better than doing it free-hand so long as the locking mechanism doesn't slip. Alternatively if you place a 90 degree square on your object you're drilling you'll find it's a LOT easier to get a 90 degree hole. Originally Posted By K1rodeoboater:
Originally Posted By ModulusArms:
Originally Posted By K1rodeoboater:
No idea if this is any good...but you could get something like this to attach to your handheld drill http://www.harborfreight.com/angle-drill-guide-95622.html That's cool. Never seen one of those. They were a lot more prevalent back in the 50's and 60's, sometimes sold with the corded drills, and only for 90 degrees (not adjustable for 45's or anything). They sort of disappeared after that point. They're not super accurate but they're better than doing it free-hand so long as the locking mechanism doesn't slip. Alternatively if you place a 90 degree square on your object you're drilling you'll find it's a LOT easier to get a 90 degree hole. Those Harbor Freight and similar angle drill guides have pretty awful customer reviews. I thought something similar for 90 degree holes (namely for the trigger holes) would be pretty smart. This seems to be the ticket - $21.47 shipped via Amazon Prime 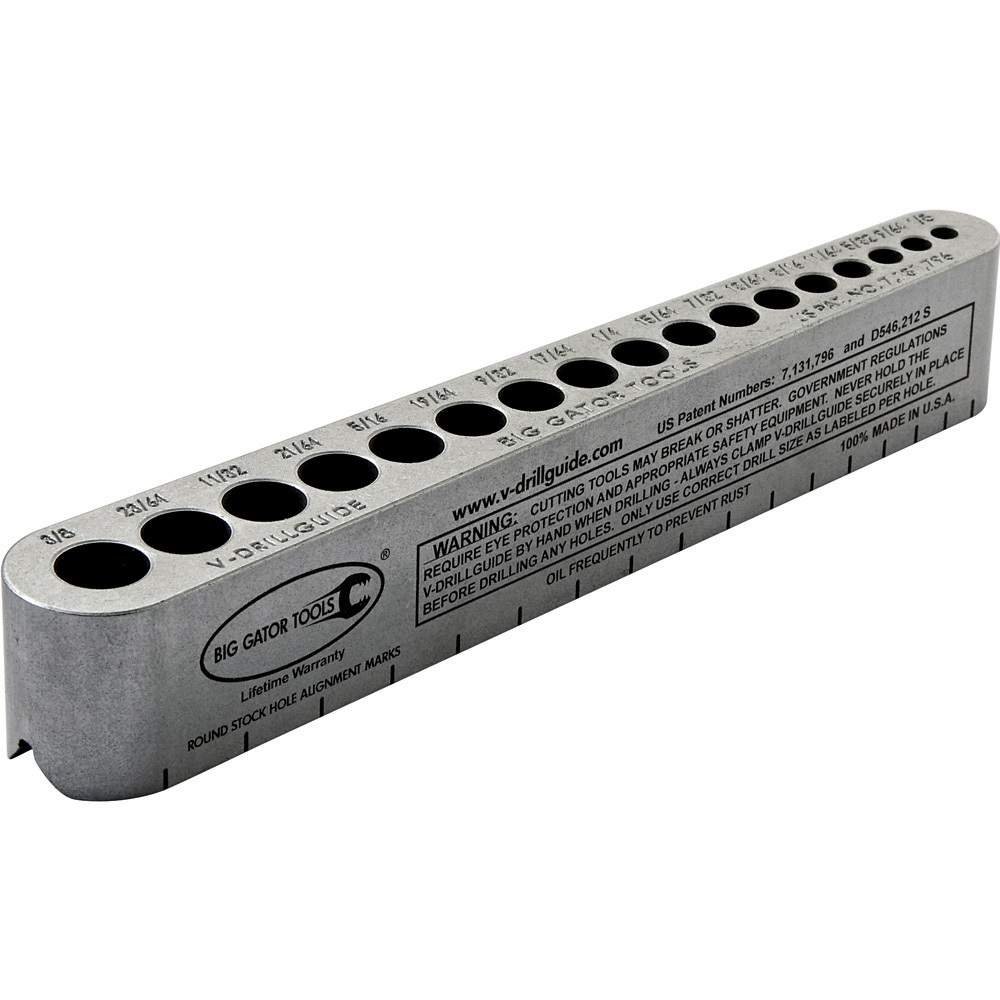
|
NRA Life Member
|
Originally Posted By troy_v:
Those Harbor Freight and similar angle drill guides have pretty awful customer reviews. I thought something similar for 90 degree holes (namely for the trigger holes) would be pretty smart. This seems to be the ticket - $21.47 shipped via Amazon Prime http://ecx.images-amazon.com/images/I/612o%2Br4lGgL._SL1000_.jpg Originally Posted By troy_v:
Originally Posted By K1rodeoboater:
Originally Posted By ModulusArms:
Originally Posted By K1rodeoboater:
No idea if this is any good...but you could get something like this to attach to your handheld drill http://www.harborfreight.com/angle-drill-guide-95622.html That's cool. Never seen one of those. They were a lot more prevalent back in the 50's and 60's, sometimes sold with the corded drills, and only for 90 degrees (not adjustable for 45's or anything). They sort of disappeared after that point. They're not super accurate but they're better than doing it free-hand so long as the locking mechanism doesn't slip. Alternatively if you place a 90 degree square on your object you're drilling you'll find it's a LOT easier to get a 90 degree hole. Those Harbor Freight and similar angle drill guides have pretty awful customer reviews. I thought something similar for 90 degree holes (namely for the trigger holes) would be pretty smart. This seems to be the ticket - $21.47 shipped via Amazon Prime http://ecx.images-amazon.com/images/I/612o%2Br4lGgL._SL1000_.jpg The drill guide has that built into it. |

|
Love the HD Jig!!!
Have now finished 4 and have a red and a blue anodized to do (plus several more unanodized). Use the single hole method thru the trigger slot and that is by far the easiest and nicest looking lower yet! Right around 1:15 from cold set up to finished lower and even quicker when you have several lined up and the pilot (trigger) hole already drilled! Couple of tricks: Keep these parts together all the time - Top plate, front takedown plate, left side plate - Rear plate attached to buffer tube disk (just barely loosen the two screws so it can screw out of the hole) - leave long screw in the right side plate - just back off enough to loosen out of Left Side plate. With this method you only take out 4 screws - you just loosen the two on the buffer tube disk. I like to do at least three at a time so the jig is almost totally set up and you just drop a lower in, tighten the side plate and go! 110% improvement over the Mark 1 Modulus Arms jig. Thanks guys for this upgrade! FH ETA: One caveat on the above tricks - this works when you are doing identical lowers. If you change brands then loosen the left side plate and recenter the two sides on the new lower. Do this once then leave the left plate alone! |
“It’s mandatory to get old, but only optional to grow up,”
Chief Warrant Officer 5 Ralph Rigby
Chief Warrant Officer 5 Ralph Rigby
|
Originally Posted By FontanaHorseman:
Love the HD Jig!!! Have now finished 4 and have a red and a blue anodized to do (plus several more unanodized). Use the single hole method thru the trigger slot and that is by far the easiest and nicest looking lower yet! Right around 1:15 from cold set up to finished lower and even quicker when you have several lined up and the pilot (trigger) hole already drilled! Couple of tricks: Keep these parts together all the time - Top plate, front takedown plate, left side plate - Rear plate attached to buffer tube disk (just barely loosen the two screws so it can screw out of the hole) - leave long screw in the right side plate - just back off enough to loosen out of Left Side plate. With this method you only take out 4 screws - you just loosen the two on the buffer tube disk. I like to do at least three at a time so the jig is almost totally set up and you just drop a lower in, tighten the side plate and go! 110% improvement over the Mark 1 Modulus Arms jig. Thanks guys for this upgrade! FH Thanks! We appreciate the kind words. |
| These are now in stock and shipping within three days! |
| We are now selling replacement parts for those who have had mishaps or lost parts. |
| These are currently in stock but we only have a few left. They won;t be available for another 14-21 days so if you are interested, now is the time to "pull the trigger". |
|
Originally Posted By ModulusArms:
These are currently in stock but we only have a few left. They won;t be available for another 14-21 days so if you are interested, now is the time to "pull the trigger". We are out of stock for another week on these. |
|
I got my second receiver done this past weekend. This one took around 3 hours maybe a little under that.
I did the standard instructions drilling out and then milling. I did do one slight variation which looks much better than my first one, On the rear takedown shelf I ended up going to the measured depth and then did another pass on the shelf around .005" more to clean and level the webbing spot leveling it with the shelf taking just the coating off. This left me with a completely flat and milled shelf. |
|
Originally Posted By FontanaHorseman:
Love the HD Jig!!! Have now finished 4 and have a red and a blue anodized to do (plus several more unanodized). Use the single hole method thru the trigger slot and that is by far the easiest and nicest looking lower yet! Right around 1:15 from cold set up to finished lower and even quicker when you have several lined up and the pilot (trigger) hole already drilled! Couple of tricks: Keep these parts together all the time - Top plate, front takedown plate, left side plate - Rear plate attached to buffer tube disk (just barely loosen the two screws so it can screw out of the hole) - leave long screw in the right side plate - just back off enough to loosen out of Left Side plate. With this method you only take out 4 screws - you just loosen the two on the buffer tube disk. I like to do at least three at a time so the jig is almost totally set up and you just drop a lower in, tighten the side plate and go! 110% improvement over the Mark 1 Modulus Arms jig. Thanks guys for this upgrade! FH ETA: One caveat on the above tricks - this works when you are doing identical lowers. If you change brands then loosen the left side plate and recenter the two sides on the new lower. Do this once then leave the left plate alone! Waiting for my HD to be shipped.... for reference please describe the "single hole method through the trigger slot" |
|
Originally Posted By Paxdad:
Waiting for my HD to be shipped.... for reference please describe the "single hole method through the trigger slot" Instead of drilling all the 3/8" holes with the drilling jig you can just drill the trigger slot pilot hole, the one that goes all the way through. Then you mill out the rest using the router. It is more work for the router but less work for drilling. If you don't have a drill press and don't have the speed drill kit then this is a pretty good way to go. If you have drill press or the speed drill adapter then it doesn't save as much time. |
|
Originally Posted By SoftwareJanitor:
Instead of drilling all the 3/8" holes with the drilling jig you can just drill the trigger slot pilot hole, the one that goes all the way through. Then you mill out the rest using the router. It is more work for the router but less work for drilling. If you don't have a drill press and don't have the speed drill kit then this is a pretty good way to go. If you have drill press or the speed drill adapter then it doesn't save as much time. Originally Posted By SoftwareJanitor:
Originally Posted By Paxdad:
Waiting for my HD to be shipped.... for reference please describe the "single hole method through the trigger slot" Instead of drilling all the 3/8" holes with the drilling jig you can just drill the trigger slot pilot hole, the one that goes all the way through. Then you mill out the rest using the router. It is more work for the router but less work for drilling. If you don't have a drill press and don't have the speed drill kit then this is a pretty good way to go. If you have drill press or the speed drill adapter then it doesn't save as much time. Back in stock! |
AR Sponsor