Posted: 10/29/2007 10:06:26 AM EDT
[Last Edit: mike_nds][Edited]
|
Whats the deal with your company name? Its very unusual. It must have some certain meaning. Please enlighten us? Kinda reminds me of Schlotzski's. Funny name, serious sandwich. |


Something I've always wanted to know but was too dumb to ask! 
|


Hmm, sounds like Harlan must have to been from around the Grand Forks area? Hehehe, sounds like that might be a good game for us North Dakotans, "Guess where Harlan's home town is." I used to raise small grains and flowers about an hour West of Fargo before I got married. The wife decided to re-enlist and go for a commission so I went back into the military and sadly away from ND. I used to raise small grains and flowers about an hour West of Fargo before I got married. The wife decided to re-enlist and go for a commission so I went back into the military and sadly away from ND. 
|

I just had to come and investigate, very interesting, I was expecting a spud gun.
Stuff here is very serious and you're right, the name will stay with me for some time to come. I'll tell a few others to come check this Industry Partner out... 
|
When my Green Laser Dot appears on your Forehead.You've already missed what just happened, Forever..
The Green has become Red, it's running down your face and into your eyes and the Green Laser is now shining out the back of your head. Ooooops!!!
The Green has become Red, it's running down your face and into your eyes and the Green Laser is now shining out the back of your head. Ooooops!!!
|
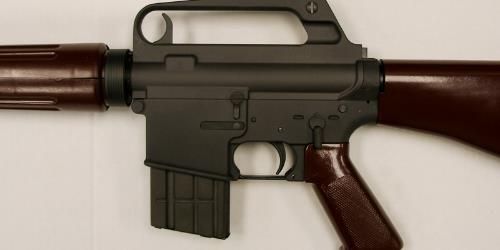
I'm putting the FSB mounting tutorial here so it doesn't get lost again. I'm going to mount the fsb on the barrel in the Century kit today. We will take pictures of each step, and give an explanation along with it. This is kind of the hillbilly method, and can be done on a drill press or mini-mill. 1. See if the fsb will slide on barrel, if not, sand /file barrel journal until a tight fit (tapped on with mallet) is achieved. I like it really tight so the fsb doesn't shift when drilling. If you make it too loose, you can use locktite to hold the barrel in the proper position. (it must cure overnight). Or you can take a pointed punch and dimple the area under the front leg to create a tighter fit.  2. Time up the fsb on the barrel. I'm using the calibrated eyeball method today (because I don't have a fixture). I mount the barrel to the receiver for this, and keep it mounted the whole time so I can check for shifting of the fsb. In my experience, I have found that I get the proper zero with the fsb canted slightly (1/2 degree maybe?) to the right. If I have it top-dead-center, it will shoot to the right, and I'll have to crank my rear sight to the left to compensate. All my GI barrels seem to have this cant built in. YMMV Make a mark with a punch or dremel on the underside so you can check to see if the fsb shifted during the process. Once you've drilled and reamed you are committed. 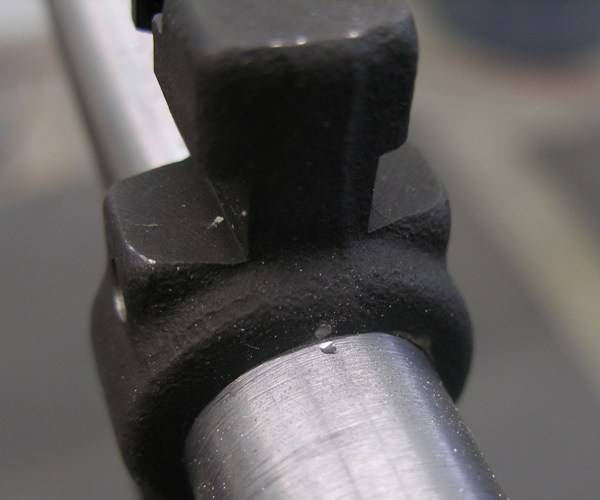 I also take a marker and put some lines on the side for back-up  3. Mount the barrel in a solid vise. I used v-blocks, but you can also use wood blocks made at home. Leveling the part is very important (on both planes) I used a gauge pin and a bubble level. Not the most high tech, but it is what most guys would have. Make sure to support the backside, so it doesn't cant the barrel in the vise. BRD's fixture would be preferred. 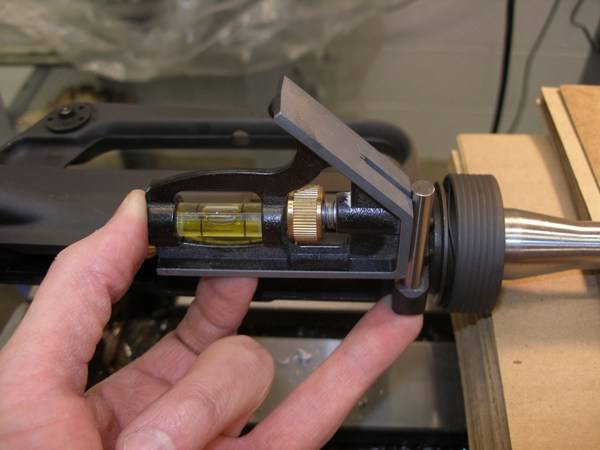 I also checked the fsb as well as I could with a smaller pin. Not precise, but it helps avoid an oops.  4. Because a drill bit will walk away from the barrel's radius (when using a pre-drilled fsb) , I flatten out the bottom of the hole with an 1/8" end mill.  Then I drilled it with a #31 drill bit. The small end of the 2/0 taper pin is .125", so you want to use a slightly smaller drill bit. Use lots of oil or cutting fluid. And blow the chips out of the hole.  5. Then I hand reamed the hole with the 2/0 spiral flute tapered reamer. Again, cleaning off the reamer and blowing out the hole often. Go slow, and check the depth of the pin before reaming more.  6. Leave at least an 1/8" of pin sticking out because it will go deeper when tapped in. You can always ream it more later. This pin hole needs to reamed a little more.  I ALWAYS DO ONE HOLE AT A TIME. That is; drill, ream, and finish pin the first hole before I even start on the second. This will keep the fsb from shifting on you and having your pins reamed at different angles. 7. This is where I stopped on the first pin. (before tapping it in) It proved to be a little deeper than I would have liked.  This is the difference in the finished depth after both were tapped in. Luckily, I found another pin in my parts box that was slightly different, and when installed was not as deep.  8. Sometimes, you will not come out on the backside exactly where you wanted. The angle can be slightly off, or the drill walks away from the barrel steel because its harder than the fsb. This is a cosmetic issue that is avoided by using an un-drilled fsb (the preferred method). I have never really liked using pre-drilled fsb's for this reason.  9. The fsb was taken off the barrel, and the barrel was plugged and parkerized. The fsb was not. 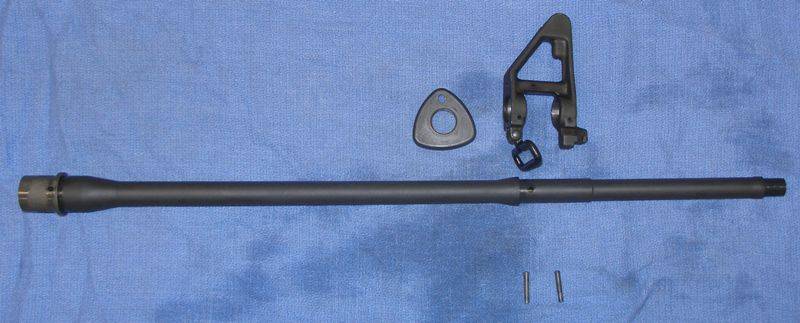  10. Then the rifle was reassembled.  
|
Yes, our parts are tight, we did that on purpose.
Don't sweat it. It's a service rifle, not a Fabergé egg. "Hognose'
Don't sweat it. It's a service rifle, not a Fabergé egg. "Hognose'