



Posted: 3/8/2026 5:43:59 PM EDT
[Last Edit: -Obsessed-][Edited]
|
Complete Filament Calibration Guide for FDM 3D Printing This guide explains how to fully calibrate a new filament for FDM 3D printing. Proper calibration ensures optimal surface quality, dimensional accuracy, and print reliability. Many users only calibrate temperature and flow rate, but filament performance also depends on moisture level, pressure advance, cooling behavior, and volumetric flow limits. This guide walks through a full calibration process in the correct order so that each step builds on the previous one. Read this guide. Digest it. Consider the reasoning behind each step, and why it builds in the order it does. Learning HOW to critically think about these processes instead of blindly (and mindlessly) following them will help you develop the “spidey senses” that you’ll be able to use to adjust advanced slicer settings in the future to achieve what you’d like. Don’t just follow the guide - become an expert on it. A Word on Auto-Calibration and “Generic” Filament Profiles Generic filament profiles and built-in auto-calibrations are convenient starting points, but they are rarely ideal for achieving optimal results in FDM 3D printing. These presets are designed to work “well enough” across a wide range of printers, filaments, and environmental conditions, which means they must make broad assumptions about material behavior and hardware performance. In reality, even filaments of the same type can vary significantly between brands, colors, and production batches, affecting factors such as extrusion temperature, flow characteristics, and cooling requirements. Additionally, differences in printer hardware—such as hotend design, nozzle material, extruder gearing, and part cooling—can greatly influence how a filament performs. Automatic calibration routines can help approximate certain parameters, but they typically test only a narrow set of conditions and cannot account for all real-world printing variables. As a result, relying solely on generic profiles or automated calibrations often leaves print quality, dimensional accuracy, and reliability below what can be achieved through thorough, filament-specific manual calibration. Overview: Calibration Order It is important to perform these calibrations in the correct sequence. Recommended Order: []Dry the filament []Dry the filament (Double Check) []Dry the filament (Triple Check) []Baseline printer check []Temperature calibration []Flow ratio (extrusion multiplier) []Pressure Advance / Linear Advance []Maximum volumetric flow rate []Retraction tuning []Cooling calibration []Overhang performance []Bridging calibration []Shrinkage / dimensional compensation []Surface quality tuning Performing these out of order can lead to inaccurate results. 1. Drying the Filament DO NOT SKIP THIS STEP. I DON’T CARE IF IT CAME IN A SEALED DESICCANT-LADEN BAG. DRY YOUR FILAMENT. 90%+ OF ISSUES WE FIX ON THIS FORUM ARE FROM WET FILAMENT. IF YOU’RE UNSURE IF YOUR FILAMENT IS DRY…IT’S NOT. EVEN IF YOU ARE SURE IT’S DRY, IT’S PROBABLY STILL NOT. Moisture is the most common cause of poor print quality. This picture is the exact same roll of filament, the exact same GCODE. Printed 12 hours apart, before, and after drying. Attached File Symptoms of wet filament include: []Stringing []Poor layer adhesion []Poor surface quality []Poor dimensional accuracy []Surface pitting (can sometimes look like a random z seam) []Inconsistent extrusion []Audible popping during printing Recommended Drying Temperatures: []PLA: 50°C for 12 hours []PETG: 65°C for 12 hours []ABS: 80-85°C for 12 hours []Nylon: 95°C for 12-24 hours Allow filament to cool inside the dryer before printing to avoid rapid moisture absorption. I recommend a dry box storage solution to keep your filament dry. NOTE: If you use LARGE contianers and standard silica desiccant, you are likely going to have more air than the desiccant can keep up with keeping dry. If you use a cheap hygrometer, make sure it reads 10-12% (whatever the minimum is for that unit). If it creeps above 15% that’s a tell-tale sign that your desiccant can’t effectively dry the air in the box, and you need to get a smaller box. I recommend 4L Cereal containers that are common on Amazon. There are dozens of designs for desiccant pods (many with build in bearings to allow feeding directly from the box) and there are also countless storage options for these containers. Printing directly from a dry box or actively drying/heating while printing is recommended for particularly hygroscopic materials, such as Nylon. 2. Baseline Printer Verification Before calibrating filament, verify the printer itself is properly tuned. Confirm the following: []Extruder steps/mm calibrated []Bed leveling complete []Nozzle clean and undamaged []Belts properly tensioned []Gantry is Level []Stable first layer []Machine calibrations are complete (resonance compensation, motor noise compensation, etc) Filament calibration cannot compensate for mechanical problems. 3. Temperature Calibration I personally don’t bother with Temp Tower calibration most of the time now that I’ve gained sufficient experience. Why? Because I print almost exclusively functional prints, and functional prints like heat. I print at the very top of the temperature range for a given filament (or sometimes even above), and only adjust as I need, for things like cooling performance or heat build up, etc. That said, this guide is meant to be complete, so I’ll cover the proper technique to calibrating it. It’s the FIRST thing you should dial in, as all the other calibrations can be greatly impacted by the temperature. Goal: Find the temperature that provides (for general printing) the best balance between: []Layer adhesion []Surface quality []Minimal stringing Common Method: Temperature Tower Print a tower where temperature changes every 10mm or so. Typical step size: 5°C Example range for PLA: 190–220°C Evaluate each section for: []Surface quality []Bridging performance []Stringing []Layer bonding []Heat build up (often manifesting as curled corners) Choose the lowest temperature that still provides strong layer adhesion for general printing. For maximum strength, you want the highest temp (and lowest fan speeds) that give you dimensional accuracy. 4. Flow Ratio / Extrusion Multiplier Flow ratio determines how much filament is extruded relative to slicer expectations. Goal: Achieve correct line width and wall thickness. There is a lot of contention on the best calibration for this. I won’t get into the merits of each as my opinion is unimportant. Is what I’ll share is a “middle ground” approach that blends tactile/visual inspection with a bit of objectivity to help bridge the gap between the two camps of thought here. Recommended Test: Archimedean Chords YOLO Test Steps: []Go to your favorite site and download a YOLO Calibration profile. I may end up providing mine if there is demand. []Print these YOLO tiles. Generally it’s something like 5 to 10 tiles, each with a flow ratio printed on it (1.00, 0.99, 0.98, etc) or a flow ratio deduction printed on it (0, -1 (which is 0.99), -2 (which is 0.98), etc). You’ll set the top surface to Archimedean Chords. []NOTE: Make sure your slicer is set to by object flow ratio, and that the flow ratios line up with the proper labeling on the tiles. If you’re in advanced/expert/developer mode (depending on slicer) you will have an option for “top surface flow ratio.” SET THIS TO 1.00. This is NOT an override setting, it’s a multiplier of the object’s flow ratio. You don’t want to further modify the flow ratio for the top surface, so set this to 1.00. []After printing, look for the tile with the lowest bump where the center circle meets the outside concentric lines on the RIGHT side of the circle. The lowest visible bump is the winning tile. The correct flow ratio is this tile’s flow ratio +0.01 (so if the -3 tile is the winner, which is a 0.97 flow ratio, then the correct flow ratio for your filament is 0.98.) Example Images: Attached File Attached File 5. Pressure Advance/Linear Advance/K-Factor/Flow Dynamics Calibration All these terms describe what is commonly known as Pressure Advance. Pressure advance compensates for pressure buildup in the hotend during acceleration and deceleration. When inaccurately calibrated, you’ll get thin spots and thick spots around corners, leading to dimensional inaccuracy and overall corner weakness. Symptoms of incorrect values: []Bulging corners []Rounded edges []Inconsistent line width The ideal value produces: []Sharp corners []Consistent extrusion []No gaps or bulges Recommended Calibration Method: Pressure Advance Tower I personally use a custom model for this calibration, which is largely the same as the built-in tower in OrcaSlicer and Bambu Studio. The difference is I have a consistent (across all filament types) tower height and K-Factor Range (0.00-0.60) on a 60mm tower so I never have to worry about which starting and ending range I selected. I know EVERY tower in this house that I’ve printed is the same exact parameters, and as a bonus it makes reading it easy. If it’s asked for, I can make my file and custom layer GCODE available. []IMPORTANT: You must temporarily remove layer time limitations on your filament profile to get an accurate PA calibration. Go to your filament settings, under cooling, and make the mimum layer time 1s and uncheck "Slow printing down for better layer cooling." []Run PA Calibration. Tower will have corners of varying angles to compare. The K-Factor changes by height. []Determine which height produces the cleanest corners. Note each corner may have slightly different values; find the best overall “middle ground.” []Measure the height of your idea height and find the corresponding K-factor that was assigned to that layer. THAT is your K-factor to plug in for proper PA behavior. Attached File Attached File BAMBU USERS: To my fellow Bambu bretheren, you MUST make sure you’re setting your filament profiles up correctly, otherwise your K-factor will NOT be used for your prints! There is a LOT of nuance in this area, which is annoying, but there is at least some logic behind it. Given Bambu can print directly from their Bambu Handy App, they wanted a way to ensure filament profiles properly capture K Factor. They decided to encode it at the firmware level to read from the AMS settings first (which is accessible to the printer when it receives a job regardless of whether that job came from BBS, OS, or Bambu Handy). I can go into details if anybody wants, but the general rule of thumb is the printer will use this workflow and find the first K-Factor it finds. Once it finds one, it stops, so earlier items on this list supercedes later items: Flow Dynamics Calibration @ Time of Print > AMS Flow Dynamics Setting > K-factor stored in the filament profile in OrcaSlicer (Bambu Studio no longer has this as a setting) > Generic K-factor (0.2 for everything except PETG, which is 0.4 as of mid 2025). 6. Maximum Volumetric Flow Rate Every filament has a maximum melt rate determined by hotend capacity and material viscosity. There are “high flow” hotends, but there are ALWAYS trade offs in using these. They ooze more, and usually the design makes clogging with CF or GF filaments much more likely on a 0.4mm nozzle (I’ve never had issues with HF0.6mm nozzles, having logged over 10k hours on them, many of which were PETG-CF). Calibrating these hotends are the same regardless of whether they are standard flow or high flow. Exceeding maximum volumetric flow rate limit causes: []Under-extrusion []Weak layers []Surface artifacts []Some filaments have a sheen change (like PETG going from glossy to matte) when they’ve been pushed too far Common Test: Volumetric Flow Tower Not much of a tower, but it’s usually a lengthy ribbon which has increasing speeds with each layer. Plenty of options out there, and this calibration is built into both BBS and OS. NOTE: You must also temporarily modify your filament profile for this calibration as well. Set minimum layer time to 1s and uncheck “Slow Printing Down for Better Layer Cooling.” Typical ranges for standard flow hotends (HF hotends can be up to double these): []PLA: 14–24 mm³/s []PETG: 12–20 mm³/s []ABS: 12–20 mm³/s Set the slicer volumetric limit slightly below the failure point. Special note on PETG: PETG is often limited by print speed vs. Max Flow Rate. PETG layer adhesion falls off a cliff above a certain speed, and you’ll start to experience “tearing” when the filment is pulled away from the intended extrusion line by the nozzle’s movement. Every PETG filament is different, but this can be as low as 100mm/s on some printer/filament combos, or can be as high as 250mm/s. PETG HS remedies this (and max flow rate) to a point, but there are other trade offs there as well. 11. Shrinkage and Dimensional Accuracy Different materials shrink at different rates during cooling. This can affect: []Clearances/fit []Mechanical assemblies []Large prints Common Method: Print a dimensional calibration bar (for example, a generic 10x10x100mm bar) always laying down so the long side runs along the print bed. Measure the actual length and compare it vs. the target length. For example, if you read 99.5mm, you have experienced 0.5% shrink (which is about what ABS typically shrinks). You enter this value as a percent of target size in the slicer (a bit backwards and opposite of flow ratio). So you’d enter 99.5%. NOTE: Slicers are blind to this compensating behavior on the Prepare/Layout tab when placing parts on the build plate. Be sure to give adequate clearance to each part if you’re printing with a filament that has shrinkage as the slicer will blow the parts up to compensate for shrink and your parts may inadvertently intersect! Alright. Once you have made it this far, the basic calibration process is complete. You can keep going if you run into particular problems during certain prints. I GENERALLY know what each of these settings should be and tend to customize them print by print based on what I’m printing. Optional (as needed): Retraction Calibration Retraction prevents oozing during travel moves. Symptoms of incorrect settings: []Stringing []Blobs at travel points []Under-extrusion after retraction Common Tests: []Retraction tower []Stringing test with spaced pillars Tune: []Retraction distance []Retraction speed Direct drive systems typically use shorter distances than Bowden setups. Optional (as needed): Cooling Calibration Cooling strongly affects print quality and overhang performance. Goal: Use the minimum cooling necessary for good geometry. Excessive cooling can weaken layer adhesion. Common Test: Cooling tower where fan speed increases per segment. Evaluate: []Surface finish []Overhang quality []Layer bonding Optional (as needed): Overhang Performance Overhang capability depends on temperature, cooling, and layer height, and of course, the filament family you’re printing with (PLA overhangs much better than ABS for example). Common Test: Overhang tower with increasing angles (angles are measures from vertical as is the standard): []45° []50° []55° []60° []65° []70° Note the steepest angle that maintains acceptable quality. This is a helpful calibration for when you jump into CAD and you design your own models. Also understand that what works for you might not work for everyone so try to maintain a reasonable overhang threshold if you plan on publishing your model. Optional (as needed): Bridging Calibration Bridging performance depends on: []Temperature []Cooling []Bridge speed []Bridge flow []Material type Common Test: Bridge length tests with spans of increasing distance. Adjust slicer bridge settings until sagging is minimized. Slicers have come a long way in this realm and the common consensus is SLOW DOWN the print (just a couple years ago, speeding up was the consensus, which I always thought was silly). Most generic profiles already have pretty decent bridging parameters these days, but still, tune as necessary. Optional (as needed): Surface Quality and Fine Tuning Final adjustments optimize cosmetic quality. These could potentially be coupled with a slicer setting guide more so than a filament calibration guide, but these are at least something to keep in mind…filament profiles aren’t the ONLY thing that matter. Parameters to consider: []Outer wall speed []Acceleration []Jerk settings []Layer height []Ironing These adjustments are optional but can significantly improve print appearance. Final Notes Backup your machine and filament profiles. Recovering them sucks. 
|
|
P2S for my first one (implying there will be others. RIP my bank account ). They didn't have the AMS combo in stock. So, I just grabbed the printer for now. AMS HT and filament buffer on the way. Definitely, still have the training wheels on, as the most complicated thing I've done so far is download a file from printables, import and convert the file in Bambu slicer, and send it over to the printer. Only used PLA, and it went well. But, I was able to see the print quality degrade as the filament absorbed moisture over the next 12+ hours. |
|
Originally Posted By mitsuman47: P2S for my first one (implying there will be others. RIP my bank account ). They didn't have the AMS combo in stock. So, I just grabbed the printer for now. AMS HT and filament buffer on the way. Definitely, still have the training wheels on, as the most complicated thing I've done so far is download a file from printables, import and convert the file in Bambu slicer, and send it over to the printer. Only used PLA, and it went well. But, I was able to see the print quality degrade as the filament absorbed moisture over the next 12+ hours. Get yourself a drybox setup now. You'll be glad you did later. I still have some final touches. But it's serviceable. Attached File |

|
Love this thread. I'm looking forward to implementing the changes in the filament settings! I'll second the dry box setup. I started with Walmart and Sterilite 20Qt boxes because they are on sale for just under $7 and hold 4 spools. Given I just got my P2S, Something is better than nothing!  I'll be doing the cereal boxes for others as I get more established. ETA: Oh, and my wife is all excited about this and already talking about our next printer.
|
Louis L'Amour, “To make democracy work, we must be a nation of participants, not simply observers. One who does not vote has no right to complain.”


|
I'm starting the process of filament calibration and I've looked at the various temp towers on Makerworld but having a hard time deciding on which one. Some of the posted comments are less than spectacular. I want to print your dry box project with PETG. I get a lot of spider webbing with it and thought doing a temp tower would help to dial that in. Can you make a recommendation? |
|
Originally Posted By mvintx: I'm starting the process of filament calibration and I've looked at the various temp towers on Makerworld but having a hard time deciding on which one. Some of the posted comments are less than spectacular. I want to print your dry box project with PETG. I get a lot of spider webbing with it and thought doing a temp tower would help to dial that in. Can you make a recommendation? Sure. But first...did you dry it for 12+ hours at 65C? |
|
I sure did, a couple of days ago and then I put it in a dry box. But I think it needs more drying because the hygrometer says 21%. Needs more I guess. I dried the PA6CF for 24 hrs at 85° and it reads 13%. Probably need to dry it another 24 hrs. |
|
Originally Posted By mvintx: I sure did, a couple of days ago and then I put it in a dry box. But I think it needs more drying because the hygrometer says 21%. Needs more I guess. I dried the PA6CF for 24 hrs at 85° and it reads 13%. Probably need to dry it another 24 hrs. Does the box have desiccant in it? If it has enough desiccant it should absolutely not be reading that high. Remember the hygrometer measures the air not the filament. Here is the temp tower I used to use back when I used them. This same design has been recycled for years, but this particular one has the different temp ranges for each filament type and has the 3MF files setup for the layer change gcode so you don't have to bother doing that yourself. Temp Towers |
Printing a PETG temp tower was a great learning experience and although the print quality was not that much different from 222-260°, I learned a great deal about inserting G codes for the temp changes. Had to make a bunch of notes though because I don't think I'll be able to do that from memory. The bottom tore off when I pulled it off the plate. |
|
Originally Posted By mvintx: Printing a PETG temp tower was a great learning experience and although the print quality was not that much different from 222-260°, I learned a great deal about inserting G codes for the temp changes. Had to make a bunch of notes though because I don't think I'll be able to do that from memory. The bottom tore off when I pulled it off the plate. https://i.imgur.com/Lrtexwr.jpeg You have to be careful with PETG. Many brands adhere so strongly to PEI that it can rip the PEI off the steel sheet. So be careful. A trick you can use is to spray the sheet with Windex before printing PETG. Windex acts as a release agent. However PLA will NOT stick after. This is another reason why many of us have multiple sheets. I keep one for PETG and one for everything else. You could also use liquid glue, which acts as an adhesive when hot and a release agent when cool. The GCODE thing gets easier with time..obviously if you're used to coding, etc, that helps too.  Keep experimenting and learning. I still do.
|
|
Good idea on an extra plate. Should I get another textured PEI or Engineering plate? The Cool plate super tack pro says it has improved adhesion for PLA and PETG. Bambu Cool Plate SuperTack Pro |

Here is a YouTube video of the process in orca slicer. Use the order of tests obsessed gives above, though. 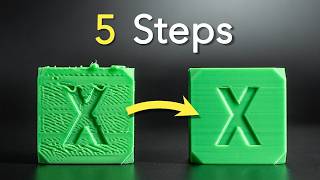 Filament Calibration Masterclass – 95% do it wrong! |
|
Originally Posted By mvintx: Good idea on an extra plate. Should I get another textured PEI or Engineering plate? The Cool plate super tack pro says it has improved adhesion for PLA and PETG. Bambu Cool Plate SuperTack Pro Sorry never saw this. Up to you really. I like having flexibility so I have two textured PEI plates and an engineering plate, which is pretty similar to the Prusa Satin plate. I don't see the need for supertack unless you print really long PLA parts. Of all materials, that's oddly the one that tends to warp off textured PEI the worst. |

|
The video posted above recommends to avoid calibrating flow ratio by measuring a single wall thickness because of the potential for error like this: Attached File This is inline with my reasoning which is why I don't use this method, but I thought I'd do a little experiment to see just how bad it actually is. I printed a cube in vase mode from ABS at 45mm/s wall speed on my Core One and then cut three of the walls away leaving me with just one wall. I was careful to try and push the burr towards the inside of the box for the next part. Attached File I brought the sample down to the metrology lab and fired up the old optical comparator. Attached File Attached File Attached File Unfortunately I had to rest a pick on top of the sample because the cooling fans for the lights were blowing directly on the part and causing it to wobble too much to get an accurate reading. This caused a slight amount of bowing which is apparent in the images. Here's what it looks like at 50X magnification: Attached File Actually much better than I had anticipated. The right side of the image is slightly out of focus because it was extremely difficult getting the part perfectly inline with the lens just by hand, but thats ok for this demo because the right side is where the burr from cutting was anyway so I tried to ignore it as much as I could. Zooming in a little further. This is one of the best sections. Each tick mark is 0.1mm at 10X mag. I am at 50X mag so each tick should correspond to .002mm. My line width was set to 0.45mm in the slicer and counting the divisions on the scale I get approximately 2.2mm, which divided by 50 equals .044mm. I measured the sample with micrometers and got 0.043-0.045 variance across the length of the part. Attached File Here's one of the worse sections: Attached File This is toward the bottom of the part which should in theory be the most stable during printing. You can see a few layers of varying line thickness as well as some curvature (keeping in mind this is likely being caused by the pick resting on top). I will note that the flow ratio for this material was calibrated using the YOLO method (which to be fair is subjective) but measuring with micrometers does confirm the wall thickness. If you choose to calibrate by measuring the wall then be sure to take several measurements around the part and average them together. The biggest complaint I have with measuring single wall thickness is with carbon fiber material, the fibers will stick out past the actual plastic extrusion and give false readings which will lead to under extrusion. Some brands are worse than others. I have had much more consistent results with carbon fiber and my Glock frames have been stronger since changing my flow ratio calibration method to yolo. When I have more time I would like to repeat this test with carbon fiber and see exact how far they protrude from the parent material. Anyway the point of this post is not to try and convince anyone to switch to yolo, just to share the results of my test which I found to be interesting. Let me know if you'd like to see more. |
|
Originally Posted By mvintx: Many of us on this forum appreciate the lengths you go to for us mere mortals. Will doing the YOLO test on carbon fiber - without an optical comparator - be of any value? That was kind of my point. Measuring the single wall thickness can work well for standard filaments but the carbon fibers sticking out the sides can give you false readings and lead to underextension. Doing the yolo test here has proven to be more reliable for me. YMMV This is a rail section from one of my PA6-CF Glock frames that was printed using the single wall measurement method. It broke here after only a few magazines and cracked in other places after a couple hundred rounds. After recalibrating flow ratio with the yolo method, the extrusion multiplier increased by something like 0.1 which is pretty significant. If you look closely you can see signs of under extrusion. Attached File Of course you don't need an optical comparator to do calibrations. I was just interested in seeing how closely the layers stacked up with each other. I was actually pretty surprised at how consistent they are. |
|
I had a little trouble understanding the correction factor you applied to the flow ratio. I Did the YOLO with Polymaker PETG. There are 11 tiles marked from +.05 thru -.05. The best looking tile is marked -.03. The top surface flow ration in Bambu Studio default setting is 1. I left it at that. The default flow ratio in filament settings if .95. Is my desired flow ratio .97 (1.00 minus .03) or .92 (the default .95 minus .03)? And if you'd be so kind to lend me you file for the Pressure Advance Tower. |
|
Originally Posted By mvintx: I had a little trouble understanding the correction factor you applied to the flow ratio. I Did the YOLO with Polymaker PETG. There are 11 tiles marked from +.05 thru -.05. The best looking tile is marked -.03. The top surface flow ration in Bambu Studio default setting is 1. I left it at that. The default flow ratio in filament settings if .95. Is my desired flow ratio .97 (1.00 minus .03) or .92 (the default .95 minus .03)? And if you'd be so kind to lend me you file for the Pressure Advance Tower. Before you start, make sure the filament flow ratio is set to 1.00 in the filament profile. Also make sure the top surface flow ratio is set to 1.00, if you have that setting. Then, match object flow ratio with each of the tiles. - 1 is 0.99, etc. Then whichever tile is the first tile with the faintest bump, that's the correct tile to base this test from. Take that tile's flow ratio, and add 0.01 to it. That's the proper flow ratio. If you have other flow ratios, you're multiplying flow ratios and then things go sideways fast. I recon setting everything to 1.00 and only adjusting the object flow ratios for the cleanest, easiest to understand results. The good news is you can get one 3MF set up with all the pepper settings and then save it off. That's what I do. Same with pressure advance. I'll list the pressure advance STL and code here in awhile. Busy with something at the moment. |
|
Originally Posted By -Obsessed-: Before you start, make sure the filament flow ratio is set to 1.00 in the filament profile. Also make sure the top surface flow ratio is set to 1.00, if you have that setting. Then, match object flow ratio with each of the tiles. - 1 is 0.99, etc. Then whichever tile is the first tile with the faintest bump, that's the correct tile to base this test from. Take that tile's flow ratio, and add 0.01 to it. That's the proper flow ratio. If you have other flow ratios, you're multiplying flow ratios and then things go sideways fast. I recon setting everything to 1.00 and only adjusting the object flow ratios for the cleanest, easiest to understand results. The good news is you can get one 3MF set up with all the pepper settings and then save it off. That's what I do. Same with pressure advance. I'll list the pressure advance STL and code here in awhile. Busy with something at the moment. Thanks. I did not set the filament flow ratio to 1.00 so I'll run the Yolo's again. My tiles are marked .02, .03, etc. instead of having the ratio on them....makes it a little confusing. |
|
Originally Posted By mvintx: Thanks. I did not set the filament flow ratio to 1.00 so I'll run the Yolo's again. My tiles are marked .02, .03, etc. instead of having the ratio on them....makes it a little confusing. I'll share my 3MFs for pressure advance and Yolo tonight. My Yolo tiles have the flow ratio printed on them for more clarity. |
|
Originally Posted By mvintx: I had a little trouble understanding the correction factor you applied to the flow ratio. I Did the YOLO with Polymaker PETG. There are 11 tiles marked from +.05 thru -.05. The best looking tile is marked -.03. The top surface flow ration in Bambu Studio default setting is 1. I left it at that. The default flow ratio in filament settings if .95. Is my desired flow ratio .97 (1.00 minus .03) or .92 (the default .95 minus .03)? And if you'd be so kind to lend me you file for the Pressure Advance Tower. Your filament flow ratio is 0.922 The top surface flow ratio overrides that. If you want a smoother top you can lower it by .02 or .03. Generally leave it at 1.0. |
|
Google Drive of Print Profiles / 3MFs Here you'll find the K-Factor calibration and the Flow Ratio tiles (both in 3MFs). Here is the relevant Gcode line you need on layer change for the K-Factor calibration. Just this one line does what you need: M900 K{min(0.060, 0.001 * (floor(layer_z) + 1))} This will make it such that the first mm of layer height = 0.001, second mm is 0.002, so on and so forth. The 60th (aka last mm) is 0.060, so every k factor calibration goes from 0 to 0.060, which should basically cover everything. Make sure you are overriding your filament profiles to allow fast enough printing. Ideally you want at least 150mm, but I've tested it as low as 50mm...the K-Factor results are the same, but the results are more pronounced the faster you print. |
|
Originally Posted By -Obsessed-: Google Drive of Print Profiles / 3MFs Here you'll find the K-Factor calibration and the Flow Ratio tiles (both in 3MFs). Here is the relevant Gcode line you need on layer change for the K-Factor calibration. Just this one line does what you need: M900 K{min(0.060, 0.001 * (floor(layer_z) + 1))} This will make it such that the first mm of layer height = 0.001, second mm is 0.002, so on and so forth. The 60th (aka last mm) is 0.060, so every k factor calibration goes from 0 to 0.060, which should basically cover everything. Make sure you are overriding your filament profiles to allow fast enough printing. Ideally you want at least 150mm, but I've tested it as low as 50mm...the K-Factor results are the same, but the results are more pronounced the faster you print. Thanks vey much. I'm running your Flow Ratio right now with ABS (it's what happened to be in the machine) |
|
Originally Posted By mvintx: OK, check my math skills here; Polymaker ABS, best tile is .92, (I forgot to slow the print speed to the recommended 30-50 mm/s) 1.00-.07=.93 x the default setting .95 = .8835 flow ratio Seemed like a low number in my limited experience The test is really best done with the filament flow ratio set to 1.00, as I've mentioned twice now. And define best. you're not looking for the best. You're looking for the first tile (from the lower end, counting up) that exhibits an obvious ridge on the right side of the circle. |
|
Originally Posted By -Obsessed-: The test is really best done with the filament flow ratio set to 1.00, as I've mentioned twice now. And define best. you're not looking for the best. You're looking for the first tile (from the lower end, counting up) that exhibits an obvious ridge on the right side of the circle. Yes, I paid attention. Both the top surface flow ratio and filament flow were set to 1.00. It was the print speed I forgot to set to Polymakers spec of 30-50 mm/s. And I thought I was looking for the ridge on the right side to disappear or at least be the lowest...not sure where I got that idea. The first obvious ridge from the lower end would be .95. That makes the flow ratio .903. (1.00-.05x.95) |
|
Originally Posted By mvintx: Yes, I paid attention. Both the top surface flow ratio and filament flow were set to 1.00. It was the print speed I forgot to set to Polymakers spec of 30-50 mm/s. And I thought I was looking for the ridge on the right side to disappear or at least be the lowest...not sure where I got that idea. The first obvious ridge from the lower end would be .95. That makes the flow ratio .903. (1.00-.05x.95) Where are you getting that math? If your filament flow ratios are set to 1.00 as they should be, and 0.95 was the first tile with a visible bump, the flow ratio is 0.96, it's simply 0.01 higher than the tile value. |
|
Originally Posted By -Obsessed-: Where are you getting that math? If your filament flow ratios are set to 1.00 as they should be, and 0.95 was the first tile with a visible bump, the flow ratio is 0.96, it's simply 0.01 higher than the tile value. Sorry. I guess I mis-interpreted your previous posts. If it's as simple as adding .01 then I'm good with that. Sorry for being so obtuse. I blame it on my advanced age. |
|
Setting the filament profile to 1.00 is just extra an extra step. Dont fear the math. https://www.obico.io/blog/flow-rate-calibration-orca-slicer-comprehensive-guide/ From Ellis' print tuning Attached File |
|
Originally Posted By Tholo: Setting the filament profile to 1.00 is just extra an extra step. Dont fear the math. https://www.obico.io/blog/flow-rate-calibration-orca-slicer-comprehensive-guide/ From Ellis' print tuning https://www.ar15.com/media/mediaFiles/246073/1000017266_png-3749221.JPG Until you realize many can't do math. Or the slicer changes the logic as an override VS multiplier. It takes 2 seconds to change it. |
|
I've been playing with the Adaptive Pressure Advance in the newest OrcaSlicer update. I seem to like it so far. It's really obvious when you print tests at 2K accel and 7K accel or higher how much the PA value can change. Basically you run PA tests at each acceleration your printer runs at for inner walls, outer walls, infill, etc. In my case it was 2K, 3K, and 5K. At each acceleration you're also running a different flow rate, so I had 4 different flow rates to test from my min to max setting. You end up with 12 PA tests then you pick which PA value suits the filament for that acceleration and flow. Oh, forgot to mention you can't do it with Bambu printers only ones that are running Klipper like my QIDI P4. |
|
I just fire another roll of Inland basic pla in there and it does its auto-calibration and goes to town. I live in a humid environment and I have never had a failed print and I print a lot of stuff. I did move it to the basement where I have a dehumidifier and its usually around 50% humidity there during the summer. I will get the occasional string but nothing a quick shot with a butane lighter doesn't just take care of. I'm mostly printing hobby stuff for wargames, terrain and whatnot. I'm sure there are situations where I'd want to manually do stuff. |

|
Ok instead of clogging up the other thread, I’m trying to actually get this PA6-CF dialed. I dried it at 100C for about 18hrs starting Sunday afternoon and it’s been in a 70C dryer since then while I fail to successfully print a FTN5. 300C nozzle, 120C bed temp, 50C chamber, 30mm/s in a 0.6mm nozzle at 0.2mm layer height and 0.65mm line width across the board. I need some help interpreting these flow and PA calibrations: This is the fine flow cal centered at 0.96, and to me the 0.95-0.94 looks and feels the best. That seems low to me. Attached File Next is PA cal. These all look identical to me. Attached File Is this a heat issue? What do I need to look at next? |
The hardest part about a zombie apocalypse will be pretending I'm not excited.
|
Originally Posted By thezentree: Ok instead of clogging up the other thread, I’m trying to actually get this PA6-CF dialed. I dried it at 100C for about 18hrs starting Sunday afternoon and it’s been in a 70C dryer since then while I fail to successfully print a FTN5. 300C nozzle, 120C bed temp, 50C chamber, 30mm/s in a 0.6mm nozzle at 0.2mm layer height and 0.65mm line width across the board. I need some help interpreting these flow and PA calibrations: This is the fine flow cal centered at 0.96, and to me the 0.95-0.94 looks and feels the best. That seems low to me. https://www.ar15.com/media/mediaFiles/142455/IMG_1936_jpeg-3810412.JPG Next is PA cal. These all look identical to me. https://www.ar15.com/media/mediaFiles/142455/IMG_1935_jpeg-3810414.JPG Is this a heat issue? What do I need to look at next? @thezentree You're doing the wrong version of both calibrations. For flow, do the YOLO test. it's not nearly as subjective. For K Factor, do the tower, not the herringbone. The herringbone pattern is notoriously unreliable. Instructions for both are in first post.  Then read post #27 and post #30. Then, I think you'll be equipped to do what you need to do. Then read post #27 and post #30. Then, I think you'll be equipped to do what you need to do.
|
| I have been unsuccessful in looking for a YOLO flow cal profile for qidislicer, and neither of those 3mfs in the google drive you linked will open. The PA tower calibration baked into qidislicer is some godawful 8 hour long print |
The hardest part about a zombie apocalypse will be pretending I'm not excited.
|
Originally Posted By thezentree: I have been unsuccessful in looking for a YOLO flow cal profile for qidislicer, and neither of those 3mfs in the google drive you linked will open. The PA tower calibration baked into qidislicer is some godawful 8 hour long print Just switch to Orca |
|
Originally Posted By thezentree: I have been unsuccessful in looking for a YOLO flow cal profile for qidislicer, and neither of those 3mfs in the google drive you linked will open. The PA tower calibration baked into qidislicer is some godawful 8 hour long print 1. Use OrcaSlicer 2. Just download the YOLO STLs and configure them yourself. 3. But seriously. OrcaSlicer. 4. Instead of opening the 3MF try importing it instead. 3MF is also a valid 3D format, not just a slicing file. |
| Yeah I downloaded orcaslicer last night and am trying to get the print profiles back to where I had them in qidi. Will report back once I get to the point where I can start calibrating filaments again. |
The hardest part about a zombie apocalypse will be pretending I'm not excited.
Join the Community
Your next conversation starts here.
Create your free account to join discussions, share your experience, save topics, and connect with the AR15.COM community.
- Join discussions
- Follow topics and replies
- Connect with fellow enthusiasts
Already a member? Sign in
Stay informed by subscribing to our Newsletter