


Armory Sponsor


Posted: 3/1/2012 1:24:23 AM EDT
[Last Edit: TheGrayMan][Edited]
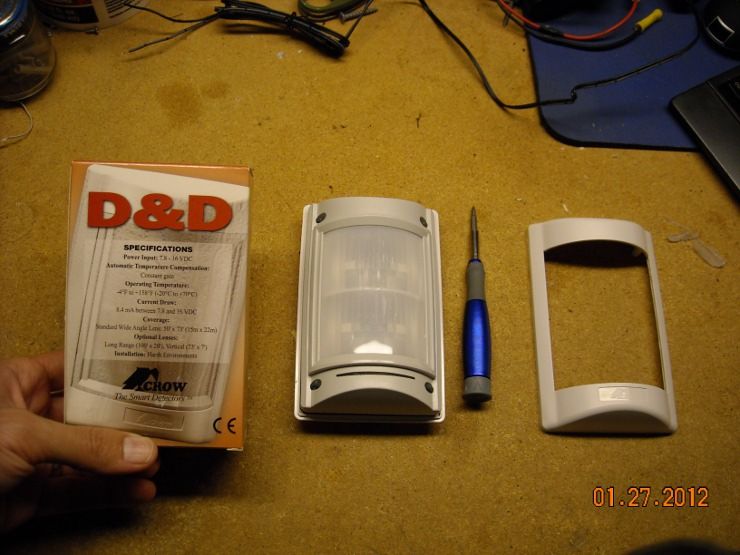
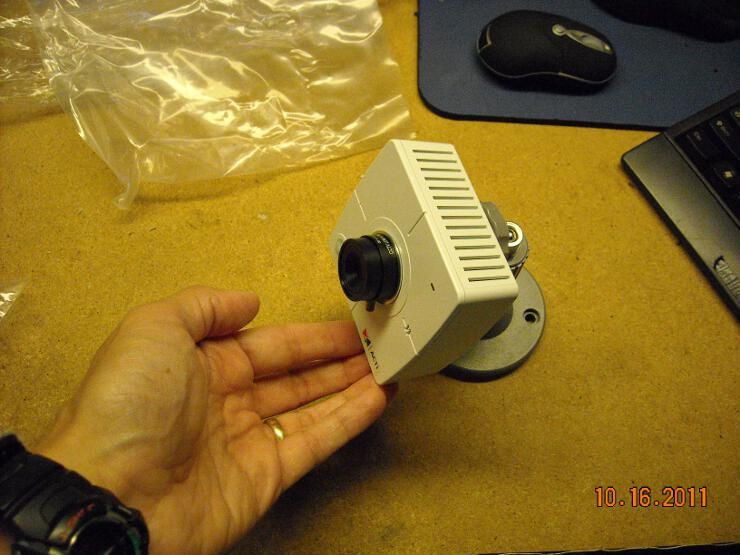
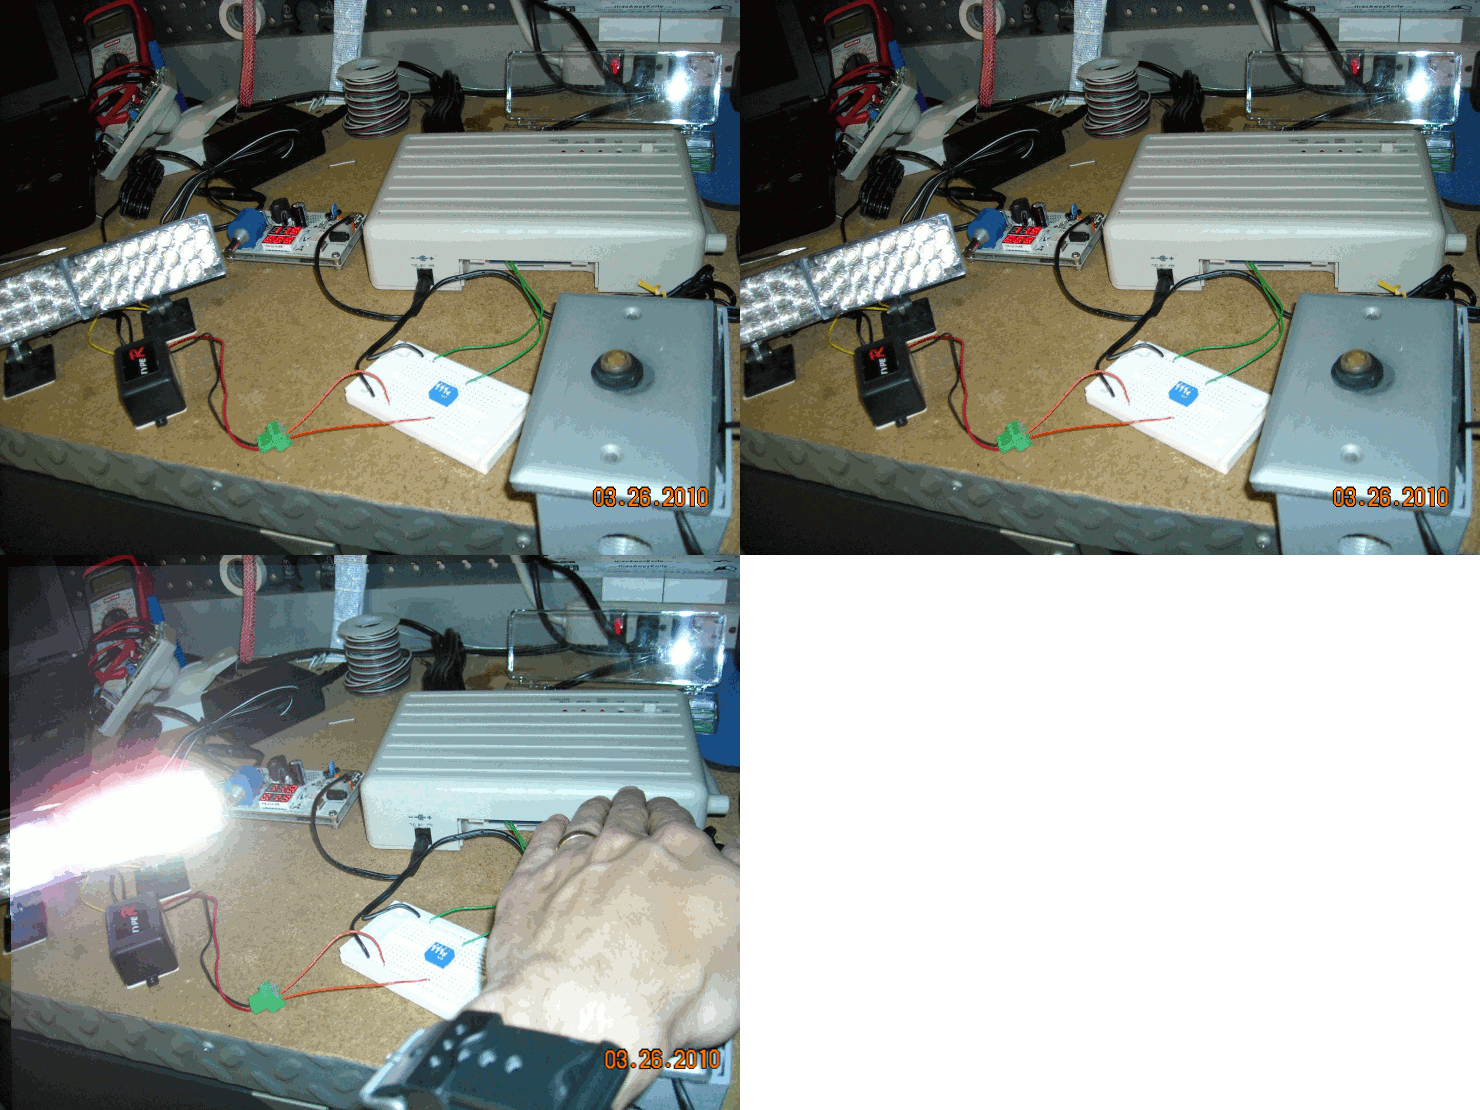
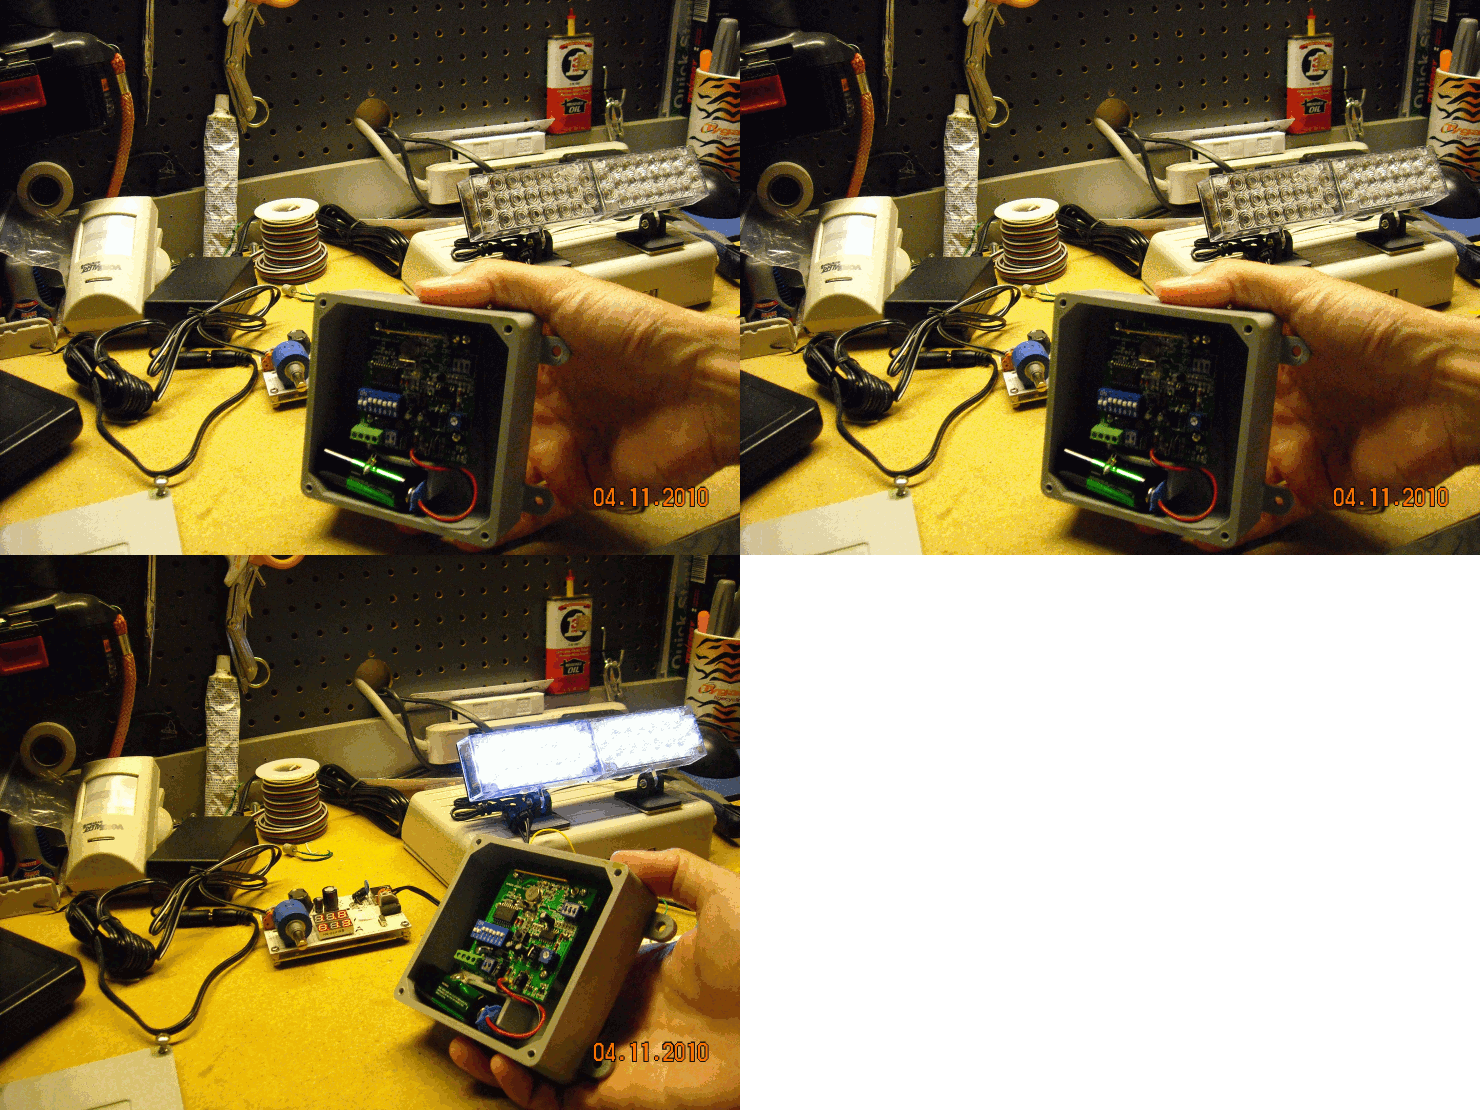
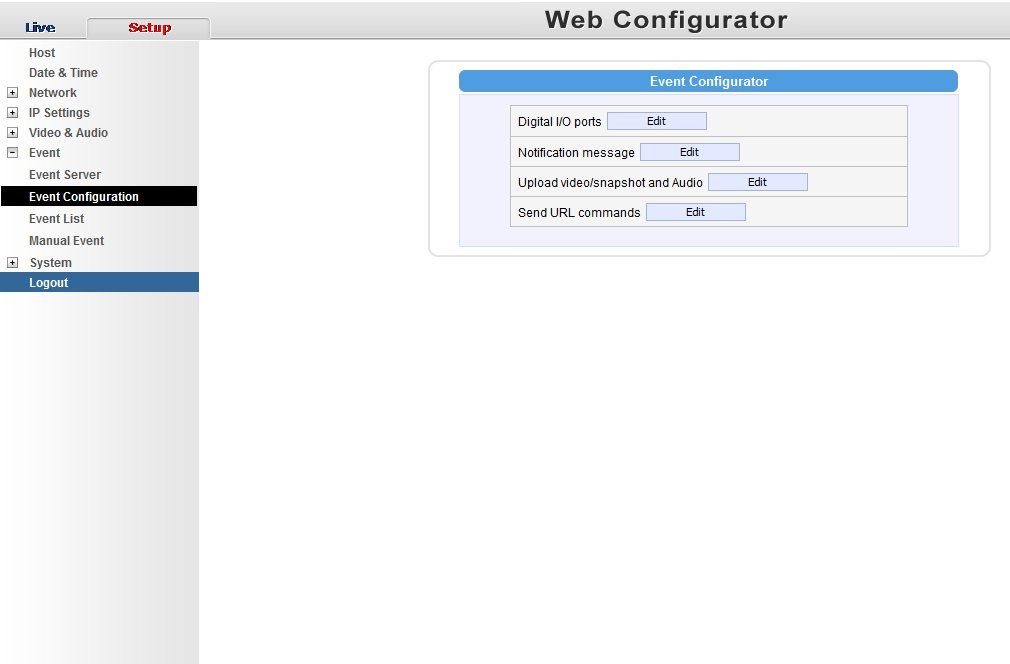
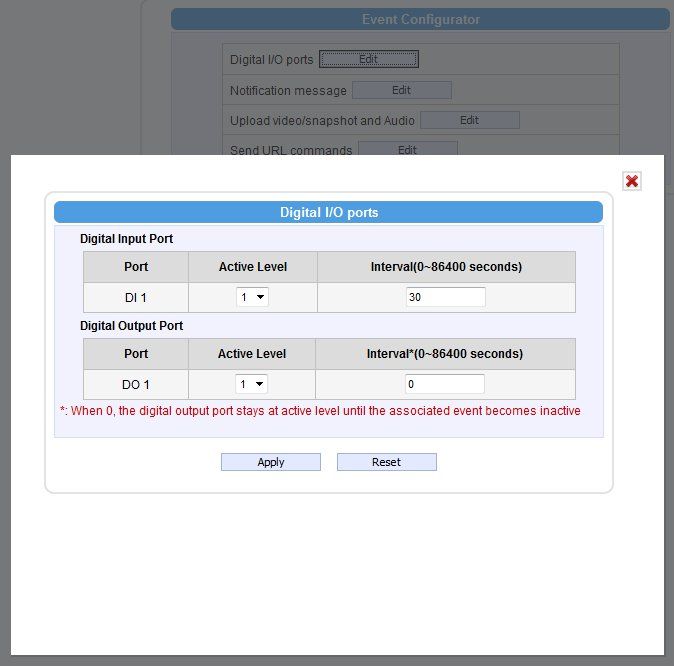
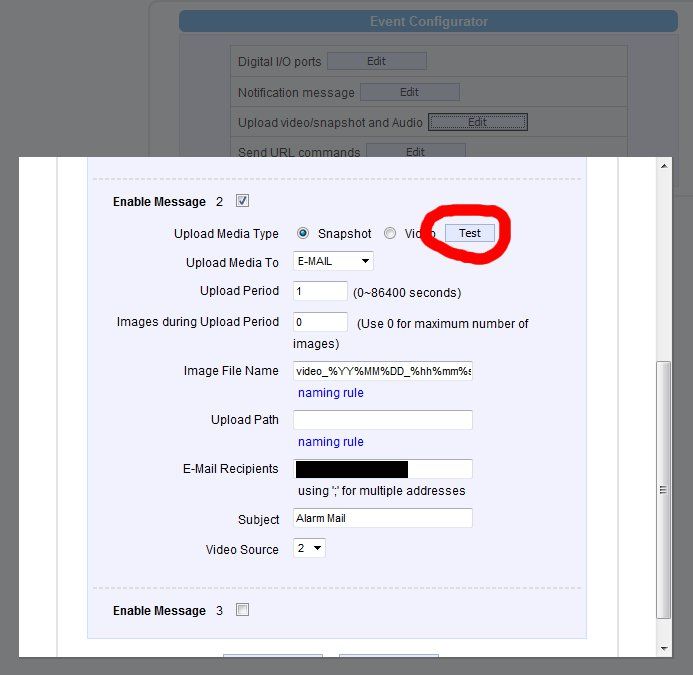
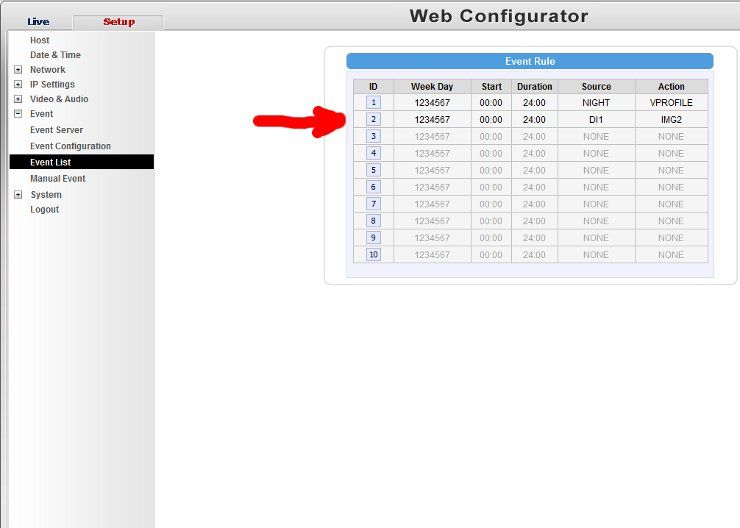

"How can you know so little about this and be occupying a chair at the time that you do?"
-Christopher Hitchens to Ron Reagan Jr. on the topic of terrorism-
-Christopher Hitchens to Ron Reagan Jr. on the topic of terrorism-
|
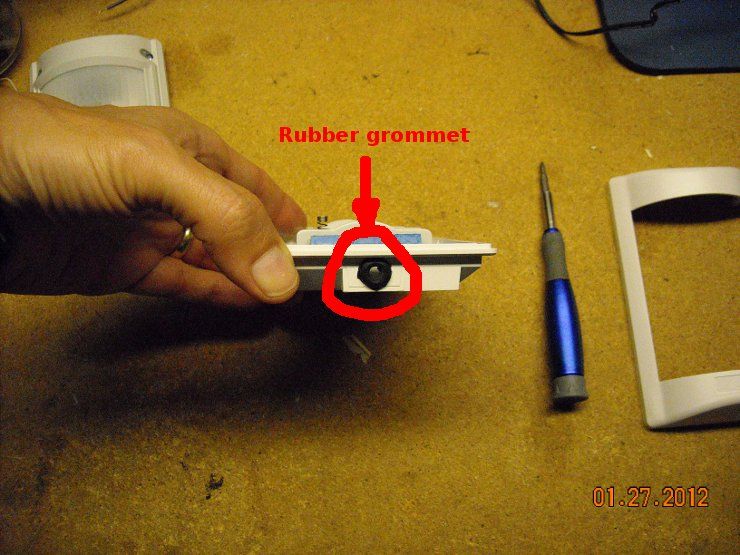
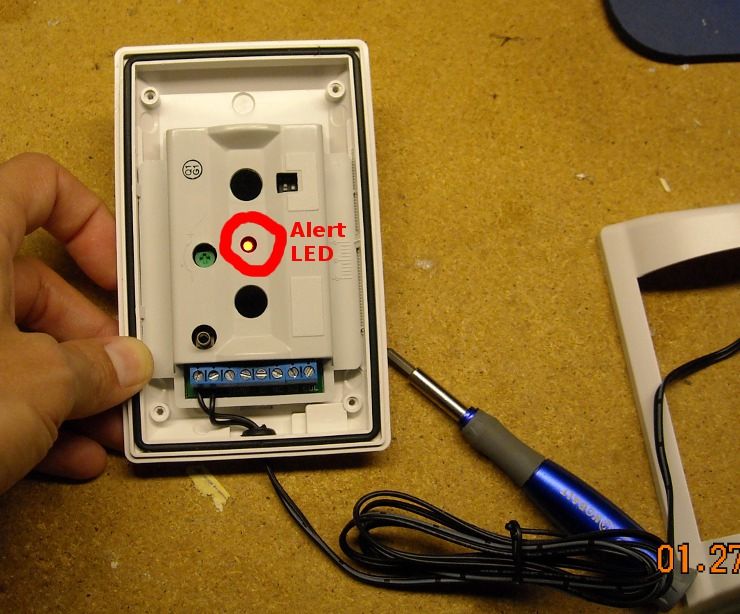
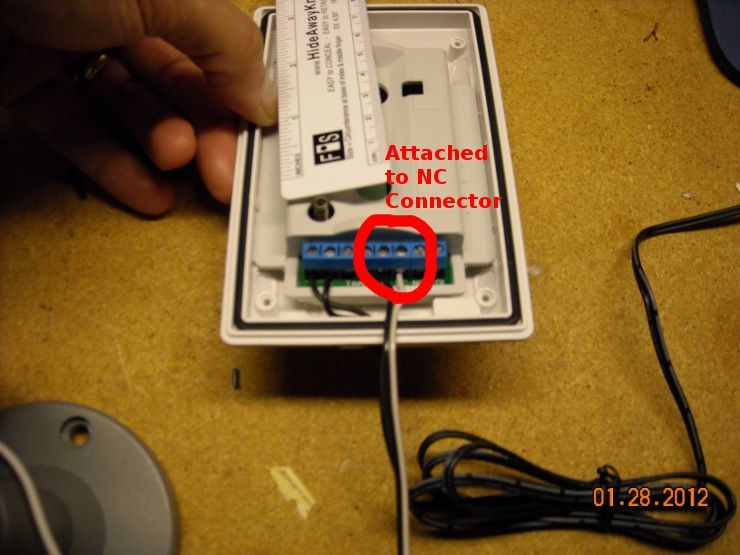
OK... as a follow-up to my post about sensors, we're going to integrate one into my current setup.
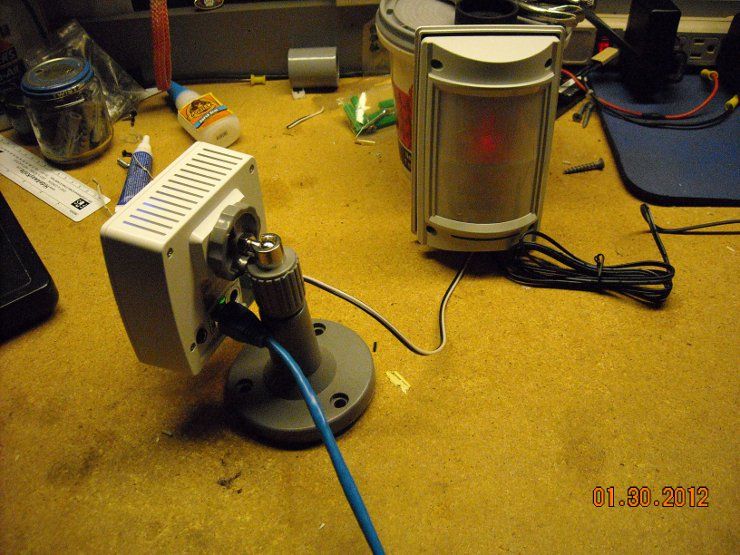
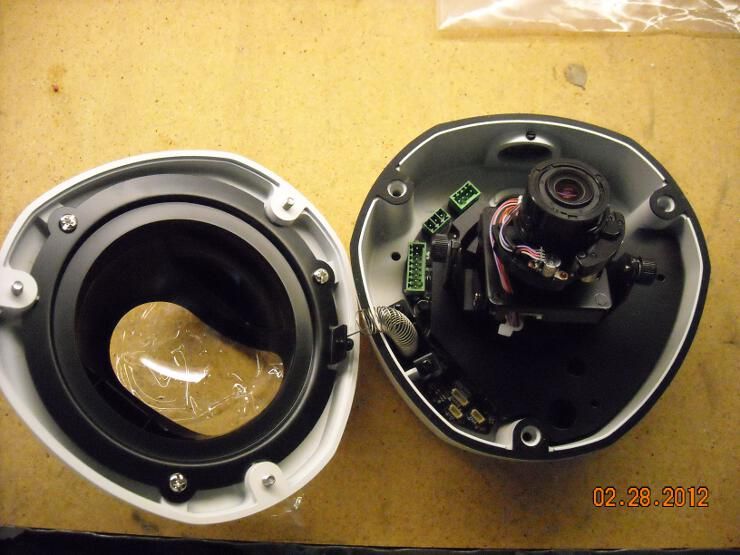
Unfortunately, I had to replace one of my Mobotix cameras... it's been acting flaky since a lightning strike a few months ago. It finally wouldn't power up any more... and it's too expensive to replace at retail prices, so I got an Acti camera: KCM-7211, with standard software, dome, and accessory bag: 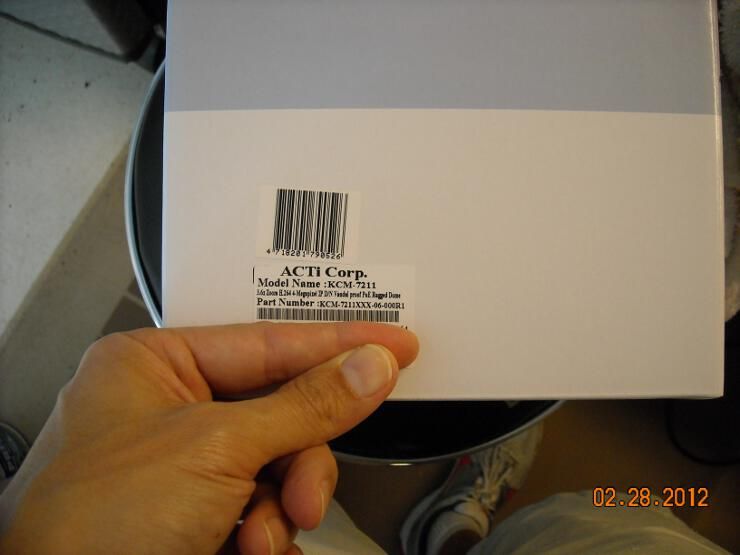
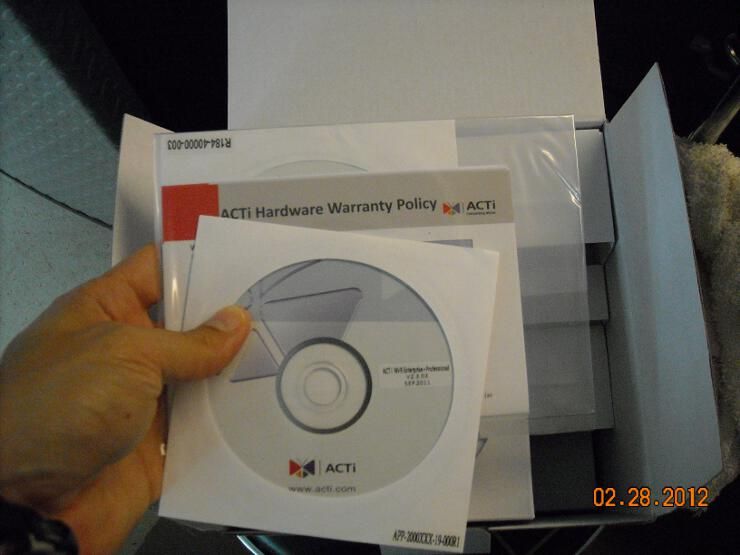
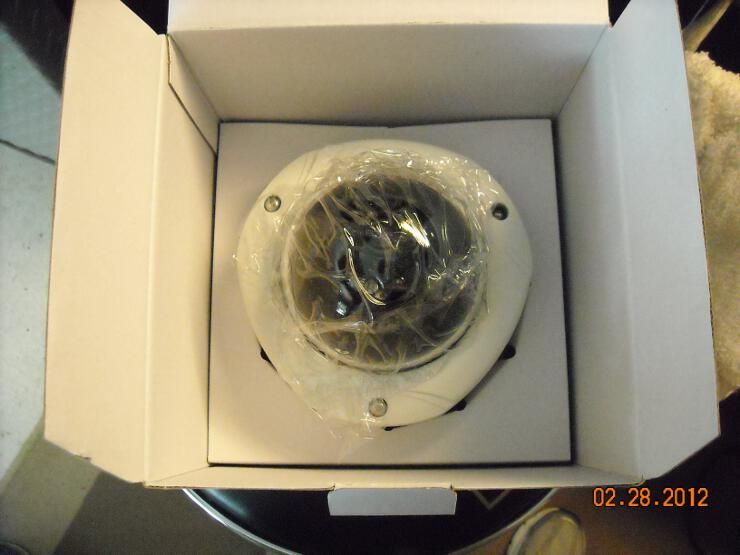
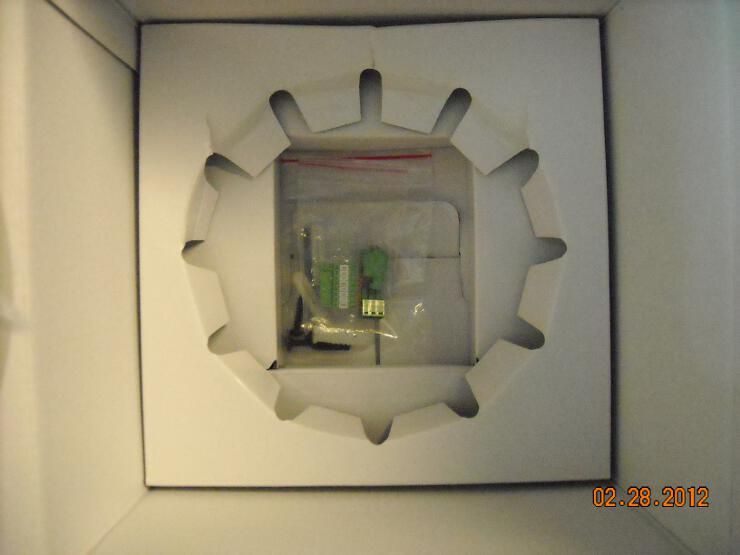
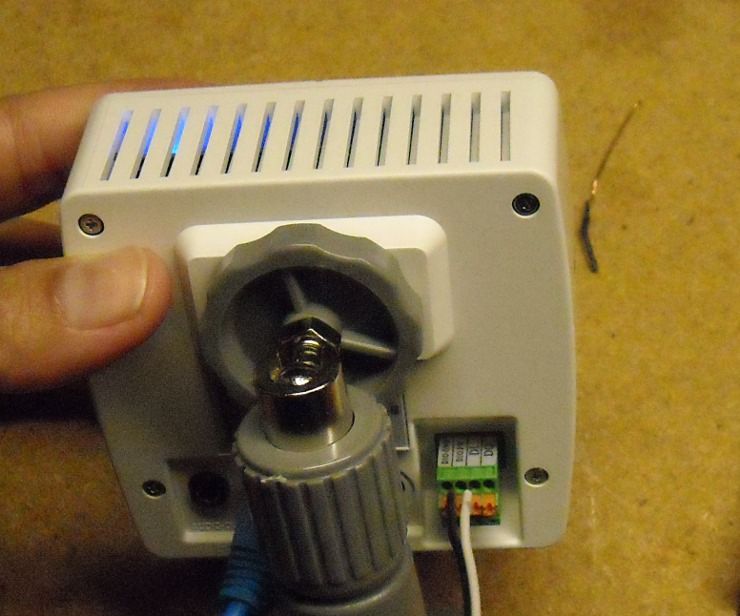
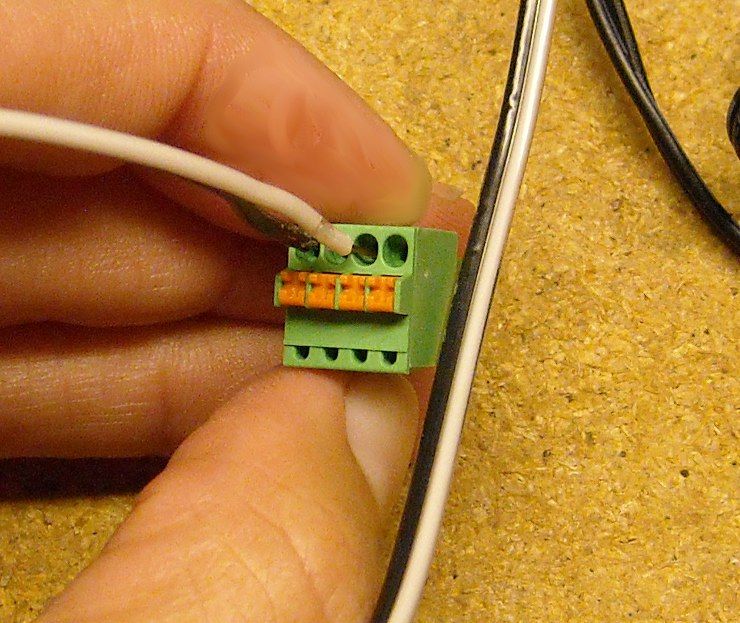
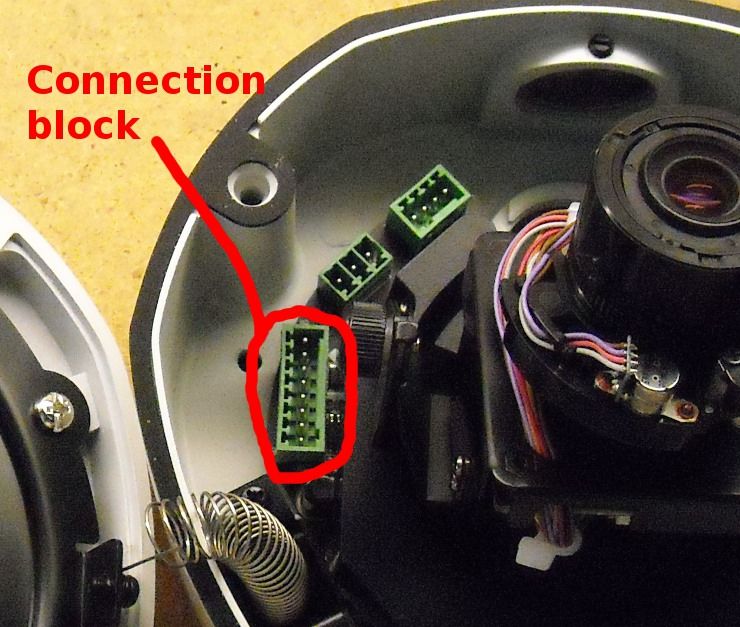
Of particular interest to this thread is the connector block. This is the little plug-in jobbie that allows you to access the camera's digital I/O functions, and tie it into sensors, buzzers, etc. It's a little larger than the one for the 4201 cube camera, but the connections we'll be using are identical 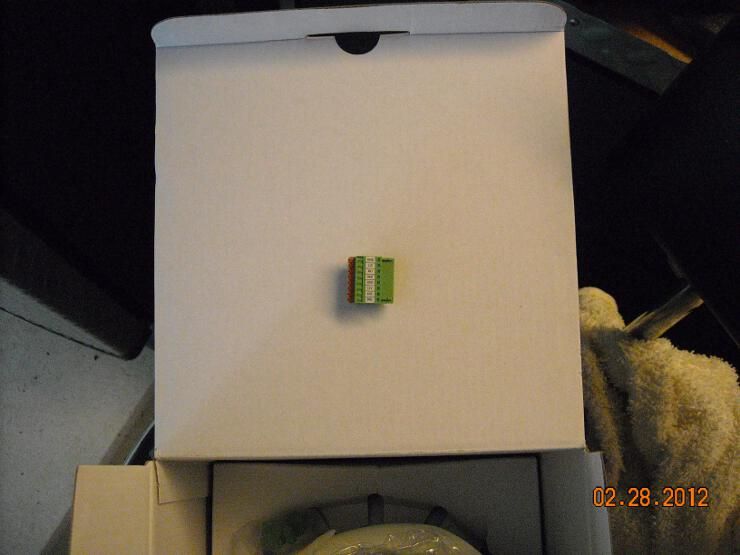
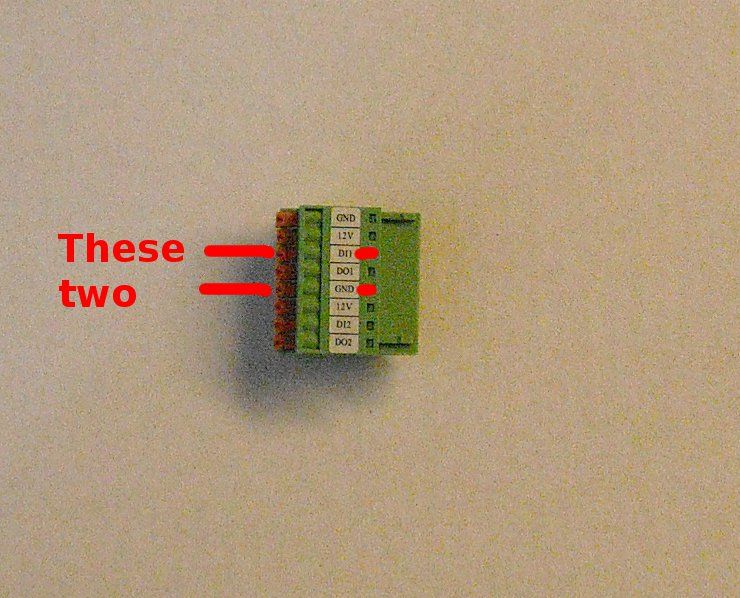
Here's the 4201 for comparison 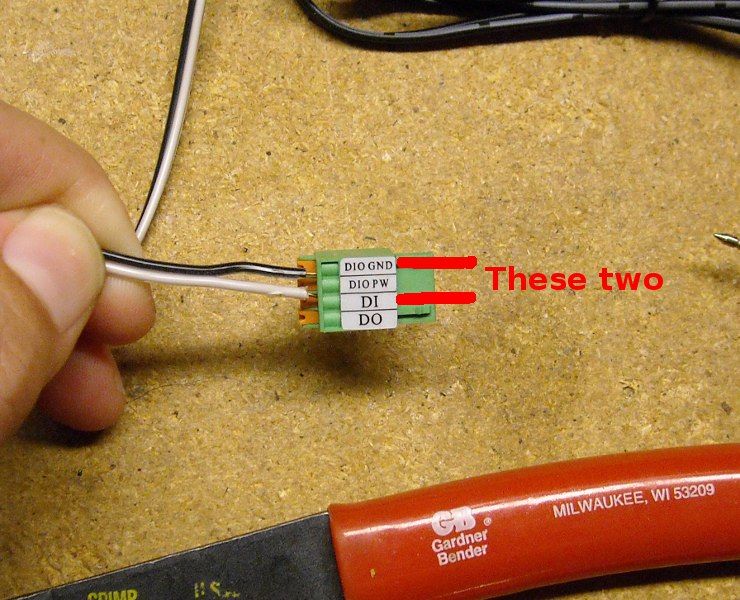
Here's the inside of the camera from two angles, and a close-up with the connection block plug-in annotated: 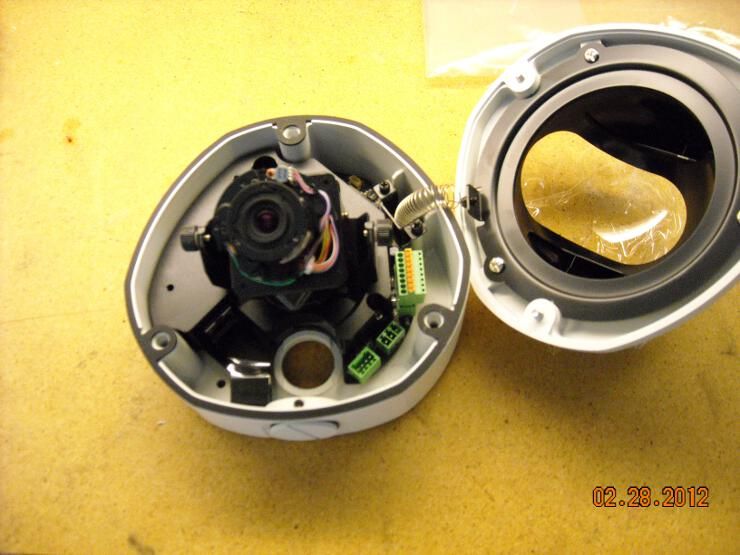
Here's the site of the old camera... alas... we hardly knew ye. It was set up to watch the side of the home leading up to a gate... great natural choke-point: 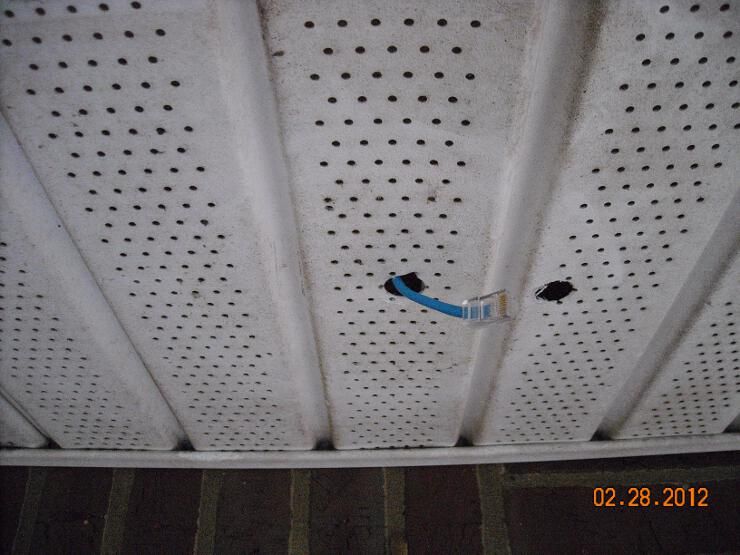
The PIR will be mounted partway down the side of the house, partially protected in the upper corner of a window alcove: 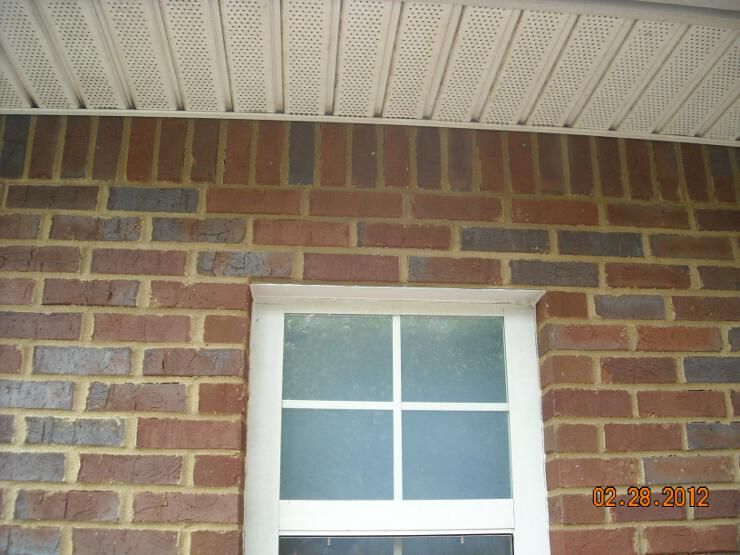
We used fish-stix to put two-conductor 18ga wire into the attic from the camera site (see the blue cable? That's cat5 carrying PoE and network to the camera. The brown wire to the right is the 2-conductor 18ga for our PIR signaling) 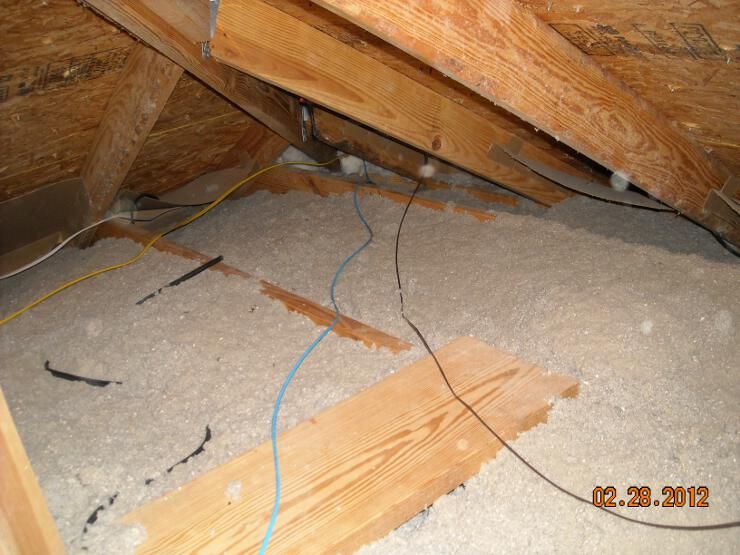
Here's wire fished up into the attic from the PIR site... same type of wire. The PIR will need two wires to power itself, and two wires to carry signal to the camera) 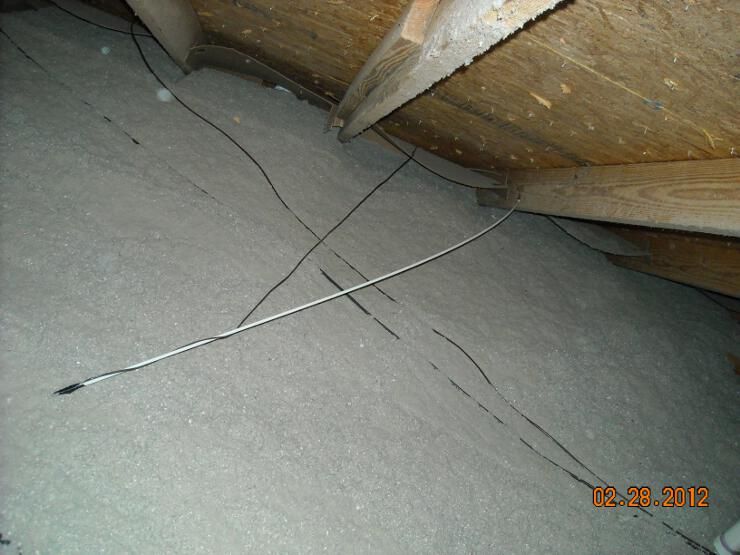
To save ourselves time in the nasty attic, we untape the PIR power-wiring from the white fish-stix, and tape the signal wiring to the same fiberglass rod... allowing us to pull the signal wire down with the same rod. 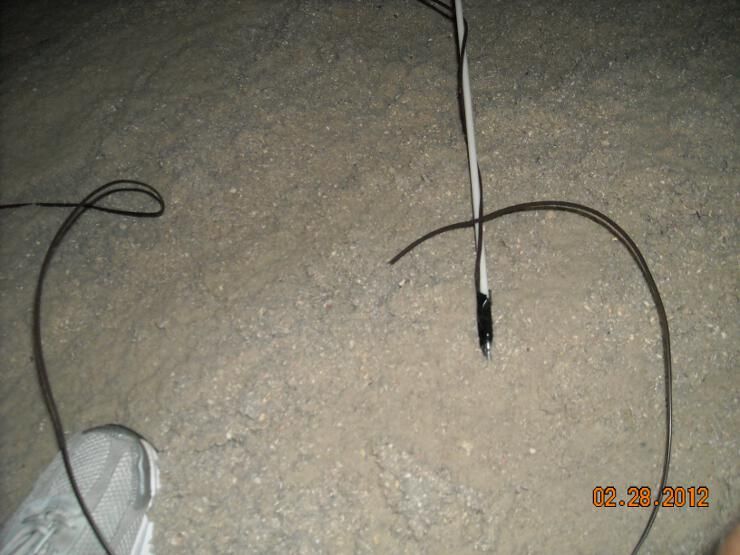
We go outside and pull the rod back to us... and we now have the wiring we need for the PIR: 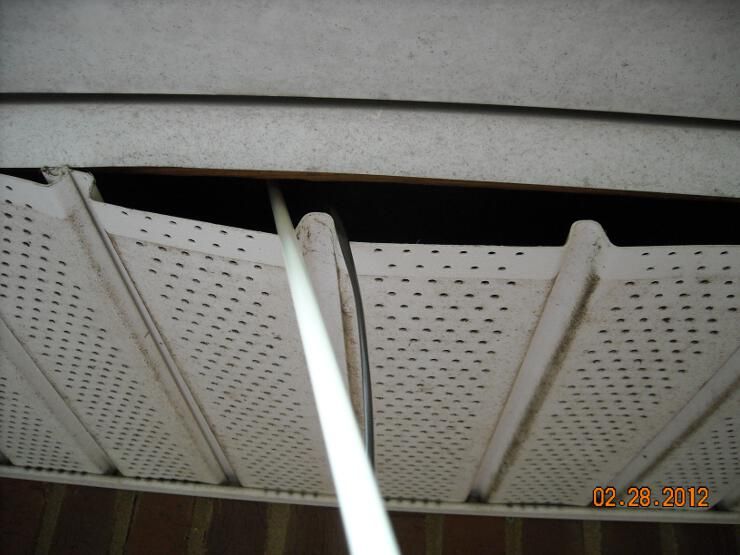
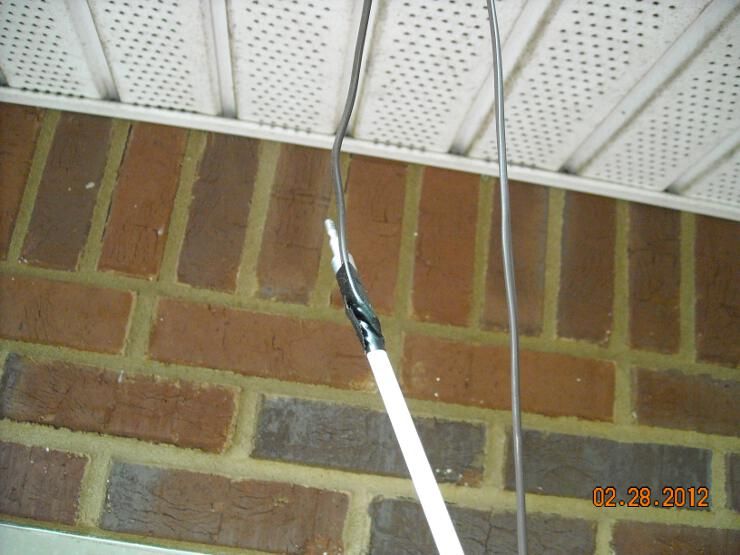
Here I've bent the end of the power wiring so I can tell them apart: 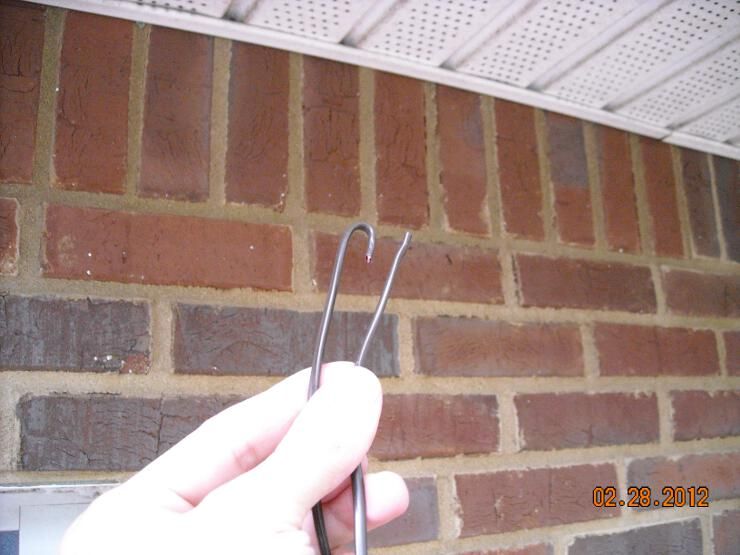
We drill a small hole and fish both wires through the soffitt vent, right next to the wall: 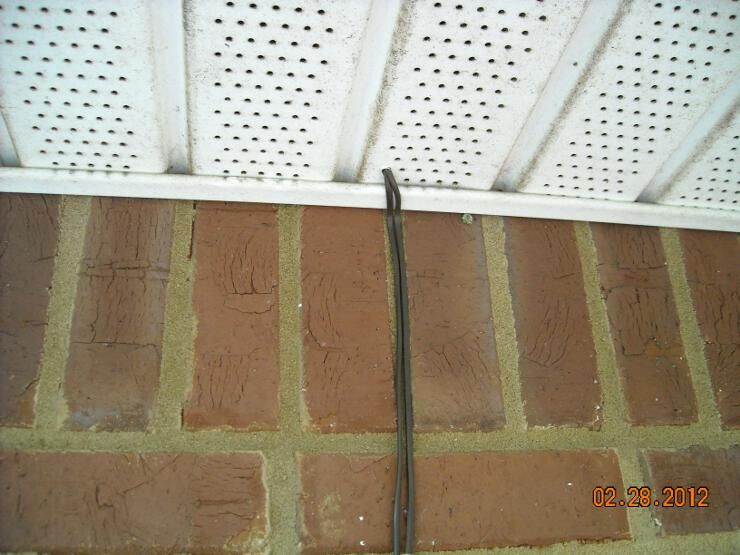
We route them down the wall to our PIR: 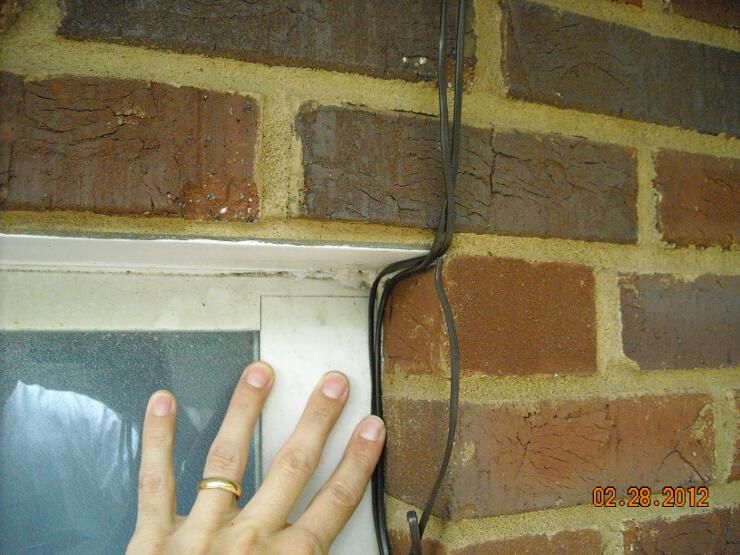
Here's what it looks like: 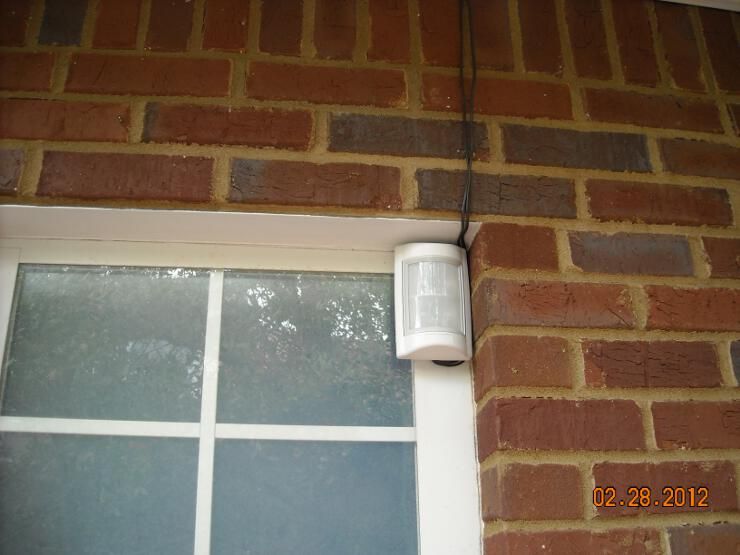
UPDATE: I didn't completely like the angle of coverage, so I elected to mount the PIR at a slightly different angle, to better throw the coverage pattern down the outside wall of the home: I cut the end of a 2x4 diagonally, then sawed the end off, leaving me with two wood wedges. 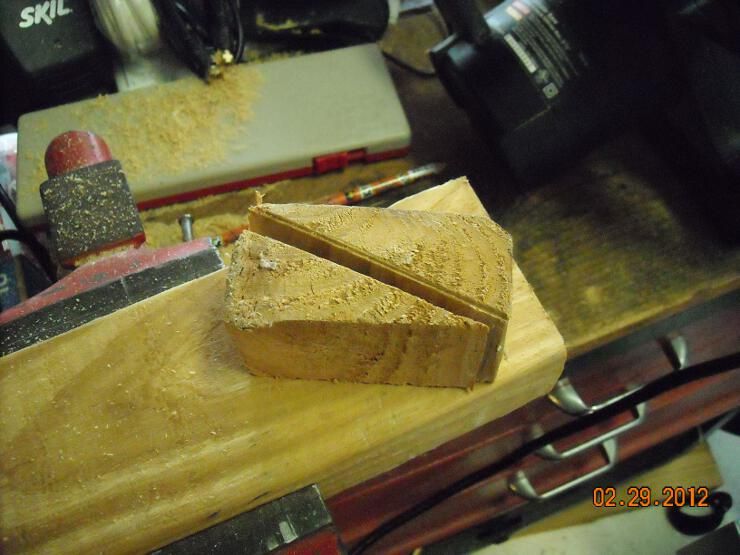
I measured where to place it, and it's perfect size-wise: 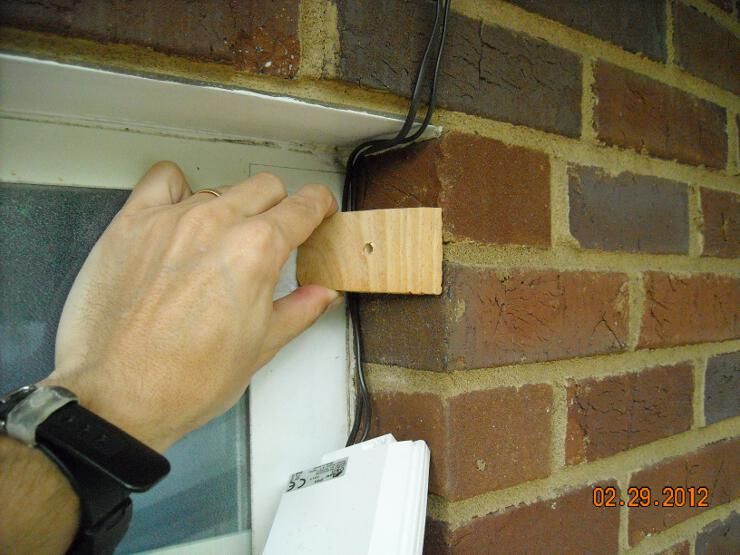
A masonry bit into the mortar, an anchor, and counter sinking the screw made for a nice angled mount: 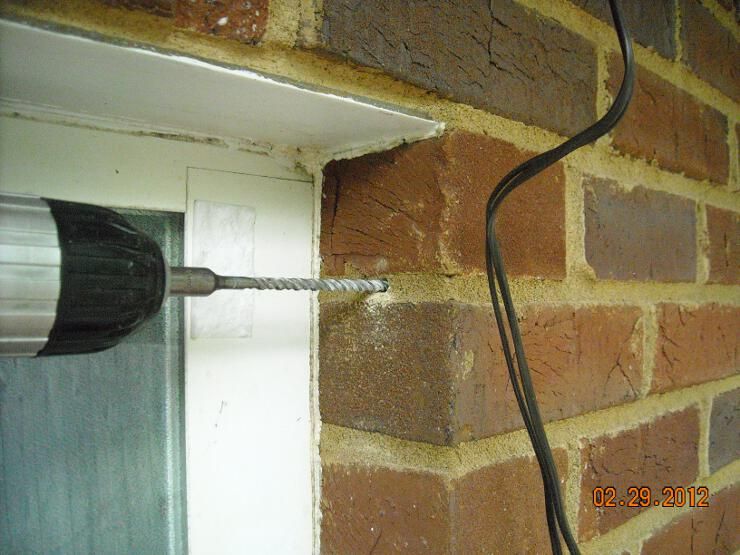
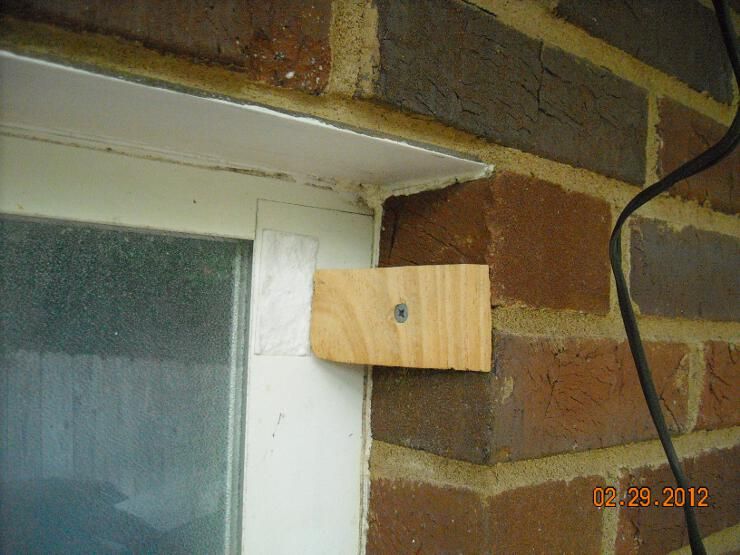
A bit of double-sided 3M tape on the back of the PIR, and we're all set: 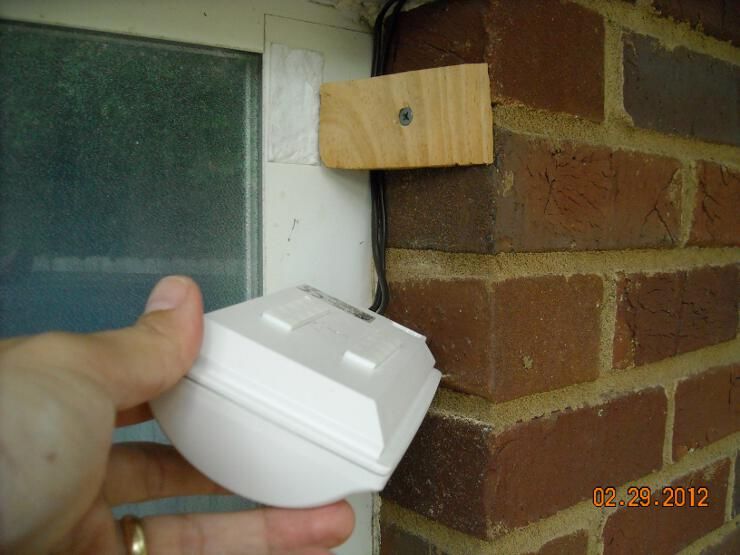
|
"How can you know so little about this and be occupying a chair at the time that you do?"
-Christopher Hitchens to Ron Reagan Jr. on the topic of terrorism-
-Christopher Hitchens to Ron Reagan Jr. on the topic of terrorism-
|
OK... we're going to put in another of these PIRs (because I like 'em). This one goes on the other side of the structure, where the utilities (phone/cable) enter the home. If your home security strategy includes your DVR or cameras emailing you alerts, you'll want to pay attention here.
I'll have another post on protecting the utilities next week or so... For now, we're going to integrate another Crow PIR with another Acti camera: The mounting location will be next to this downspout: 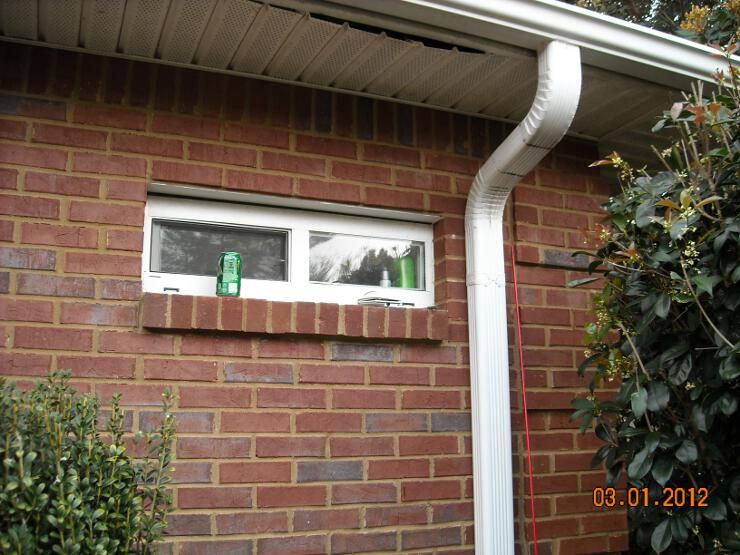
And it will be tied into this camera, a little further down the wall (the hemispheric structure already mounted on the wall is an IR illuminator): 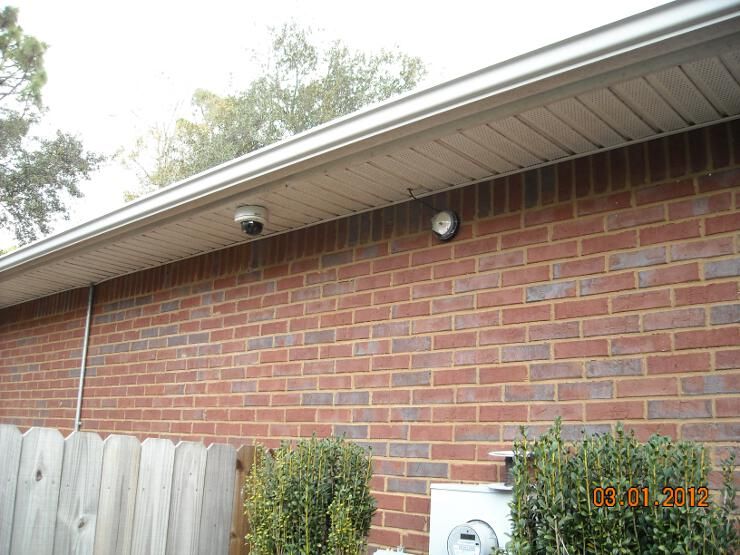
Here I've placed an anchor into the wall, and we'll be using that other wedge of wood we made yesterday: 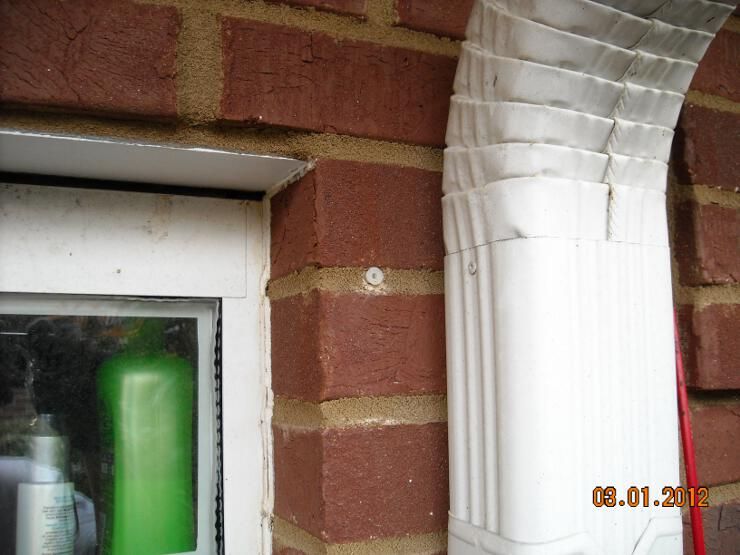
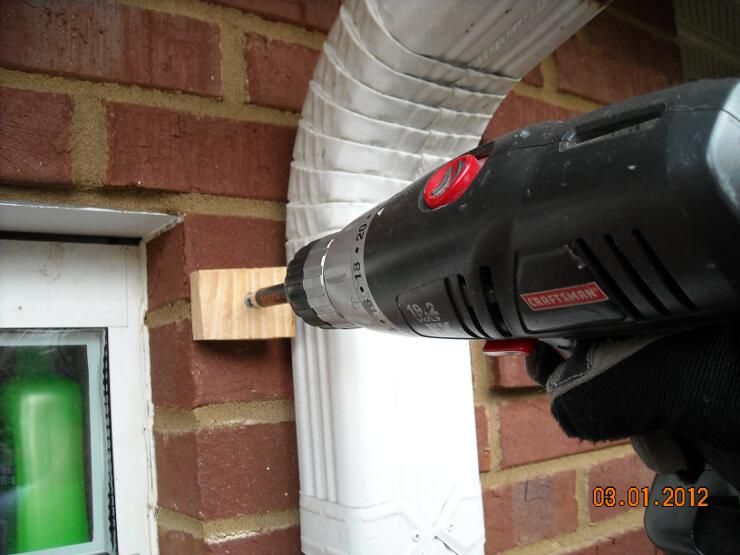
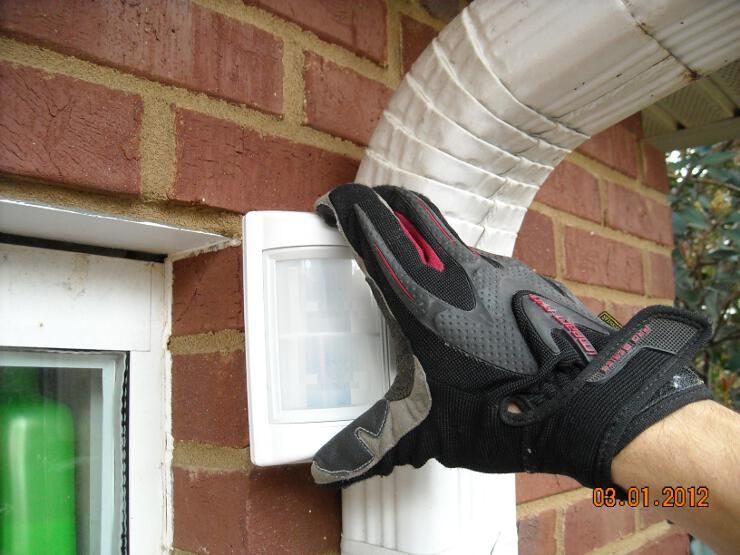
We're going to run the cable just above the soffit, rather than up into the attic and across (I didn't feel like an attic crawl today): 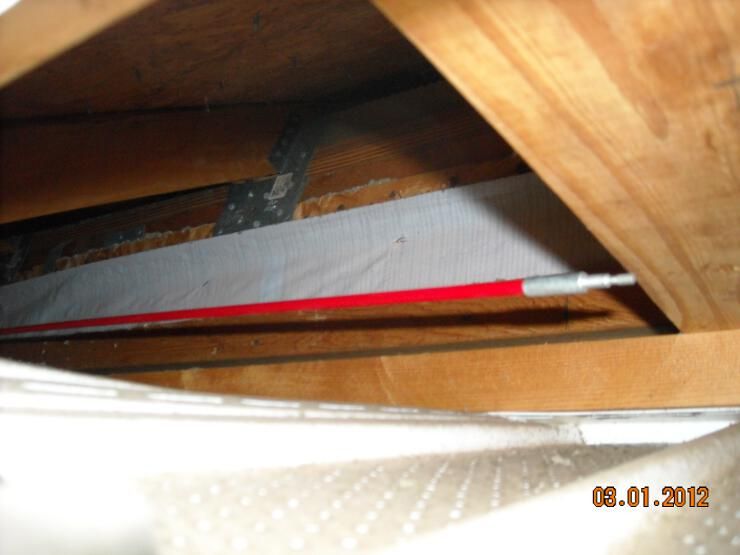
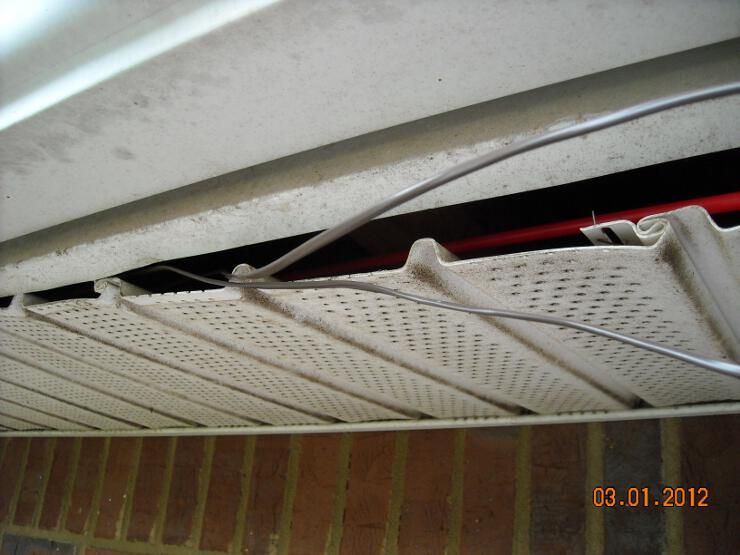
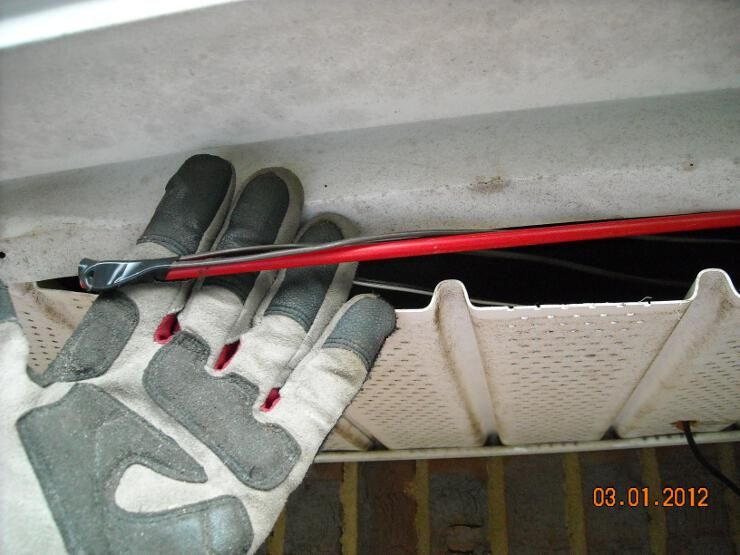
We already have 12VDC power over here from a previous analog install (which is powering that IR illuminator), so rather than using standard wiring nuts, we're going to put in a proper connection block: 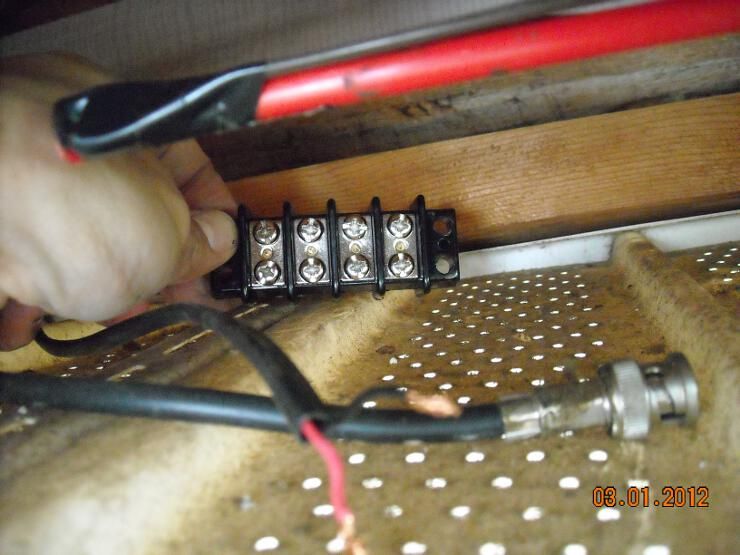
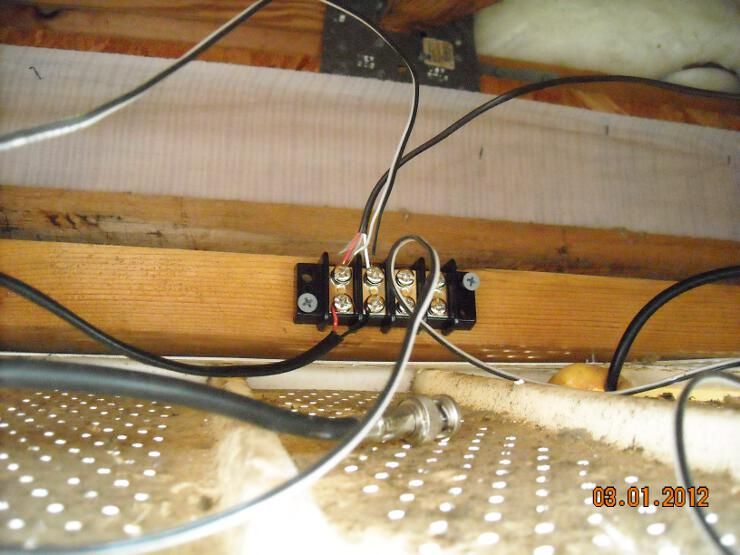
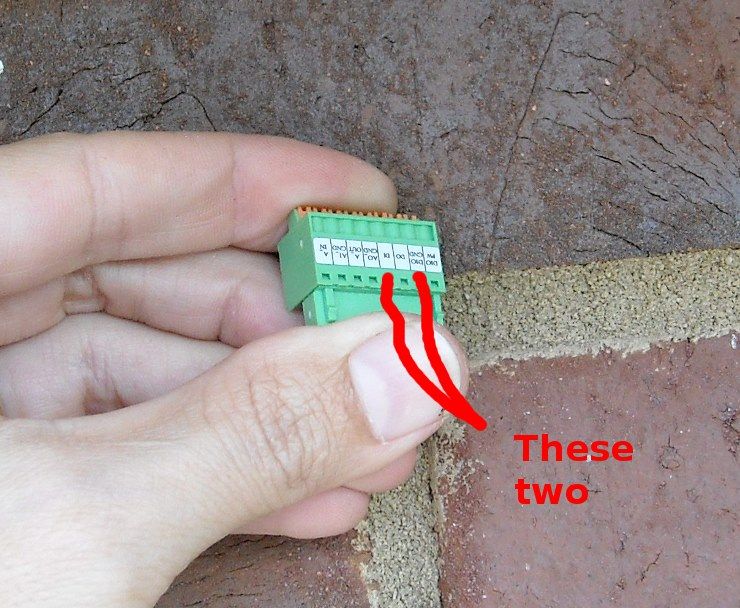
The two-conductor 18ga from the PIR will connect to the previously-shown little green connector block: 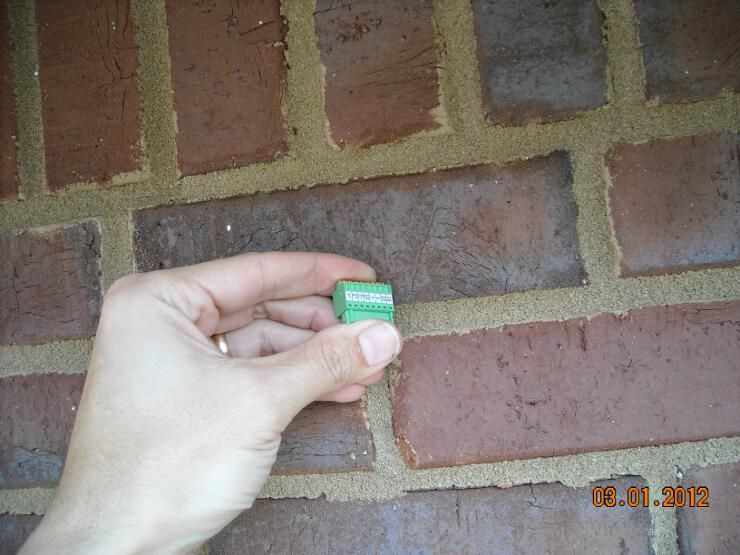
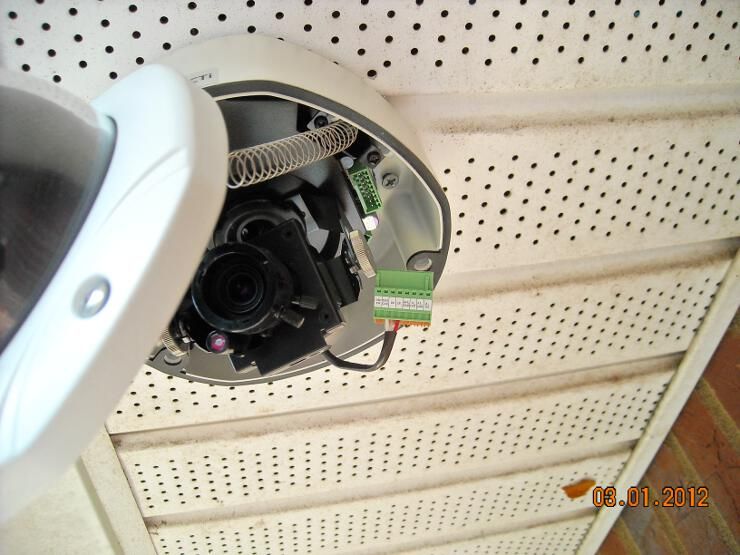
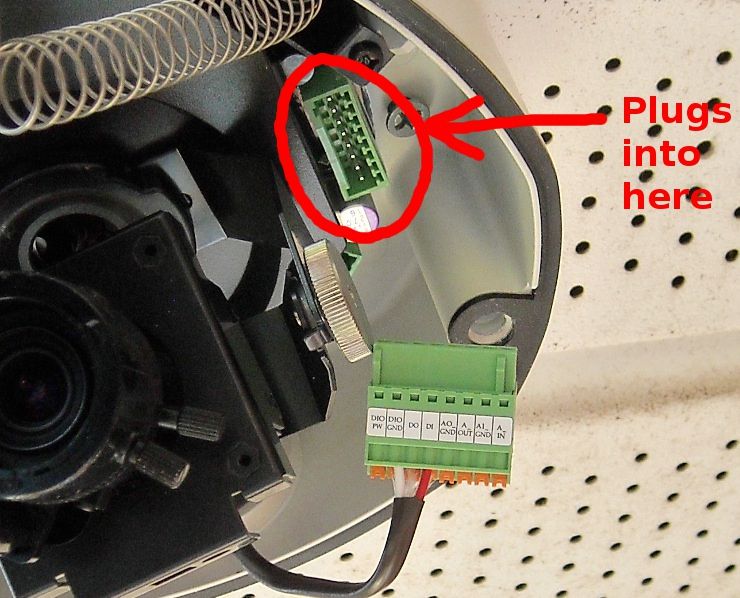
More 3M double-sided tape, and we're GTG: 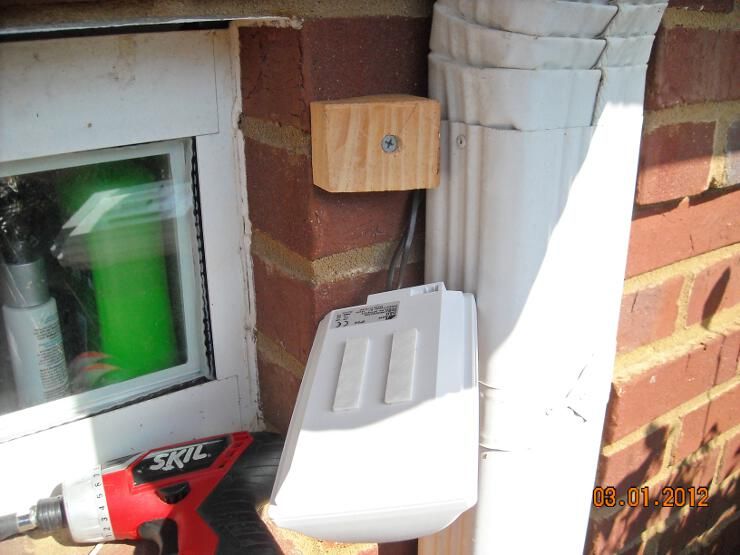
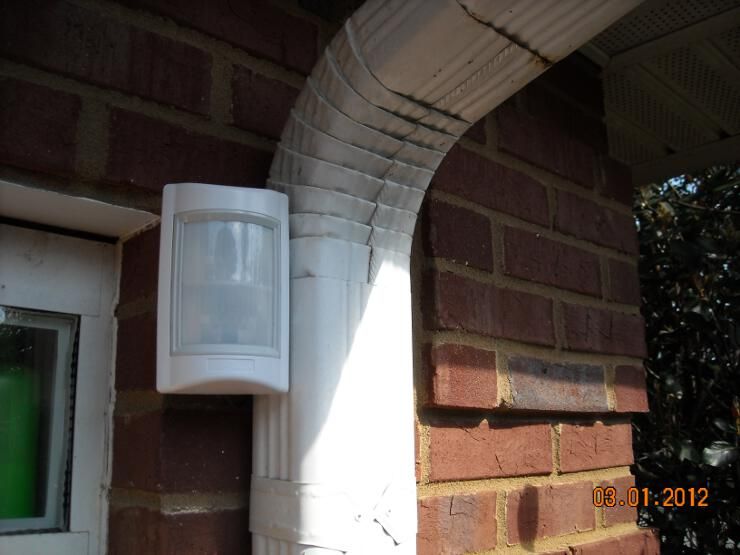
|
"How can you know so little about this and be occupying a chair at the time that you do?"
-Christopher Hitchens to Ron Reagan Jr. on the topic of terrorism-
-Christopher Hitchens to Ron Reagan Jr. on the topic of terrorism-
|
Here's another example of slaving a sensor to a camera for more accurate alerts.
I was using a Vivotek camera in my garage, but elected to go with a camera with WDR (wide dynamic range) for a slightly better picture. The location in question is a really nasty lighting challenge for the average camera... dark garage, looking out into the bright sunlight. It's going to tend to overexpose the picture, and render the darker areas completely opaque. Here is the old camera. Nothing wrong with it, just wanted something a little different: 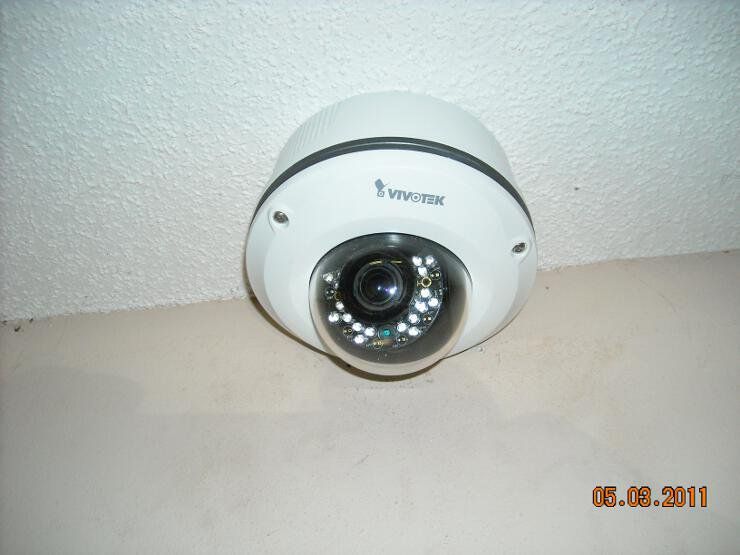
Here's its replacement... an Acti 7411 (megapixel dome with WDR): 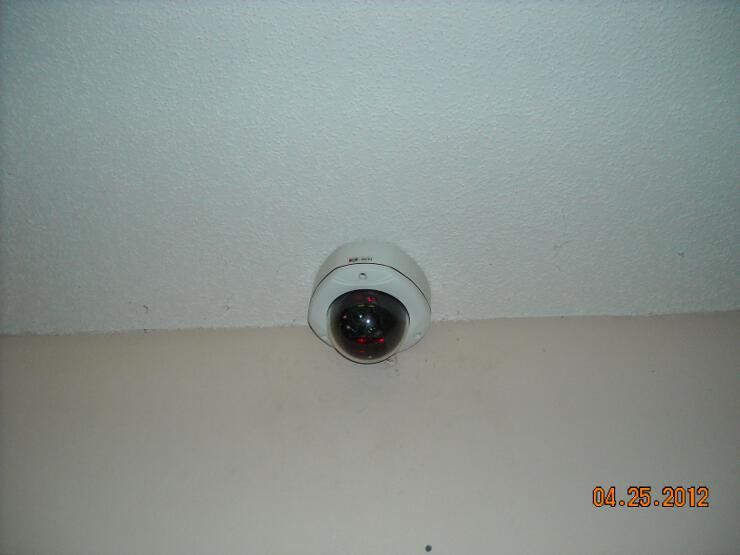
While we were changing out the camera, I decided to integrate a sensor with the camera, and configure it to email alerts to my phone. I cannibalized a sensor from a gate that I'd previously alarmed (before my youngest child knew enough not to run into traffic). 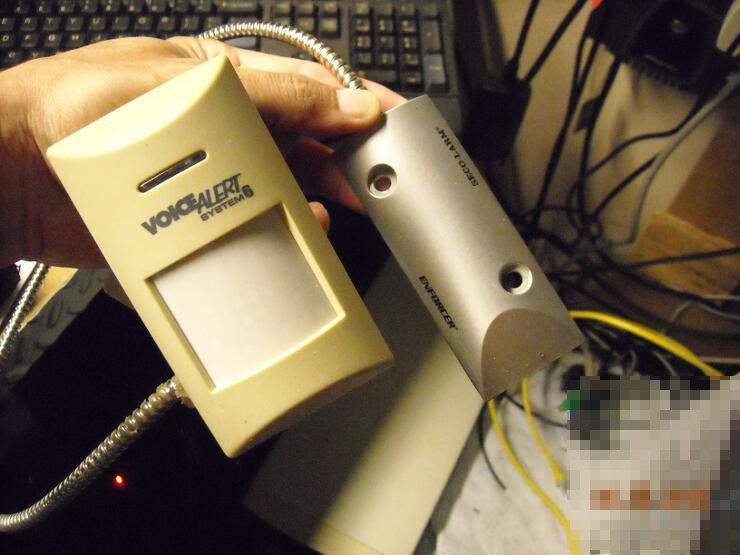
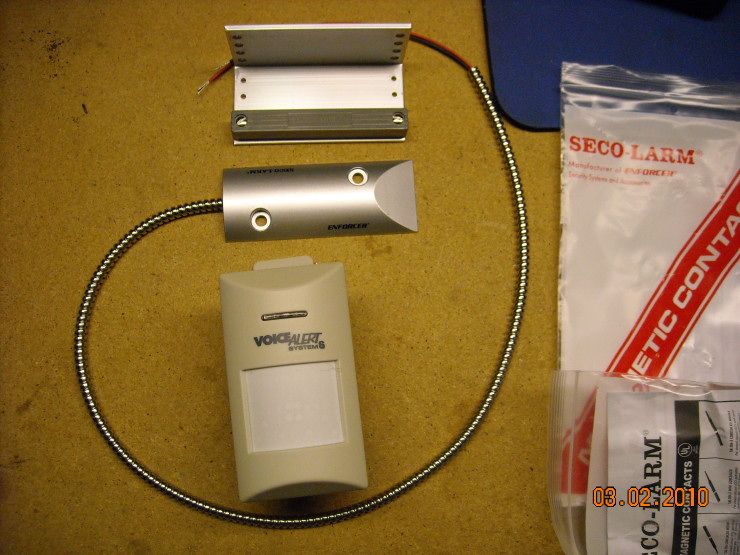
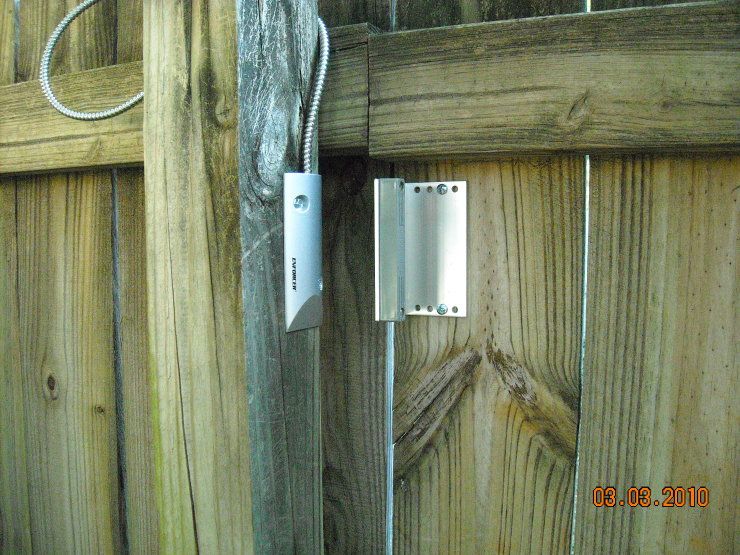
The sensor was detached from the VoiceAlert transmitter, mounted at the top of the garage door, and wired into the Acti camera thusly: 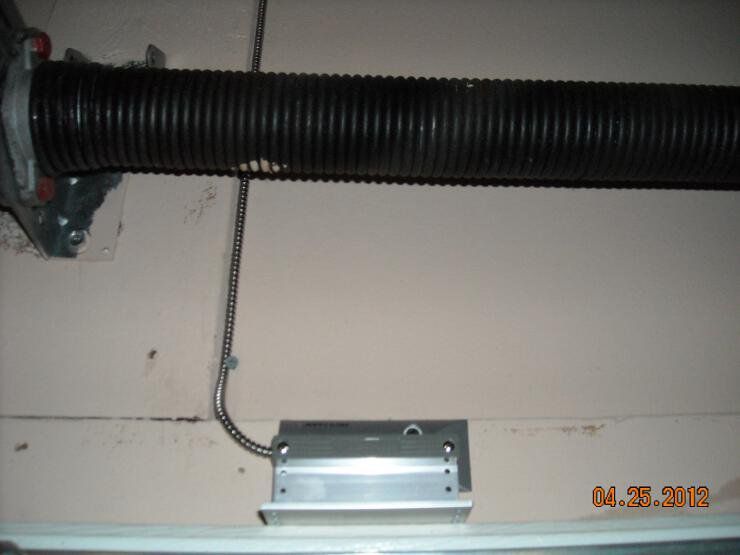
Here are the two pictures from the Vivotek and Acti cameras, respectively... note how much more visible the dark areas are in the second picture. The first picture is higher-res (2MP vs 1.3MP), but the WDR shows much more detail in the shadowed areas in the second picture (most visible in the right-lower corner) 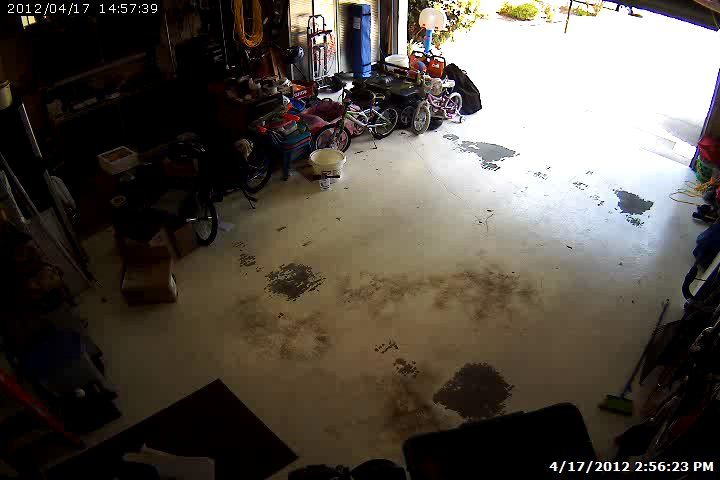
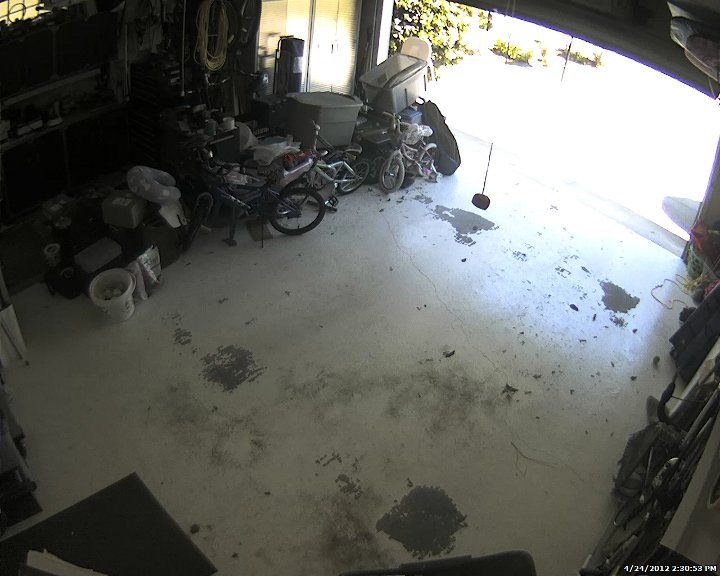
Now, when the garage door is opened, I get a series of images sent to my cell phone: 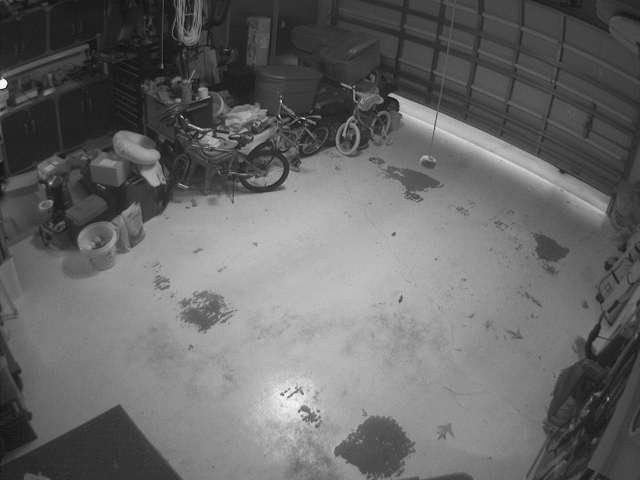
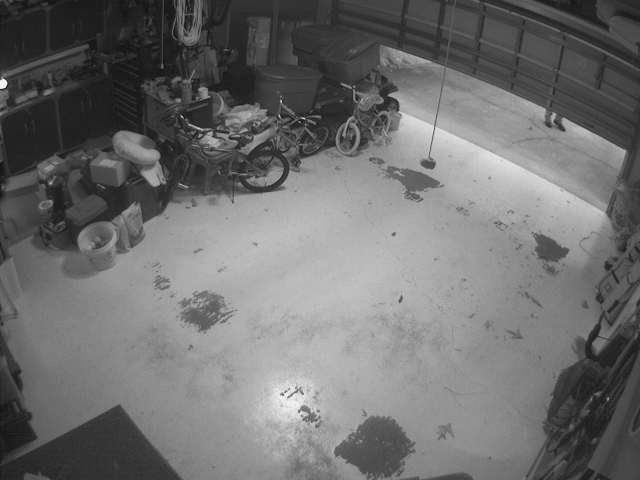
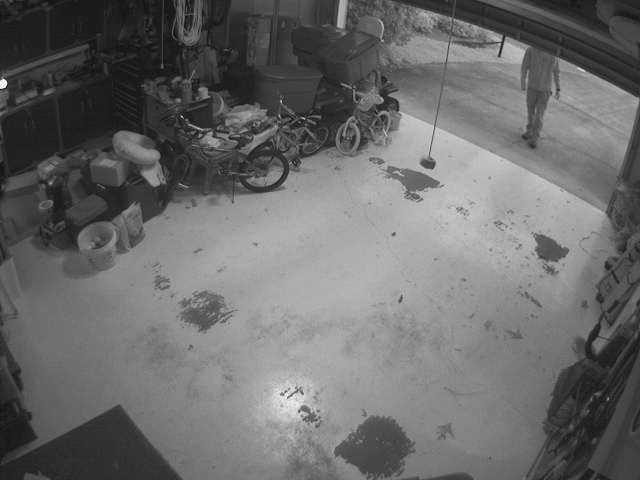
You can literally use any sensor with these types of cameras. This particular case was a standard, run-of-the-mill magnetic reed switch (larger, and designed for garage doors, but otherwise identical to the reed switches/contacts your home alarm uses at most doors/windows). This sensor doesn't require power, and only requires two wires to attach to the camera. Make your cameras smarter, and your alerts worth paying attention to. 
|
"How can you know so little about this and be occupying a chair at the time that you do?"
-Christopher Hitchens to Ron Reagan Jr. on the topic of terrorism-
-Christopher Hitchens to Ron Reagan Jr. on the topic of terrorism-

|
Copied-and-Pasted from the larger thread... a follow-up to the sensors mentioned above:
OK. So everyone following this thread will recall my section on adding external sensors to your cameras. They're generally superior to video-motion-detection in every way... but even high-quality sensors can get fooled. I'm about to show you how/why that can happen. Recall the Crow sensors I've been using. Crow makes very high-end detectors. The company is Israeli, and you know the Israelis always make good stuff. 

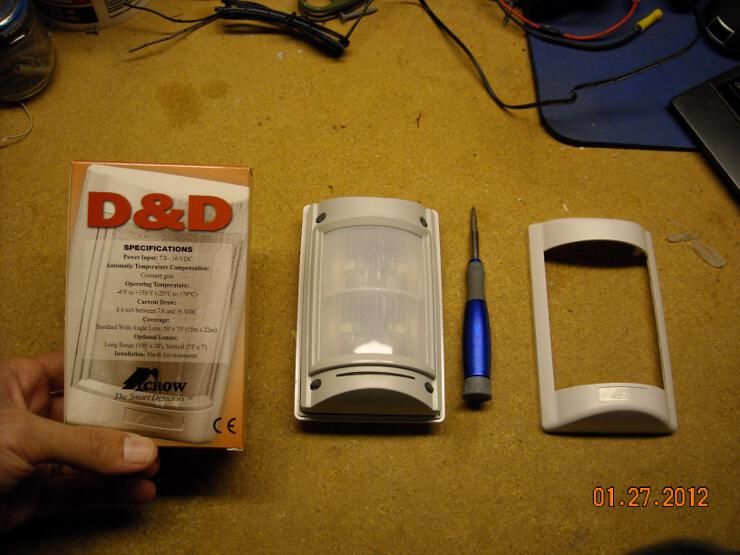
Anyway, adding the dual-element PIR to my camera GREATLY cut down on my false alerts. In fact, I wasn't getting any false alerts at all... and then the weather started to warm up. There was a definite pattern to it. The false alerts would start in the afternoon, usually about 1-2PM, and I'd get one every so often, with nobody in the images that were arriving. I was puzzled. And then I looked at the scene again: 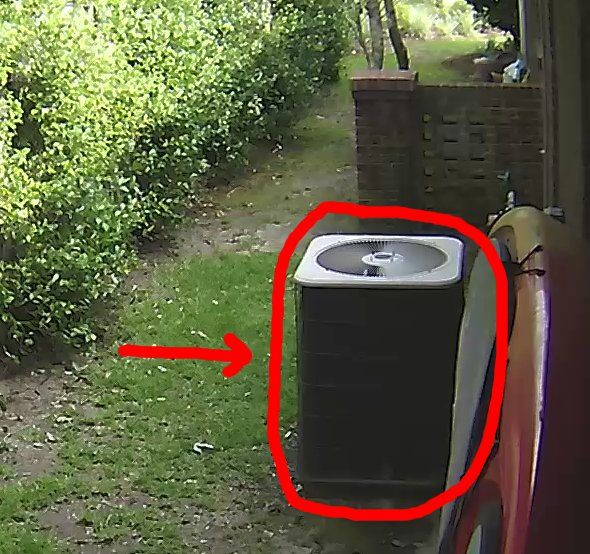
Yep. Right there. The warm air currents from that AC unit were just enough to trigger the occasional false alert on warm days... even with the detector sensitivity turned all the way down. Screw that. I want my alerts to be meaningful. So I went with a slightly different model... Crow's EDS-3000. This little bugger actually includes a quad PIR, and a K-band microwave radar element inside. The entire sensor assembly rotates through almost 180 degrees inside the housing, enabling the sensor to be flat-mounted to a wall, and the sensor array turned either direction. 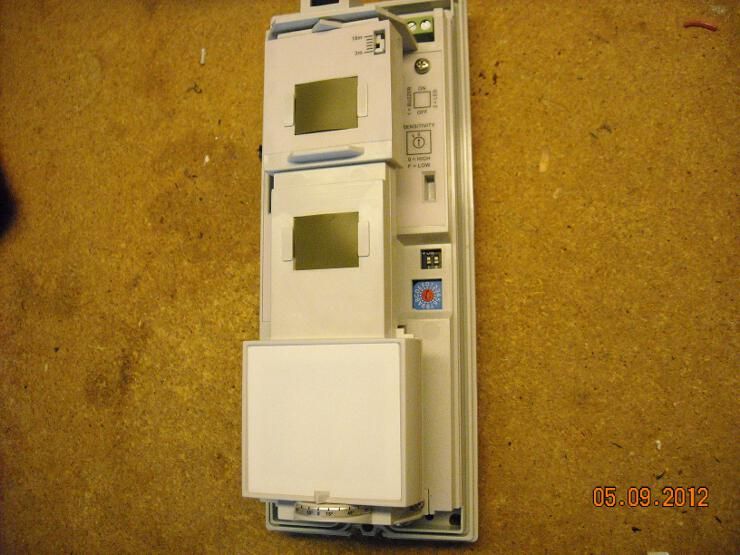
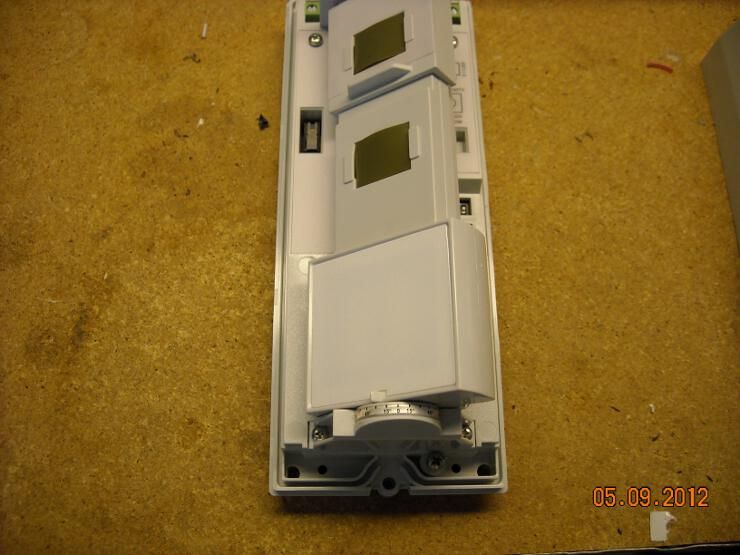
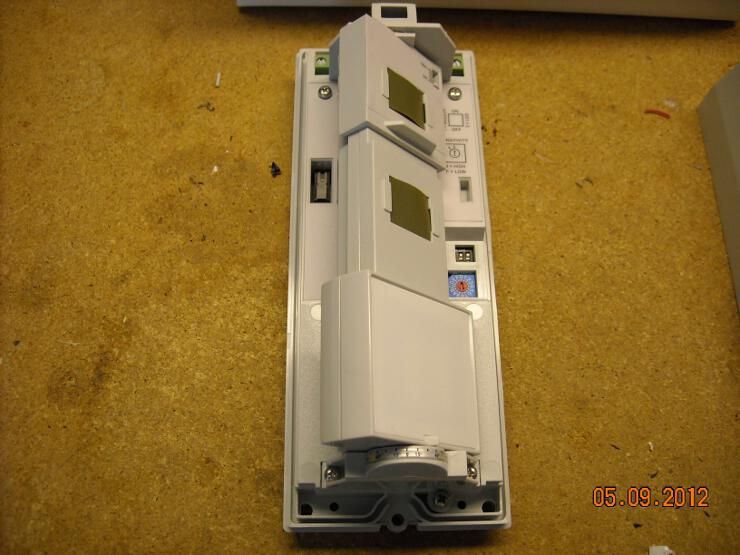
I went with the same mounting location, just for testing purposes (the wiring, all identical hookups to the previous Crow sensor, was already there). 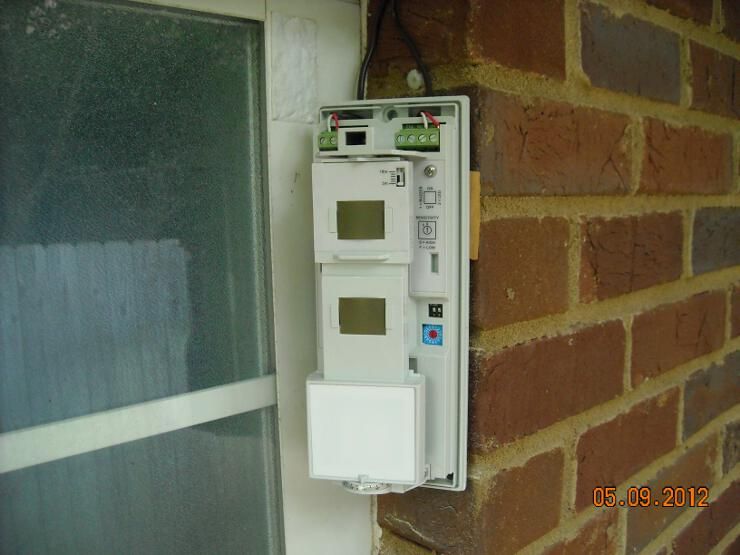
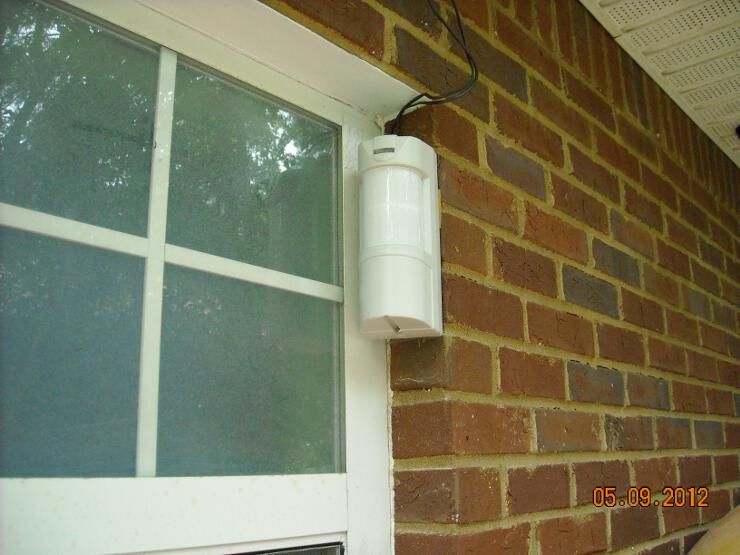
Problem was, the mounting location was too high... the regular Crow D&D dual-PIR is supposed to be mounted 7-8 feet off the ground for best results. This unit is supposed to be mounted at 4-5 feet. There was no way to do it right there. Where I'd placed it, it was scanning at fence-top height, and I was getting PIR-and-radar hits on feral cats at night... like this little bugger 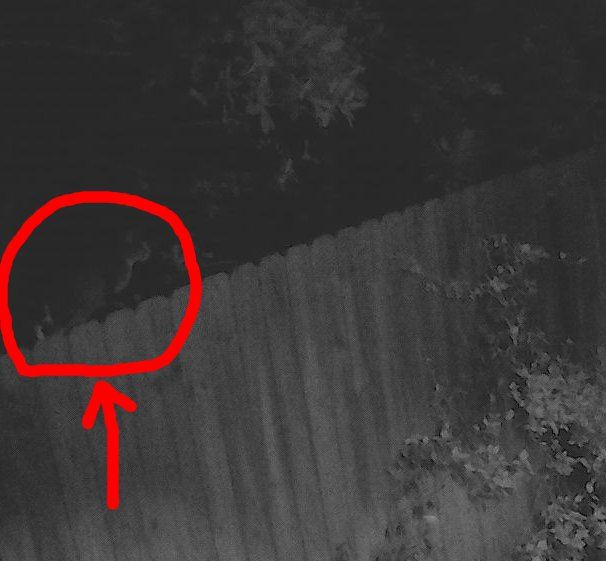
So I went back to plan "A." I took the original D&D PIR sensor and mounted it further down the wall, away from that AC unit. I also used a shallow outlet box to wall-mount it, and some conduit to run the wiring up to the attic. 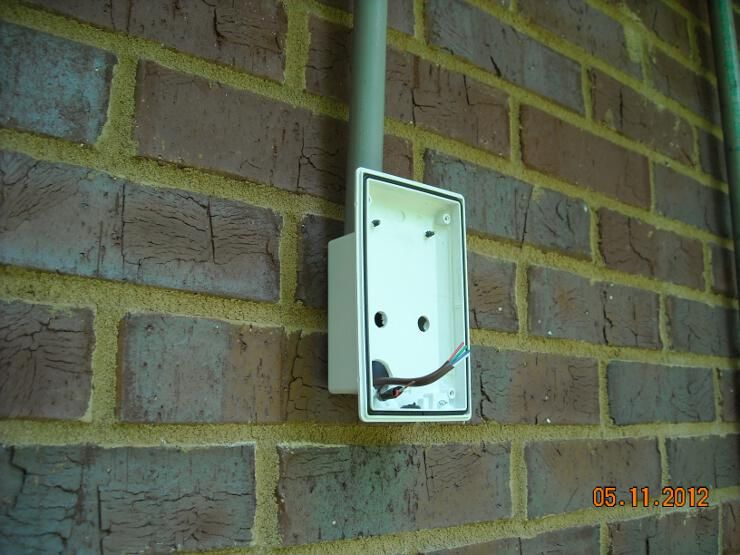
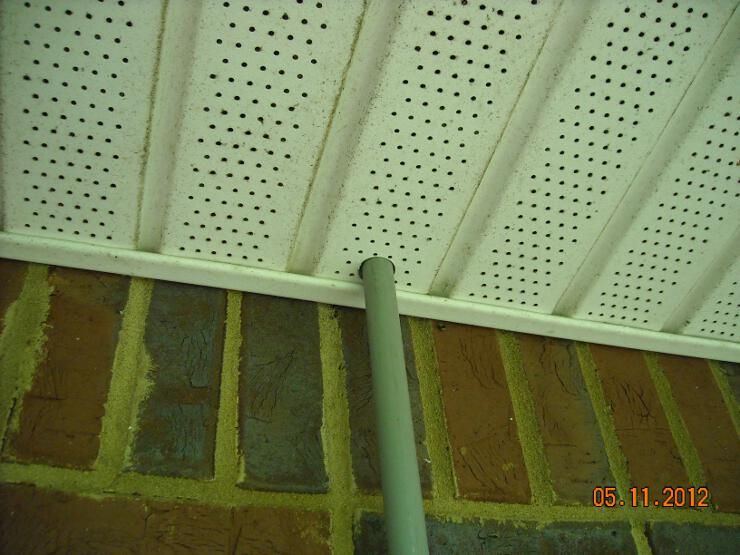
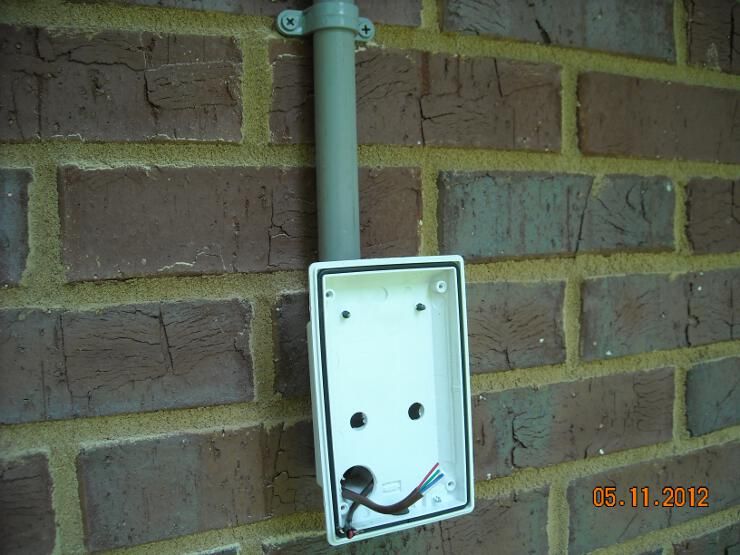
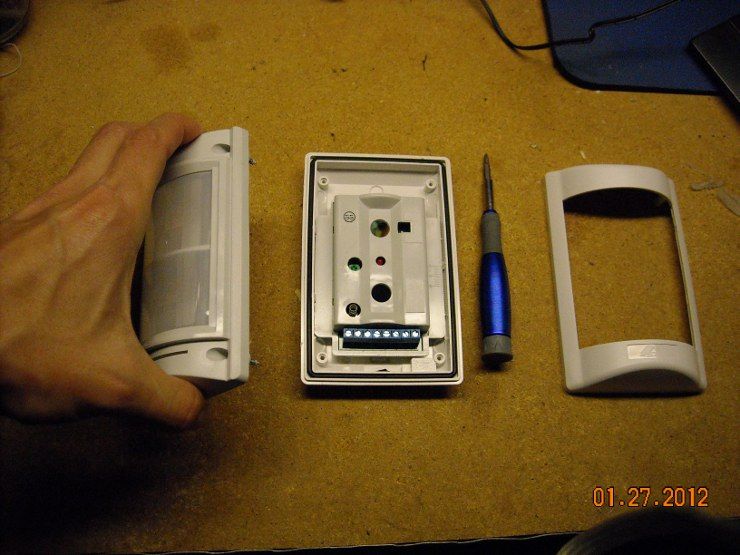
The electronic board of that D&D sensor is easily removable: 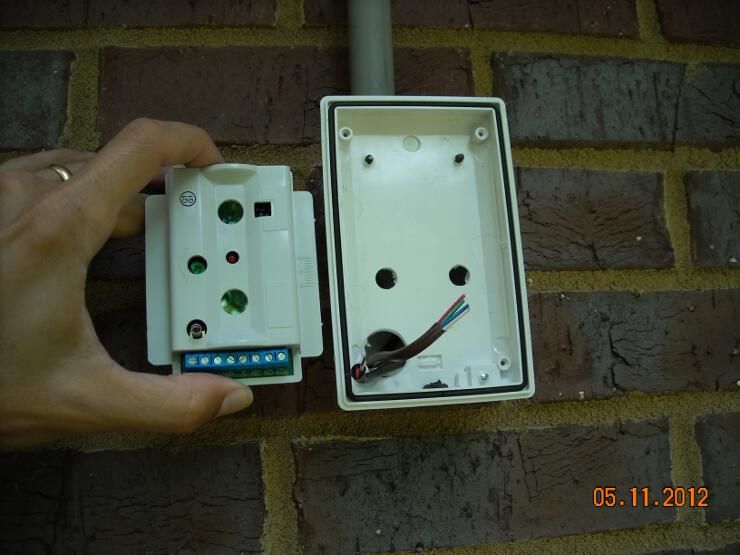
And here it is mounted: 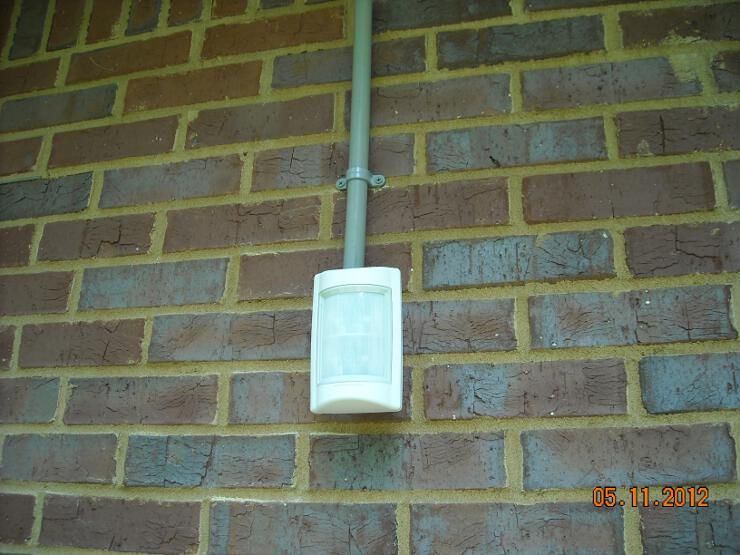
I walk-tested it, and there's no sneaking past that thing... no matter how slow you walk, and no matter how low you try to get. I'll update the forum on any further false-alarm problems as the weather warms up. |
"How can you know so little about this and be occupying a chair at the time that you do?"
-Christopher Hitchens to Ron Reagan Jr. on the topic of terrorism-
-Christopher Hitchens to Ron Reagan Jr. on the topic of terrorism-

|
Do you know where I can buy an alarm system composed by an ip camera and one external motion detector, as I have difficulty on mounting this equipment myself?
I have an IP camera with motion deteccion, but due to sunlight changes, I have many false alarms. And I think this is a common problem. It is necessary to have an external sensor to prevent false alarms. Thank you. |
|
Originally Posted By ccardoso:
Do you know where I can buy an alarm system composed by an ip camera and one external motion detector, as I have difficulty on mounting this equipment myself? I have an IP camera with motion deteccion, but due to sunlight changes, I have many false alarms. And I think this is a common problem. It is necessary to have an external sensor to prevent false alarms. Thank you. Some cameras have integrated PIR elements into the camera body. Mobotix does it, Axis does it with some of their models, and Vivotek does as well. You'd get FAR fewer false alerts with PIR detection, especially when you compare it to video motion detection. |
-----BEGIN GEEK CODE BLOCK-----
Version: 3.1.2
GMD d-- a+ C++ L++ w M e++++
PS--- PE++ Y++ t+ R- !tv b++++ D---
h---- A++ r+++ y+ z++++ k++ F+++/F4
------END GEEK CODE BLOCK------
Version: 3.1.2
GMD d-- a+ C++ L++ w M e++++
PS--- PE++ Y++ t+ R- !tv b++++ D---
h---- A++ r+++ y+ z++++ k++ F+++/F4
------END GEEK CODE BLOCK------

|
not sure if this is the right place, but can a home system be set up to notify the police without a dedicated monitoring service like ADT? I'm looking at a system for the new house in FL, and all I wanted were cameras but she seems to want the police notified in case someone breaks in while I'm away.
Or would I be looking at sending her phone an alert and she calls? |
|
Originally Posted By IHTFP08:
not sure if this is the right place, but can a home system be set up to notify the police without a dedicated monitoring service like ADT? I'm looking at a system for the new house in FL, and all I wanted were cameras but she seems to want the police notified in case someone breaks in while I'm away. Or would I be looking at sending her phone an alert and she calls? I think they all have a "service" that they call. I don't know if there's a law against the alarm directly contacting the police, but I doubt the police would be thrilled about a bunch of false alarms clogging up their 911 system. |
Everything you are doing is wrong, and it is my sworn duty to resist you.

|
Originally Posted By Abrenneman:
Is adding these sensors to a Hikvision camera and Hikvision DVR good to go as well? Thank you! As long as your Hikvision camera has the Alarm I/O feature, yes... you can add any of these sensors to a Hikvision cam as well. |
Everything you are doing is wrong, and it is my sworn duty to resist you.
|
Sorry for more questions!
I am running conduit and cat 6 direct bury wire to three locations around the property to get a better camera view of my actual house. I am just going with hikvision as that is what my entire system has. Actually already ordered from BH. Anyway I'm guessing I may need/want to add PIR sensors and will prob go with the crow stuff you mentioned. Can I run DC through cat 6? Or do I need to pull like 18ga double wire? Thank you! |
|
Originally Posted By Abrenneman:
Sorry for more questions! I am running conduit and cat 6 direct bury wire to three locations around the property to get a better camera view of my actual house. I am just going with hikvision as that is what my entire system has. Actually already ordered from BH. Anyway I'm guessing I may need/want to add PIR sensors and will prob go with the crow stuff you mentioned. Can I run DC through cat 6? Or do I need to pull like 18ga double wire? Thank you! I'd run 18ga 2-conductor bell wire along with your cat6. It'll go in the same conduit easily. |
Everything you are doing is wrong, and it is my sworn duty to resist you.
|
Originally Posted By TheGrayMan:
I'd run 18ga 2-conductor bell wire along with your cat6. It'll go in the same conduit easily. Alright done! Just need to order some pir sensors and a Dc injector. Do you have a recommendation for a injector that would be for maybe 6 pir sensors at most? No need for IR illuminators or anything. |
|
So something like This
Cut the wire ends off and connect to a junction box, that has the 18ga wires ran to my sensors and I am good to go? Sorry for all the questions, never really worked with DC before like this and don't want to fry my sensors. And then just turn the power up to 12, or up slowly until it all works? Thanks again! ETA I am having a hard time finding crow PIR Sensors in the US! |

|
It's time for a long-needed update to this thread.
By now, many posters are familiar with the Hikvision brand of cameras. Hikvision came on the market a few years ago, and have really pushed a new standard in the quality-for-$$$ category. The price-points of Hikvision (and their competitor Dahua) have become so affordable that many members have installed (or are considering installing) these systems. With that in mind, let's discuss how to make your Hikvision system smarter... with sensors. Alarm sensors have been used for decades in the construction of regular home burglar alarm systems, and most are electrically quite simple. They are generally either NO or NC (Normally-Open, or Normally-Closed) switches, and the alarm panel/brain monitors the state of these switches by running a very low-voltage/amperage current through the sensor. If a NC (Normally Closed) sensor (like a reed switch on a door or window) experiences a change-of-state (eg. the window/door opens, moving the magnet away from the reed switch, and the connection opens, breaking continuity) the current stops flowing, and the panel/brain detects it. The same can happen when current suddenly flows through a NO (Normally-Open) sensor, when it was an open connection before. Here is a link that explains it Simple mechanical sensors like reed switches are as dead-nuts reliable as a sensor can get (as long as the magnet retains its magnetism)... but their application is limited to a defined opening/door/window/gate. Fortunately, there are other sensors that can cover a much wider area, with reliability that is nearly as good. This brings us to PIR and Microwave sensors. These are the "motion detectors" that everybody has probably seen a thousand times in standard household burglar alarms. They are usually mounted in a corner, and cover a room in the house. Fortunately, that's not nearly the limit of their utility. They can also be mounted outdoors, and cover perimeter areas on your property, or the yard around your house. These are the sensor technology behind some "driveway" alarms, and many game-cameras. Here are several examples. Going from Left-to-Right, we have an Optex LX-402, a Crow SRX-360, and a Crow Double-Dual (DD): All are outdoor-rated, but the Optex only uses a single PIR sensor. The SRX has dual-sensors (PIR and Microwave). The DD has dual PIRs. 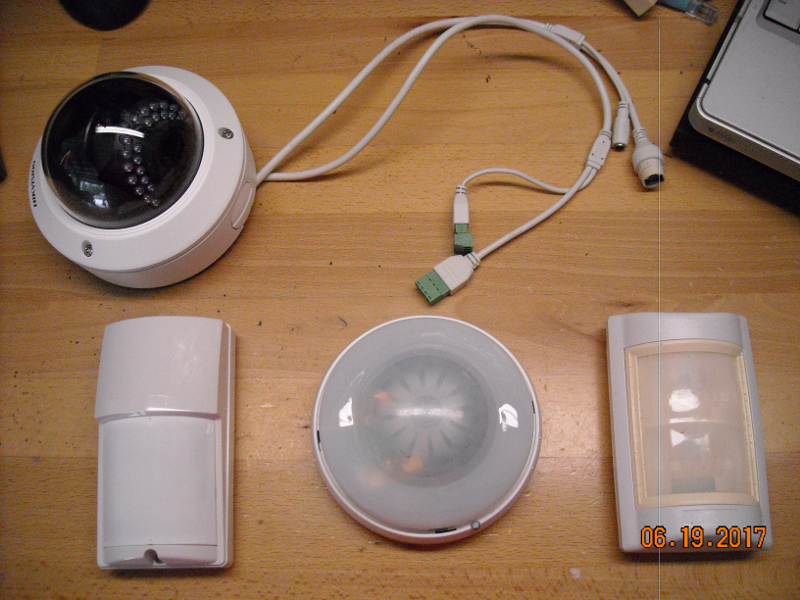
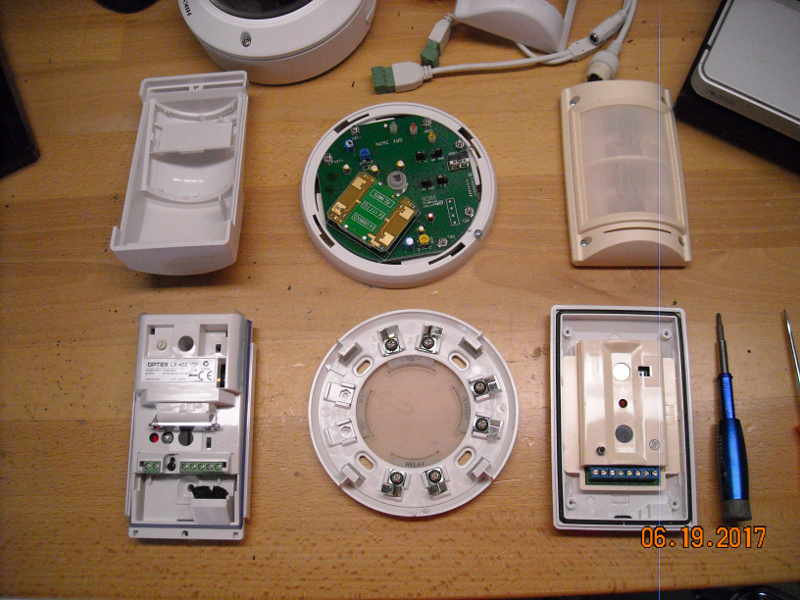
Here are close-ups of the Optex, the SRX, and the DD, respectively: 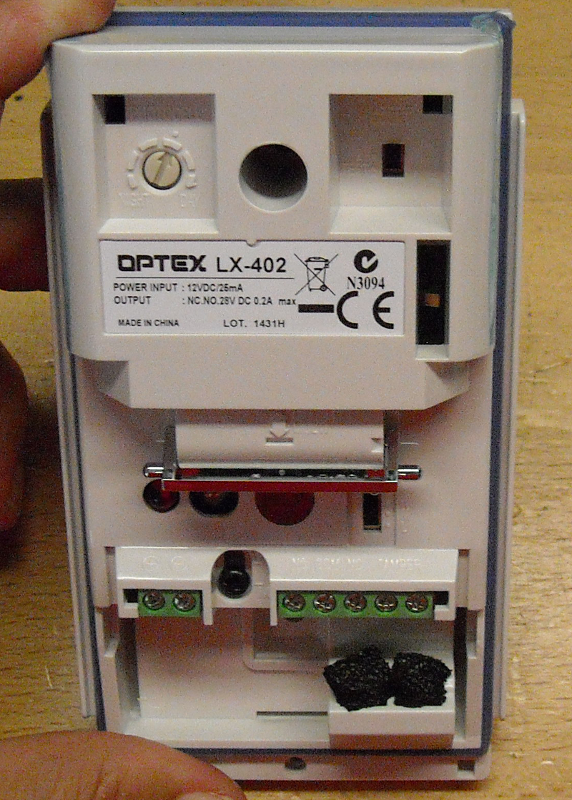

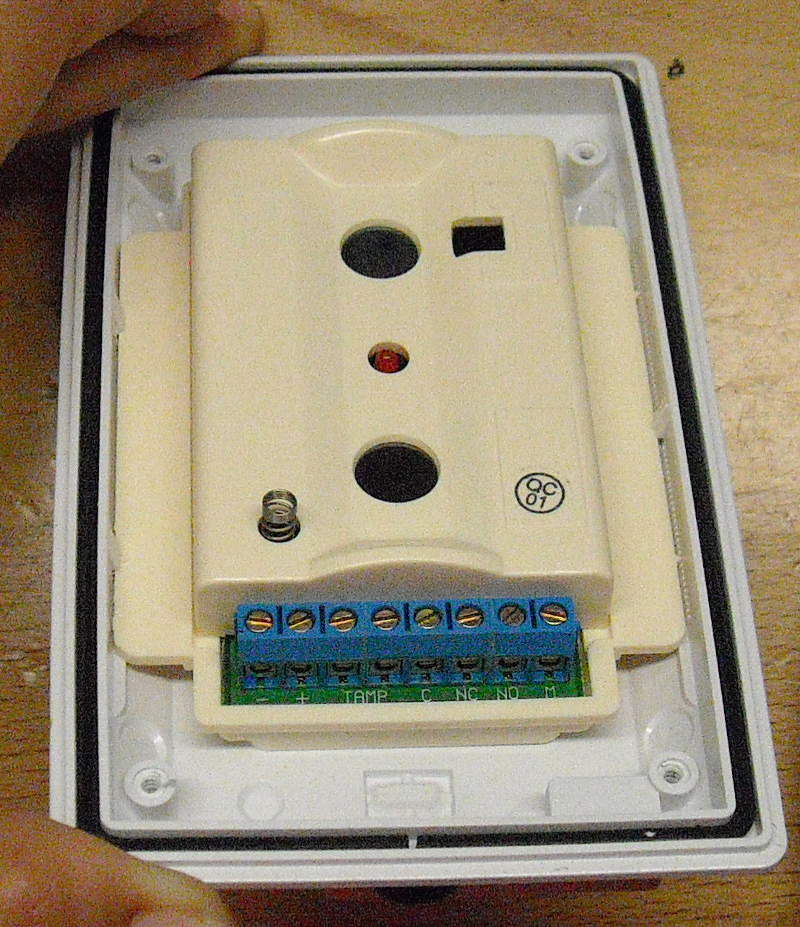
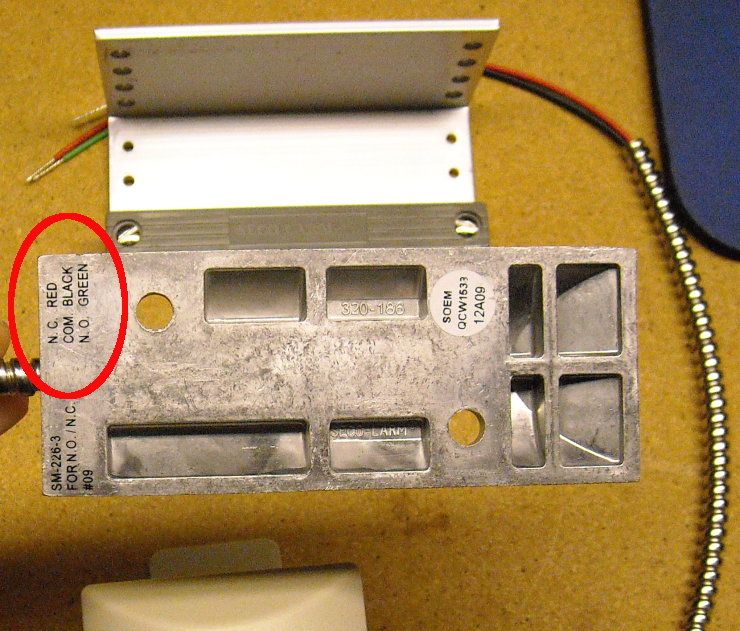
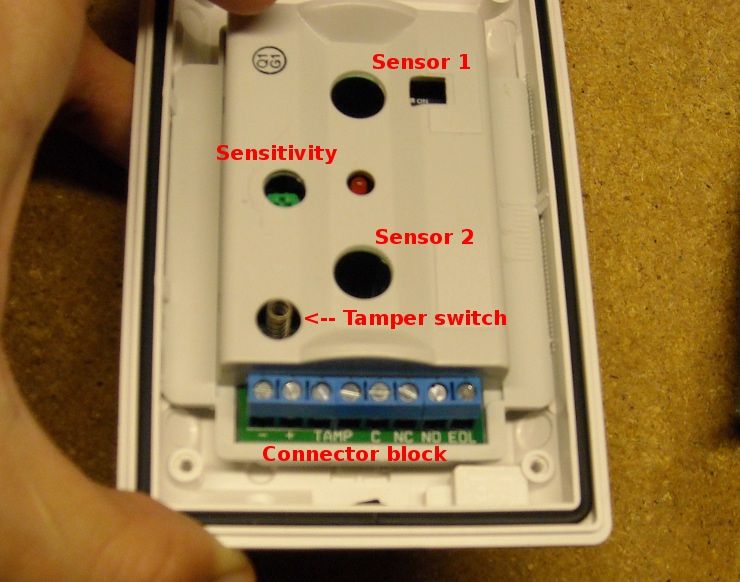
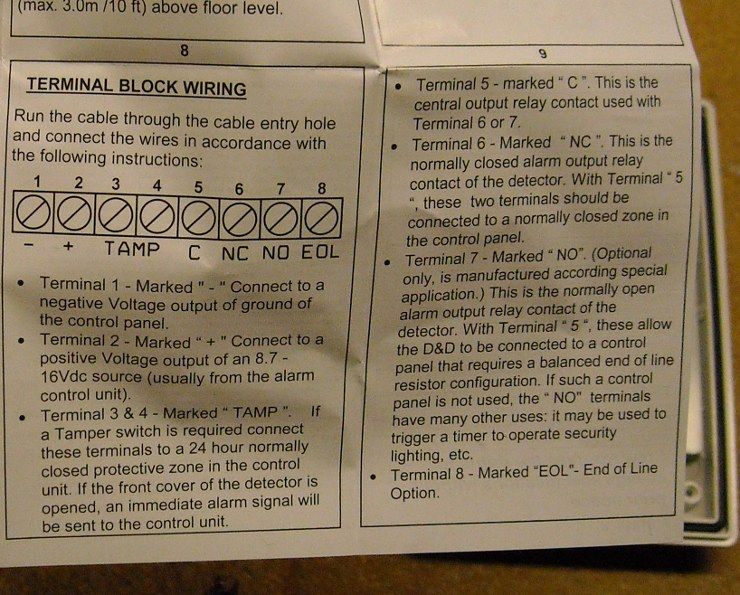
Note what you see on all of the close-ups. All three of these sensors have 12v DC input (note the +/- terminals; you can't read them on the Optex, but it's the left-most terminals), and NO/NC connections, usually next to a "C" or "COM" connection, which would be the ground (the alarm connections are marked "relay" on the SRX, and are a NC zone). The NC/NO/Relay connections are the ones that go to the camera. It's two wires; you can't get it wrong. So each sensor requires four wires: two for power, and two for signal to the camera or alarm panel. Standard alarm wire has four conductors for this reason (circled in red): 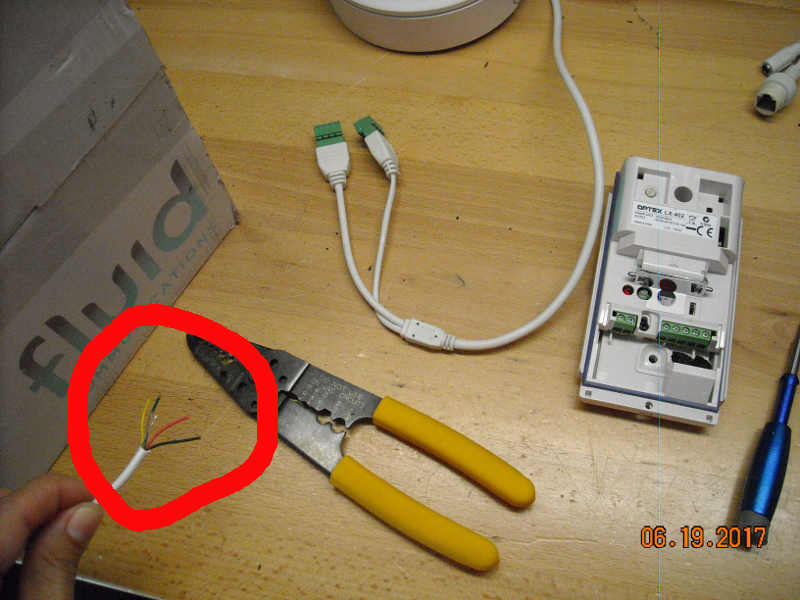
We are going to use the Optex as our example sensor. The Hikvision "Alarm" connector looks like another connector on the camera (the "Audio" connector), and you have to read the imprint on the plastic to determine which one you have. Going from right-to-left in the below picture, the Alarm connector has four connections: I, GND, O, and another GND. For the input from your sensor, you need to connect wires to "I" (for input) and the immediately-adjacent "GND." 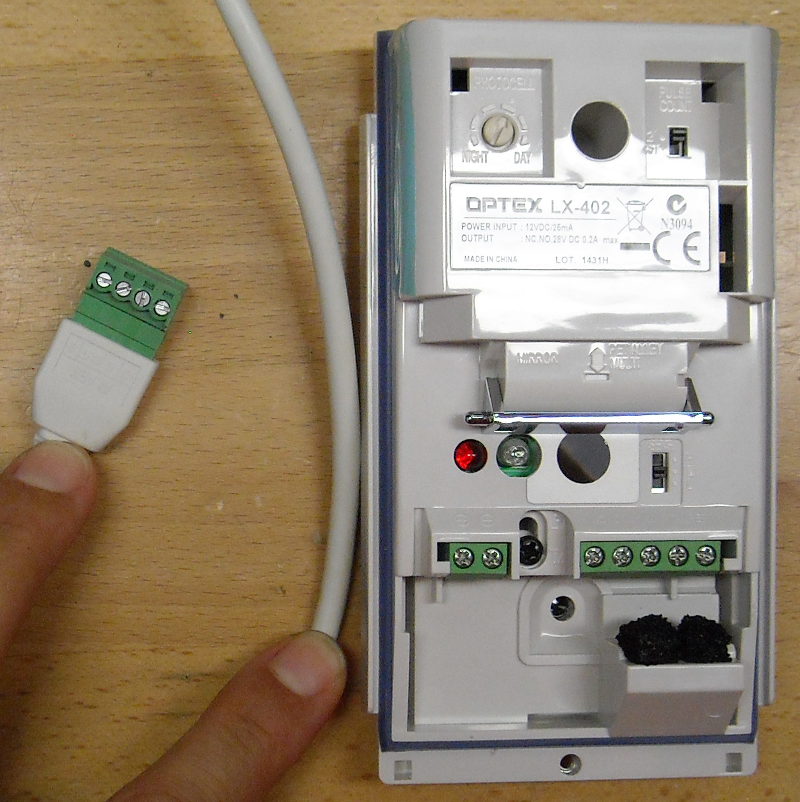
You can see they are standard screw-down terminals (end-on view:) 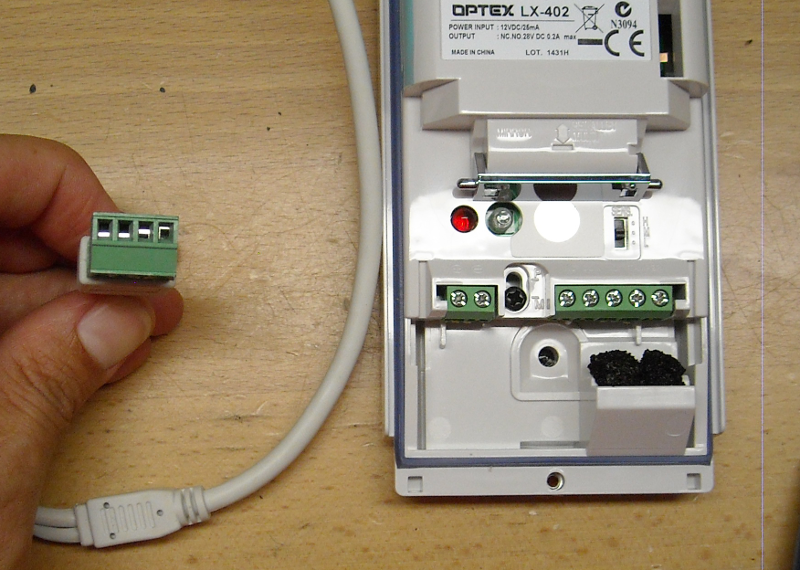
When the PIR is hooked up to both power, and the camera, it looks like this. 12v DC hooked up to the PIR, and the two wires going from PIR to camera. After that, it's all software config in the camera. I'll cover that in my next post. Referring to the pic below, on the camera side, the Green wire is attached to GND terminal, and the Yellow wire is connected to "I" (or input) terminal. On the PIR side, the GND terminal on the PIR is directly between the NO, and the NC terminals. So the connectors on the PIR side, going from left-to-right are (+) (-)... skip to next connector block... NC, GND, NO. 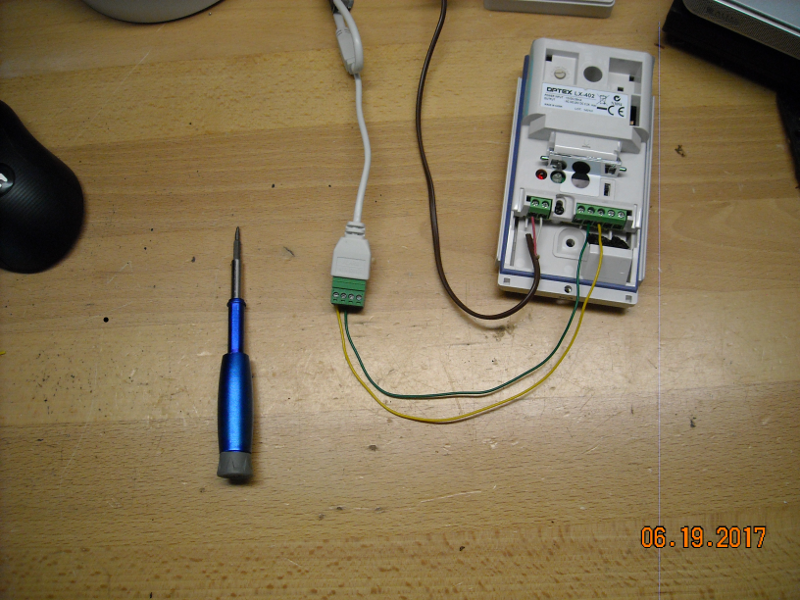
Make sense so far? |
Everything you are doing is wrong, and it is my sworn duty to resist you.
|
So here's the software configuration within the Hikvision cameras (latest Firmware version, as of this post).
Start at the "Network" configuration section, and make sure you click "Advanced Settings" in the left-most column. The "Basic" section doesn't allow email configuration, but the "Advanced Settings" section will give you the option of configuring an email server. Click the Email tab at the top of the page (red arrow): 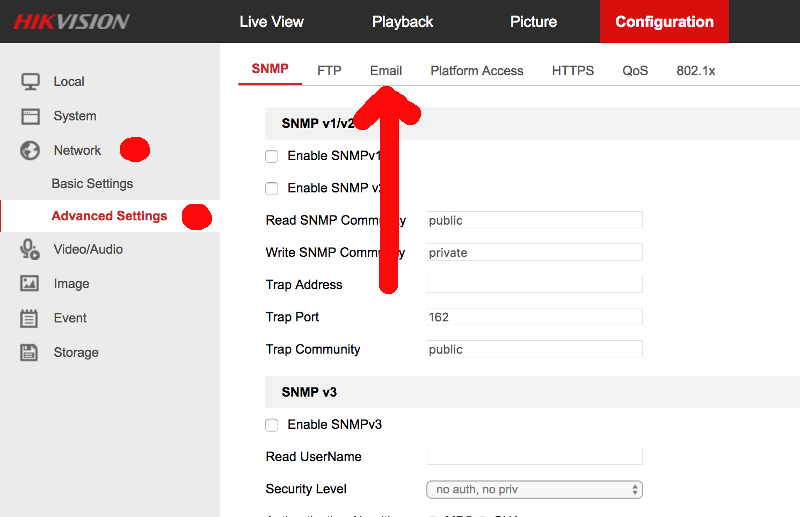
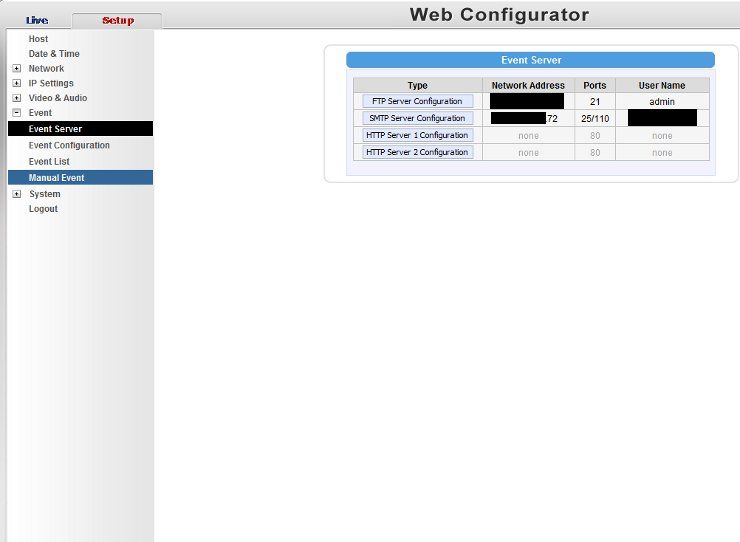
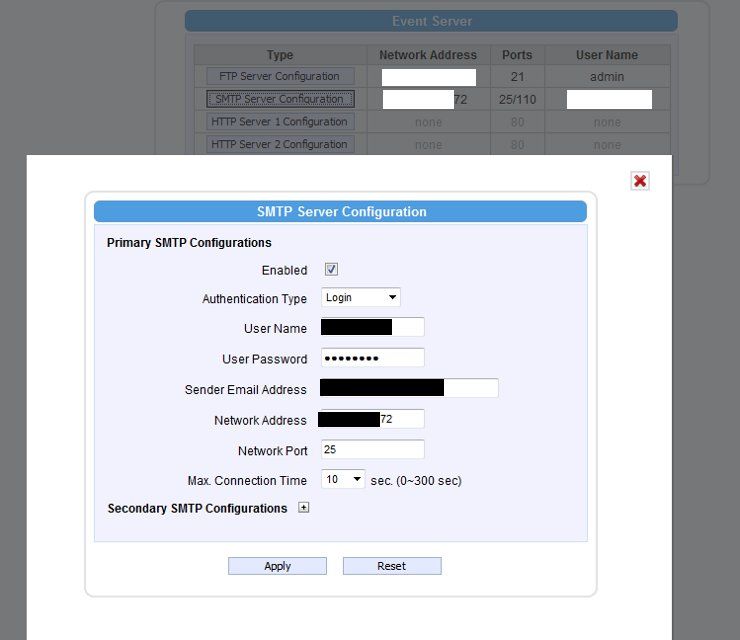
Once you're in "Advanced Settings" and "Email," you need to enter the settings for whatever email server or email relay service you're using. If you have a company email server, you can enter the IP address, sender, etc. Sender: just a name Sender's address: This is an email address... [email protected], or whatever. SMTP server: This is the IP address of your mailserver. It can be local, or remote. SMTP port: Usually 25, but can be on other ports, depending on your mail service. You can use anything you like... but as an example, the instructions for relaying through Google's G-suite are here. There are others... googling for "SMTP relay service" will give you plenty of options (usually 5-10 bucks a month or so), or you can set up your own mailserver if you have the geek chops to make it work. Click "attached image" to get an image in your email, and I usually pick 5s as the time interval. That gives me about three images per-email. Authentication: enter whatever your service requires. I use IP authentication, so I don't have to worry about this section. As long as the email comes from a certain IP, the service will forward it. Don't forget to click the "Test" button (red arrow) to make sure it all works before moving on. 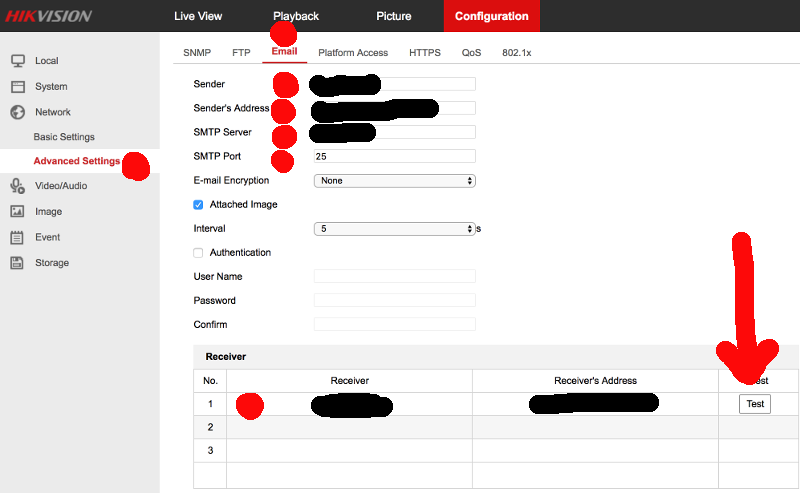
That's the hard part... the rest is easy. Here's the "Basic Event" section. Note the red-dotted fields/buttons. There is only one alarm input, so the A<--1 is checked by default. The alarm type is NO (Normally-Open), so we have that selected. You could just as easily use a NC sensor, and simply change this field to NC The "Arming Schedule" tab in the middle of the page is highlighted, enabling you to determine exactly when the camera will pay attention to the sensor (the sensor is always active... but unless it's during one of the blue time-periods, the camera will ignore the input). Clicking on a day will allow you enter time intervals, and then repeat them on various days, or set each day with a custom time schedule. This person has kids, so this camera alarm is set to be active during the day when owner is at work and kids are at school, and at night... it's largely inactive during the weekend, when kids are home and running around. 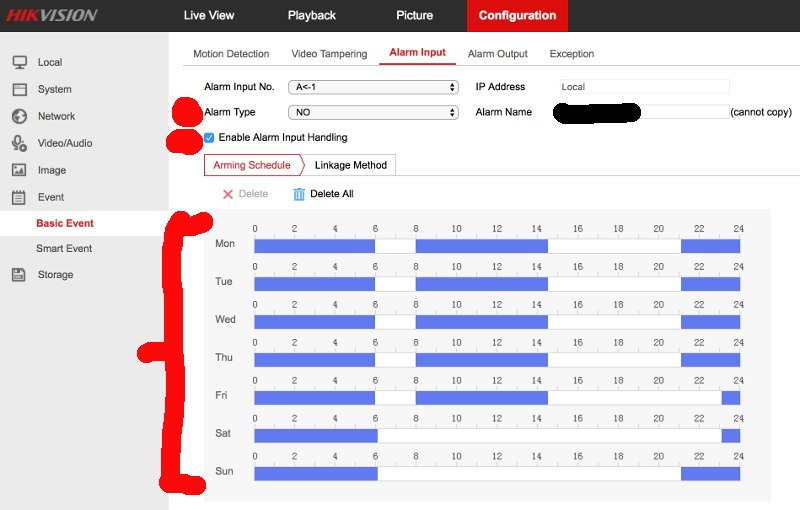
Clicking the "Linkage Method" tab will bring up the options of what you want the camera to do with the alarm. Ensure the "Alarm Type" is still "NO" Enable Alarm input handling Under "Normal Linkage" click "Send Email," and an email will be sent every time the alarm is triggered. 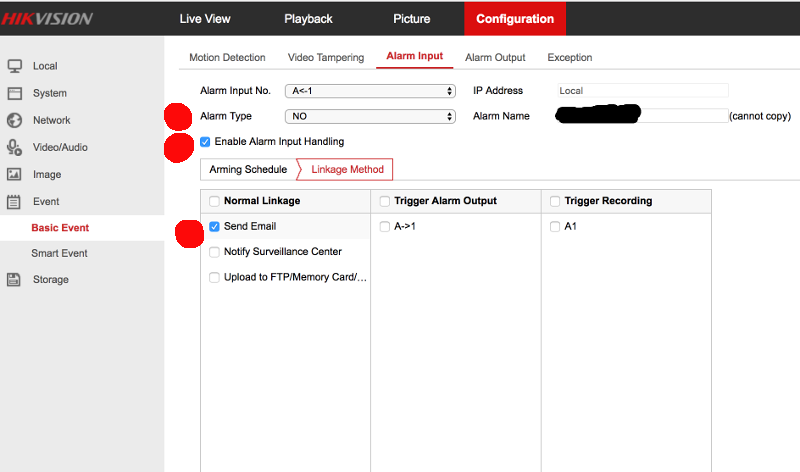
That should do it. Now as you look at those pages, you can see that other options exist. You can also enable alarm OUTPUT from that camera. This output can be fed to an alarm system, a buzzer, a relay, a chime, a light... the options are endless. It can also trigger internal recording inside the camera (to a microSD card), so you have backup images in case the bad guys steal your DVR/NVR. |
Everything you are doing is wrong, and it is my sworn duty to resist you.

Armory Sponsor