


Armory Sponsor

Posted: 5/14/2026 7:02:43 PM EDT
[Last Edit: hitchhiker][Edited]
|
ITT I will show you my method for improving the feeding, smoothness, and overall reliability of the Ruger BX-25 magazine. They work fairly well from the factory, although I have heard that the quality of them has gone downhill in recent years. With FRTs now available for the 10/22, this is no longer the chase for diminishing returns as it was when I developed the method years ago. I did it then because I was bored and had already done everything else to my 10/22s that I could think of. I once had one of the old Akins Accelerators, and with that particular setup the BX-25 mags would occasionally choke. Once I slicked up the mags, they ran flawlessly with it. Ammunition aside, with a 10/22 that is in decent working order and clean, the magazine is typically the weakest link. Except the 10rd mags, but who wants those when 25rd mags are available? If you attempt any of this to one of your mags, you do so at your own risk. If you remove too much material from the feed ramp of the mag for instance, it will change the angle of presentation of the cartridge to the chamber. Use finesse. The goal is to remove very little material; too little to be easily measured. You only want to smooth out what is already there. Tools and materials needed: 3/32" allen key (find one that isn't worn- these screws are stainless and they can strip easily) Scotch bright pad 220 grit sand paper (not shown) Some sort of dry lube (I used 3-in-1 PTFE lube in this instance) I have also used EEZOX in the past. Anything that leaves a dry or mostly dry film will work. Avoid wax or wet lubes- lead and fouling stick to these and form a gunk that reduces feeding reliability. Dental polishing strips- you can get these on amazon for around $10 (look up Amylove Dental Polishing Strips) and get the 3-pack with fine, medium, and course grits. Ultrasonic cleaner if you have one, not strictly necessary though. 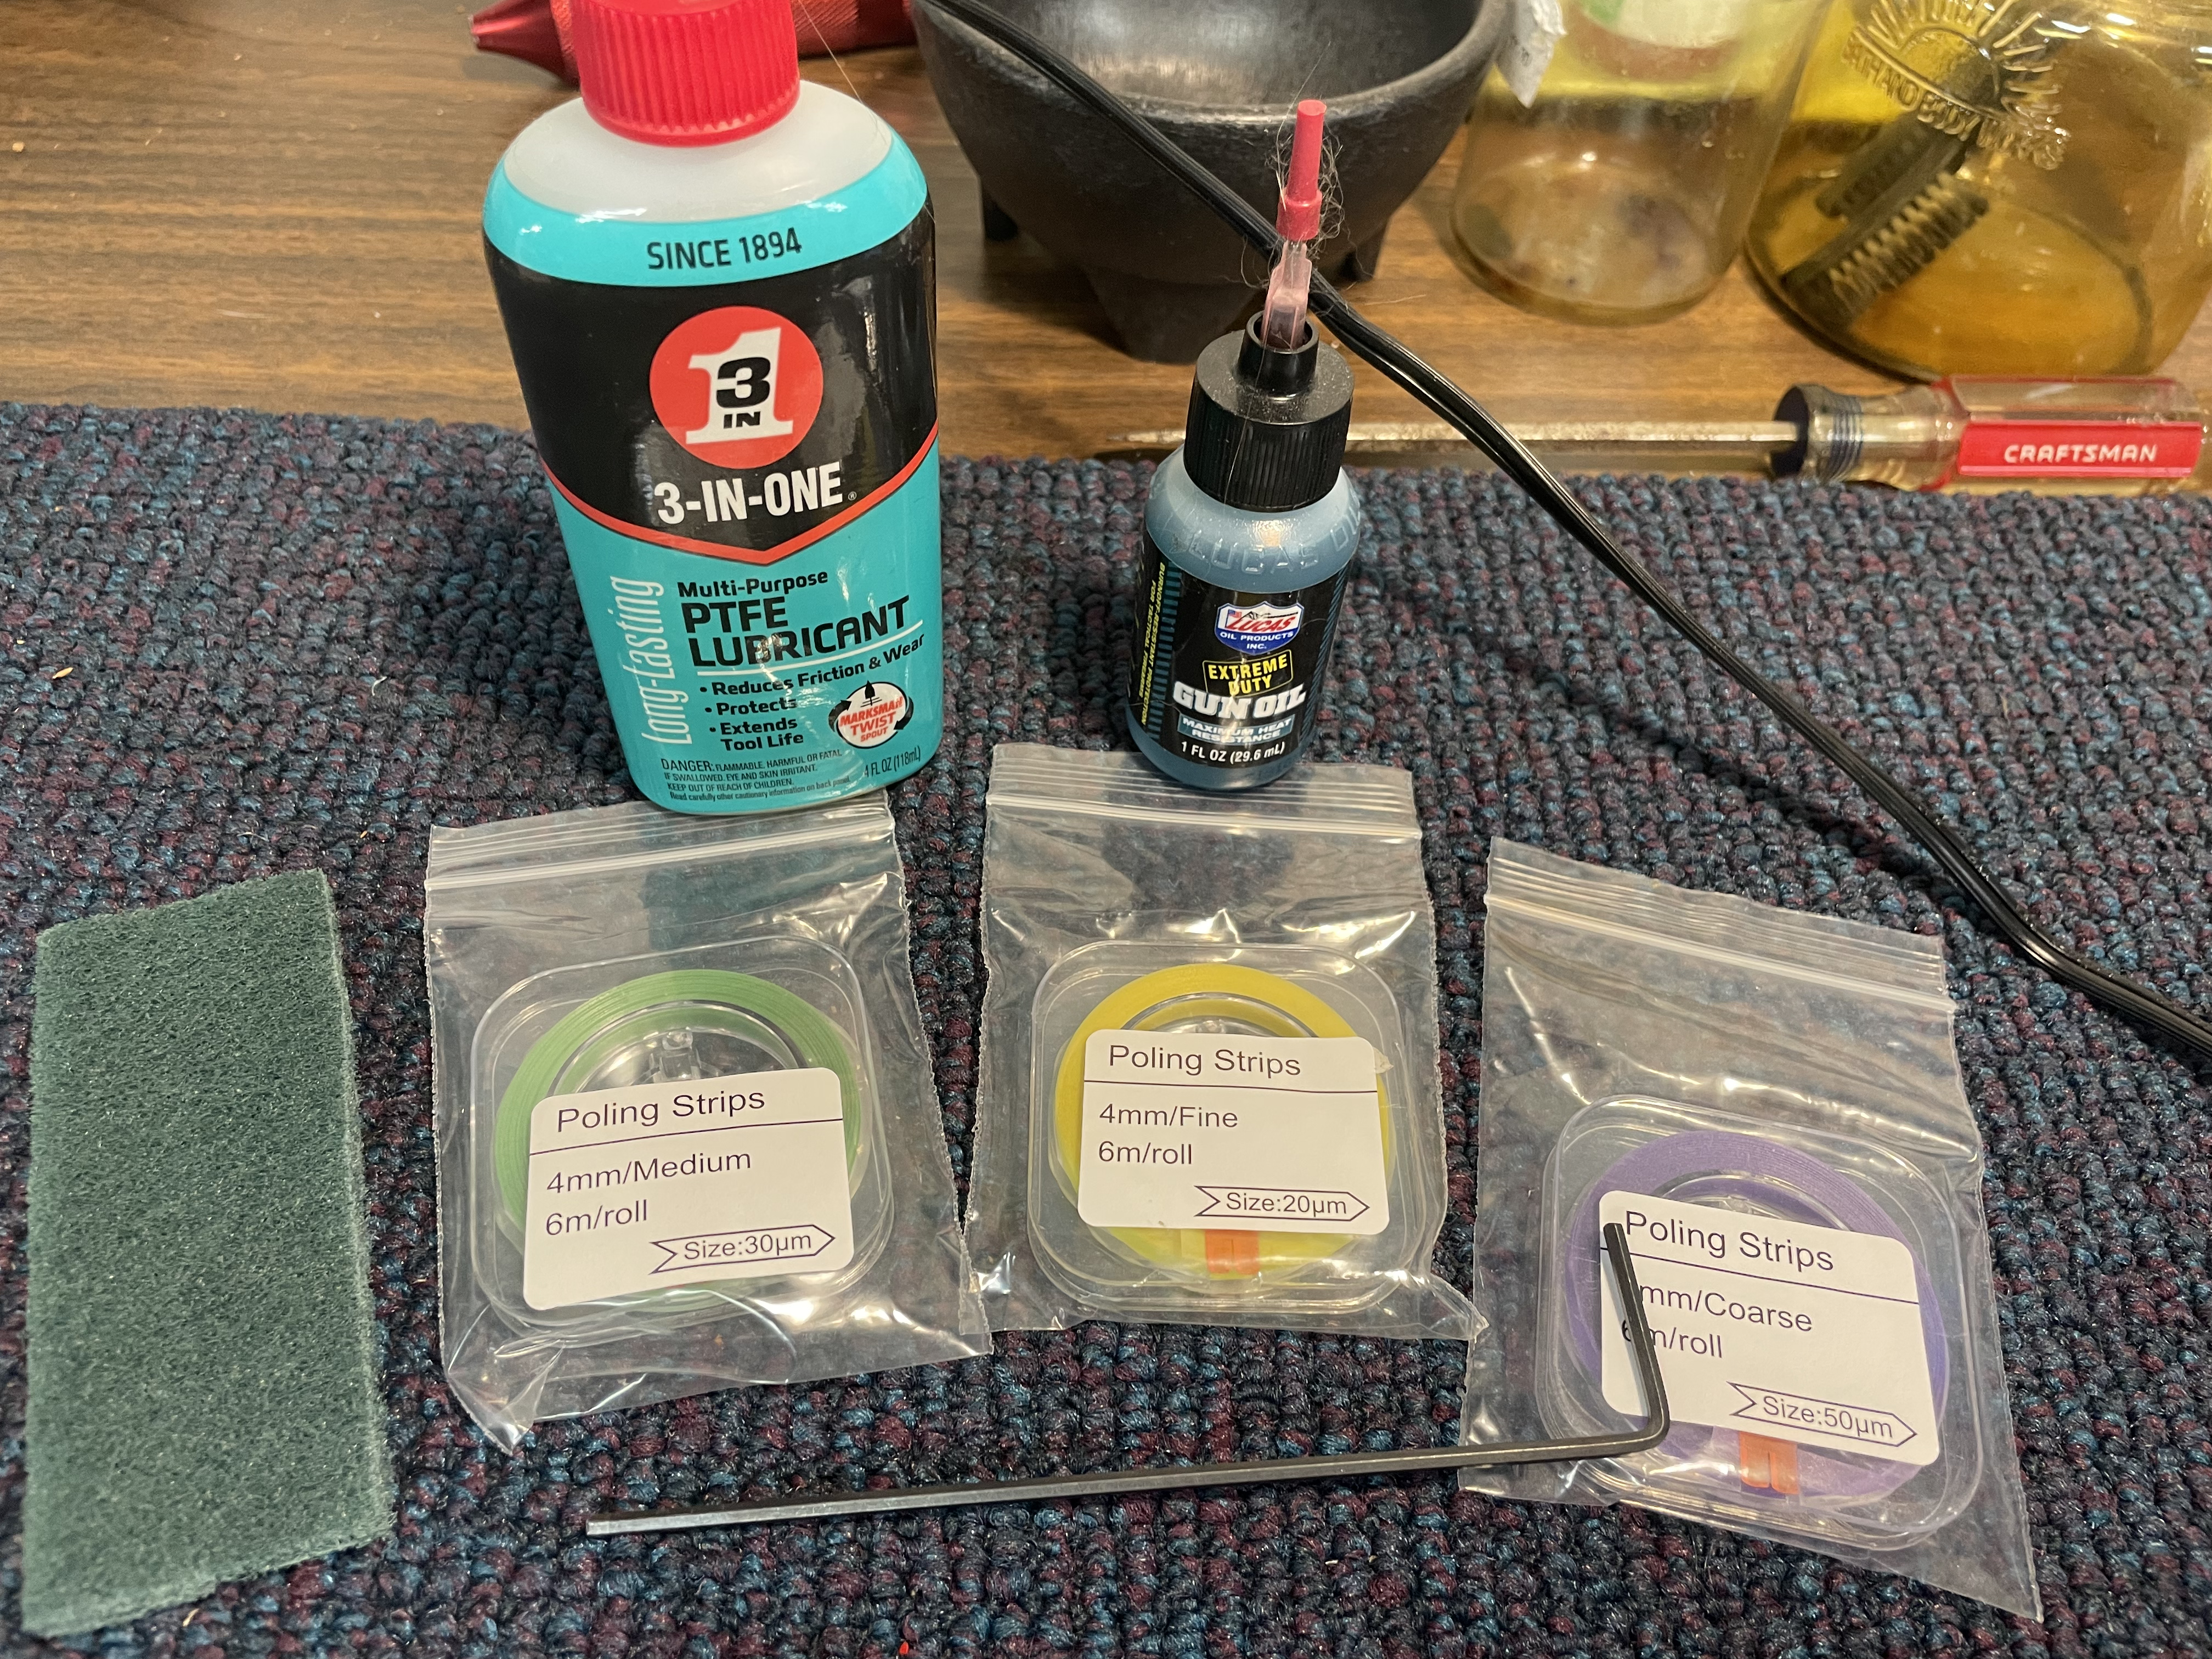 A couple notes before you begin- if the mags are dirty, I suggest that you wear nitrile gloves. Lead poisoning is no joke. Also, the mags themselves are very forgiving to disassemble and reassemble; the follower spring is self-contained will not come flying out at you. If you are doing them in batches, keep the components of each mag WITH that mag. There have been several iterations of these mags over the years and I can't guarantee the parts from one iteration will work for another. The differences are subtle, but you never know. I actually took a scribe to the ones I did years ago and numbered each major component to match each mag, since I would do several at a time. Less potential for headaches that way. Finally, if the mags are dirty, clean them thoroughly before beginning any modifications. I suggest using an ultrasonic cleaner if you have one, filled with water, a splash of simple green or something similar, and a drop or two of dawn dish soap. Only use the ultrasonic on the feed lips section and the follower. You could throw everything but the follower spring assembly and screws in there if you want, but good luck getting the mag bodies dry in a reasonable timeframe. They have lots of nooks and crannies. Use an old tooth brush to scrub these parts well. Alternately, just use soapy water and a toothbrush. Step 1- Remove the allen screws at the top and bottom of the mag, set aside. Note that the long screw goes to the bottom of the mag and the short screw goes to the top. Pull the mag halves apart, with the mag laying on its side such as it if the screws you just removed were at the top. Right-hand side of the mag facing upwards, in other words. This image shows the mag already split open. Note- the bottom screw threads into a small nut that is pressed into the mag body. These CAN fall out, but usually are a snug fit and do not. You can put a piece of tape over the nut hole to contain it if you are concerned with that happening. 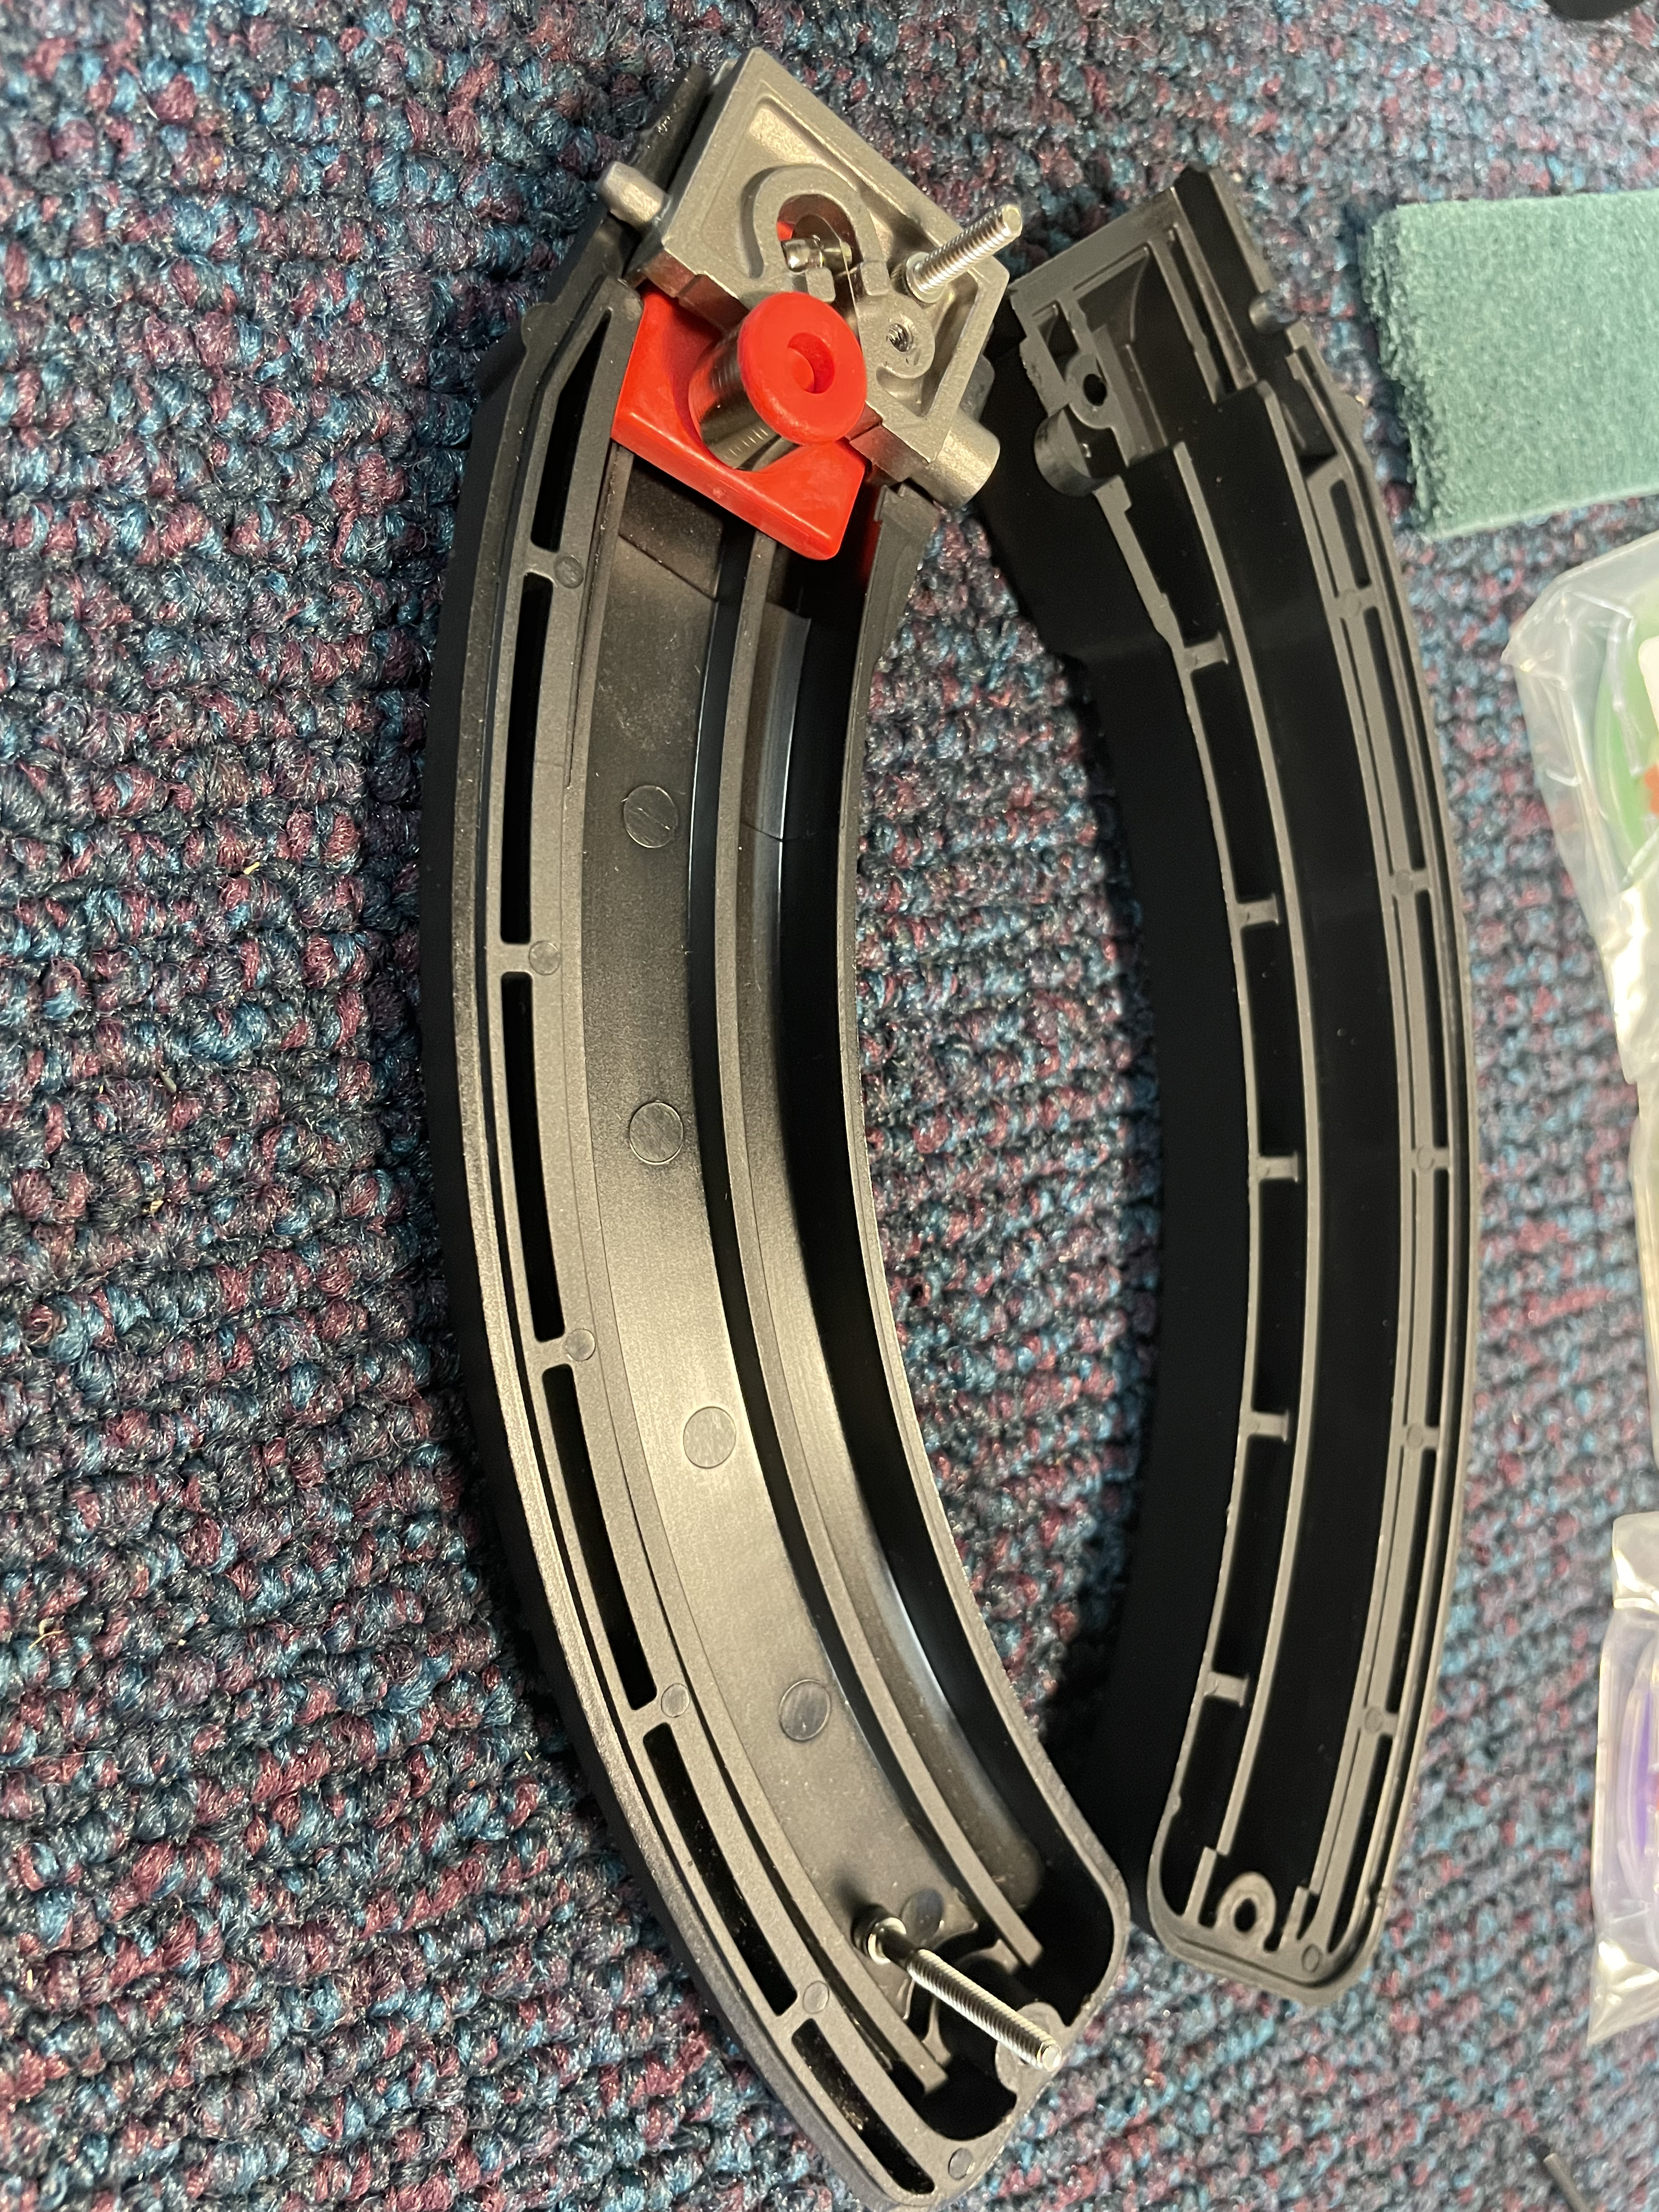 Step 2- Take note of how the parts at the top of the mag are oriented. I suggest you take some pics of it with your cell phone for reference. As I said, the design is forgiving. After you take note of the parts orientation, lift out the clockwork spring and the little roller that it is wound around. It is self-contained and unless you drop it or something it'll stay that way. Set it aside, and then you can slide the follower away from the feed lips section of the mag. The follower is the red part with the post sticking up, the post being what you just slid the spring assembly off of. Once it is clear of the metal feed lips assembly it can be lifted out and set aside. Now you can pivot the feed lip assembly upward (the part of it that is deeper in the mag lifts upward first, then the whole thing lifts out) and at this point the mag is now completely disassembled and the cleaning/ work can begin. Clean the feed lips, follower, and inside of the mag halves now if they need it. 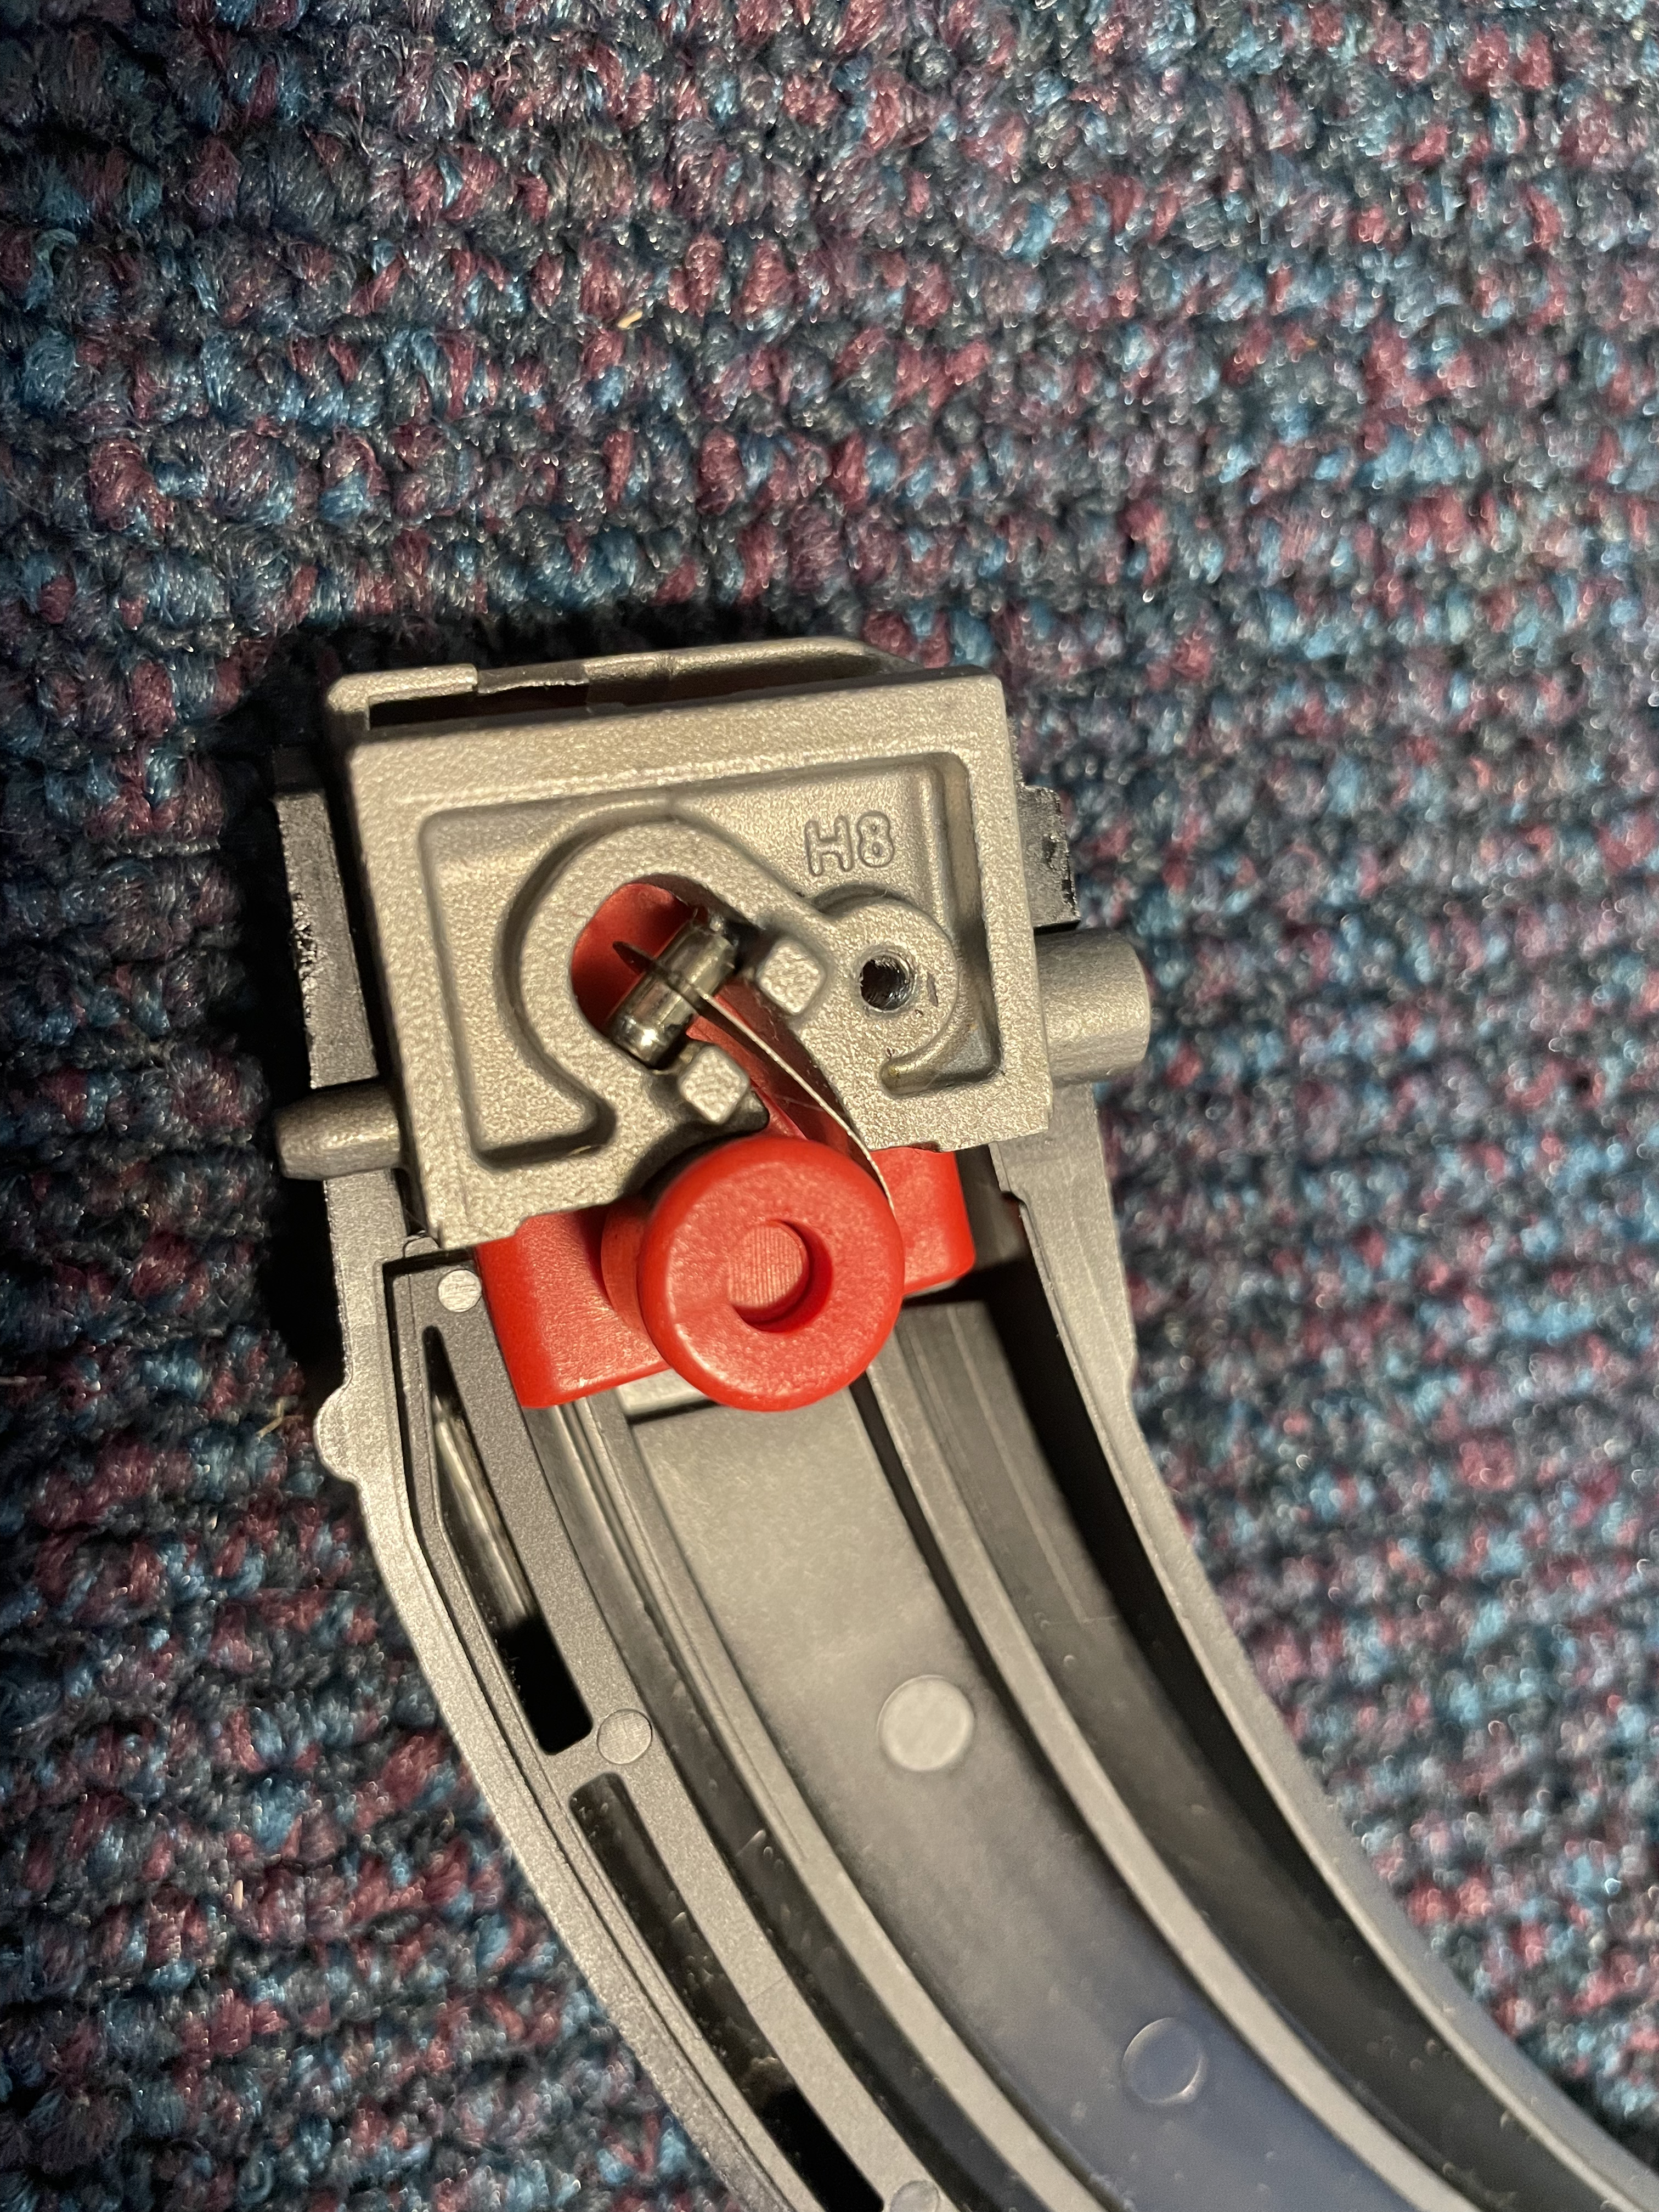  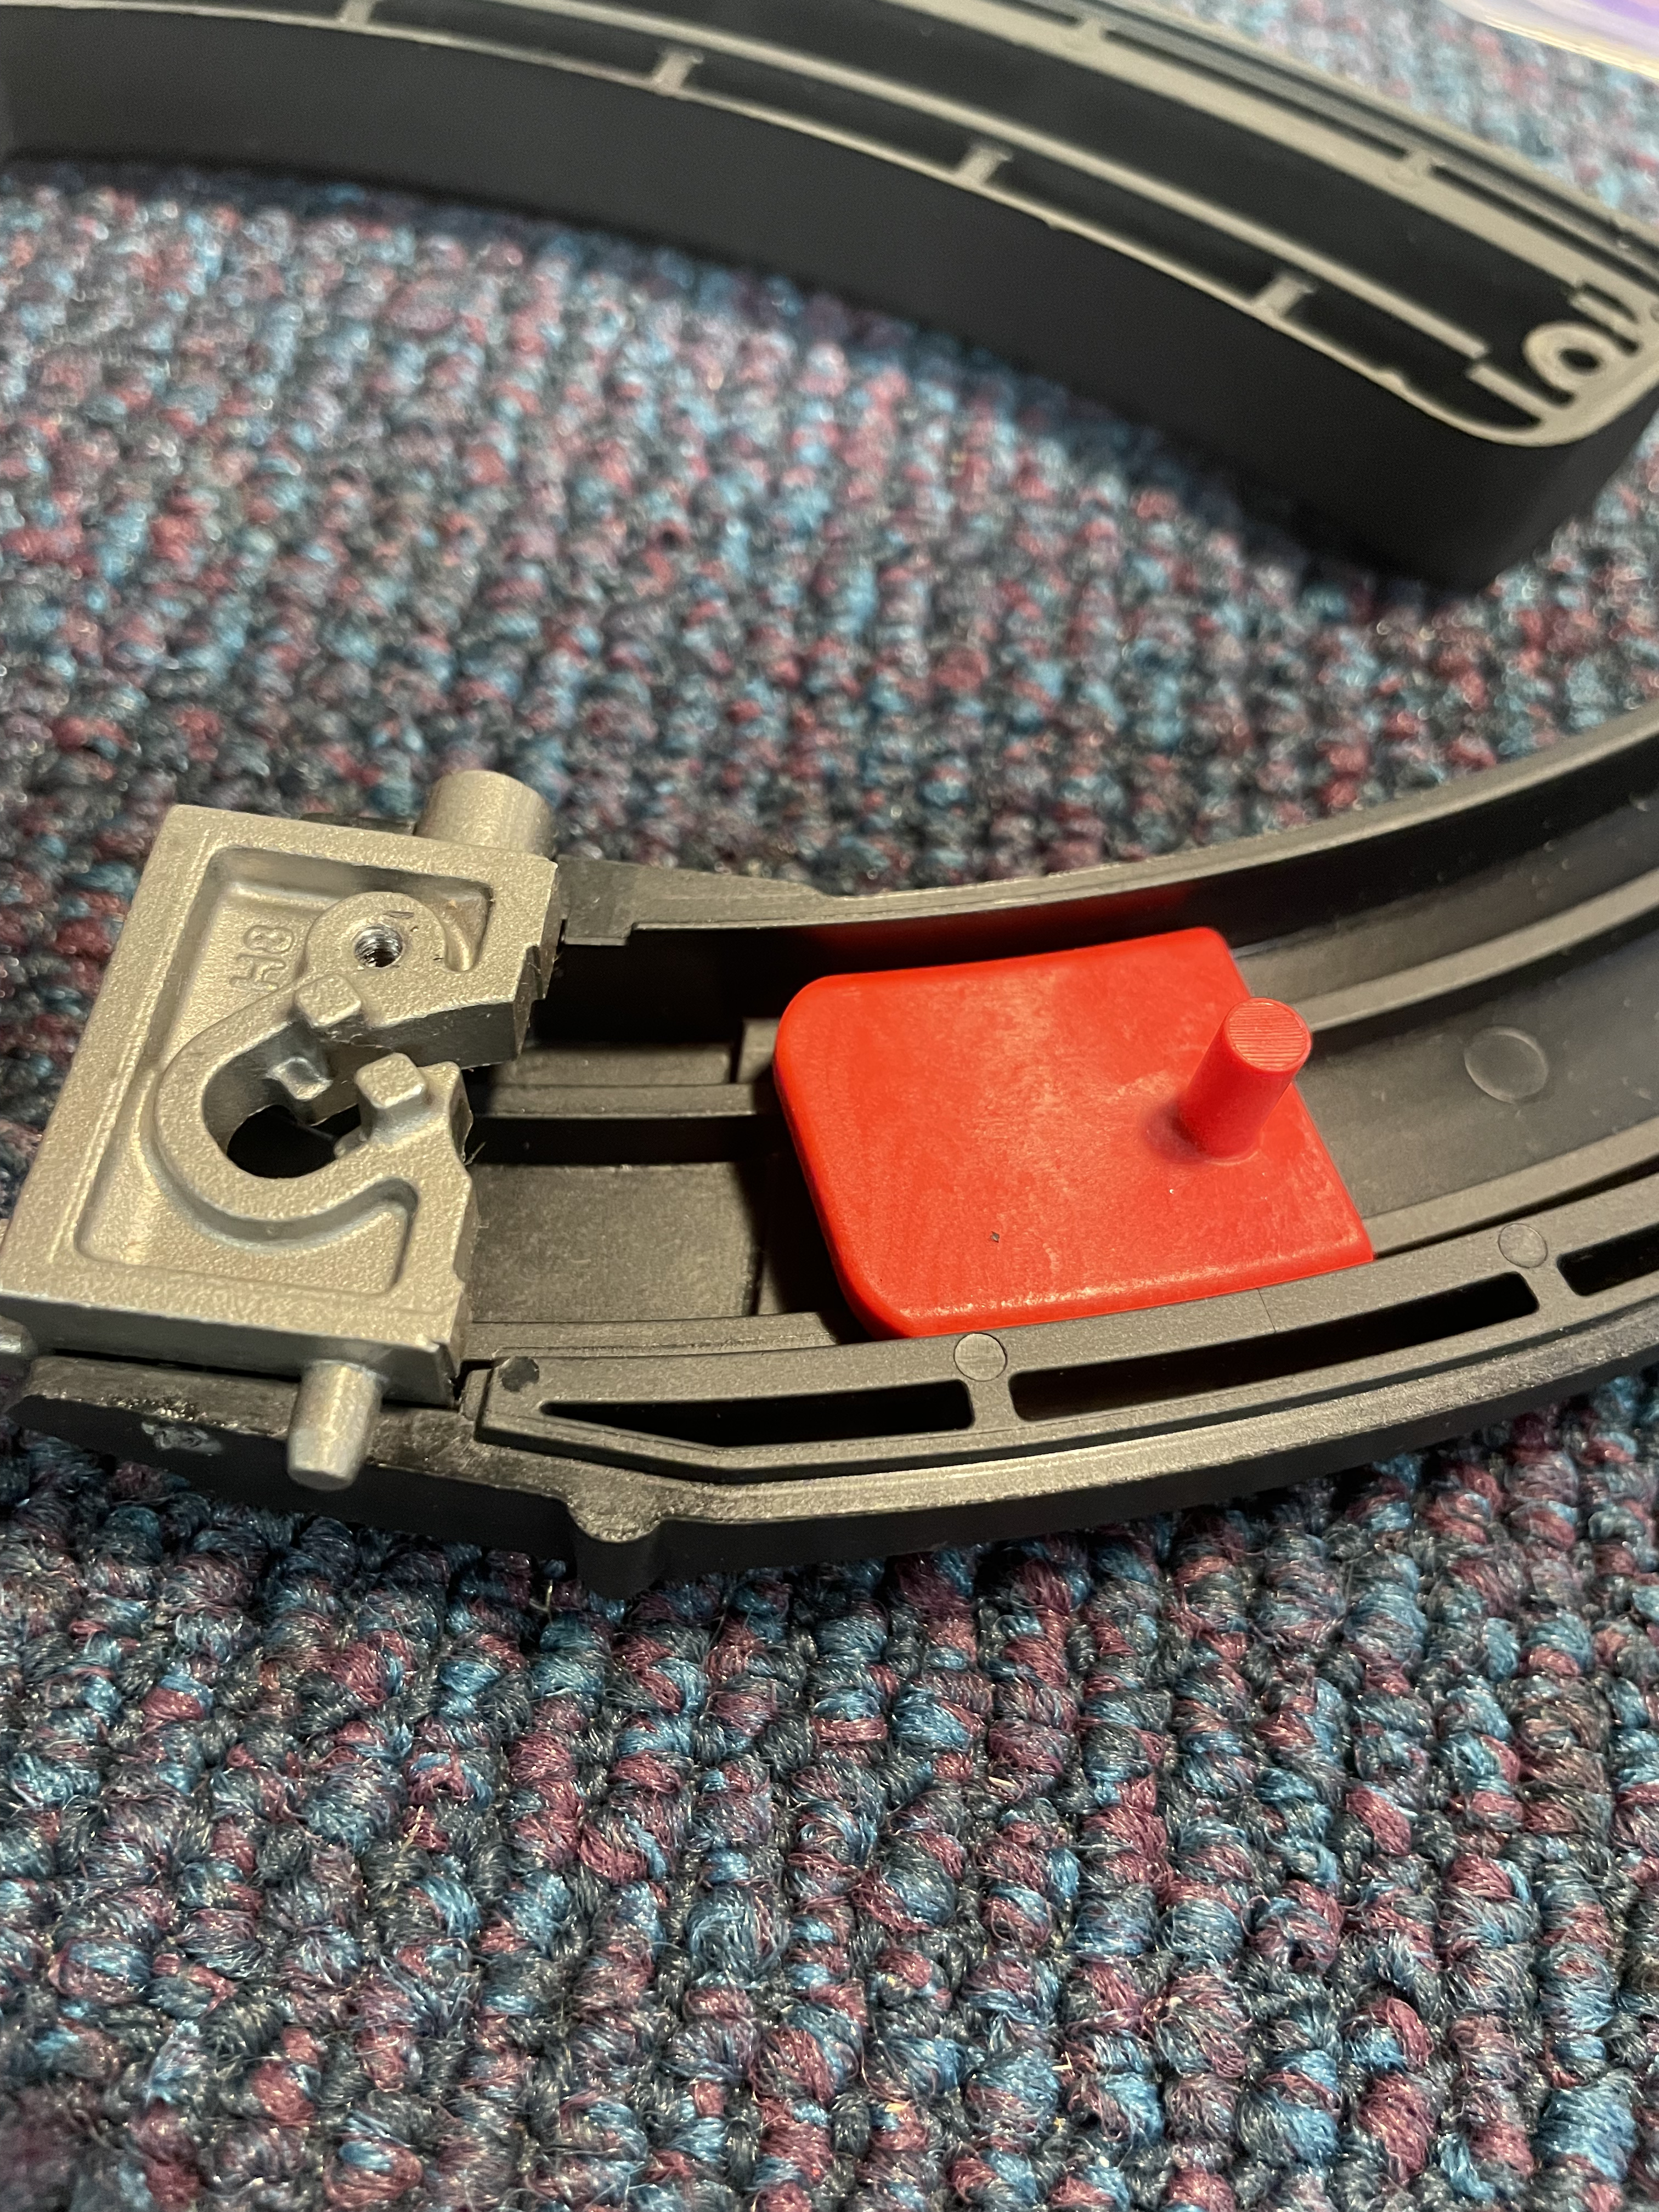 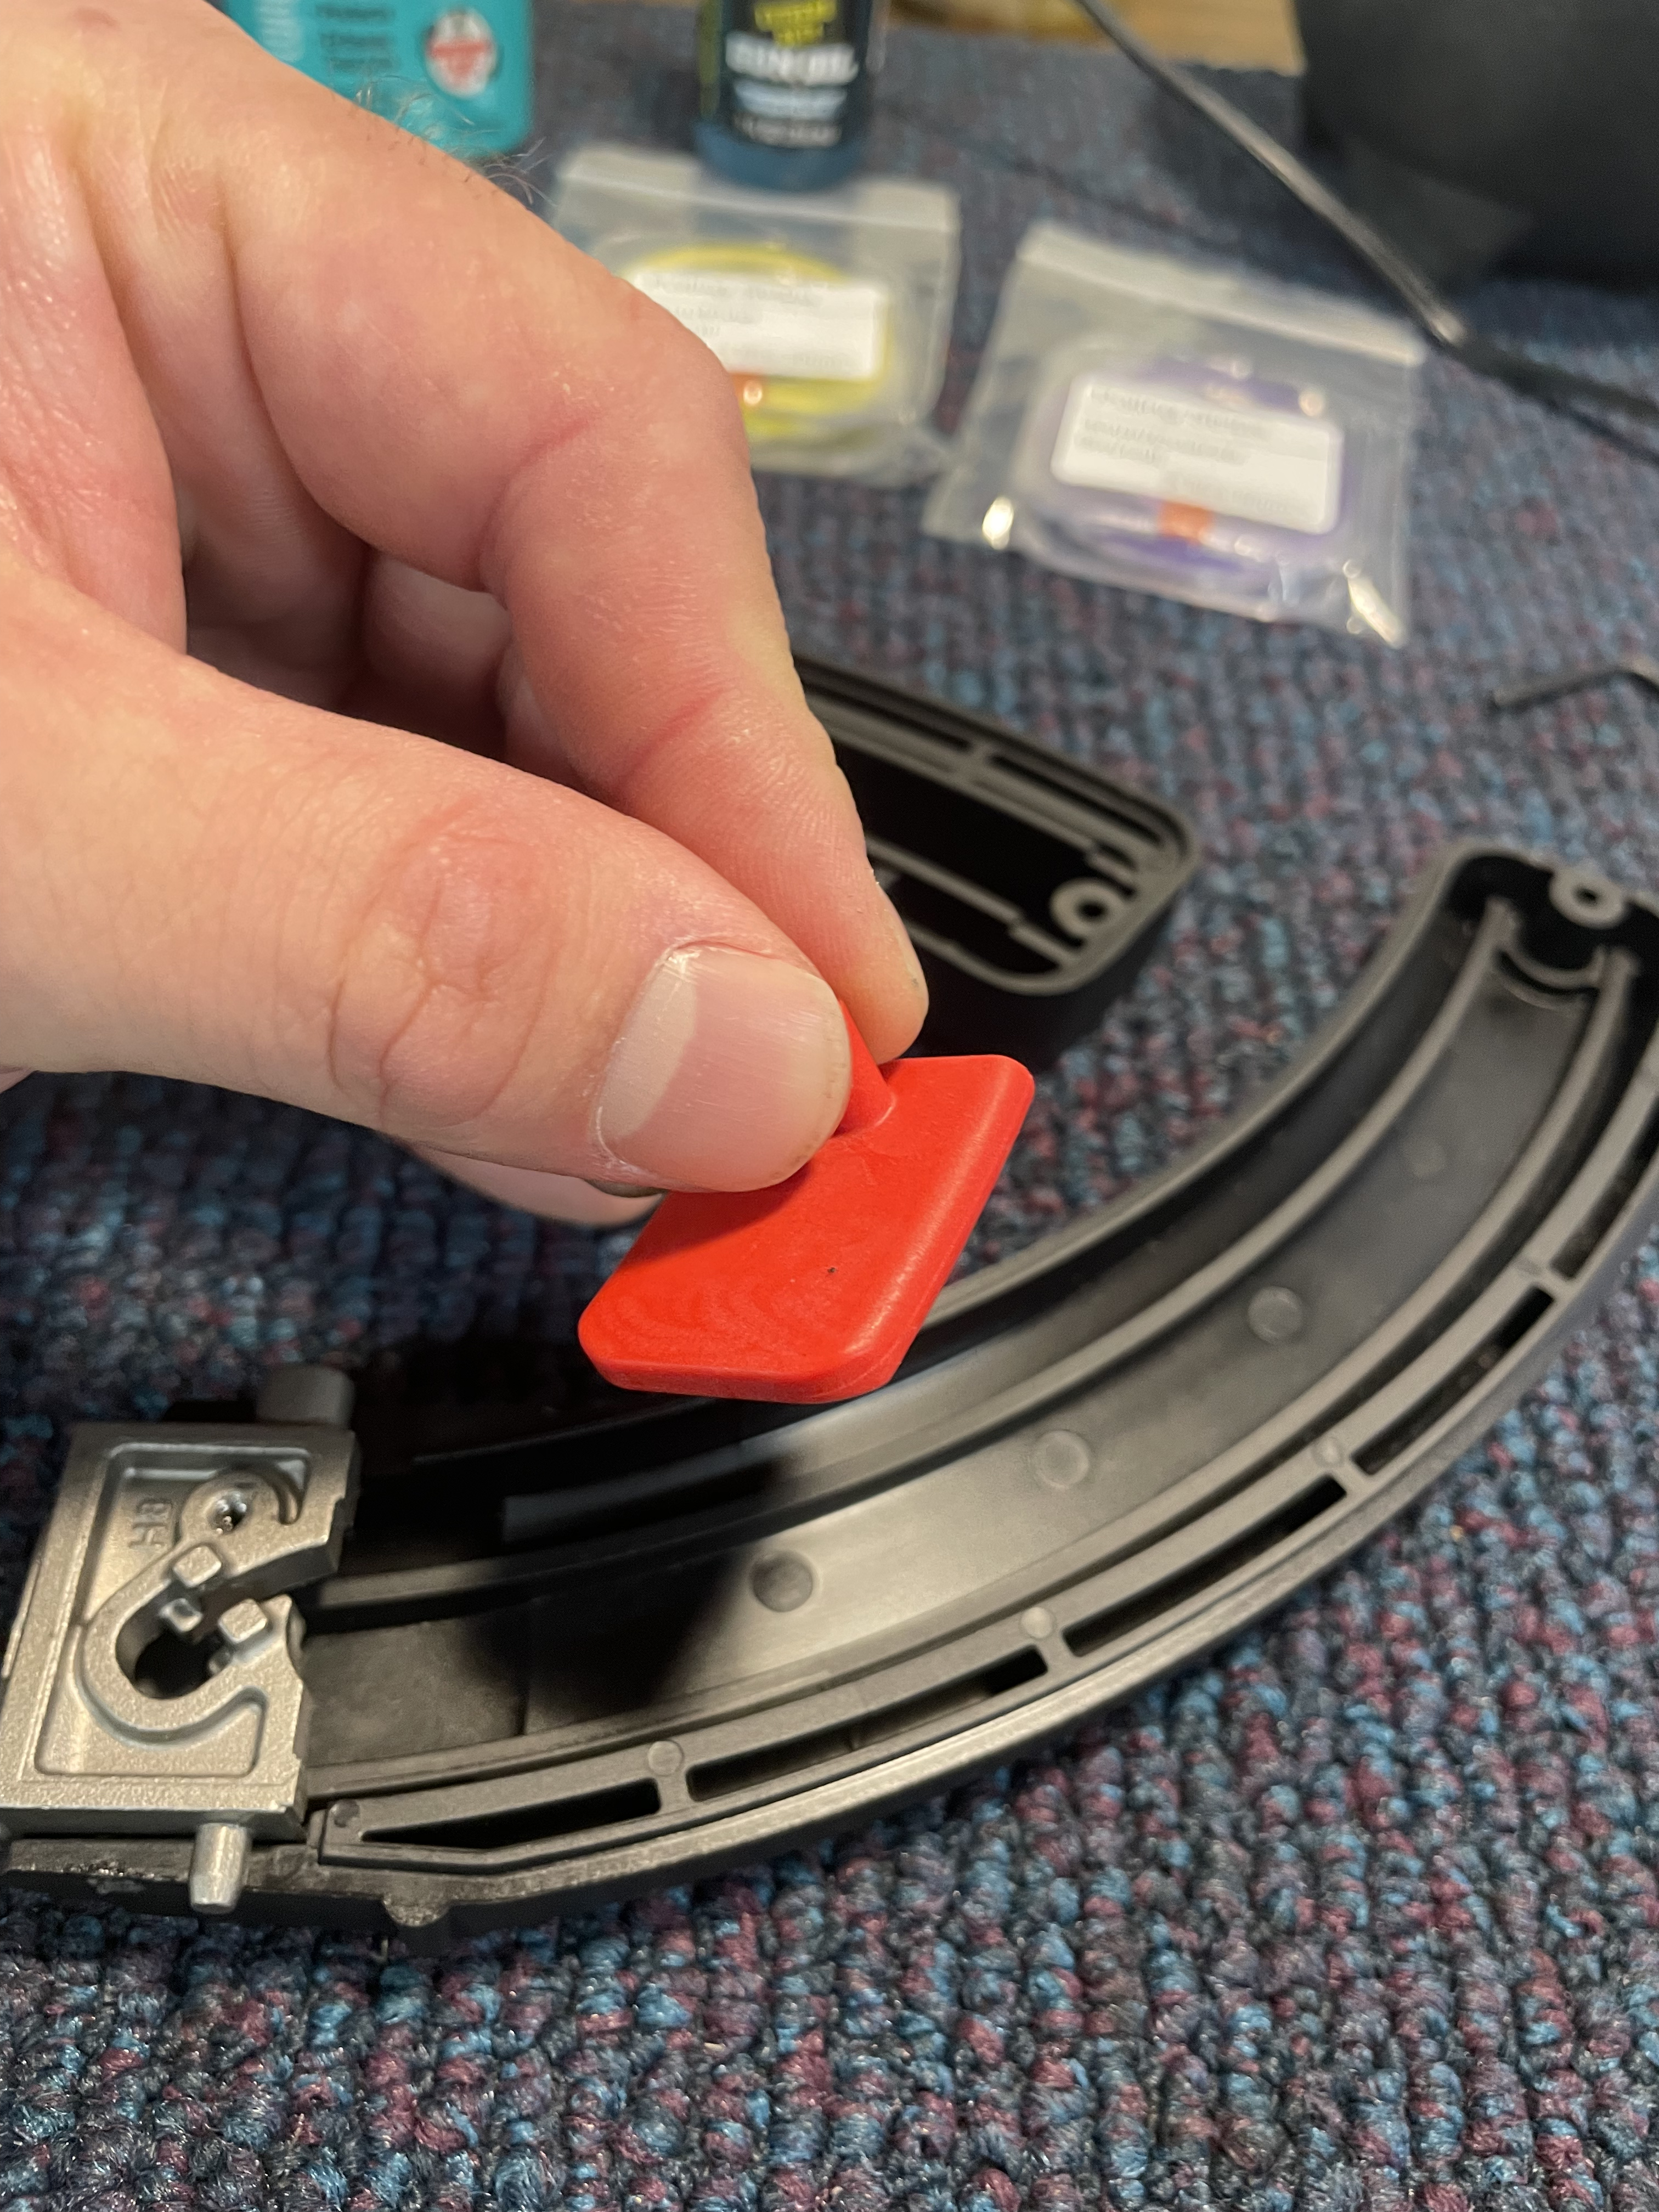 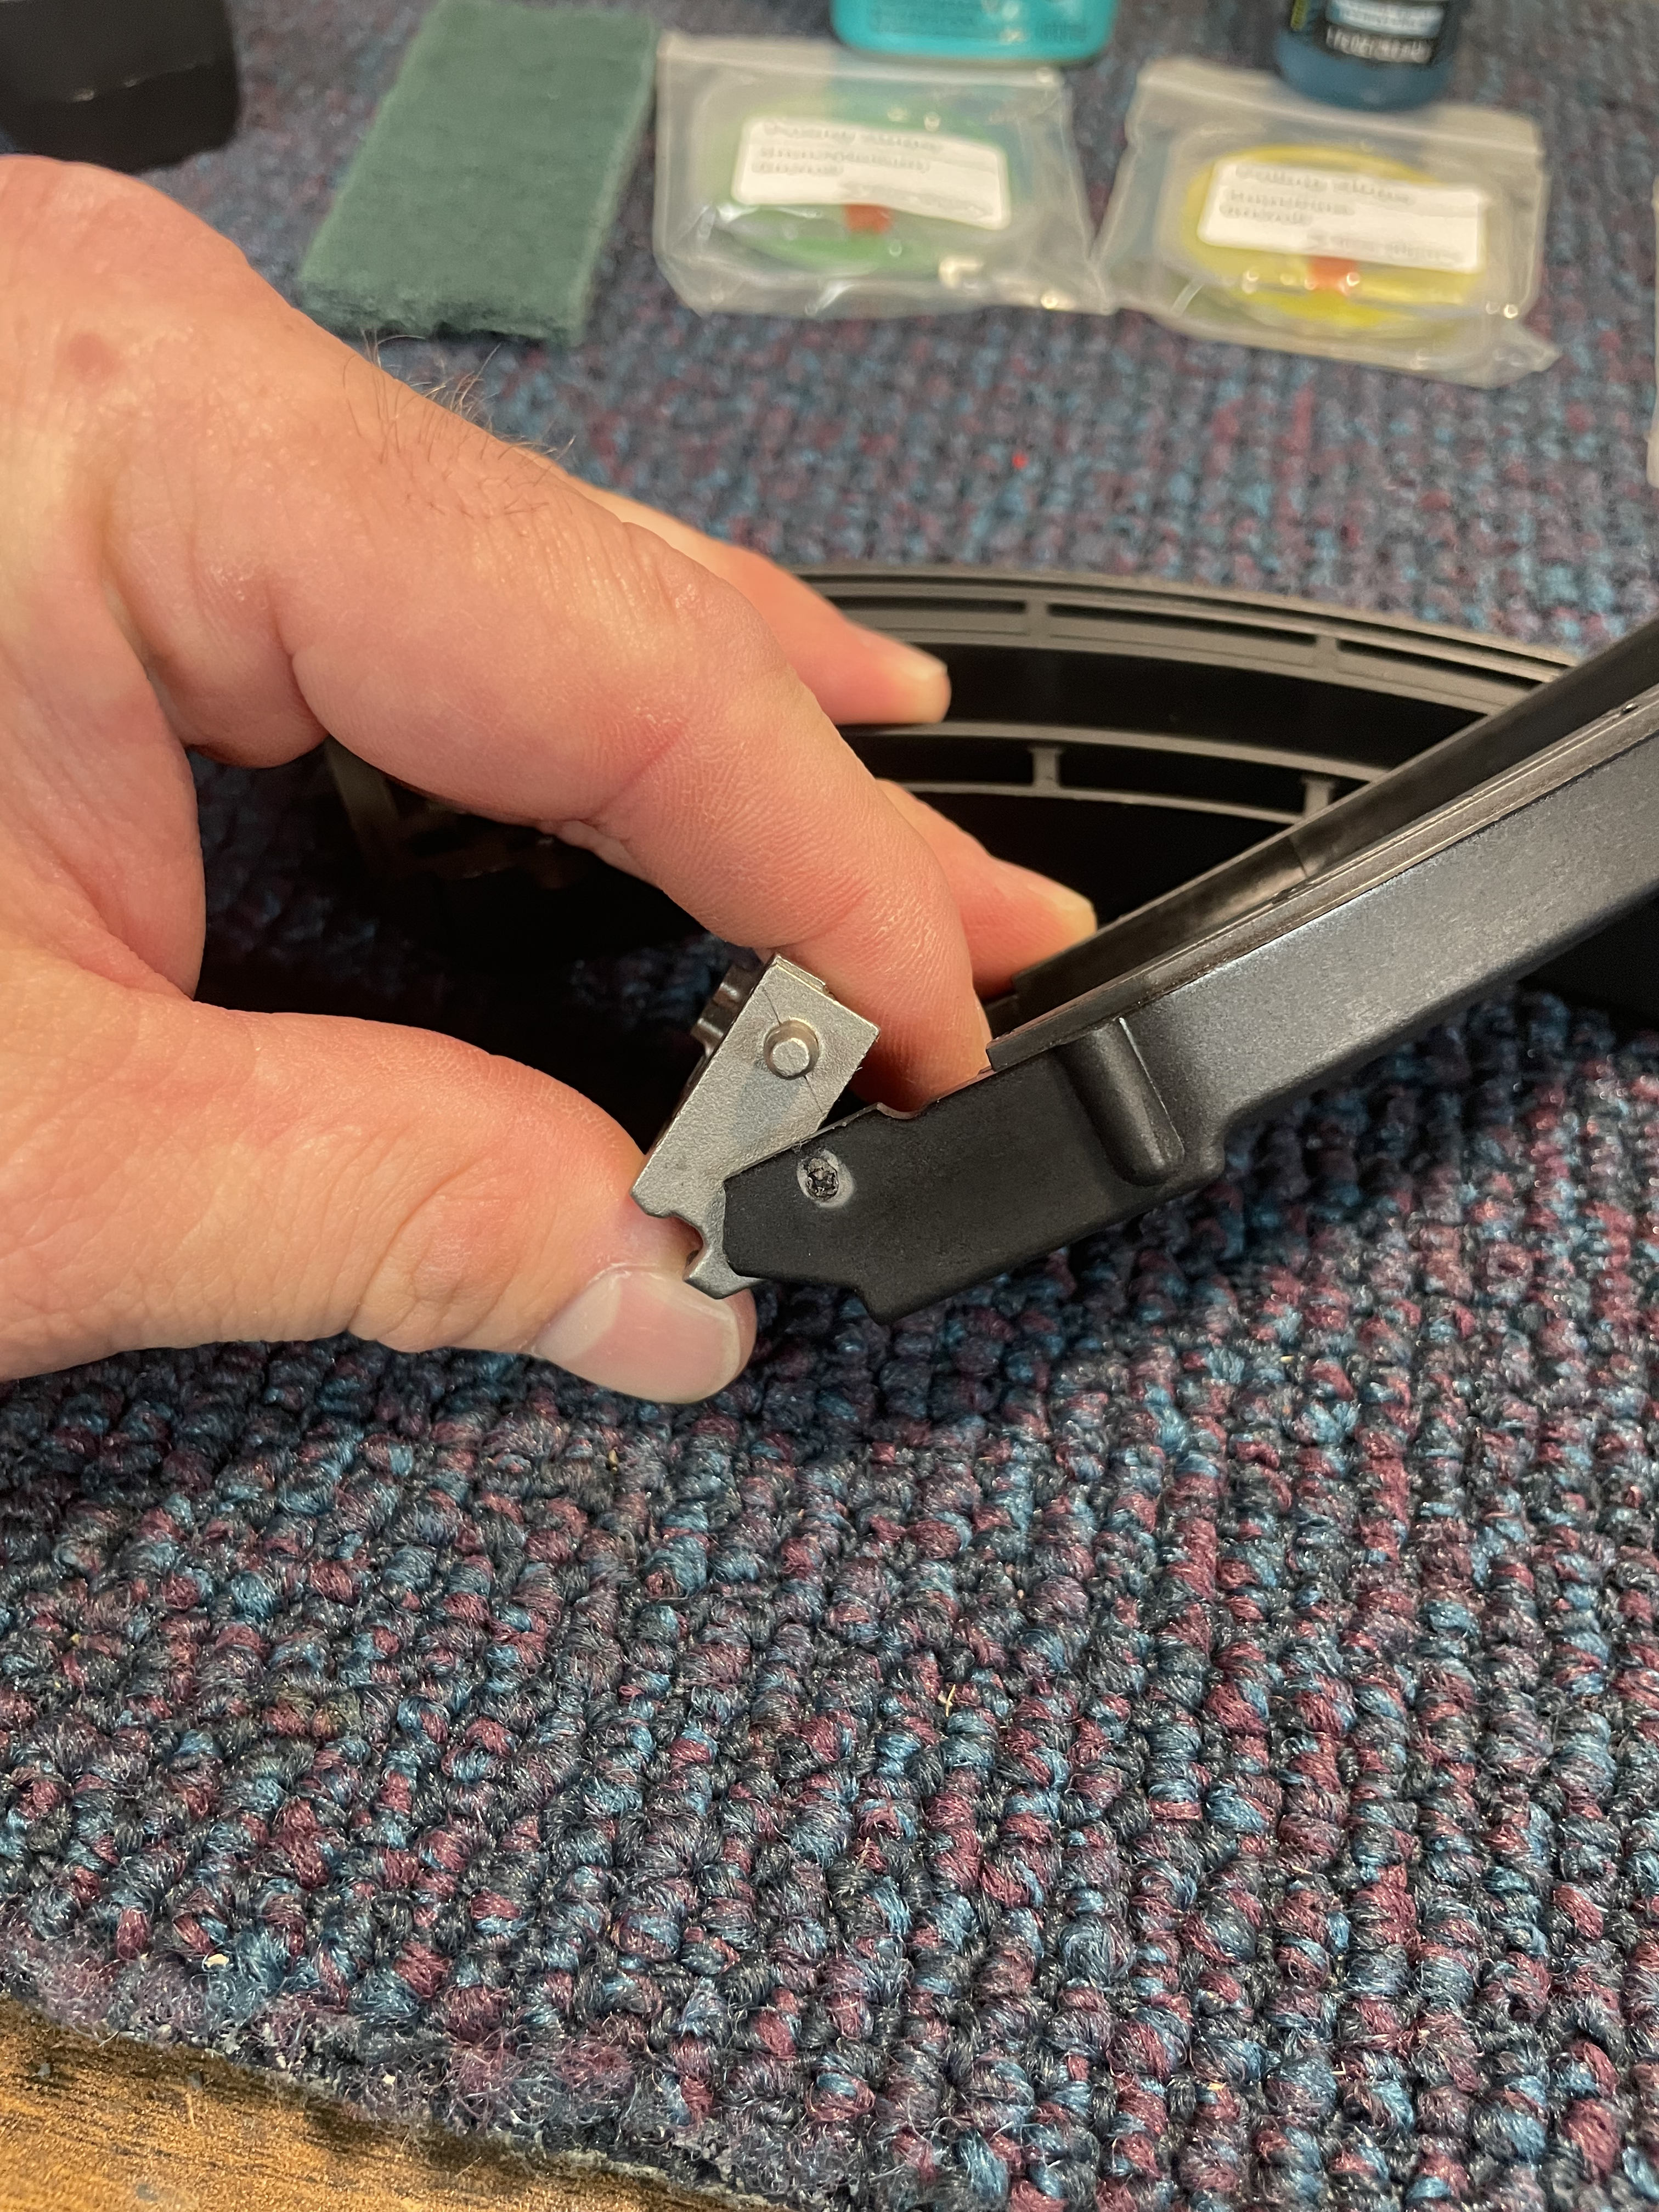 Step 3- The follower and cartridges slide up and down raised rails on the inside of the mags shells, and can ride along the for and aft walls as well. We will use a piece of scotch-brite pad to smooth these up a bit. Cut a small piece of scotch-brite off of a full sized piece so its more manageable. It doesn't take a lot of time or effort to make a difference- maybe 15-20 seconds per rail of rubbing the scotch-brite up and down the rail, and 20-30 seconds each on the fore and aft walls. Do this to both sides of the mag shell. Don't inhale the dust this produces, unless you enjoy sinus problems. You can see in the pics that the areas I have worked have become a milky grayish color. Once you have done the mag halves, take the follower and do the same to it. Work it all the way around- top, fore and aft, and sides. Bottom doesn't matter. Also wrap the scotch-brite around the post sticking out of the follower and spin it a few times to smooth it out a bit. It is important to clean all these parts well before you lube and reassemble them later on. Warm soapy water works well if you don't mind waiting on them to dry. If not, carefully blow them out with compressed air and wipe them out with paper towels. The scotch-brite leaves an abrasive dust that needs to be removed. 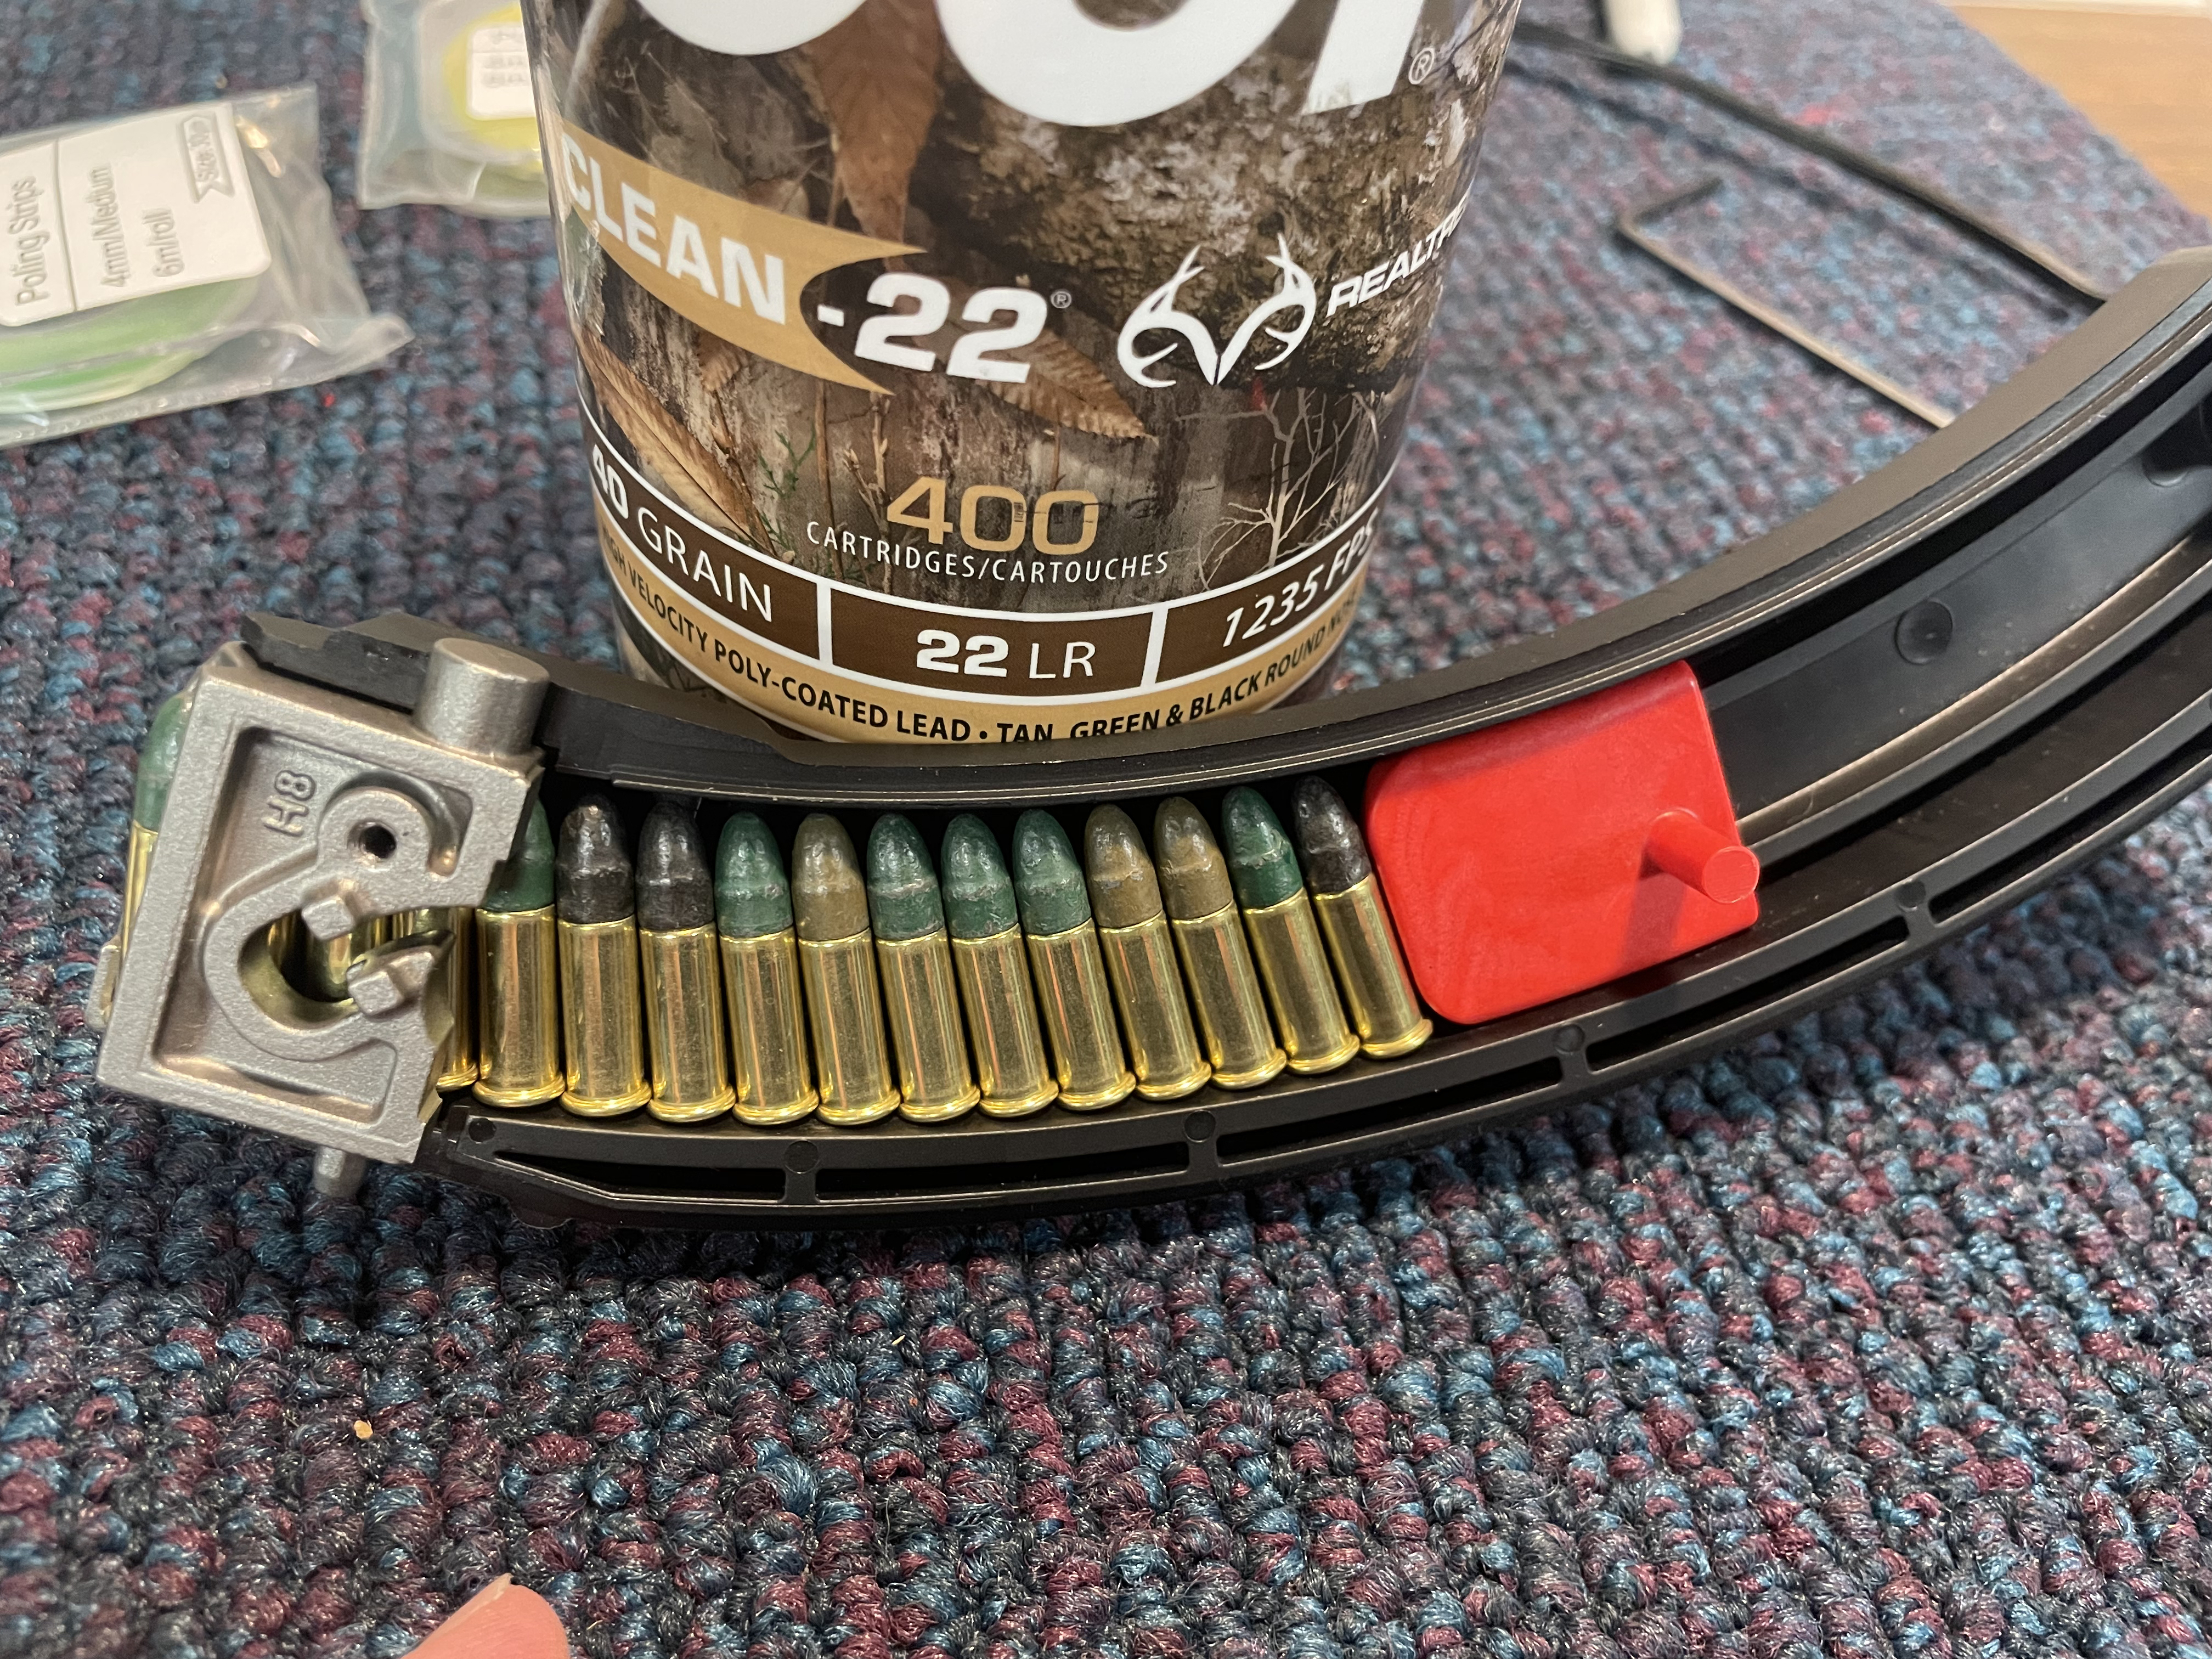   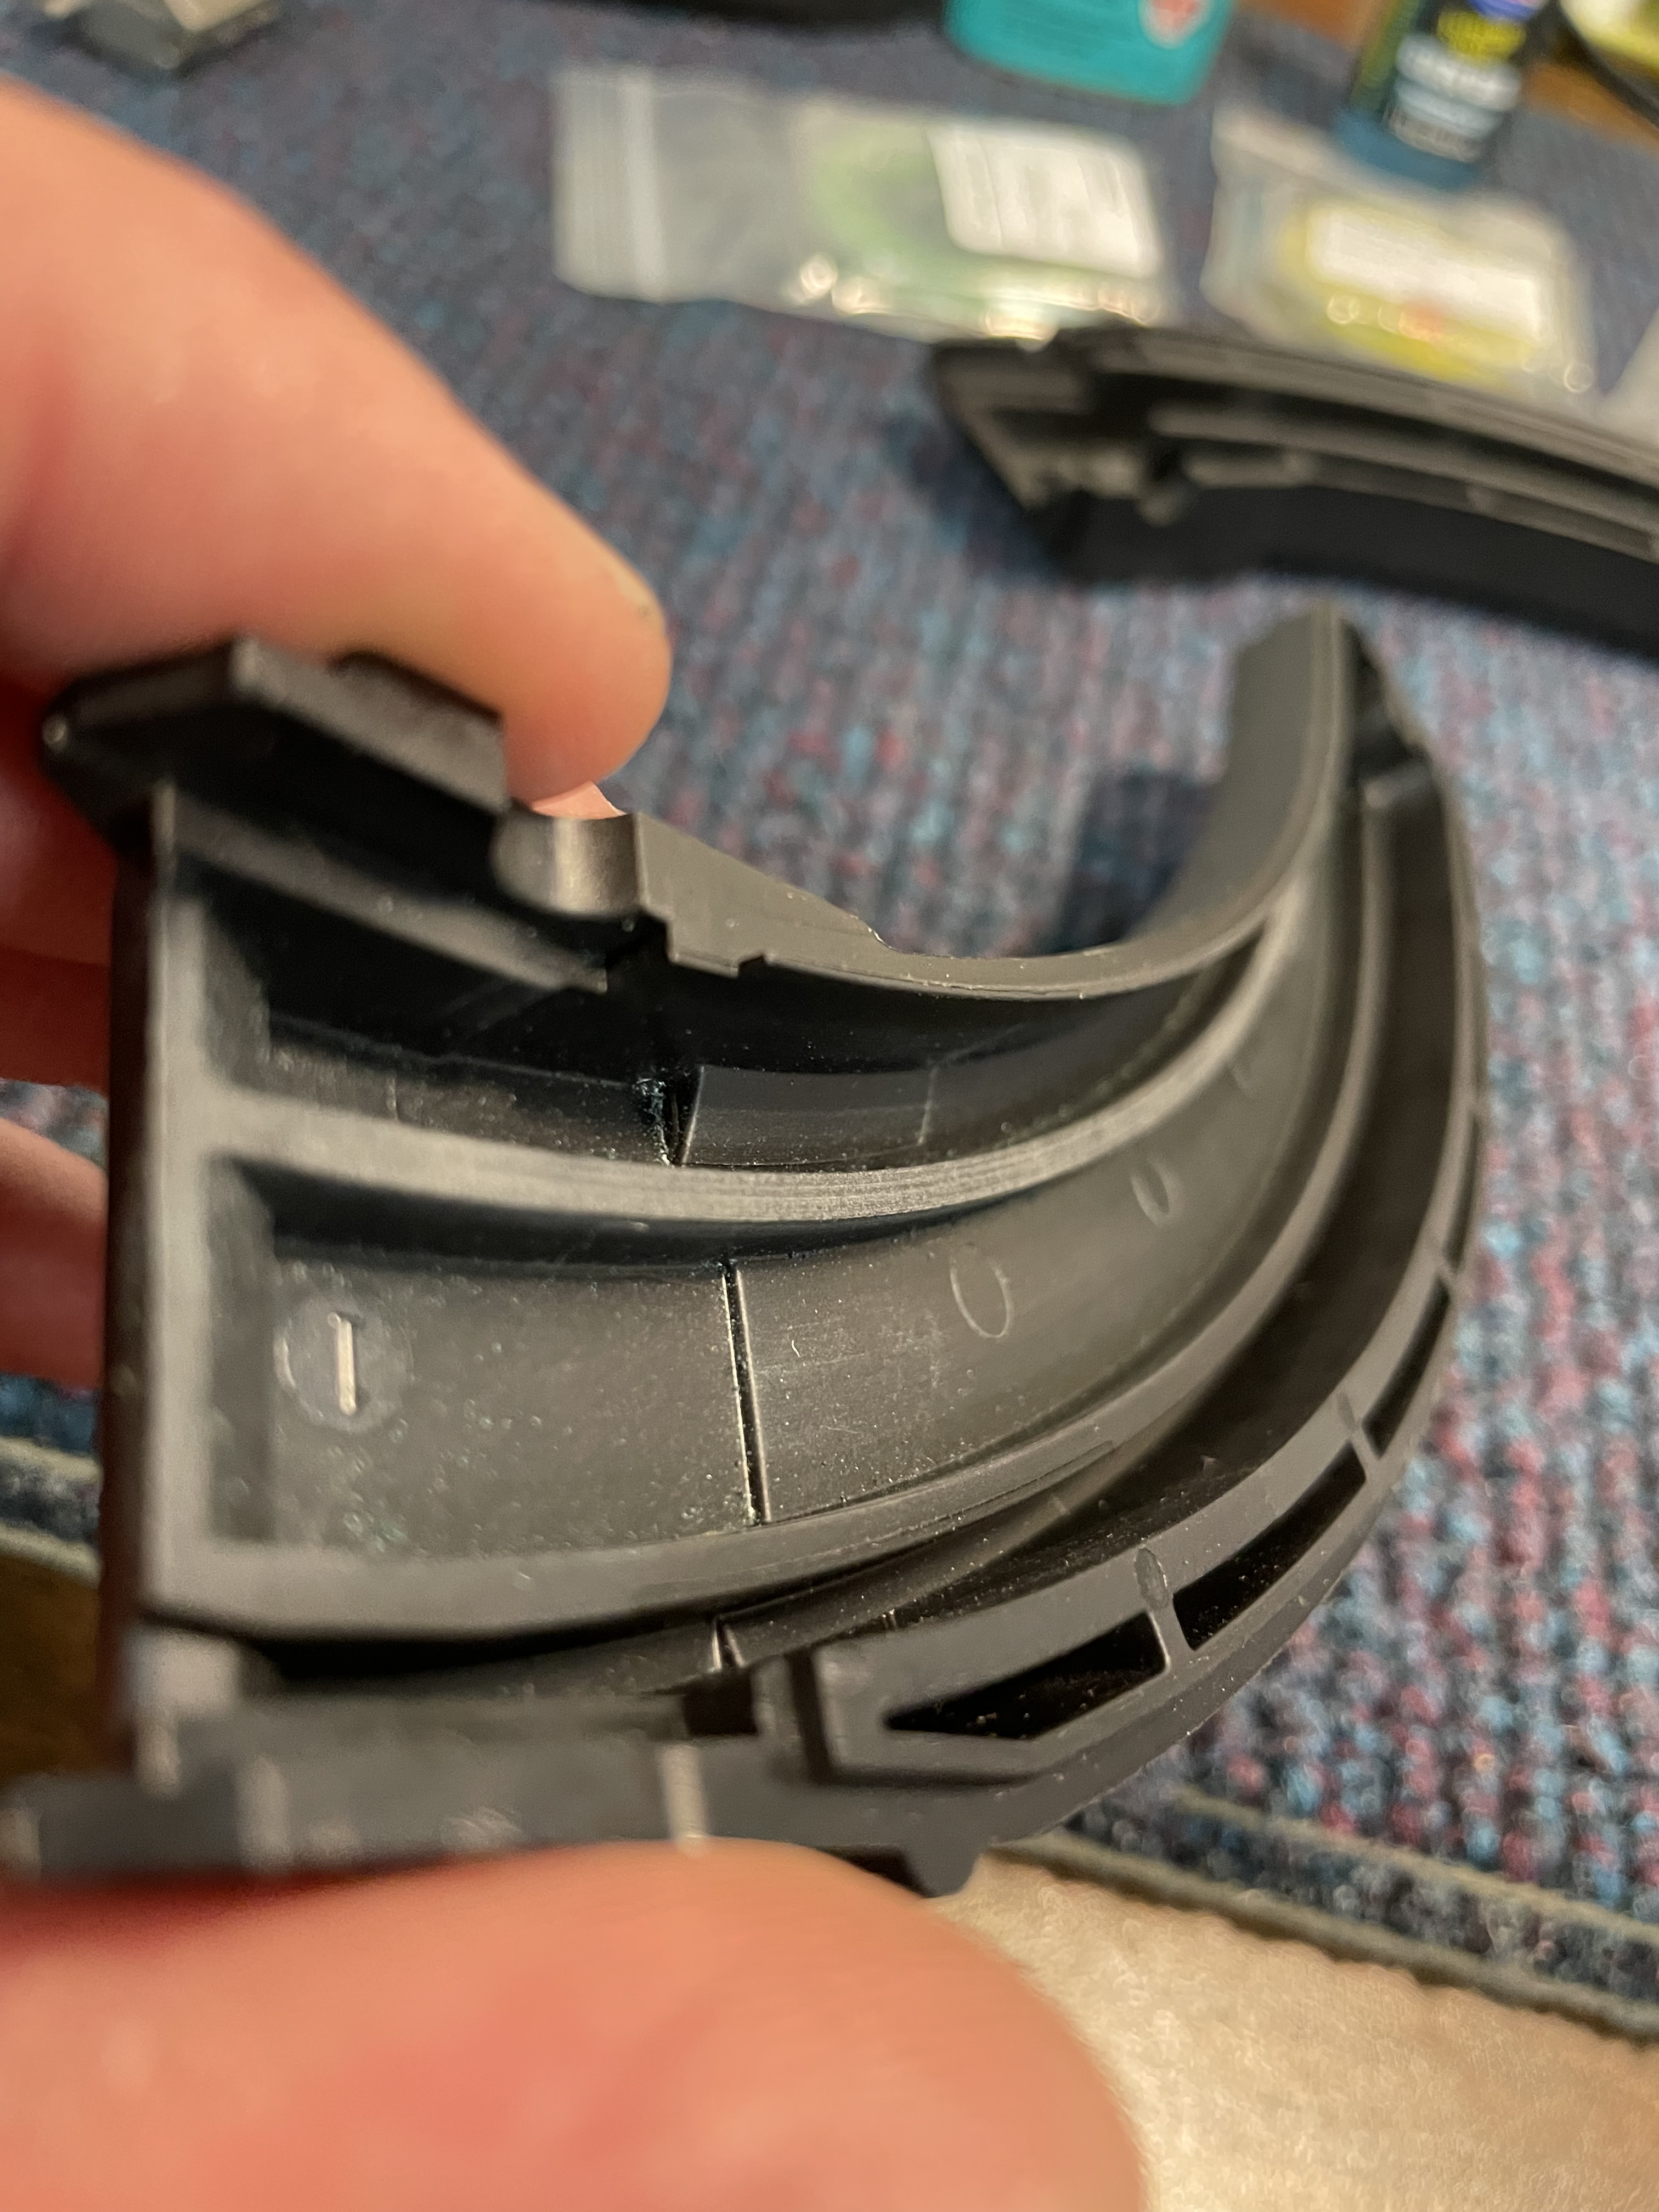 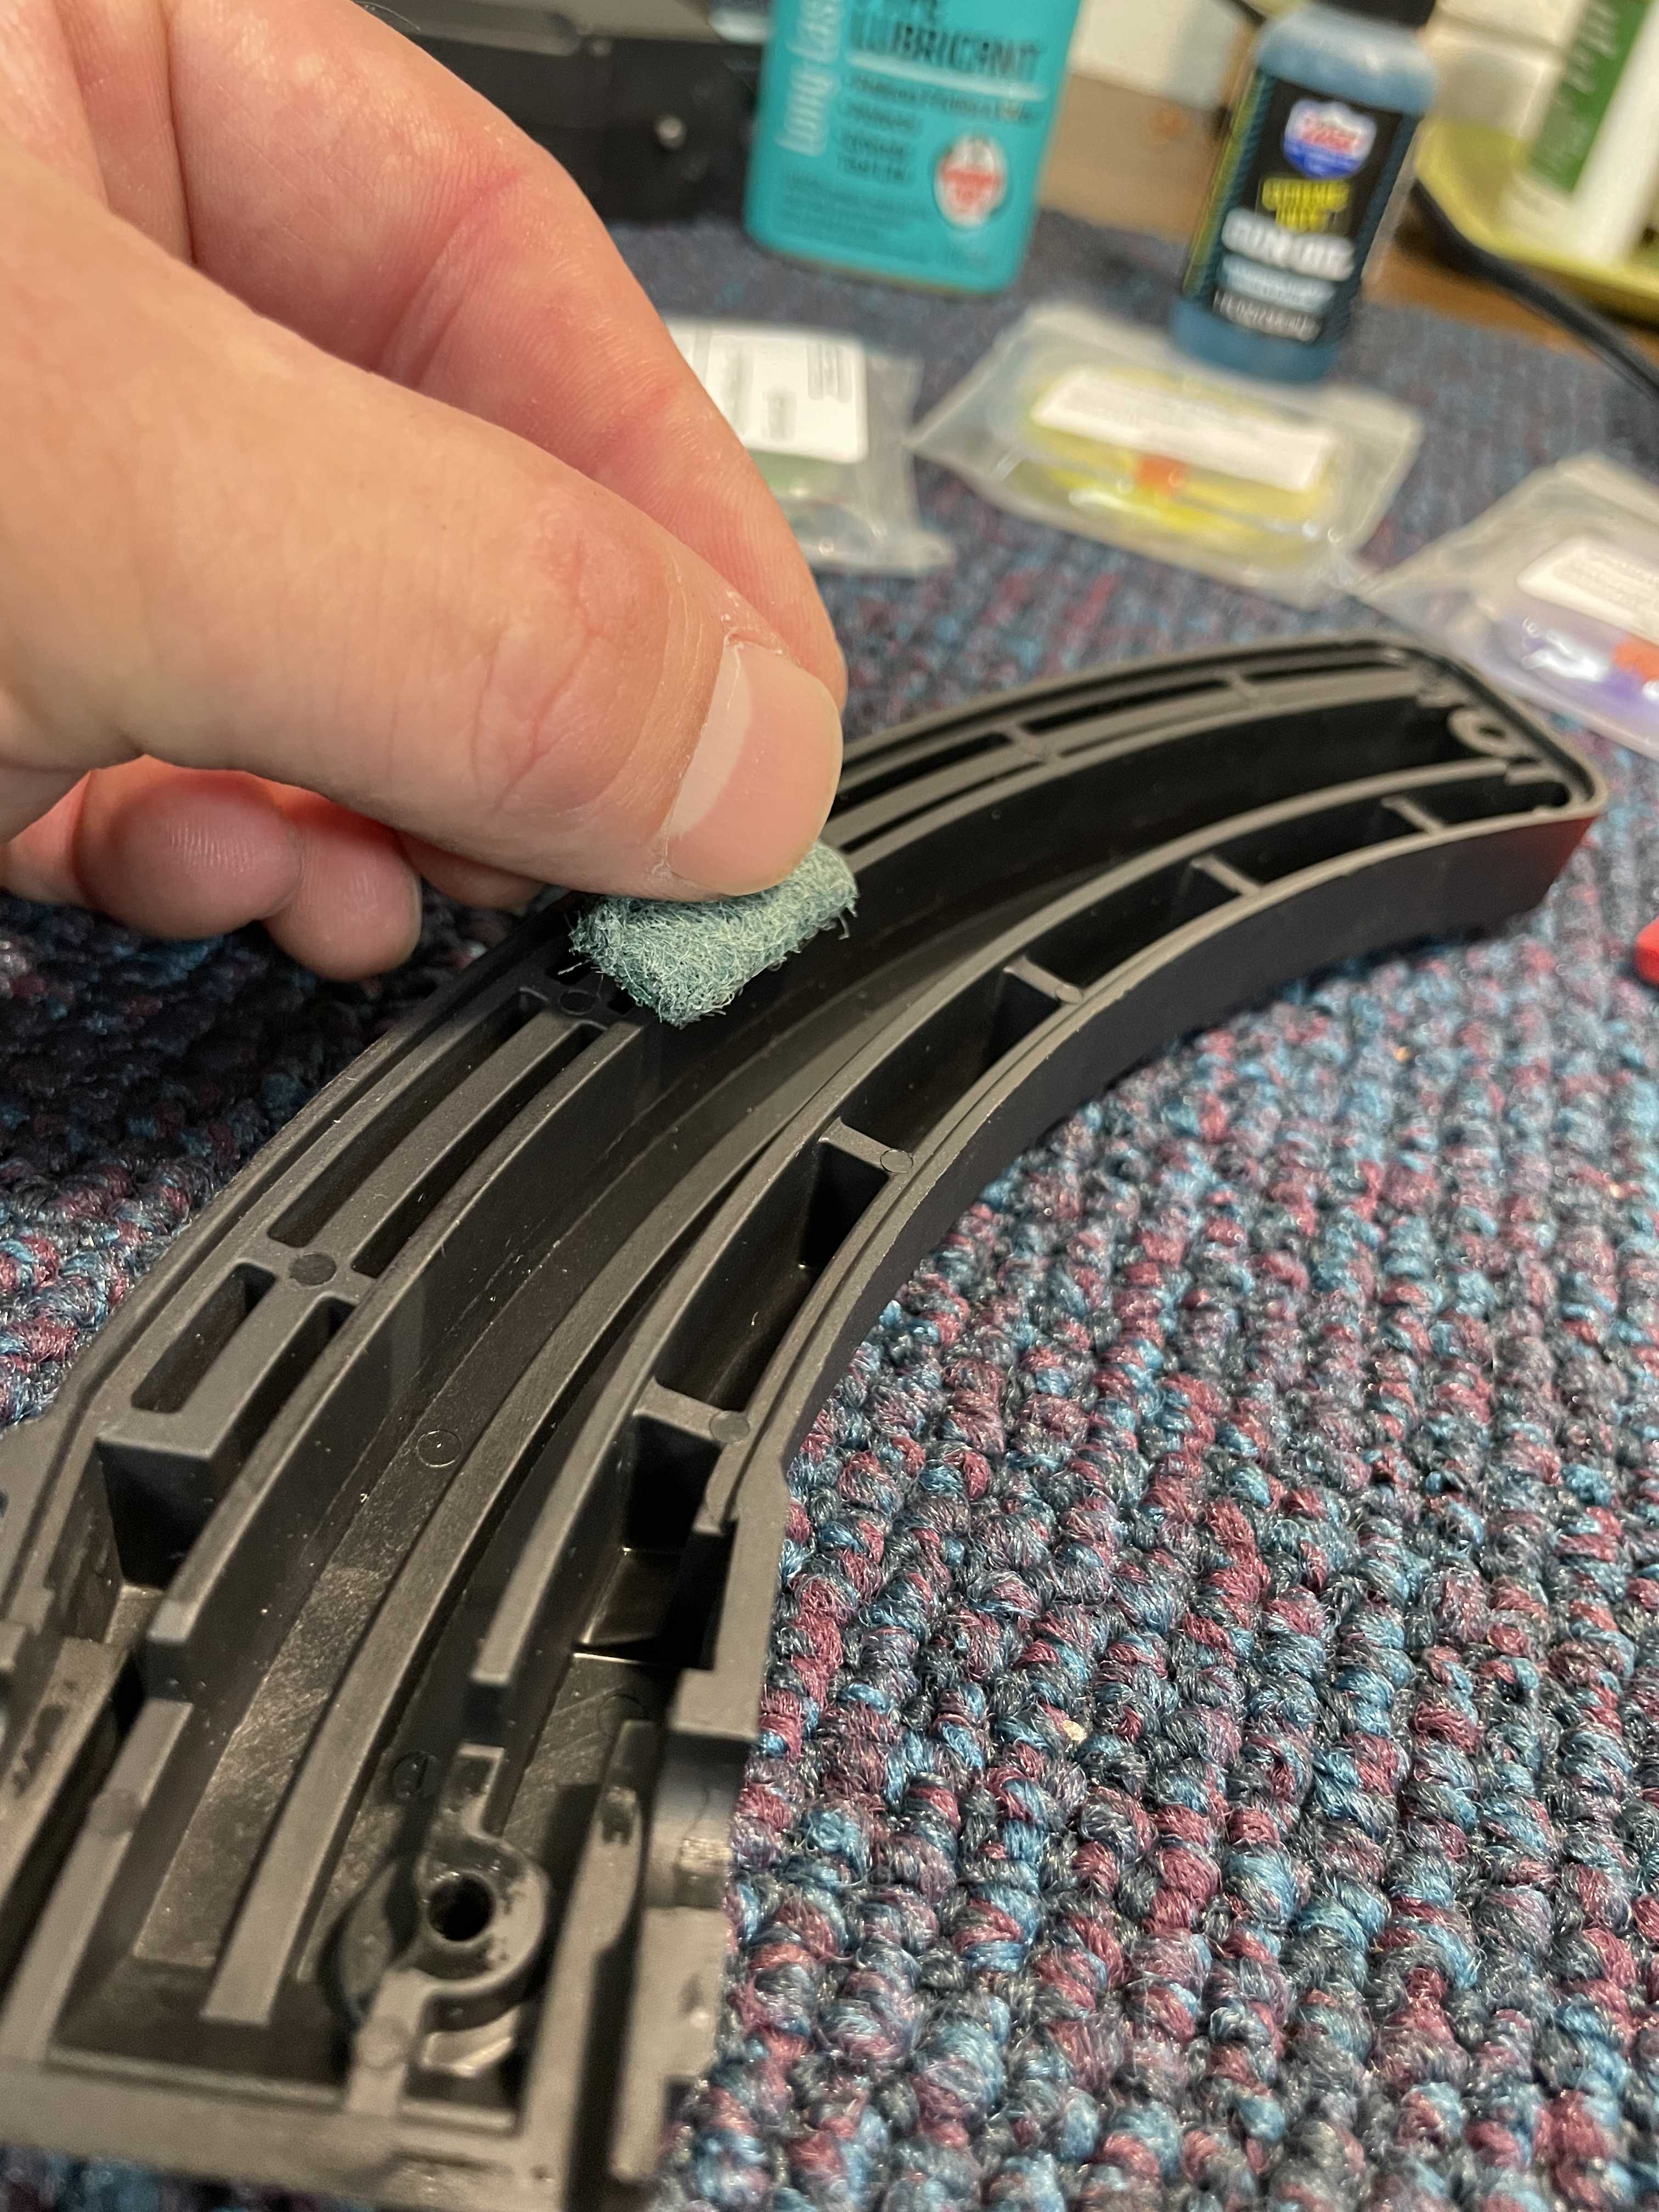 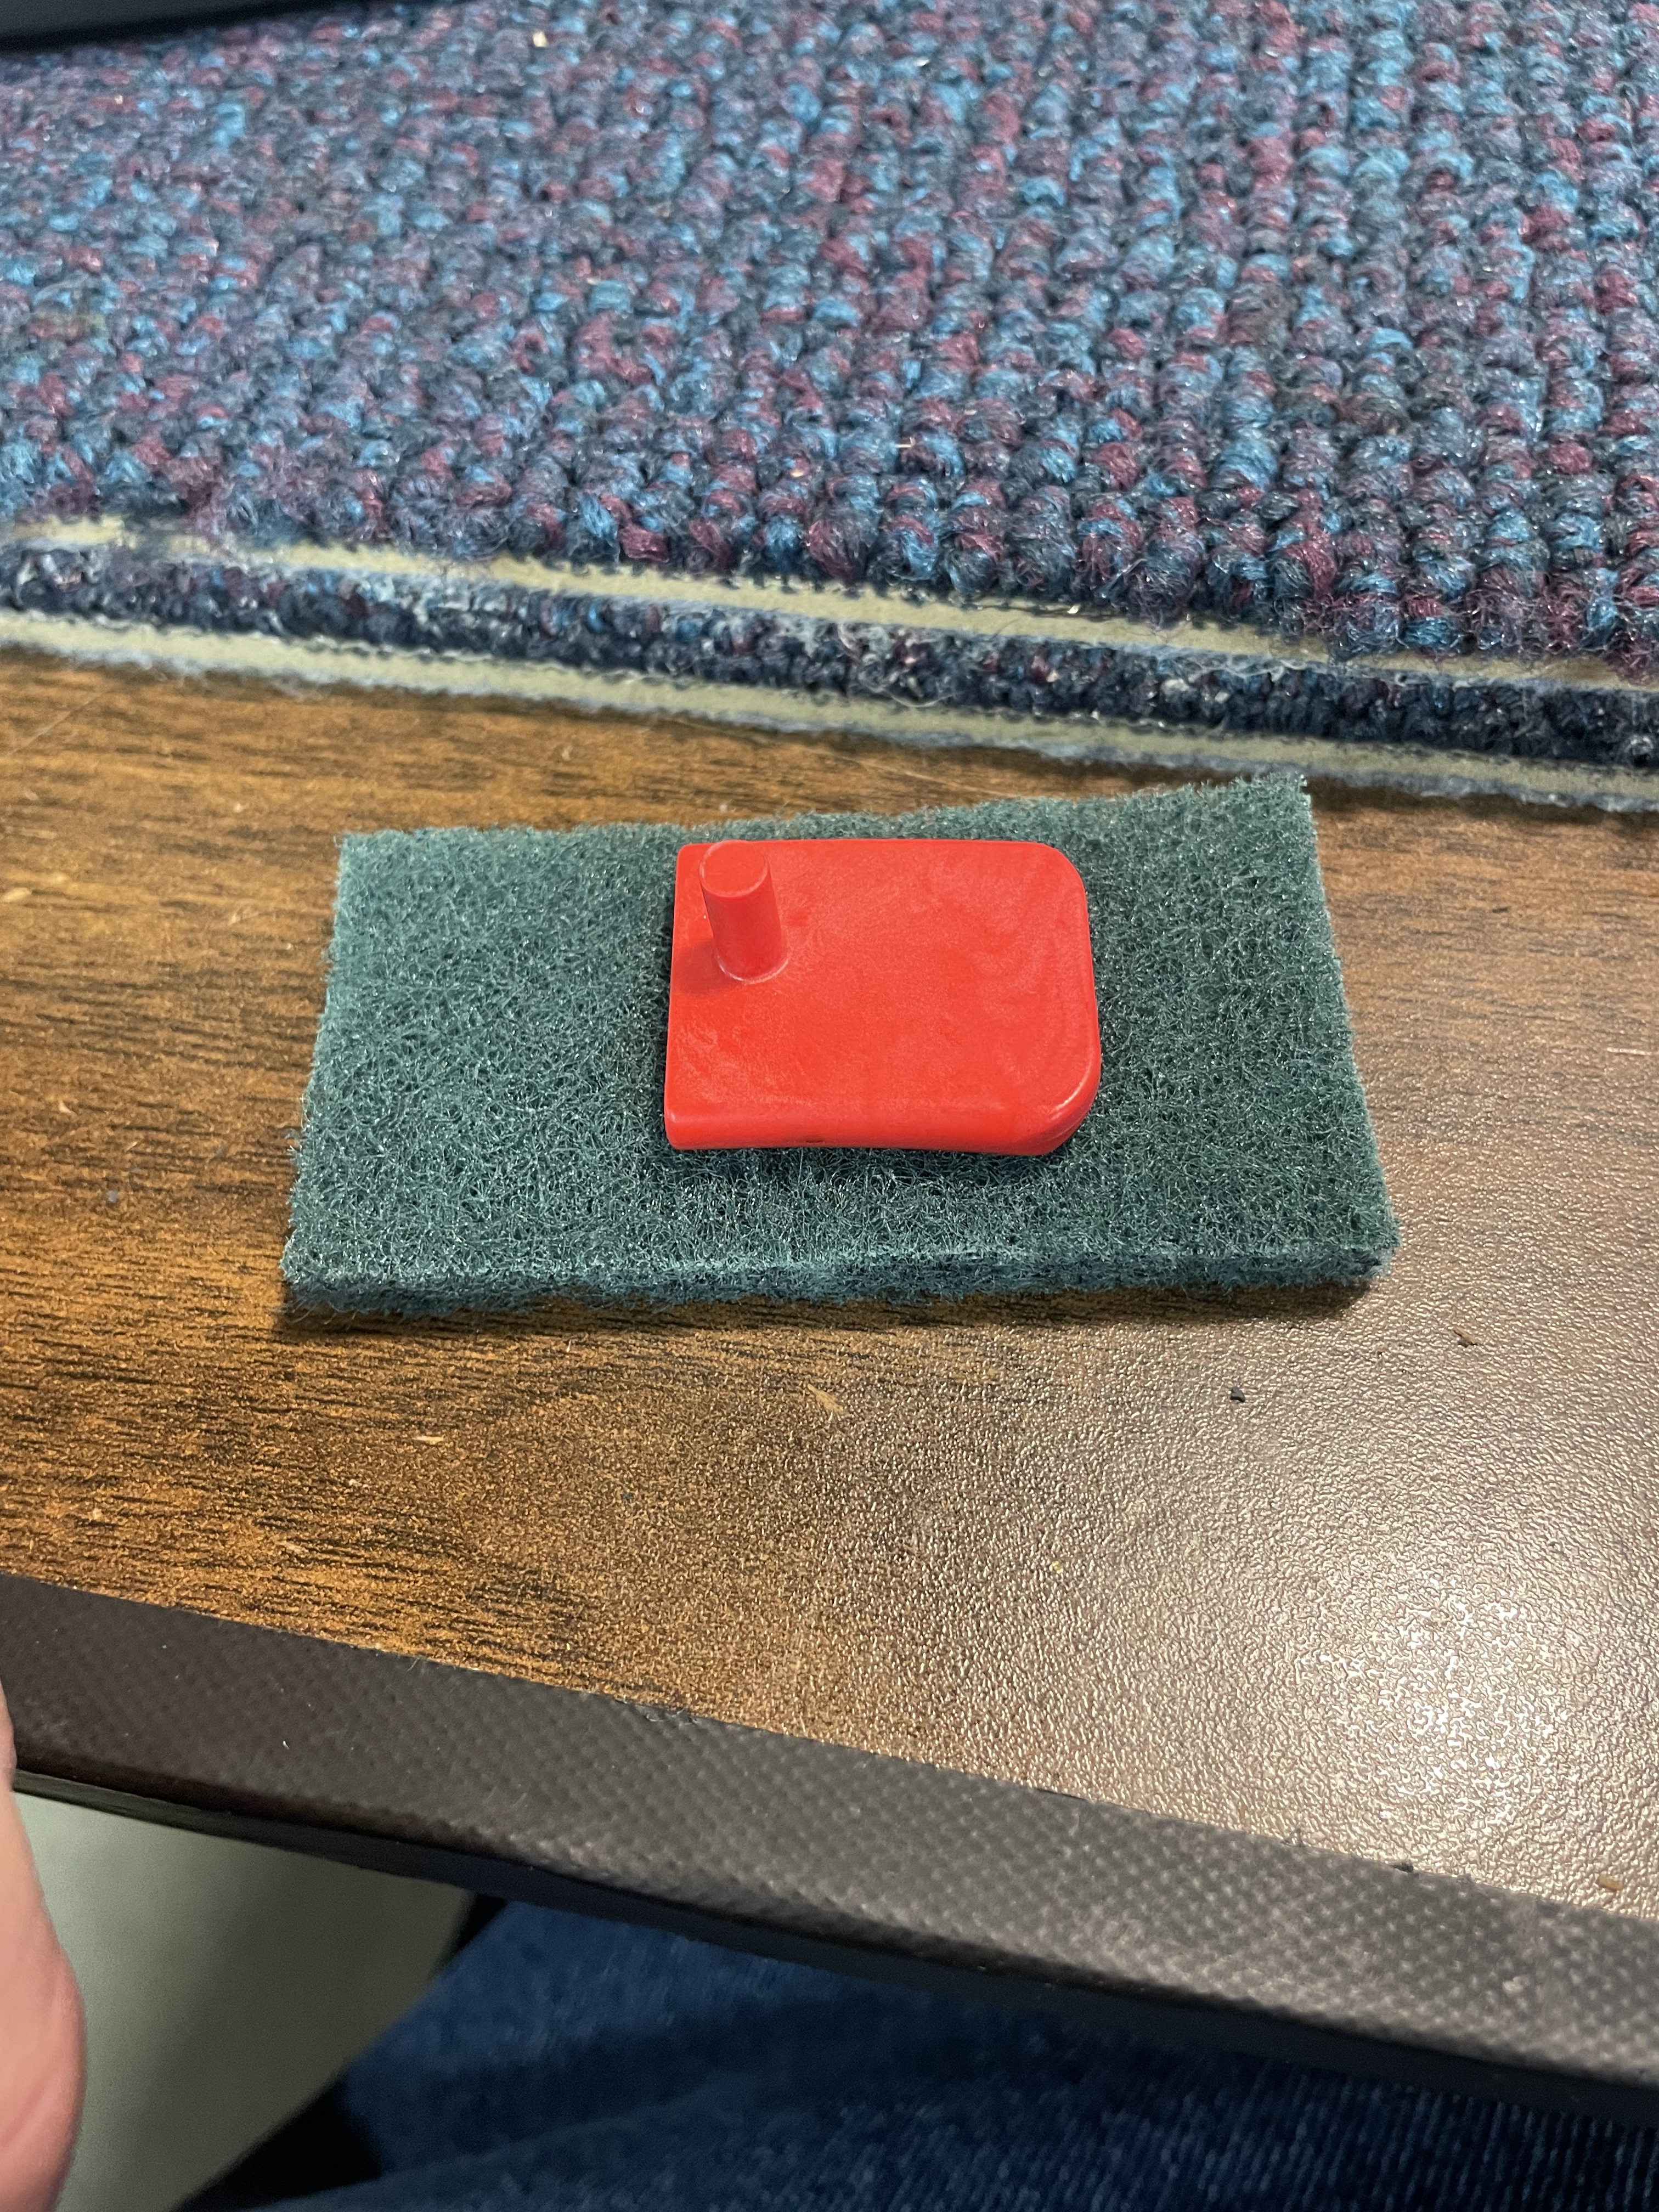 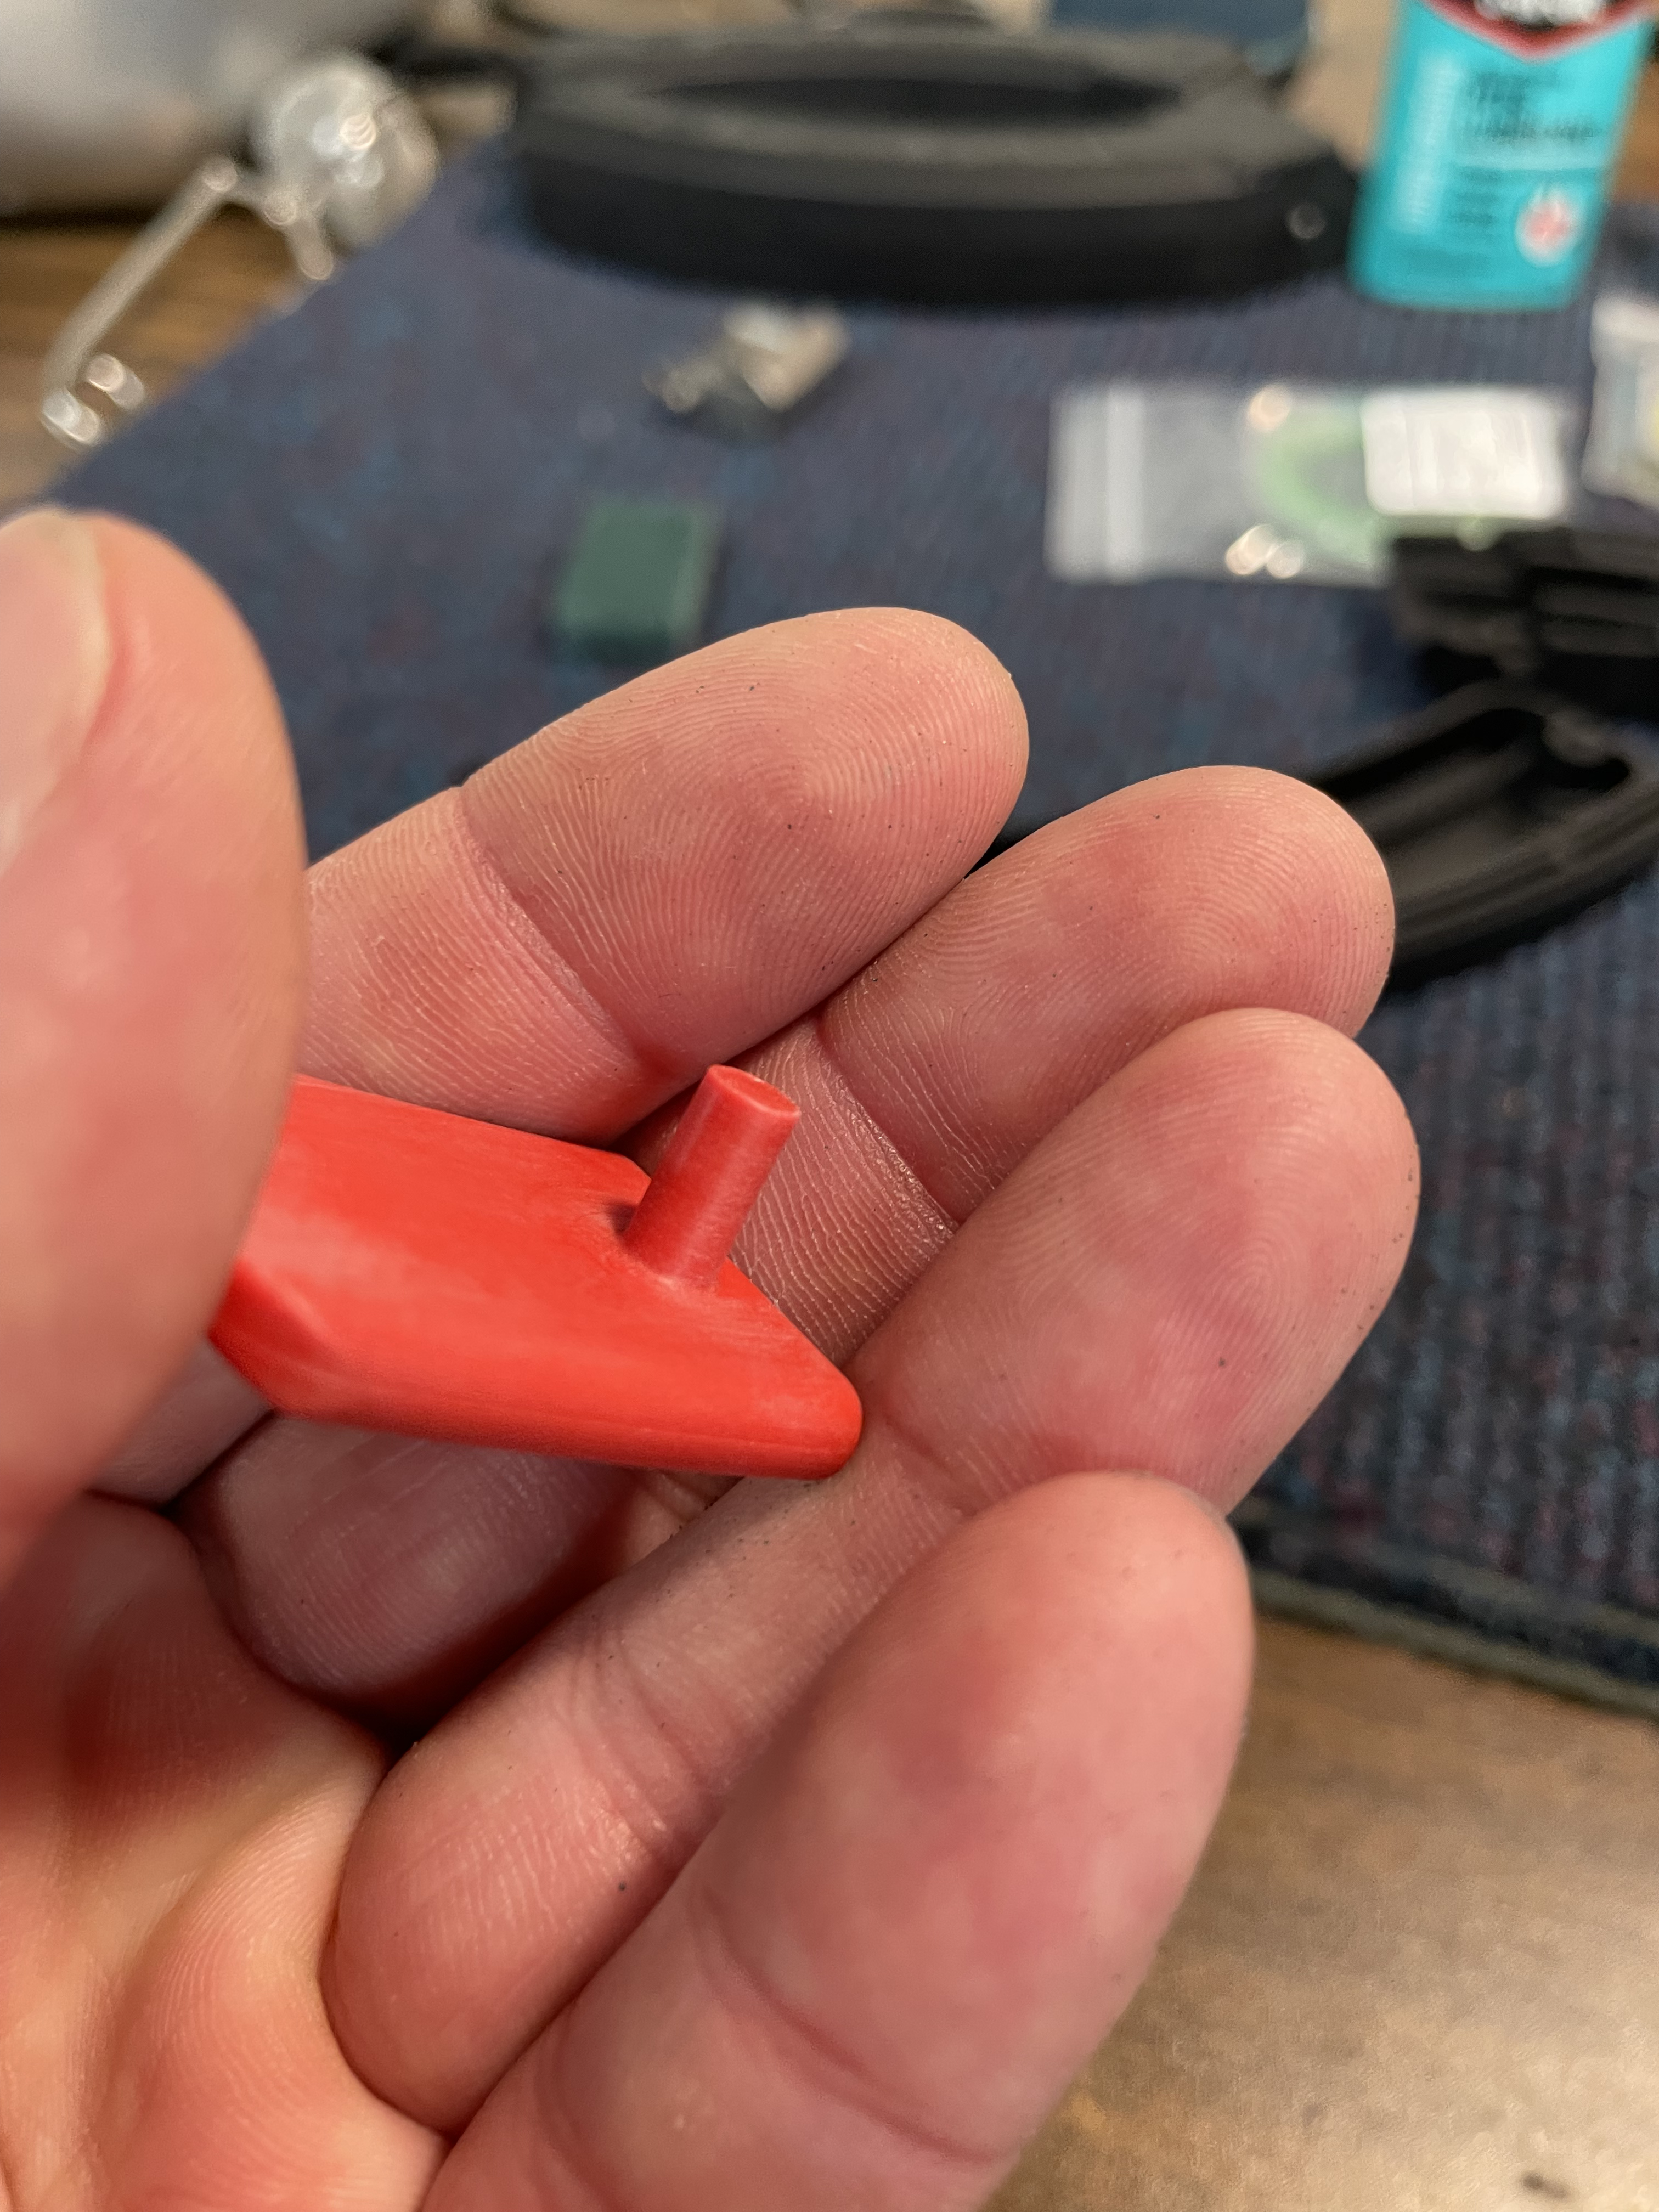 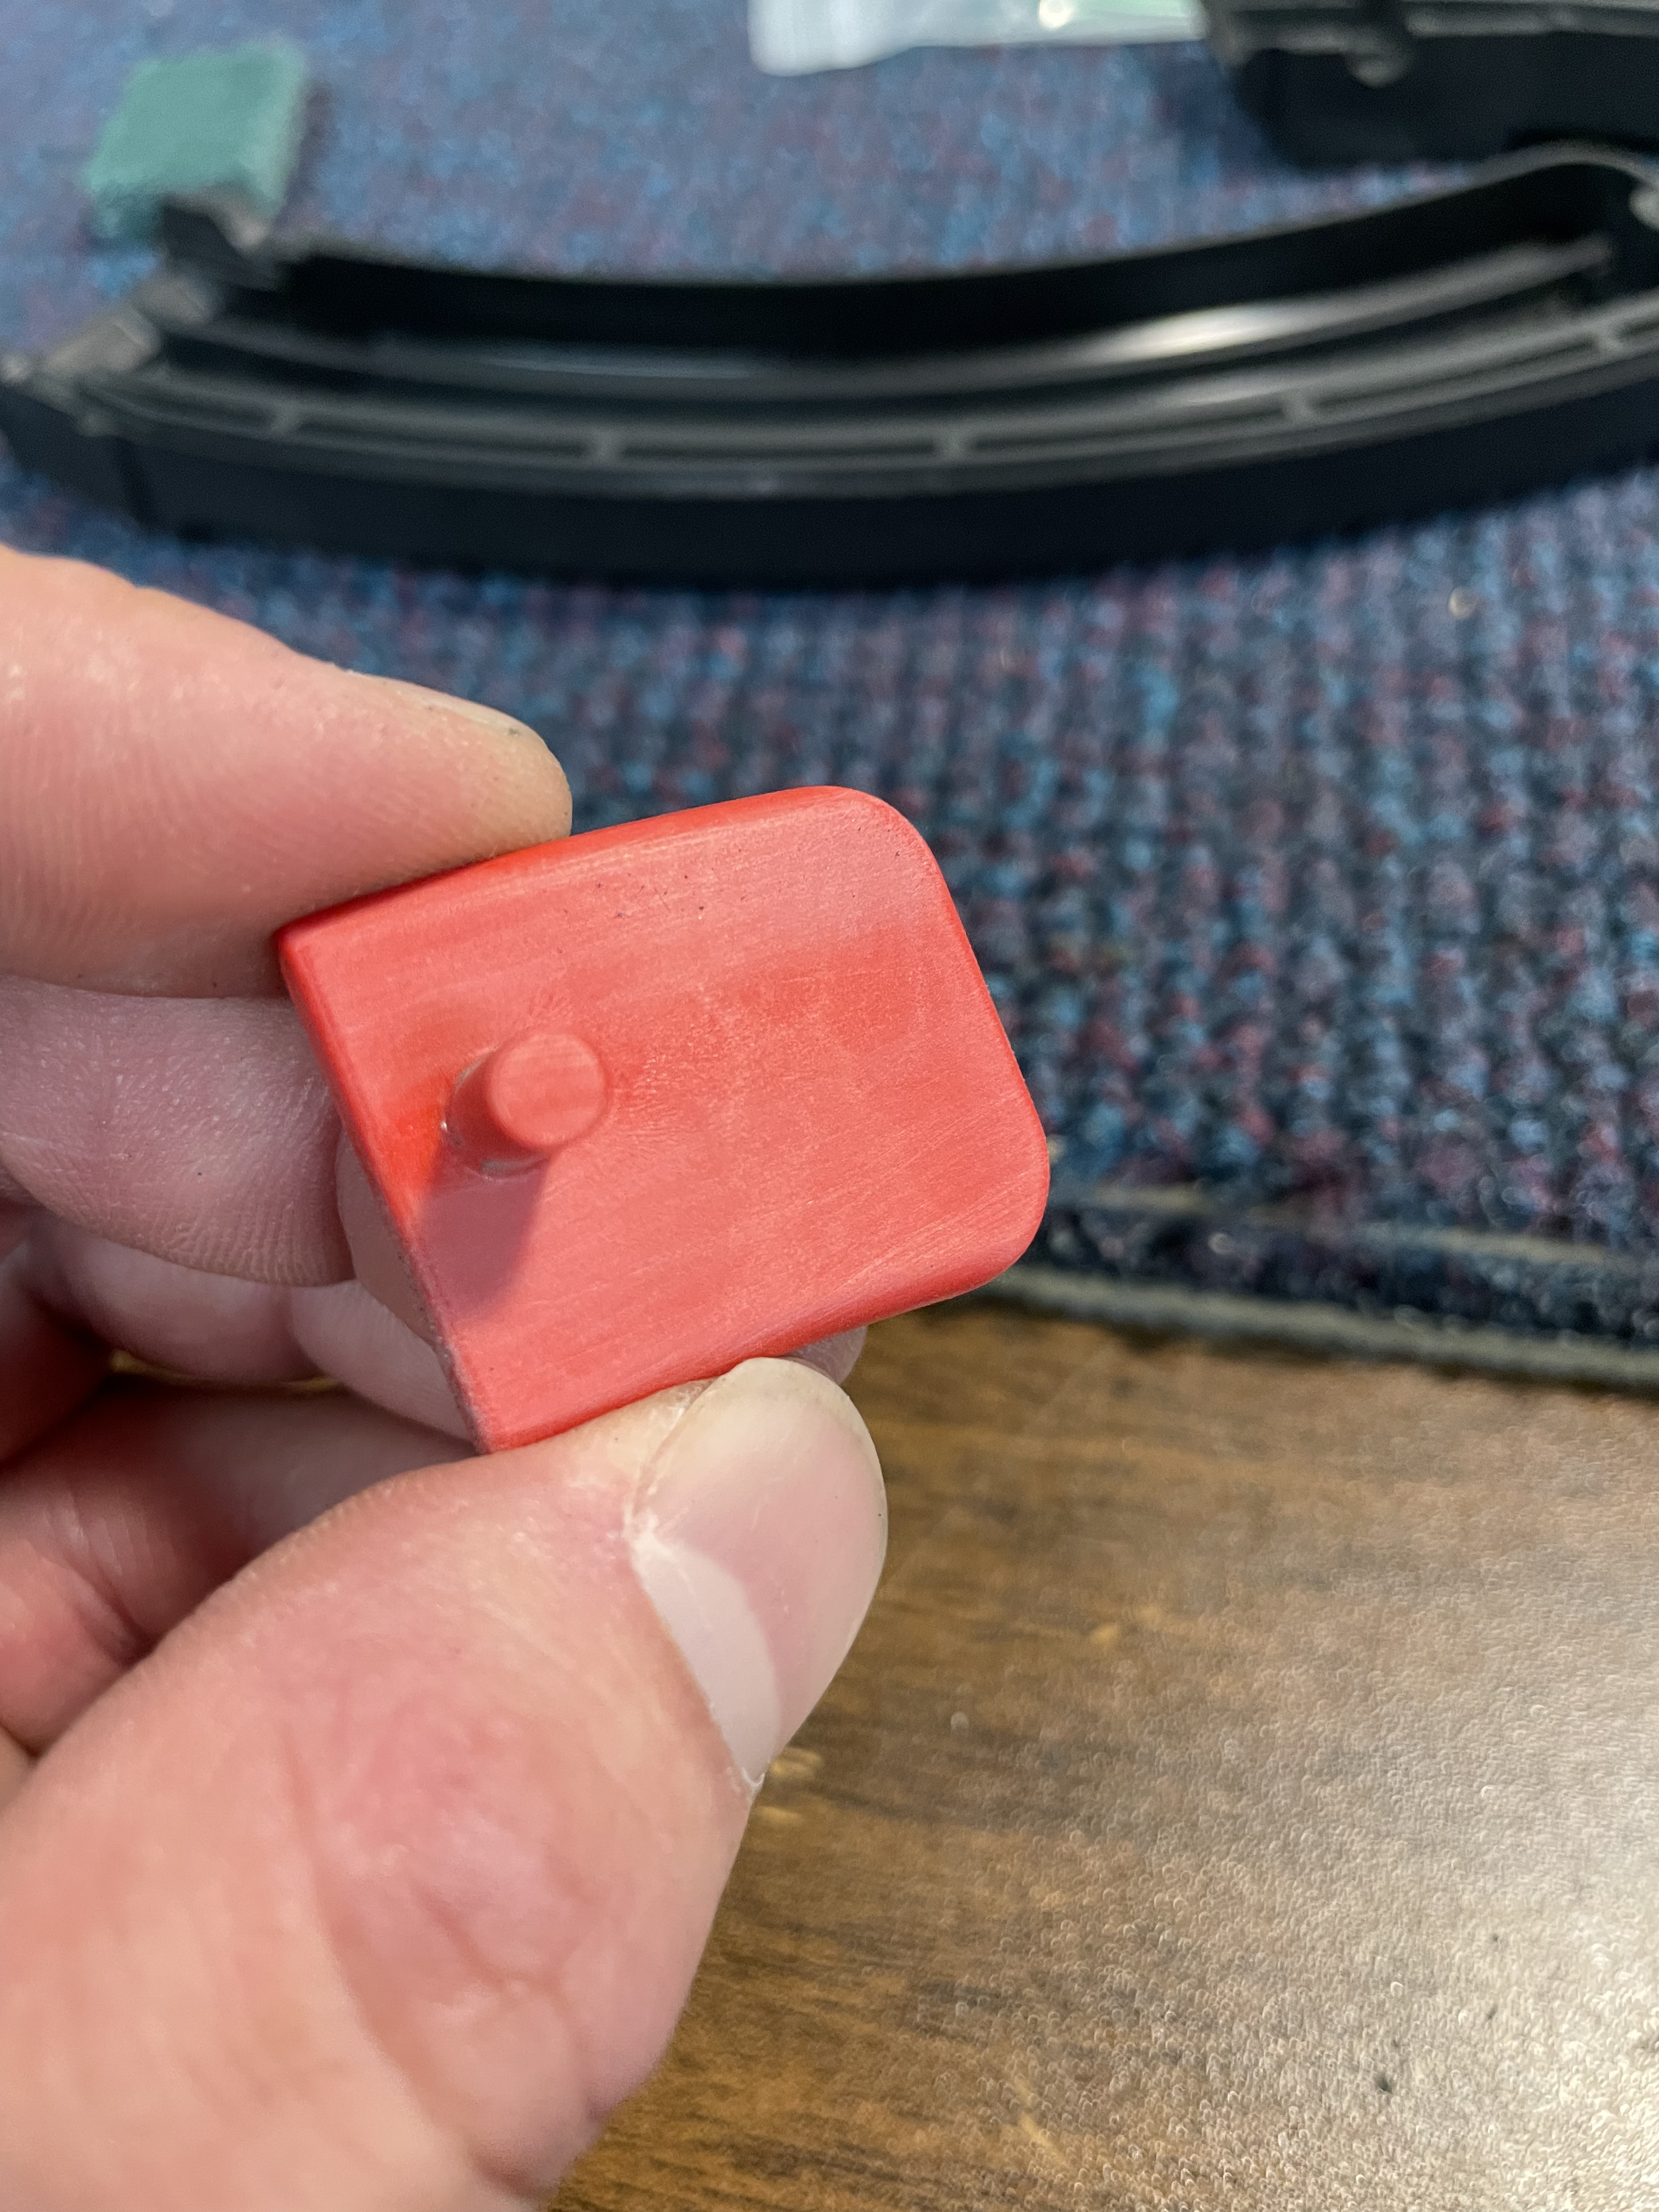 Step 4- If you look at the first image, you can see two used mags and the feed lips from a new one sitting on top of them. Note the lines on the two used mags that I am pointing out with thew allen key. These lines are where lower-left section of the bolt contacts the mag as the gun cycles. Ill show you how to alleviate some of the friction here. Take the feed lip part and place it with that big, flat surface facing down on the 220 grit sand paper on a flat surface. While keeping the surface as flat as you can (be careful not to rock it back and forth) slide it back and forth on the 220 grit. Do it for 10-15 strokes and look at the results. You aren't trying to remove much material, just to smooth it out where the bolt rides on it. On this one, you can see that the surface is not flat so the sandpaper only removed certain areas. That is ok. The bolt wont hit the lower areas, so those don't matter. Once you are satisfied that the higher surfaces have been smoothed out, wipe off the surface and repeat this process with a full sized scotch-brite pad to further polish the flat surface. 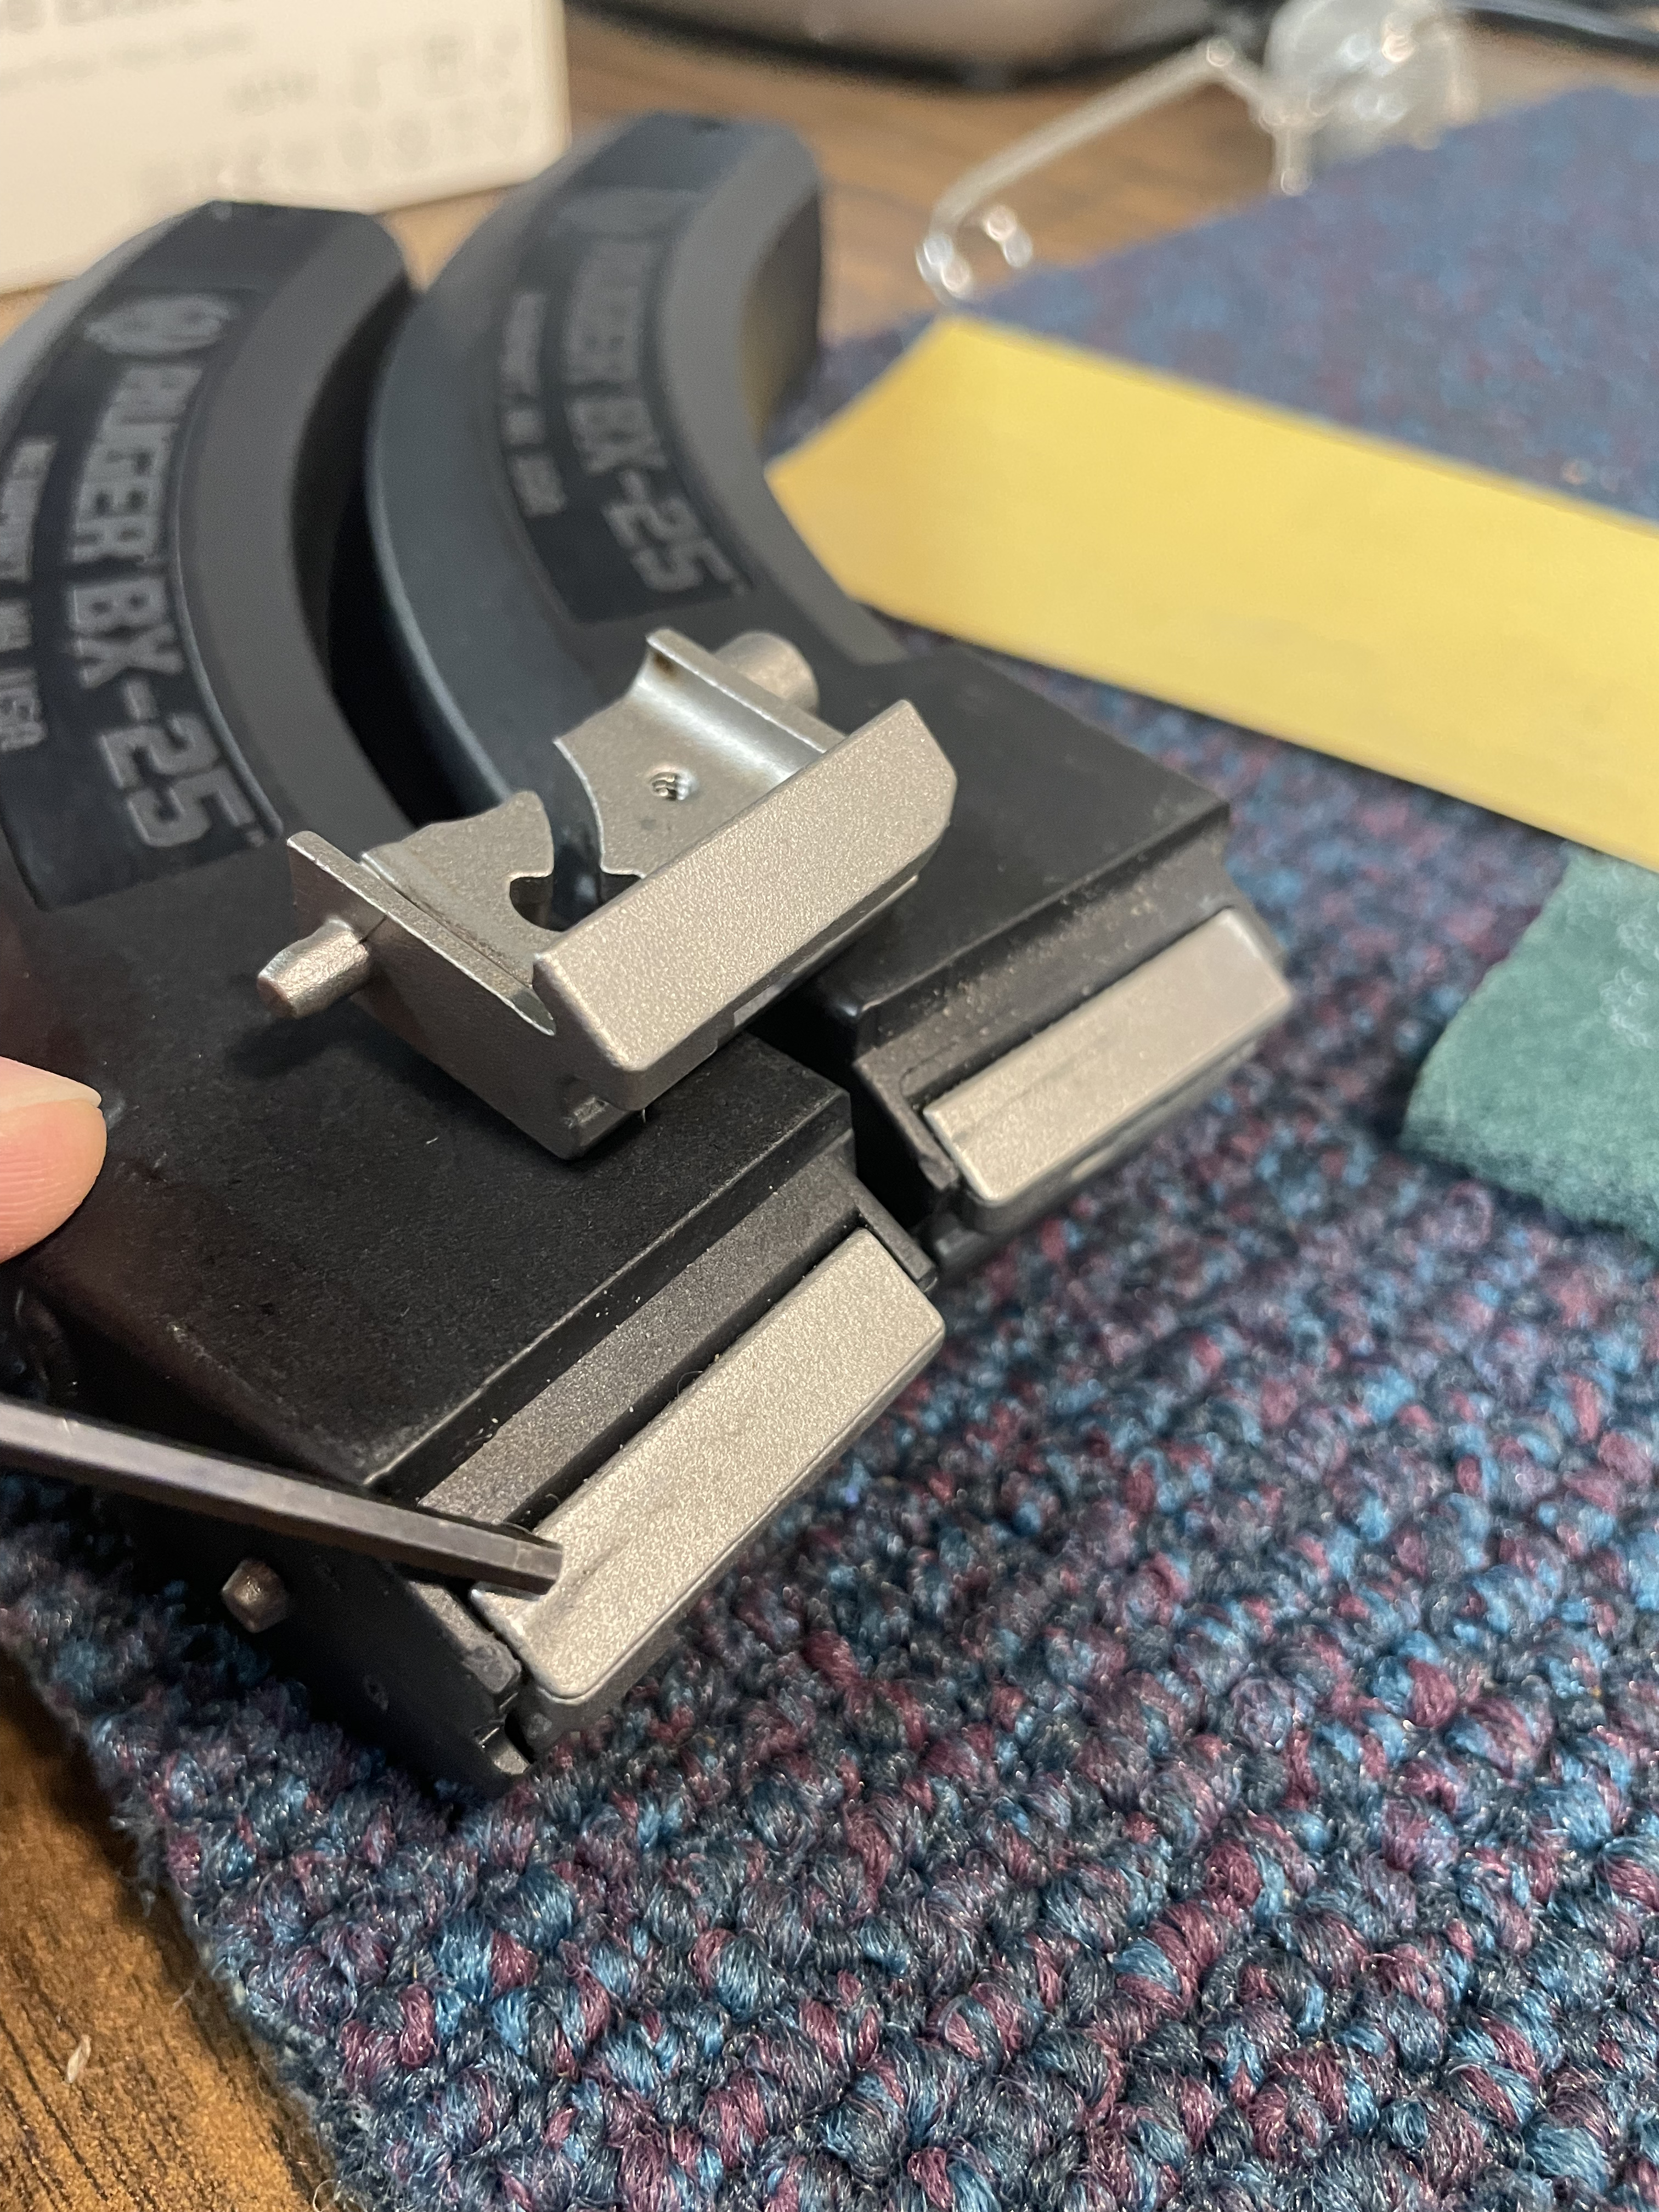 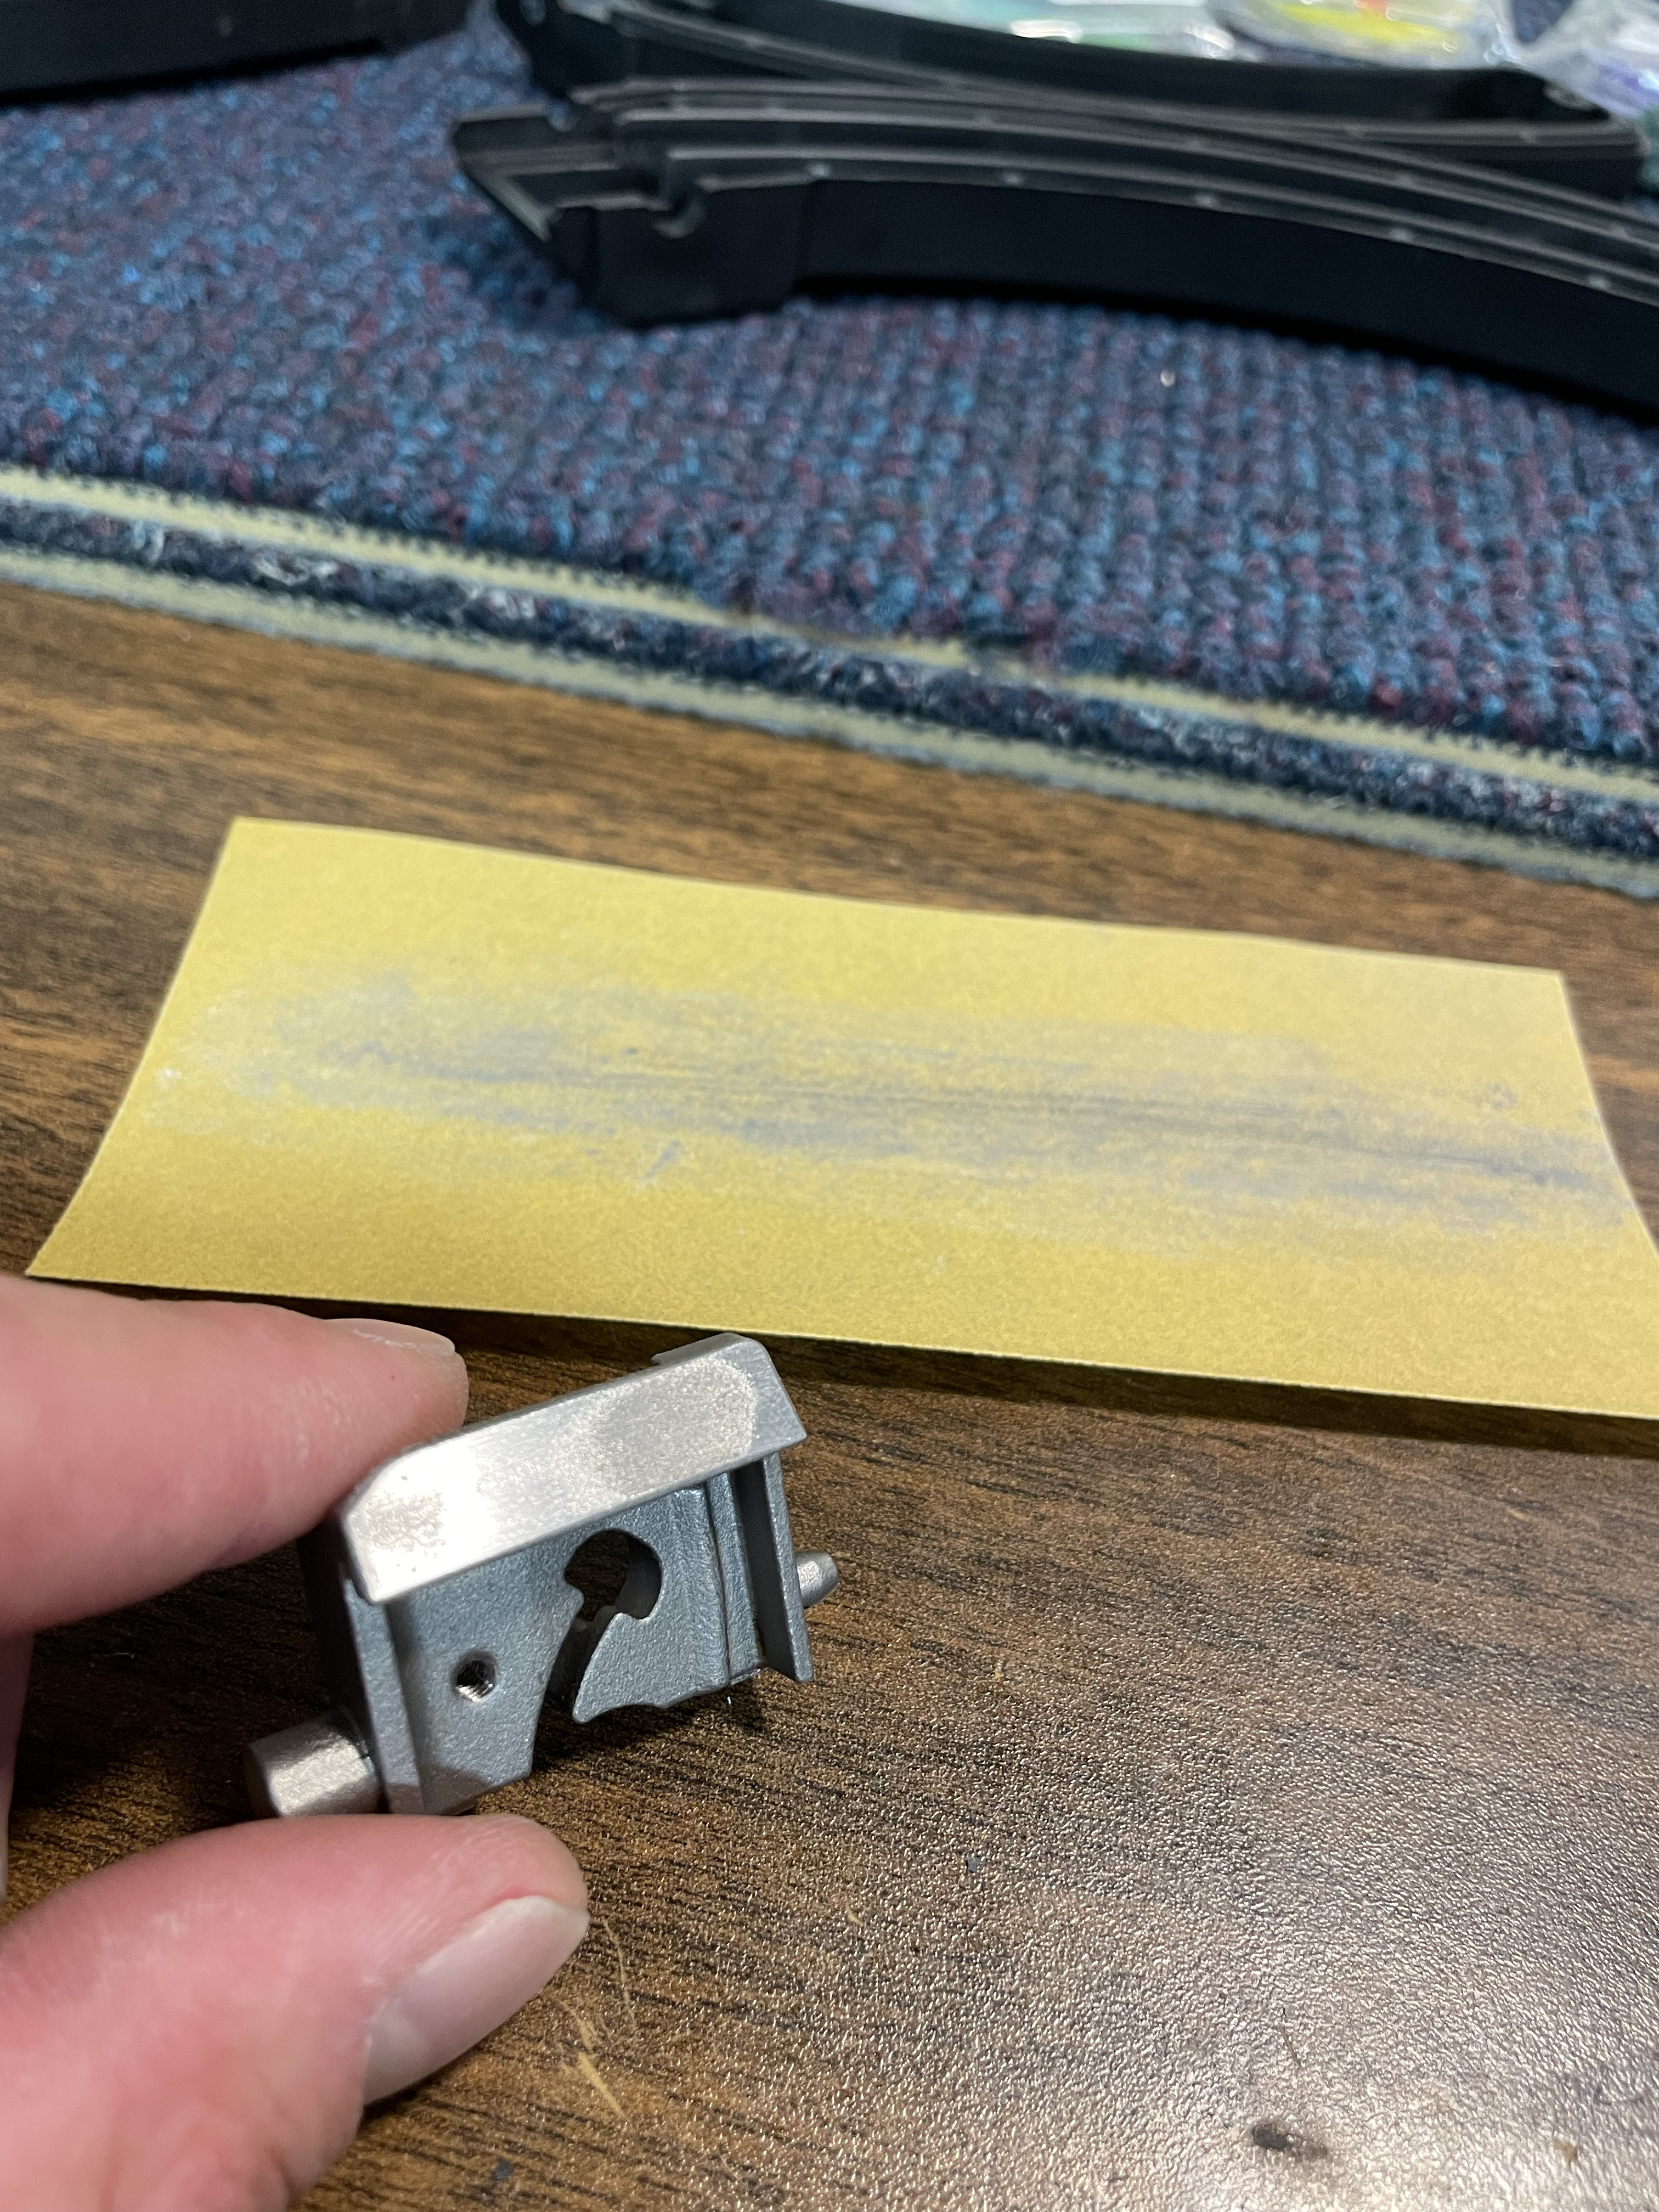 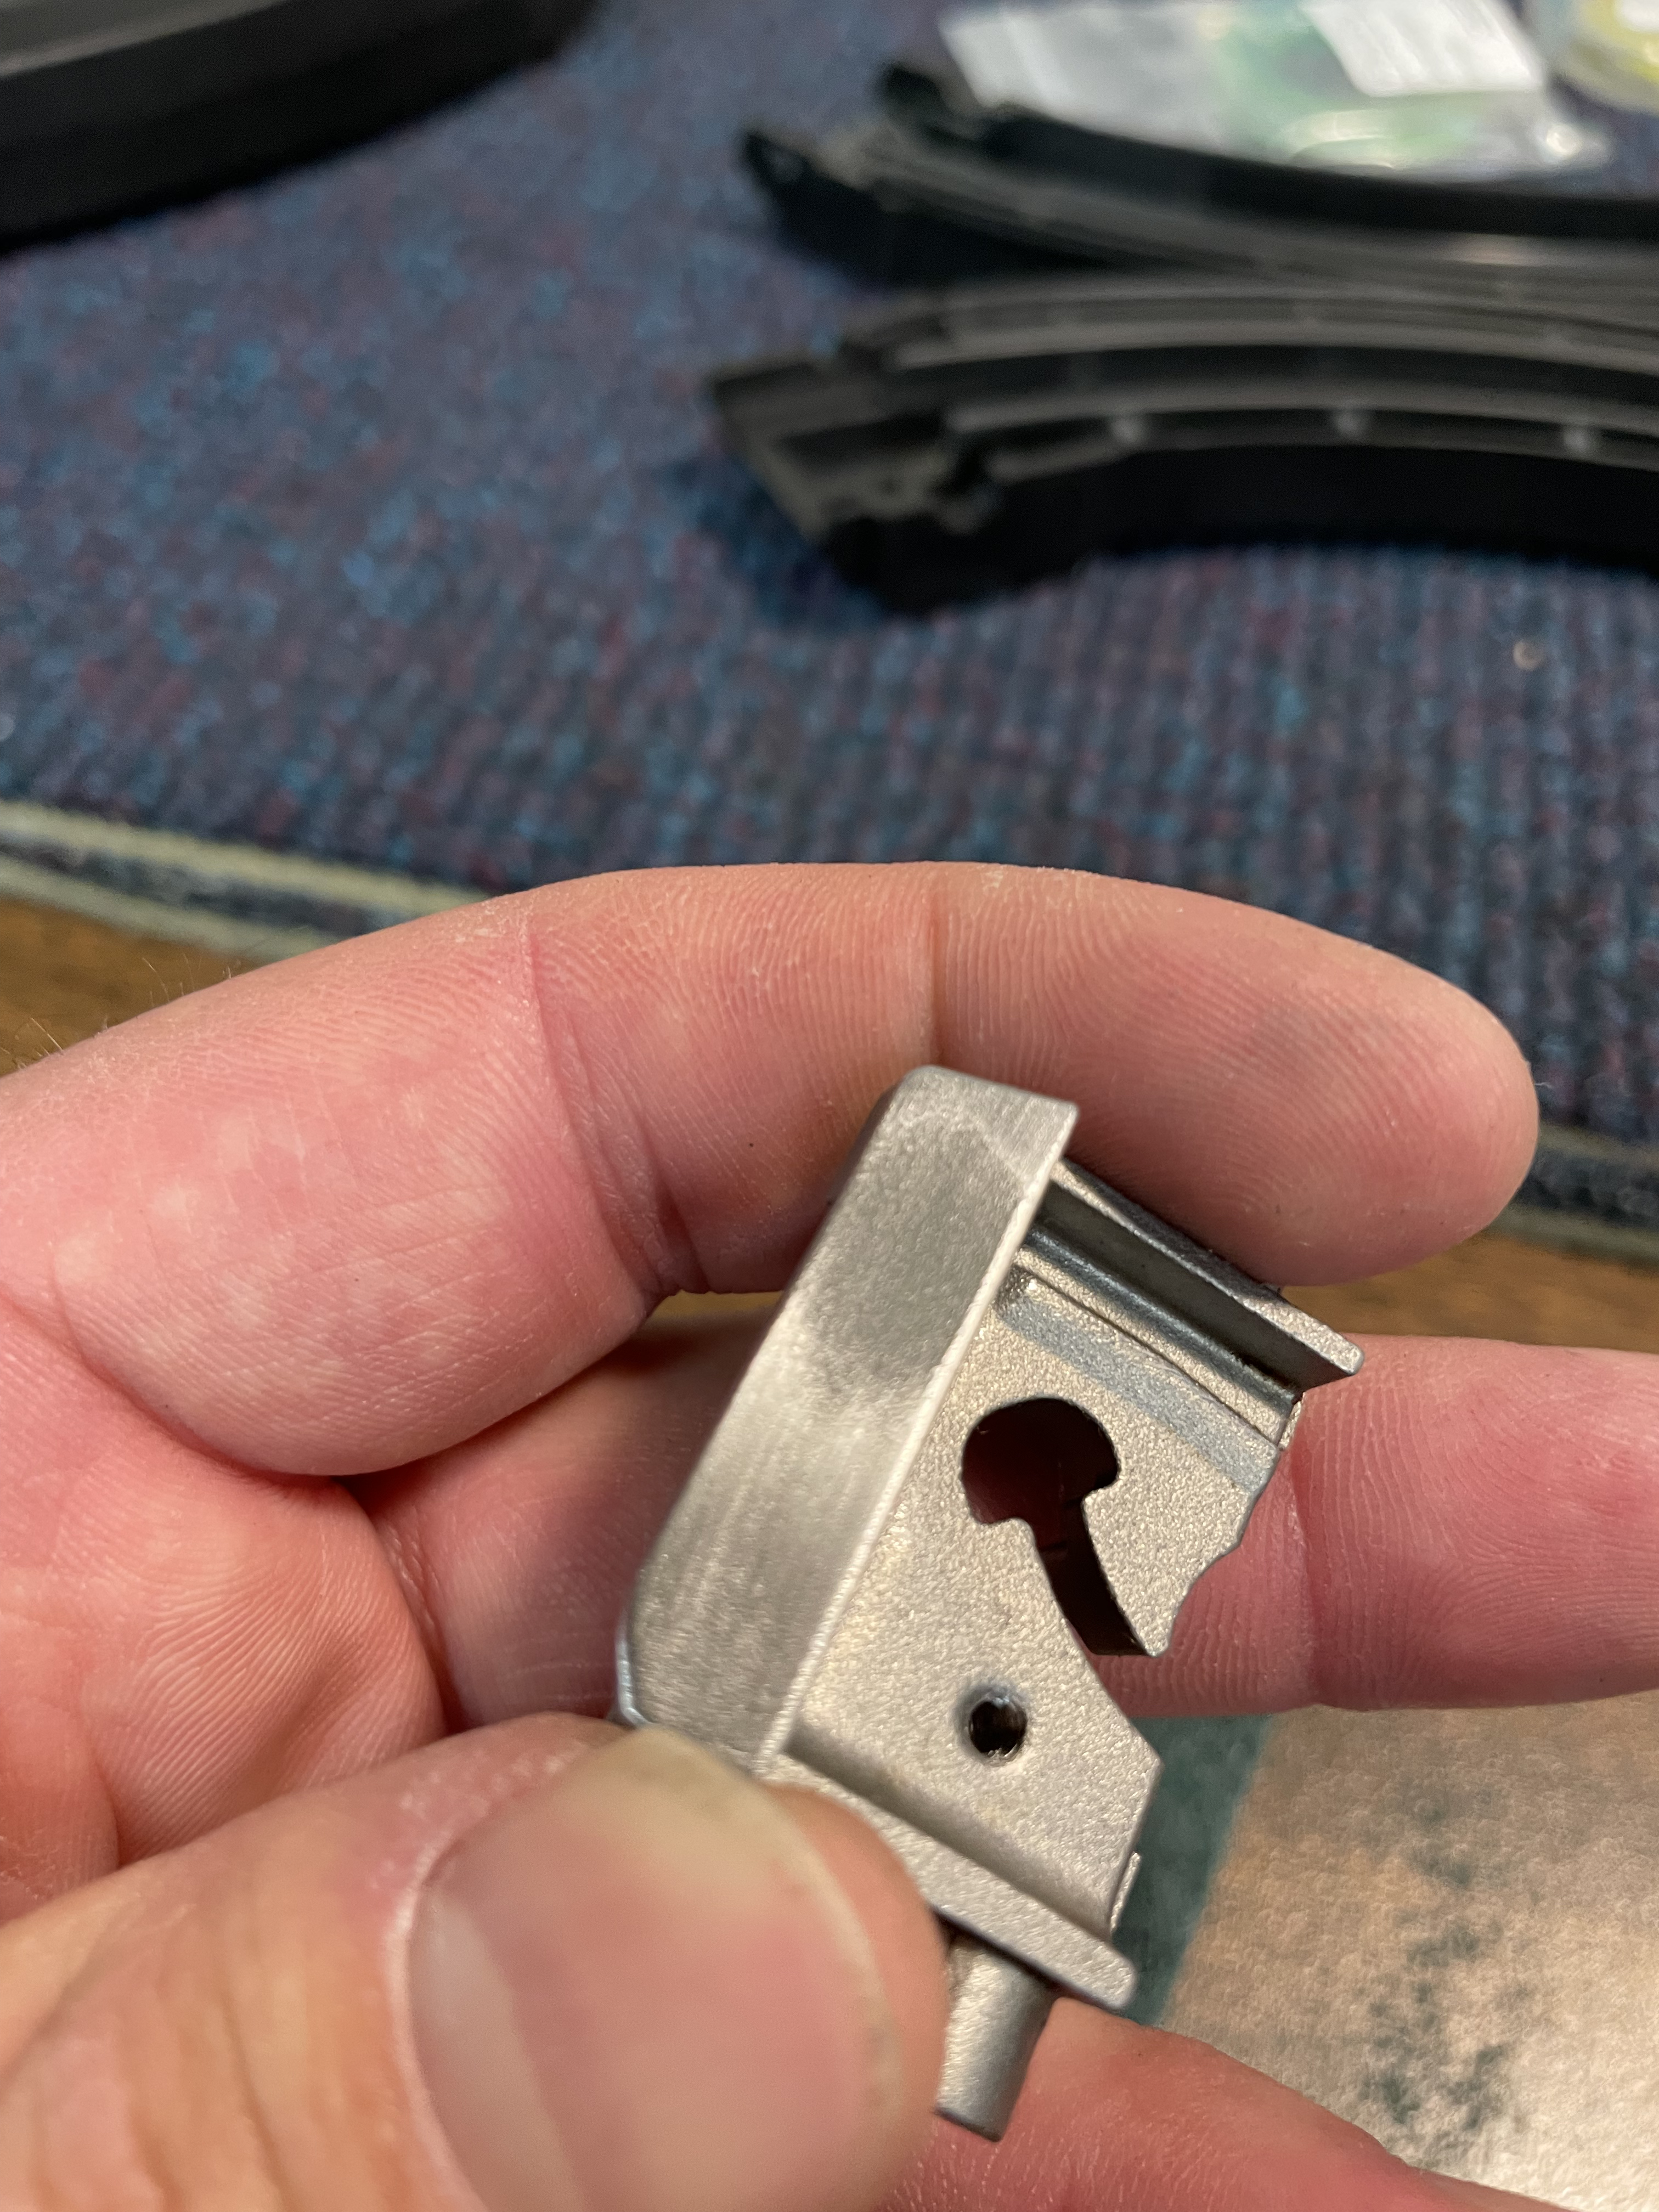 Step 5- Next is the feed ramp polishing. Think of it as polishing the feed ramp on a 1911 or other pistol. The feed ramp is a tad rough from the factory. Serviceable, but rough. We are going to improve it dramatically. This is where the dental polishing strips come in. It is also the most awkward part; as it the feed lip assembly is hard to hold while you do it. You could have somebody hold it securely at the edge of a workbench while you do the polishing if you had to. I put mine, VERY carefully, in a bench vise. If you do this, please beware that the feed lips are easy to smash in a vise. If you smash or deform them, good luck getting the mag to ever work again. Anyways, we will be using the dental polishing strips to polish the feed ramp area. Once you have the feed lips secure somehow, cut a 6-8" section of all three grades of polishing strip to work with. Starting with course, feed it through the front of the feed lips with the abrasive side facing the feed ramp. Grab each end of the strip and work it back and forth, and side to side slowly as you go, to smooth out the surface. The polishing strip will deform some to match the contour of the feed ramp area. Do it for 15-20 seconds with the course, then 15-20 seconds with the medium, and finish it with the fine. Remember, if you take too much material off during this step, the cartridge presentation may no longer be correct and it will cause jams and misfeeds. Just get it smoothed up and call it good.  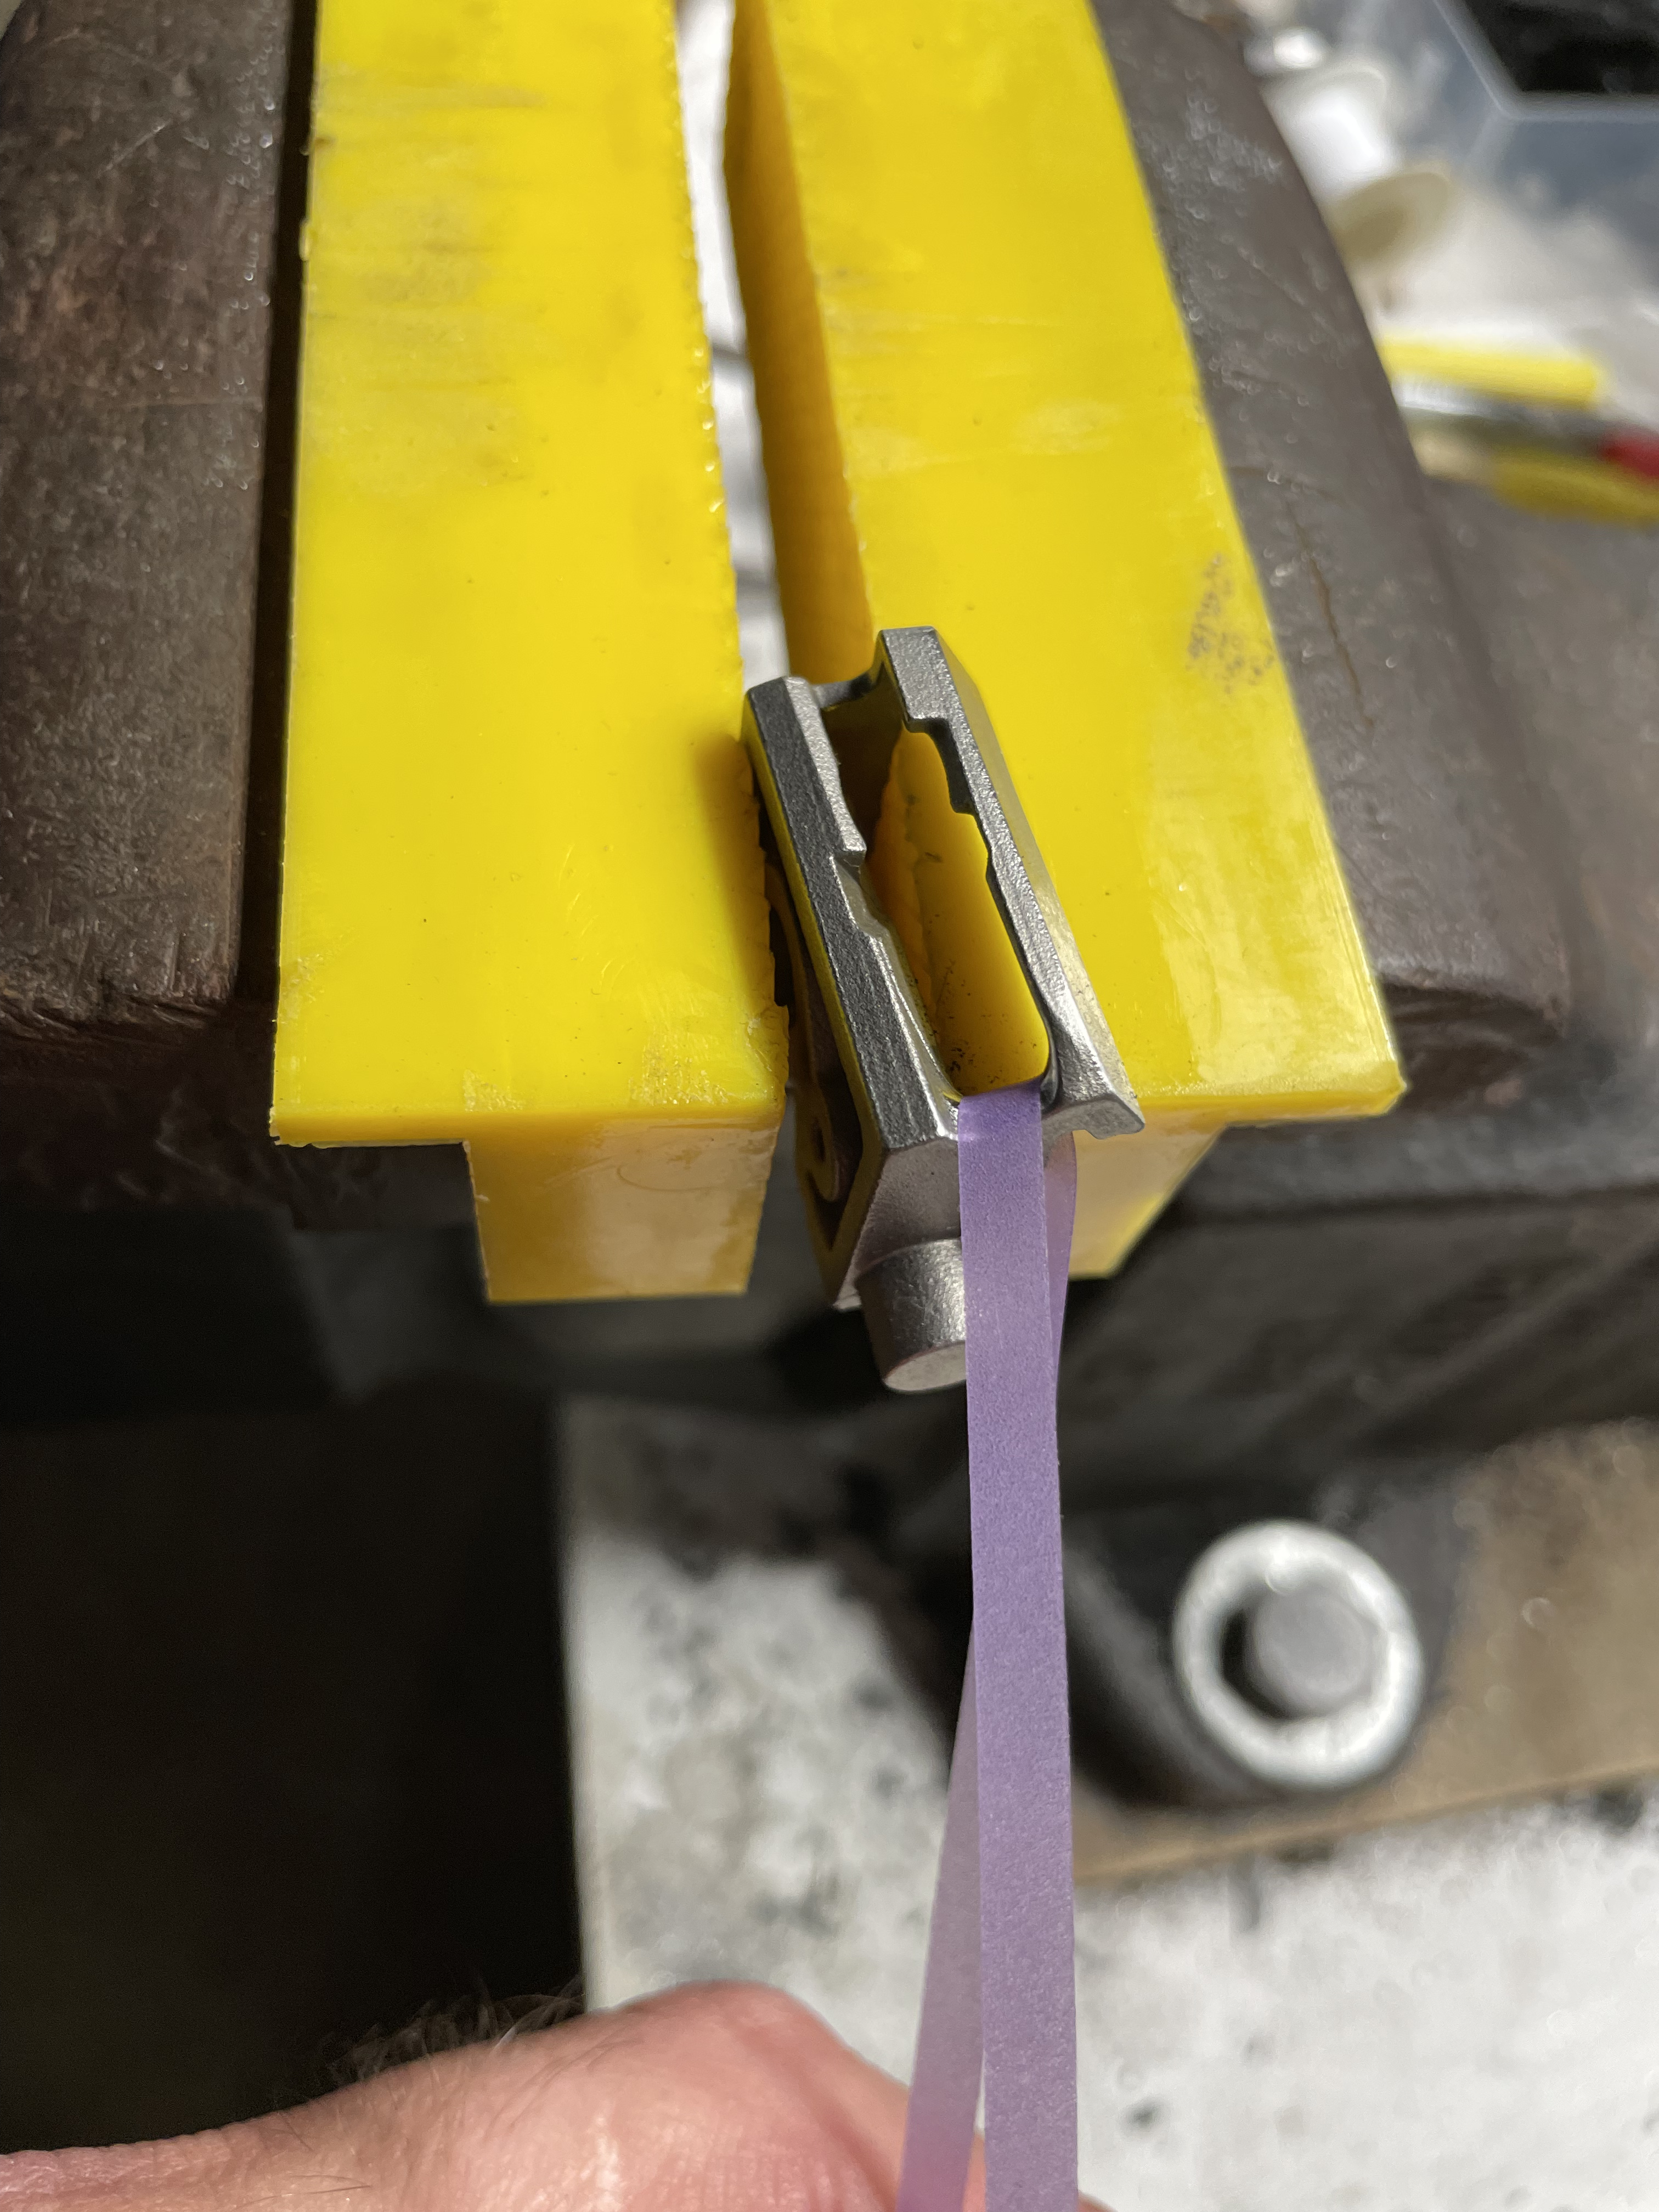 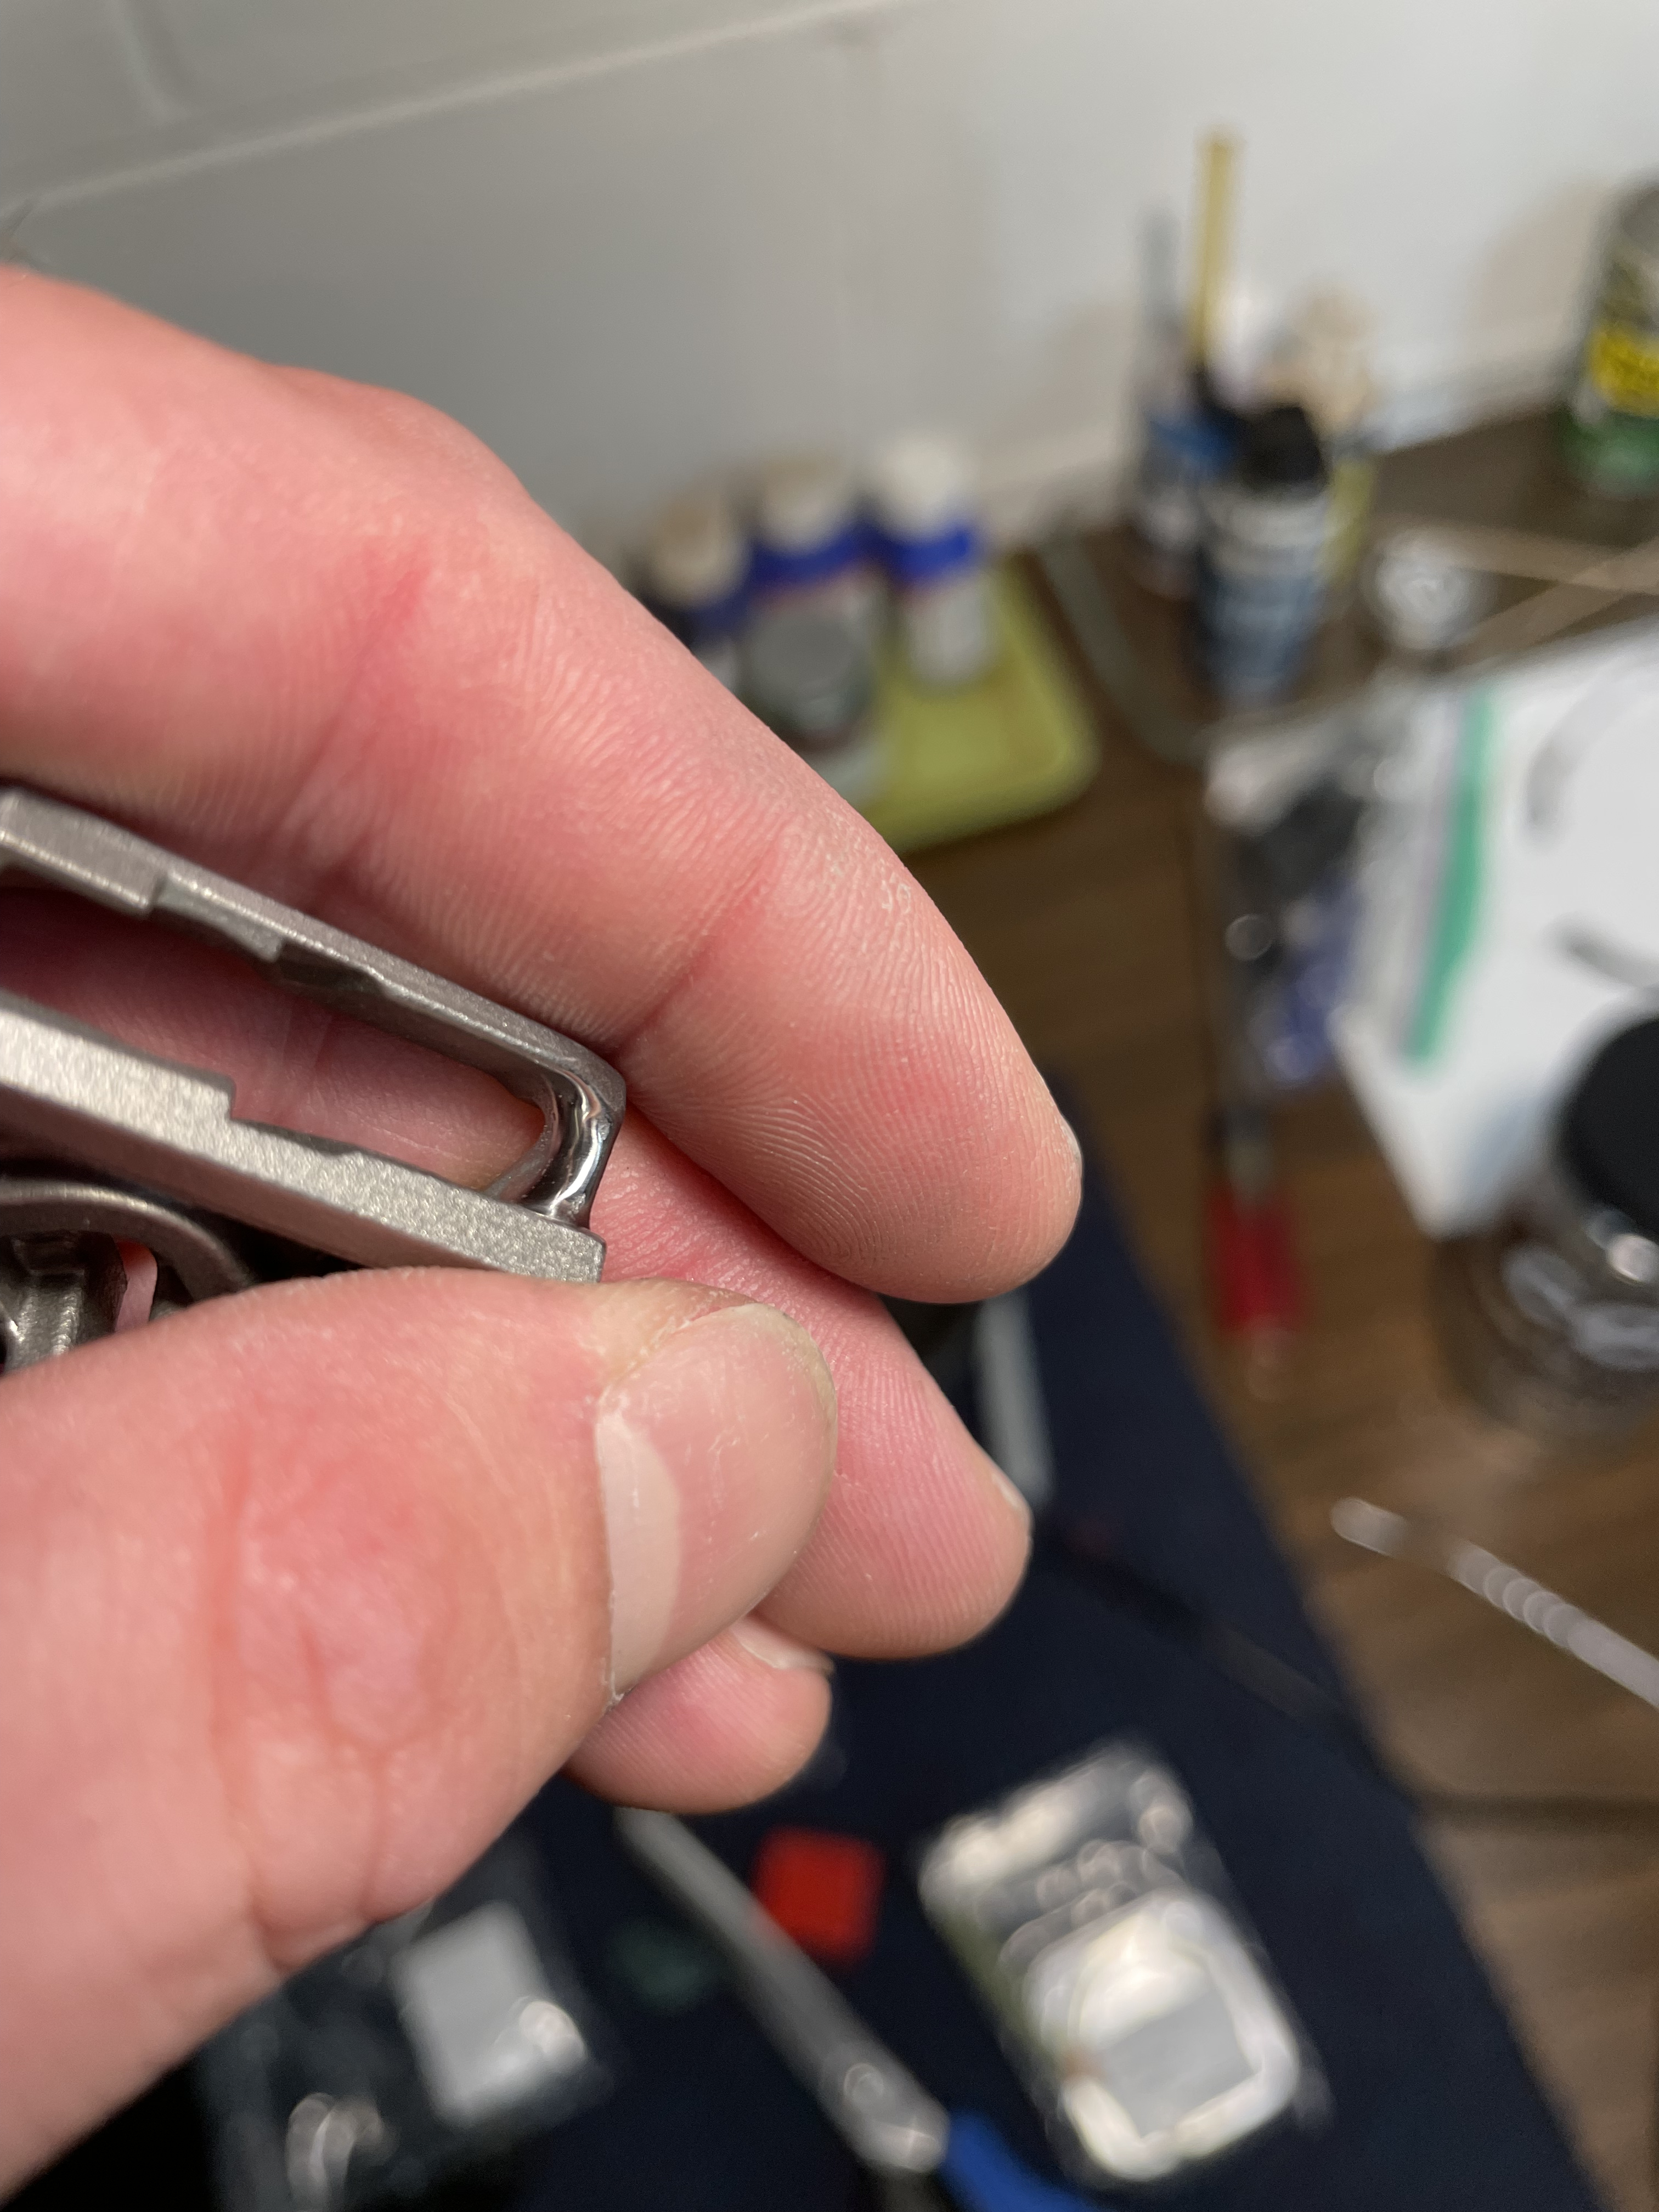 Step 6- On the inside of the feed lips, there is a small rail that the bullets and follower slide up. This rail corresponds to one of the rails in the right half of the magazine. It, the wall right behind it, as well as the curved wall opposite from it, all need to be hit with the small piece of scotch-brite. These surfaces are likely high-contact surfaces for the cartridges; particularly the curved wall where the nose of the bullet could ride along. Nothing special here, just work the scotch-brite up and down along the rail and the two walls. Once you have done this and gotten those areas smoothed up a bit, you can clean the feed lips in soapy water or an ultrasonic cleaner. 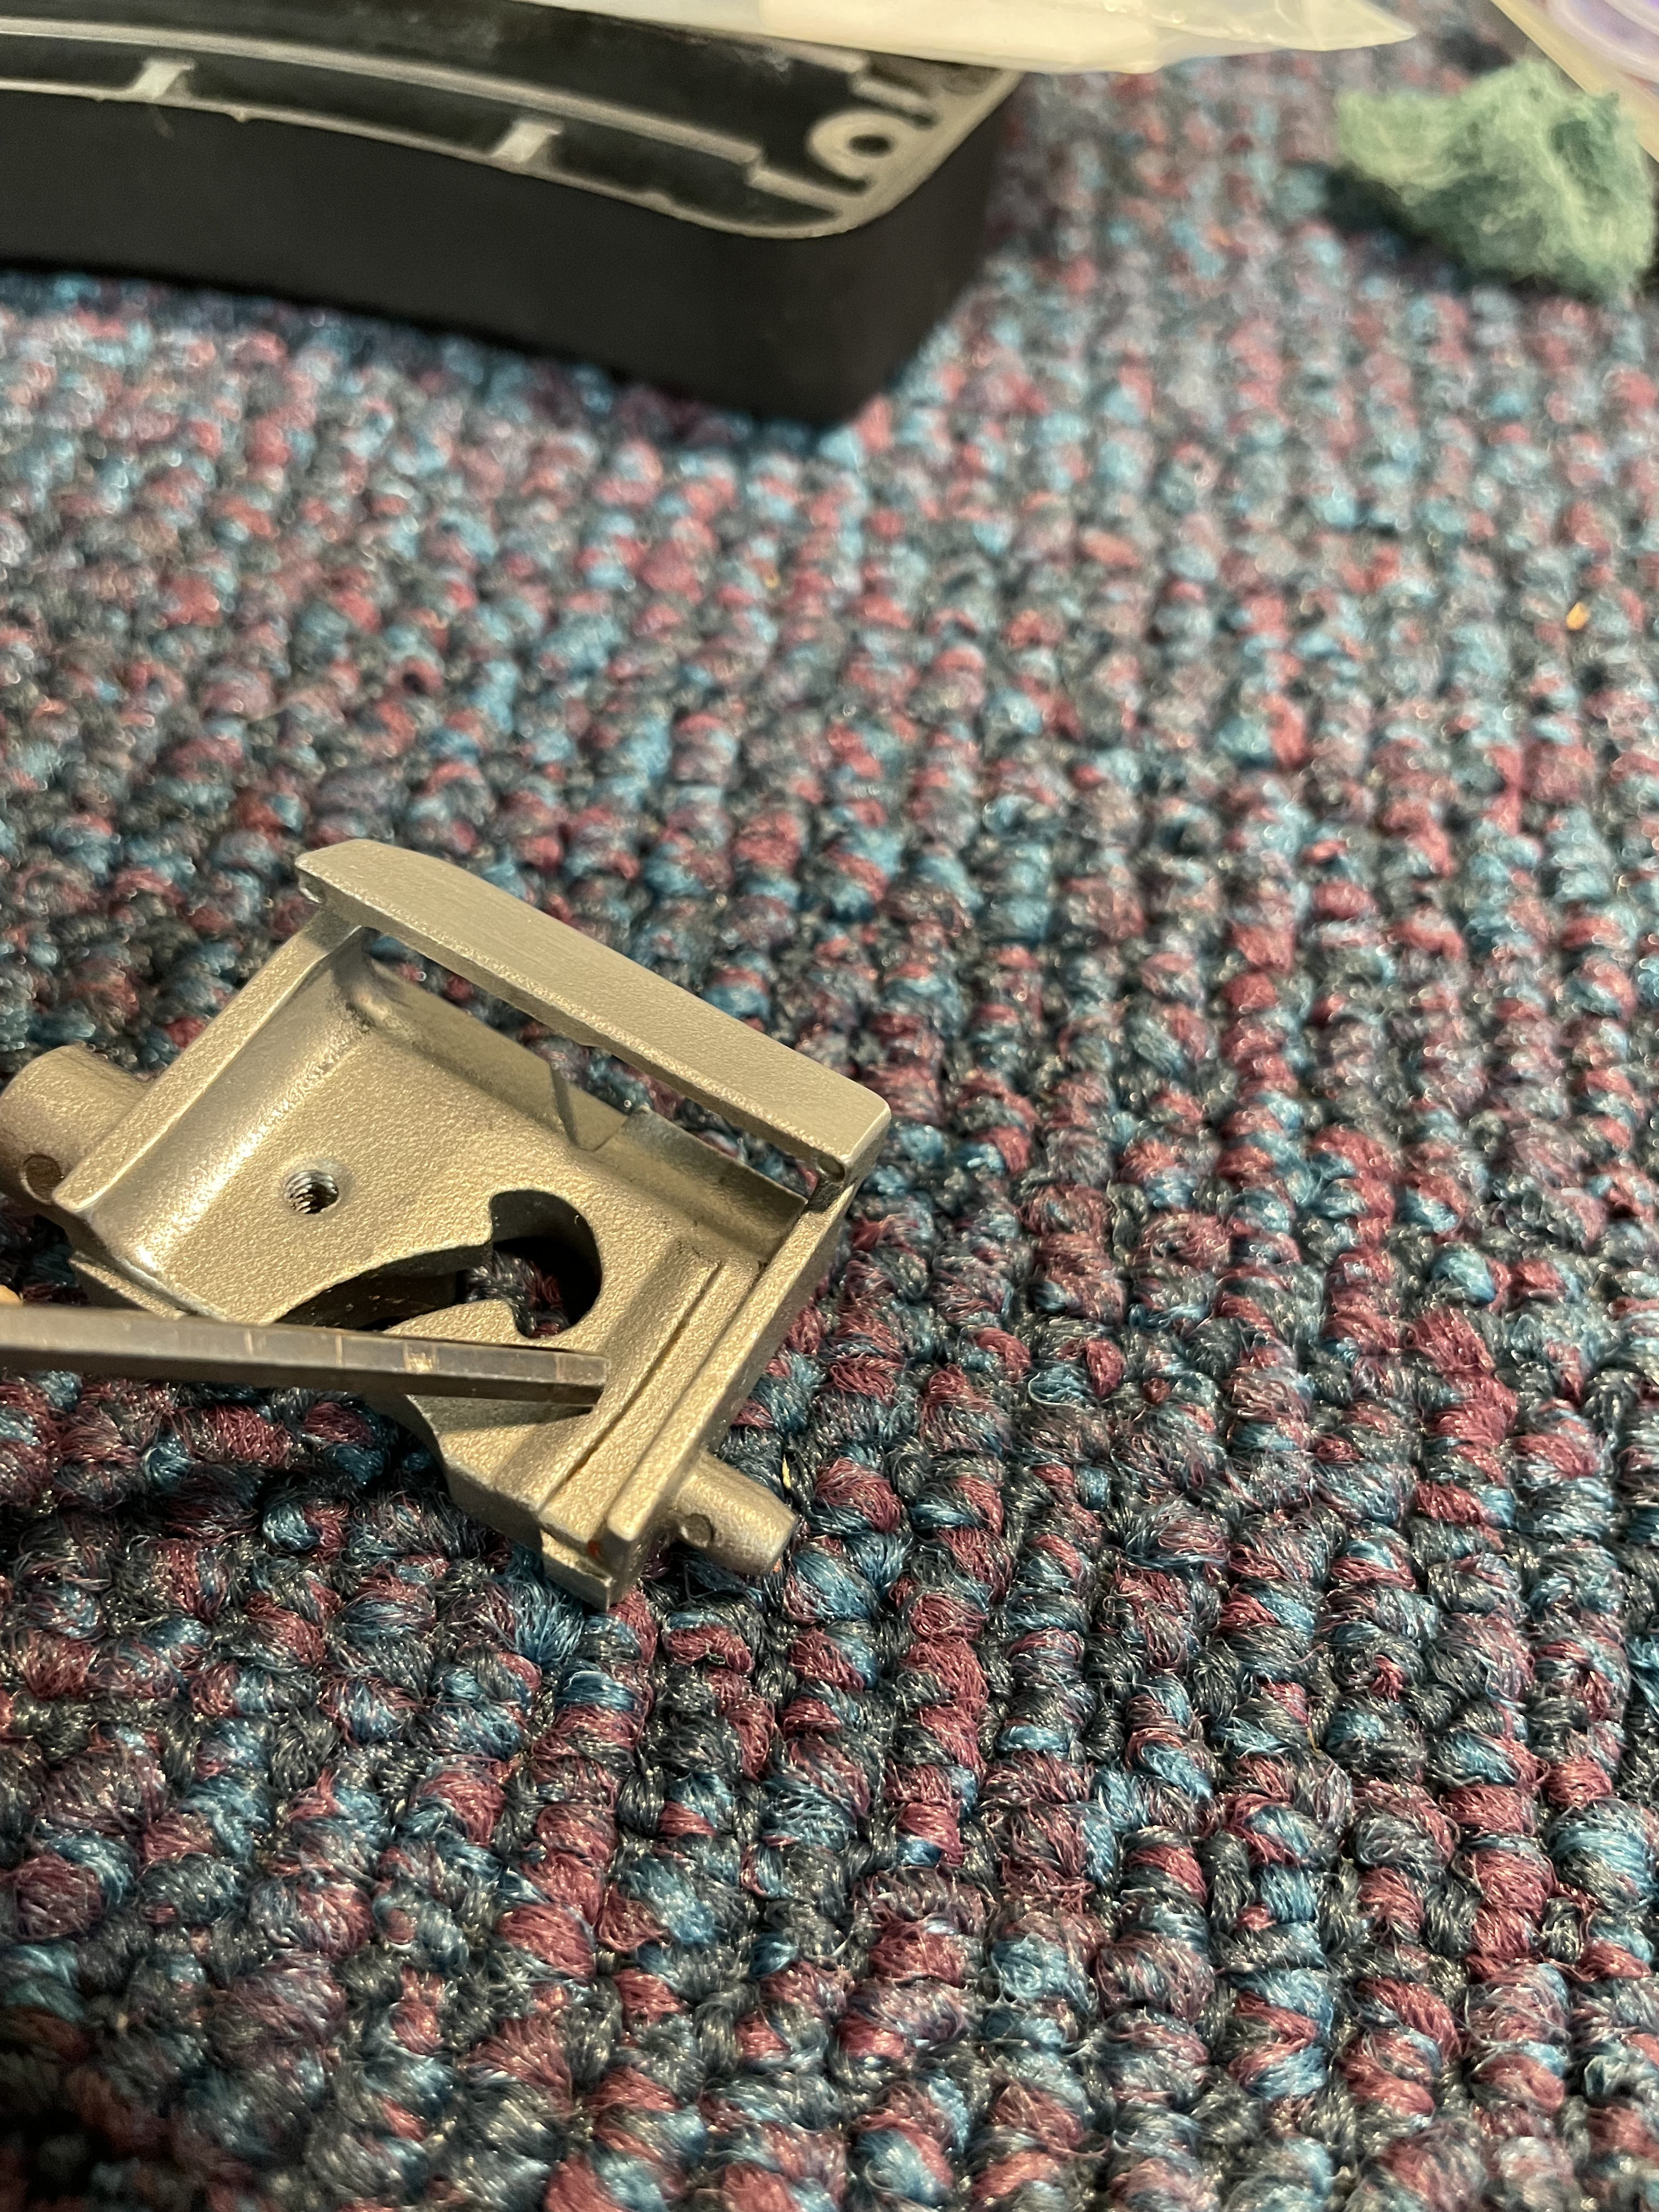  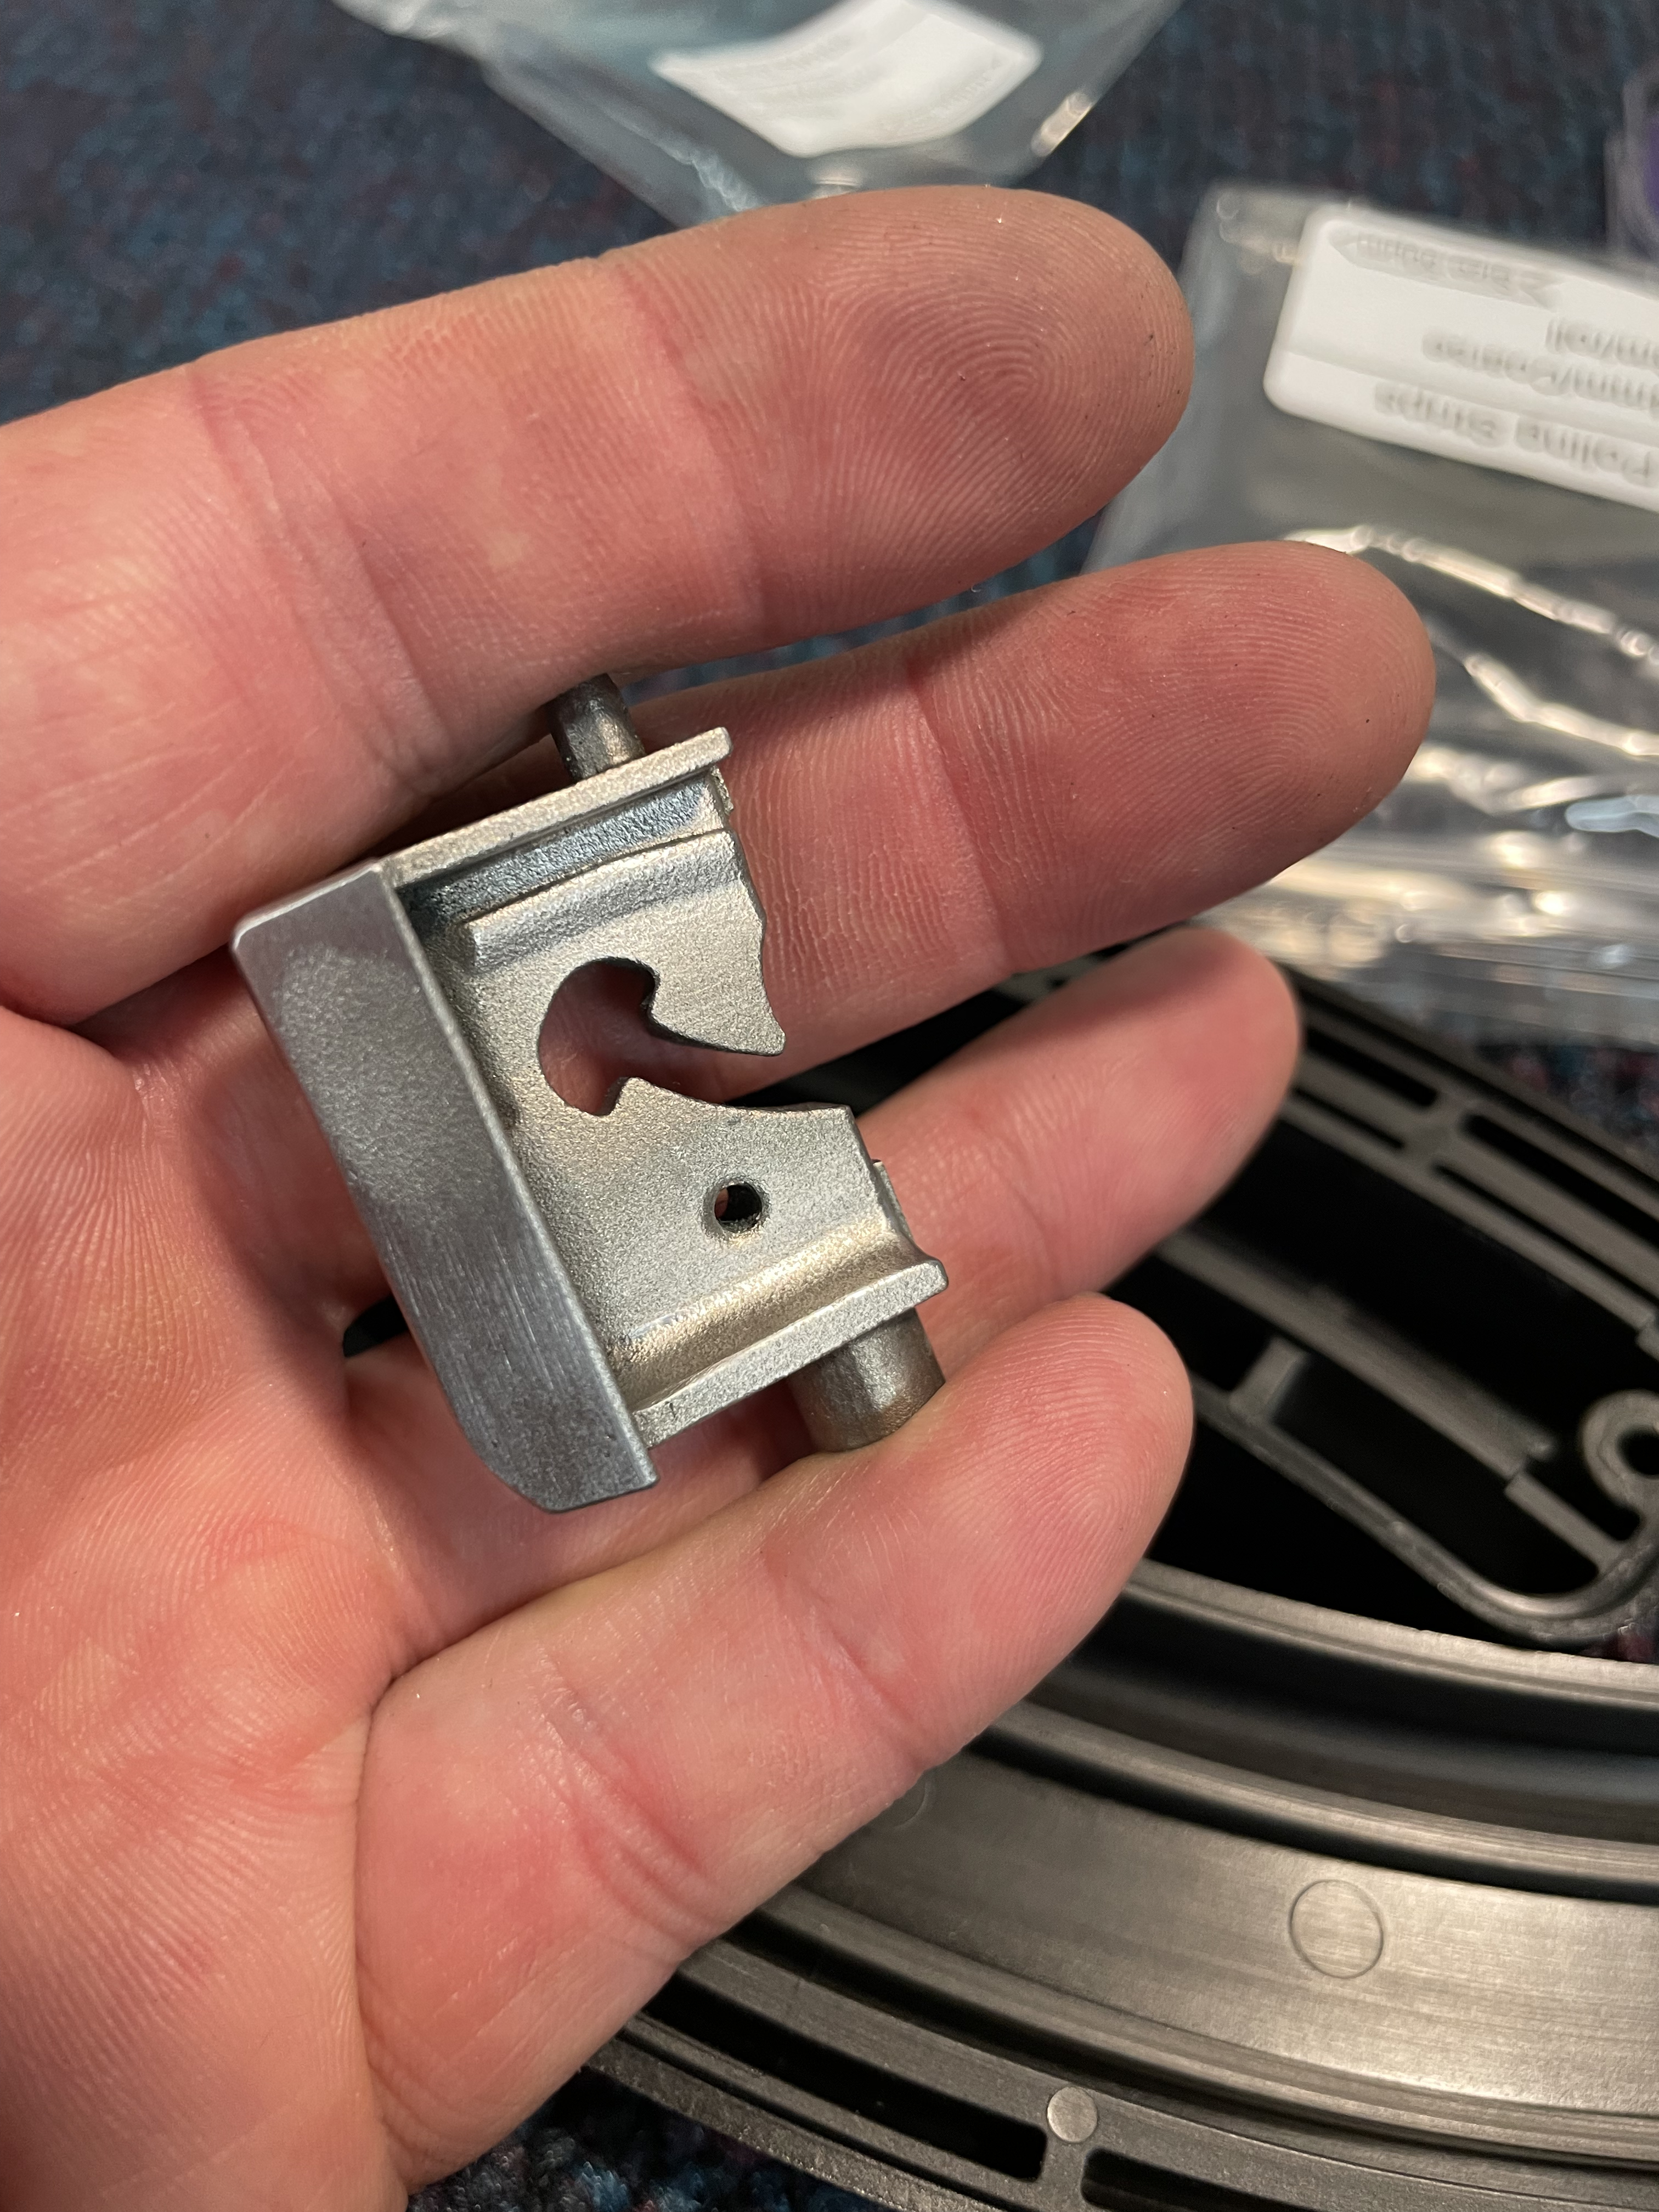 Step 7- Now we are ready to lube and reassemble. Once all the parts have been cleaned and are dry, take whatever dry lube you chose or whatever gun oil of your choice and use a cotton swab or cloth saturated in it to wipe down the rails inside the magazine halves as well as the fore and aft walls, the follower and the post of the follower, and all surfaces on the feed lips that a cartridge or the follower may touch. In particular, lube up the areas that were modified throughout this process. Also, put a drop of oil on the side of the follower spring, such that it soaks into the coils. A key here is that less is more- it doesn't take a whole lot. Once everything is lubed up, you can take the feed lips and tilt/ rock them back into the left side of the mag body. Once they are in and seated flat, put the follower back onto it's rails, post-up, and slide it up into the feed lips. Now comes the follower spring. Look at the spring, and how it has a tail sticking out with a roll-pin going through it. The roll pin gets seated into a cutout on the side of the feed lips. You can get the roll pin seated, with the spring assembly angled up and away from the follower it rides on, and pivot it down onto the stud that is protruding from the follower. Should drop right into place. Once you have done it a couple of times, its easy-peasy. After that, you can place the other half of the mag on top and re-install the screws. Long one in the bottom, short one in the top. Be careful not to cross-thread them, and do not wrench down on them when you tighten them. They don't need a lot of torque to hold the mag together. If you get to this point- congrats. The mag is now much smoother than it was from the factory, and the bolt should feel and cycle smoother.  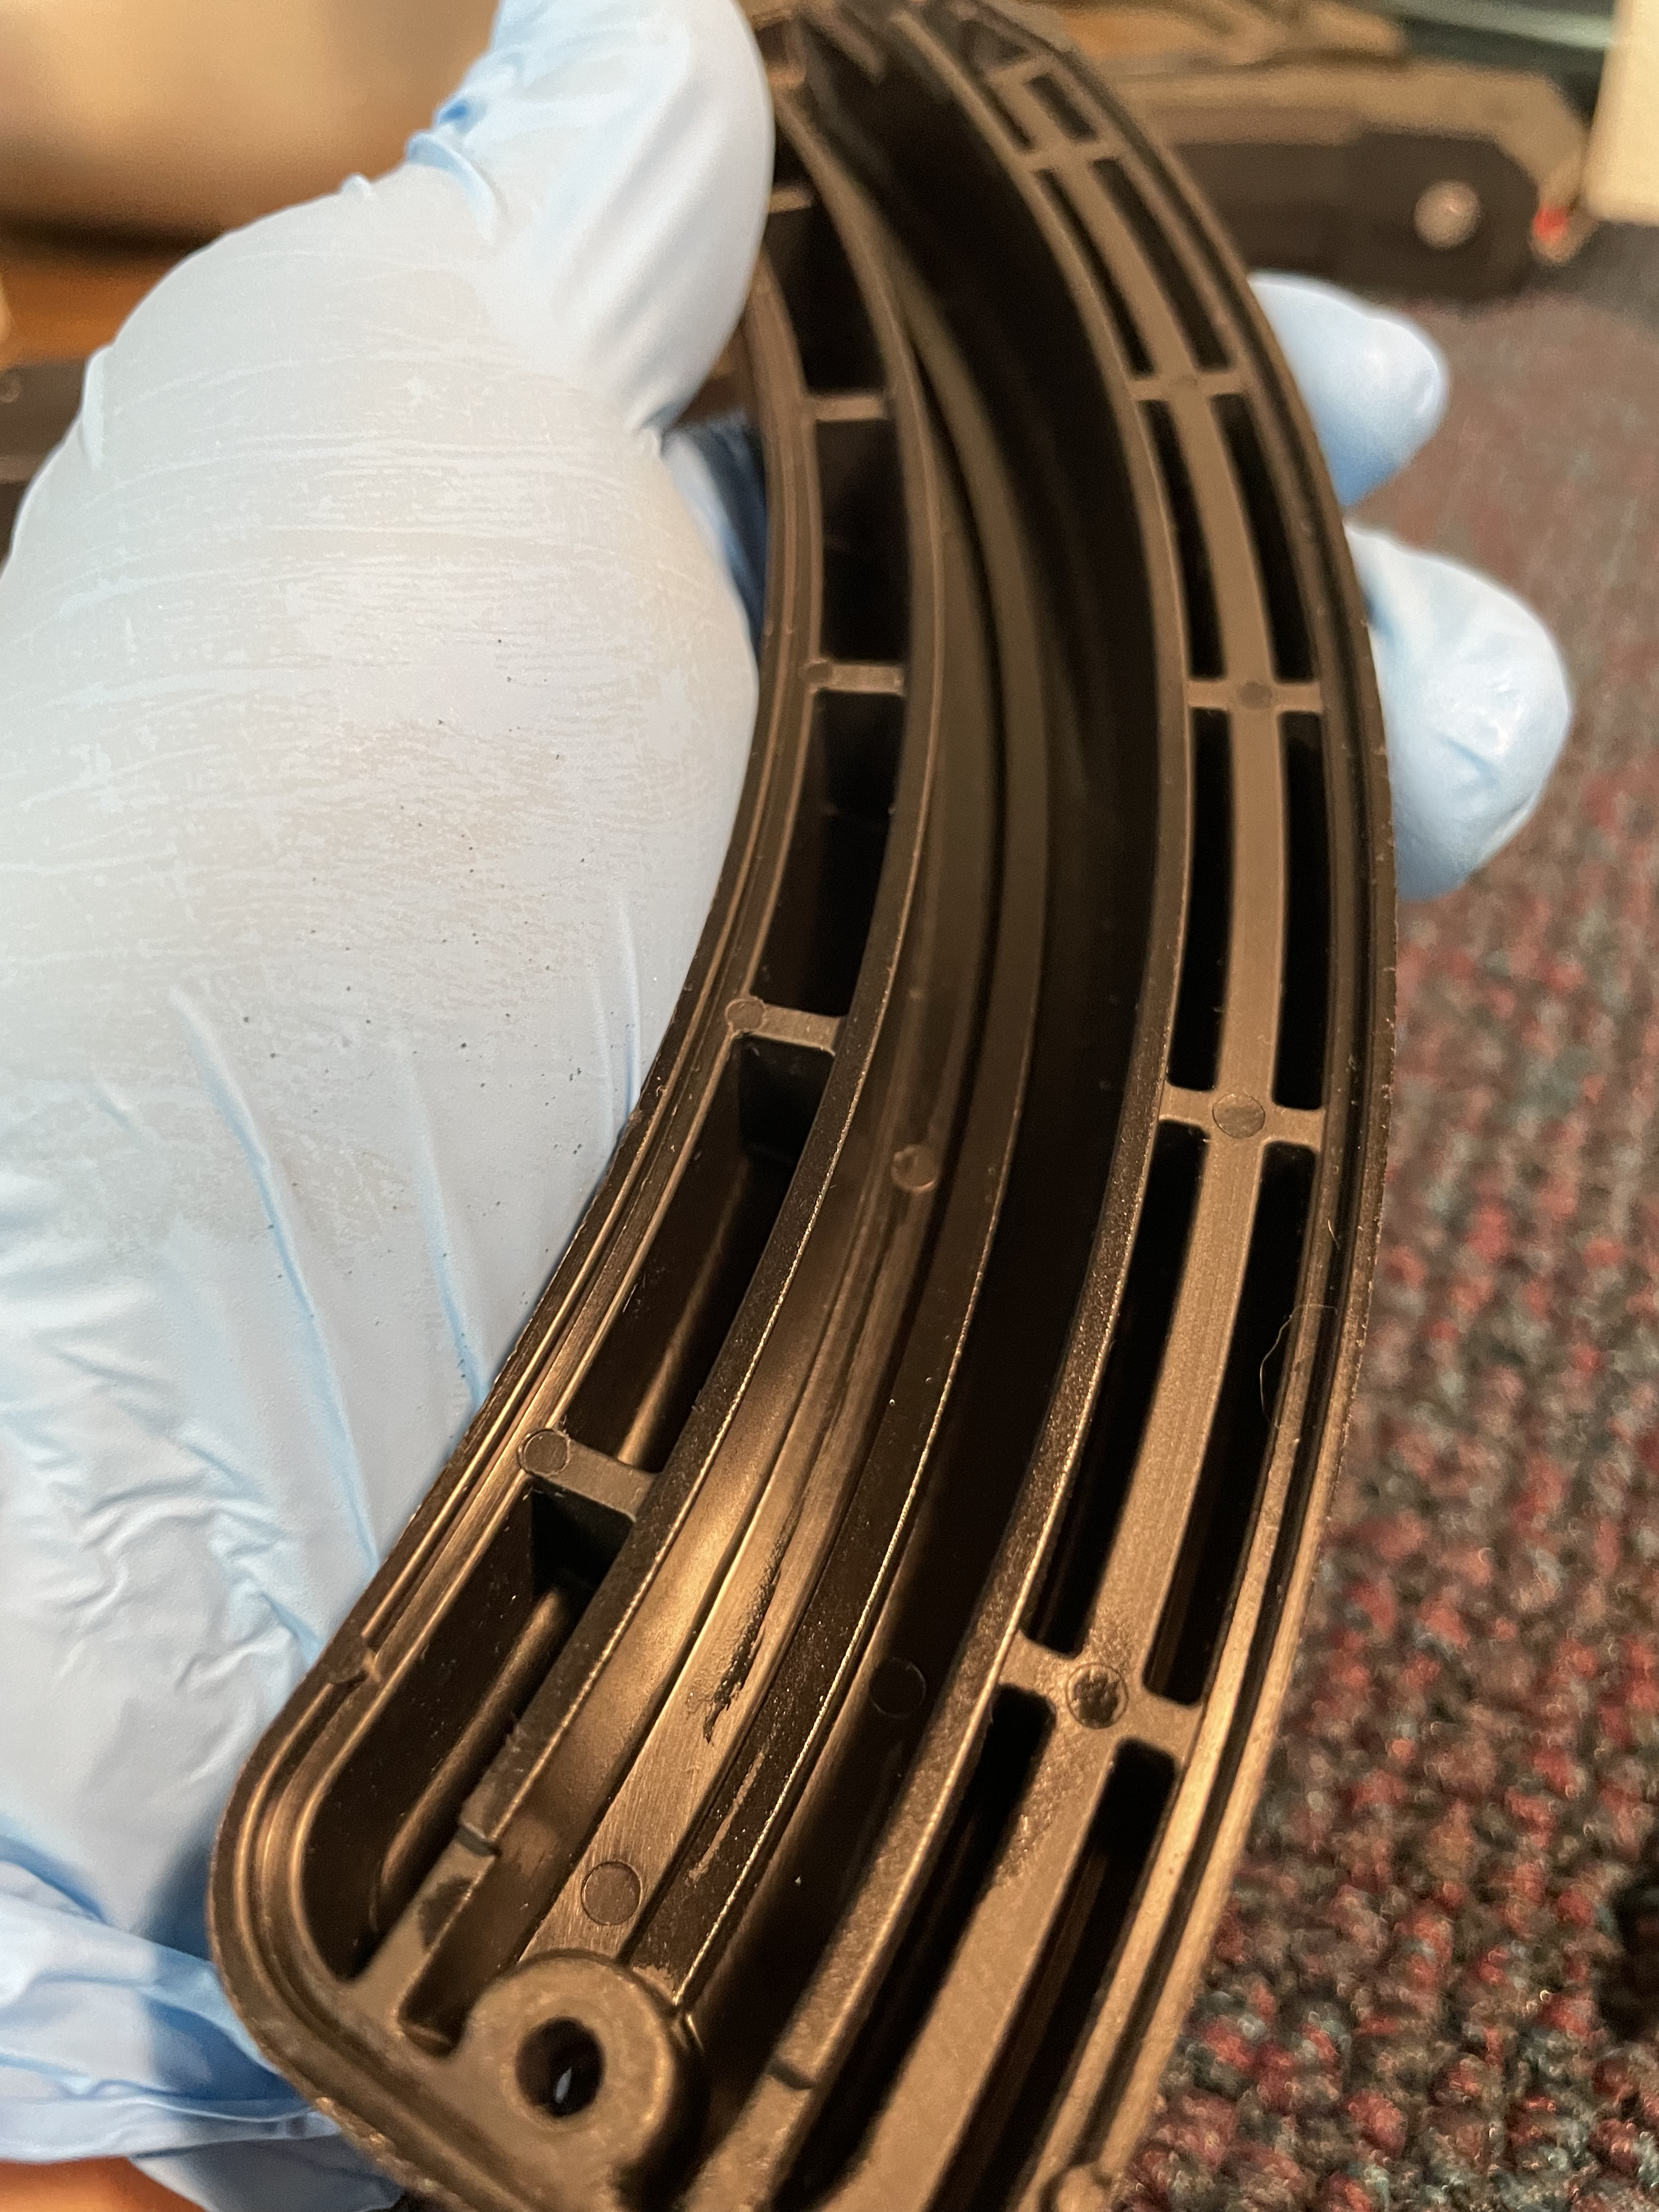 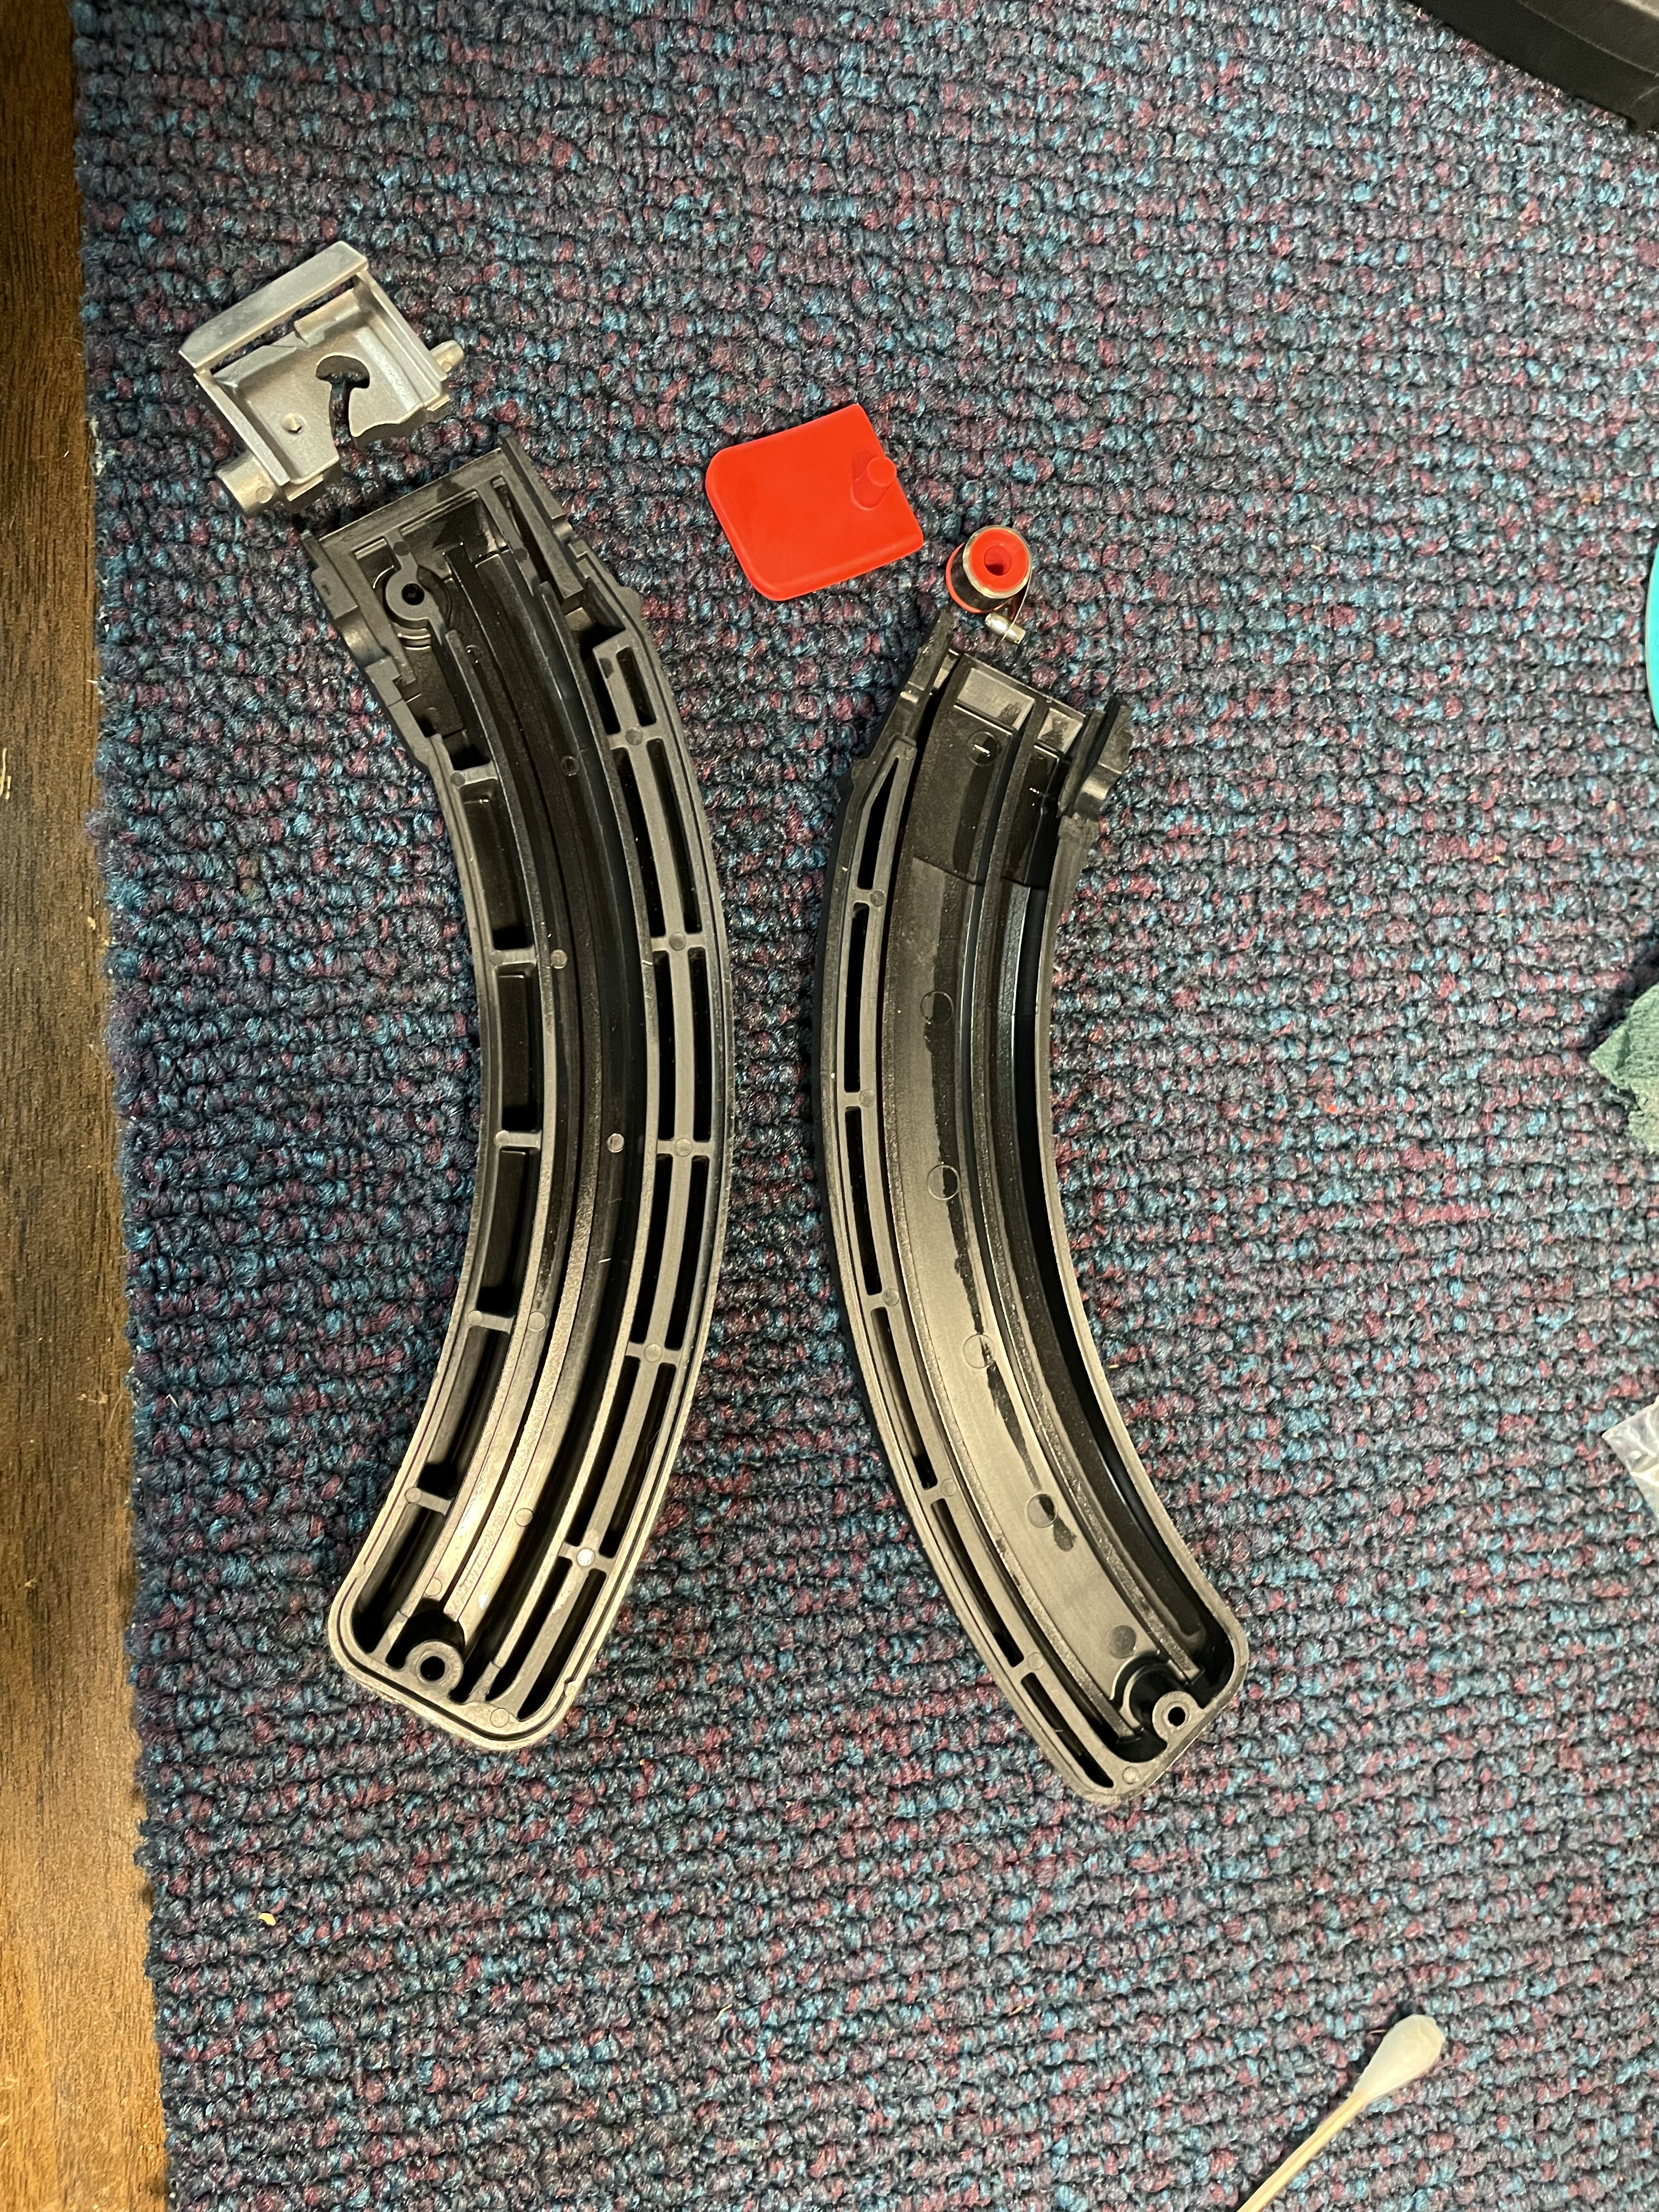 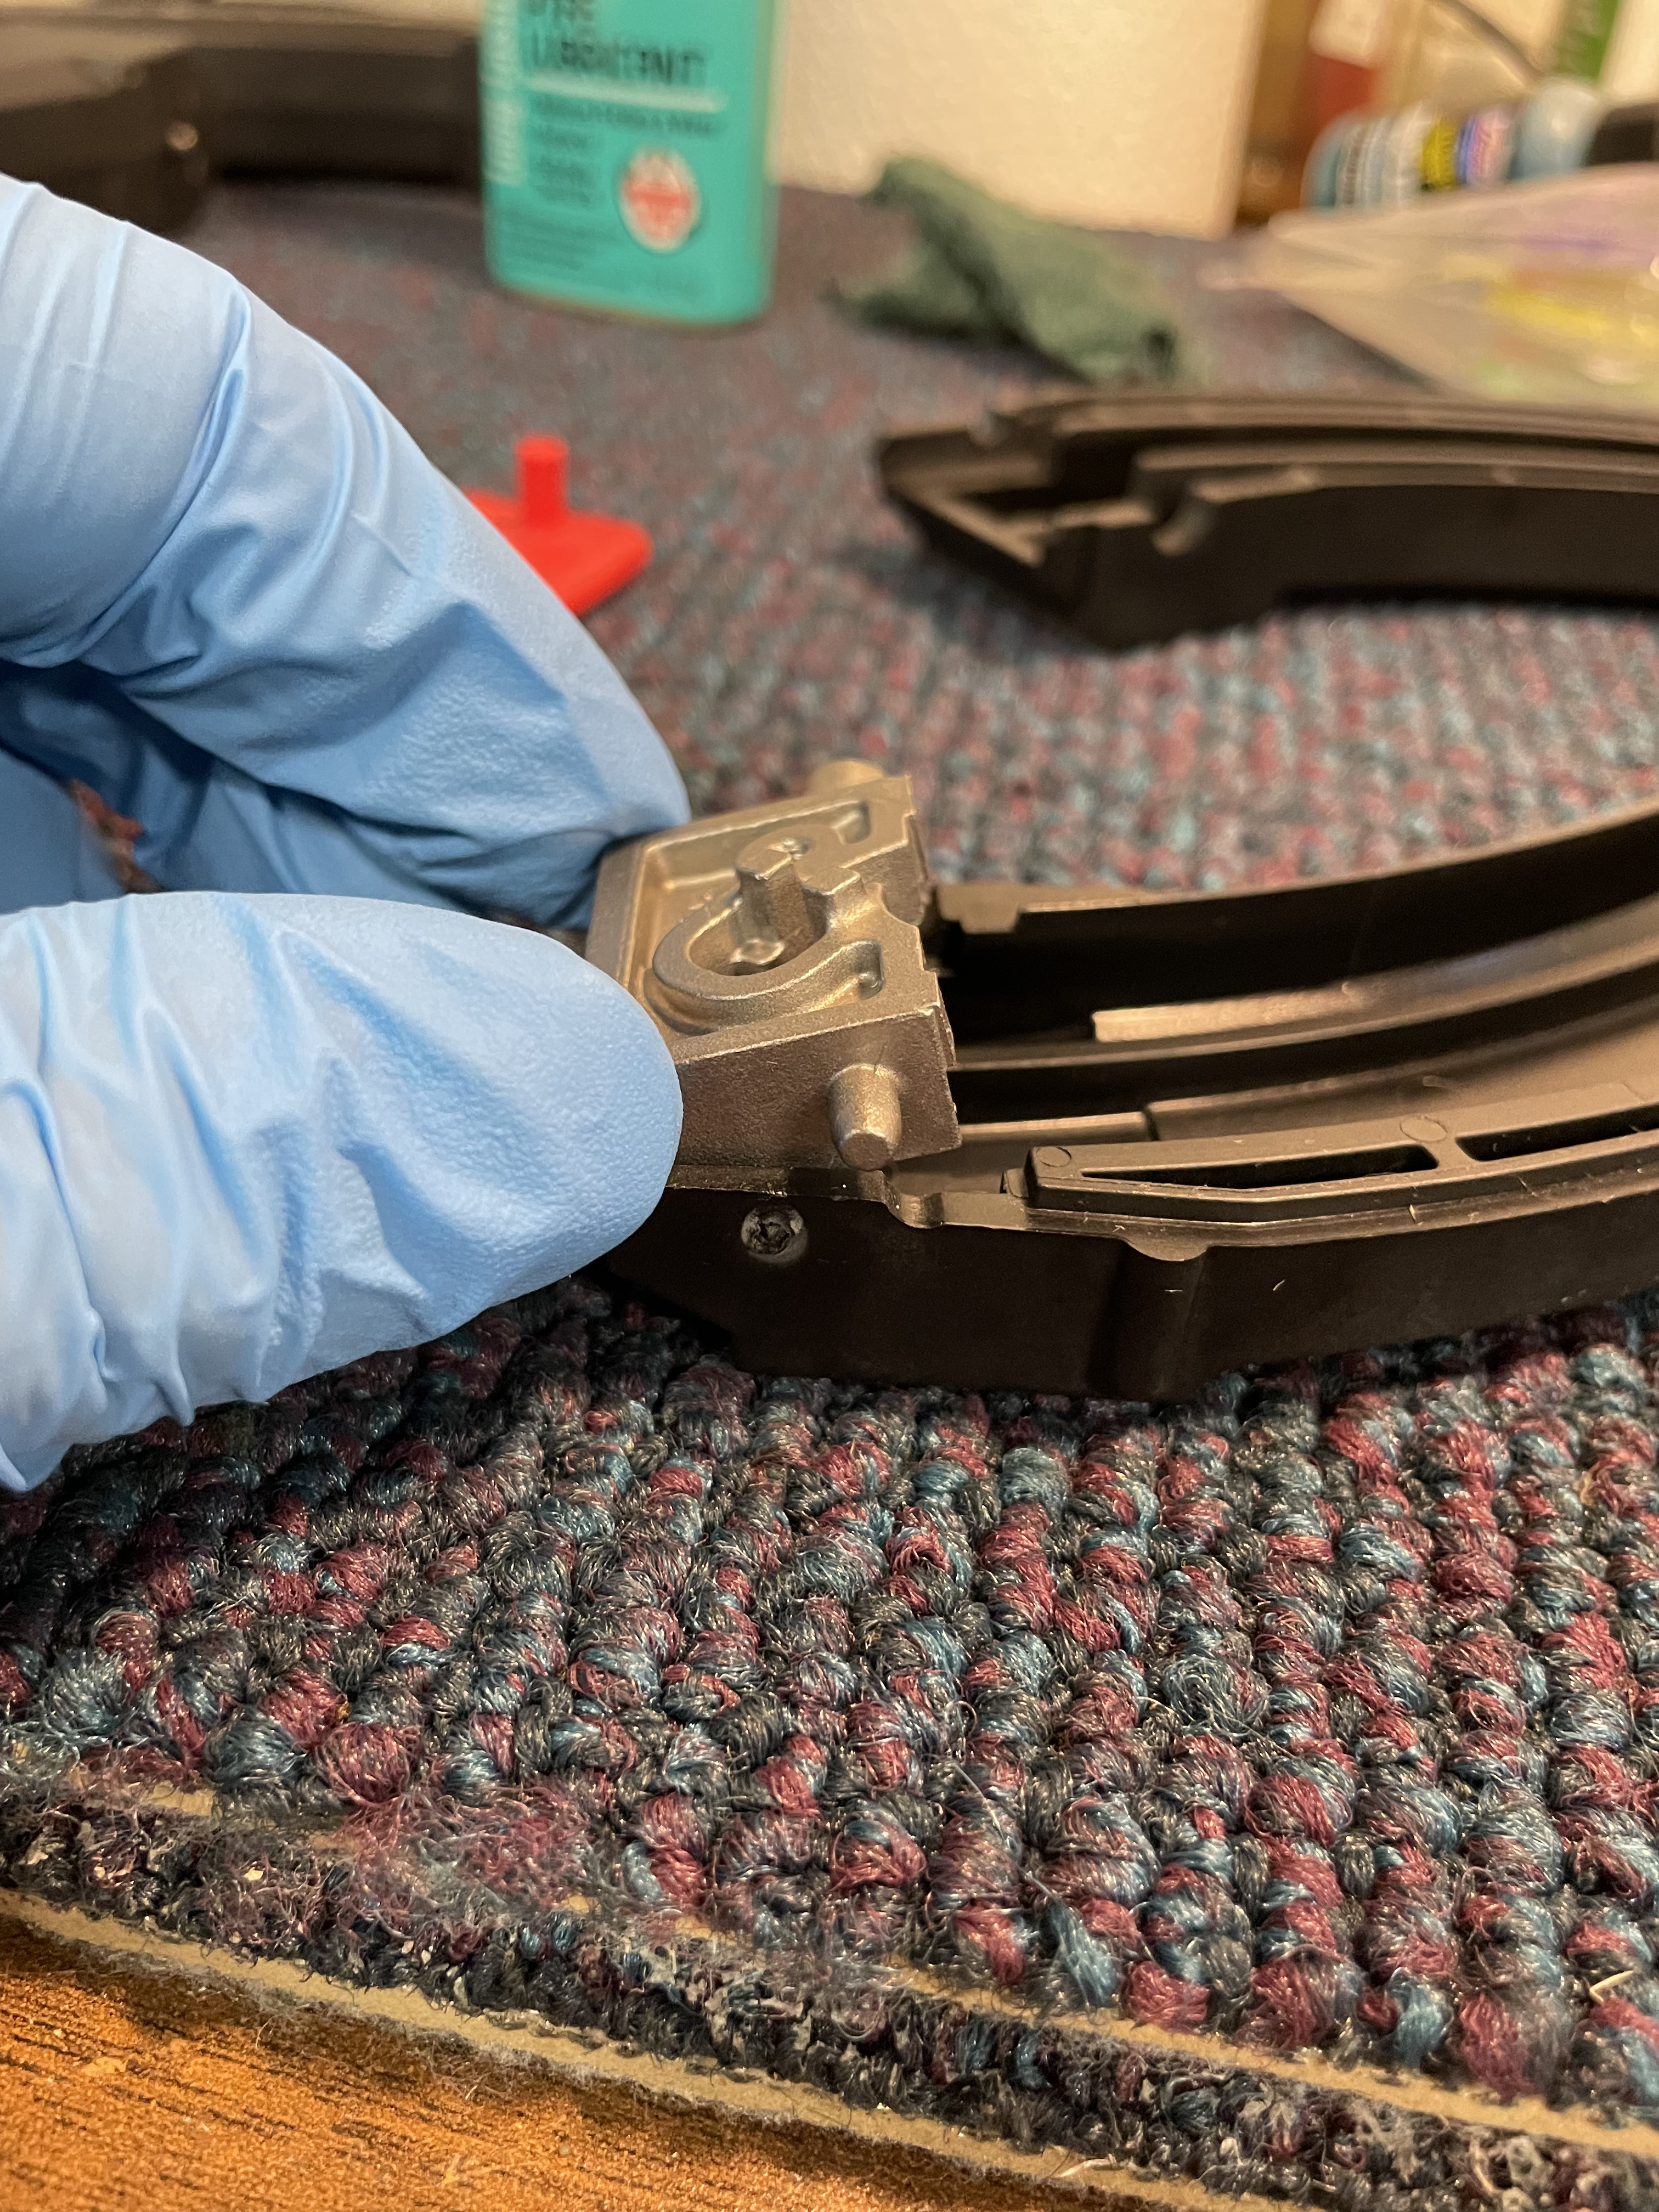 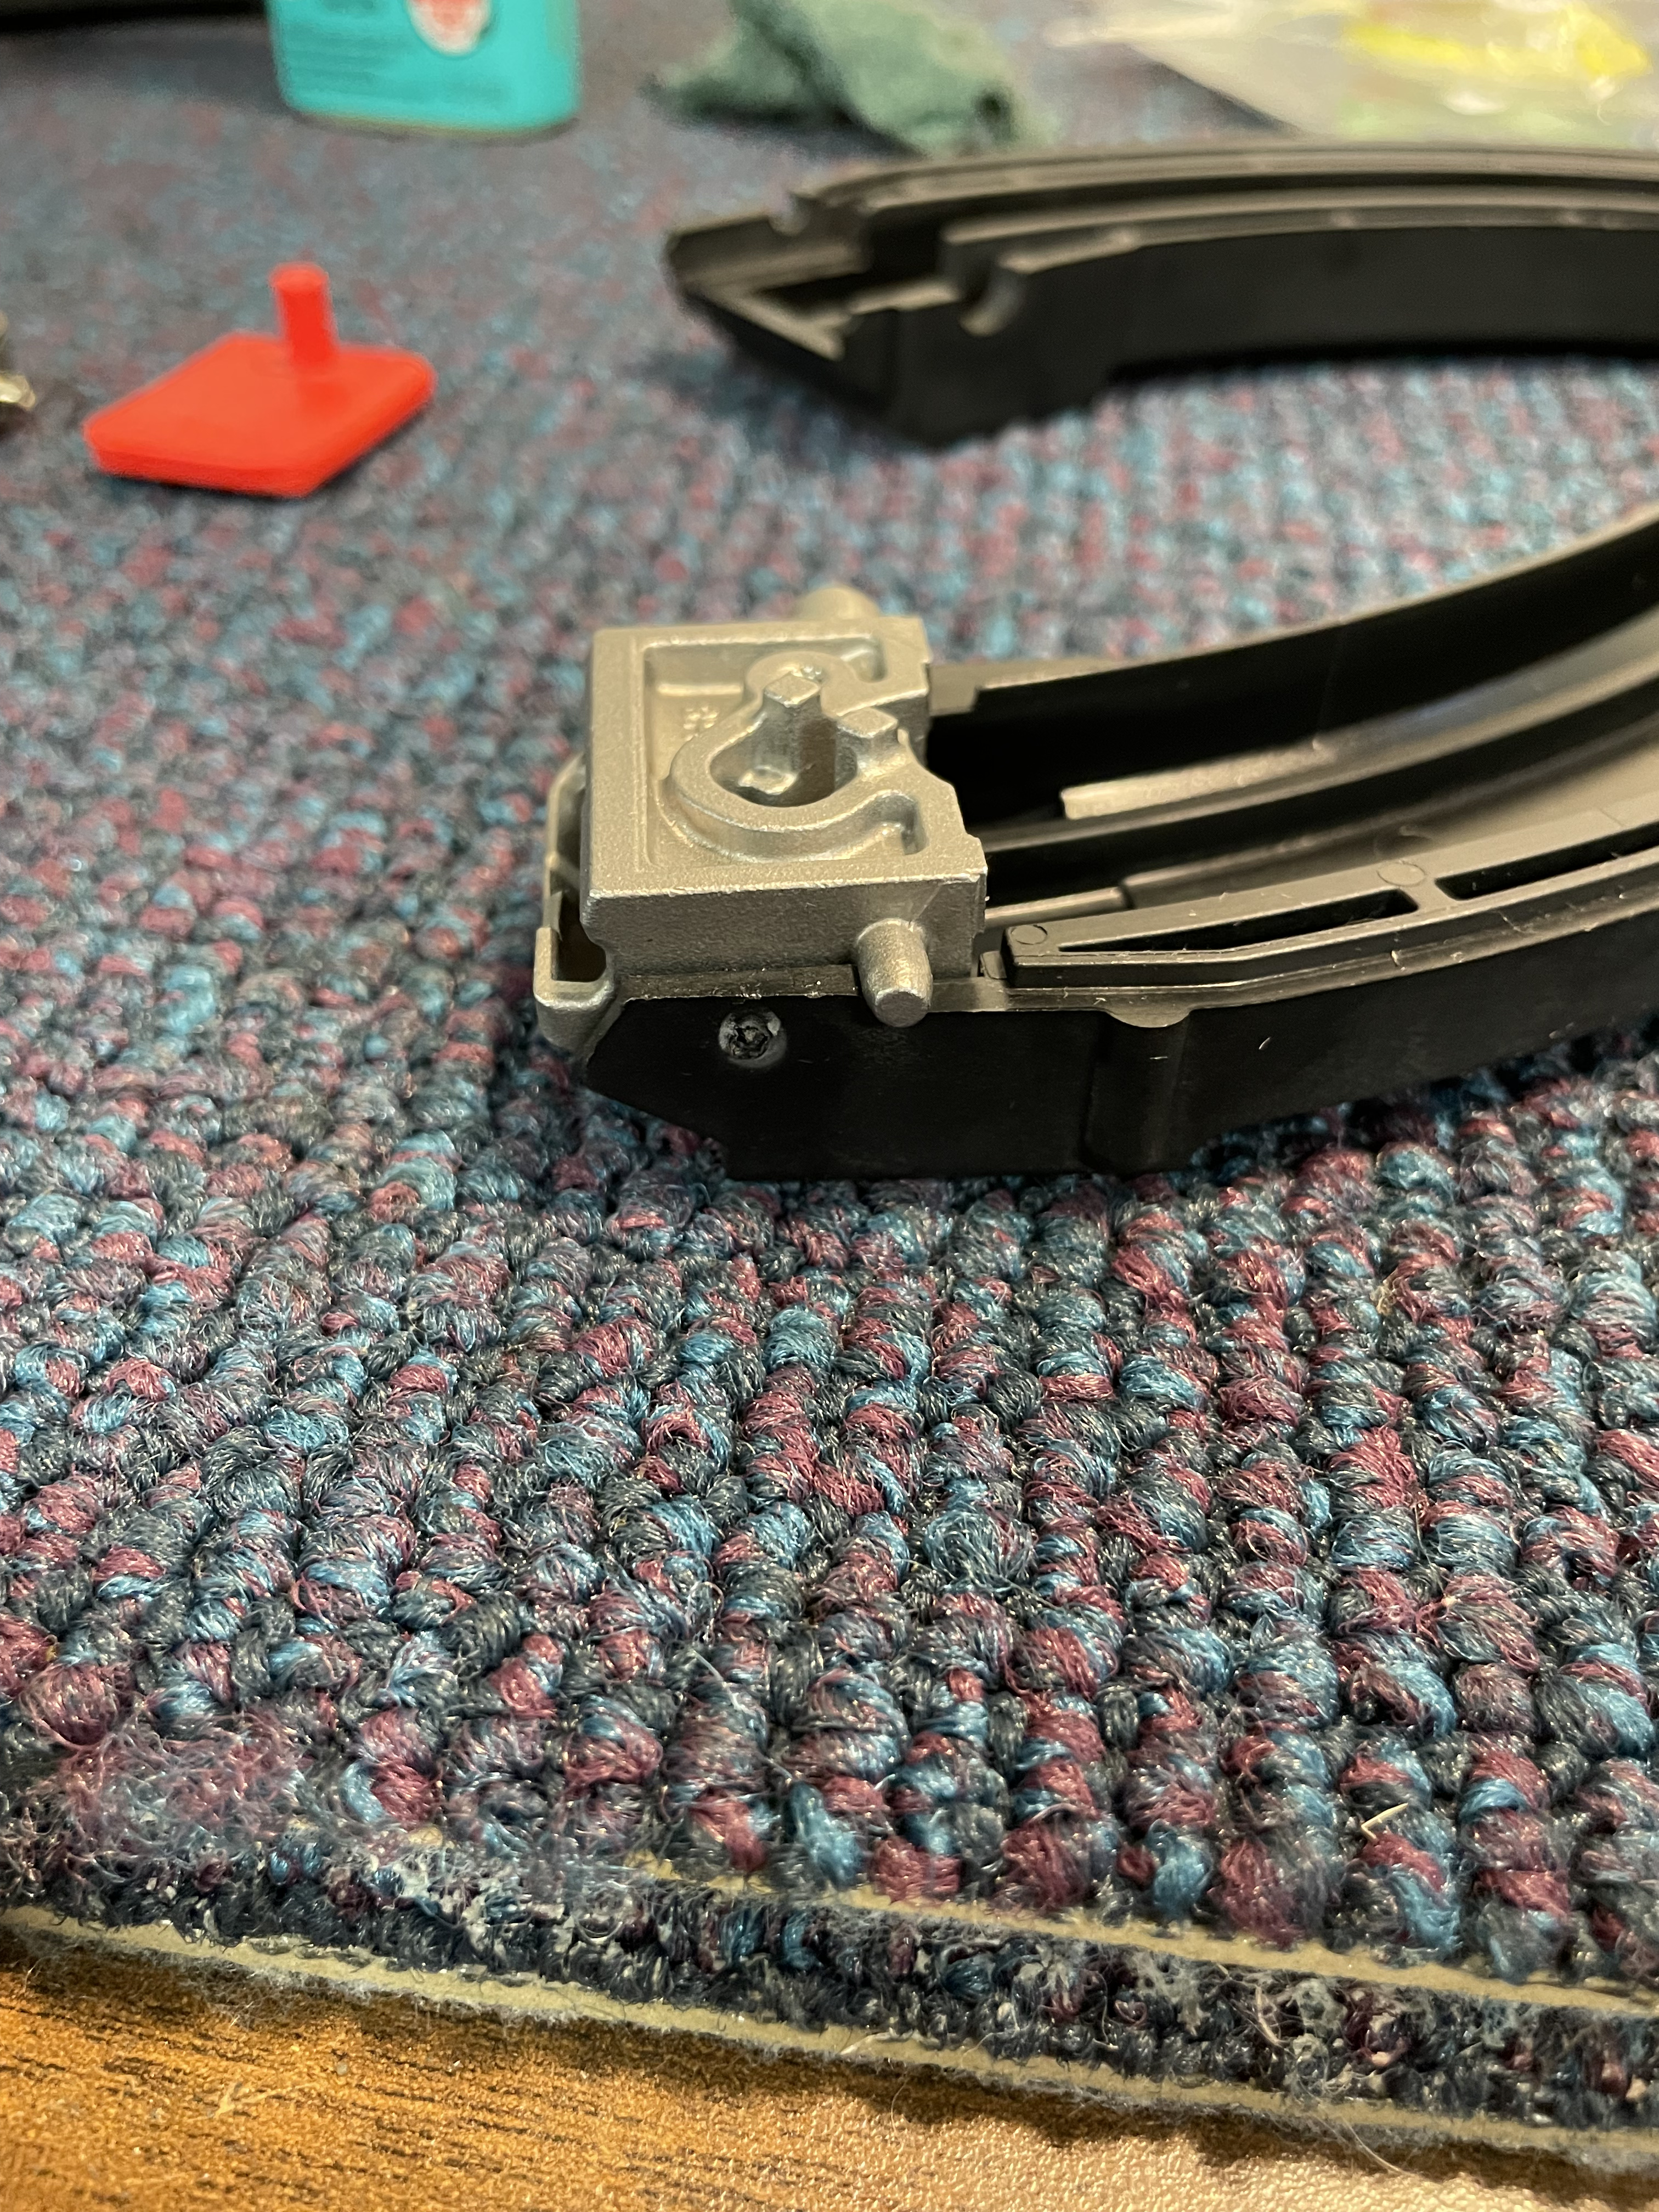 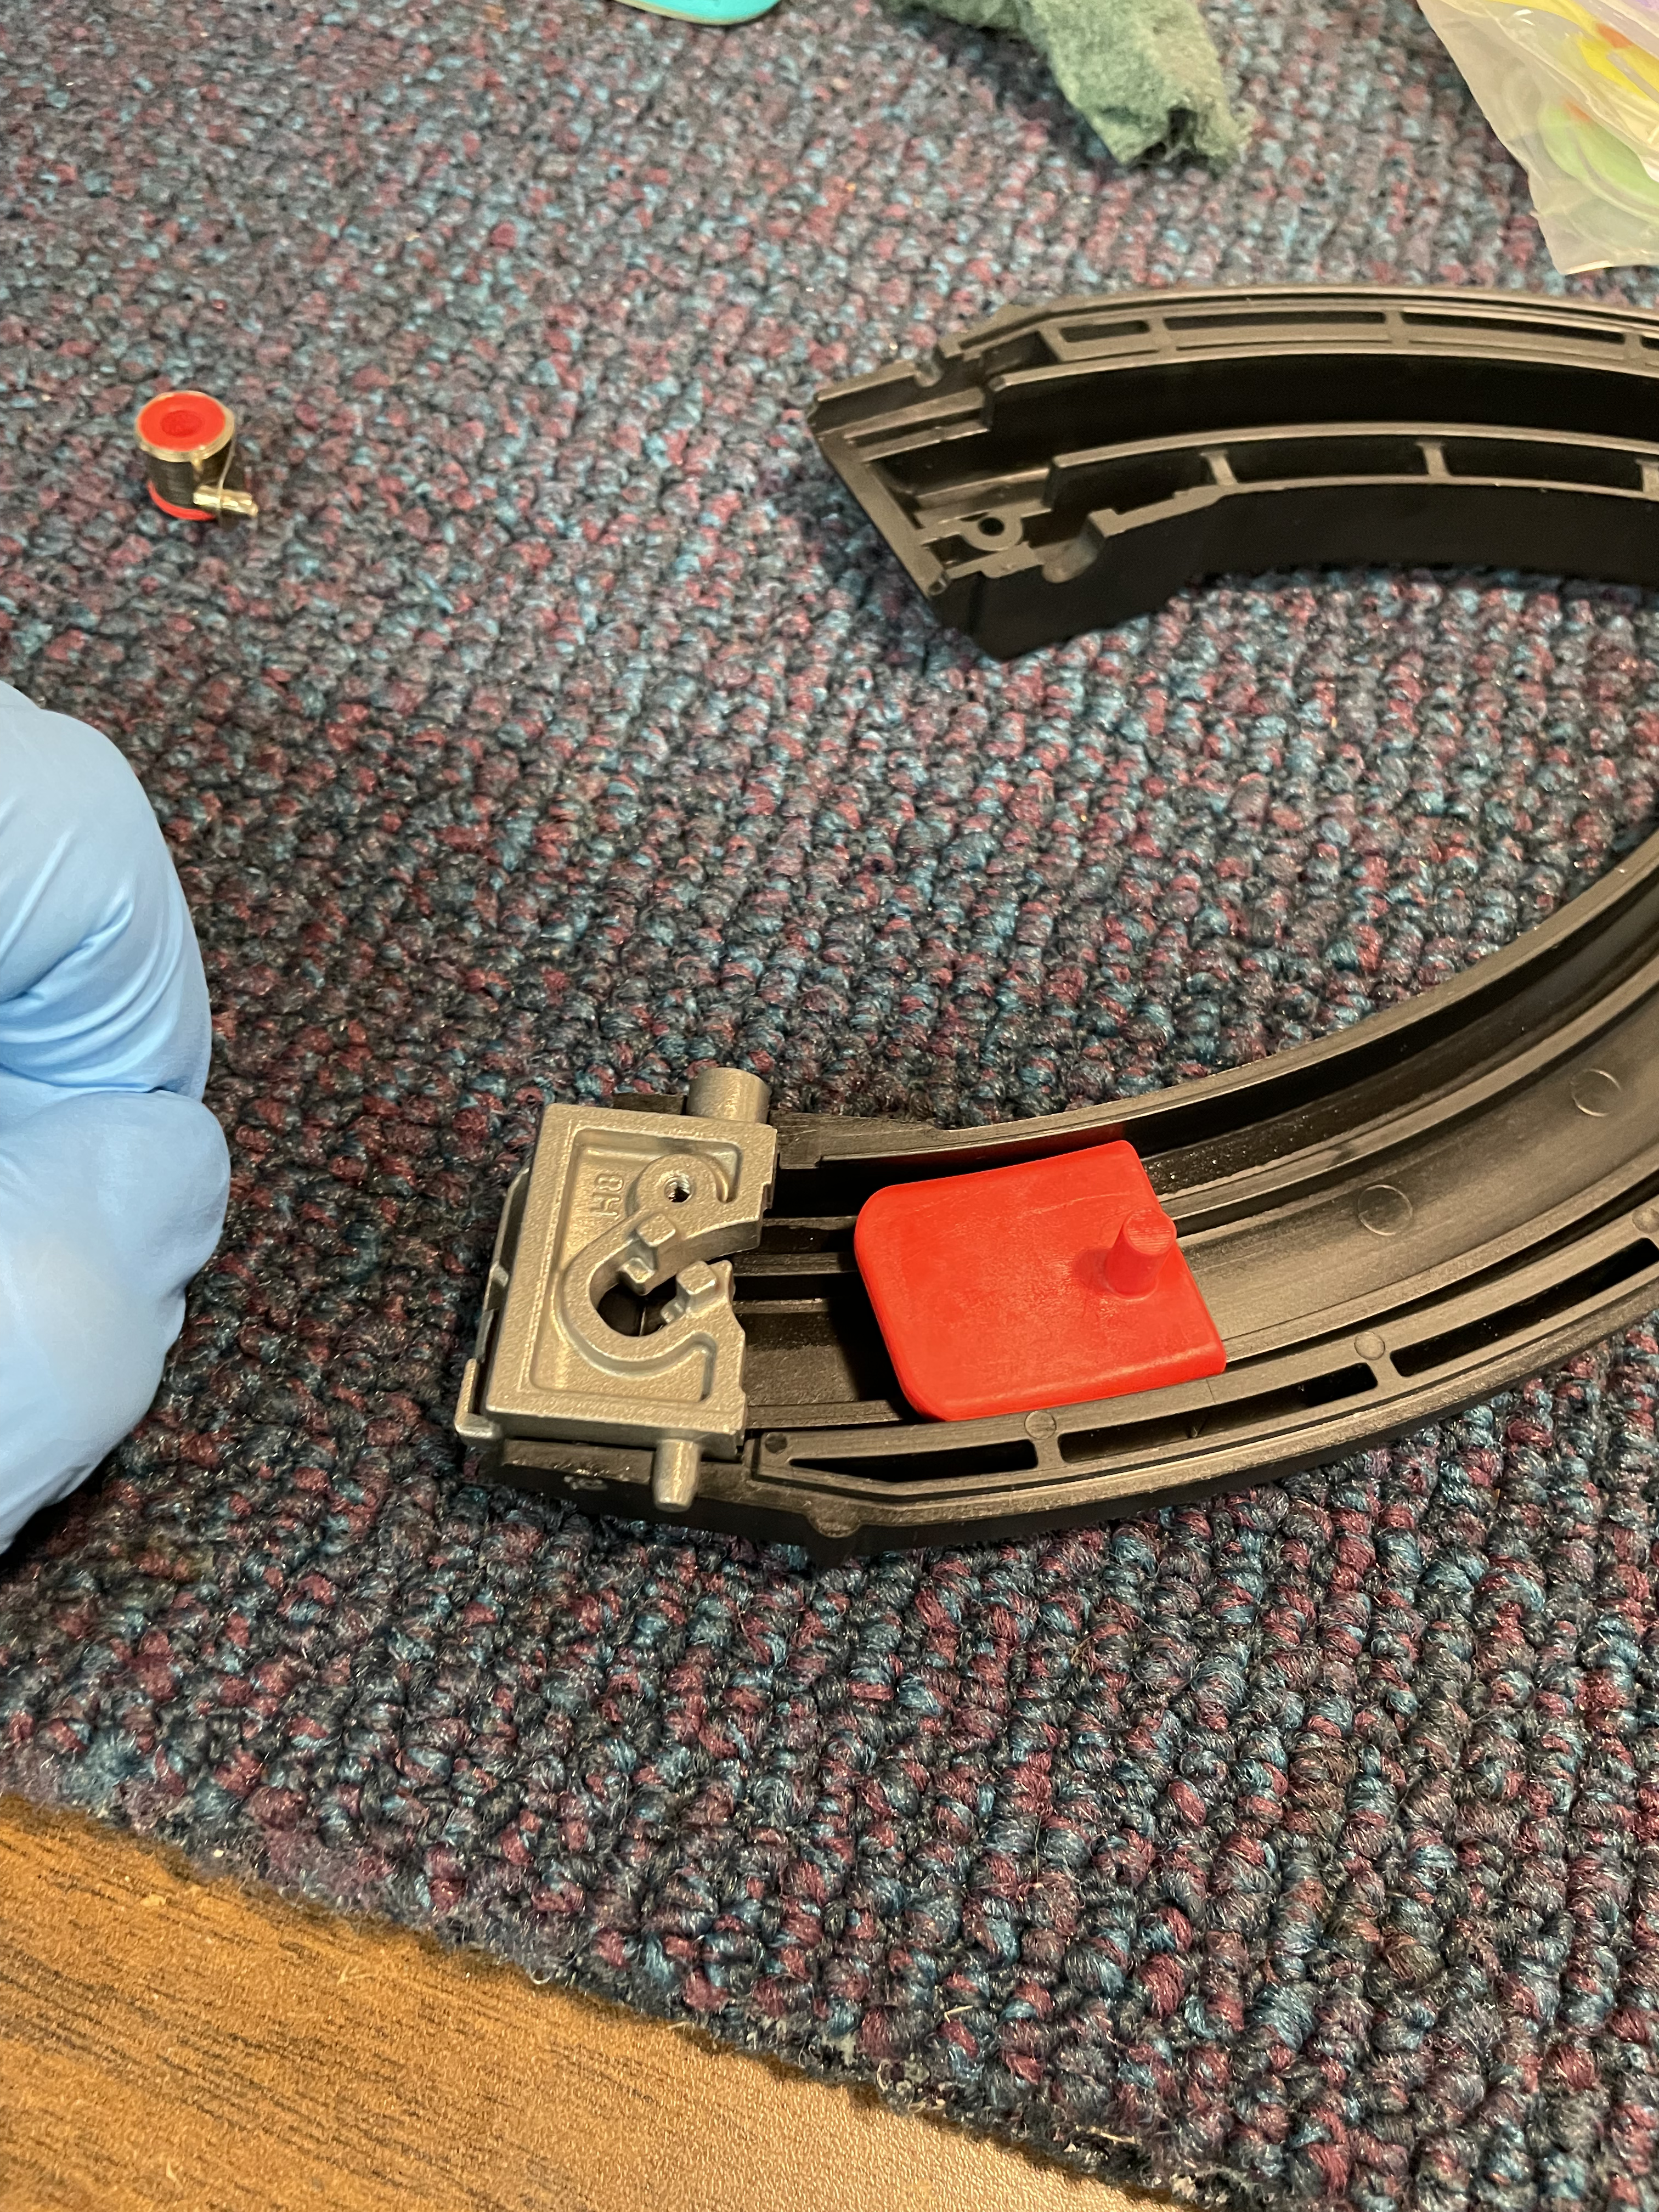 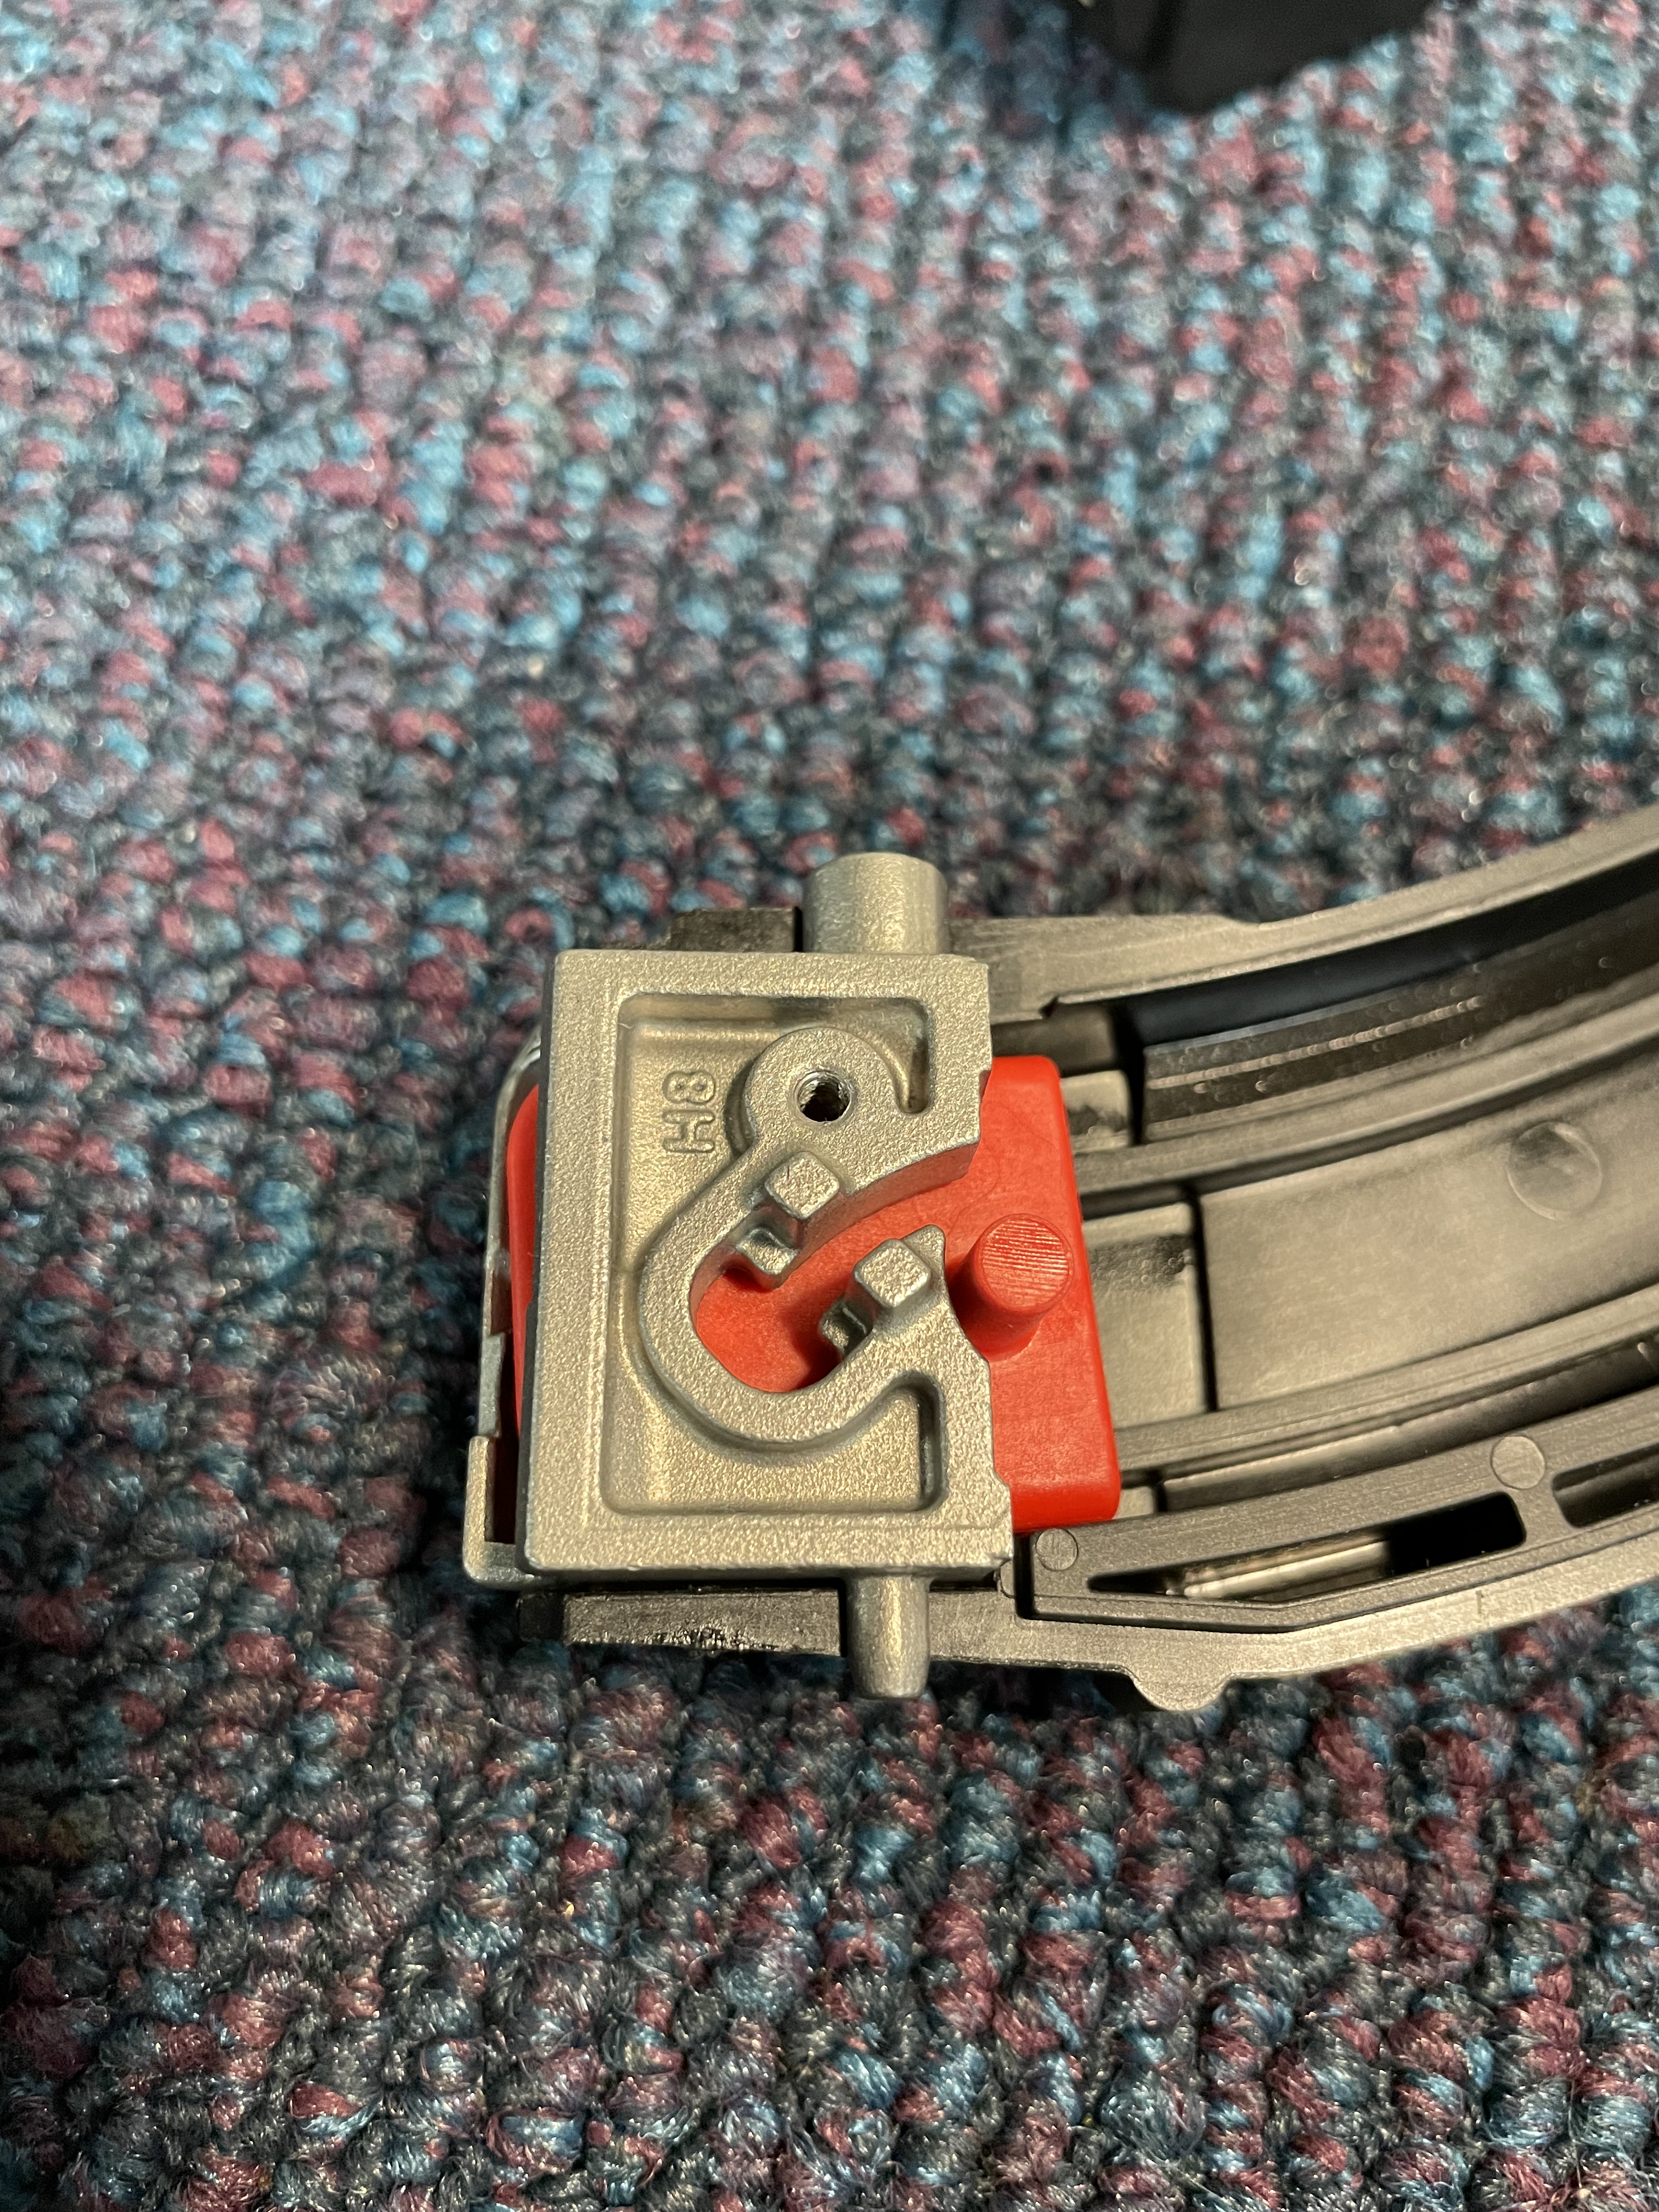 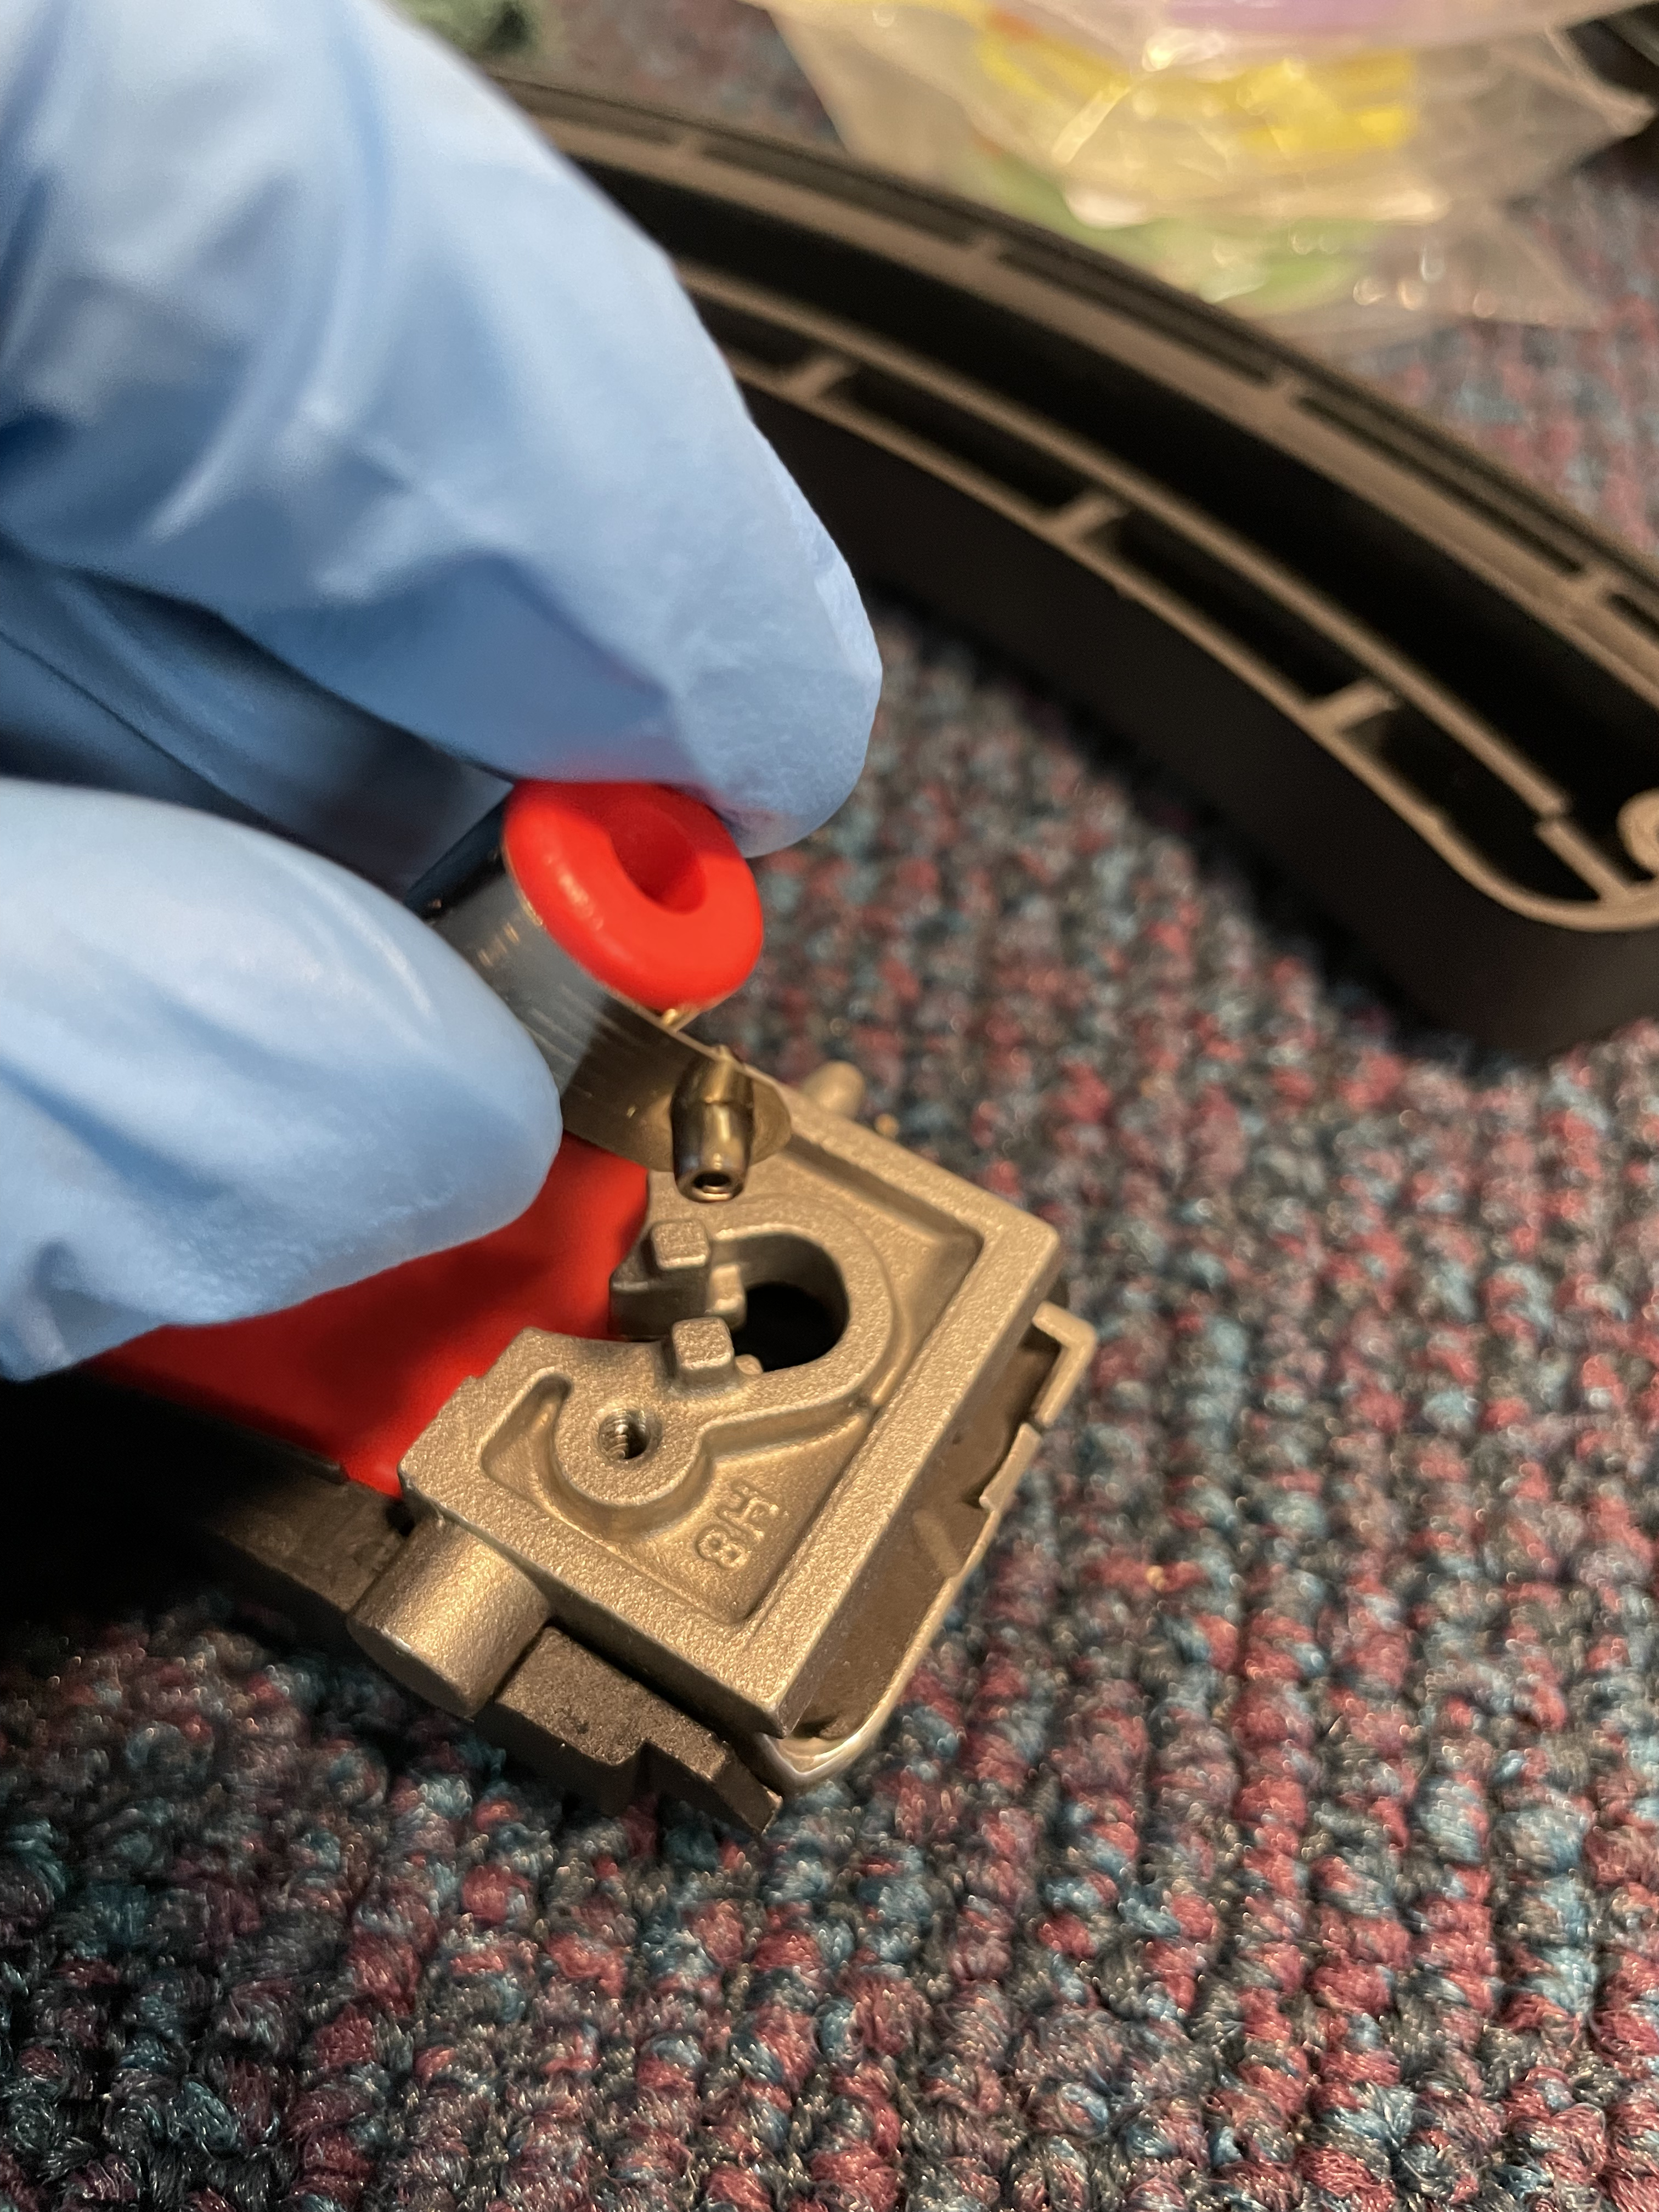 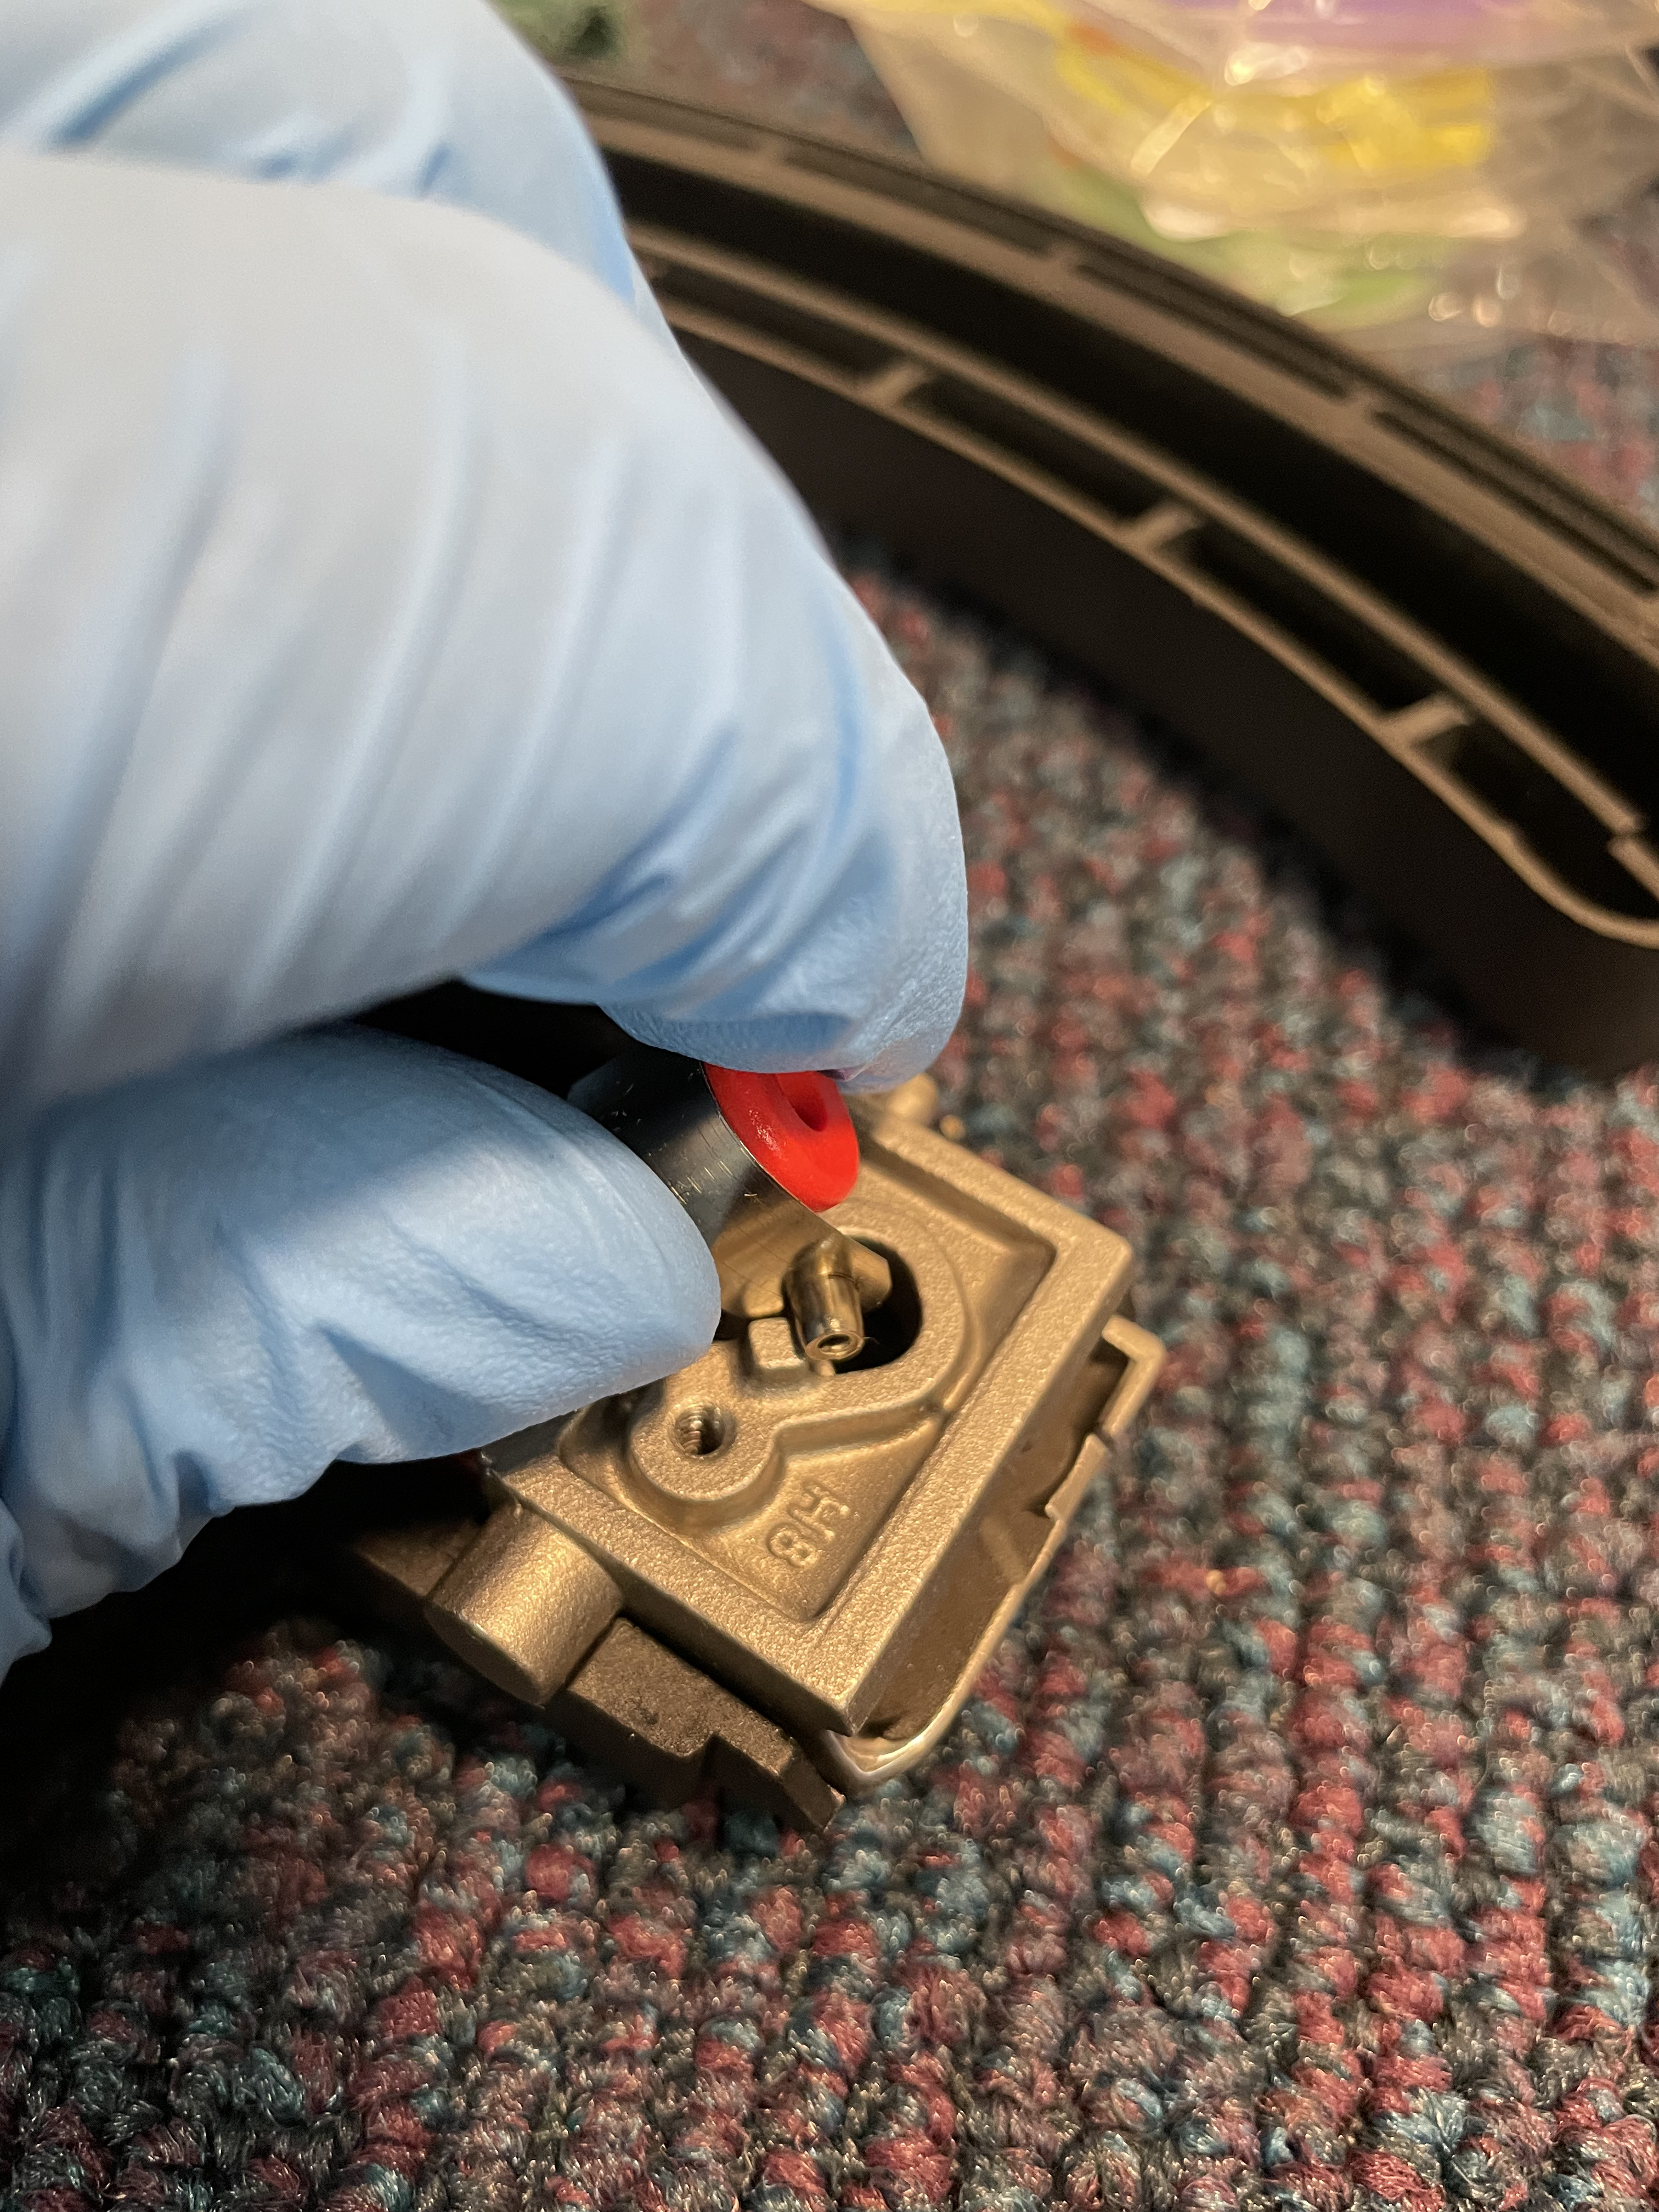 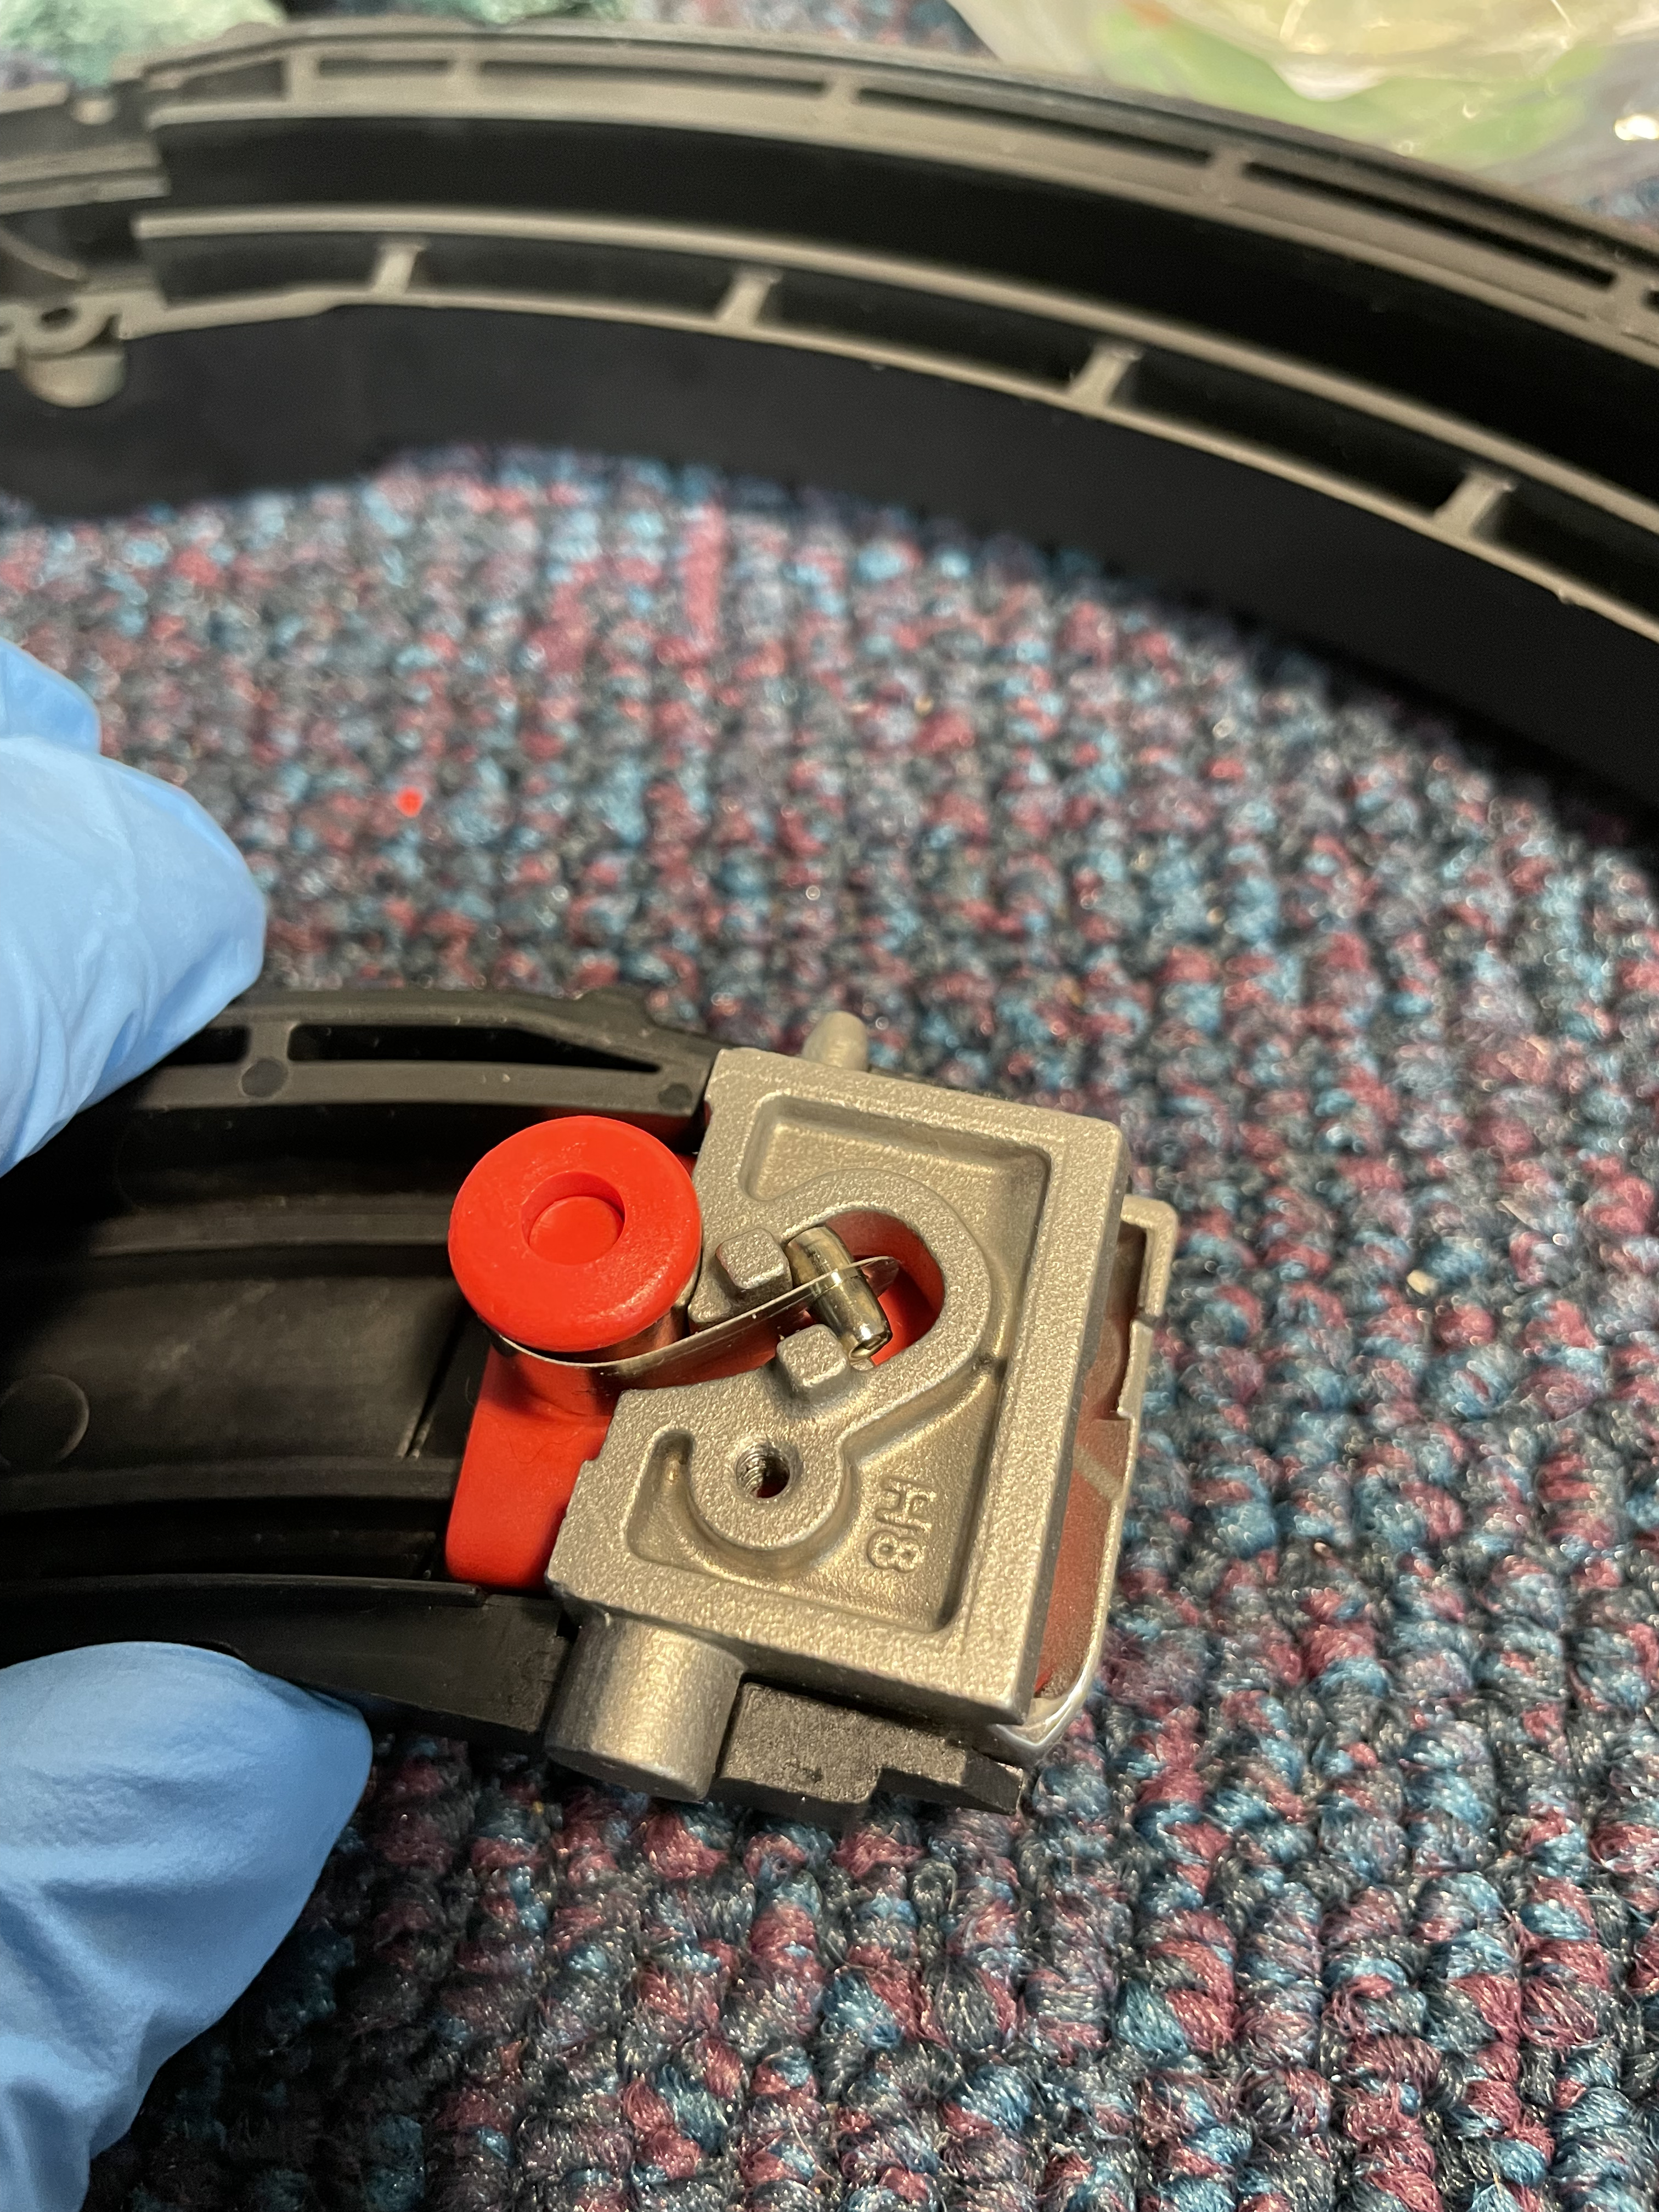  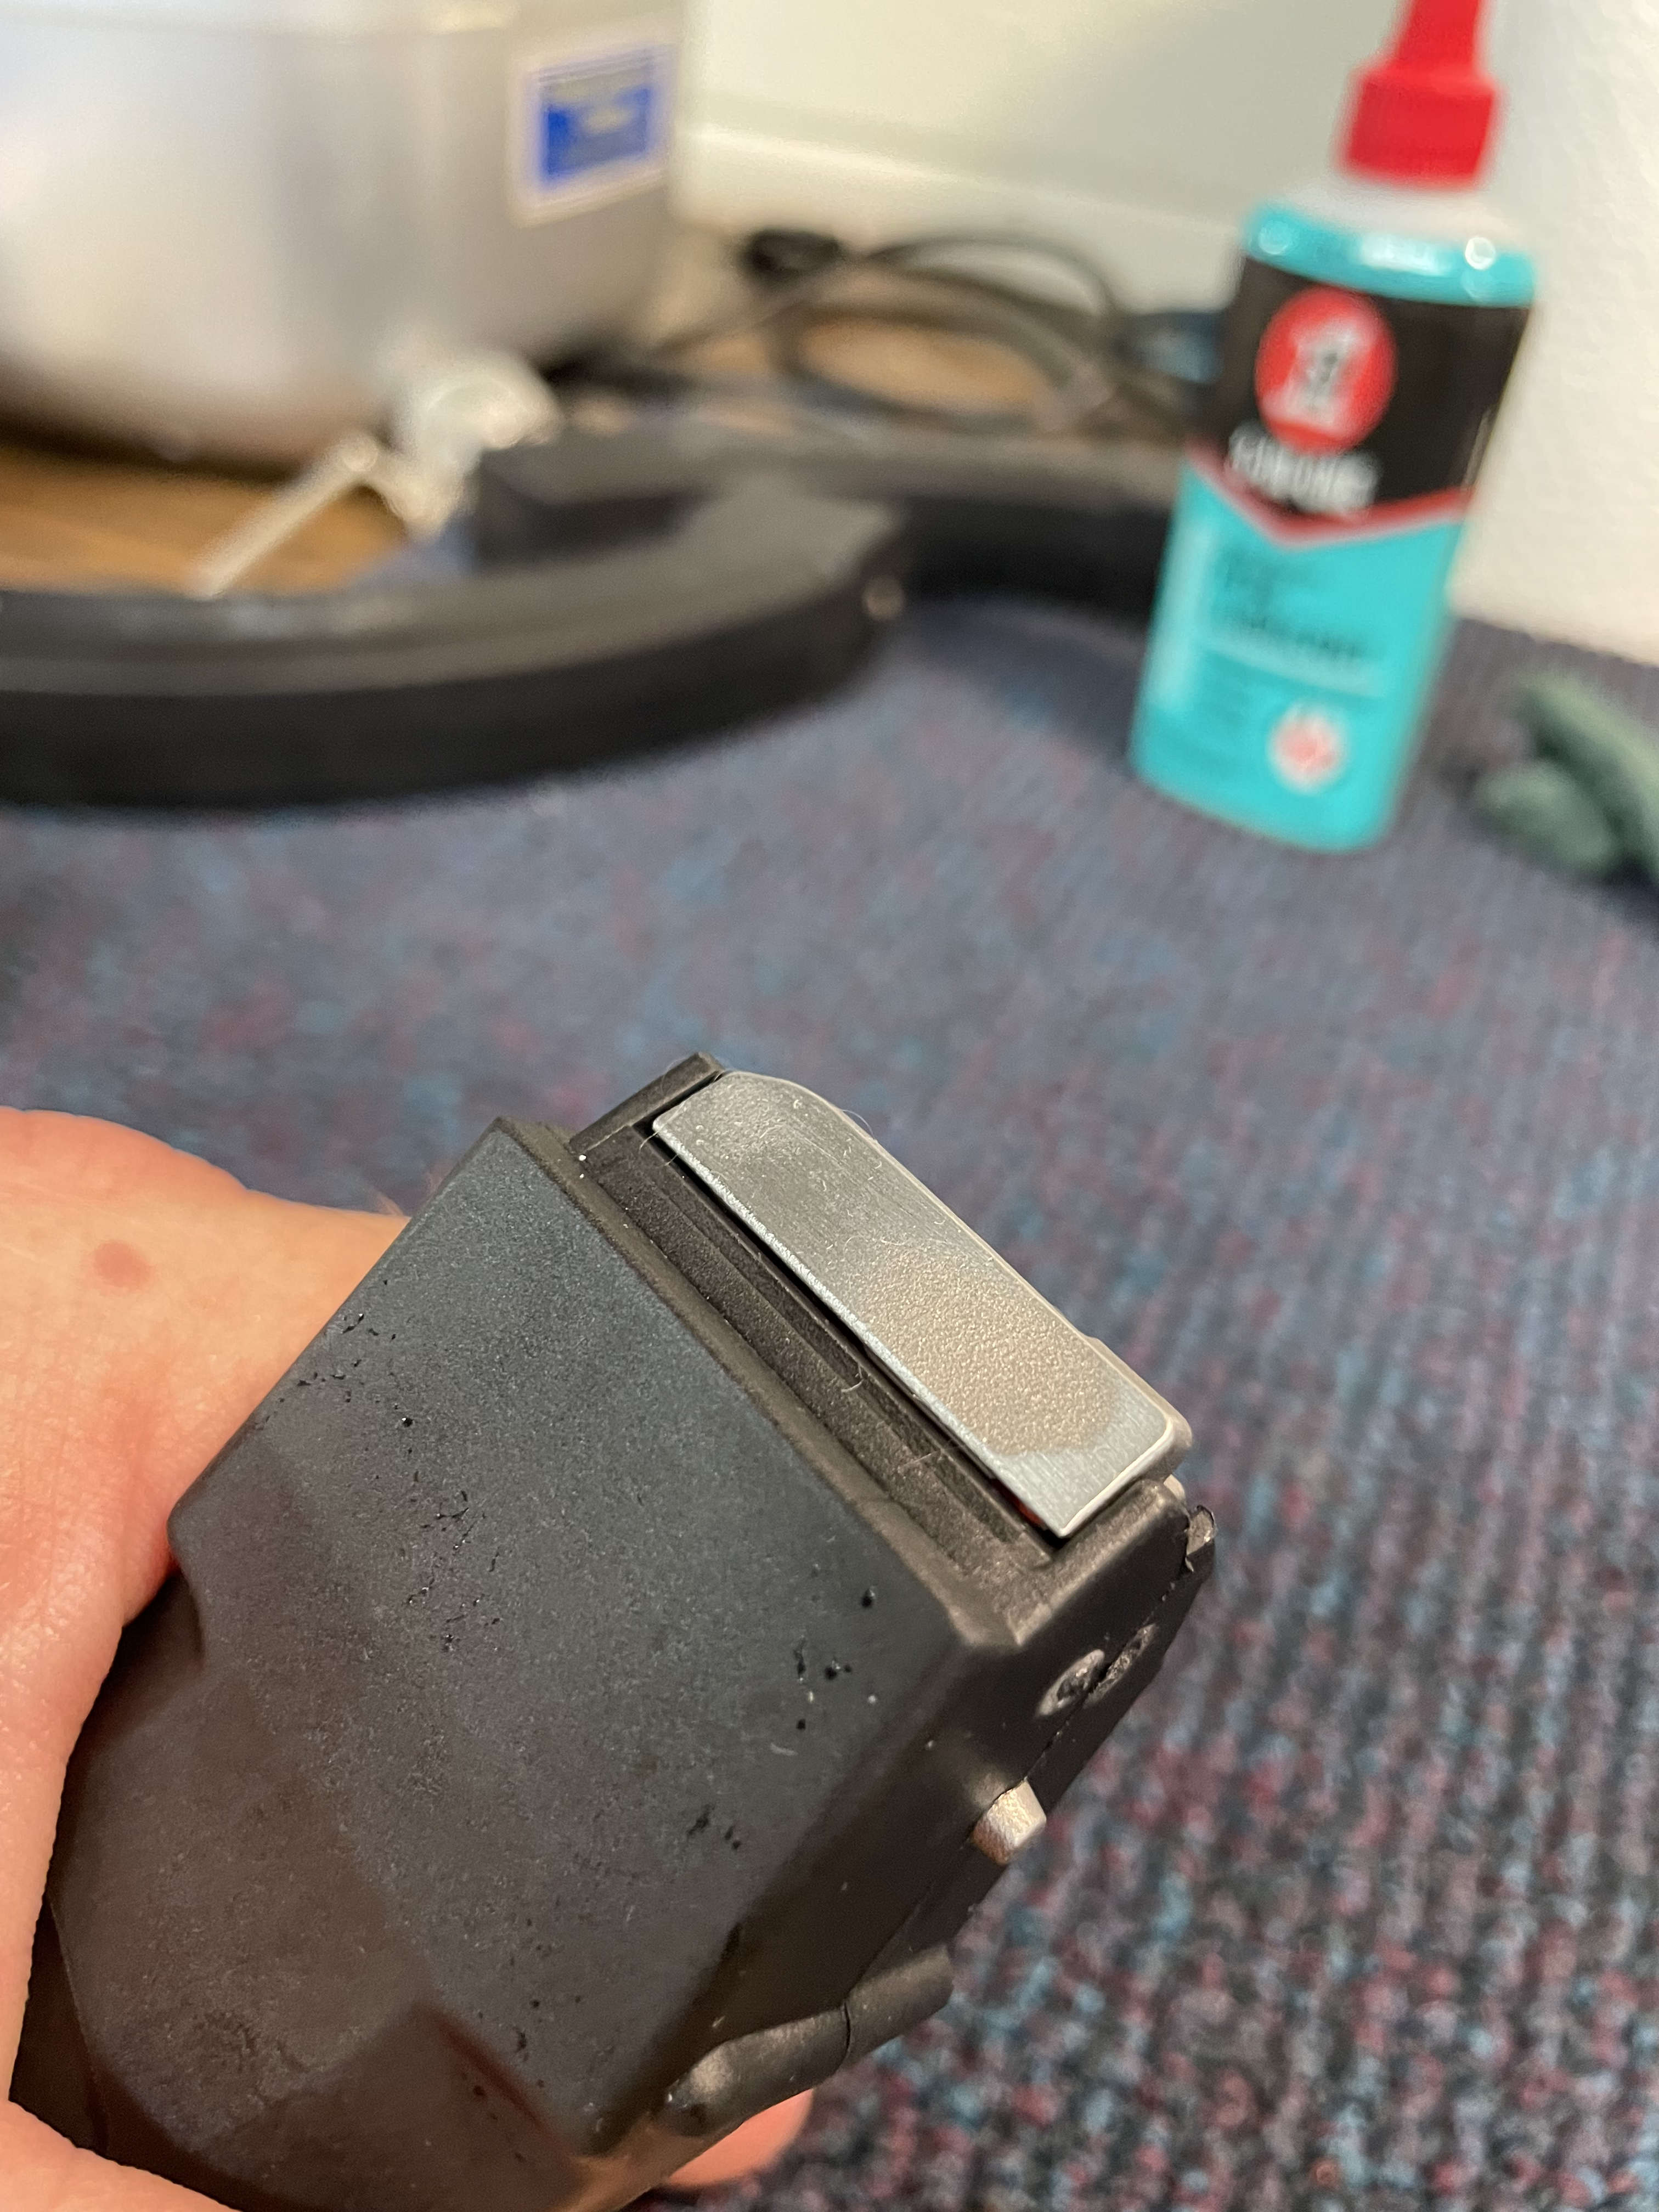 Final notes- I have never done a tutorial like this, so if it is too long-winded please forgive me. Also, if you don't have a Maglula for 10/22 mags, get one. It makes loading the mags MUCH easier. Now if my MARS 10/22 FRT ever gets here, Ill have to buy another BX-25 mag and do a side-by-side comparison to see how much difference all that work made with a high ROF setup.. LOL Also- Sorry the pics turned out so big. Thumbnail size was too small, and there wasnt a middle option. @HammerTech @Polarbear31 @tac556 @hrt4me |




| A well-deserved thank you for a tutorial that is excellently presented: the concise "how and why", the clear, well-lit photodocumentation of tools and techniques, and the helpful hints are exactly what a tutorial should be. No extraneous blathering about "this one time...", no blurry, dark photos of the other junk on your bench with the subject down in one corner, or your fingers in the way. It was a pleasure to read: thank you! |


| Just the right amount of detail - What, then images to attached the idea to. |
Disclaimer - OP is bad at knowing things, and might catch on fire.
Vet - Op MMAMA
Every other species kills off their stupid......we cater to them. -- spin-drift
Nobody ever called 911&said I just did something smart. -- TheFlynDutchman
Vet - Op MMAMA
Every other species kills off their stupid......we cater to them. -- spin-drift
Nobody ever called 911&said I just did something smart. -- TheFlynDutchman
| That is beautiful, OP. It also illustrates how deep Ruger is into casting, the feed lips are obviously cast, hadn't ever thought about that before. Would seem there may be a market for the FRT bros for polished aftermarket billet feed lips. |
I sell firearms produced by the finest child labor in the world, be it Filipino, Muslim, Mormon, Arizonan, or Texan.

| Awesome tutorial OP. Was just out shooting ground squirrels for 6 days last week and went through a little over 4,500 rounds of .22 and having lots of issues with my BX25’s the more I shot so I was planning on cleaning them this week, but now I will do this! |
http://www.randomgunstuff.com/
|
Thanks for all the positive responses guys! Ive thought about trying to figure out a more efficient way to do the feed lip part, as it is the most labor-intensive part of the process. Ive wondered if there is a better process where you could do a bunch of them at once; maybe with a vibratory media of some sort. You dont necessarily have to have a mirror finish on the feed lips to see an improvement; they are about the same texture as 400 grit emery cloth from the factory. Also, there are surfaces that would benefit from a polish that are impractical to get to by hand- particularly the little channels that guide the .22lr rim upward/ forward as the bullet feeds. |


|
Originally Posted By hitchhiker: @desertmoon @PigBat No idea why the pics arent showing up for you guys. Im tech-retarded if it doesnt involve 3d design or printing. Must have been the matrix glitch: if I click in the big empty blank spot where I know a picture should be, it suddenly pops up. I am less tech-savvy than you, so I'll just be thankful the pix are somehow back. Still, many thanks for an excellently-done tutorial. |
|
Originally Posted By PigBat: Must have been the matrix glitch: if I click in the big empty blank spot where I know a picture should be, it suddenly pops up. I am less tech-savvy than you, so I'll just be thankful the pix are somehow back. Still, many thanks for an excellently-done tutorial. OP: thank you for the great tutorial!!!! You methodology is very similar to how I got American made Thermold mags to work wayyyyy back when. |
"Such predicaments! I must forge ahead!"

|
@M4-AK Im not sure what you mean. Of course, my coffee hasnt kicked in yet, either. The mag I did in this tutorial, I bought probably 5 years ago. I hadnt done much with my 10/22s for a long time; the main reason I did the tutorial was because of the interest folks expressed when I mentioned the mods in one of the FRT threads. |

Armory Sponsor