


AR Sponsor


Posted: 8/31/2025 11:05:55 PM EDT
|
Hi everybody. A friend sent me a link to a video of a Solo 300 build... I had never seen them before, but the concept looked like fun. This is as far as I got today, but I need some help with a part. 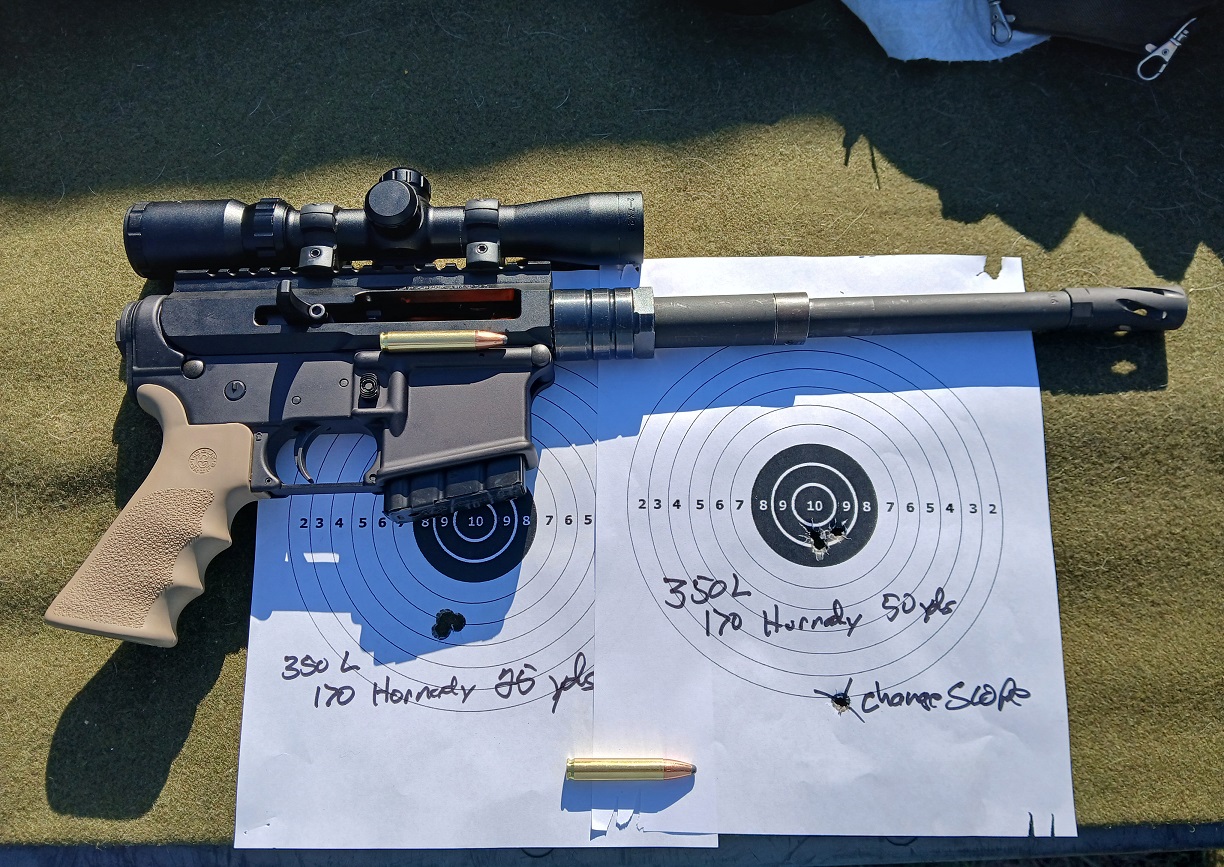 What are the AR gas keys made of? I'm trying to soften one so I can drill it for a a guide rod to slide through. Back to the build. I had an R-Guns lower in a box that needed to be used, so I started from that. I orderd a BCA side charging 350 10.5" pistol upper and took it apart. I took the bolt carrier group apart and chopped the carrier in half. 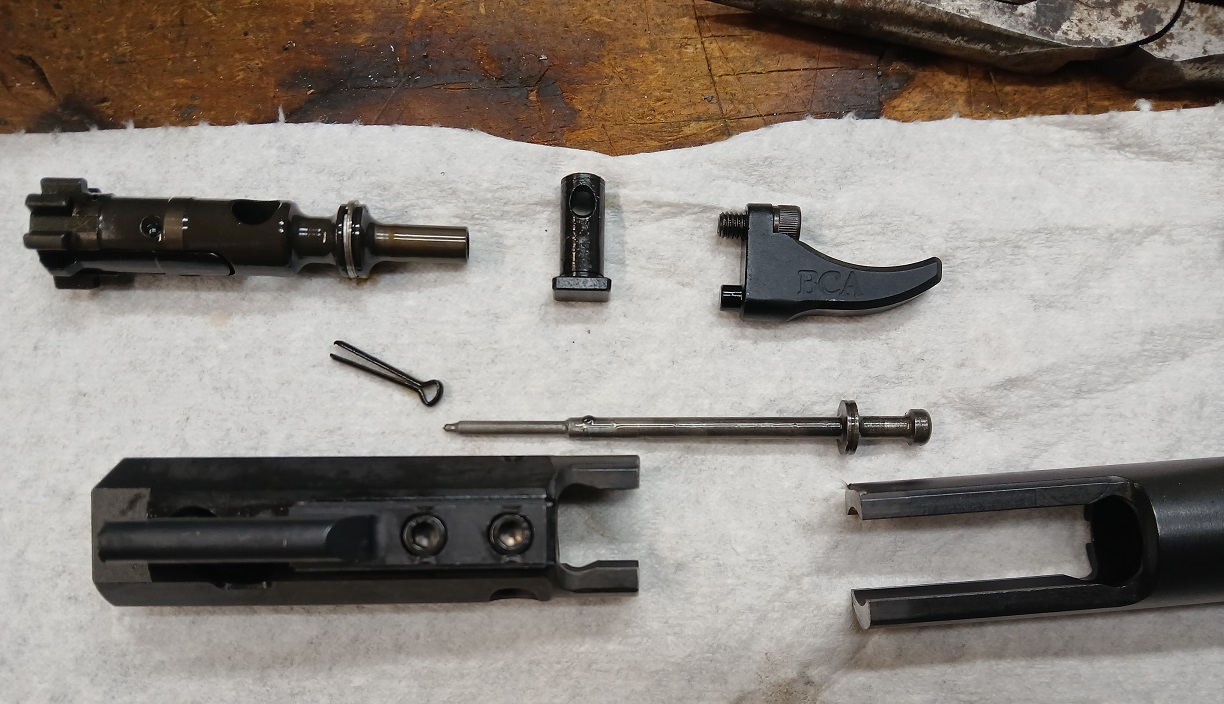 I wanted some spring tension to keep the carrier forward, so I made a brass tab to take the place of the gas key and drilled a hole in it for a guide rod. 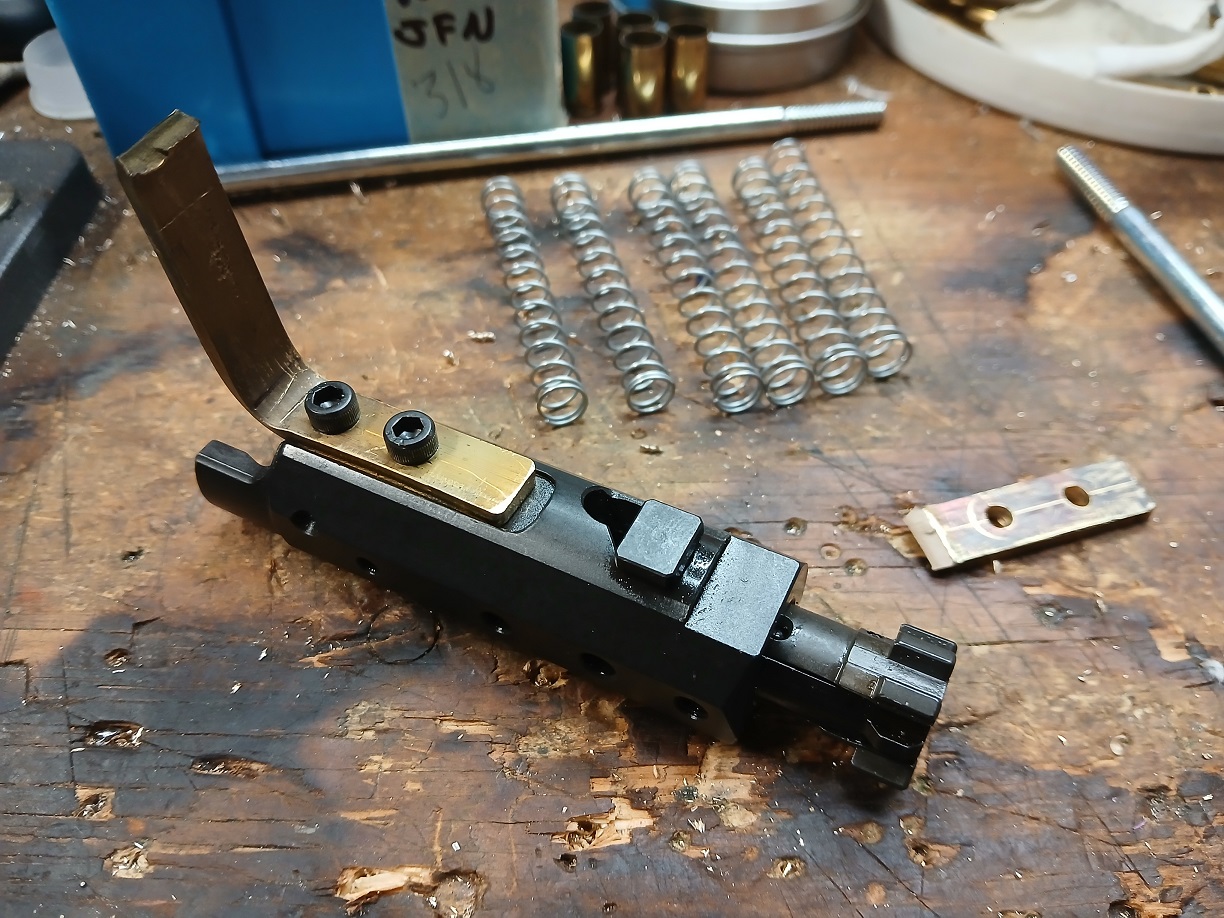 The BCA side charger has a threaded plug at the rear of the upper, so I drilled and tapped for 8-32 threads. Ace hardward had some small round bar that was too small for 10-32 threads, but too big for 8-32, so I stuck a piece in the drill and held a file to the end to step it down. Then cut 8-32 threads on it. 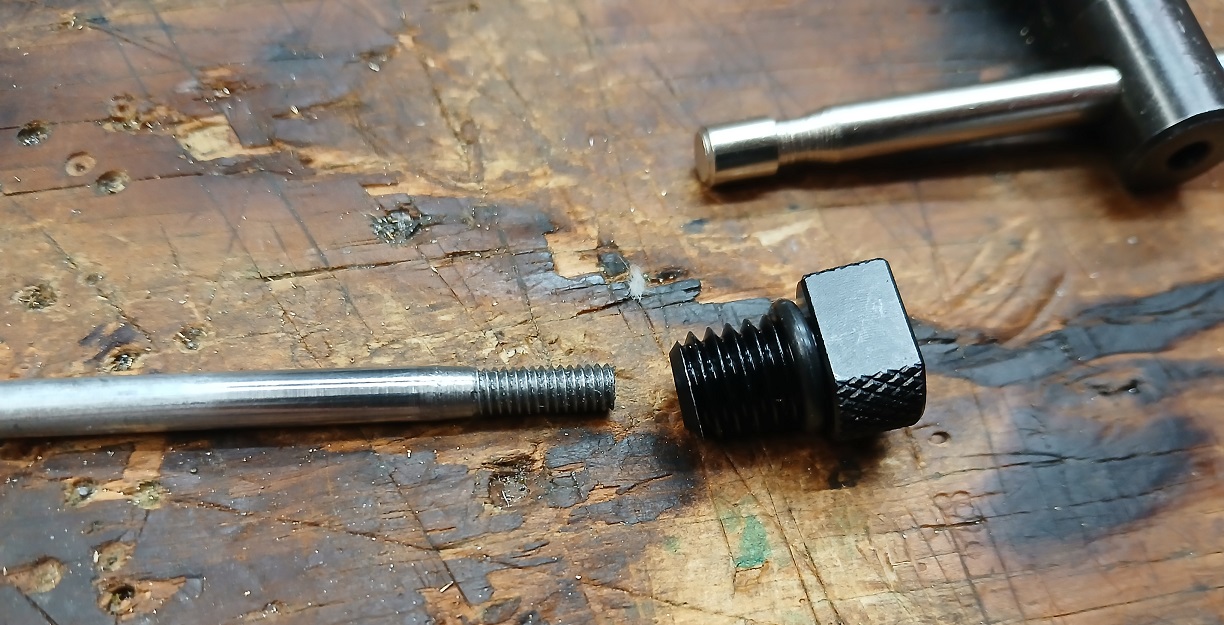 Ace had a selection of springs and I found some that looked like they might work. 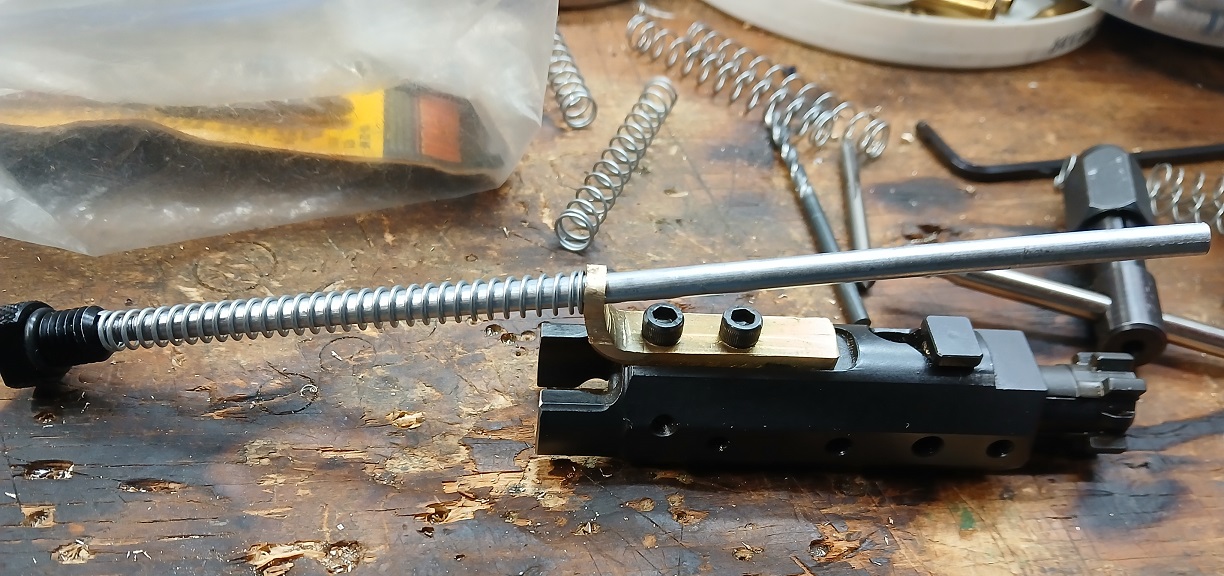 *Got too long, the rest in the following post. |
I stacked a couple in, pulled the bolt back until the springs stacked, then clipped some off until it looked about right.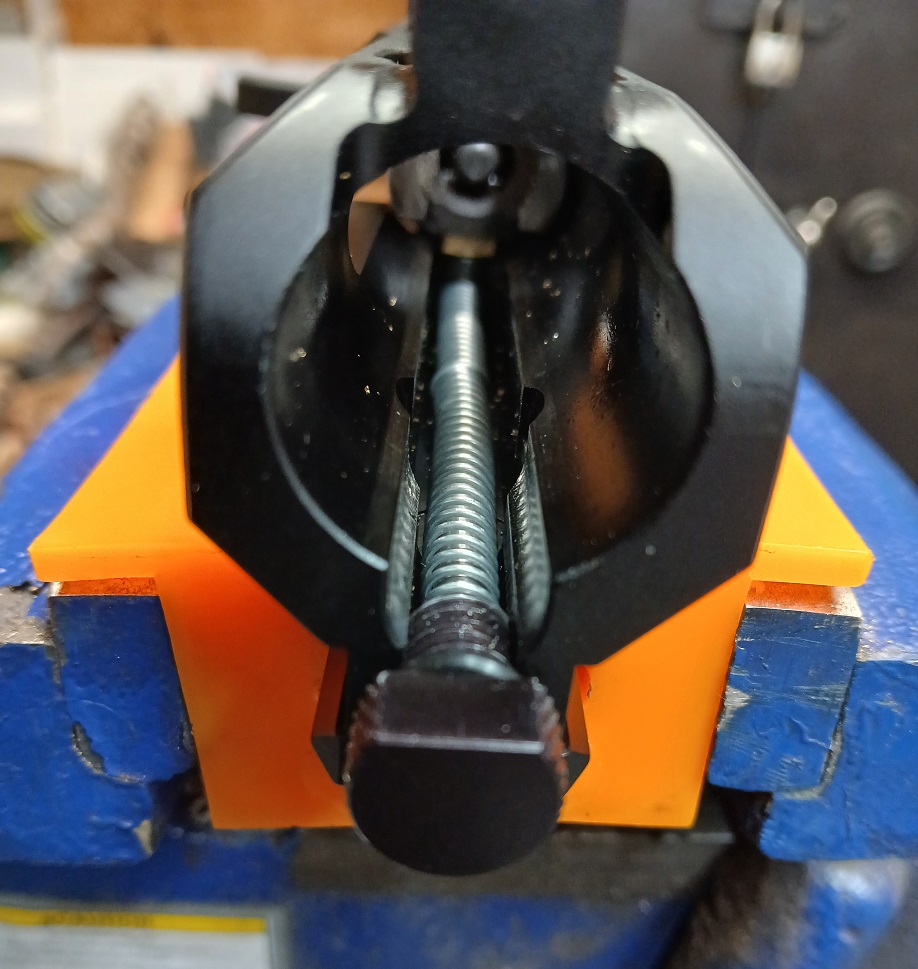 The rod goes through the tab and into the gas tube recess at the front of the upper so it's not just floating around. 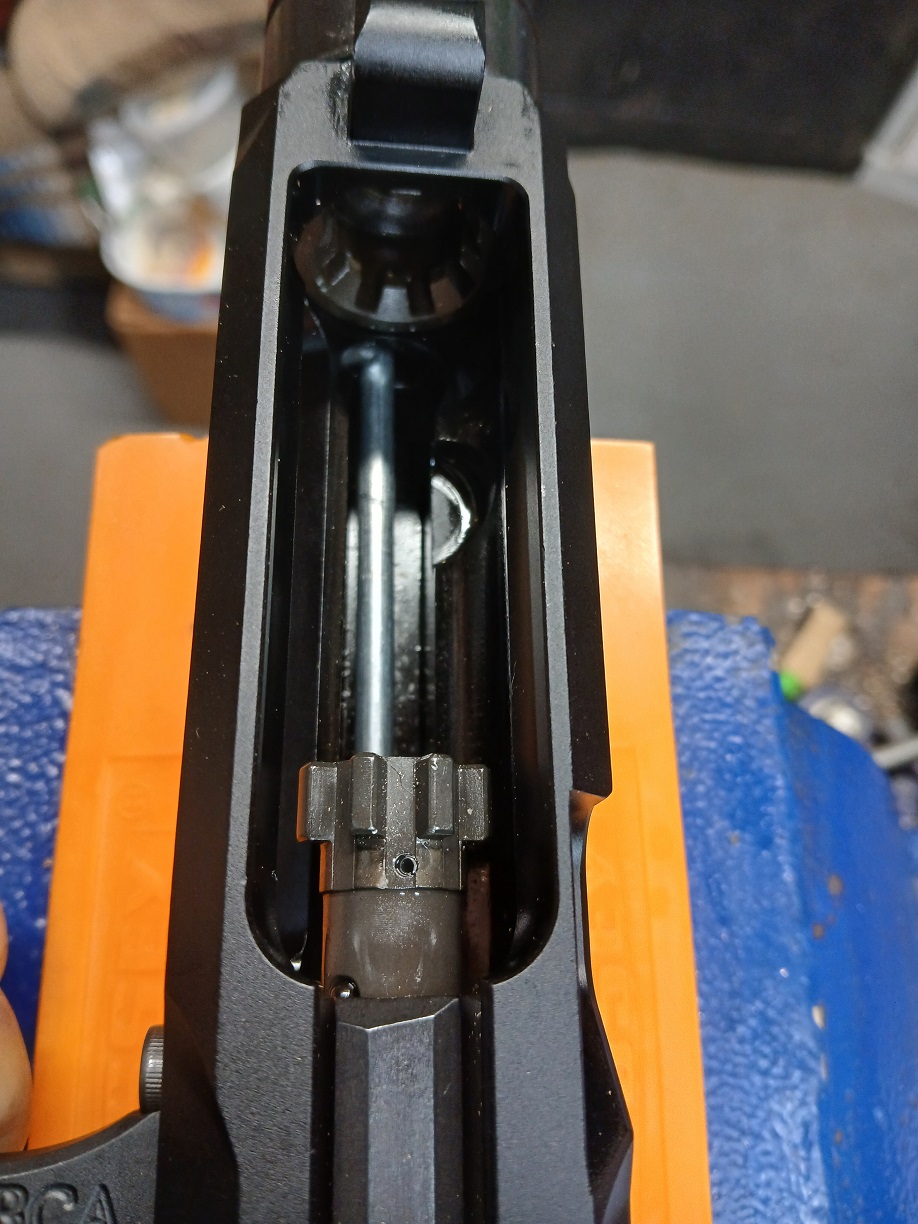 I've read that some people just turn the gas block around to block off the gas port, but I took a piece of 1"x.750" DOM tube, cut a short section and installed a 10-32 set screw. I put some locktite around the gas port before I slide it on and tightened it down in hopes of creating a seal so no gas would leak out. After shooting today I could not see any powder residue or anything around the sleeve, so I guess it worked. Now back to my problem. I took a strip of brass to made my guide rod guide, after bending and adjusting I gave it one last tweak and it snapped. I didn't think about it work hardening that much. So I started over, this time I annealed it first, then bend, filed, drilled... I didn't think about stress relieving after I was finished. it snapped off on the 3rd shot :( So I think I'll use the gas key and just drill it out for the guide rod to slide in. That thing is incredibly hard. After breaking my first drill bit, I took a torch to it, heated to red, then kept playing the flame on low on it so it would cool down slowly. I then put it in the toaster over at 400F for 30 minutes. I was able to drill just a little ways, but then it stopped. I've got about 1/4" left to go. I thought maybe I didn't get it hot enough to get to austenite? So I heated it again to orange this time. I didn't have a magnet handy to touch it to. I left it in the toaster over for awhile, then turned it off. I haven't gone back to try drilling again. Maybe I should find out what kind of steel they made them out of? Then I can look up the proper procedure for normalizing? Continued... |
|
I tried it with some very light 147jhp subsonic loads to get it on the target, then turned to full power Hornady 170gn handloads. it shot great at 25 yards, I stepped back to 50 to shoot another target. After a couple of shots it was obvious something wasn't tight, it was the rings on the rail. Tightened them up and shot the 50 yard target. it looks pretty good. It was late and dinner was on, so I didn't shoot from the bench. maybe tomorrow. The trigger on that thing is horrible! I'll stone and polish tomorrow before doing any serious target work. My son's think it looks like Hon Solo's Blaster. Guess I'll have to find a cone flash hider in 5/8x24? Anyone have a line on one? I've seen 1/2x28 and a metric threaded one so far. Thoughts? |
|
Very nice. I like how you solved the spring problem. I just spent an hour making one for myself. I was able to drill from the inside through the carrier key with a #21 cobalt drill. (My last one.) The drill tip broke when it broke thru so I finished with a pointed dremel bit and diamond burr. A 5/32" rod passes smoothly thru the hole. Plan is to grind the angled back end to 90 deg and use a spacer and washer between the spring and the carrier key (now the guide for the guide rod. |
|
I was wondering about a cobalt drill bit. I didn't have any on hand. If my last softening effort didn't work, I'll pick up some cobalt bits. I like your idea of milling a flat for the spring to push against. Maybe grind a flat on a stainless washer, then solder it to the gas key base for the spring to push against? |
|
I filed away all the diagonal part of my gas key and it was not very hard. They do have to stake the screws in, so maybe the HSS bits will work with lots of oil and patience. There is enough clearance around the guide rod for the spring to pass over the rectangular part of the gas key and press against the back of the little tube where the gas passes, so I will let the springs butt against the gas key. If your gas key is too hard to drill, why not make a block of mild steel. Drill the two screw holes and countersink them. For the guide rod passage, drill from the front and rear about 1/4 inch and grind away everything between them. That may work for a brass block as well. |
|
Thanks for making my pictures work :) I used a cutting disk on the angle grinder to cut away that angled portion on front, then I was able to drill it out. I put it back together, but the gas tube and the plug on the back of the BCA upper are not at the same height :( I can mill one out of a chunk of 1/2" square stock, but it has to go through that small opening at the rear. Then you drill the hole and there isn't much metal left. I may rethink where to mount the rear of the guide rod. |
|
From what I think you are saying, the guide rod never was high enough at the back of the upper. It must be in the charging handle tunnel for it's entire length to clear the gas key. This is the conundrum I am facing: How to secure the back of the guide rod since I will be using a standard upper. |
|
The guide rod is too high in the back to go through the center of the gas key. So the rod is angled down from high in the back to low in the front. I had an idea that is much simpler. I can't belive I didn't think of it first. It should work for a standard upper also. I have an extra standard upper still in the box, I can check to see if it fits that one also. Should have pictures this afternoon. |
|
Sorry, no pics today, got hung up repairing the door frame on my son's house. Anyway, a 1" piece of Aluminum round bar fits into the upper perfectly. I cut a piece 3/4" long, then milled a flat and drilled for a 5/16" bolt to go up into the gas key slot. mark the height you need for the guide rod, then drill and tap for the guide rod. Mine is 8-32. The BCA upper has that round plug that will hold the guide rod block in. I'll have to check on a standard upper, should be something to do the same. I'm only half way done and it's late, so I'll finish up tomorrow with pics. |
I cut a piece of 1" round Aluminum to fit in the rear and mounted the guide rod to it so it would go through the stock gas key.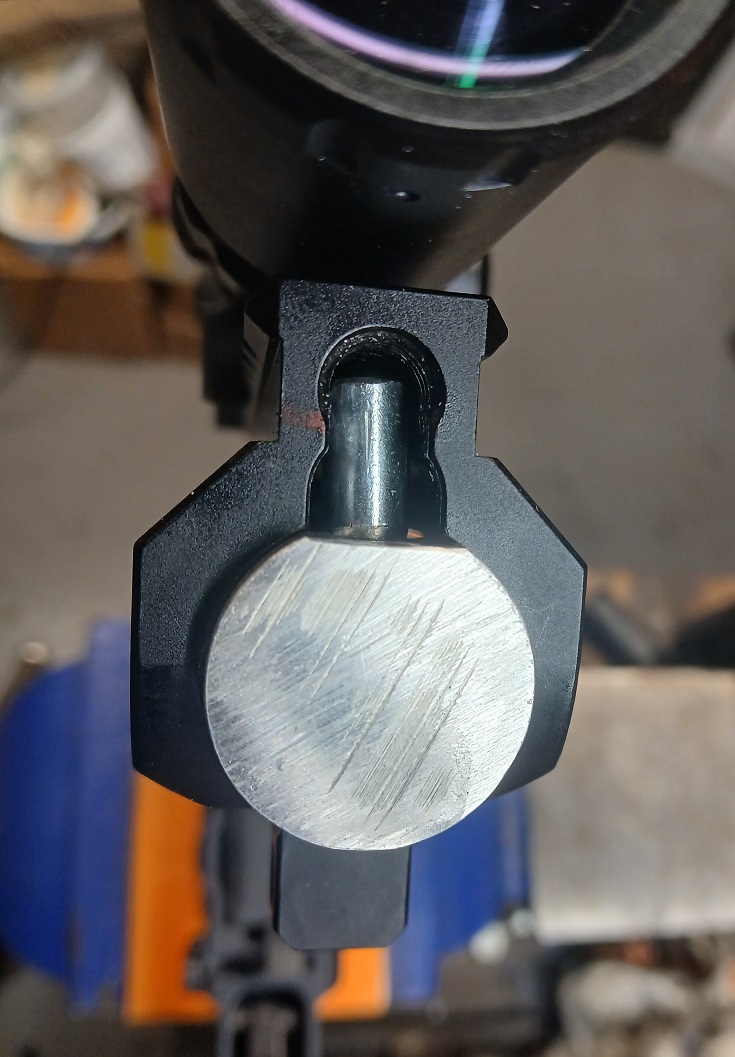 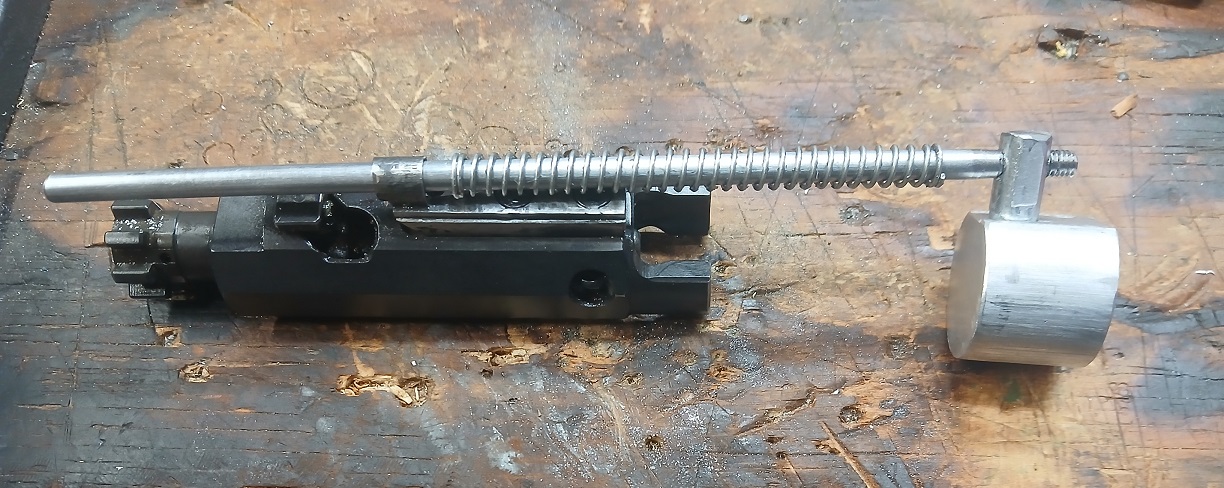  The problem is that when you get enough spring tension to just keep the bolt forward, then pull the bolt back, the spring stacks and the bolt won't come back far enough to be behind the magazine :( So it looks like I'll have to machine a new block to take the place of the gas key and move the spring face as far forward as possible. When I had the brass tab in, it worked just fine until the brass broke. So maybe if I start with a piece of 1/2" square cold rolled? For the standard upper, it looks like you might be able to take a charging handle, cut most of it off, then mount your guide rod to the rear of it somehow? Just an idea of where to start? 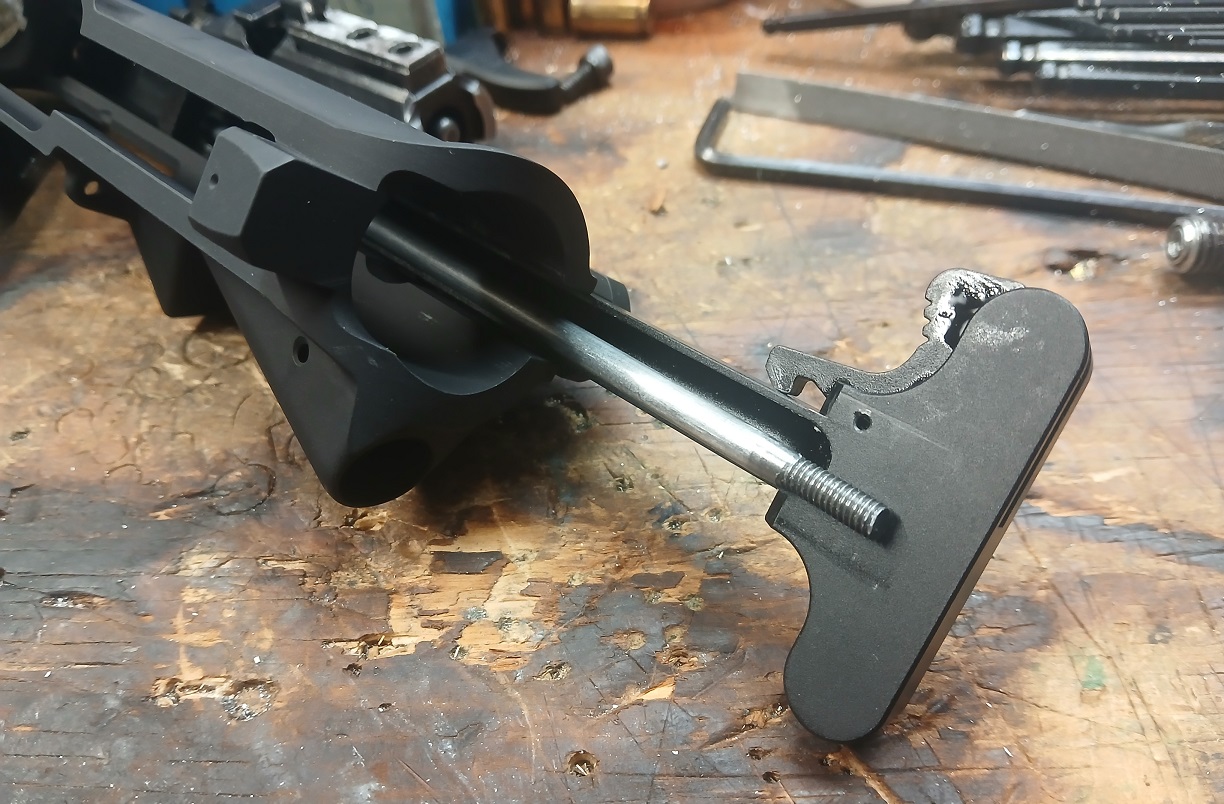
|
|
Someone on another forum suggested using a couple of grub screws to ride against the stock gas key to hold the bolt open and closed. that sounds like a much simpler idea. I'd just have to drill and tab a couple of holes in the gas key slot. I ordered some M10x12 screws, should be here friday. |
|
Yeah, you are right about moving the front guide all the way forward and the back end of the spring as far back as possible. Currently I am using a 1/8" stainless rod for the guide and with a 10/22 spring resting against the drilled out gas key and the face of a regular charging handle, the bolt opens 1.55" from the front of the eject port. A Volquartsen spring which has fewer turns but same length will allow the bolt to open .500 more to 2.05". That and only about 5/8" more will clear the mag. Reproducing your first attempt with the spring pushing way up near the front should get us where we want to be. If we need more spring force we can add a piece of the same stock and, in my case, cut out a piece of the charging handle to accommodate. I think 1/8" for the guide rod is fine considering how little it has to do. ETA: I don't follow the grub screws idea. |
|
I ordered some ball point spring loaded Grub Screws. Like a set screw, but with a spring loaded ball bearing in the tip. So If I mount one sideways in a self made gas key with the ball aligned with the rounded side cut at the front left of the upper? So with the bolt closed, it will have spring pressure keeping the bolt forward so it can't just slide back. Then pull the charging handle back, this will compress the spring loaded ball which will ride in the square channel in the top of the upper? Maybe mark where it will be with the carrier all the way to the rear, then use a ball mill to cut a slight rounded depression in the left side so the ball detent will hold the bolt to the rear until it is pushed forward? The Grub screws came in the other day, but I haven't had a chance to measure anything. I have some 5/8" 4140 square stock left over from building an ejector for an O/U shotgun, I could use that, but Aluminum would be easier and maybe not as abrasive on the gas key channel? |
|
Ok now I see. If you were not using a recoil spring, I can see how the rear grub would work. However, wouldn't the drag of the hammer against the bottom of the carrier accomplish the same thing? The front grub will do somewhat the same thing as the gas rings regarding retarding the carrier from sliding back. I measured the pull weight of the bolt with 1, 2 and 3 rings and got 2, 5 and 8 pounds resp with my trigger gauge. After a bit of wear I bet those numbers would drop. You will probably have to try the grub and see which you prefer. I also measured the pull weight of pulling open the closed bolt; it repeatedly took a 5 pound tug. I have no idea if this is helpful, but I got this new trigger gauge... In my case, I have made a gas key similar to your last attempt and am working on a rear plug to hold in the spring and guide rod. ETA: If you could get two grubs in there, one from each side, do you think that would hold the carrier like you want? |
|
You are absolutely right, the hammer pressure on the carrier does keep it to the rear when open. I was thinking about something to try to keep it positively closed while hunting. I'm just wondering if the 5 or 8# gas ring pressure would be enough to ensure the carrier stays forward? It's probably similar to the pressure from the small spring on my guide rod? |
|
Good question. I have never heard of an AR popping open without deliberate action, so I measured the force it took to yank the charging handle of my rifle and pull the carrier full open. The measurements were mostly 18 pounds with a few outliers as expected. I think you can safely say that to exceed that number whether with friction or springs, and the bolt stays closed. I also did a search to see if anyone else actually measured the same thing. I only found one guy who did and he said the results were between 10 and 15. I did a little thinking about your grub screw solution last night and maybe that is the best way to go. What is needed is a steel surface for the ball to move into. The steel part could be a raised section of the gas key and as a result the grub/gas key interaction will only occur when the carrier is forward and the bolt is locked in the barrel. No springs or guide rod needed. |
AR Sponsor