


AK Sponsor


Posted: 11/24/2007 8:11:30 PM EDT
[Last Edit: GTLandser][Edited]
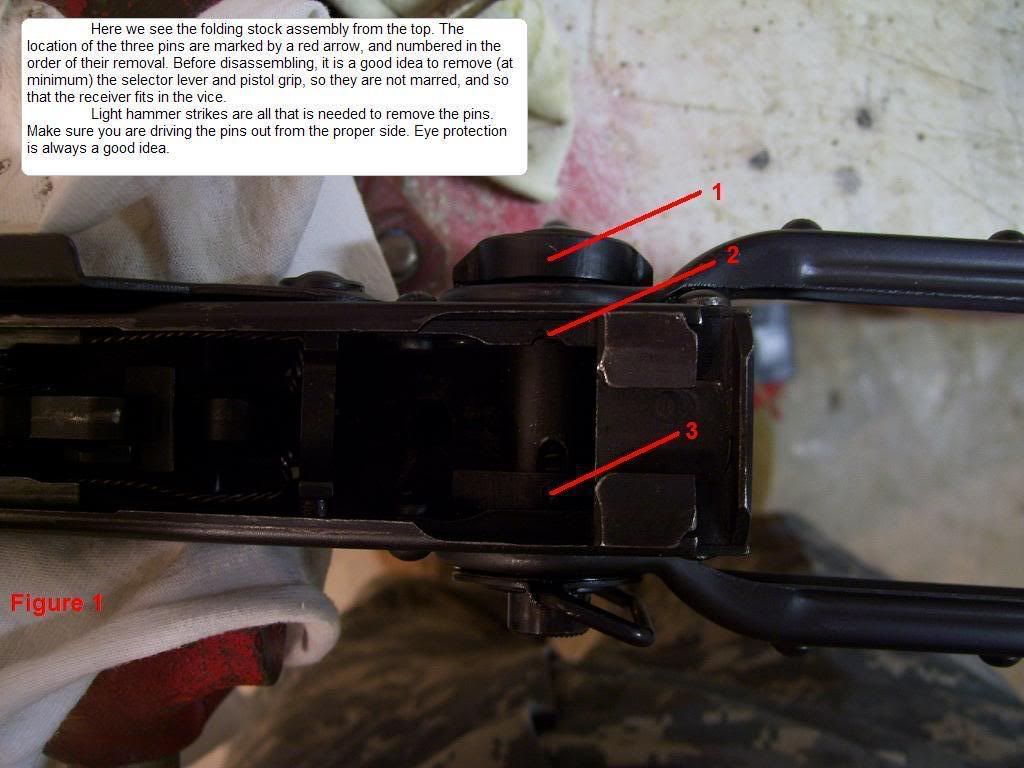
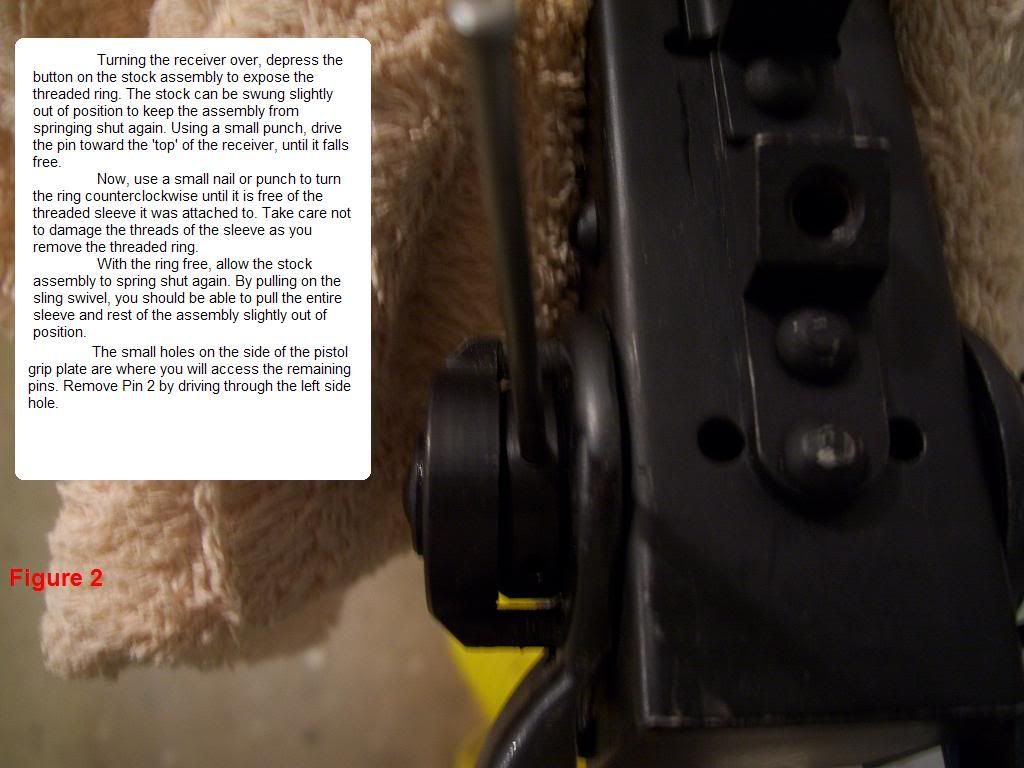
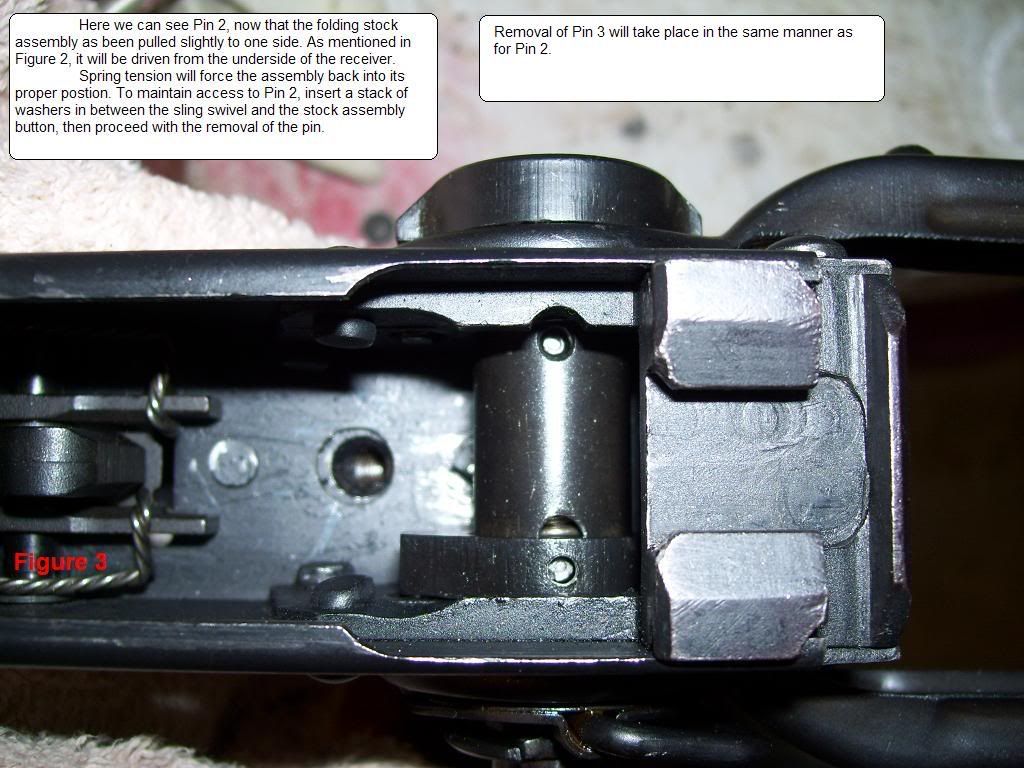
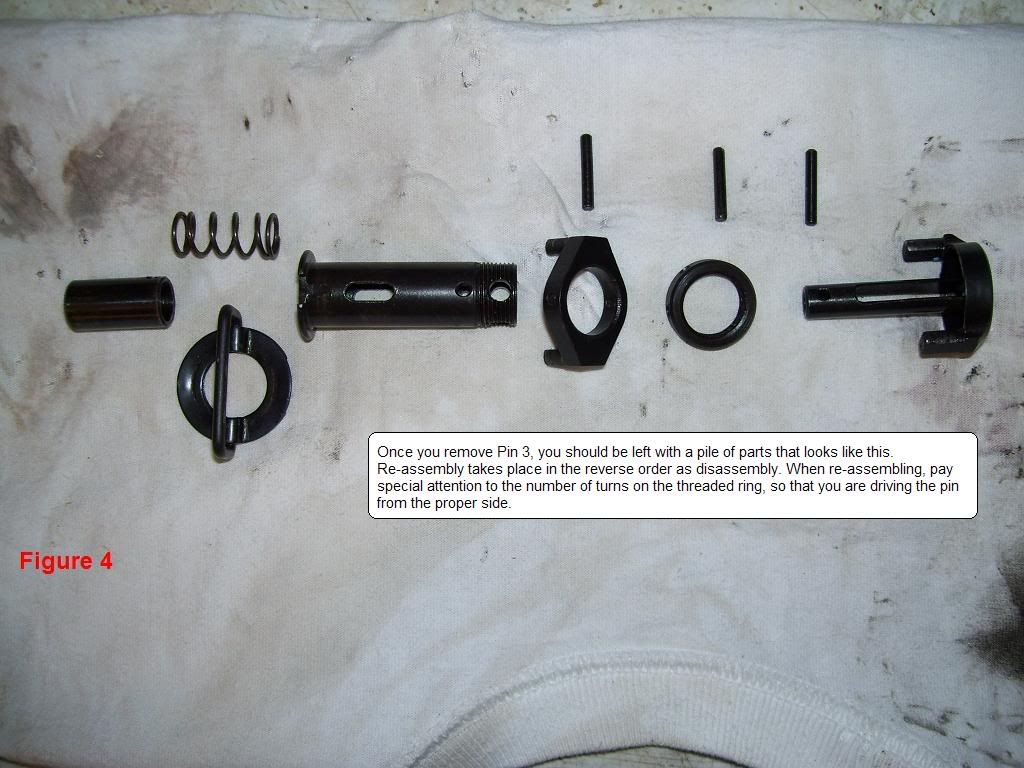
ETA: the threaded ring has several holes; make sure the re-alignment of the ring is the same as when you disassembled so you are putting the pin back in from the correct side. ETA2: the pins themselves are identical; but the threaded ring has at least one different sized hole, making it important to drive the pin from big-hole-side to small-hole-side. You will be able to identify the sides by the wear around the holes. ETA3: Notice the location for the pins on the sleeve––in some locations, a pin passes through and connects several different pieces, so alignment is important. Obviously, Pin 1 goes in the large hole on the right-hand end, Pin 2 goes in the next hole to the left, and Pin 3 fits in the slot at far left. Getting Pin 3 through the holes in the button, slot in the sleeve, and through the left-side studded locking ring is especially obnoxious, so here again a stack of washers to depress the button is helpful. ETA4: to access the original pictures, I created a throw-away photo-bucket account. I release all rights to these pictures, for any commercial or non-commercial use. User name: user654789 Password: okmOKM |

AK Sponsor