To reassemble, perform this procedure:
|
| 1. |
Insert the field tool kit in to the stock, thin end first. To do it real fast, insert it half way, and then slap it with your palm, so that it rides all the way in.
|
| 2. |
Insert the cleaning rod. Make sure that it is locked in it's well.
|
| 3. |
Align the front end of the gas tube with the gas block opening, then insert the rear end of the gas tube, and lock it with the lever in horizontal position.
|
| 4. |
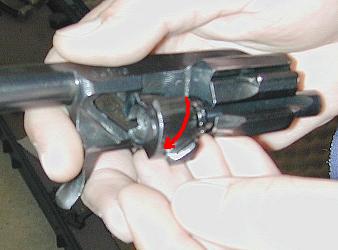
Insert the bolt in to the carrier all the way, then rotate it counterclockwise, while moving it forward along the carrier.
|
|
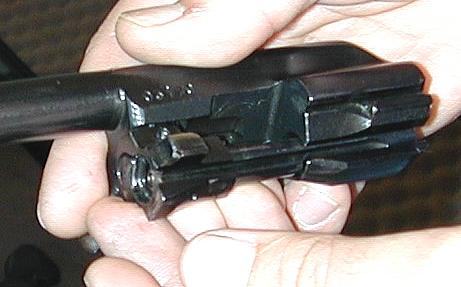
If you are doing it right, the bolt must enter its railing inside and stop in the position indicated in the picture below:
|
|
Keep it there while inserting the carrier back into the receiver.
|
| 5. |
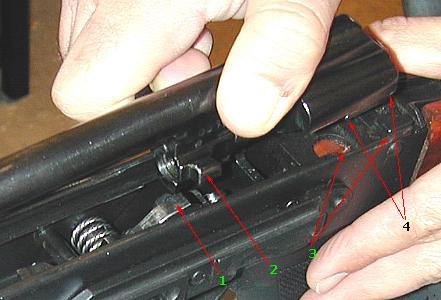
Manually cock the hammer (1) to allow for a carrier to be reinserted. Insert the gas piston end of a carrier into the rear sight block, and lower the rear end of the carrier into the receiver, making sure that the bolt stays in front-locked (2) position inside carrier, and the carrier rear end (4) is aligned with the opening in the receiver railing (3).
|
|
Push down and forward on the rear end of the carrier to slide it all the way toward the rear sight block.
|
| 6. |
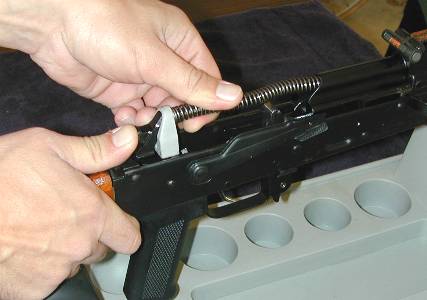
Insert the front end of the spring assembly into the round opening in the rear end of the carrier. Push the serrated button forward and align the railings, then release the button, allowing spring assembly to move backwards until set in place.
|
|
| 7. |
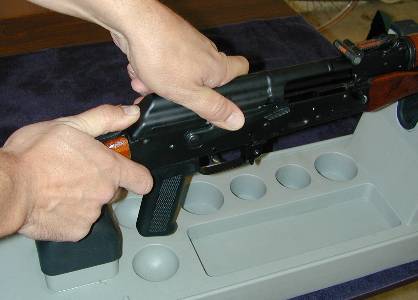
Insert the front end of the top cover into the rear sight block well. Lower the rear end of the cover and press it down, till it locks with the spring assembly. It is widely used to slam on the rear end of the top cover to quickly lock it in place.
|
|
| 8. |
Before attaching the magazine, see if the weapon operates by pulling the charging handle all the way to the back, allowing it to slam forward. Never ride the handle forward, except when explicitly recommended. Pull the trigger, then move the safety lever to the "Safe" position.
|
 Win a FREE Membership!