TX, USA
|
[Last Edit: KTM300XCW]
[#1]
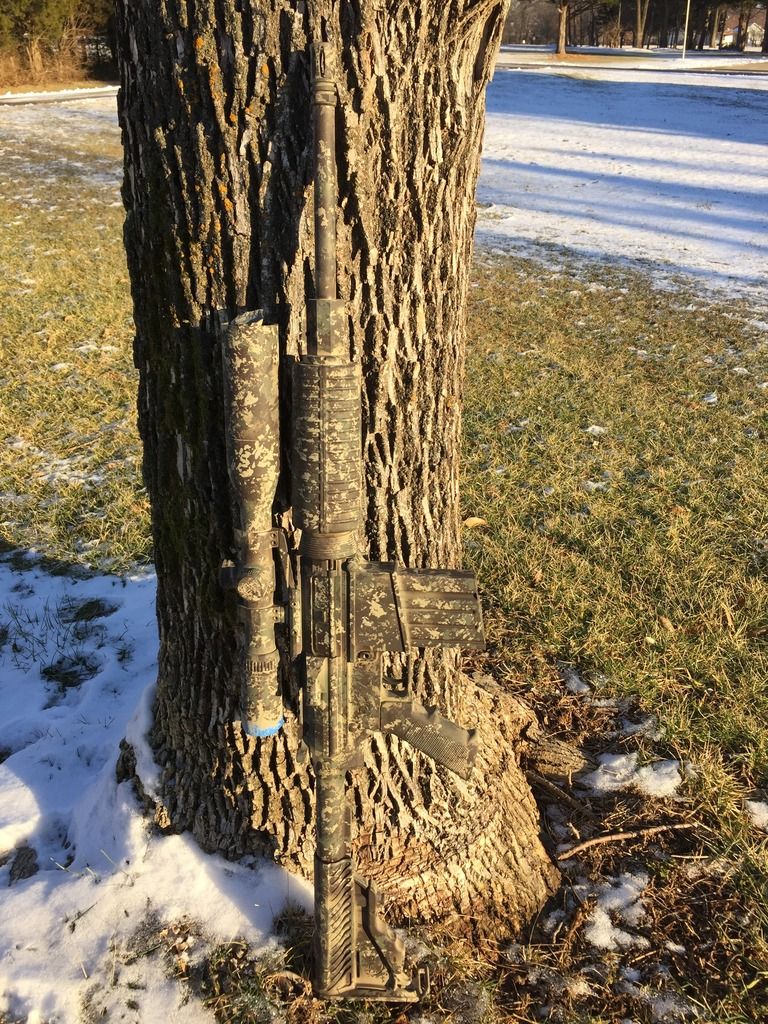
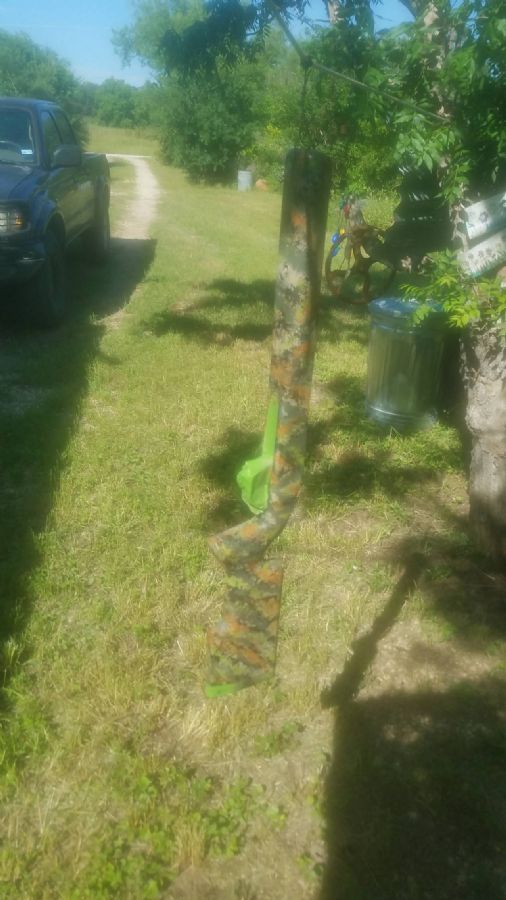
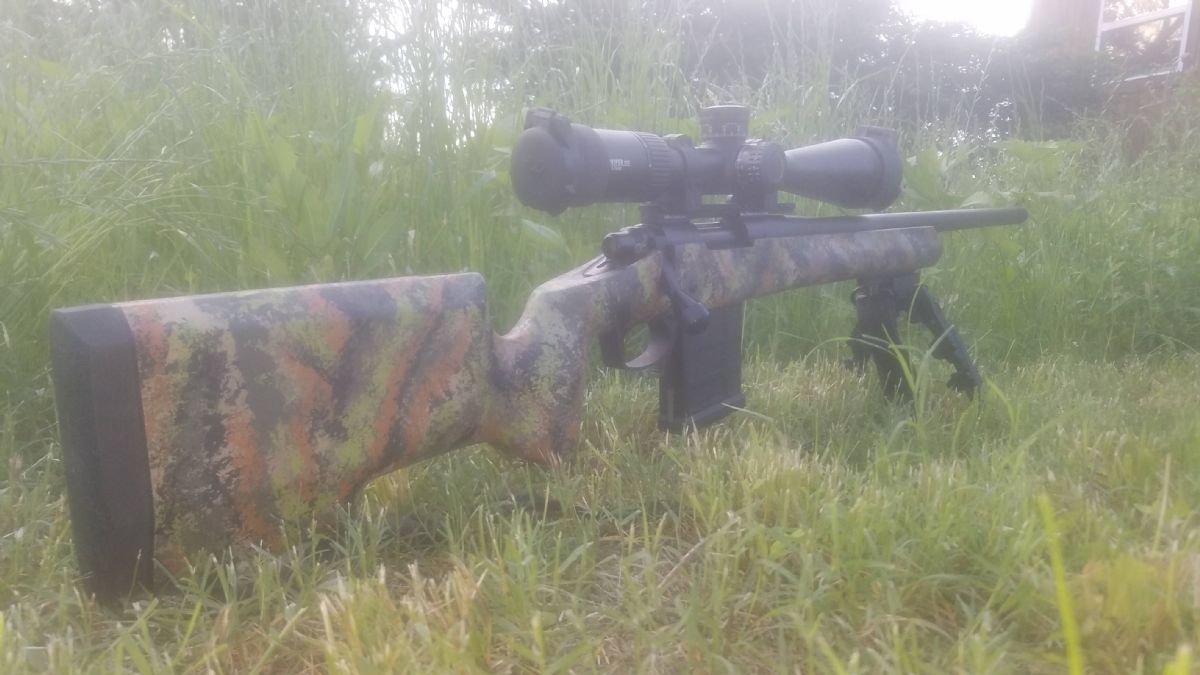
Here is my take on the sponge method:
The Green stock on the Hog Hunter stood out like a sore thumb here in Texas so I decided to camo it using natural sponges and spray paint. Below are before and after pics. I also love all the beer bottles in the previous pics. This is definitely a job that requires drinking. It makes the creative juices flow. 


|
|
|
|
[#2]
Well, I wanted a white rifle, so here is my drunken attempt. I used rustoleum white, black, and grey primers.
Started with my cheapest build...PTAC upper/PSA lower 
White Base coat 
I didn't stripe, because I wanted more white than anything. I used various sponges and an old loofa to dab on the black and grey. I should have taken more time and made it more uniform, not entirely happy with it, but it was fun to try out anyway. 


|
|
|
|
CO, USA
|
[Last Edit: backpacker21]
[#3]
This one looks great and damn near blends perfectly with that tree. Well done!
Originally Posted By KTM300XCW:
Here is my take on the sponge method: The Green stock on the Hog Hunter stood out like a sore thumb here in Texas so I decided to camo it using natural sponges and spray paint. Below are before and after pics. I also love all the beer bottles in the previous pics. This is definitely a job that requires drinking. It makes the creative juices flow. <a href="http://s916.photobucket.com/user/TORCHRIDER/media/HH-3_zpseolwcobd.jpg.html" target="_blank">http://i916.photobucket.com/albums/ad1/TORCHRIDER/HH-3_zpseolwcobd.jpg</a> <a href="http://s916.photobucket.com/user/TORCHRIDER/media/HH-1_zpslktqi45g.jpg.html" target="_blank">http://i916.photobucket.com/albums/ad1/TORCHRIDER/HH-1_zpslktqi45g.jpg</a> <a href="http://s916.photobucket.com/user/TORCHRIDER/media/HH-2_zpsau9hemil.jpg.html" target="_blank">http://i916.photobucket.com/albums/ad1/TORCHRIDER/HH-2_zpsau9hemil.jpg</a> |
|
|
|
[#4]
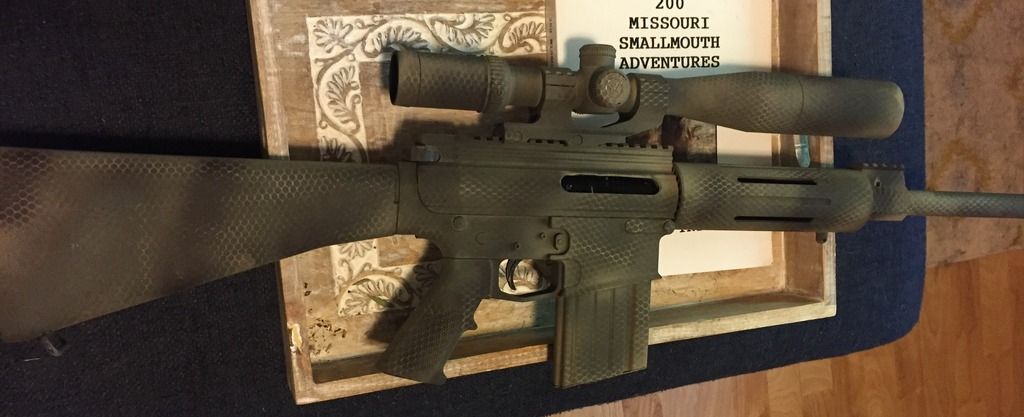
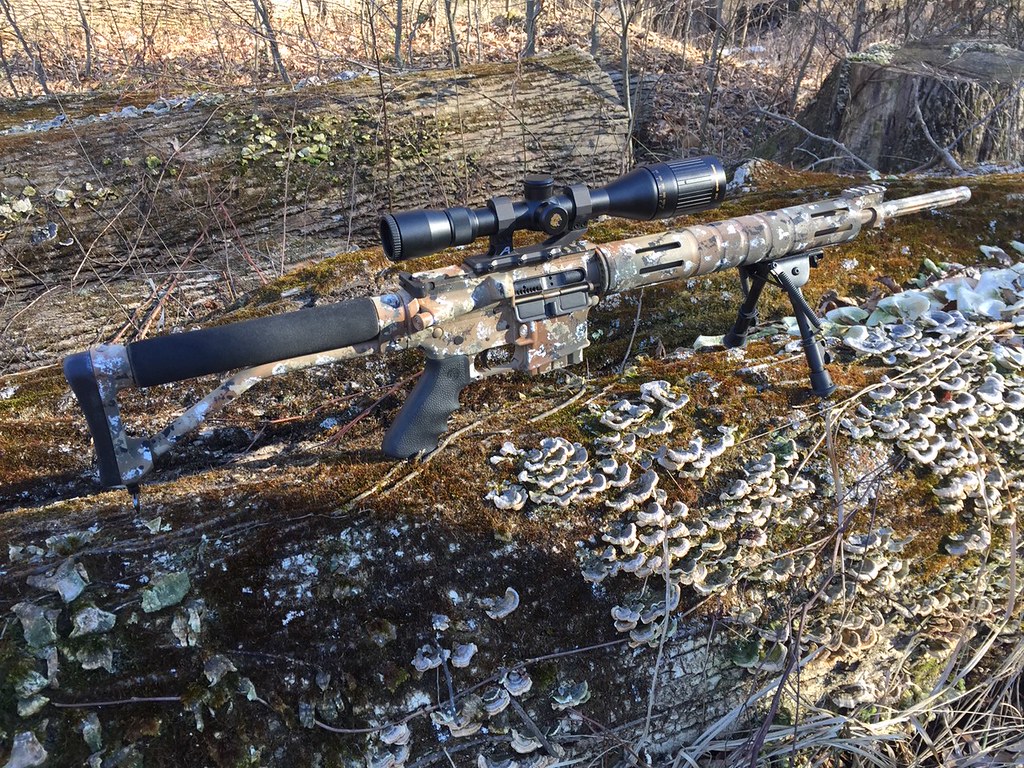
My submission. All paint was rust-oleum camouflage. Everything was coated with deep forest green, then black, earth brown, khaki, and flat grey primer. On the rifle I used a piece of toolbox drawer liner material wadded up. Scope, rings, and bipod, were done entirely with natural sponge. I think it works. My only disappointment was the flat clear turned kind of milky. Oh well.
|
|
|
|
FL, USA
|
[#5]
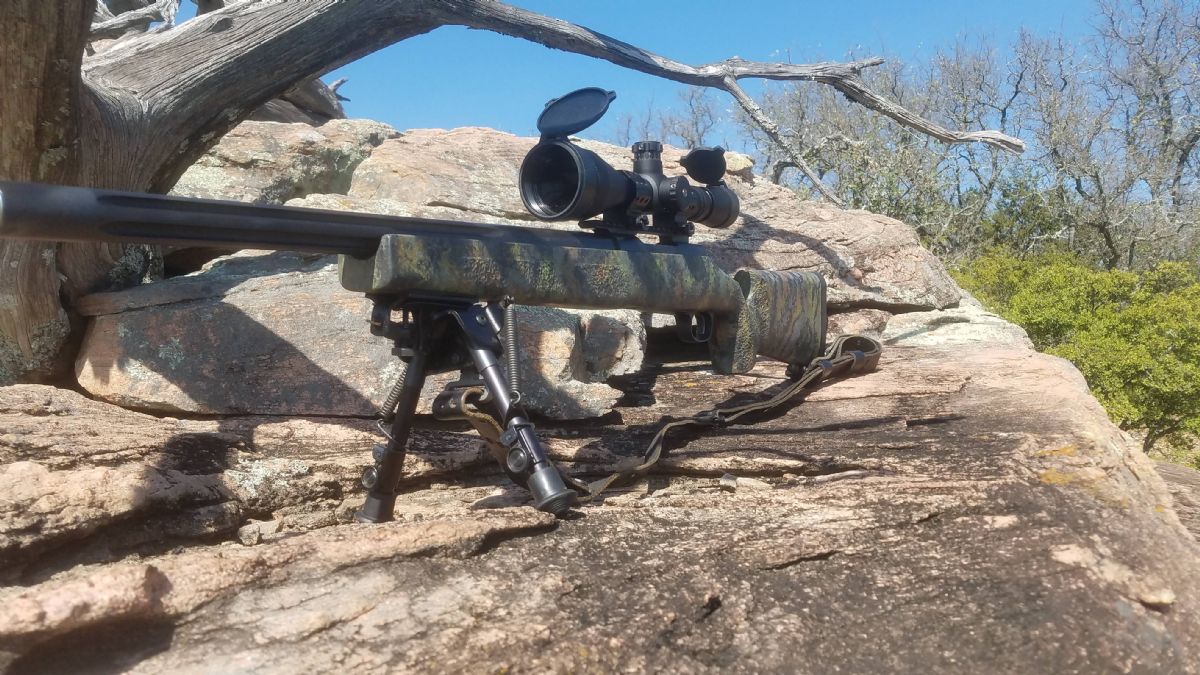
my first attempt at any firearms painting.
justed rustoleum camo colors, originally went with just the fde/dark green colors but added in the brown to fit in with my AO better. 


|
|
|
|
[#6]
Very cool.
|
|
|
|
USA
|
[Last Edit: GunsAreFun308]
[#7]
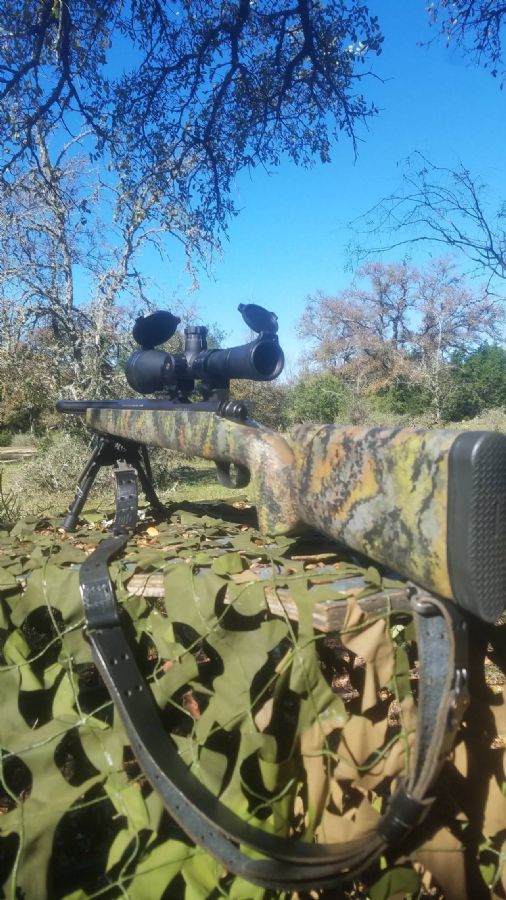
My first attempt at firearm painting. Rustoleum camo colors: dark forest green, brown, and khaki. Got most of the information from this topic. Thanks everyone!
|
|
|
|
[#8]
Thanks to this thread, I did this. Rustoleum kahaki, earth brown, deep Forrest green, and black. Finished with a matte clear.
|
|
|
|
|
[#9]
Thanks to this thread, I did this. Rustoleum kahaki, earth brown, deep Forrest green, and black. Finished with a matte clear.
|
|
|
|
IL, USA
|
[#10]
Here's one that I just finished up. All done in Cerakote. Magpul FDE with patriot brown accents as the background. Magpul FDE, patriot brown, and graphite black applied with natural sponge after flash cure of the base colors.


|
|
|
MN, USA
|
[#11]
Originally Posted By JoeMal:
I was inspired by this thread... Used the "Camo" colors offered by Rustoleum; Green, Khaki, Earth Brown, & Black Started by spraying the entire stock green. Then used some natural sponge and put down a wide stripes of brown every few inches. Then khaki overlapping that a bit, but not so wide of strips. Then black...and so on. Also added some green in once I started covering up the stock with the other colors. I kept layering as I went, making my stripes thinner and thinner until I got to the point where I was doing individual 'dabs' here and there where needed. I wanted to keep the khaki to a minimum and wanted the darker colors more prevalent. All in all it probably took an hour or two, plus time to tape the stock. I'm very happy with it and the pictures don't do it justice. It's raining today but I'll try to get some pictures in natural light and it should look a lot nicer. http://i.imgur.com/aP6K43v.jpg http://i.imgur.com/IcRbWJV.jpg http://i.imgur.com/4SqYWhx.jpg http://i.imgur.com/YrqX6q6.jpg Love it |
|
|
MN, USA
|
[#12]
Originally Posted By JoeMal:
I was inspired by this thread... Used the "Camo" colors offered by Rustoleum; Green, Khaki, Earth Brown, & Black Started by spraying the entire stock green. Then used some natural sponge and put down a wide stripes of brown every few inches. Then khaki overlapping that a bit, but not so wide of strips. Then black...and so on. Also added some green in once I started covering up the stock with the other colors. I kept layering as I went, making my stripes thinner and thinner until I got to the point where I was doing individual 'dabs' here and there where needed. I wanted to keep the khaki to a minimum and wanted the darker colors more prevalent. All in all it probably took an hour or two, plus time to tape the stock. I'm very happy with it and the pictures don't do it justice. It's raining today but I'll try to get some pictures in natural light and it should look a lot nicer. http://i.imgur.com/aP6K43v.jpg http://i.imgur.com/IcRbWJV.jpg http://i.imgur.com/4SqYWhx.jpg http://i.imgur.com/YrqX6q6.jpg Love it |
|
|
MN, USA
|
[#13]
Base coat applied

|
|
|
MN, USA
|
[#14]

|
|
|
USA
|
[#15]
Second attempt at rattle can paint (first attempt in earlier post). I was going to do another sponge paint job but I decided-after much practicing-to go with mesh.
|
|
|
USA
|
[#16]
Anyone know why my pictures won't post properly?
|
|
|
|
[#17]
Originally Posted By GunsAreFun308:
Anyone know why my pictures won't post properly? |
|
|
|
|
[#18]
Originally Posted By SuperV:
I used cotton balls for mine, but same concept: http://i1288.photobucket.com/albums/b481/SuperV13/IMG_20140719_185237051_zpsd5fa0688.jpg http://i1288.photobucket.com/albums/b481/SuperV13/IMG_20140719_185253002_zpsc42e52b2.jpg |
|
|
|
GA, USA
|
[#19]
Originally Posted By GunsAreFun308:
Second attempt at rattle can paint (first attempt in earlier post). I was going to do another sponge paint job but I decided-after much practicing-to go with mesh. http://i259.photobucket.com/albums/hh309/itsinthecards07/9D5101E9-FCC5-43C8-BB3A-7C3B3269BBD7_zpsxtju7twk.jpg |
|
|
WA, USA
|
[Last Edit: Mr_Wrong]
[#20]
This is over an fde paint job it had previously.
http://imgur.com/a/t8FHk https://m.imgur.com/SP222ao |
|
|
|
[#21]
Do you guys clean the sponges out after you use them? I just did some practice on a handguard and have been cleaning them with paintbrush cleaner, but its kind of a pain.
|
|
|
|
|
[#22]
Originally Posted By 2apatriot:
Do you guys clean the sponges out after you use them? I just did some practice on a handguard and have been cleaning them with paintbrush cleaner, but its kind of a pain. |
|
|
|
|
[#23]
Originally Posted By 2apatriot:
Do you guys clean the sponges out after you use them? I just did some practice on a handguard and have been cleaning them with paintbrush cleaner, but its kind of a pain. |
|
|
|
USA
|
[Last Edit: SHWELL]
[#24]
Def dont clean them. Most of the time they are a one time use, but I have experienced my best results when using an old sponge with dry paint on it.
|
|
|
|
[#25]
Savage 10 FCP-SR using Aervoe paints
Started with a base coat of Light Coyote, then added stripes of OD. Sponged LC over the OD and vice versa. Then sponged Foliage Green all over, followed by Earth Brown, and finally Coyote. I then went back and added a little more OD all over. iPotato pics |
|
|
|
IN, USA
|
[#26]


Sponge camo job. Camoflauge sand base Army Green in stripes over sand Sponged sand over green and green over sand Sponged deep forest green over entire rifle |
|
|
|
[Last Edit: charliedontsurf]
[#27]


|
|
|
|
|
[#28]
|
|
|
|
GA, USA
|
[#29]

|
|
|
|
[#30]
Originally Posted By charliedontsurf:
https://www.AR15.Com/media/mediaFiles/100961/20181102_113825-740641.jpg |
|
|
|
|
[Last Edit: R3L04D]
[#31]
|
|
|
|
AR, USA
|
[#32]
Remington Model 7. Rustoleum Khaki base, then used an assortment of Rustoleum Sand, Deep Forest Green, and Aervoe Army green, earth brown, earth red, and dark green.


|
|
|
|
[#33]
Originally Posted By JoeMal:
Details on how you did that would be awesome! Originally Posted By JoeMal:
Originally Posted By charliedontsurf:
https://www.AR15.Com/media/mediaFiles/100961/20181102_113825-740641.jpg |
|
|
|
|
[Last Edit: charliedontsurf]
[#34]
Originally Posted By Et2ss:
@charliedontsurf Originally Posted By Et2ss:
Originally Posted By JoeMal:
Originally Posted By charliedontsurf:
https://www.AR15.Com/media/mediaFiles/100961/20181102_113825-740641.jpg 
Stock was already matte black from factory. Masked off butt pad. Scotch brite scuffed entire stock. Wiped clean with brake cleaner. Sprayed entire stock with matte tan. Scuff again with Scotchbrite pad. Applied the next 8 colors(all matte) from lightest to darkest in sequence randomly but in a kind of tiger stripe pattern. When I got to black, I would outline the other colors dabbing a border of black around the pattern for a shadowy 3D affect. After going through all the colors, would let coat dry, then scuff again before applying next coat. Repeated this process through 4 or 5 coats until I had the desired effect I could live with. Once all coats were applied and dry, I lightly scuffed with Scotchbrite pad to dull it down just a bit and to kind of blend the overlapping sponge borders. Paint was applied with natural sea sponge of random shapes. Applied paint to cardboard palette then dabbed on stock. This was my first attempt at sponge camo, I wanted to do the entire rifle but just couldn't bring myself to do it. I can't recall all the colors, half were Krylon and Rustoleum camo paint the other colors like the orange/red and bright green were Rustoleum brand. The grey was high temp primer IIRC. There were 8 or 9 colors total IIRC. All matte. It took a few hours, the only real problem is knowing when to stop. I was going to seal it with matte clear but didn't want any hint of a sheen, so I backed away said that's enough and lightly scuffed it one final time and left it at that. I call it TigerTarn camo. 
|
|
|
|
|
[#35]
Originally Posted By charliedontsurf: https://www.AR15.Com/media/mediaFiles/100961/20181025_104032-721292.jpg TigerTarn |
|
|
|
|
[Last Edit: charliedontsurf]
[#36]
Originally Posted By Et2ss:
Outstanding Originally Posted By Et2ss:
Originally Posted By charliedontsurf: https://www.AR15.Com/media/mediaFiles/100961/20181025_104032-721292.jpg TigerTarn I will probably redo it and try to replicate my pattern from my FN SPR A1A. 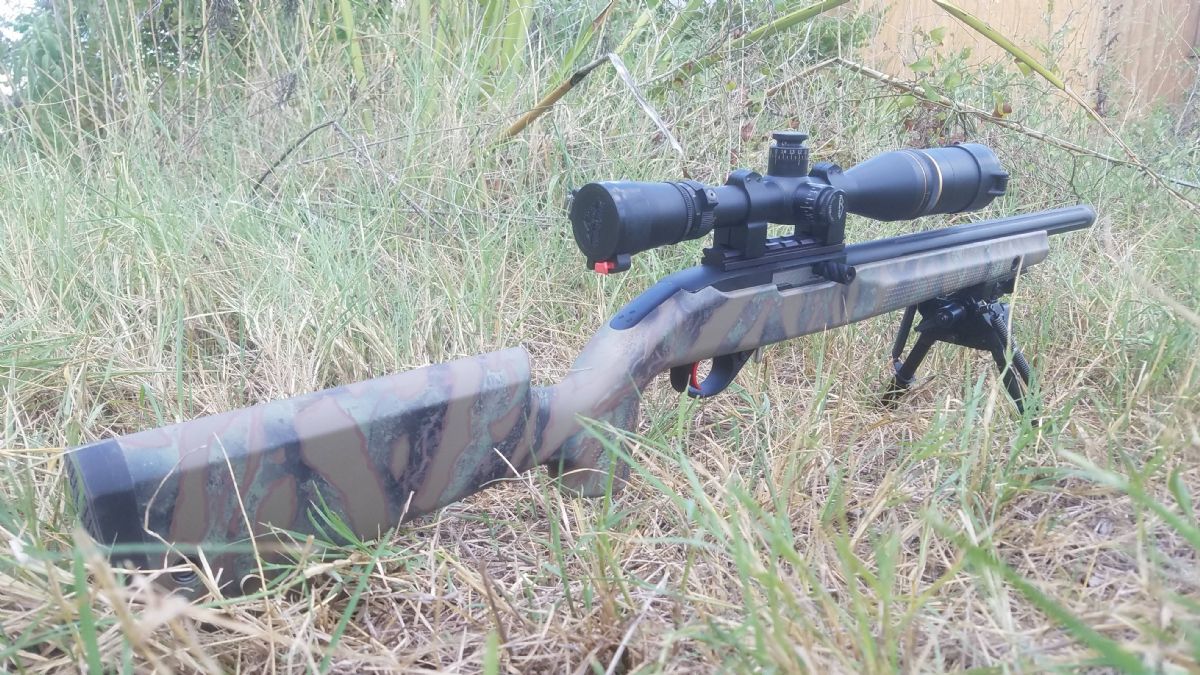
|
|
|
|
CA, USA
|
[#37]
Originally Posted By charliedontsurf: Here's a 10 -22 I did, it was masked and sponged, then sprayed with only 3 colors, stock was already FDE. I will probably redo it and try to replicate my pattern from my FN SPR A1A. https://www.AR15.Com/media/mediaFiles/100961/20180819_160823-850312.jpg |
|
|
|
[#38]
Did my CZ455 last weekend, just needs some touch up on the black for little more depth.


|
|
|
|
|
[#39]
This 700 in a Manners is next.
I think I will just leave the base black then use a funky matte cinnamon color in large splotches with some coyote dabbed in the middle hoping to leave the black as border in between splotches. 
|
|
|
|
|
[#40]
Just finished the Manners.
|
|
|
|
|
[#41]
|
|
|
|
OH, USA
|
[Last Edit: psdan000]
[#42]
The sponge technique is the easiest and best way to camo in my opinion, here's a few I've done with Krylon. I usually lay down a multi color base coat...go with a couple standard colors then I will mix colors on a paper plate then sponge away (krylon FDE and Black make a cool grey color). Always love the results.
 IMG_1692 IMG_1692
 IMG_0878 IMG_0878
 IMG_E3600 IMG_E3600
 IMG_0867 IMG_0867
 IMG_0866 IMG_0866
 IMG_4025 IMG_4025
|
|
|
|
[#43]
Originally Posted By charliedontsurf:
https://www.AR15.Com/media/mediaFiles/100961/20190513_192856-944399.jpg |
|
|
|
|
[#44]
Originally Posted By Et2ss:
A well executed job! The colour pallet, as well as the pattern make a really nice disruptive camo Originally Posted By Et2ss:
Originally Posted By charliedontsurf:
https://www.AR15.Com/media/mediaFiles/100961/20190513_192856-944399.jpg Next up is a Grayboe stock for my .223 700. |
|
|
|
|
[#45]
Originally Posted By psdan000: The sponge technique is the easiest and best way to camo in my opinion, here's a few I've done with Krylon. I usually lay down a multi color base coat...go with a couple standard colors then I will mix colors on a paper plate then sponge away (krylon FDE and Black make a cool grey color). Always love the results. https://live.staticflickr.com/65535/47961006667_19fda69d80_b.jpgIMG_1692 https://live.staticflickr.com/65535/47961047871_67480759e8_b.jpgIMG_0878 https://live.staticflickr.com/966/41660063112_b3d71161c4_b.jpgIMG_E3600 https://live.staticflickr.com/65535/47961022153_d7c36e2932_b.jpgIMG_0867 https://live.staticflickr.com/65535/47961022173_107bb94e03_b.jpgIMG_0866 https://live.staticflickr.com/2844/12491581165_a0f106c4c3_b.jpgIMG_4025 @psdan000 What colors did you use for the AR on the log? |
|
|
|
|
[#46]
Fall is upon us. Some photos of rifles in areas with leaves down would be appreciated, along with the paint colors you used. Examples that didn't blend so well are just as useful as those that did blend well for what it's worth!
Thanks |
|
|
|
TX, USA
|
[Last Edit: kenboyles72]
[#47]
Well, after a year of contemplating about painting my rifle, I pulled the trigger on it today. I had this thread bookmarked for when I decided to do a paint job. Didn't turn out to bad, may have to go back and darken it just a bit on the lighter areas. Rifle looks way better IRL than in the pic.

|
|
|
|
[#48]
If you go to WalMart this is what you are looking for. Sharpie for scale. I walked past them a couple times because I was looking for something bigger. Just an assumption on my part as I have never bought sponge before. Going to try an urban camo on my poor boy pistol project soon. |
|
|
|
MN, USA
|
[#49]
yOu FoRgOt HaLf Of It.

|
|
|
|
[#50]
Dad's new deer rifle, not bad for my first stab at sponge camo, maybe a little busy...
|
|
|
|
 Win a FREE Membership!
Sign up for the ARFCOM weekly newsletter and be entered to win a free ARFCOM membership. One new winner* is announced every week!
You will receive an email every Friday morning featuring the latest chatter from the hottest topics, breaking news surrounding legislation, as well as exclusive deals only available to ARFCOM email subscribers.

AR15.COM is the world's largest firearm community and is a gathering place for firearm enthusiasts of all types.
From hunters and military members, to competition shooters and general firearm enthusiasts, we welcome anyone who values and respects the way of the firearm.

Subscribe to our monthly Newsletter to receive firearm news, product discounts from your favorite Industry Partners, and more.
Copyright © 1996-2024 AR15.COM LLC. All Rights Reserved.
Any use of this content without express written consent is prohibited.
AR15.Com reserves the right to overwrite or replace any affiliate, commercial, or monetizable links, posted by users, with our own.


