FL, USA
|
Posted: 8/15/2010 7:54:56 PM EDT
I wanted to share my experience trying out Sponge Camo and found only a few references on some other forums so I thought I would post a how to.
Materials- Khaki, OD, and Oregano Rustoleum or Krylon Sponge-Walmart craft section buy the one that look like natural sponges. Gloves A likely victim I started by painting an old stock with a base coat of khaki. 
I then painted random but fairly evenly spaced stripes of OD over the khaki base coat. 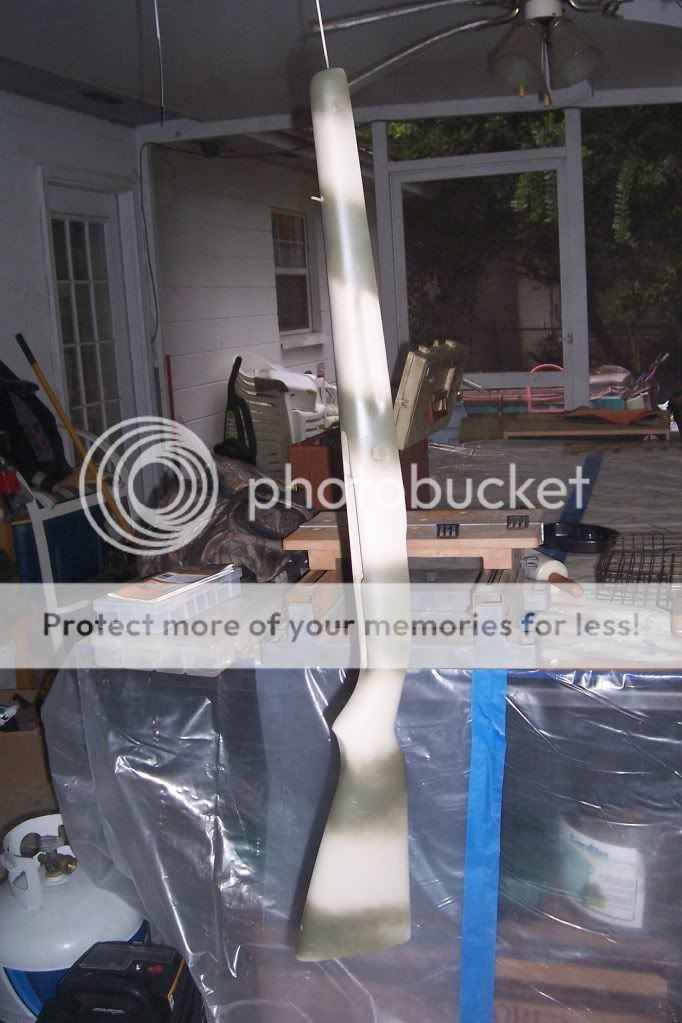
The next step was to spray some of the khaki onto a paper plate, then dip the sponge into the paint and dab the khaki paint onto the OD stripes. Dont go to heavy. 
The next step is to take the sponge then dip it in OD paint then dab the OD paint on the kahki. Again don't go to heavy. 
This is what you should have so far- not half bad but we're not done. The next step is to put some Oregano color over the whole thing again using the paper plate and the sponge. 
After the Oregano. 
I should have left well enough alone at this point but thought it needed some brown or dark tan so I started with a liitle Rustoleum Nutmeg and although its kind of close to the dark tan background in woodland Marpat I thought it was to light. I then followed up with some Rustoleum Chestnut-still to light. So––- I went with Rustoleum Flat Brown. It finished up a little busy but blends in well. 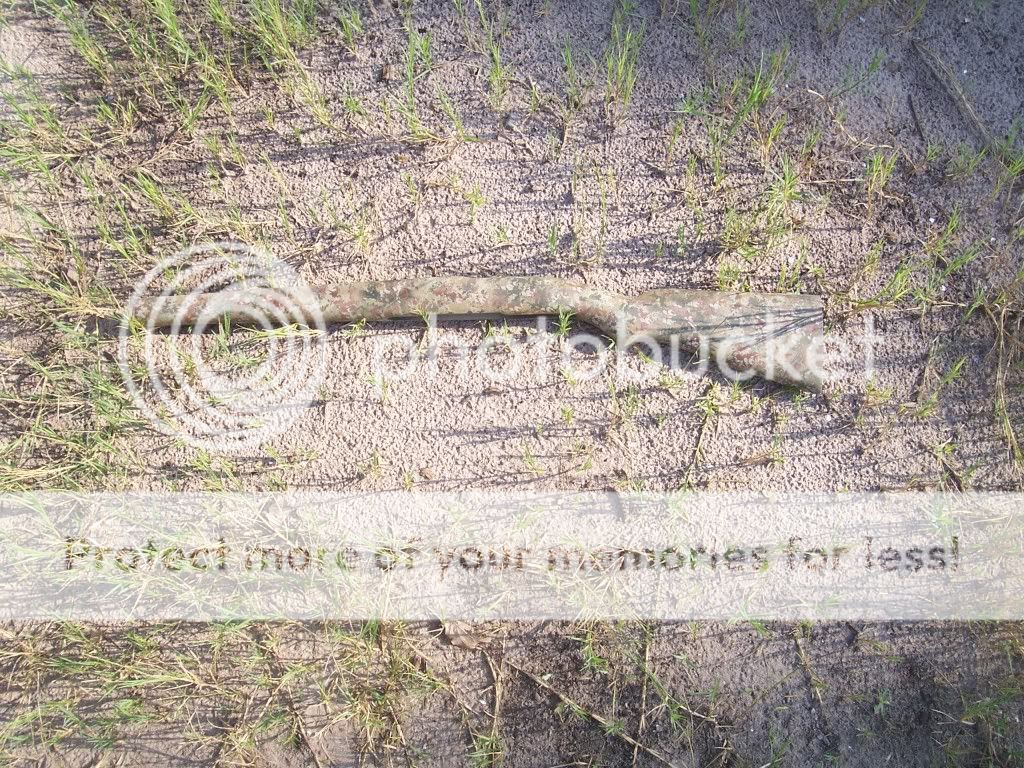

Not bad for a first attempt. I liked the overall effect and thought that for a rattle can job it looks outstanding. For my next attempt I decided to try an urban type camo consisting of Rustoleum light gray, medium and dark gray primer. The victim is my son's old airsoft gun. 
Here is the finished product. It seems that using three colors keeps the pattern a little more open and defined. 
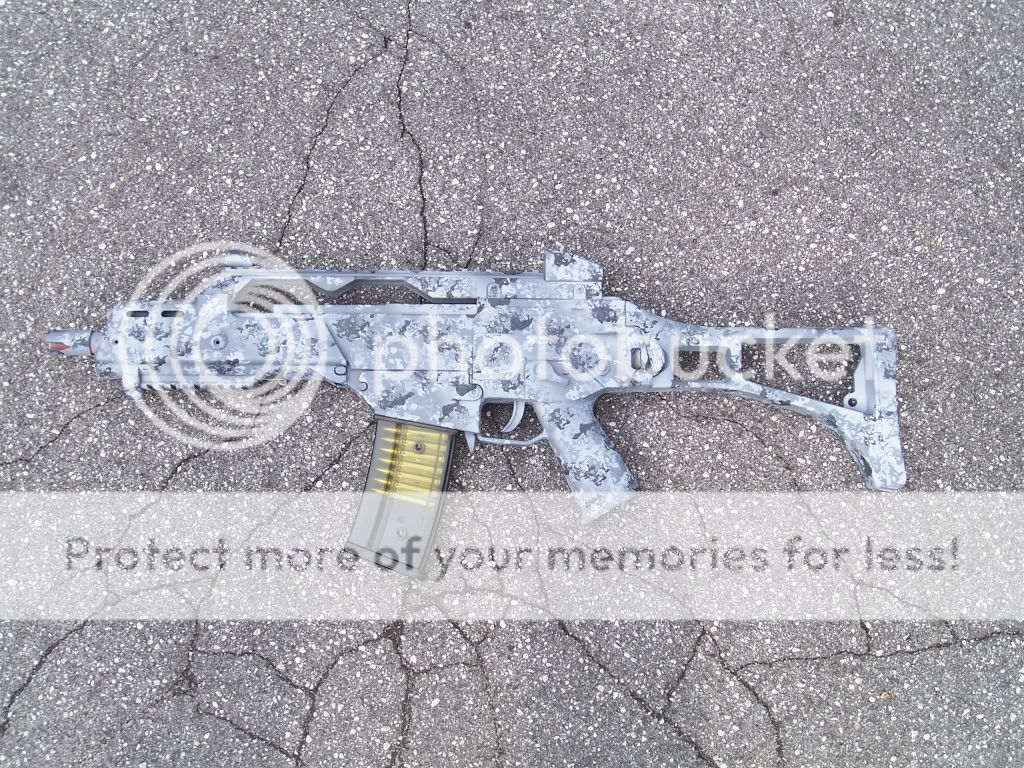
I was wondering if it would be possible to use this technique with Duracoat. I've painted with stencils and will continue to do so but this seems like alot of fun and it's not permanent. The next victim will be one of the ARs. |
|
|
AL, USA
|
[#1]
Started the camo today. I think it looks pretty decent. Ill do the receiver once I get the WGRS put on.

|
|
|
MO, USA
|
[#2]
My humble addition. Rustoleum camo colors, faux natural sponge, 1 hour or less to paint and pattern. Looks pretty good in person


|
|
|
AZ, USA
|
[Last Edit: xFatboyx]
[#3]
I gave it a shot today. I really like how it came out


|
|
|
AZ, USA
|
[#4]
Heres mine
|
|
|
AZ, USA
|
[#5]
Did my daughters 22 crickett. They (twins) will be 5 in June one of them can hit a 20oz bottle at 25 yards now that it has a red dot and bipod. After I painted a couple of my guns with the sponge camo she's been asking me to paint hers so did this a few hours ago today. I like it for what it is

|
|
|
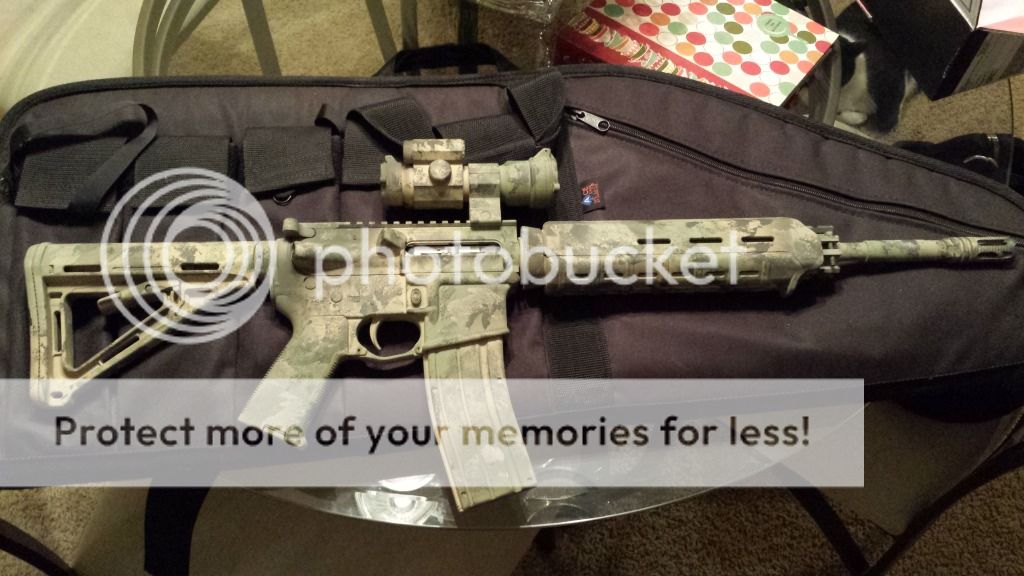
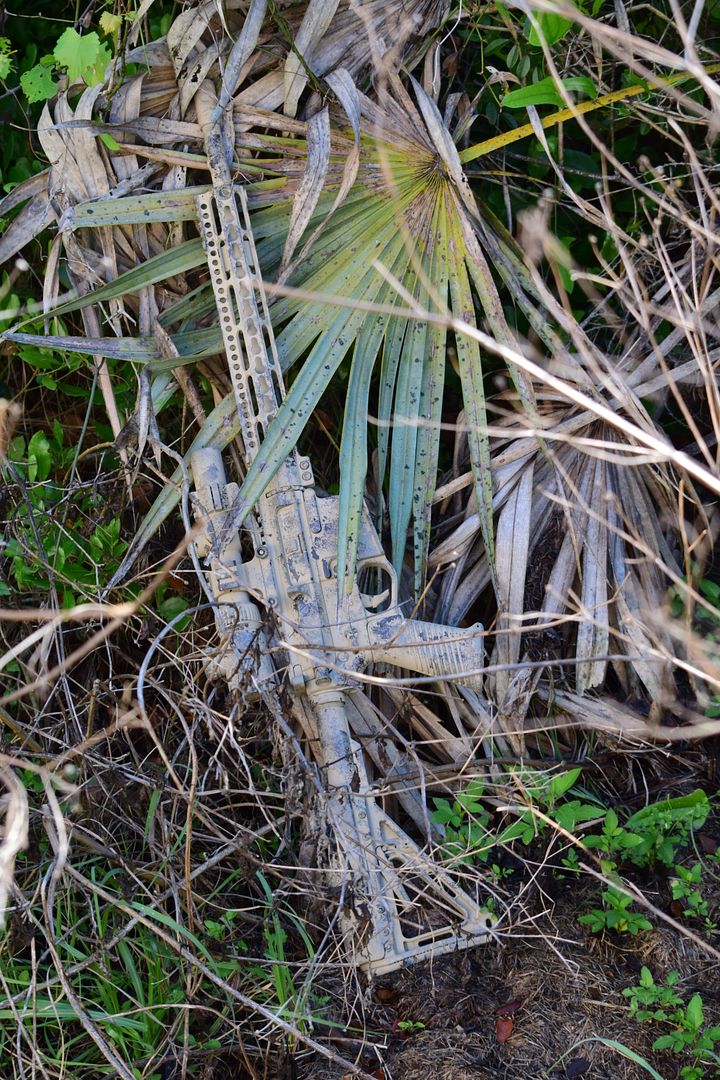
FL, USA
|
[#6]
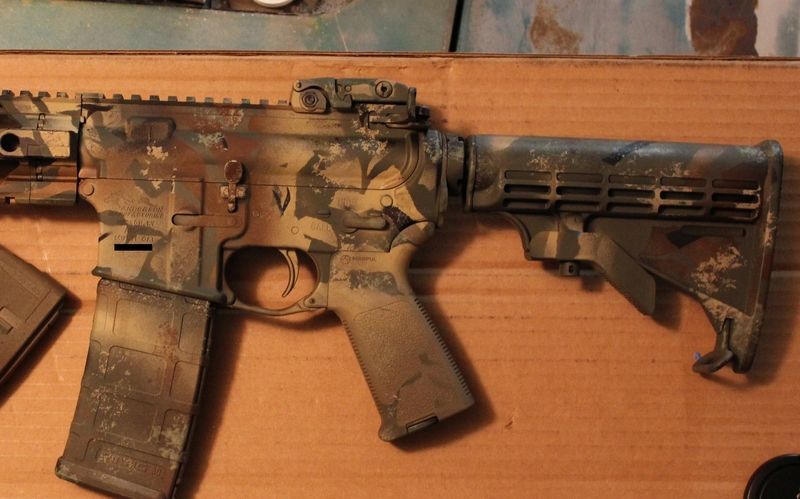
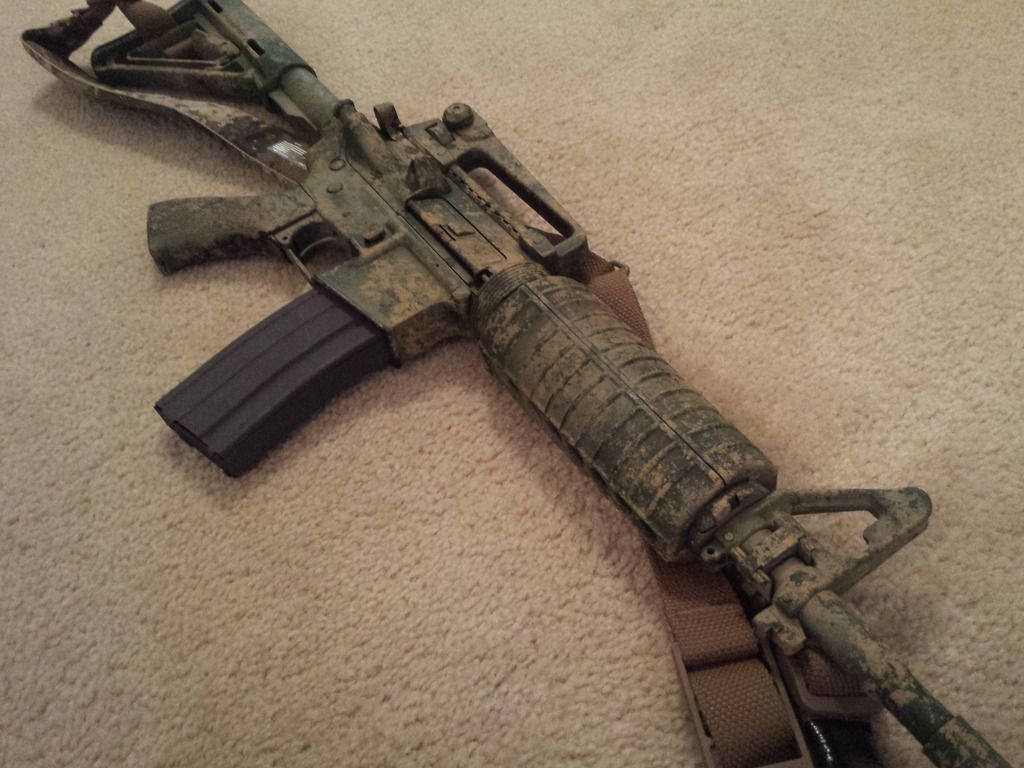
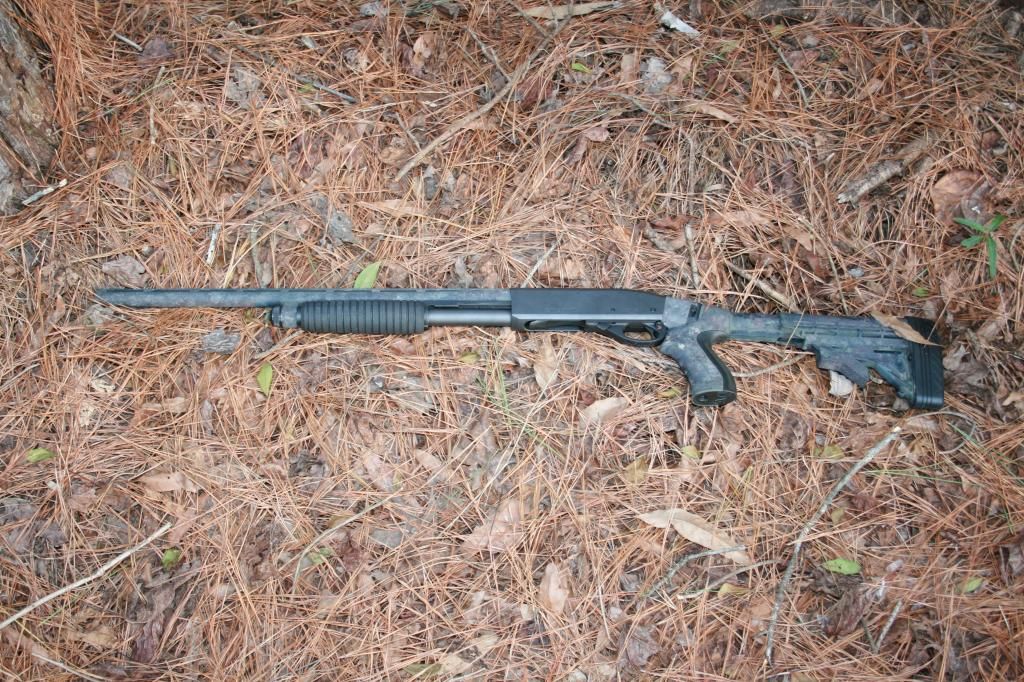
Thought I would revisit the Sponging Technique on one of my newest builds. This gun was put together to be my work Horse gun for Training Classes.
I recorded the process (Again), and posted it on Youtube. https://www.youtube.com/watch?v=2v7preGNY2w&feature=gp-n-o&google_comment_id=z130tfh55pfoitgte22yyfnwvuikgrflc I ended up adding Brown Stripes and then adding more Sponging (Pistured) after the video was done. 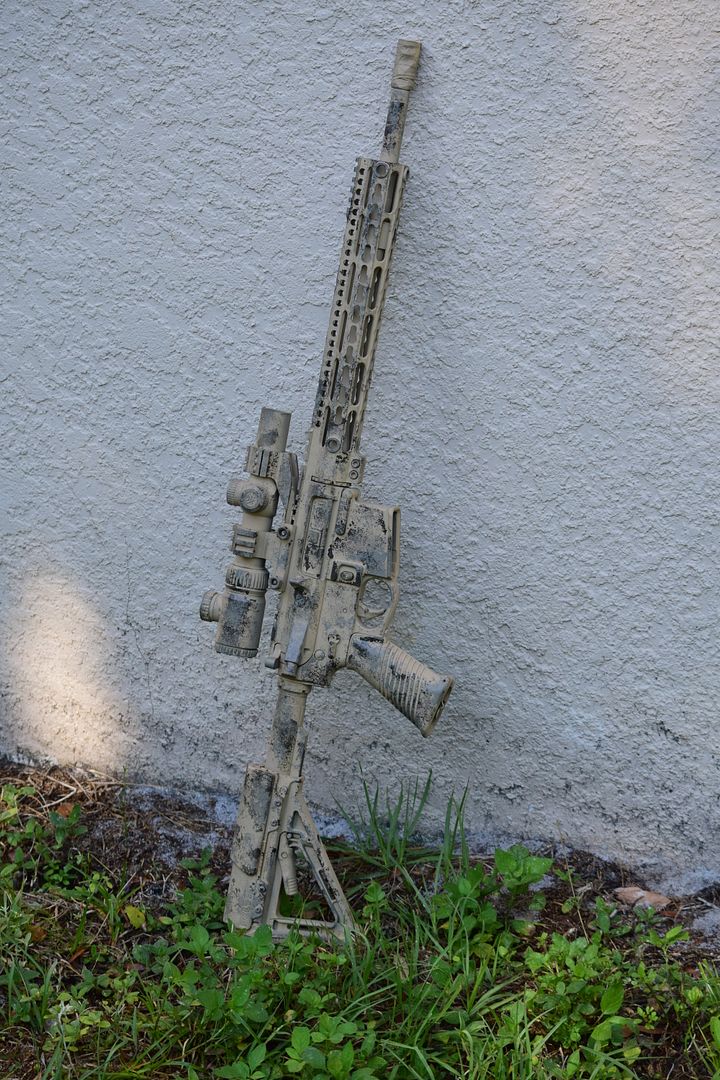


|
|
|
|
[Last Edit: backpacker21]
[#7]


|
|
|
|
|
[#8]
Looking for an urban camo scheme...what colors?
Saw a post way back that used three shades of grey....need to mix in any other colors to blend in an urban area? Thinking about a khaki base then use the shades of grey.. any ideas? Saw one pattern that used a bluish color too... Thanks, FH |
|
|
|
VA, USA
|
[#9]
I have 3 shades of gray primer I'm going to try. Just waiting to decide on what optics to run.
|
|
|
|
[#10]
I'm looking for for the same "urban" type finish as well. I'll be keeping an eye out for what you guys come up with.
|
|
|
|
|
[#11]
Newly approved SBR. I tried to get a color palette a bit lighter than multicam. It turned out pretty well, but I think it may have needed a bit more splotches.


|
|
|
|
|
[#12]
Soon to be SBR

|
|
|
|
ID, USA
|
[Last Edit: JPShooter]
[#13]
Originally Posted By jrn156:
I wanted to share my experience trying out Sponge Camo and found only a few references on some other forums so I thought I would post a how to. I just wanted to thank the OP for this post way back in 2010! I really liked the technique and just used it on my AR15 Grendel. 
|
|
|
OK, USA
|
[Last Edit: CuZin]
[#15]
 " /> " /> " />I recently bought a Remington 5R Mil-Spec in 308. It came with the HS Precision dark green stock. I put a KMW Loggerhead cheek rest on it and then tried my hand at sponge painting for the first time. Not great, but I like it better than it was. " />I recently bought a Remington 5R Mil-Spec in 308. It came with the HS Precision dark green stock. I put a KMW Loggerhead cheek rest on it and then tried my hand at sponge painting for the first time. Not great, but I like it better than it was. |
|
|
TX, USA
|
[#16]
|
|
|
ID, USA
|
[#17]
I like the pics everyone! I'm wanting to paint my AR so that it will sort of blend in in the forrest of North Idaho and the plains of eastern montana. Anyone recommend 3 colors that will do this? I know that I am talking 2 extreme differences. But I was thinking maybe a OD green ,black ,and some type of tan or brown
|
|
|
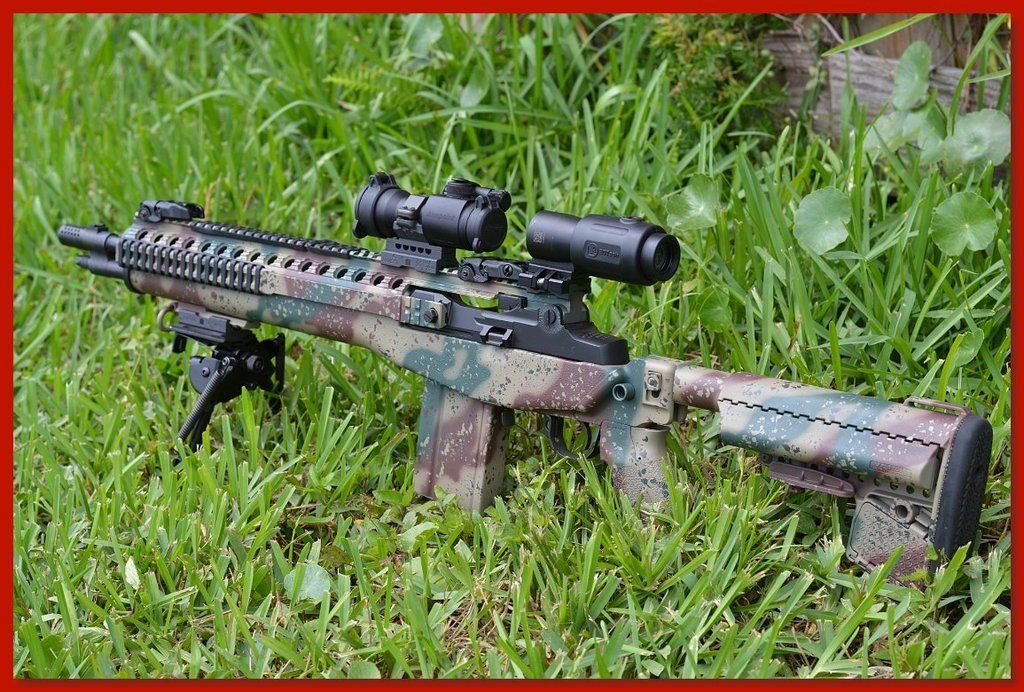
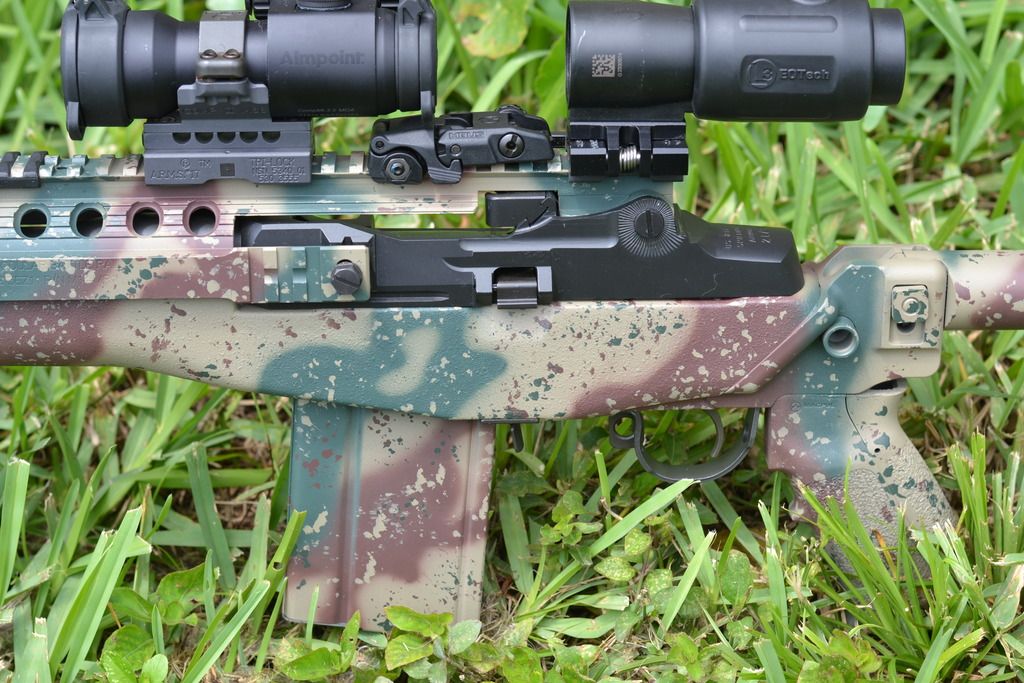
FL, USA
|
[Last Edit: DMills]
[#18]
Everything below was done with Duracoat -
SOCOM II was requested to be modeled after German Ambush - Probably one of my favorite projects I ever did 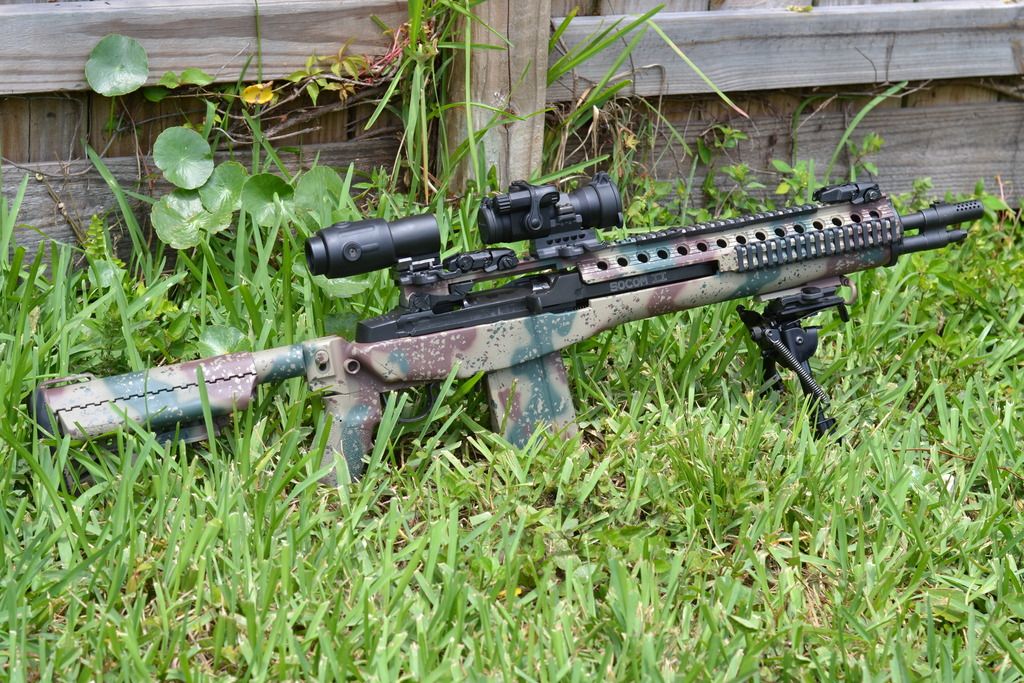
Accuracy International Stock and Scope were kind of an ATACS style: 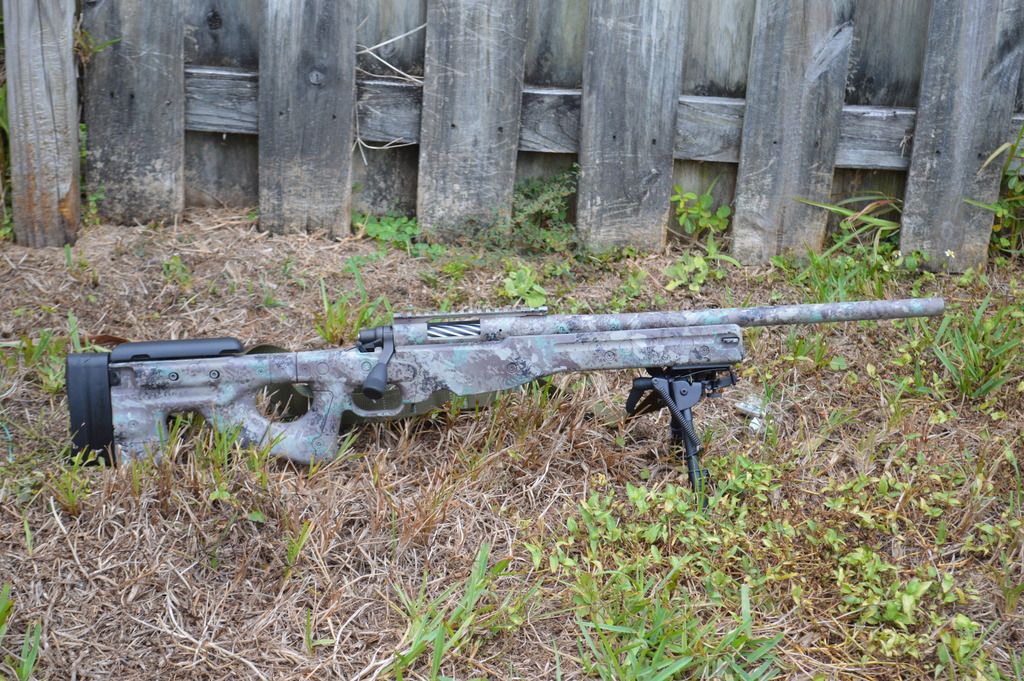

ZT and Spyderco in random sponge patterns: 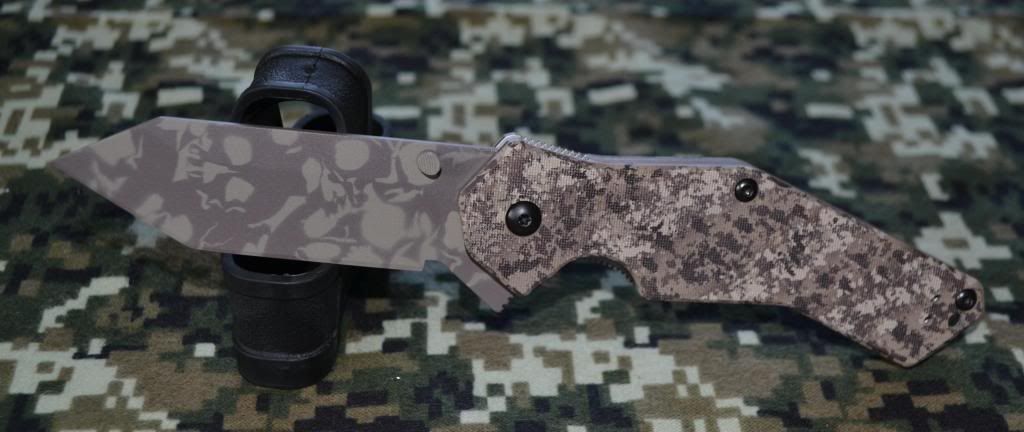

|
|
|
|
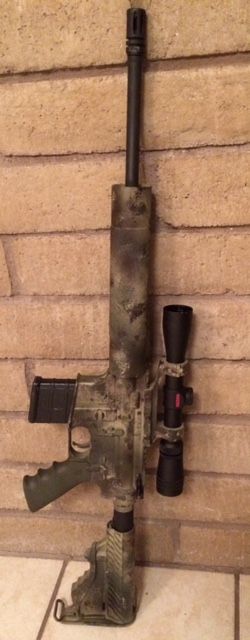
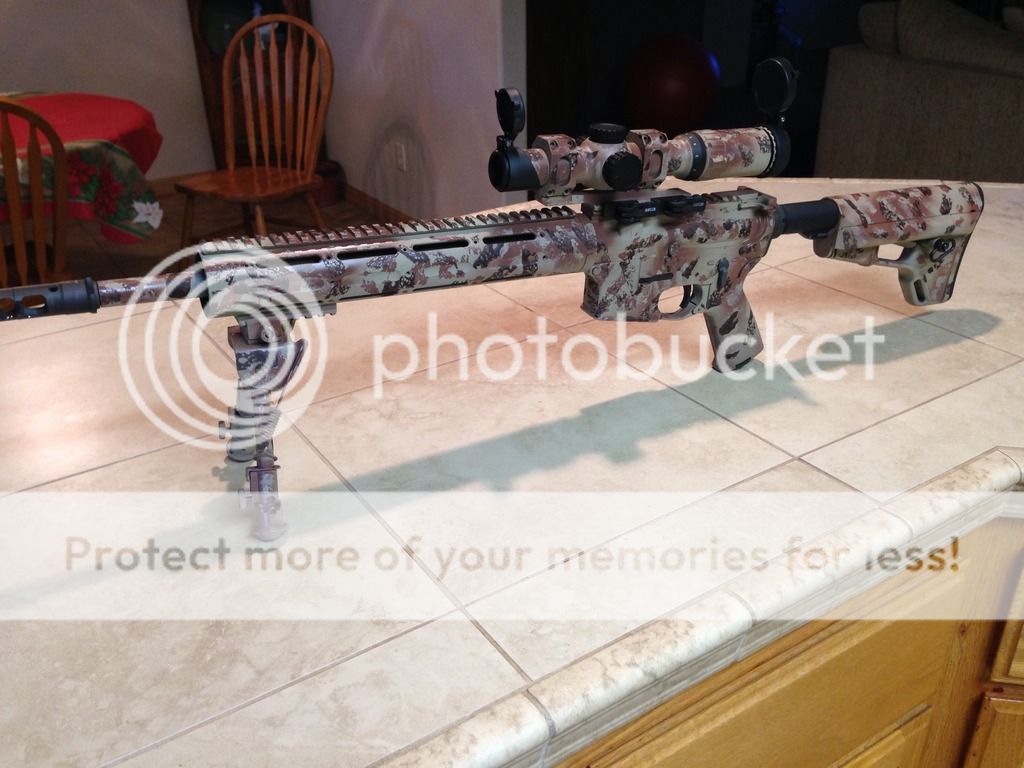
[Last Edit: North_42]
[#20]
Here's my first attempt at sponge camo. iPhone doesn't quite do it justice...

|
|
|
|
VA, USA
|
[#21]
Originally Posted By SuperV:
I used cotton balls for mine, but same concept: <a href="http://s1288.photobucket.com/user/SuperV13/media/IMG_20140719_185237051_zpsd5fa0688.jpg.html" target="_blank">http://i1288.photobucket.com/albums/b481/SuperV13/IMG_20140719_185237051_zpsd5fa0688.jpg</a> <a href="http://s1288.photobucket.com/user/SuperV13/media/IMG_20140719_185253002_zpsc42e52b2.jpg.html" target="_blank">http://i1288.photobucket.com/albums/b481/SuperV13/IMG_20140719_185253002_zpsc42e52b2.jpg</a> Really nice job here! |
|
|
|
[#22]


|
|
|
|
OH, USA
|
[#23]
Originally Posted By prcharlie:
<a href="http://s60.photobucket.com/user/prcharlie/media/20160315_115741-1_zpsyenlx5wz.jpg.html" target="_blank">http://i60.photobucket.com/albums/h5/prcharlie/20160315_115741-1_zpsyenlx5wz.jpg</a> <a href="http://s60.photobucket.com/user/prcharlie/media/20160315_151740_zps5lsk4c2o.jpg.html" target="_blank">http://i60.photobucket.com/albums/h5/prcharlie/20160315_151740_zps5lsk4c2o.jpg</a> <a href="http://s60.photobucket.com/user/prcharlie/media/20160315_154110_zpsh6brz19x.jpg.html" target="_blank">http://i60.photobucket.com/albums/h5/prcharlie/20160315_154110_zpsh6brz19x.jpg</a> Nice! What colors/paint brand did you use? |
|
|
|
[#24]
Originally Posted By RHR:
Nice! What colors/paint brand did you use? Originally Posted By RHR:
Originally Posted By prcharlie:
<a href="http://s60.photobucket.com/user/prcharlie/media/20160315_115741-1_zpsyenlx5wz.jpg.html" target="_blank">http://i60.photobucket.com/albums/h5/prcharlie/20160315_115741-1_zpsyenlx5wz.jpg</a> <a href="http://s60.photobucket.com/user/prcharlie/media/20160315_151740_zps5lsk4c2o.jpg.html" target="_blank">http://i60.photobucket.com/albums/h5/prcharlie/20160315_151740_zps5lsk4c2o.jpg</a> <a href="http://s60.photobucket.com/user/prcharlie/media/20160315_154110_zpsh6brz19x.jpg.html" target="_blank">http://i60.photobucket.com/albums/h5/prcharlie/20160315_154110_zpsh6brz19x.jpg</a> Nice! What colors/paint brand did you use? Thanks, Rusto camo forest base, brown and, Aervo coyote stripes with alternate sponging. |
|
|
|
|
[#25]

|
|
|
|
PA, USA
|
[#26]
What kind of texture is left on the rifle after doing this? It seems like it would have an uneven, crappy feeling texture.
|
|
|
CO, USA
|
[Last Edit: backpacker21]
[#27]

|
|
|
TX, USA
|
[Last Edit: R3L04D]
[#28]
I was inspired by this thread...
Used the "Camo" colors offered by Rustoleum; Green, Khaki, Earth Brown, & Black Started by spraying the entire stock green. Then used some natural sponge and put down a wide stripes of brown every few inches. Then khaki overlapping that a bit, but not so wide of strips. Then black...and so on. Also added some green in once I started covering up the stock with the other colors. I kept layering as I went, making my stripes thinner and thinner until I got to the point where I was doing individual 'dabs' here and there where needed. I wanted to keep the khaki to a minimum and wanted the darker colors more prevalent. All in all it probably took an hour or two, plus time to tape the stock. I'm very happy with it and the pictures don't do it justice. It's raining today but I'll try to get some pictures in natural light and it should look a lot nicer.     |
|
|
TX, USA
|
[#29]
Originally Posted By Phong: What kind of texture is left on the rifle after doing this? It seems like it would have an uneven, crappy feeling texture. |
|
|
|
[#30]
Originally Posted By JoeMal:
I was inspired by this thread... Used the "Camo" colors offered by Rustoleum; Green, Khaki, Earth Brown, & Black Outstanding work! |
|
|
|
TX, USA
|
[#31]
Originally Posted By FYRARMS: Outstanding work! Originally Posted By FYRARMS: Originally Posted By JoeMal: I was inspired by this thread... Used the "Camo" colors offered by Rustoleum; Green, Khaki, Earth Brown, & Black Outstanding work! |
|
|
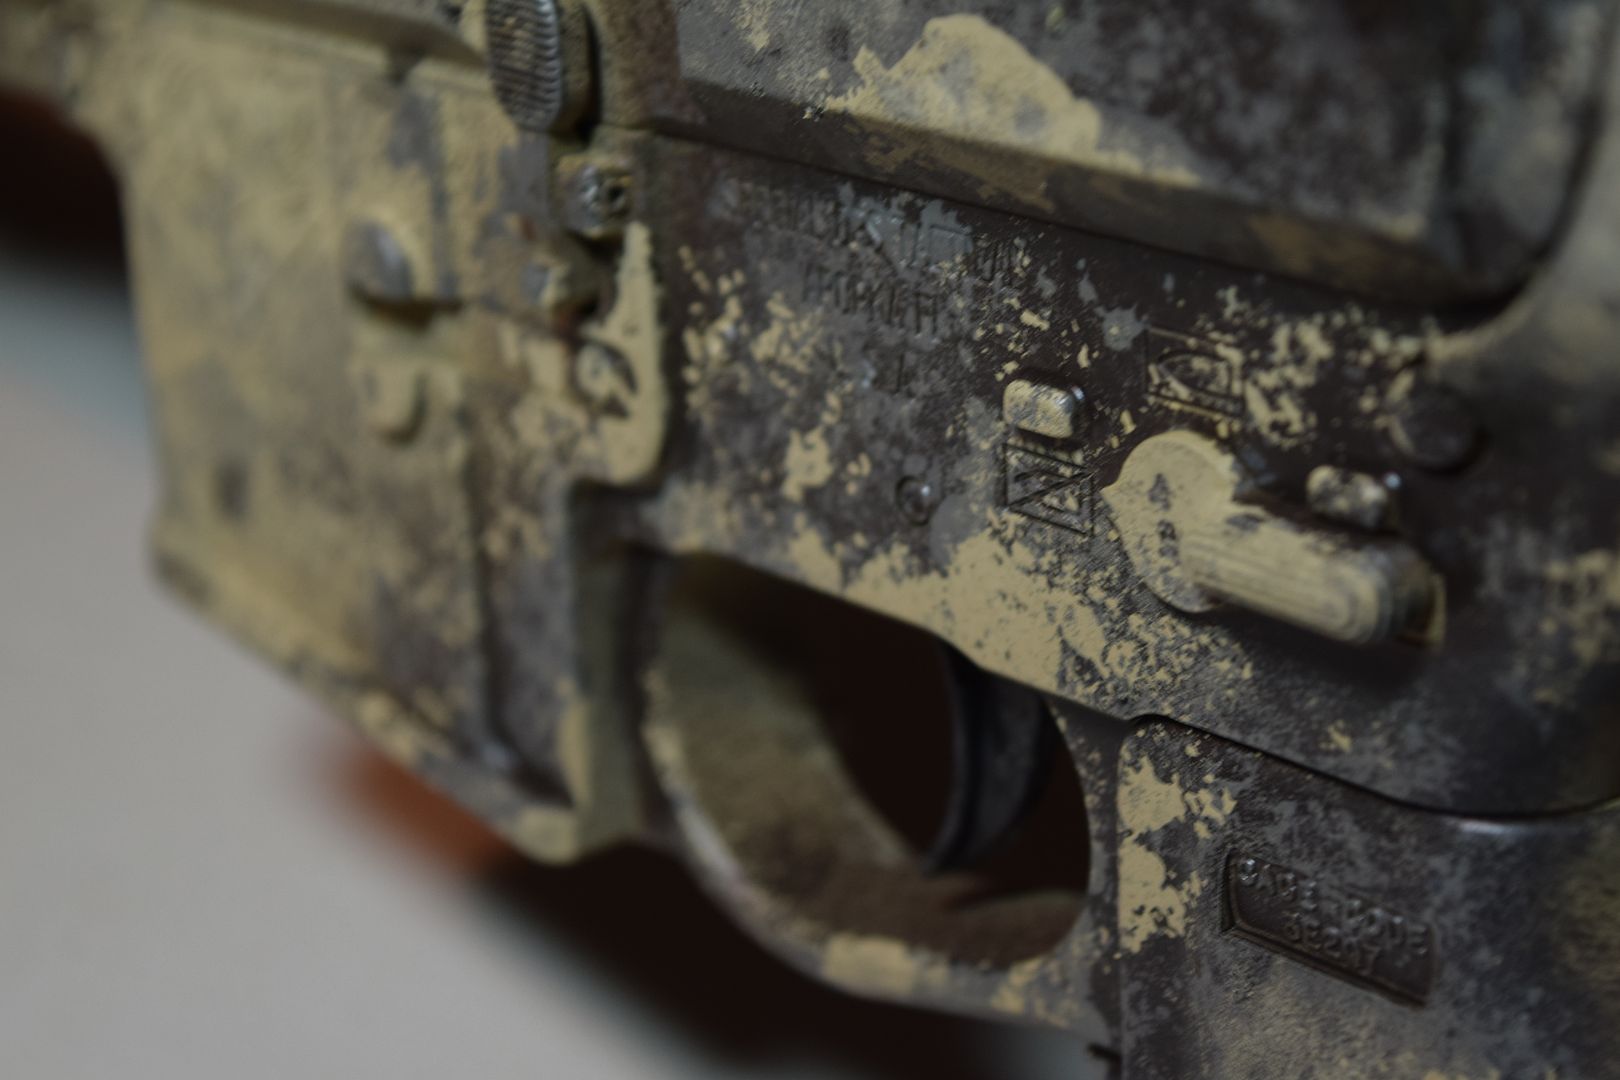
OH, USA
|
[#32]
Could somebody posts some pictures of the type of sponge they are using? May seem like a silly request, but I bet some types of sponges get better results than others. Picture worth a thousand words and all that.
|
|
|
TX, USA
|
[#33]
Originally Posted By TacCar: Could somebody posts some pictures of the type of sponge they are using? May seem like a silly request, but I bet some types of sponges get better results than others. Picture worth a thousand words and all that.  |
|
|
OH, USA
|
[#34]
Thanks for the pic. All I can find so far are the synthetic type sponges. I was thinking from looking at them, that they weren't going to give me enough of a broken up effect. If that makes sense. I'm going to hold out for natural sponge or much better faux sponge. It one of those thi n gs you see all over the place until you need it for something.
|
|
|
TX, USA
|
[#35]
Originally Posted By TacCar: Thanks for the pic. All I can find so far are the synthetic type sponges. I was thinking from looking at them, that they weren't going to give me enough of a broken up effect. If that makes sense. I'm going to hold out for natural sponge or much better faux sponge. It one of those thi n gs you see all over the place until you need it for something. |
|
|
|
[#36]
What color is used for the multicam almost white color?
|
|
|
|
TX, USA
|
[#37]
Originally Posted By Ex0331: What color is used for the multicam almost white color? |
|
|
|
[#38]
Originally Posted By JoeMal:
I was inspired by this thread... Used the "Camo" colors offered by Rustoleum; Green, Khaki, Earth Brown, & Black When I finally get around to painting my AR I'm going to copy the shit out of this 
Great job |
|
|
|
|
[#39]
Has anyone done this on larger scale surfaces? I built a plyometric box for my wife, and she would like it painted pink camo. I was looking to try something like this, but am worried that the pattern may end up looking too small on the box. Apologies if it has already been addressed in this thread. I thought I worked my way through the whole thing, but might have skipped a page or two.
|
|
|
|
FL, USA
|
[#40]
Originally Posted By armstrong001:
Has anyone done this on larger scale surfaces? I built a plyometric box for my wife, and she would like it painted pink camo. I was looking to try something like this, but am worried that the pattern may end up looking too small on the box. Apologies if it has already been addressed in this thread. I thought I worked my way through the whole thing, but might have skipped a page or two. Not sure what a plyometric box is, but if its just a big box, get a sponge roller cover at your local paint store, lowes, home depot.... Pressure determines size of print. |
|
|
|
[#42]
^MGS?
|
|
|
|
TX, USA
|
[#43]
Originally Posted By armstrong001: I went ahead and tried it. She said she likes it, but worst case I can always paint over it and start again. I'm not completely happy with it, but it's ok for a first try: White base coat http://img.photobucket.com/albums/v326/armstrong001/Mobile%20Uploads/20160529_115735.jpg Light pink 2nd layer http://img.photobucket.com/albums/v326/armstrong001/Mobile%20Uploads/20160529_152330.jpg First pass with sponges http://img.photobucket.com/albums/v326/armstrong001/Mobile%20Uploads/20160529_153220.jpg Second pass http://img.photobucket.com/albums/v326/armstrong001/Mobile%20Uploads/20160529_154002.jpg Adding in a darker pink http://img.photobucket.com/albums/v326/armstrong001/Mobile%20Uploads/20160529_154432.jpg Adding in grey. I also went back and added some more to the other colors, because it looked too much like polka dots http://img.photobucket.com/albums/v326/armstrong001/Mobile%20Uploads/20160529_160157.jpg I'm not completely happy with it, so if anyone has any ideas on what I could do to improve, I would appreciate the feedback. Apologies if this is the wrong place to be discussing something other than painting firearms. I'll remove it if it doesn't fit here. Originally Posted By armstrong001: Originally Posted By Kinganuthin: Originally Posted By armstrong001: Has anyone done this on larger scale surfaces? I built a plyometric box for my wife, and she would like it painted pink camo. I was looking to try something like this, but am worried that the pattern may end up looking too small on the box. Apologies if it has already been addressed in this thread. I thought I worked my way through the whole thing, but might have skipped a page or two. Not sure what a plyometric box is, but if its just a big box, get a sponge roller cover at your local paint store, lowes, home depot.... Pressure determines size of print. I went ahead and tried it. She said she likes it, but worst case I can always paint over it and start again. I'm not completely happy with it, but it's ok for a first try: White base coat http://img.photobucket.com/albums/v326/armstrong001/Mobile%20Uploads/20160529_115735.jpg Light pink 2nd layer http://img.photobucket.com/albums/v326/armstrong001/Mobile%20Uploads/20160529_152330.jpg First pass with sponges http://img.photobucket.com/albums/v326/armstrong001/Mobile%20Uploads/20160529_153220.jpg Second pass http://img.photobucket.com/albums/v326/armstrong001/Mobile%20Uploads/20160529_154002.jpg Adding in a darker pink http://img.photobucket.com/albums/v326/armstrong001/Mobile%20Uploads/20160529_154432.jpg Adding in grey. I also went back and added some more to the other colors, because it looked too much like polka dots http://img.photobucket.com/albums/v326/armstrong001/Mobile%20Uploads/20160529_160157.jpg I'm not completely happy with it, so if anyone has any ideas on what I could do to improve, I would appreciate the feedback. Apologies if this is the wrong place to be discussing something other than painting firearms. I'll remove it if it doesn't fit here. I also did my sponging in diagonal lines instead of random |
|
|
|
[#44]
I just used a car wash sponge from the local farm store.
I just blot some paint on when it starts to wear off. 
|
|
|
|
NY, USA
|
[#45]
I tried this on some pmags but when you touch them it scuffs up the paint leaving a white-ish residue. Am I suppose to put a coat of clear over it to stop this? Or is it just the way it is?
I used Rustoleum Camo spray paint |
|
|
TX, USA
|
[#46]
Originally Posted By GTN: I tried this on some pmags but when you touch them it scuffs up the paint leaving a white-ish residue. Am I suppose to put a coat of clear over it to stop this? Or is it just the way it is? I used Rustoleum Camo spray paint |
|
|
FL, USA
|
[#47]
Originally Posted By GTN:
I tried this on some pmags but when you touch them it scuffs up the paint leaving a white-ish residue. Am I suppose to put a coat of clear over it to stop this? Or is it just the way it is? I used Rustoleum Camo spray paint Did you use the spong from te kitchen that has soap in it? |
|
|
NY, USA
|
[#48]
Originally Posted By Kinganuthin:
Did you use the spong from te kitchen that has soap in it? Originally Posted By Kinganuthin:
Originally Posted By GTN:
I tried this on some pmags but when you touch them it scuffs up the paint leaving a white-ish residue. Am I suppose to put a coat of clear over it to stop this? Or is it just the way it is? I used Rustoleum Camo spray paint Did you use the spong from te kitchen that has soap in it? Ha no. Actually they were sprayed |
|
|
SC, USA
|
[#49]
|
|
|
MT, USA
|
[#50]
thread inspired me to change up the original paintjob i was working on to this. Did it all with duracoat so it should last much better than the krylon jobs.


|
|
|
 Win a FREE Membership!
Sign up for the ARFCOM weekly newsletter and be entered to win a free ARFCOM membership. One new winner* is announced every week!
You will receive an email every Friday morning featuring the latest chatter from the hottest topics, breaking news surrounding legislation, as well as exclusive deals only available to ARFCOM email subscribers.

AR15.COM is the world's largest firearm community and is a gathering place for firearm enthusiasts of all types.
From hunters and military members, to competition shooters and general firearm enthusiasts, we welcome anyone who values and respects the way of the firearm.

Subscribe to our monthly Newsletter to receive firearm news, product discounts from your favorite Industry Partners, and more.
Copyright © 1996-2024 AR15.COM LLC. All Rights Reserved.
Any use of this content without express written consent is prohibited.
AR15.Com reserves the right to overwrite or replace any affiliate, commercial, or monetizable links, posted by users, with our own.