|
Posted: 2/24/2017 7:01:38 PM EDT
Basic 7" x 2" plate carrier shoulder pads (for the newbies)
Materials for ONE pad: 3d Spacer Mesh (1/8") - 3.5" x 7" Cordura (500D) - 12" x 7" Foam (1/4") - 2" x 5.75" Hook (1") - 7" Loop (1") - 7" Binding tape (1") - ~8" [x2] 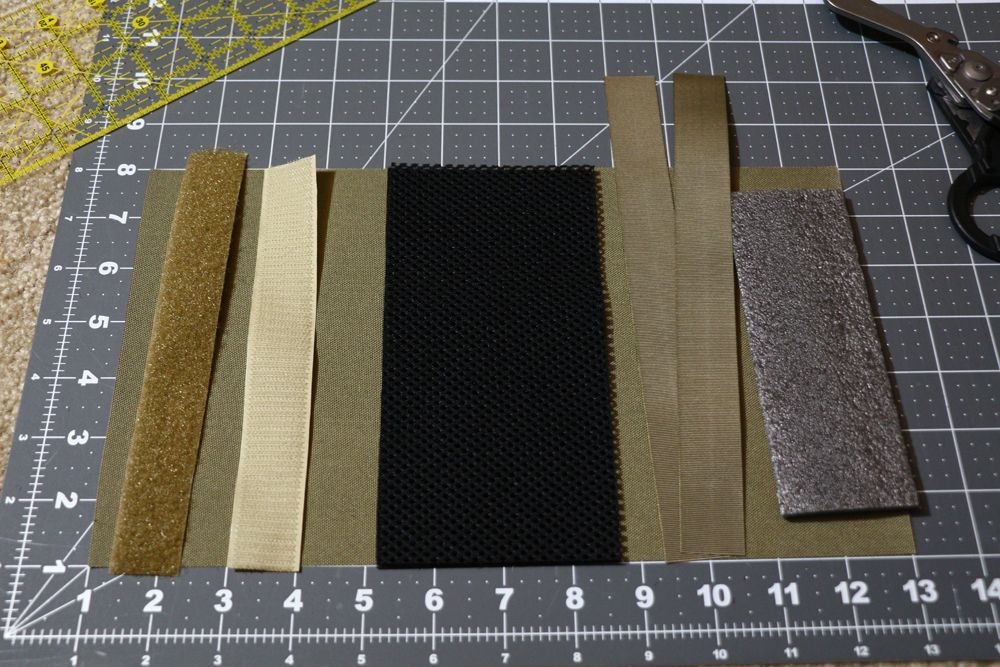
Place the "right sides" together; stitch the 7" sides together with a 0.5" seam allowance (the standard for this tutorial) 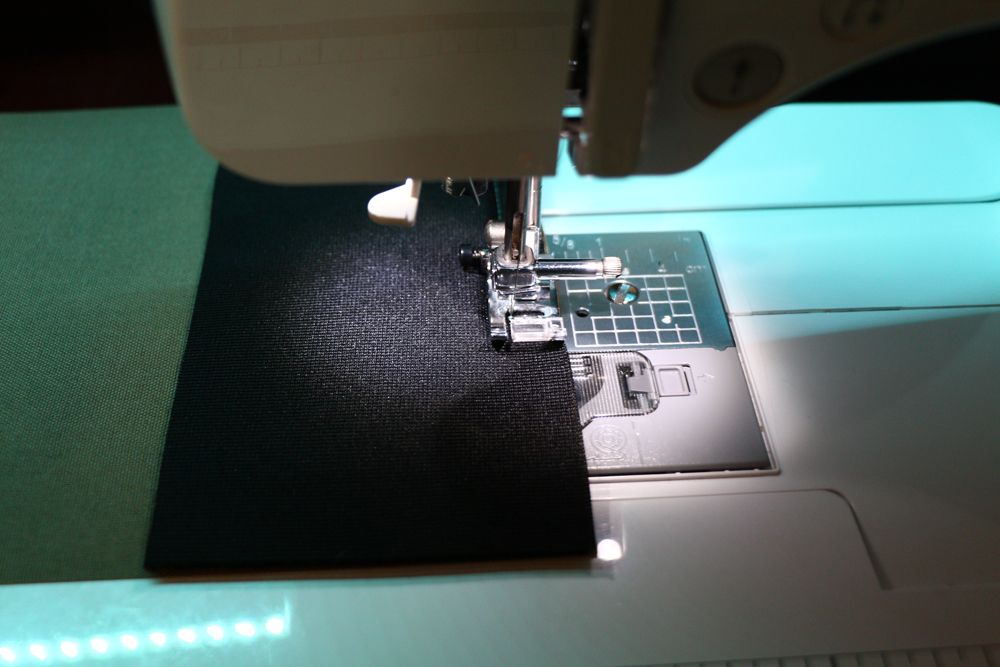
Stitch the other side 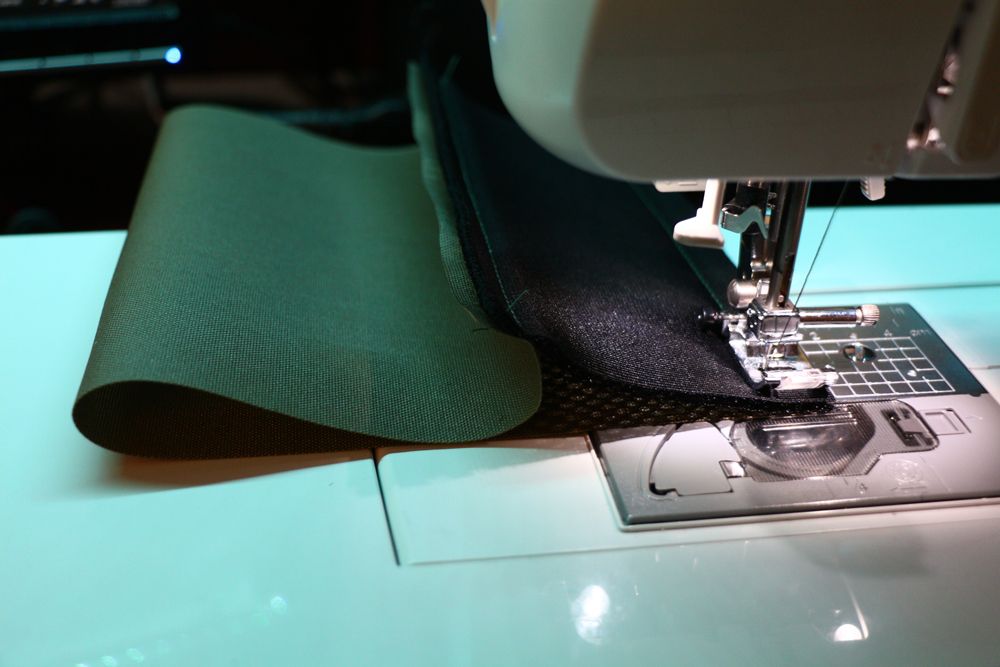
Fold inside-out; center the Cordura wings so they are even on both sides; stitch down the sides (about 0.25" from the edge of spacer mesh) 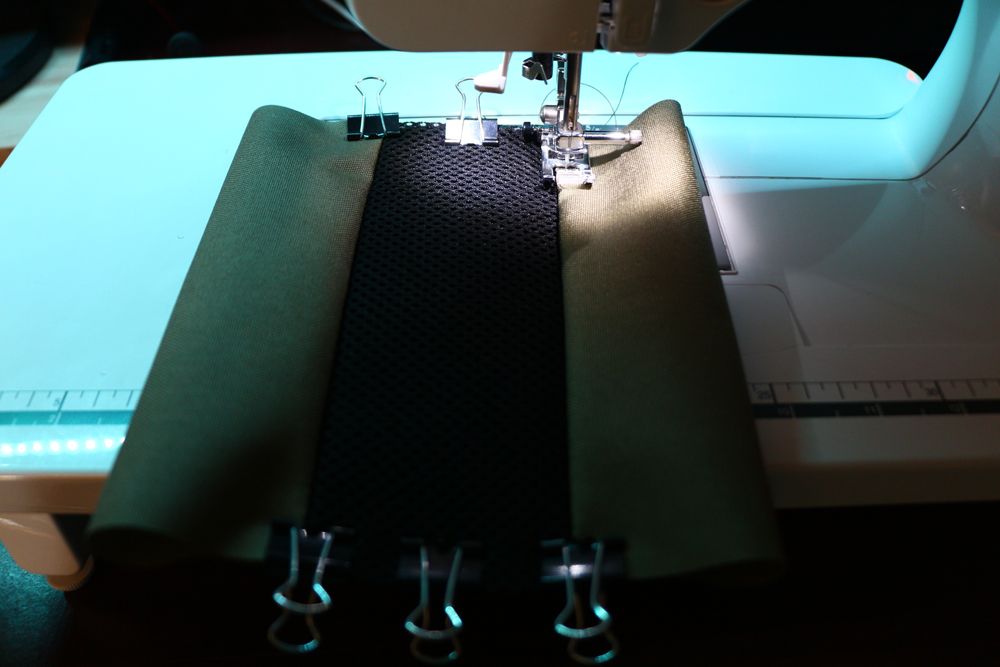
If you're poor like me and don't have the capability to bind on your sewing machine, break out the iron; fold the binding tape in half and iron it down; use a weight to hold it down while it cools 
Bind one side (leave about 0.75" of binding tape as a tail on each side; fold it over and sew it down on your second pass) 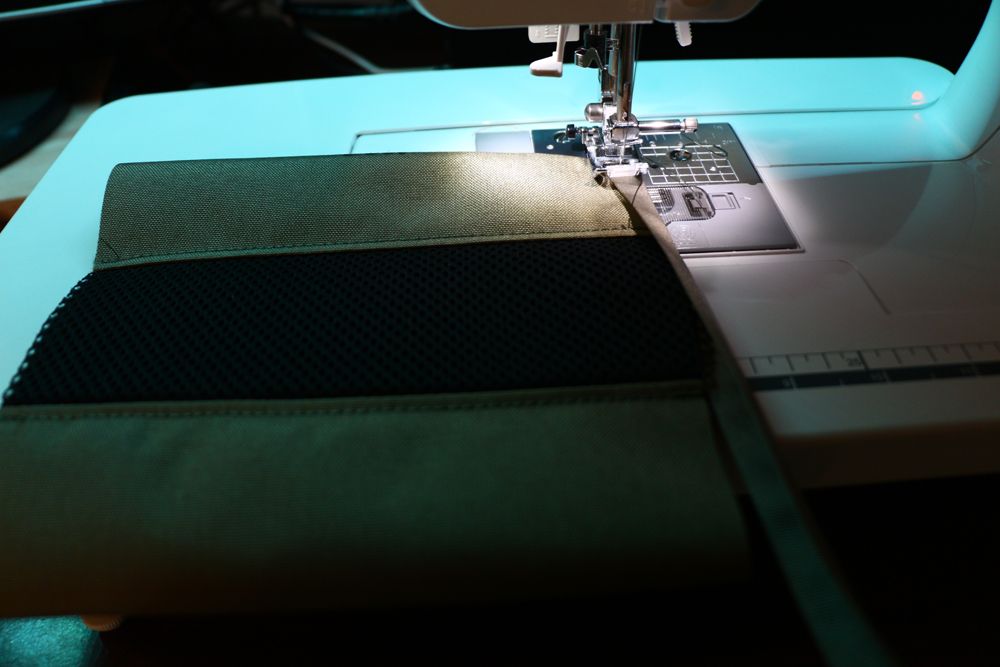
Shove the foam all the way to the bottom of the sleeve; bind the remaining open side 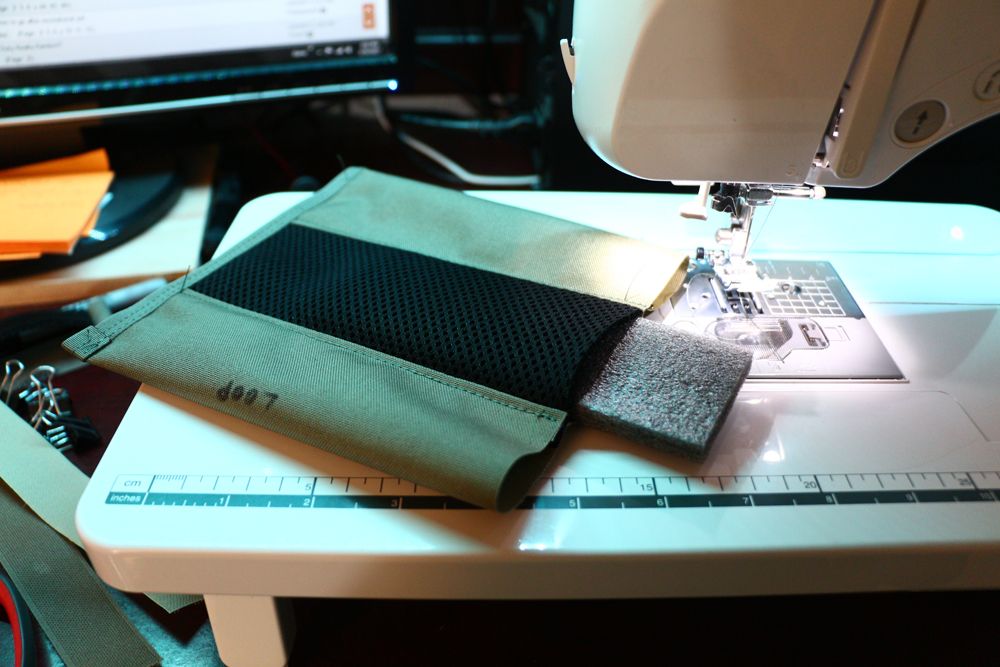
Here's how it looks so far (notice how I folded the binding tails; they will not be visible once I sew the Velco) (Also note how I wrote where the hook and loop goes; it sucks sewing it onto the incorrect side) 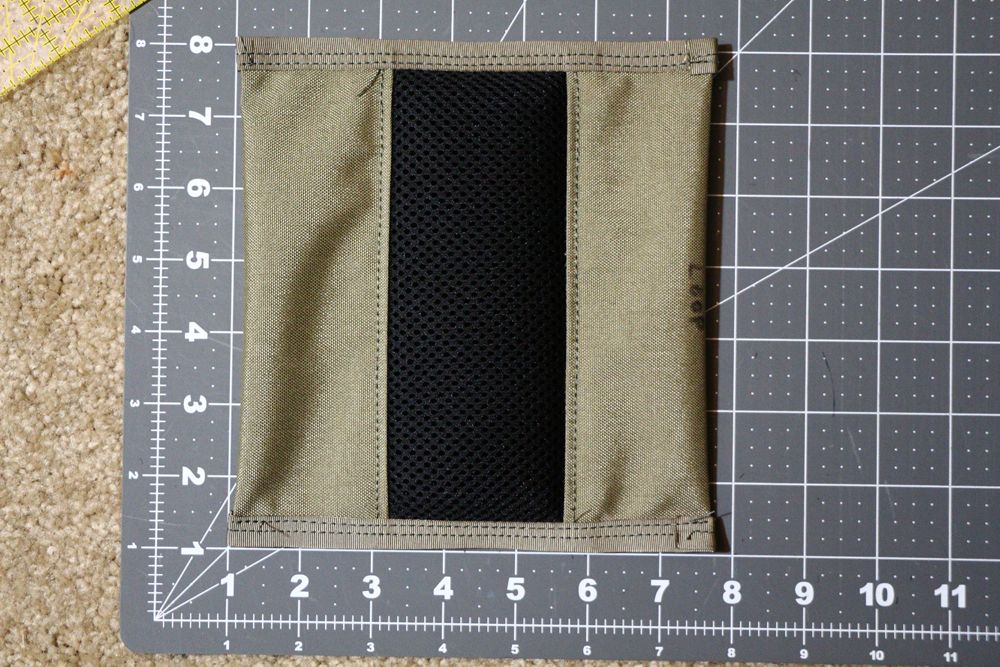
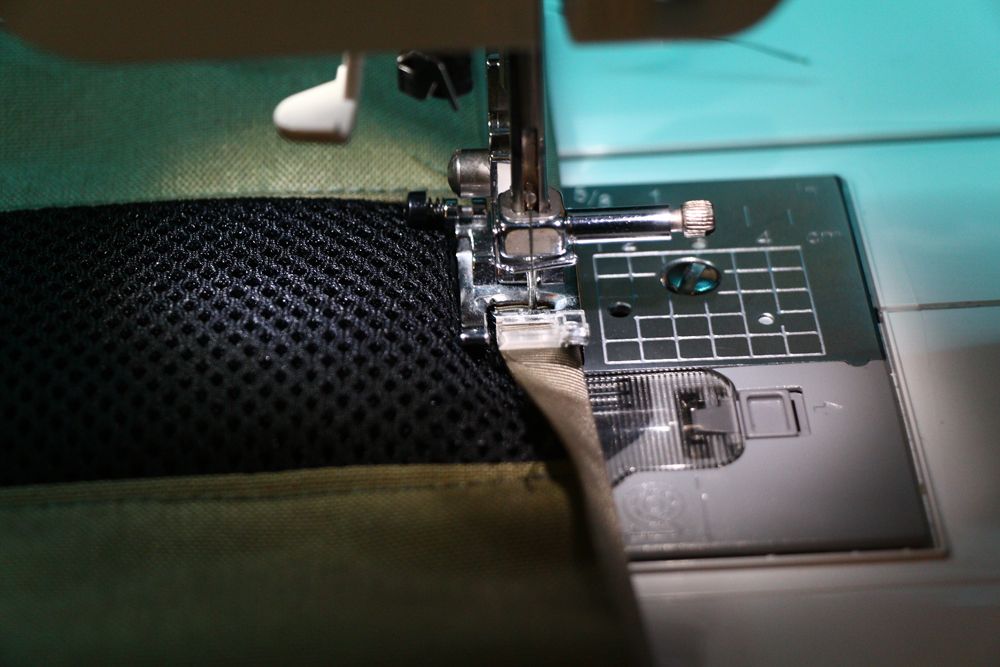
Stitch the hook (rough side) and loop (soft side) 
Repeat all of the above for the second shoulder pad; here are the finished products; some variations / improvements are noted in the picture 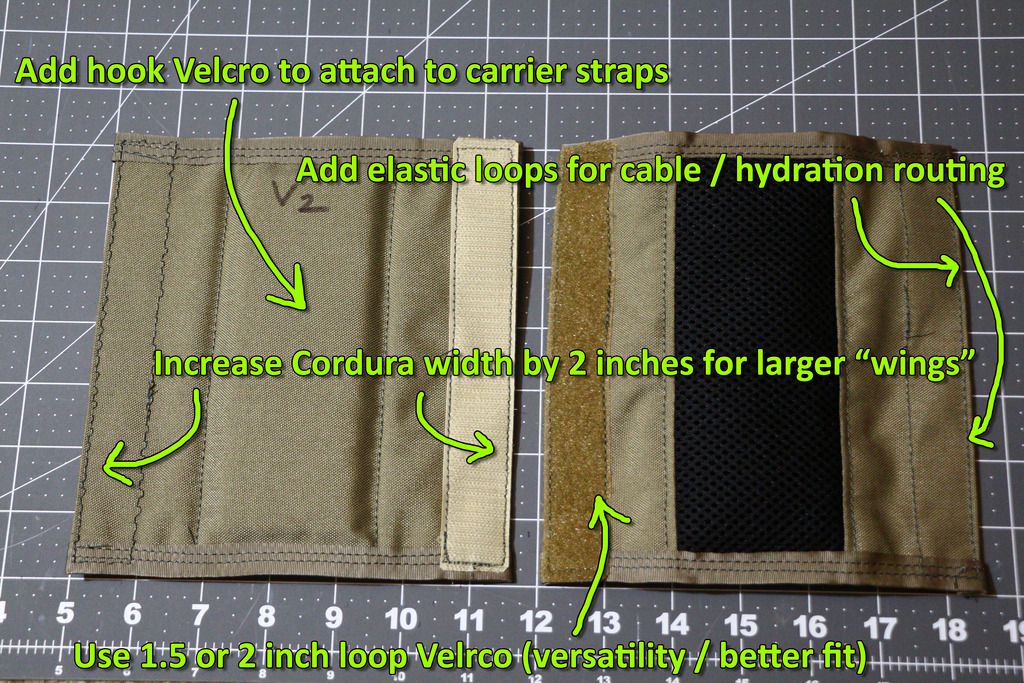
Carefully melt the strings; don't burn through your stitching 
All done (assuming you got it right on the first go)! 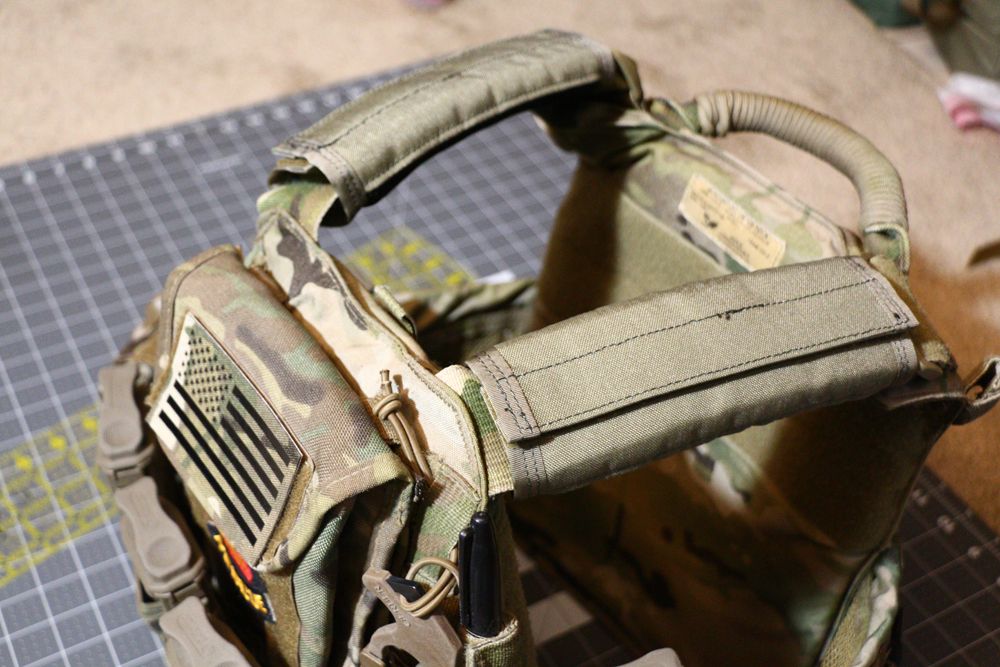
|
|
|
|
[#1]
Thumbs up, try increasing tension when doing hook and loop. I had to increase the bobbin tension on my home machine to get decent looking stitches.
Where did you get the mesh? |
|
|
|
[#2]
Quoted:
Thumbs up, try increasing tension when doing hook and loop. I had to increase the bobbin tension on my home machine to get decent looking stitches. Where did you get the mesh? Thanks. I had tension set on 8 (out of 9). It's usually fine but it was acting up on that pad. I think the bobbin was to blame. It seemed loose and I think the thread was coiled incorrectly. I switched it out after I saw that and it was fine again. It really annoys me that it did that. I might make another pad an throw that one in the trash. 
3d spacer mesh |
|
|
|
[#3]
Thanks for the link.
|
|
|
|
[#4]
thanks for posting, seems fairly straight forward
|
|
|
 Win a FREE Membership!
Sign up for the ARFCOM weekly newsletter and be entered to win a free ARFCOM membership. One new winner* is announced every week!
You will receive an email every Friday morning featuring the latest chatter from the hottest topics, breaking news surrounding legislation, as well as exclusive deals only available to ARFCOM email subscribers.

AR15.COM is the world's largest firearm community and is a gathering place for firearm enthusiasts of all types.
From hunters and military members, to competition shooters and general firearm enthusiasts, we welcome anyone who values and respects the way of the firearm.

Subscribe to our monthly Newsletter to receive firearm news, product discounts from your favorite Industry Partners, and more.
Copyright © 1996-2024 AR15.COM LLC. All Rights Reserved.
Any use of this content without express written consent is prohibited.
AR15.Com reserves the right to overwrite or replace any affiliate, commercial, or monetizable links, posted by users, with our own.


