|
Posted: 2/3/2011 10:19:08 AM EDT
I saw a thread on KTOG about modifying MOE handguards to fit the PLR, and got inspired. Here is the picture from that thread:
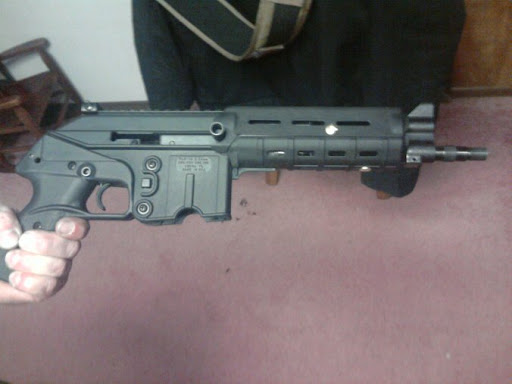 Original thread with video: http://www.ktog.org/cgi-bin/yabb2/YaBB.pl?num=1295087652 The same guys also fit Midlength MOE HGs.  I used some Carbine HGs facing the standard direction, and got everything fit well (it also wrapped around the gas block instead of sitting behind it and left the "hand stop"). I still need to figure out how I want to fasten them since I didn't make mine to slide on the rails that are molded into the gun. Any suggestions? I think I'm headed toward using screws that go through both halves and the heat shield. |
|
|
|
[#1]
Looks good I would like to put some midlength on a SU16
|
|
|
|
[#2]
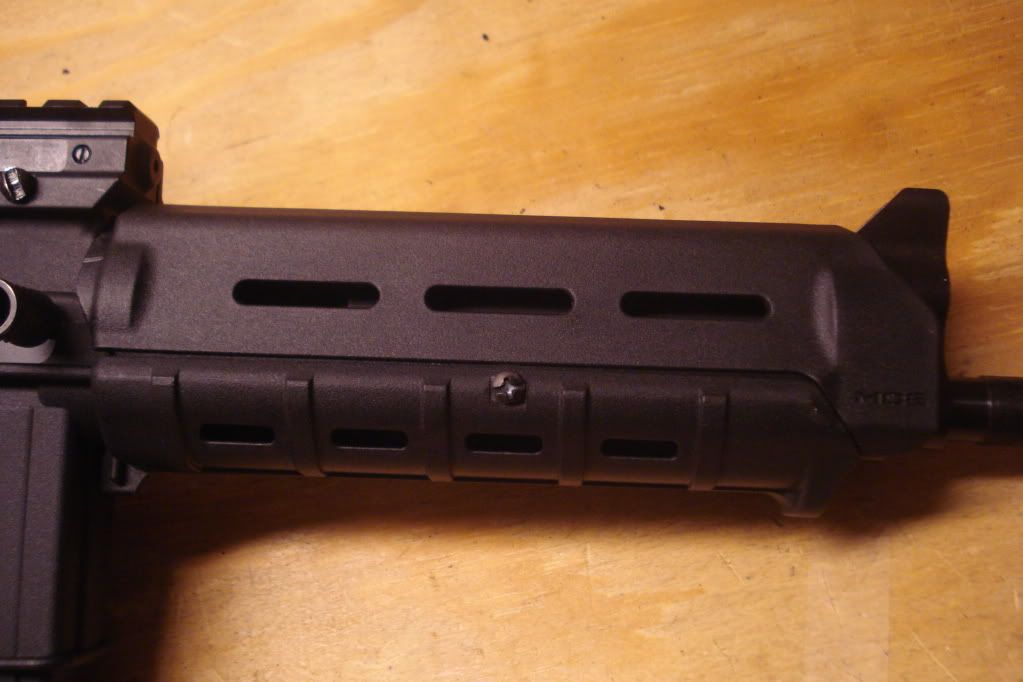
I got it finished. It was easy enough to do with hand tools (the dremmel kept melting the plastic and had a high margin for error). I ended up using small screws to hold it all together.
  |
|
|
|
[#3]
Looks great. The only thing I would is to replace the current screw with allen screw for more 'Professional' look.
|
|
|
|
[#4]
Quoted: Looks great. The only thing I would is to replace the current screw with allen screw for more 'Professional' look. I stuck with the phillips because it matched the other screws on the gun. Insert your own joke about "'Professional' Looks" and "KelTec" here. I do wish I could get the bottom of the screw face to take cold blue. I couldn't sand it to make it take. |
|
|
|
[#5]
Got some more Pics? (of the ends, from the front, top, etc)
On a 1-10 Scale, How difficult was it to cut to fit? |
|
|
|
[#6]
Quoted: Got some more Pics? (of the ends, from the front, top, etc) On a 1-10 Scale, How difficult was it to cut to fit? I'll take more for you. Difficulty: 2. It's quite straightforward. 2 notches in the front. Remove some material, then minor fitting on top and bottom in the back. All it takes is patience and double-checking of what you're about to do. It took about 1.5 hrs. with hand tools. |
|
|
|
[#7]
Quoted:
Quoted:
Got some more Pics? (of the ends, from the front, top, etc) On a 1-10 Scale, How difficult was it to cut to fit? I'll take more for you. Difficulty: 2. It's quite straightforward. 2 notches in the front. Remove some material, then minor fitting on top and bottom in the back. All it takes is patience and double-checking of what you're about to do. It took about 1.5 hrs. with hand tools. I appreciate that. I am about to pull the trigger on a Red Lion hand guard, but the MOE looks really smooth and light weight.. for 1/4 the price. |
|
|
|
[#8]
Top, rear
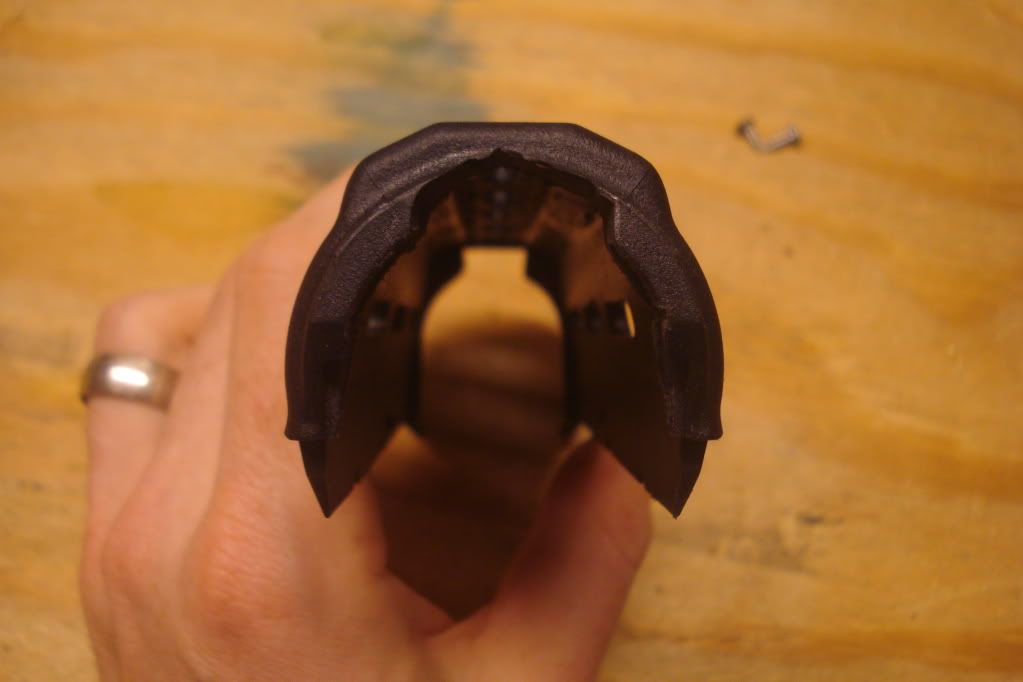 Top, rear - alternate view 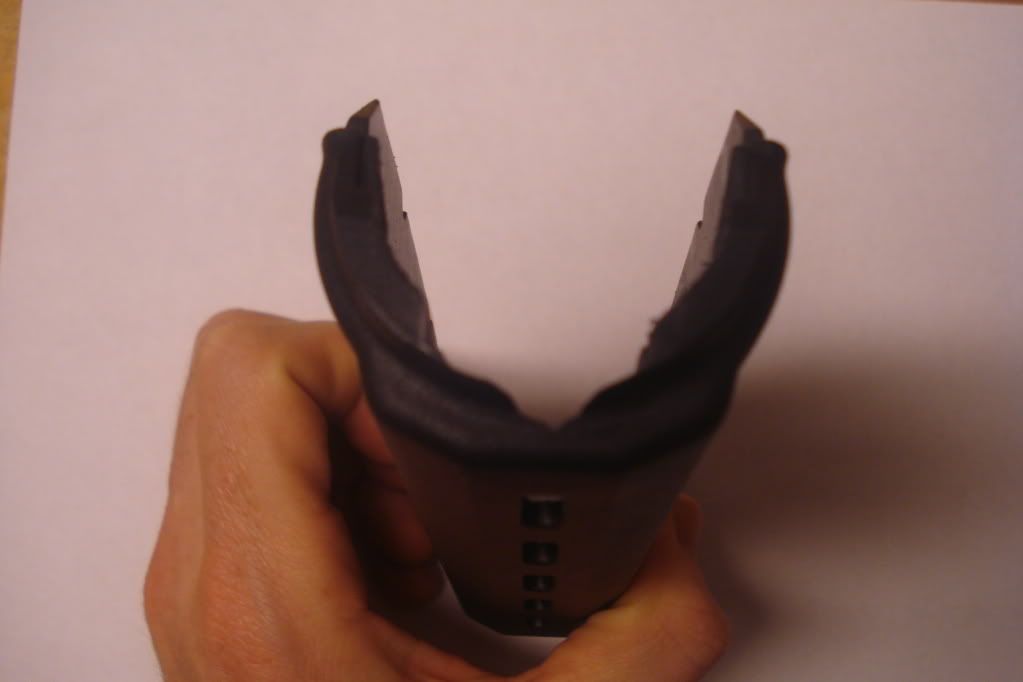 Top, front 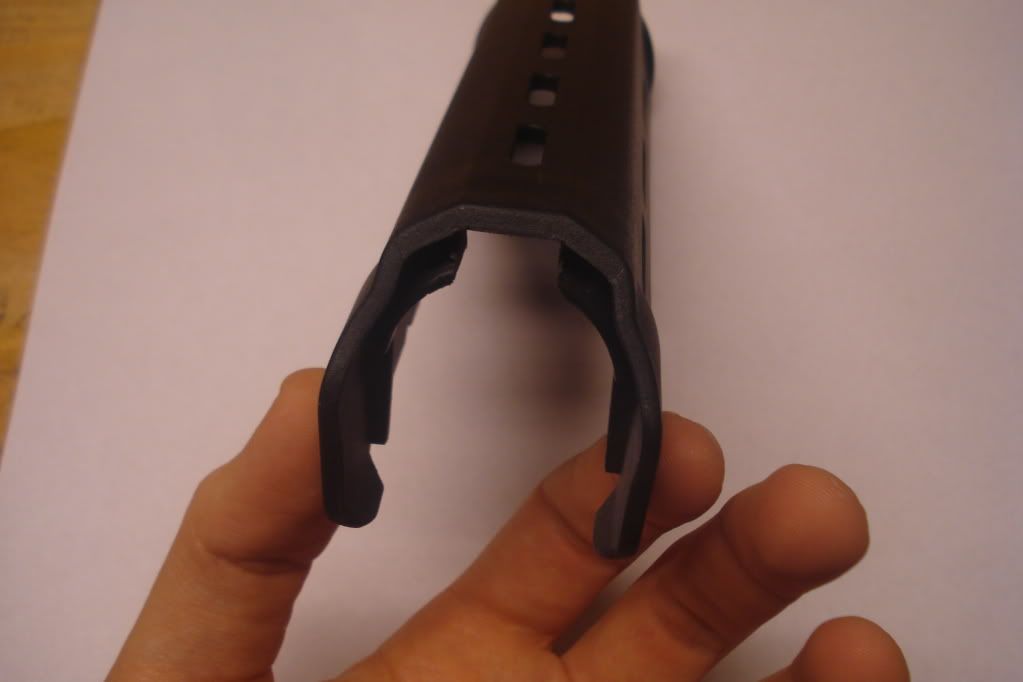 Bottom, rear (heaviest modification) 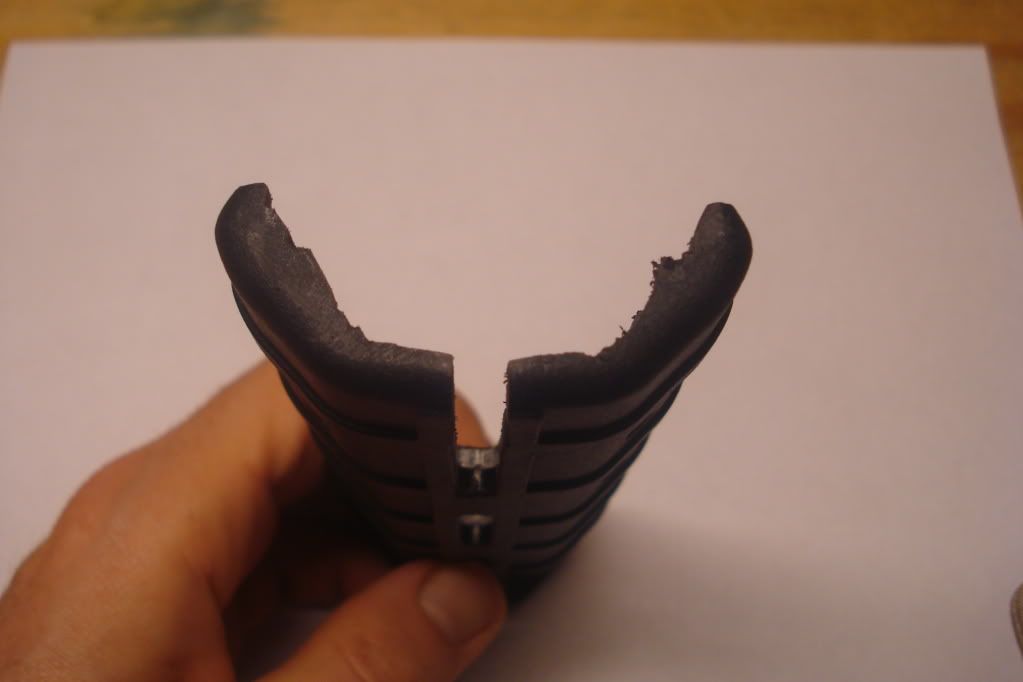 Bottom, front 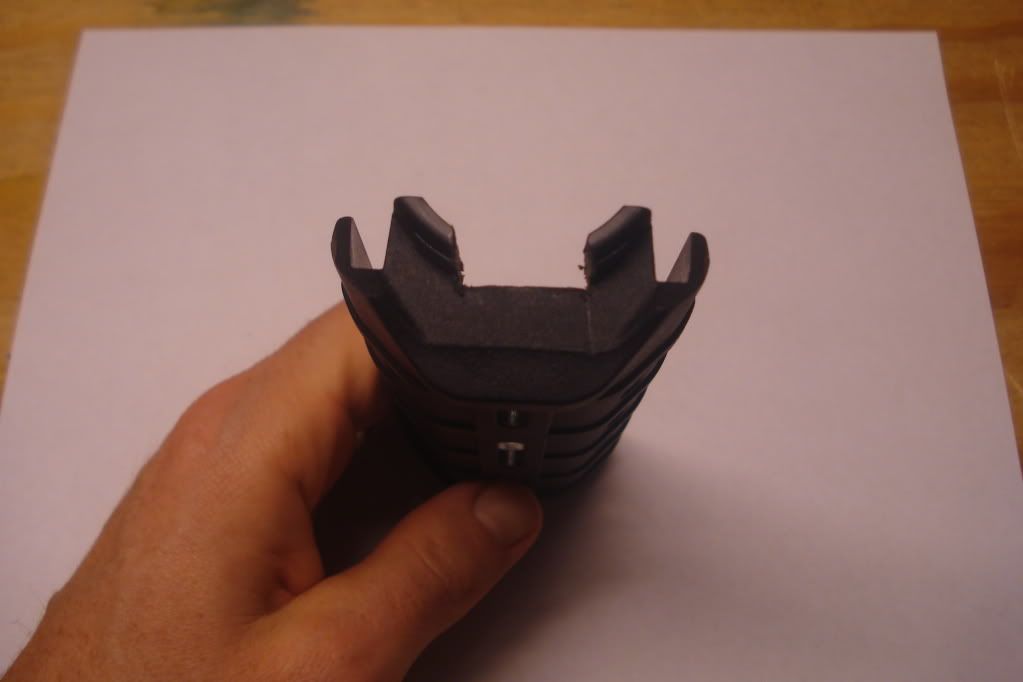 Bottom installed w/ heat shield 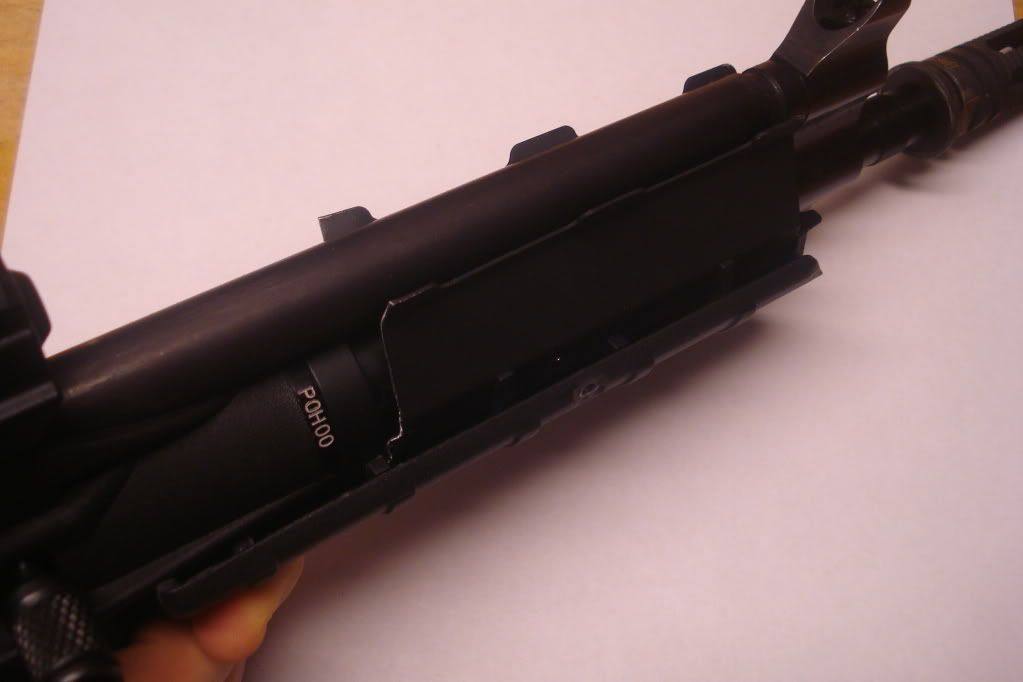 I only traced with a pencil to prep. Just remember that you can always remove more, but you can never put it back. This is especially important when making the top, front notch over the front sight and shaping on the rear when fitting around the ribs that are molded into the gun. Keeping it tight in these places will keep the handguards tight. I took out a big piece of the heat shield: this won't be a heavy-use gun. You may choose to be more thoughtful so as to retain as much of it as you can. You will have to remove the two rear-most plastic "fins" on the bottom HG to make them come together (you can see where I did this in the heat shield picture). For the screws, I elected to just use 2. You could use more to make it more sturdy. I filed flats onto the lower HG and pre-drilled through them both. You could go as far as to put the screws all the way into the heat shield, but I didn't find it necessary or desirable - it would have to pull it out of it's natural shape. 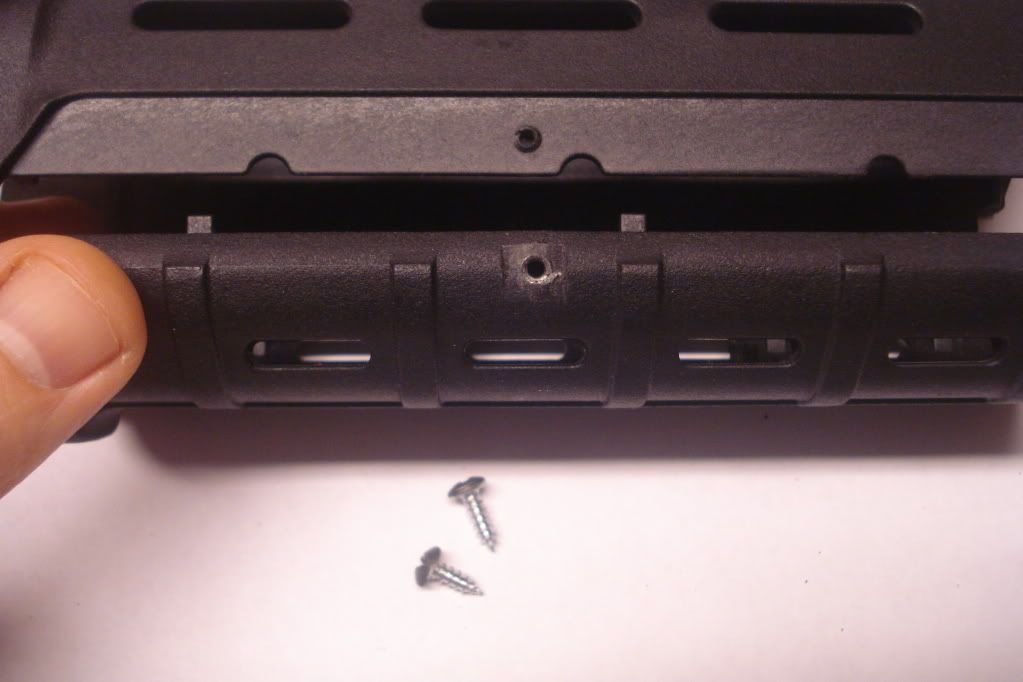 |
|
|
|
[#9]
Wow, Excellent!
You should cross-post this on KTOG. Do you like the fit and feel? Does it feel tight and sturdy? No problems mounting a light? The Front Sight Post, does it have a lot of extra space around it? or does it look like the guard was made for the gun? |
|
|
|
[#10]
Quoted: Wow, Excellent! You should cross-post this on KTOG. Do you like the fit and feel? Does it feel tight and sturdy? No problems mounting a light? The Front Sight Post, does it have a lot of extra space around it? or does it look like the guard was made for the gun? It feels great and the texture of the polymers match each other in feel and look. It is plenty sturdy for me but again, not really a hard-use gun. If I were going to have a VFG (Legal disclaimer: not going to do this), I would have put 4 screws in it instead of just 2. I haven't tried mounting a light, but it would work well. As to the front sight, the body of the HGs rests on it on top. It will be as tight as the cut that you make. If you work carefully, it won't budge. Even if it is loose, there won't be so much play in it that it won't work. Part of the reason I installed it in the standard direction is so that it would look like it was made for this gun. If you showed someone not familiar with MOEs and PLRs, they would think it came from the factory like this. Happy Filing! |
|
|
|
[#11]
Quoted:
Quoted:
Wow, Excellent! You should cross-post this on KTOG. Do you like the fit and feel? Does it feel tight and sturdy? No problems mounting a light? The Front Sight Post, does it have a lot of extra space around it? or does it look like the guard was made for the gun? It feels great and the texture of the polymers match each other in feel and look. It is plenty sturdy for me but again, not really a hard-use gun. If I were going to have a VFG (Legal disclaimer: not going to do this), I would have put 4 screws in it instead of just 2. I haven't tried mounting a light, but it would work well. As to the front sight, the body of the HGs rests on it on top. It will be as tight as the cut that you make. If you work carefully, it won't budge. Even if it is loose, there won't be so much play in it that it won't work. Part of the reason I installed it in the standard direction is so that it would look like it was made for this gun. If you showed someone not familiar with MOEs and PLRs, they would think it came from the factory like this. Happy Filing! Ok, you talked me in to it. Just order a MOE. 
|
|
|
|
[#12]
Mother...Of...God.... That was a hell of a little project!
Getting it to fit was fun, took me about 2 hours. Luckily i have a table-top saber saw and air-grinder to make the cuts and grind down parts. It was a little more involved than i first realised.. Still not super hard, just really time consuming. But i got it on there!! Really solid, rock solid. I just need to paint my screws and take some pics. |
|
|
|
[#13]
Quoted:
Mother...Of...God.... That was a hell of a little project! Getting it to fit was fun, took me about 2 hours. Luckily i have a table-top saber saw and air-grinder to make the cuts and grind down parts. It was a little more involved than i first realised.. Still not super hard, just really time consuming. But i got it on there!! Really solid, rock solid. I just need to paint my screws and take some pics. Post up your pics yet? I just got a PLR, and I am considering the same moe modifications. |
|
|
|
[#14]
Quoted: ... I ended up using small screws to hold it all together... Kind of like the gun itself. Good job, looks like it was a fun project.  |
|
|
|
[#15]
I wonder if this would work on the Sub2K with the new Red Lion Front sight.... that would be awesome.
|
|
|
 Win a FREE Membership!
Sign up for the ARFCOM weekly newsletter and be entered to win a free ARFCOM membership. One new winner* is announced every week!
You will receive an email every Friday morning featuring the latest chatter from the hottest topics, breaking news surrounding legislation, as well as exclusive deals only available to ARFCOM email subscribers.

AR15.COM is the world's largest firearm community and is a gathering place for firearm enthusiasts of all types.
From hunters and military members, to competition shooters and general firearm enthusiasts, we welcome anyone who values and respects the way of the firearm.

Subscribe to our monthly Newsletter to receive firearm news, product discounts from your favorite Industry Partners, and more.
Copyright © 1996-2024 AR15.COM LLC. All Rights Reserved.
Any use of this content without express written consent is prohibited.
AR15.Com reserves the right to overwrite or replace any affiliate, commercial, or monetizable links, posted by users, with our own.


