|
Posted: 9/22/2011 5:00:52 PM EDT
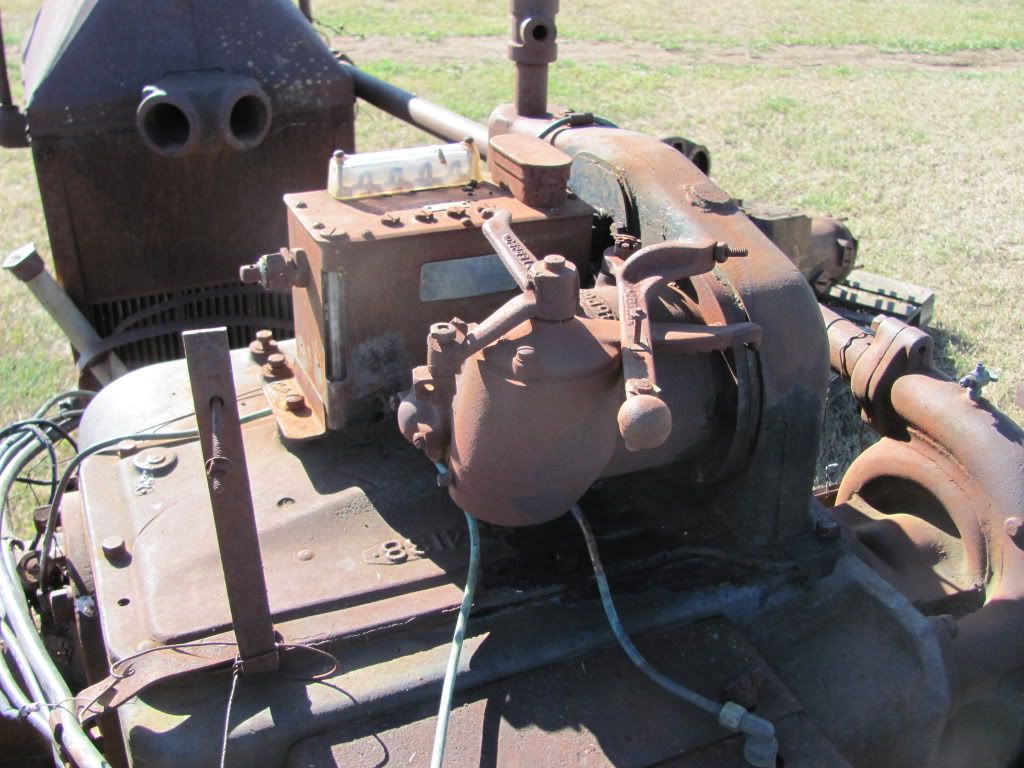
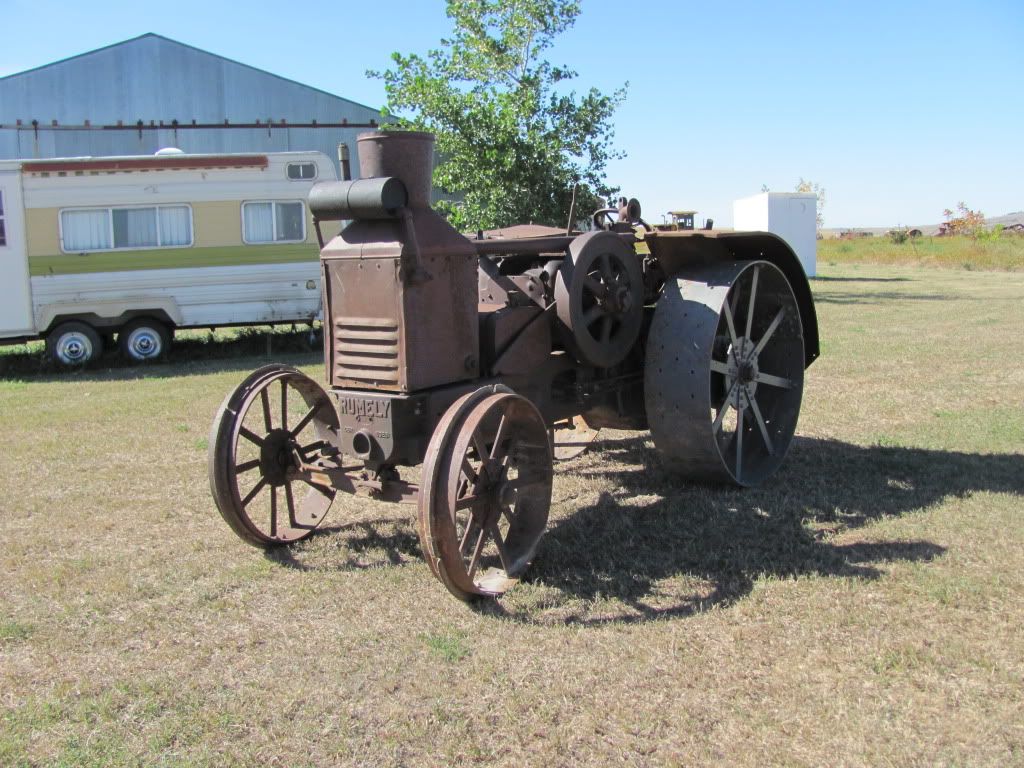
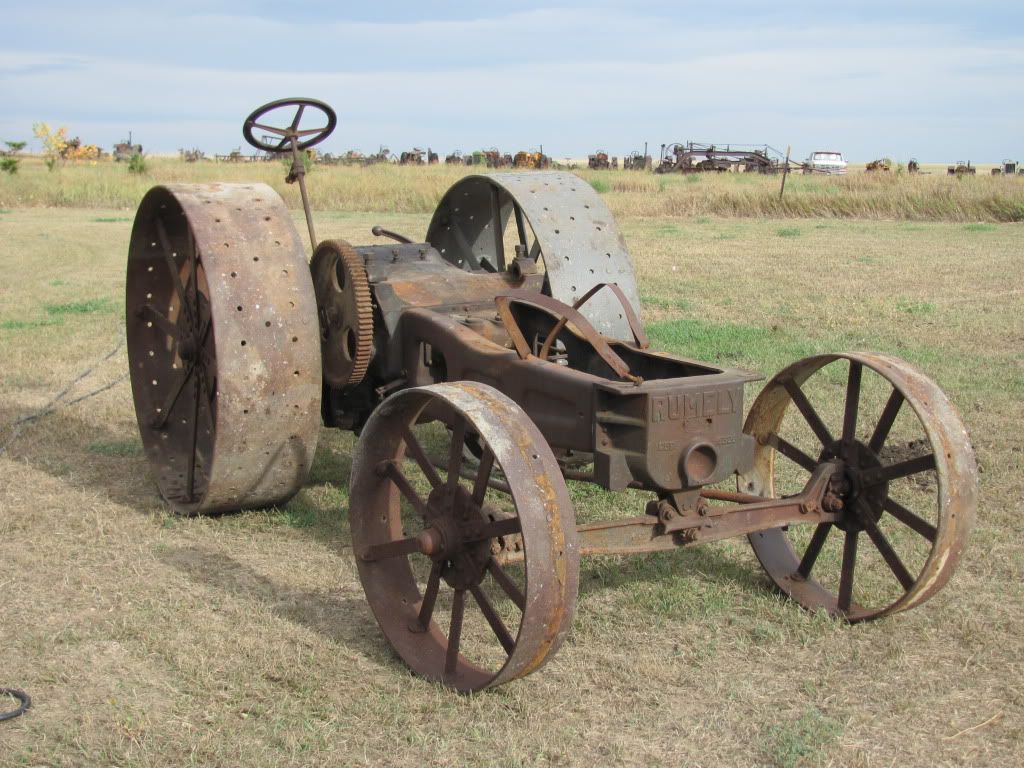
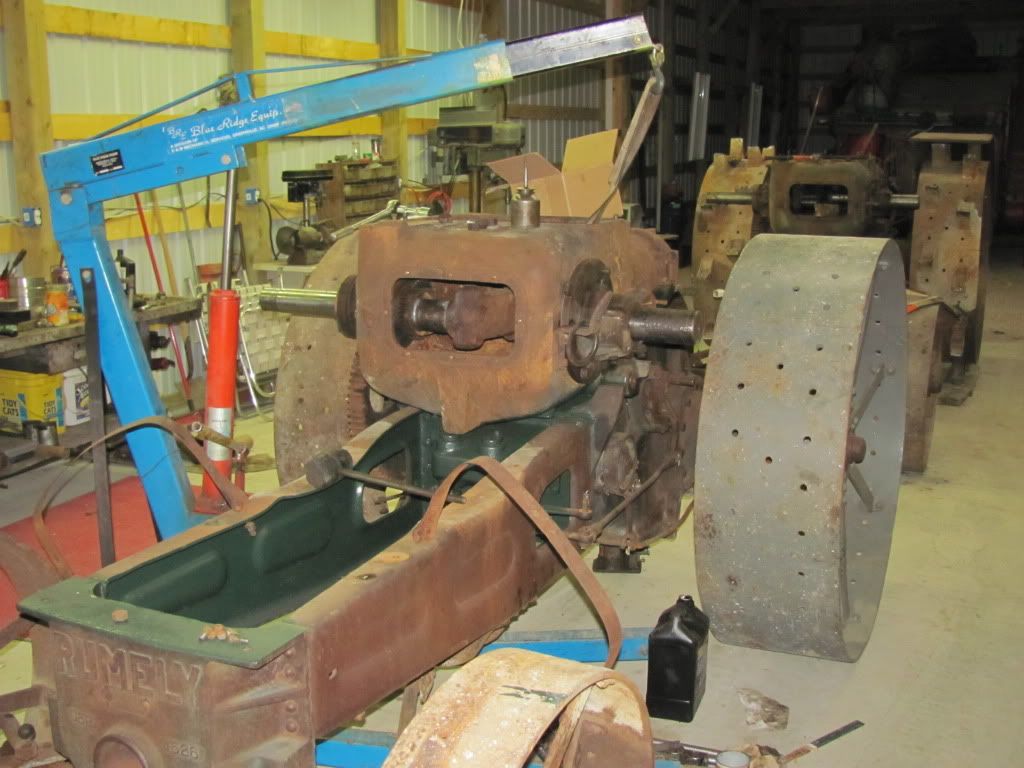
I bought 2 of these tractors a few weeks ago. The first one made it home on Monday night. I started cleaning it yesterday and tore into it today. I got it in pieces like this. It is a Rumely Oilpull model 25-40 X. This one was made in 1928. 25 stands for the advertised HP on the drawbar and 40 is the advertised HP on the belt. In the Nebraska tractor tests this model actually made close to 40hp on the drawbar and 50 on the belt. Rumely used the Oilpull moniker because the tractors used oil in the cooling system rather than water. Back in the day kerosene was much cheaper than gas but for the tractor to burn it, it had to run hot. The oil allowed the tractor to run hotter and burn the kerosene better.
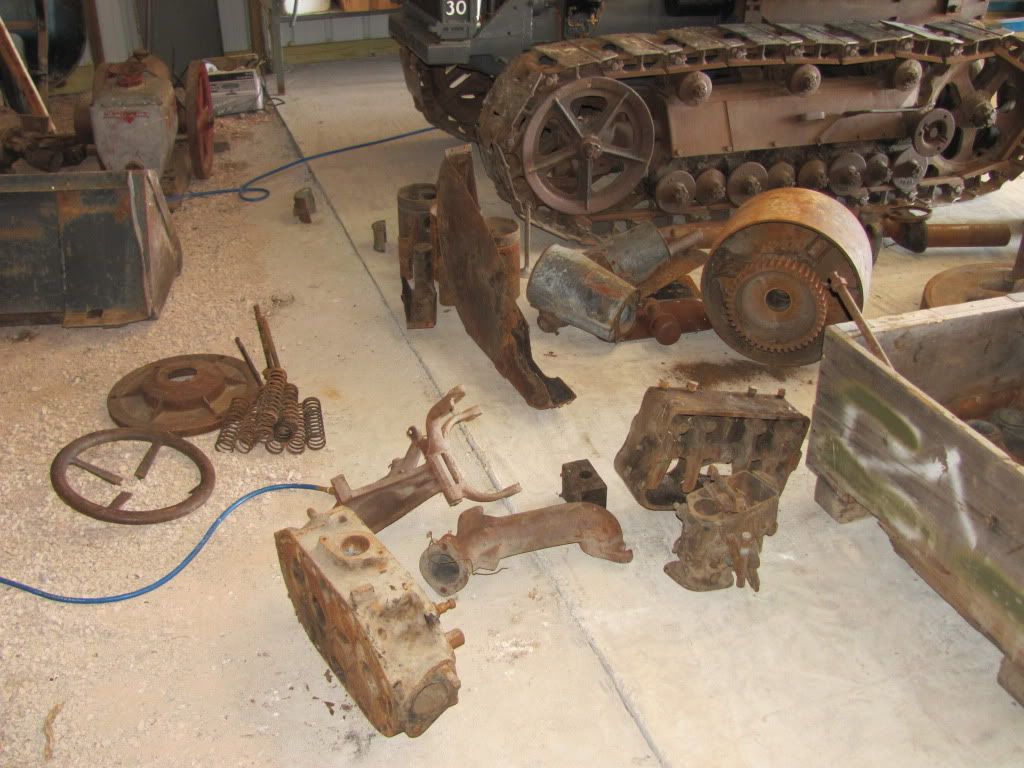
Various odds and ends to make it go. There are a few parts here for the other "erector set" thats coming. I will post pics of it when it gets here. 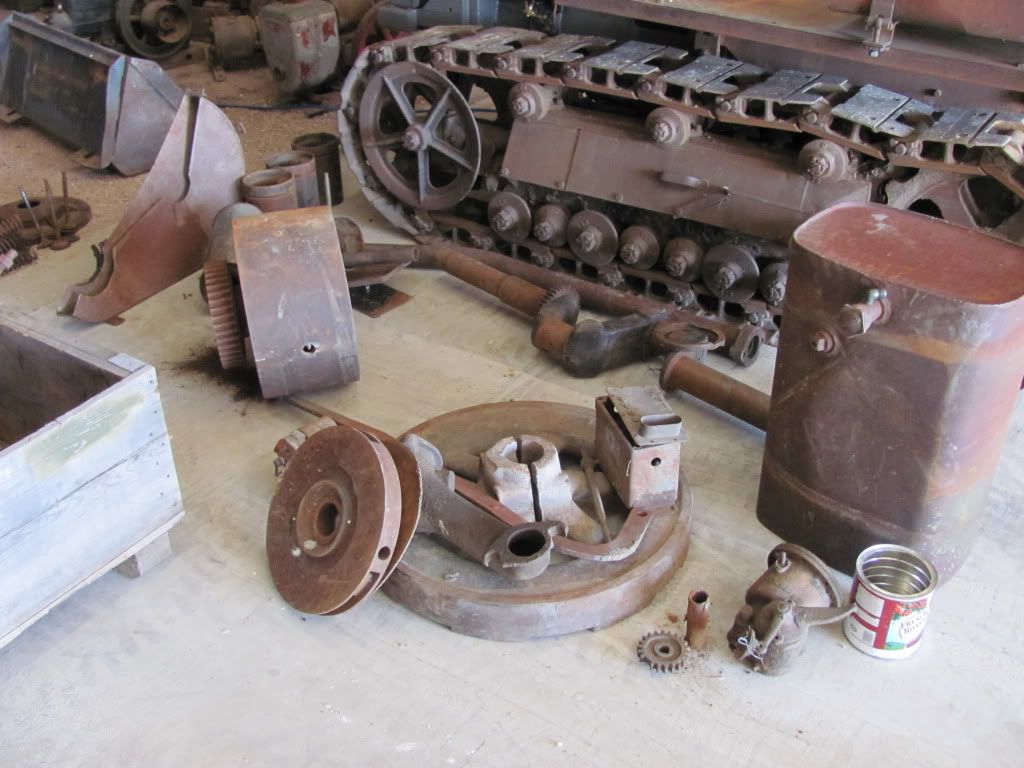
After a good power washing to remove some of the 80 year old dirt and grease. 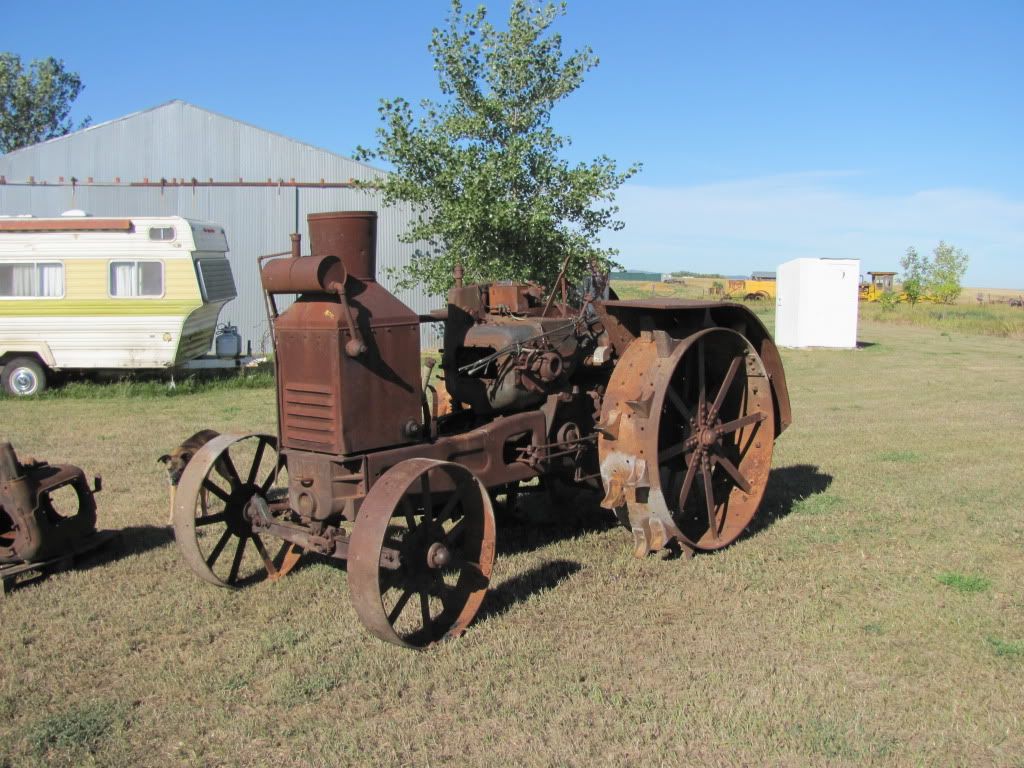
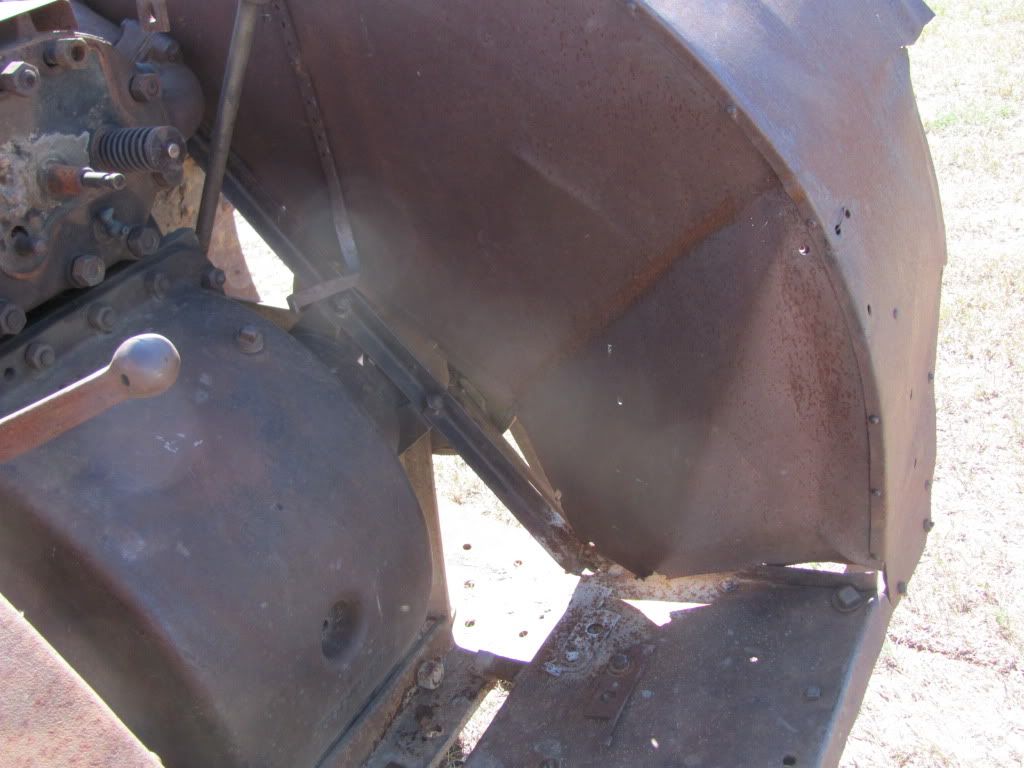
Fuel tank needs some help. 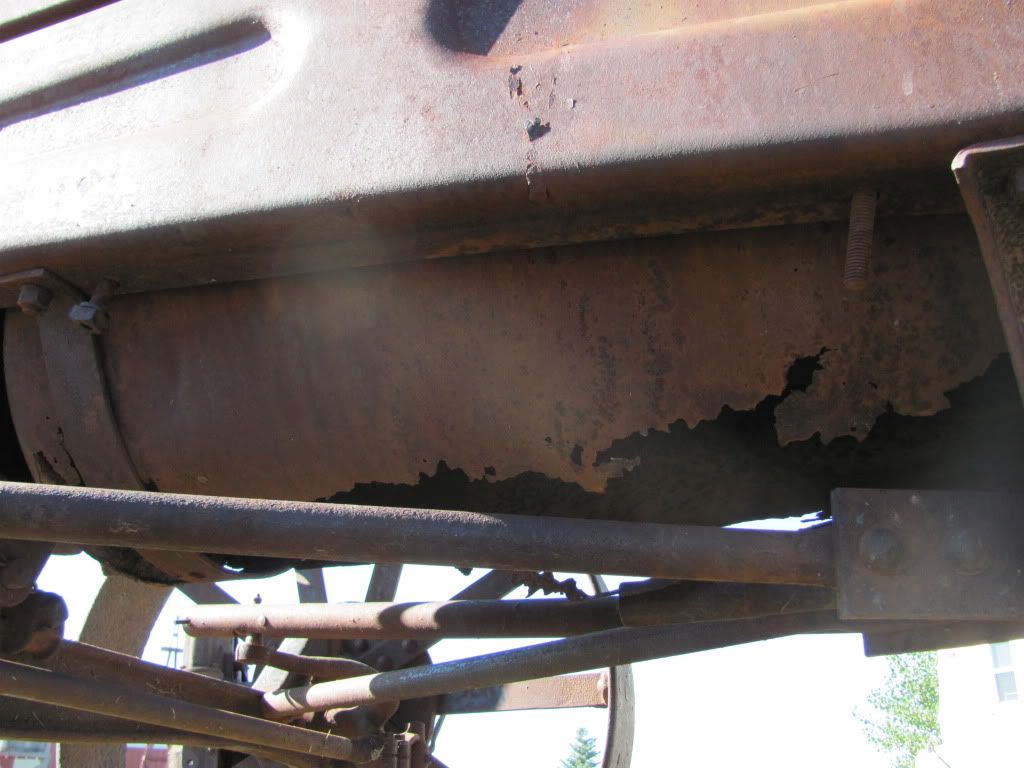
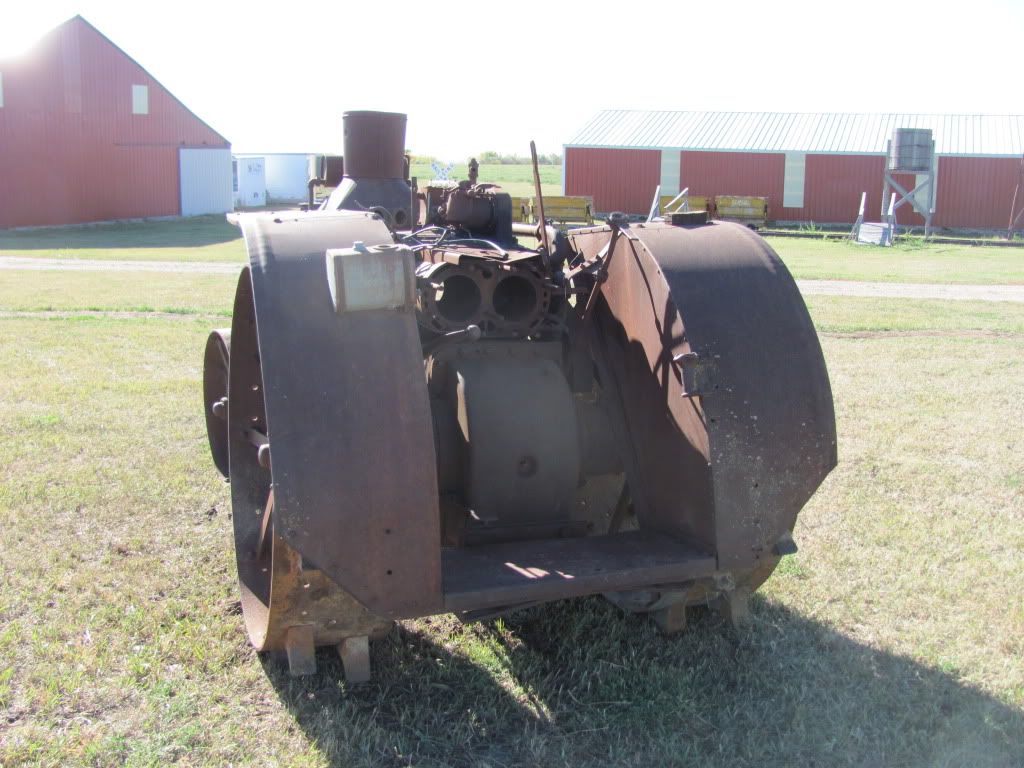
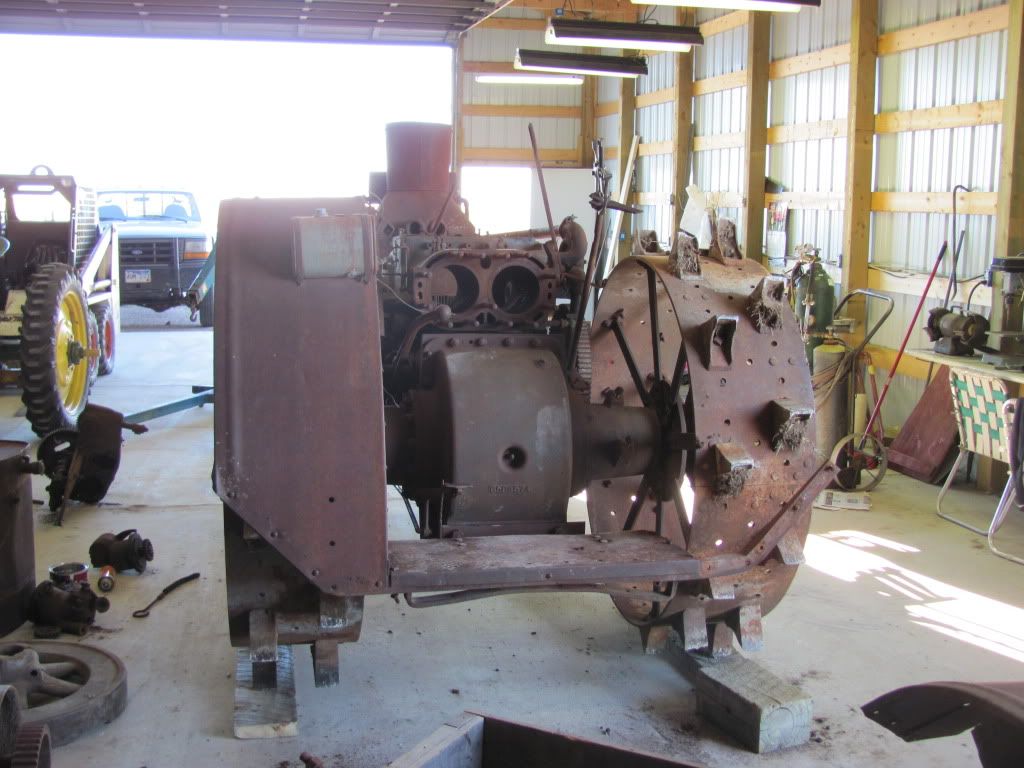
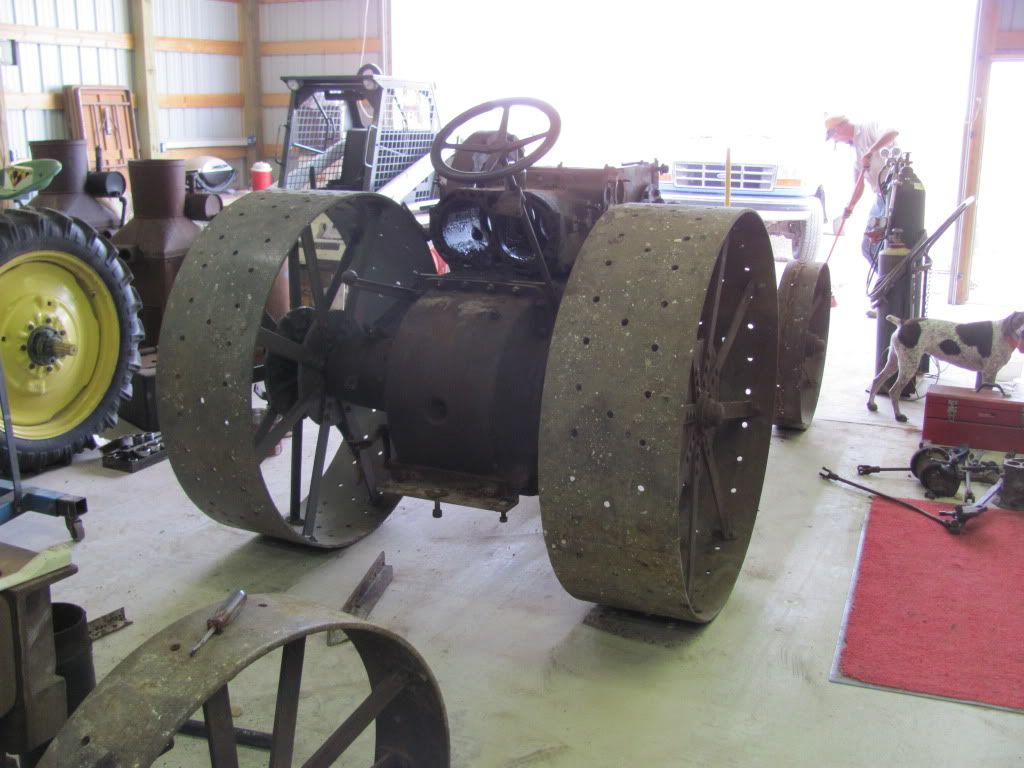
After an hour and a half by myself pushing the thing in the shop and the rest of the day tinkering this is what it looks like. 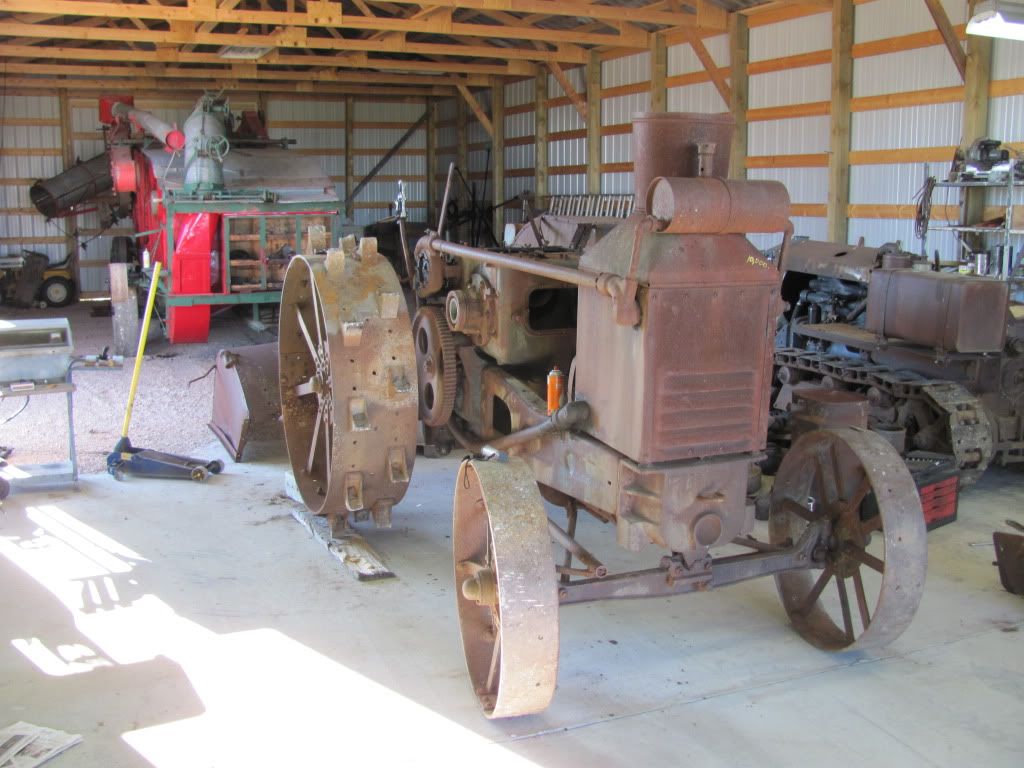
Customary bullet holes in the exhaust stack. 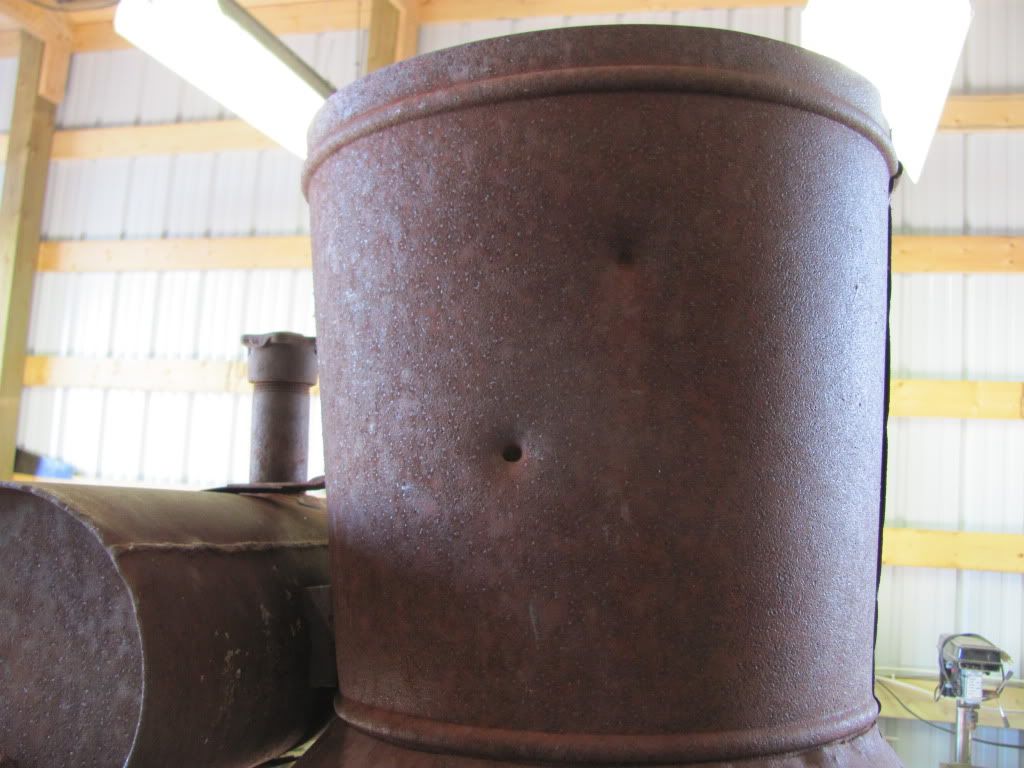
My first fuckup on this project. This is the fuel pump shaft. Note to self, do not remove cam tower before removing fuel pump shaft or you'll bend it. 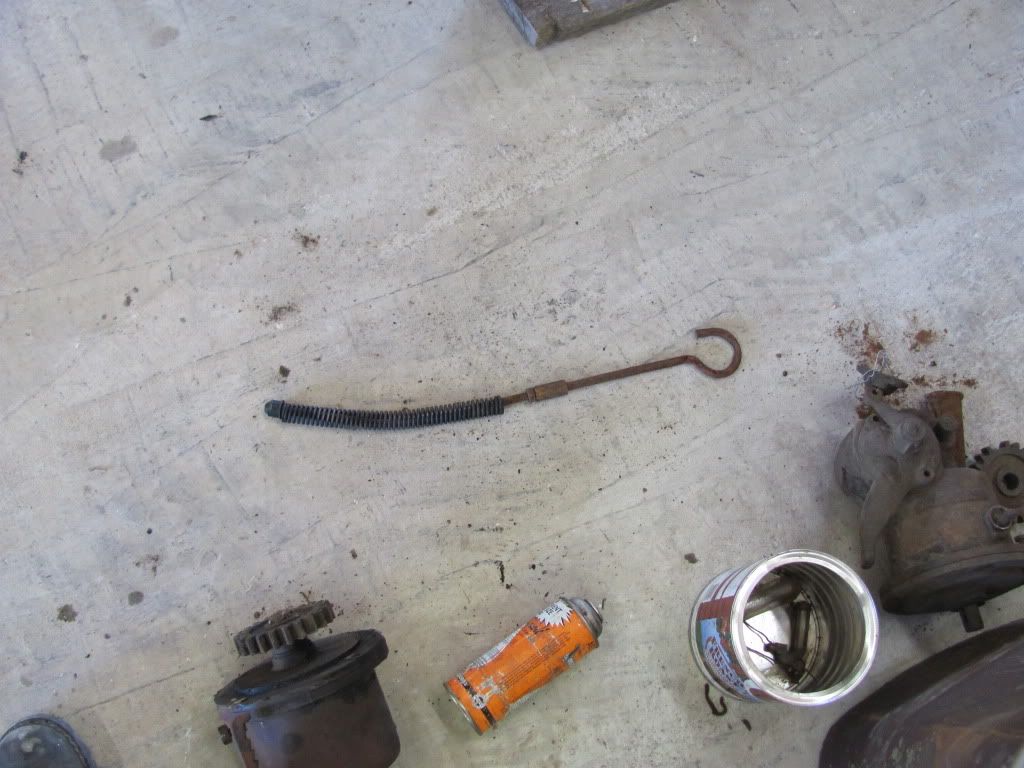
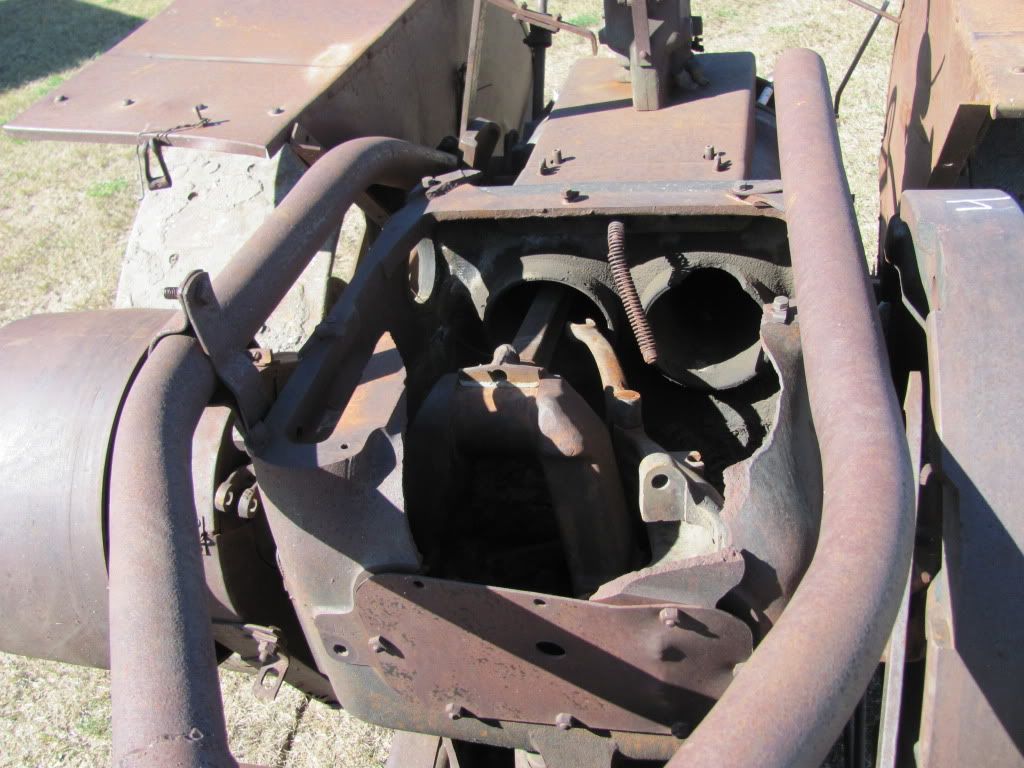
So here's my progress for today. I removed the governor, cam tower, lubricator, oil lines, right fender, and a few little odds and ends. The cam was stuck but I got that freed up. The lifters and rollers were also stuck (yeah they had roller lifters in 1928) and I got that fixed. Once I got the cam loose I figured out the magneto drive was also stuck but I got it freed up too. The lubricator was borderline stuck but some Kroil and a little working back and forth and she's pumping now near as I can tell. I got the governor freed up as well but need to do more. It's still very stiff. I also got the transmission shifting mechanism working better too. All that I know of that's stuck now is the oil pump for the cooling system. I have a lot of work ahead of me yet. |
|
|
|
[#1]
You were not wronged by the local city government by any chance, were you?

|
|
|
|
[#2]
Awesome! Where did you find it? I love the early stuff
|
|
|
|
[#3]
Quoted: You were not wronged by the local city government by any chance, were you?  |
|
|
|
[#4]
What bore on the main gun?
|
|
|
|
[#5]
Quoted:
You were not wronged by the local city government by any chance, were you? Not that I'm aware. Had the building inspector come for somewhat of a surprise inspection on the new shop a month ago or so. But apparently it was fine. This place isn't in town so nobody bothers us. Quoted:
Awesome! Where did you find it? I love the early stuff I got both of them from a tractor salvage yard in MN. I'd known about them for a long time but I am hesitant to buy a project like this without being able to sort through parts myself to know what I'm missing. I happened to be in the area Labor day weekend, swung in and took a look and decided this would be a pretty easy project. This tractor is only missing the pushrods, valve keepers, and the right side exhaust pipe and exhaust elbow. For me, that isn't too big of a deal. I can make pushrods and valve keepers and I can probably find or make the exhaust parts. Now the other one coming is missing quite a bit more, including the top part of the crank case where the rod went through it. But where I have this one that is complete I can use it as a pattern to fix the other. And I have a spare block. |
|
|
|
[#6]
Real neat. Post your progress as you go.
|
|
|
|
[#7]
Quoted:
What bore on the main gun? 6 13/16" bore by a 8 1/4" stroke. Makes about a 600ci 2 cylinder engine. |
|
|
|
[#8]
Just joking. This is very cool. Good luck !
|
|
|
|
[#9]
Neat!
|
|
|
|
[#10]
I see one (1) bullet hole, one (1) bullet dent, but i admit I may need new glasses.
ETA: Otherwise very cool. I have a brother in law that is a veritable genius at this kinda stuff. I wish I knew half of what he has forgotten about engines and tractors. |
|
|
|
[#11]
Quoted:
Just joking. This is very cool. Good luck ! If you're referring to the camper and outhouse, well what can I say, sometimes a guy needs a nap or... uh... relief.
|
|
|
|
[#12]
+1 for using Kroil. That is a can of AeroKroil I see, isn't it?
|
|
|
|
[#13]
Quoted:
Quoted:
Just joking. This is very cool. Good luck ! If you're referring to the camper and outhouse, well what can I say, sometimes a guy needs a nap or... uh... relief. I was referring to what looks like the makes of killdozer 2. |
|
|
|
[#14]
Quoted:
+1 for using Kroil. That is a can of AeroKroil I see, isn't it? Yes. I swear by the stuff now. I got a can from a friend once and what sold me on it was when I was trying to put a very tight pin into another tractor. When I used WD40 I couldn't get the pin to go in without a hammer (bad deal under the circumstance). When I used the kroil, the pin slipped right in. Since then I've done some arbitrary comparison on my own and seen some tests others have done. Kroil wins hands down. Quoted:
Quoted:
Quoted:
Just joking. This is very cool. Good luck ! If you're referring to the camper and outhouse, well what can I say, sometimes a guy needs a nap or... uh... relief. I was referring to what looks like the makes of killdozer 2. I got better outfits for a killdozer than that little thing. Almost all of these in fact... http://www.youtube.com/watch?v=LsT0S_s7ykM |
|
|
|
[#15]
Awesome.
|
|
|
|
[#16]
Quoted: You were not wronged by the local city government by any chance, were you? First post wins again. |
|
|
|
[#17]
Very cool.
|
|
|
|
[#18]
Quoted:
Quoted:
You were not wronged by the local city government by any chance, were you? 
|
|
|
|
[#19]
Cool project
|
|
|
|
[#20]
Indoor plumbing has not made it to SD yet?
|
|
|
|
[#21]
Very cool!
Did I spy a really old Cat road grader way back there? The shape of the cab reminds Me of one I ran as a kid back in the 60's. I 'm think it was made in The early 30's. It had a 4 cyl mill with an Armstrong starter & dual wheels rather than tandem axles. I graded a lot of road at a speed where You jump out & run around the thing while it was moving. Woe be unto Anyone Who tried to start it without retarding the timing on the mag first! The Ol Crew Chief |
|
|
|
[#22]
The other tractor made it here today. I think I'm gonna call this one humpty dumpty. It threw a rod at some point breaking the block, cam tower, and taking out a sleeve. I also believe the flywheel cracked when the shit hit the fan.


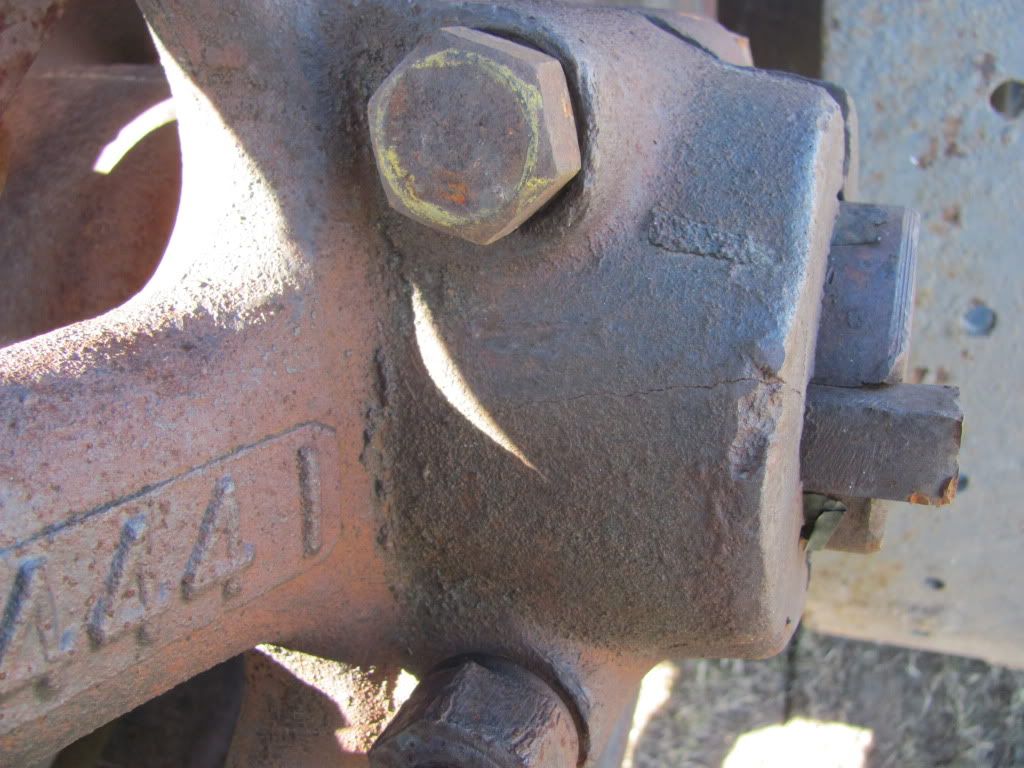
Wheel hub broke and was repaired at some point. 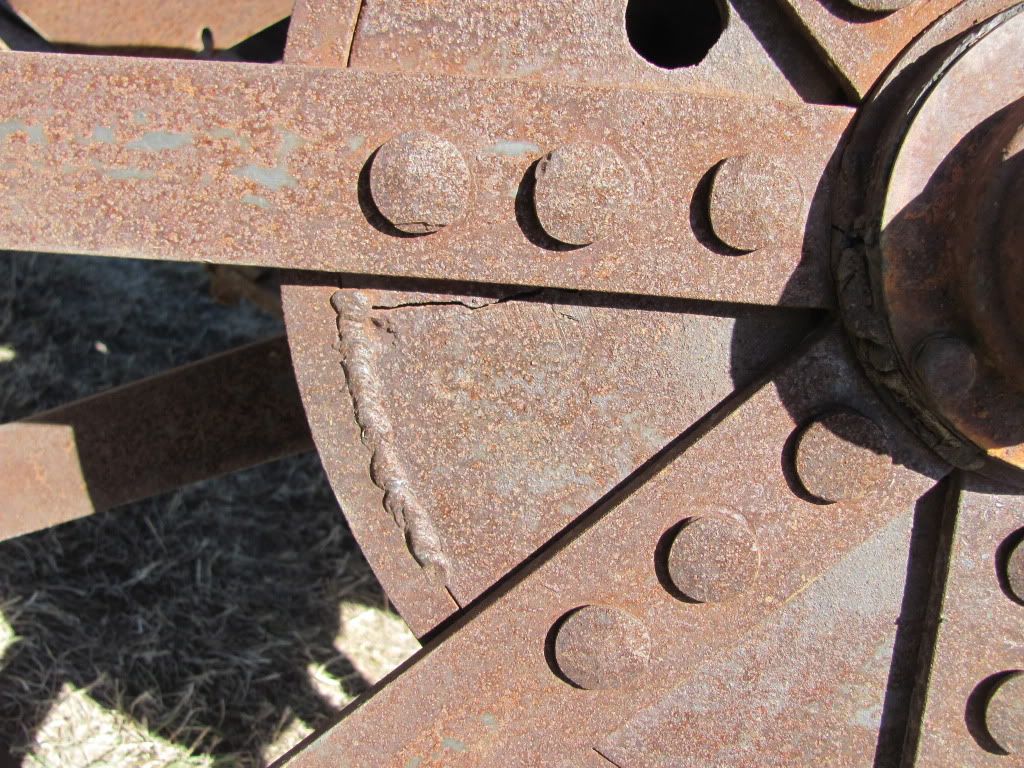
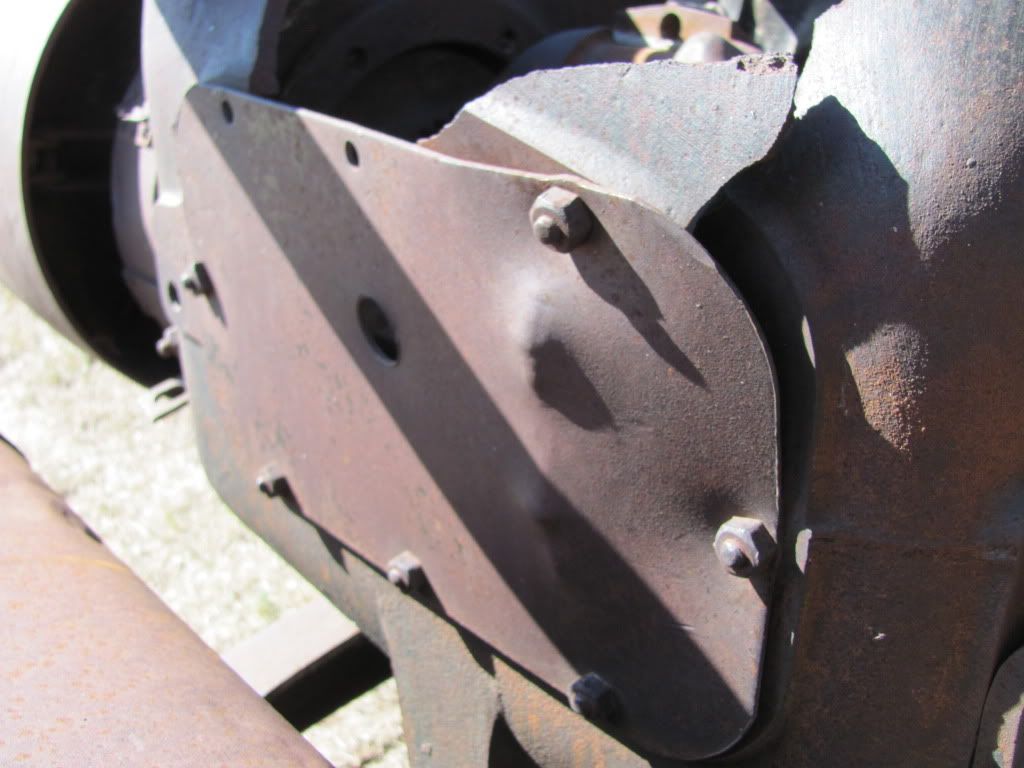
Needs sheetmetal work 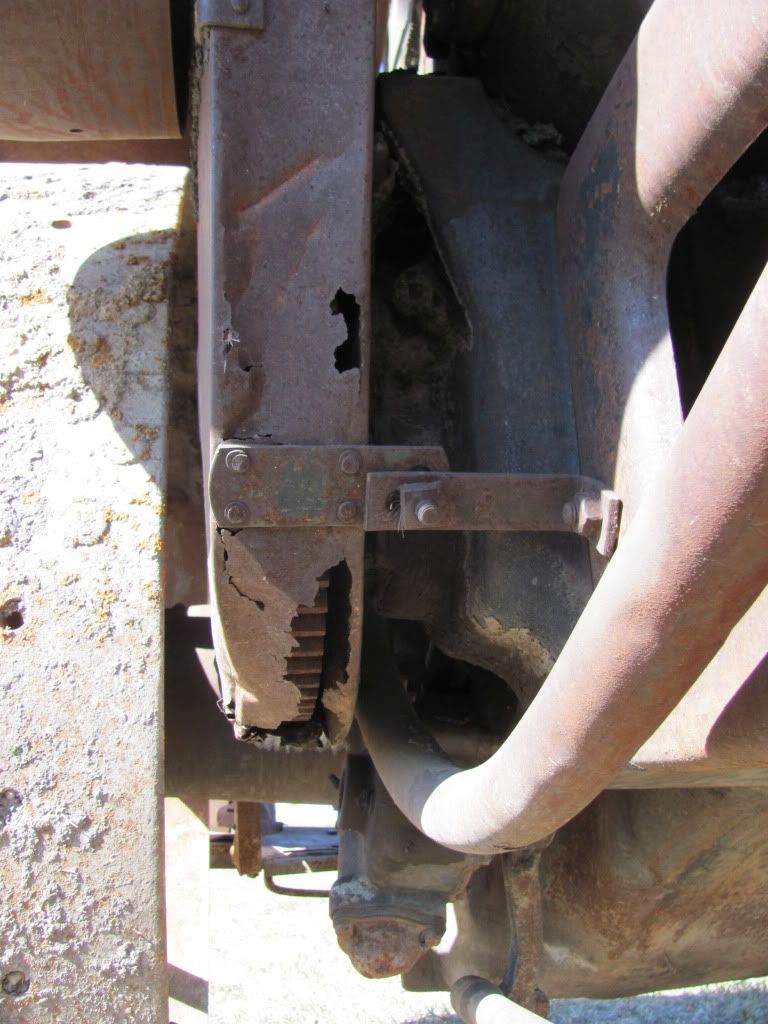
Now for a progress report: There was a lot more stuck on the first tractor than what I realized. In fact practically everything was stuck in some shape or form. I have remedied all that now. I decided to pull the radiator to help get at the gas tank as well as work on it more easily. Today I ran a glaze breaker hone in the cylinders to clean them up and see what I had to work with. Both bores look good with very minor pitting. I'll be rigid honing soon. I did start fitting pistons today as well. I am now at a crossroads. I'm almost ready to start reassembling part of the tractor. I'm torn whether to do a full restoration with paint and decals etc, or leave it in its working clothes. I have done both type of restorations but typically if I don't paint a tractor it's because it has a lot of original paint left. As the saying goes you can always paint, they'll only be original once. However, this tractor doesn't have hardly any original paint left. I like painted tractors, I like rusty tractors, what to do what to do... 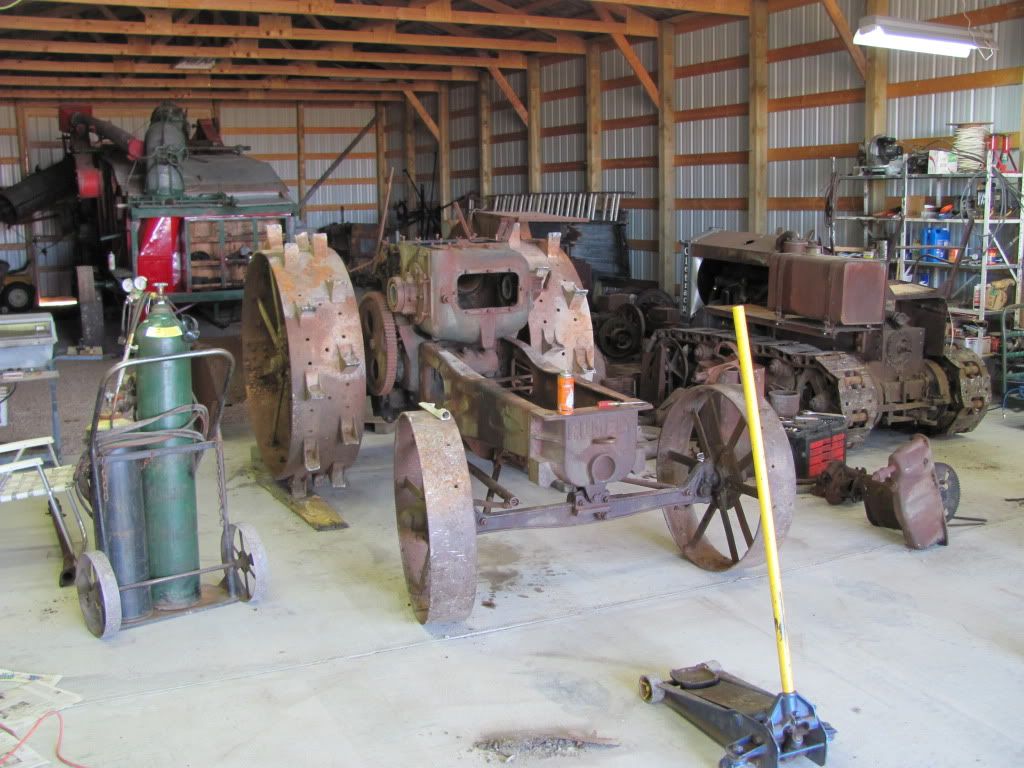
|
|
|
|
[#23]
So you have a bunch of tractors, and you pushed that thing into the shop by hand?
|
|
|
|
[#24]
Nice
I'm pretty sure this sort of thing is why my wife didn't want the house in the country with the barn !
|
|
|
|
[#25]
Quoted:
So you have a bunch of tractors, and you pushed that thing into the shop by hand? Lol no, I used a skidsteer. But being by myself and that thing having a broken steering wheel I'd go a few feet, jump off correct the tractor, go a few feet, repeat. Pain in the ass! |
|
|
|
[#26]
Quoted:
Nice I'm pretty sure this sort of thing is why my wife didn't want the house in the country with the barn ! Between my dad, brother, and I we have about 50 tractors and 120 stationary engines. We have tons of parts as well as loads and loads of "junk." I told a friend once that when you watch the show Hoarders you really start to feel kinda bad about all the crap you have tucked away. Then I justify it by saying, well my stuff is organized. And when it gets too disorganized we build another building. We did sell a couple pieces that went to Barret Jackson last week. So you can't say we don't get rid of stuff.
BRD don't have crap on rusty knuckles and busted tractors. |
|
|
|
[#27]
Dad was able to help me today and we stripped Humpty Dumpty down. I didn't have my big gear puller with me so I didn't get the flywheel off and consequently the crank, main bearings, and broken block are still on the tractor. That will be tomorrows little project. I got both sleeves out today. When I was power washing I found both chunks to the busted sleeve buried in the goop. I believe I'm going to weld these back in and then true up the cylinder and reuse that sleeve. That way I still have a spare to throw in the parts pile.
I also came to the conclusion today that this tractor had already been worked on in the not too distant past. I also believe the thrown rod was in the last few years. With everything I'm working on and fixing I'm discovering whoever had this tractor needed to have his tools taken away and beat to death with them. 

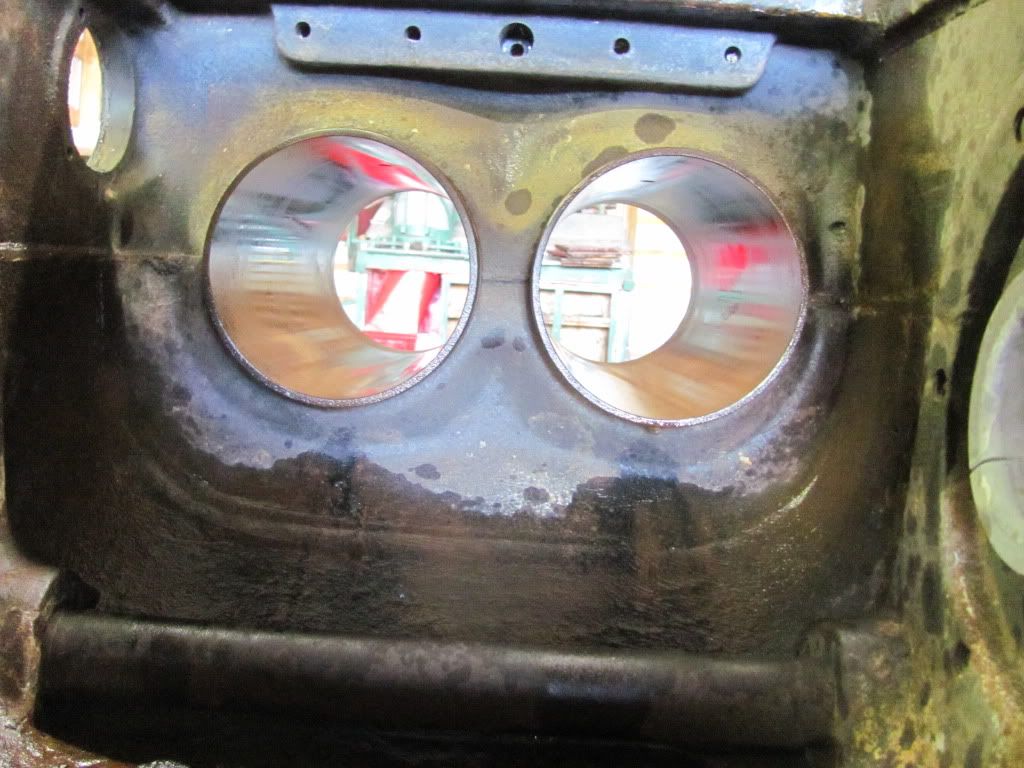
This is what the inside of the block looks like with the sleeves removed. Wet sleeve engines are a godsend I tell you! 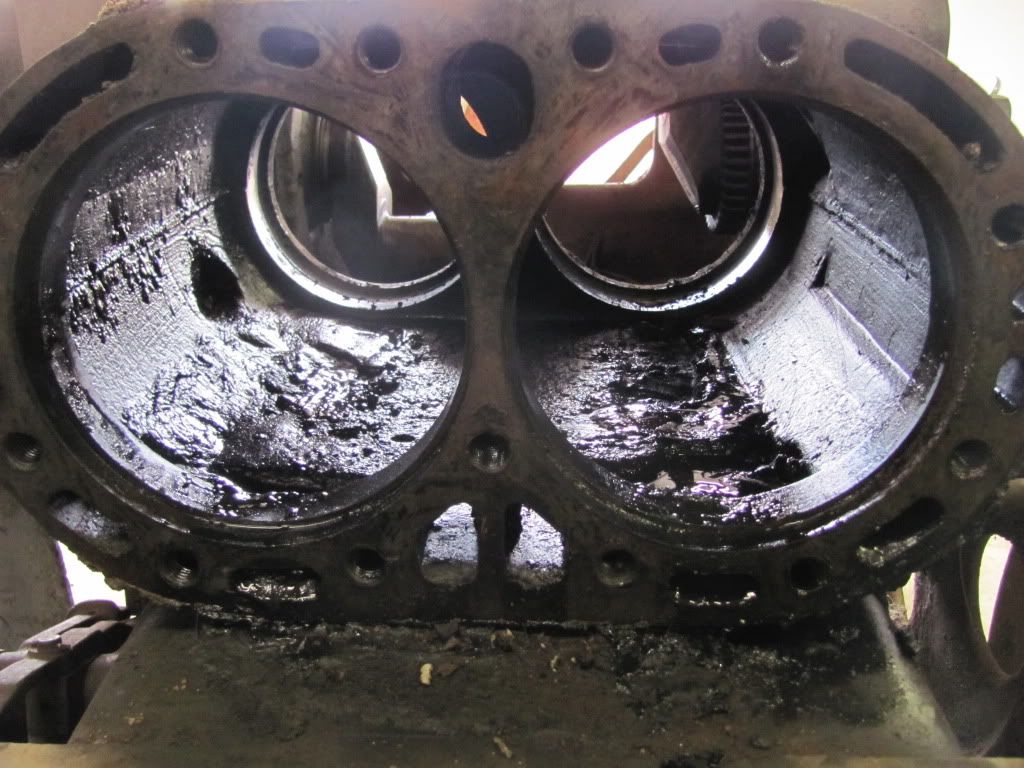
It's amazing how fast 2 guys who know what they're doing can rip a tractor apart. |
|
|
|
[#28]
Well I decided I'm going to paint Humpty Dumpty. There are simply too many parts on it that are going to need to be welded, fixed, and fabbed. The paint will hide 95% of it if I do it well. I took the block off and pushed it back outside for another cleaning. A clean tractor goes a long way to a good paint job.
I also decided that I am not going to paint it the original color. There is a lot discussion about the colors of the Superpower tractors. My research has shown that they came in both green as typical for Rumely and gunmetal blue/gray. The gunmetal color was due to Rumely getting a hot deal from Henry Ford on a bunch of paint so a lot of tractors were painted that color. Both of my tractors were gunmetal. However, Rumely's IMO should be green so that's what color I'm going to paint it. Purists might not like it but I don't give a crap, they can buy it when I'm done and paint it pink for all I care. 
After painting all the hard to get at places I put the "new" block on. I will be spraying/brushing components as they are assembled so I get the best possible coverage. 
In addition to all this I've been working diligently on pouring new rod bearings and a main bearing. The main bearings on the flywheel side of both tractors show damage and I have to wonder if the balance of the flywheel isn't to blame. Of course at the same time the tractors were run into the ground and then run some more so this type of thing isn't out of the ordinary. Pouring bearings seems to be a lost art anymore but I can tell you, it isn't that difficult with a little forethought into the setup. I've also acquired a used aircleaner and rocker arms to the tune of $500. Got a new head gasket in the mail for $100, and am about to start making valves. I only have 2 that are salvageable. I found a company that makes them but at $80 a piece I decided I can stand in front of the lathe for a while. 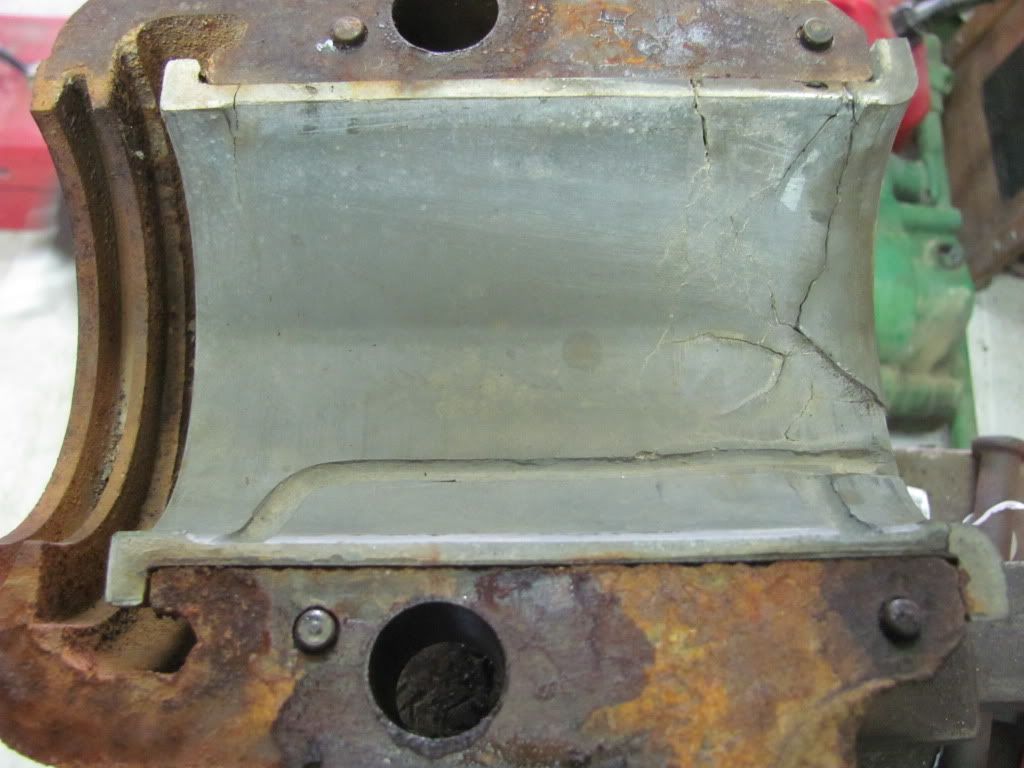
|
|
|
|
[#29]
For those who don't know what you mean by "pouring" bearing please do a picture series on it. I actually know what the process of pouring Babbitt intails, my cousins rebuilt a1909 25hp case steam tractor, and i learned of it from them.
here is a picture of the beast. 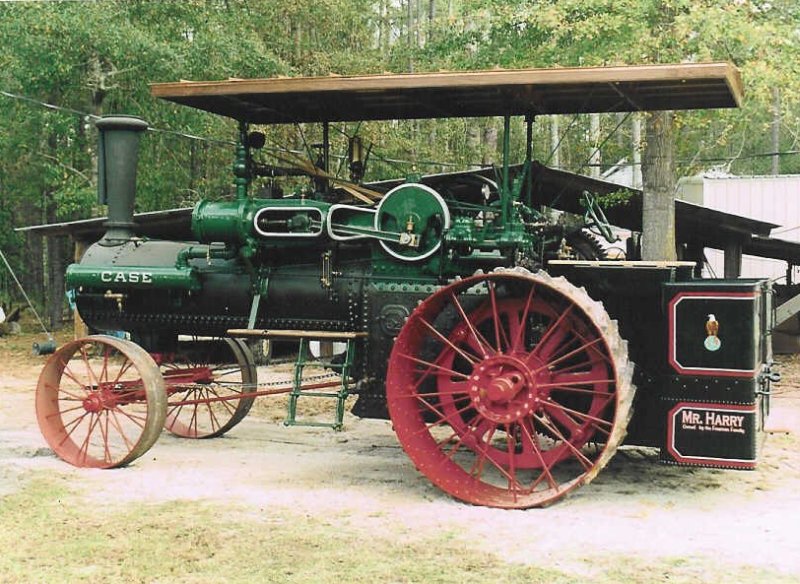 |
|
|
|
[#30]
Quoted:
For those who don't know what you mean by "pouring" bearing please do a picture series on it. I actually know what the process of pouring Babbitt intails, my cousins rebuilt a1909 25hp case steam tractor, and i learned of it from them. here is a picture of the beast. <a href="http://www.freemansmill.com/pictures/big/case-4.jpg" target="_blank">http://www.freemansmill.com/pictures/big/case-4.jpg</a>
Well I didn't take any pictures during the actual pouring process. That part is pretty simple. Bolt the rod together with a fair number of shims and jig it up on a nice flat plate. Put a shaft of a smaller diameter than the crank in the rod. Use a sort of clay called Dam-tight to plug any gaps and holes. Heat up your babbit and dump her in. Then disassemble. The tricky part is boring it properly. Luckily enough my dad got his hands on a rod boring machine several years ago. It was made here in SD and was designed to be used on old cars like your Model A's and T's. However, it works just as good on a tractor part. This isn't to say you couldn't use a boring bar in a mill or do it the really old fashioned way with a scraping knife. But if you have the machine for it might as well use it. Though I will admit these rods are stretching the limits of the machine as evidenced by the C-clamp. On to pics. 
This is the whole setup. Pretty simple in design. 
Here you can see the raw pour. Not the best looking job, but that's why we bore. 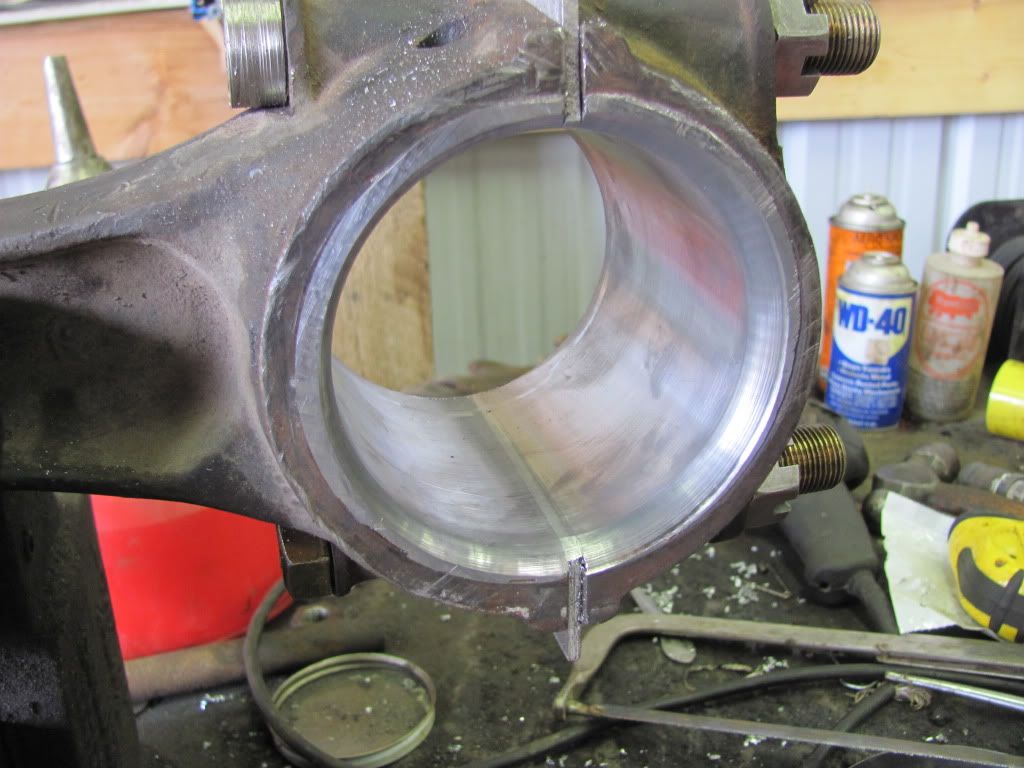
After boring and radiusing the ends now it looks like a good bearing. 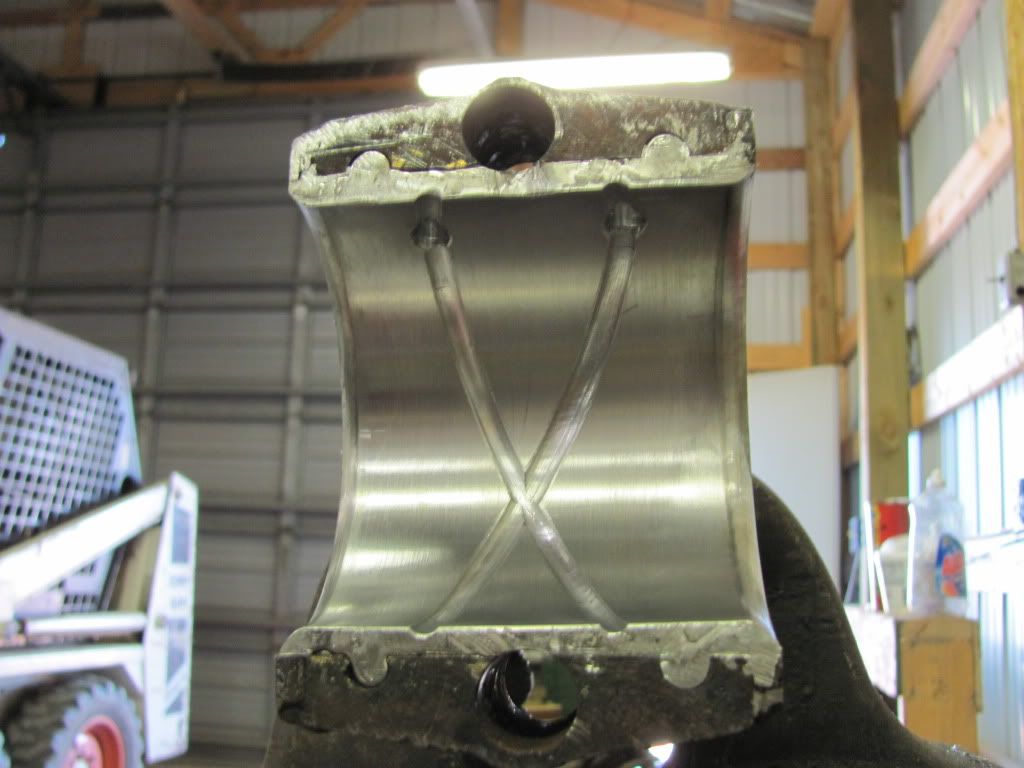
Final step is putting the oil gallery crosshatching in so the journal can get oil. The rod boring machine has an attachment to do this. 
What it looks like together. 
Once finished boring you got to fit the rods to the crank. They are never perfect and weren't designed to be. That's why we have shims like I mentioned earlier. Once you achieve the proper fit, you're done. Progress has slowed considerably with me working 2 jobs and going to class. Not to mention it just got cold and this shop isn't insulated yet. I have placed the crank back into one of the tractors and have been working on setting the endplay in the mains. This is also quite a process. The factory used a peel-able paper gasket on the mains. I basically have to do the same thing. It is quite tedious but it has got to be done right. |
|
|
|
[#31]
OST
|
|
|
|
[#32]
that is so cool. i think ill keep up with this one.
|
|
|
|
[#33]
How did I miss this?!? Bump for more cast-iron action. |
|
|
|
[#34]
thats pretty bad ass i havent heard pouring bearings in a looong time
|
|
|
|
[#35]
Another fascinating thread. I love anything to do with restorations.
|
|
|
|
[#36]
I missed this thread and all of the updates somehow. So this is a tag.
|
|
|
|
[#37]
Quoted: You were not wronged by the local city government by any chance, were you? LOL killdozer? |
|
|
|
[#38]
This is gonna be sweet when its all finished. I love the ingenuity of arfcommers.
|
|
|
|
[#39]
cool
|
|
|
|
[#40]
<––––––––another Kroil lover here
Quoted:
I missed this thread and all of the updates somehow. So this is a tag. Ditto . Cool rod boring machine The first auto machine shop I apprenticed in had one of the old machines like you used . I never got to use it , but supposedly it was the only one in the state . The old-timers that taught me back in the 80's said they had done a shit load of model A rods with it . |
|
|
|
[#41]
Can't wait to see more. I love old tractors.
|
|
|
|
[#42]
This threadelivers
|
|
|
|
[#43]
this is a great thread. tagging it for updates
|
|
|
|
[#44]
Quoted:
How did I miss this?!? Bump for more cast-iron action. No Kidding, this is awesome |
|
|
|
[#45]
pretty cool
Bump |
|
|
|
[#46]
Minor update.
Got both crankshafts put back in the tractors and fitted. I just need to make a felt seal for the flywheel side of both main bearings and the flywheels will be ready to go back on. I also pressed out the valve guides from the head on "humpty dumpty." I wouldn't have had to do that except as you'll see in the pics, some monkey put them in upside down. The cast in oilcups face down and don't allow the valve stem to be oiled. Another reason why I say whoever had this tractor needed his tools taken away and beat with them. 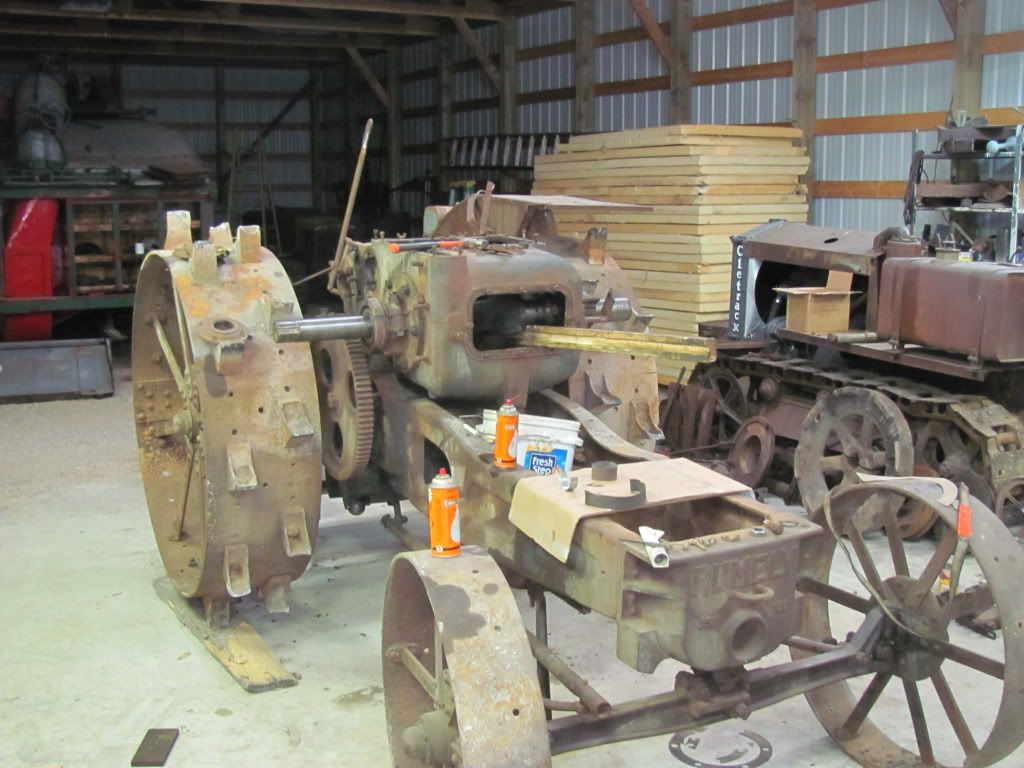
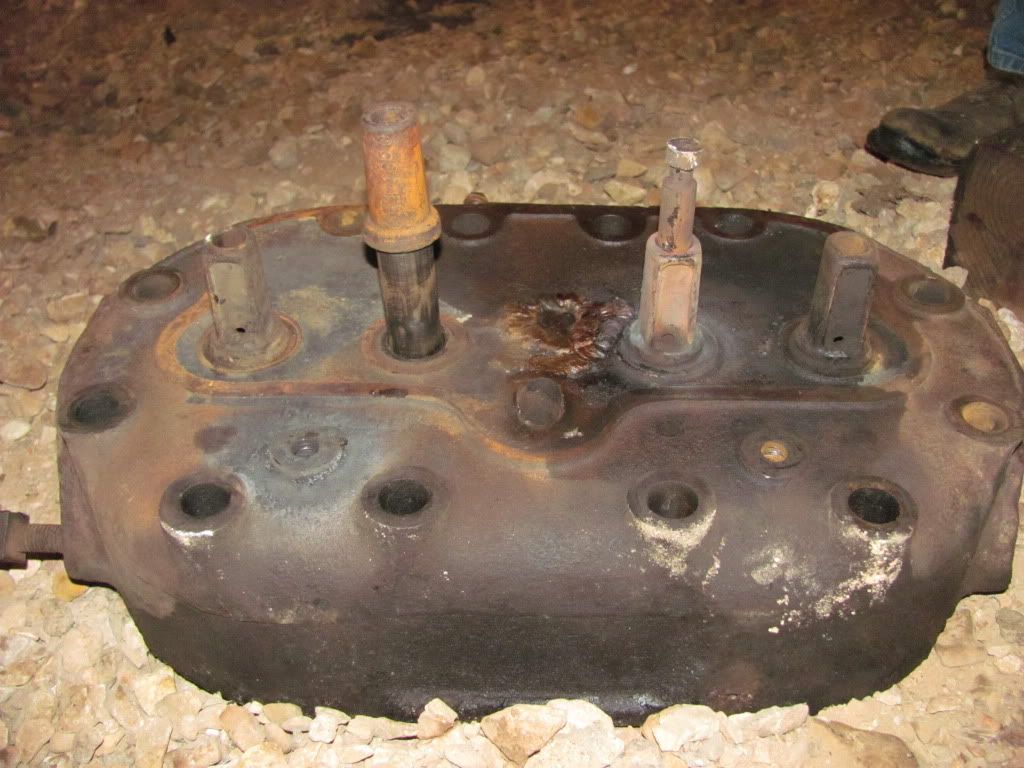
Looking at the bottom of the head. Notice the little holes and the square cup in the valve guides? Those should be up. 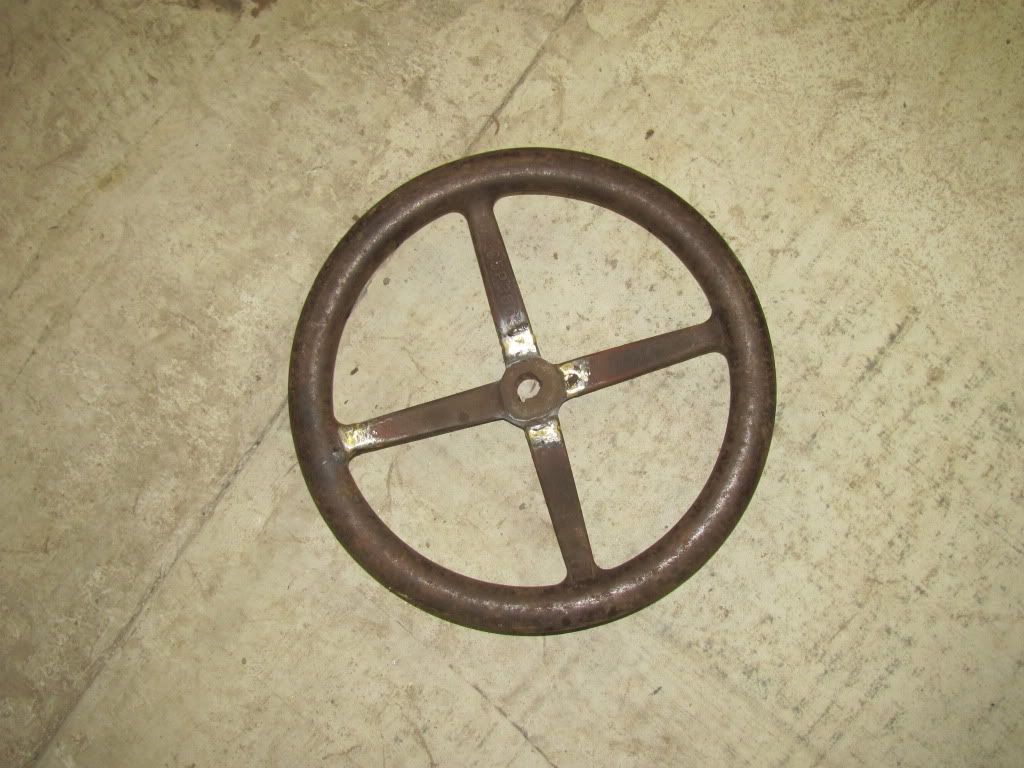
Some of my welding work. You can see the broken steering wheel in the 2nd pic of the OP. I'm by no means a professional, but I get by. And cast iron is very tough to weld. Welding spokes on a cast iron part is even harder. These welds have been ground flat and sanded a bit to blend them back into the cast iron. When painted you probably will have a tough time seeing the repair (I hope). |
|
|
|
[#47]
The con-rod bearing refurb is incredible!
|
|
|
|
[#48]
Heh heh you said erect....
|
|
|
|
[#49]
Quoted:
<––––––––another Kroil lover here Quoted:
I missed this thread and all of the updates somehow. So this is a tag. Ditto . Cool rod boring machine The first auto machine shop I apprenticed in had one of the old machines like you used . I never got to use it , but supposedly it was the only one in the state . The old-timers that taught me back in the 80's said they had done a shit load of model A rods with it . You know it's funny some of the old tools that a guy like me will seek out that are completely obsolete today. Take modern bearings for example. You call clevite and say I needs bearings for a SBC. A few days later you get them in the mail. I don't have that option so I try and find the tools that were used for the same purpose back in the day. Another oddity I have on the shelf is a magnet charger. Used for re-energizing the magnets on old magnetos. Absolutely useless on modern equipment but nearly worth its weight in gold for someone like me. When I get to it here in the near future I'll have to do series on casting a few minor parts that I need. That's kind of neat to see too. |
|
|
|
[#50]
Quoted:
When I get to it here in the near future I'll have to do series on casting a few minor parts that I need. That's kind of neat to see too. Please do! |
|
|
 Win a FREE Membership!
Sign up for the ARFCOM weekly newsletter and be entered to win a free ARFCOM membership. One new winner* is announced every week!
You will receive an email every Friday morning featuring the latest chatter from the hottest topics, breaking news surrounding legislation, as well as exclusive deals only available to ARFCOM email subscribers.

AR15.COM is the world's largest firearm community and is a gathering place for firearm enthusiasts of all types.
From hunters and military members, to competition shooters and general firearm enthusiasts, we welcome anyone who values and respects the way of the firearm.

Subscribe to our monthly Newsletter to receive firearm news, product discounts from your favorite Industry Partners, and more.
Copyright © 1996-2024 AR15.COM LLC. All Rights Reserved.
Any use of this content without express written consent is prohibited.
AR15.Com reserves the right to overwrite or replace any affiliate, commercial, or monetizable links, posted by users, with our own.


