|
Posted: 2/27/2010 2:59:16 PM EDT
I figured I would give painting ammo cans a go.
Let us call these two pictures a... teaser... I have at least 6 cans I will be painting with different imagery... So sneak peak, fresh from the paint. 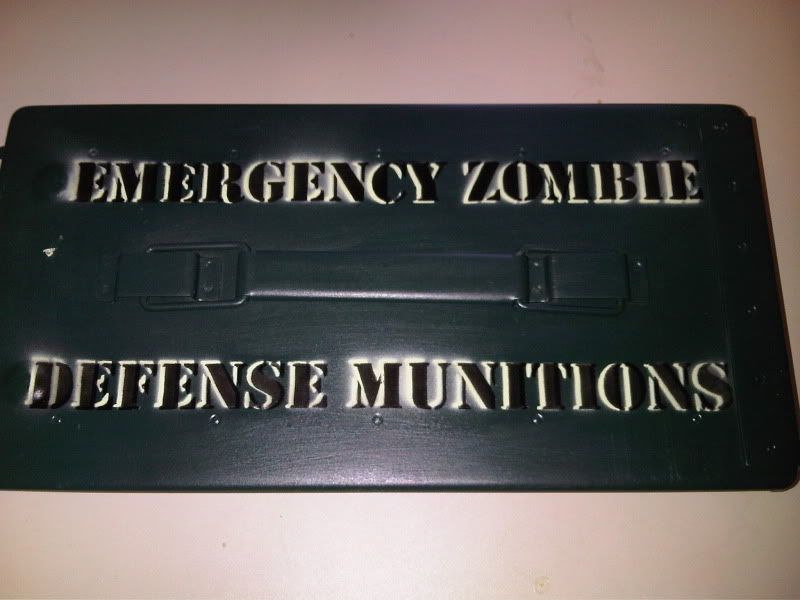 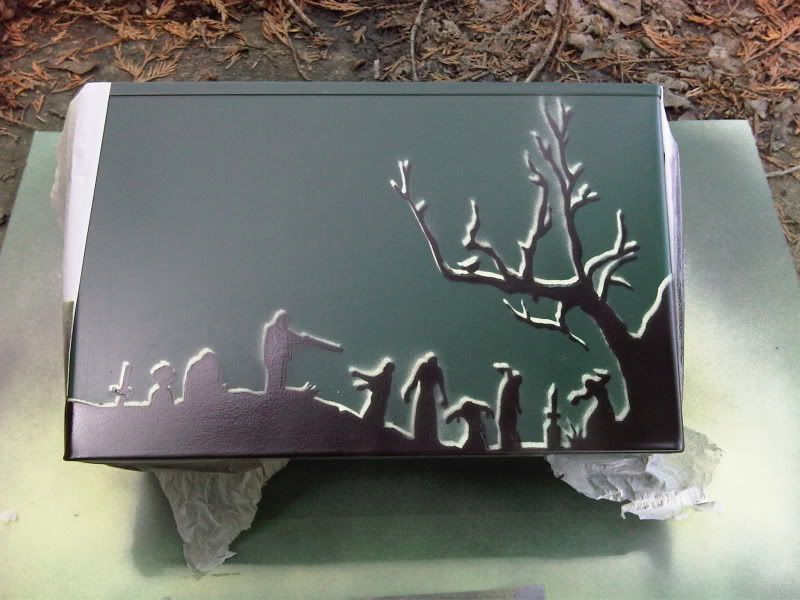 |
|
|
|
[#1]
That's very creative. How'd you get the effect?
|
|
|
|
[#2]
Stencil shot in light color, then slide the stencil just a little. Hit with the dark.
Here is what that side looks like now. This side is now 100% done except for maybe a matte clear coat. 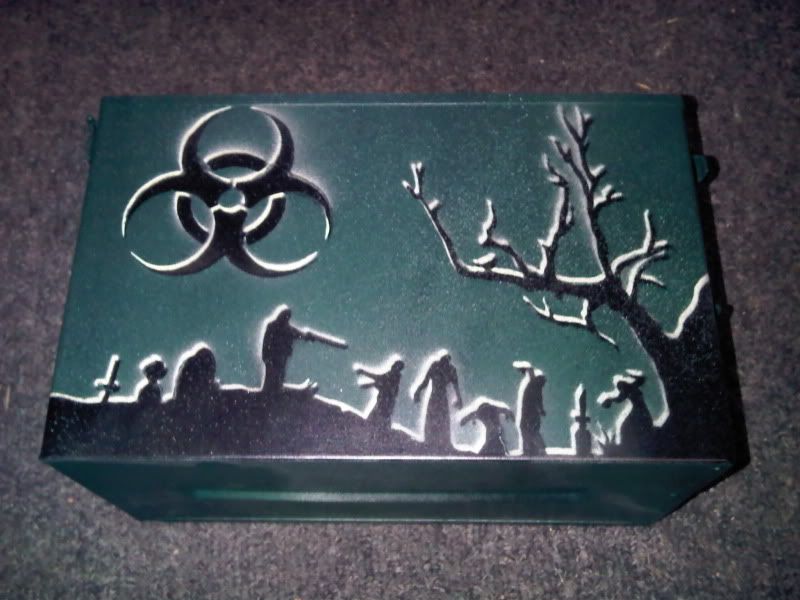 The flash is really making the light color pop a lot. It is a little more subdued in normal light. I will turn off the flash for final photos. I will try and have this can done by tomorrow and give a 4 sides and top shot. |
|
|
|
[#3]
cool
|
|
|
|
[#4]
best one i have seen
|
|
|
|
[#5]
looks great
|
|
|
|
[#6]
Nicely done..........would you do mine?
|
|
|
|
[#7]
Nice work.
|
|
|
|
[#8]
Thats awesome! But you mispelled munitions.
 Im kidding, thats a really cool effect using the stencil. Im kidding, thats a really cool effect using the stencil.
|
|
|
|
[#9]
I like. Good job!
|
|
|
|
[#10]
Quoted: Thats awesome! But you mispelled munitions. Im kidding, thats a really cool effect using the stencil. Was about to yell FUCK when you said that. Don't know why... I know I double checked my spellings Quoted: Nicely done..........would you do mine? Absolutely... For a cost. If serious send me a IM and I will break it down for ya. Thanks to everyone for the comments so far. Like I said I got plans for 6 cans. Got some gas mask designs. Large zed designs. Skulls... The whole kit and kaboodle. As for now, on my way out to a Police ride along. So look for updates tomorrow. |
|
|
|
[#11]
Very nice.
|
|
|
|
[#12]
Verah nice!
|
|
|
|
[#13]
Looks damn good! I've got to get some more ammo cans at the next gun show.
|
|
|
|
[#14]
Where did you get the stencil from?
|
|
|
|
[#15]
just dont do fake blood it looks like garbage
|
|
|
|
[#16]
All mine get powder coated .....
|
|
|
|
[#17]
Quoted: Where did you get the stencil from? Just cut them out. You can find some stencils online. But you can turn almost any normal image into a stencil if you know what you are doing. |
|
|
|
[#18]
First can pretty much done today. As promised.
The only thing missing is the caliber tag (lost the stencil need to make another tomorrow) which will go on the lids lock handle. So the blank side you see will have the caliber. Large side 1: 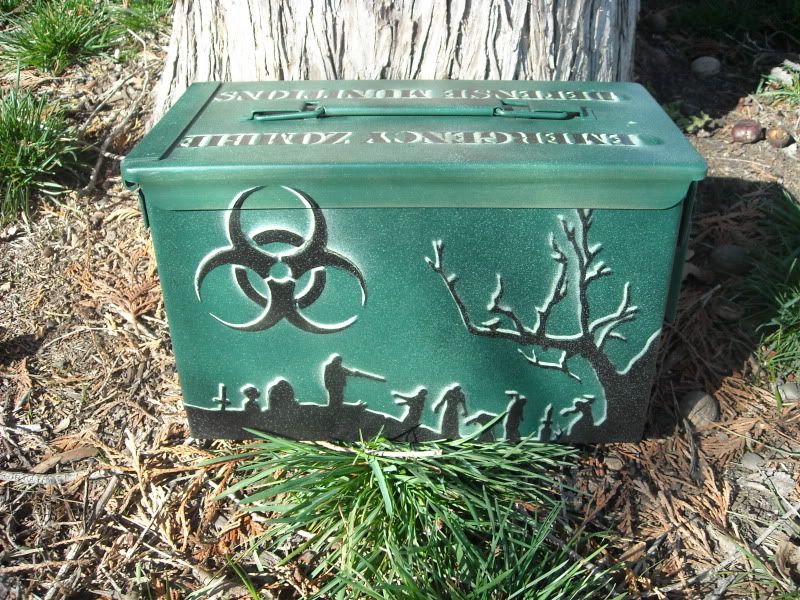 Large side 2:  Small side 1:  Small side 2: 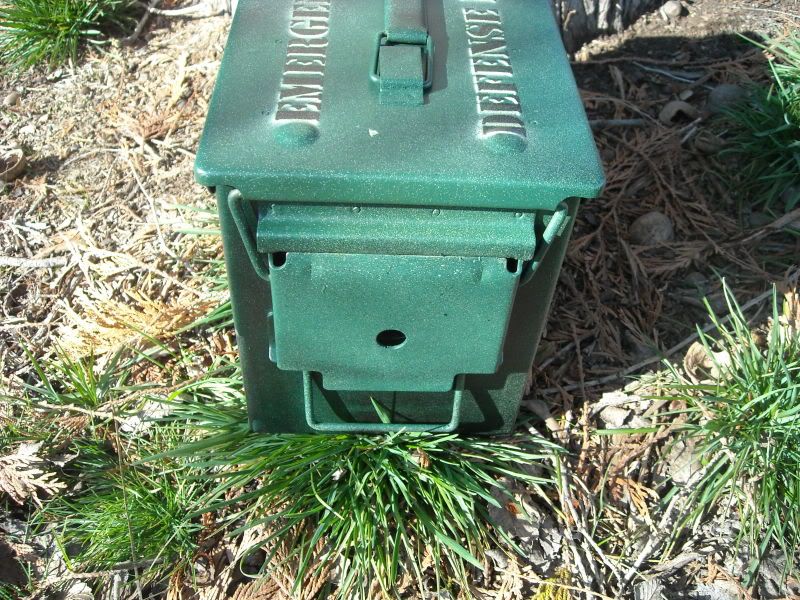 Lid: 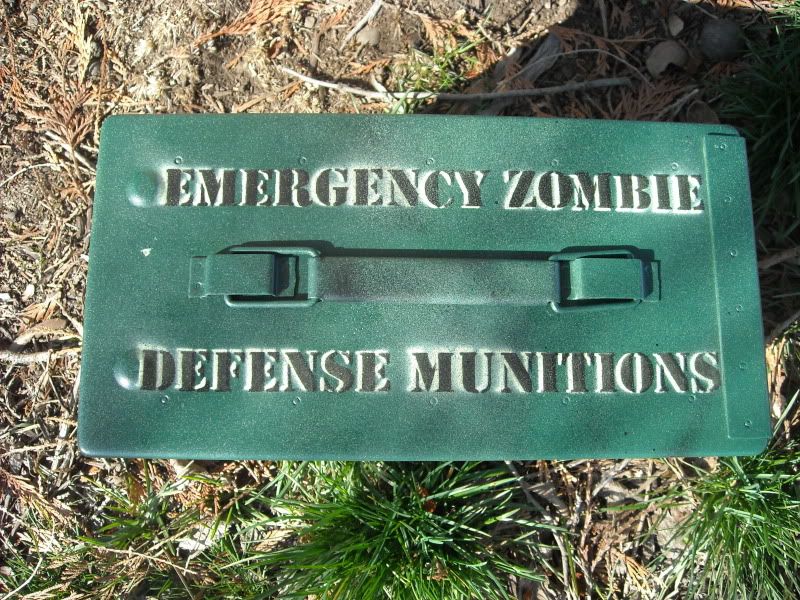 Close up of matching paint from lid to body 1: 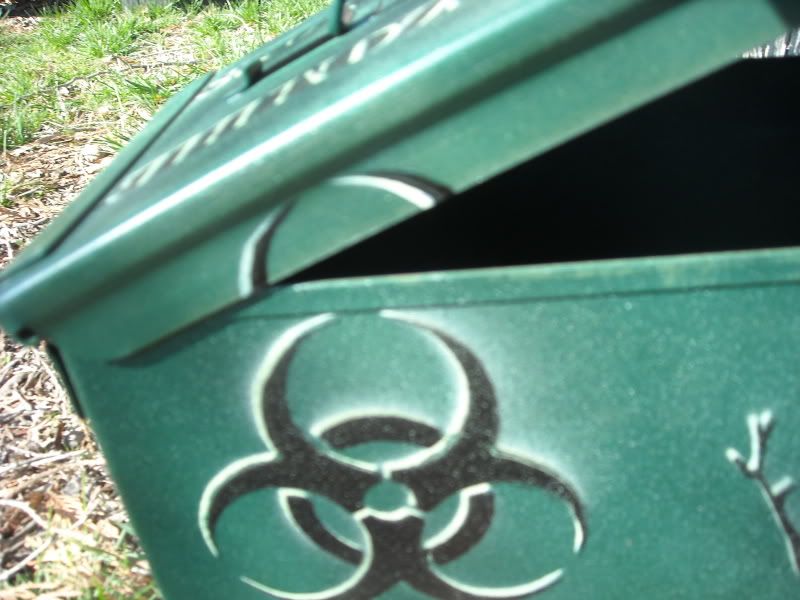 Close up of matching paint from lid to body 2:  |
|
|
|
[#19]
Looks great, if you have the stencil on a printable file and want to share........Let me know
|
|
|
|
[#20]
Awesome!
|
|
|
|
[#21]
Can 2 has begun... Another look into where this one is headed...
 |
|
|
|
[#22]
Wow, that is really cool........great idea.....!
|
|
|
|
[#23]
That is really cool. Did you use stencils for the zombie head too? If so how did you make them?
Again, great work... |
|
|
|
[#24]
Quoted: That is really cool. Did you use stencils for the zombie head too? If so how did you make them? Again, great work... I took a picture of a zombie I found online, then I cut out sections to make the detailed stencil (dark portions) then I cut out a whole background section that was painted first to give you the light back color. For that I just sprayed the detailed stencil on a peice of paper then cut out a outline around it. So you paint the light background, then put the detail stencil over the top. Basically all you need is an exacto knife (craft knives) set and a steady hand. |
|
|
|
[#25]
You guys should seriously think about trying to make money off this stuff.With all the mainstream zombie interest I think it would be worth it.
|
|
|
|
[#26]
If I just had the free time for all these ideas I get in my head...
Great work man, thanks a bunch for adding to my "To Do" list. 
Edit: I own page 2
|
|
|
|
[#27]
That looks good.
|
|
|
|
[#28]
Quoted:
Quoted:
That is really cool. Did you use stencils for the zombie head too? If so how did you make them? Again, great work... I took a picture of a zombie I found online, then I cut out sections to make the detailed stencil (dark portions) then I cut out a whole background section that was painted first to give you the light back color. For that I just sprayed the detailed stencil on a peice of paper then cut out a outline around it. So you paint the light background, then put the detail stencil over the top. Basically all you need is an exacto knife (craft knives) set and a steady hand. So you are using paper as the stencil, I always thought that you had to use some sort of plastic to keep the paint from bleeding through. |
|
|
|
[#29]
Quoted: Quoted: Quoted: That is really cool. Did you use stencils for the zombie head too? If so how did you make them? Again, great work... I took a picture of a zombie I found online, then I cut out sections to make the detailed stencil (dark portions) then I cut out a whole background section that was painted first to give you the light back color. For that I just sprayed the detailed stencil on a peice of paper then cut out a outline around it. So you paint the light background, then put the detail stencil over the top. Basically all you need is an exacto knife (craft knives) set and a steady hand. So you are using paper as the stencil, I always thought that you had to use some sort of plastic to keep the paint from bleeding through. Plastic would be best and make the stencils last longer. I just used really heavy duty card stock. Seems to be holding up so far. |
|
|
|
[#30]
Can 2 done!
Lid: 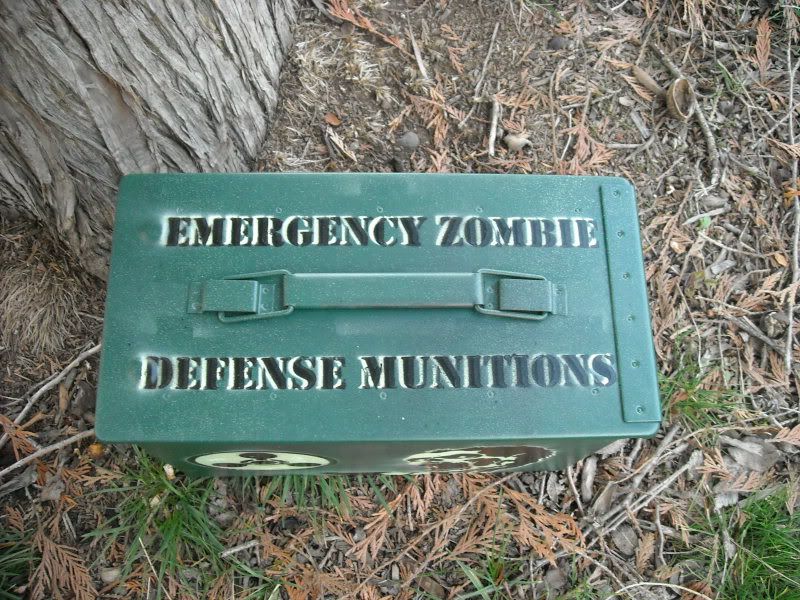 Side 1:  Side 2: 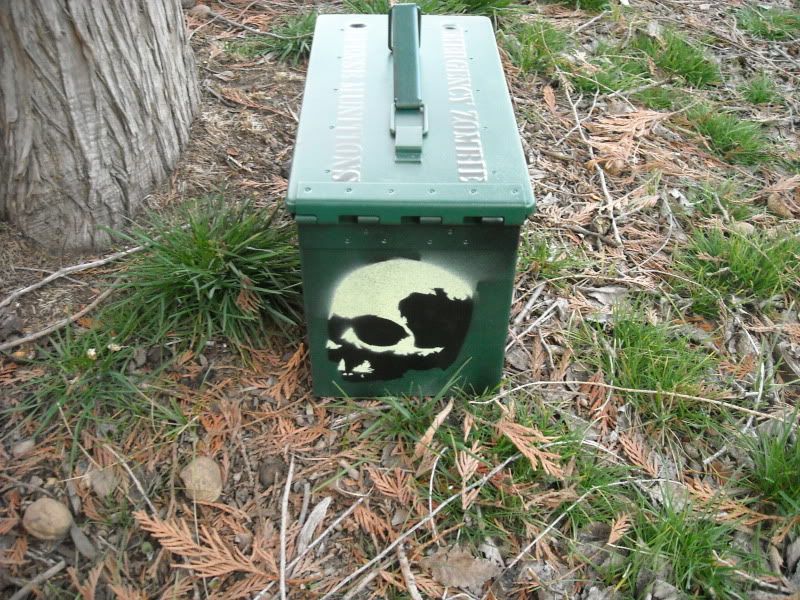 Side 3: 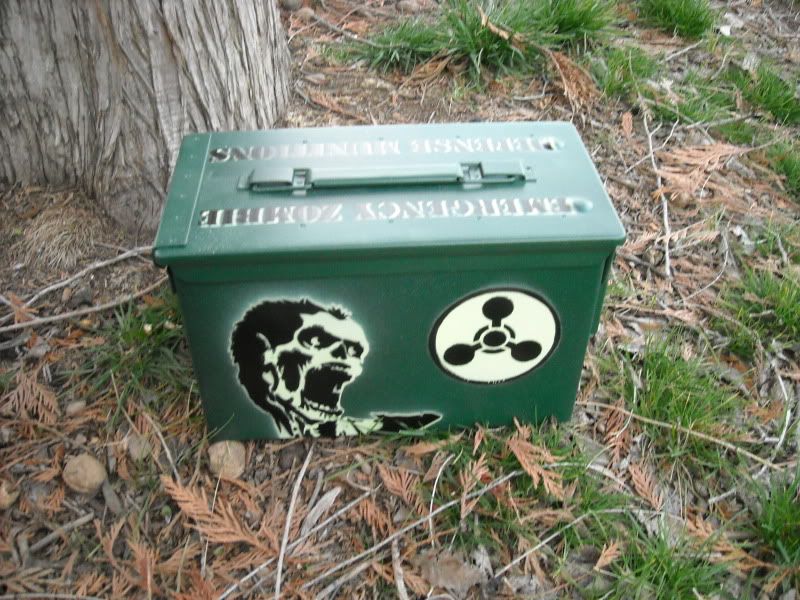 Side 4 (will have caliber):  For anyone wondering, the symbol used on the large sides is the military's chemical weapon symbol.
|
|
|
|
[#31]
Here is how the caliber sides will be looking:
 And the other:  |
|
|
|
[#32]
Very cool, I would buy many of those!
|
|
|
|
[#33]
Quoted:
If I just had the free time for all these ideas I get in my head... Great work man, thanks a bunch for adding to my "To Do" list.
Edit: I own page 2 Sorry, you can't own a page with an edit, you are renting this one like the rest of us... David_ESM, did you disassemble the cans prior to painting them or paint them as a whole? I really like the way that these are turning out for you and I'll probably attempt my own soon... |
|
|
|
[#34]
Quoted: Quoted: If I just had the free time for all these ideas I get in my head... Great work man, thanks a bunch for adding to my "To Do" list. Edit: I own page 2 Sorry, you can't own a page with an edit, you are renting this one like the rest of us... David_ESM, did you disassemble the cans prior to painting them or paint them as a whole? I really like the way that these are turning out for you and I'll probably attempt my own soon... The two shown were only dissasembled in the aspect of the lid removed from the body The insides of the can and lid were not painted. I sanded down all surfaces that got paint coverage including sanding a little more on the military lettering to make sure it didn't show through. |
|
|
|
[#35]
Those look awesome!!!
|
|
|
|
[#36]
Sorry if I'm beating a dead horse here but for the latch mechanism did you just spray in from the sides. It looks so evenly covered that I figured you must have somehow disassembled the latch. I would be worried about paint building up in the latch and interfering with its function.
|
|
|
|
[#37]
Quoted: Sorry if I'm beating a dead horse here but for the latch mechanism did you just spray in from the sides. It looks so evenly covered that I figured you must have somehow disassembled the latch. I would be worried about paint building up in the latch and interfering with its function. Well you paint the lid and the case seperately. If you mean the latch area on the side of the can I just make sure to hit it with paint from the left, right, top and bottom (just paint the ammo can right side up, then flip it upside down and hit everything again, including the bottom) If you mean the latch mechanism attached to the lid, again I just made sure to spray it from the left, right, top and bottom. The latch is super simplistic which makes it really easy to paint. You just have a solid metal peice on the lid, and then a curvy solid peice on the can. Both are real easy. Edit: As far as paint building up and interfering, well the paint isn't that thick. It isn't like an oil paint going on your wall or something. Just paint it and go with it. The latch might scrape off a little paint from use and who cares... In the end it is an ammo can and it is going to see some use. If you ever feel like fixing it, just spray it again.
|
|
|
|
[#38]
just a thaught. on the can latch jsut above your caliber designator you could place a biohazard insignia with the botom points being split by the hole where the wire seal is suppose to go... just a thaught
|
|
|
|
[#39]
Quoted: just a thaught. on the can latch jsut above your caliber designator you could place a biohazard insignia with the botom points being split by the hole where the wire seal is suppose to go... just a thaught You don't post much my friend, but when you do it is to the point, and I salute you for it. |
|
|
|
[#40]
Good stuff man....
but... We need to get you a woman....you have too much time on your hands! actually I'm just jealous! |
|
|
|
[#41]
Quoted: Good stuff man.... but... We need to get you a woman....you have too much time on your hands! actually I'm just jealous! I have one... When she came home and saw what I was doing she took her own photos and posted them for her friends... If you cruise BOTD much you may have seen her.
|
|
|
|
[#42]
Then you sir, are one lucky guy!
remember...I'm still jealous! |
|
|
|
[#43]
Quoted:
Quoted:
just a thaught. on the can latch jsut above your caliber designator you could place a biohazard insignia with the botom points being split by the hole where the wire seal is suppose to go... just a thaught You don't post much my friend, but when you do it is to the point, and I salute you for it. thank you, you know the old addage, you are born with two ears (eyes) and one mouth so its only common sense to listen (read) twice as much as you talk (post)... i dont know your hobby back ground but you obveously have some art in there. there are some ways to get a really clean/long lasting finnish on a painted steal surface. i did paint and body work for 3 years up till 2008 and have beed doing it as a hobby and a way to feed my weapon habbit. if you are curious about anything i love this kind of stuff. or if you have more experience in this than me... disregard and chalk my post up to being a noob. *like my section leader use to tell me "shoot back then finnish your joke".* |
|
|
|
[#44]
<a href="http://s66.photobucket.com/albums/h244/thelms0305/?action=view¤t=barret.jpg" target="_blank"><img src="http://i66.photobucket.com/albums/h244/thelms0305/barret.jpg" border="0" alt="Photobucket"></a>
|
|
|
|
[#45]
|
|
|
|
[#46]
|
|
|
|
[#47]
I have no such talents.
|
|
|
|
[#48]
Quoted: I have no such talents. Yeah... I have an art background (could easily fill a 10+ page thread with sketches) but you definitely don't need it for this. All you need is a sharp thin blade. A computer + Printer. Ammo can. Paint. And if you fuck up? Sand and repaint... Or throw the can around the yard to get it scratched up a bit and call it a well used or rugged look
|
|
|
|
[#49]
Quoted: heres one for the ladies http://i66.photobucket.com/albums/h244/thelms0305/skulltemplate1.jpg If my girlfriend ever shot her own ammo then perhaps I would... Since she just shoots my money, that will have to wait. She loves Gizmo from the Gremlin movies. In fact her username for most sites is RamboGizmo. So I went this route last halloween:  |
|
|
|
[#50]
David you have some excellent artistic skills. Those are really well done. The two tone lettering is really eye-popping.
ETA: I have a question on your stencils. I've made a few for my ammo cans (calibers no artwork) but they are a PITA to make using poster board. Do you really make yours using regular paper or is there some other material you've found works well (both in the printer and holds up to spray paint? I was getting frustrated with my 5.56 stencils (smaller numbers on the front never came out sharp IMHO). So when I did my 6.8 cans I used a Sharpie marker and plastic stencils (Put the stencils on the can and run the marker around inside). Sharper numbers but kinda small (and I'd prefer to use paint). 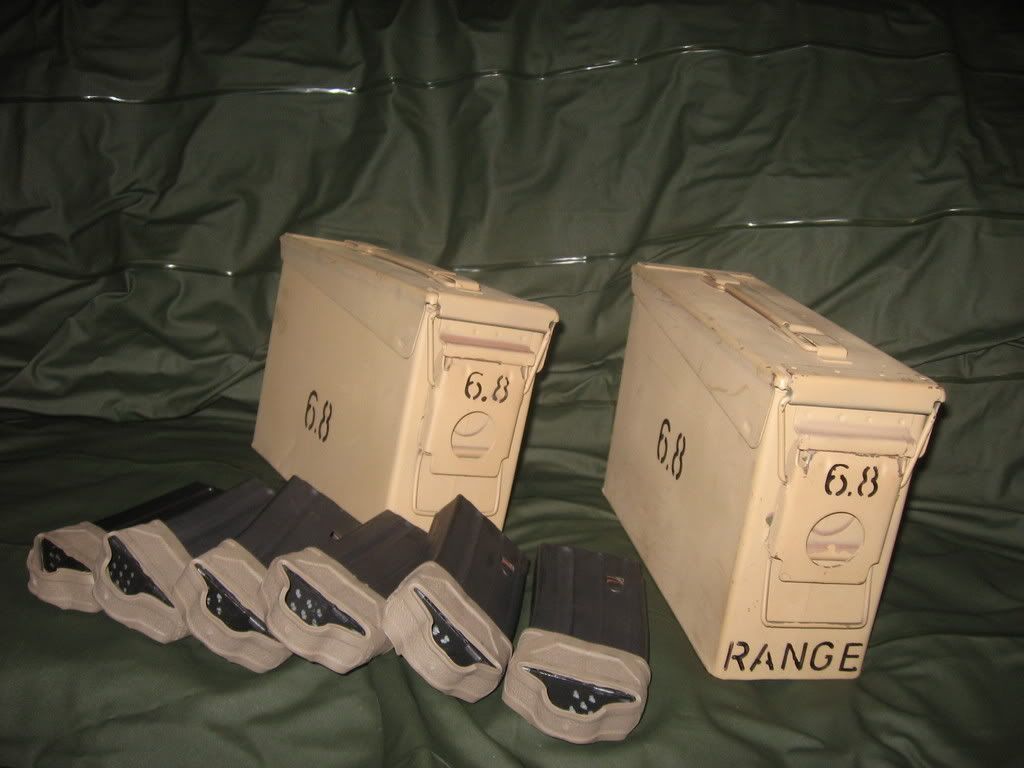
Any suggestions would be welcome. |
|
|
 Win a FREE Membership!
Sign up for the ARFCOM weekly newsletter and be entered to win a free ARFCOM membership. One new winner* is announced every week!
You will receive an email every Friday morning featuring the latest chatter from the hottest topics, breaking news surrounding legislation, as well as exclusive deals only available to ARFCOM email subscribers.

AR15.COM is the world's largest firearm community and is a gathering place for firearm enthusiasts of all types.
From hunters and military members, to competition shooters and general firearm enthusiasts, we welcome anyone who values and respects the way of the firearm.

Subscribe to our monthly Newsletter to receive firearm news, product discounts from your favorite Industry Partners, and more.
Copyright © 1996-2024 AR15.COM LLC. All Rights Reserved.
Any use of this content without express written consent is prohibited.
AR15.Com reserves the right to overwrite or replace any affiliate, commercial, or monetizable links, posted by users, with our own.


