|
Posted: 7/29/2017 3:31:13 PM EDT
[Last Edit: jacobsk]
It's a beautiful 73 degrees today here in Wisconsin. I have the house opened up and I'm trying to finish the last bit of plaster molding in our renovation.
Low humidity is helping the mud set and I'm skipping right along. I've always been inspired by others innovation, creativity, and work ethic, this practically defines the successful modern DIY'er mentality. I KNOW I'm not the only one tackling projects on the house, car, yard or whatever. What did you do today? Cutting an 8ft molding down: 
Assistant is lazily basking in the sun while I mix up plaster to hang the molding: 
First corner up in the air: 
Second piece ready to go, after a beer of course: 
|
|
|
|
AZ, USA
|
[#1]
And I thought finishing the subway tile on a 10ft tall wall was good. You guys are working like I did when I was 25. Long time ago.
|
|
|
|
[#2]
Originally Posted By JQ66:
Why not make a mold from that casting? Then cast with plaster, just like they would have done years ago? 
Nice finish on the chair, black is no easy finish to pull off, if shows every imperfection that wood grain hides! |
|
|
|
|
[#3]
With fall arriving I figured best to get our front door fitted, sealed and finished.
Had to mortise in a new lockset with deadbolt (the original from 1910 ha did several broken cast iron pieces in the mechanism) 
Re-keyed the sergeant brand deadbolt lock with a Kwickset key. This involves modifying the key "profile" in the tumbler as well as making custom pins for the tumbler (never did this before) 
Since the original lock had nice brass plates I wanted to reuse them, this involved modifying the openings from skeleton key to deadbolt: 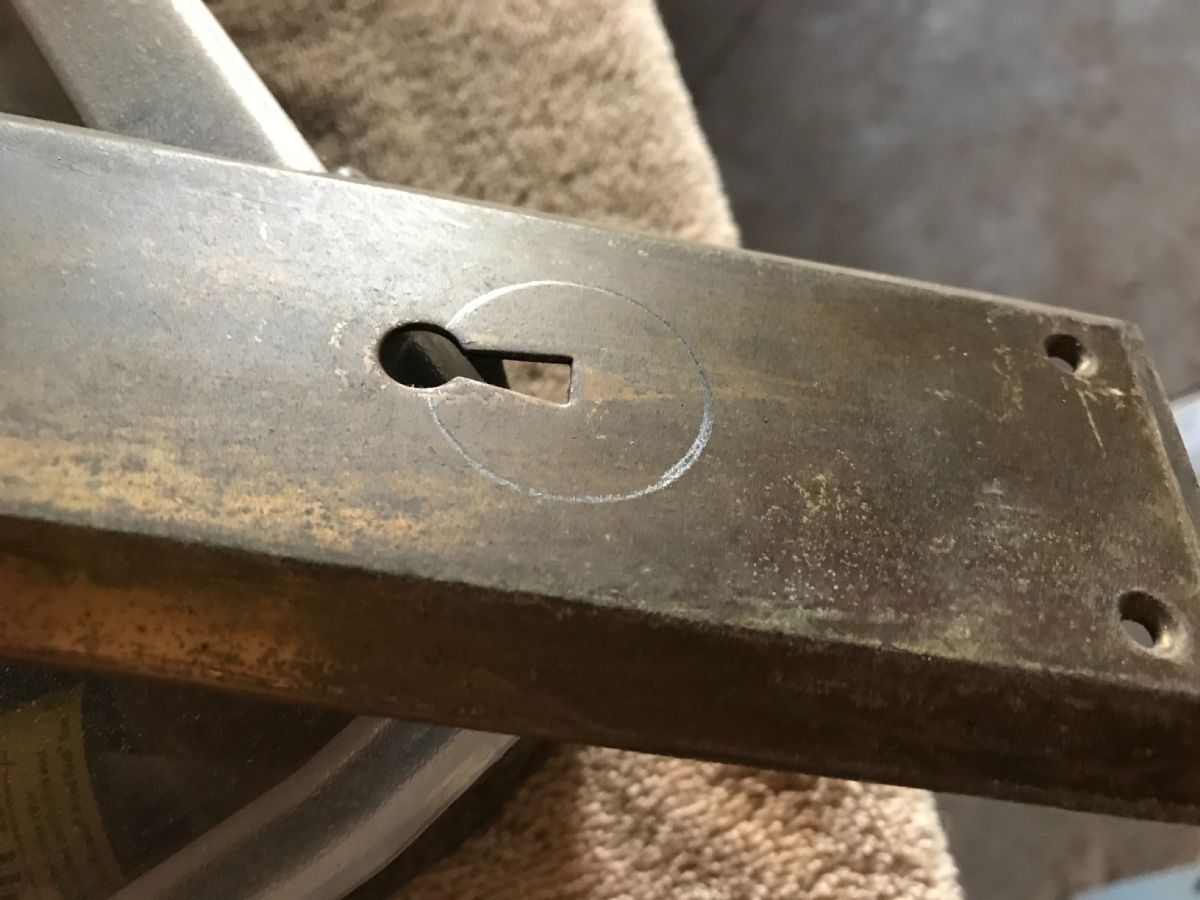
Vintage hardware (primarily brass) is such a pleasure to work with. It works so much better than cruddy pot metal which most items are made of today. It's predictable and forgiving. And it's already so old that I really can't screw up the finish! 
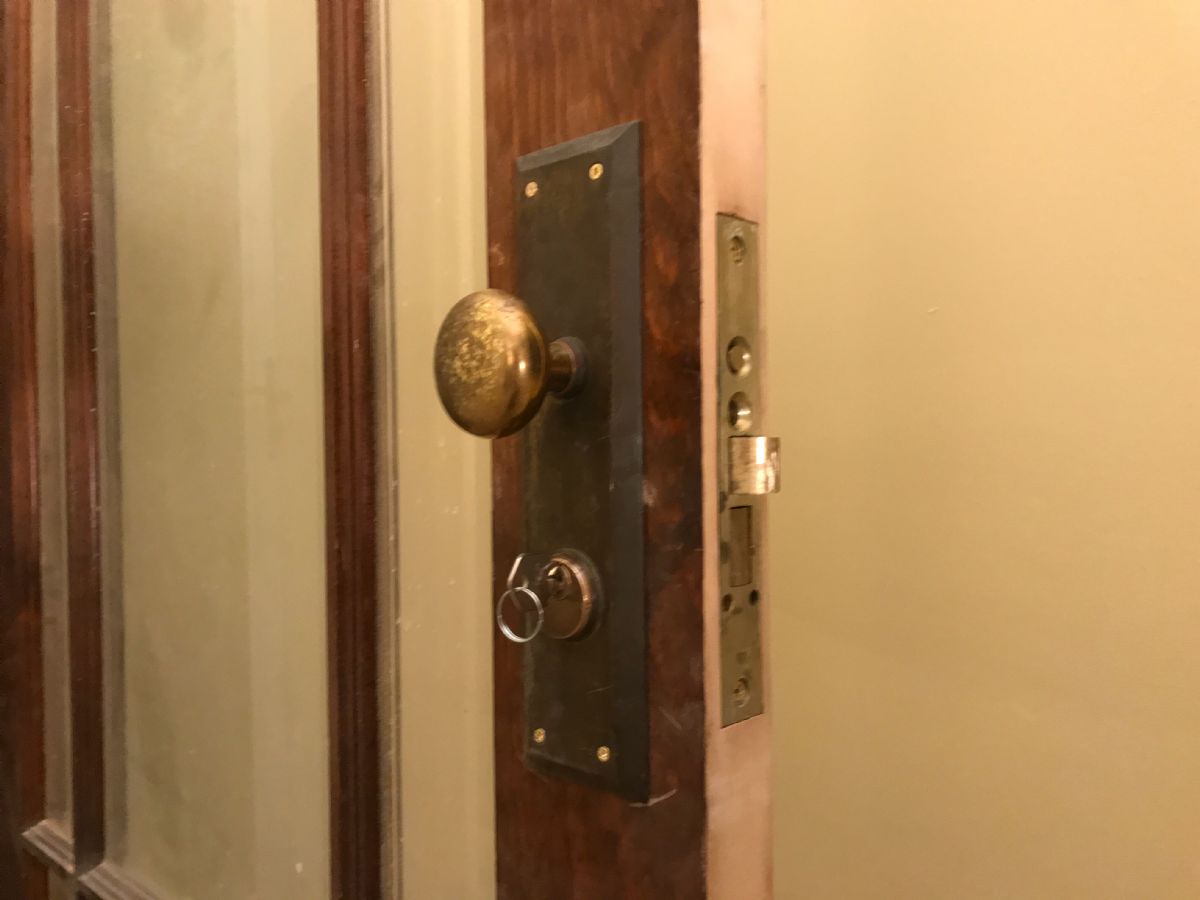
Sanded the rest of the door after final fitting and got two coats of garnet shellac on it so far tonight, my goal is three for a rich dark color before a blonde top coat. 
|
|
|
|
|
[#4]
My old tomahawk / archery target stand fell over after 9 years. A drunk driver in a brand new 2017 F150 decided he could park his truck on top of a power pole. I asked teh power co after they replaced the pole if I could have the old one. This is my new tomahawk archery target stand.


|
|
|
|
|
[#5]


Thanks to jacobsk for the tomahawk target. |
|
|
|
|
[#6]
Originally Posted By Grizz272:
https://www.AR15.Com/media/mediaFiles/175574/P1010041_JPG-306500.jpg https://www.AR15.Com/media/mediaFiles/175574/P1010045_JPG-306501.jpg Thanks to jacobsk for the tomahawk target. |
|
|
|
|
[#7]
I've been in split and stack mode the last theee days. Moved two seasoned cord next to the house and wrapped it. Split and stacked 2 new cord. After the first freeze I'll move two more seasoned cords inside the garage.
I've got about 2-3 more cords to split. |
|
|
|
|
[#8]
|
|
|
|
|
[Last Edit: jacobsk]
[#9]
Originally Posted By Grizz272:
Thanks to jacobsk for the tomahawk target. Originally Posted By Grizz272:
Thanks to jacobsk for the tomahawk target. Originally Posted By zegermanznew:
I've been in split and stack mode the last theee days. Moved two seasoned cord next to the house and wrapped it. Split and stacked 2 new cord. After the first freeze I'll move two more seasoned cords inside the garage. I've got about 2-3 more cords to split. Originally Posted By phatmax:
Spun a couple practice pieces to do some file handles. |
|
|
|
|
[#10]
Originally Posted By jacobsk:
Nice looking stand Grizz. I still can't figure out how you can get a tomahawk to stick into a log like that! Aaah fall. Wood splitting time. Helping you remember you can wear out muscles you forgot you had! I assume you poke the file into the handle? Do you just pound it in or is there a way to fasten it. I have one that I've inherited and the handle just falls off. I'm afraid if I drive the file in it'll split. |
|
|
|
|
[#11]
|
|
|
|
|
[Last Edit: DavidLee_64]
[#12]
I will be starting my next project soon. I have been having some issues with my RV power, low voltage, etc. I have been using another circuit on an extension cord for a portable A/C, battery charger, etc. I just replaced the power center as it was not charging the batteries. Then a 20 Amp breaker went out in my Sub Panel. I traced a short to a crappy installation to a receptacle. But the bad part, from the same installer, is that he ran the 30 Amp RV receptacle about 110' using 14 AWG wire. 100' should be 6 AWG at a minimum. So it's time to get some materials and run a new line.
Edit: This guy insists on helping me! 
|
|
|
|
OH, USA
|
[#13]
I cut down a huge Ash tree in my woods. I felled it exactly where I wanted. This Saturday my son and I plan to cut it and haul it to the sawmill to have boards made for my sons house.
I also put a new Winch on my ATV. I had the whole front end torn off that thing. I changed out the contactor and replaced the handlebar switch and added a remoter control(wired) unit. |
|
|
|
[#14]
I installed some fans in my media closet.

|
|
|
|
|
[#15]
After a good shellacking the door and locks are back in, brass weather stripping installed as well (I hate the new style weather stripping)

While I was in the mood to stop drafts I finally added an insulated hatch above the drop down ladder leading to the attic. This is the hole that cost me $$$$ in heating bills last year as it was unsealed. 
|
|
|
|
|
[#16]
Home stretch of replacing the front yard retaining wall, adding the cap blocks and then tossing dirt around to finish the top.
|
|
|
|
|
[Last Edit: zegermanznew]
[#17]
Beautiful work! I love (nice) retaining walls.
ETA: Added the word "nice". I love "nice" retaining walls. lol |
|
|
|
|
[#18]
All day long working on deer stands or blinds. I cobbled together a deck for a blind I have sitting on a crick crossing in a deer funnel. Put the blind up, then I cut shooting lanes and removed a tree that fell on a pasture gate. It was hot and humid in southern Ohio's woods today. Then my friend and neighbor who was helping me packed up our tools and went to new spot he has. Trimmed shooting lanes and put up cameras...
|
|
|
|
|
[Last Edit: ZRXHooligan]
[#19]

Scrubbed, washed, lubricated bike. Murder dog in background trying to murder lizards. Murder dog is a real deutscher Schäferhund from Germany. |
|
|
|
|
[#20]
Whipped together a set of cornhole boards. Unfortunately, in the process, I shot myself in the tip of my left index finger with an 18g brad. I thought my hand was far enough away, I am always conciois about it I just misjudged the distance. The brad must have hit a knot because it curled right out the side with just enough length to fucking stab me. Not a thru shot, but it is still throbbing even now and is incredibly tender to the touch. Fucking sucked but it could have been much worse.
I also used beadboard or wainscoting to back our stairs (hides the original beat to hell wood from 72'). And I built taller walls for my dump trailer for leaf season. I'll have to get pics tomorrow. |
|
|
|
|
[#21]
Ran the new Horror Freight 2000wt. Raked the backyard to clear out all the crappy branches and twigs the ancient oak dropped from Irma.
Smoked sausage and beef on the smoker that was being run by the inverter. Sharpened the turning skews for my lathe. Changed the oil on the new Genny. My only decent pic. |
|
|
|
|
[#22]
Tilled 2800 sq ft of the front yard, distributed 9 yards of compost, fertilizer, tilled it again, rolled it, and laid tall fescue sod.
Only power tools were the tiller, and my lawn mower to pull a small cart. Otherwise it was all shovels and takes. Even with the neighbors help, never again....
|
|
|
|
|
[#23]
Very nice! A lot of work but it looks like it was worth it.
|
|
|
|
|
[#24]
Awesome skills.......you guys got um'
My project for yesterday...... NO WAY am I climbing that tree. I had my gardener do that. I have been installing cameras around my house. I have 10 installed and I am becoming , as my wife stated, a bit nutty with the cameras. Once you install a few......you discover your blind spots. 

|
|
|
|
|
[#25]
That's an awesome spot for a camera, lol.
Ugh, to get into my attic I have to take down the shelves in my pantry. I've been meaning to do it for at least a year but I wasn't looking forward to it. My house wasn't holding heat well even after replacing all the windows, and when we bought the house I noticed the ceiling (in the attic) looked very well insulated. Well I got up there finally and they have R30 but they just ran it across the tops of the ceiling joists and smashed it into the ends preventing venting from the soffits. Even worse, actually, any air that was coming in the soffits was getting trapped in the bays between the insulation and the drywall.. God fucking damnit what the fuck. I spent all day up there yesterday cutting and laying all the insulation in the bays and ending it appropriately so the soffit vents allow air up into the attic space. I had enough to double insulate over the hallway and bedrooms. While I was up there, I ran the wire for our solar array. I've got to get on interconnect approval and permitting for that. This is what it looked like. Huge gaps in between the batts, lumped up everywhere, it was awful. And here is the jist of what it looked like when finished. I was able to stuff it under the plywood as well. What a giant pain in the ass. |
|
|
|
|
[#26]
Here's some shots of the solar wiring. It's just 10/3 romex in the ceiling, splices in a Jbox and turns into #10 THHN for the PVC run outside to get it to the basement. Hits the disconnect and turns back into romex to get to the MSP for a breaker tie in. I'll start a thread when I actually get to the install.
|
|
|
|
|
[#27]
I hid the conduit run right next to the back side of the chimney so you won't see it from anywhere except my side yard, and even then, it's not much of an eye catcher. The disconnect has to be within 10' of the interior disconnect, which is actually just going to be the breaker. It's only 6' away.
|
|
|
|
|
[#28]
Originally Posted By zegermanznew:
I hid the conduit run right next to the back side of the chimney so you won't see it from anywhere except my side yard, and even then, it's not much of an eye catcher. The disconnect has to be within 10' of the interior disconnect, which is actually just going to be the breaker. It's only 6' away. https://www.AR15.Com/media/mediaFiles/252780/IMG_1478-312688.JPG https://www.AR15.Com/media/mediaFiles/252780/IMG_1480-312690.JPG https://www.AR15.Com/media/mediaFiles/252780/IMG_1479-312692.JPG |
|
|
|
|
[#29]
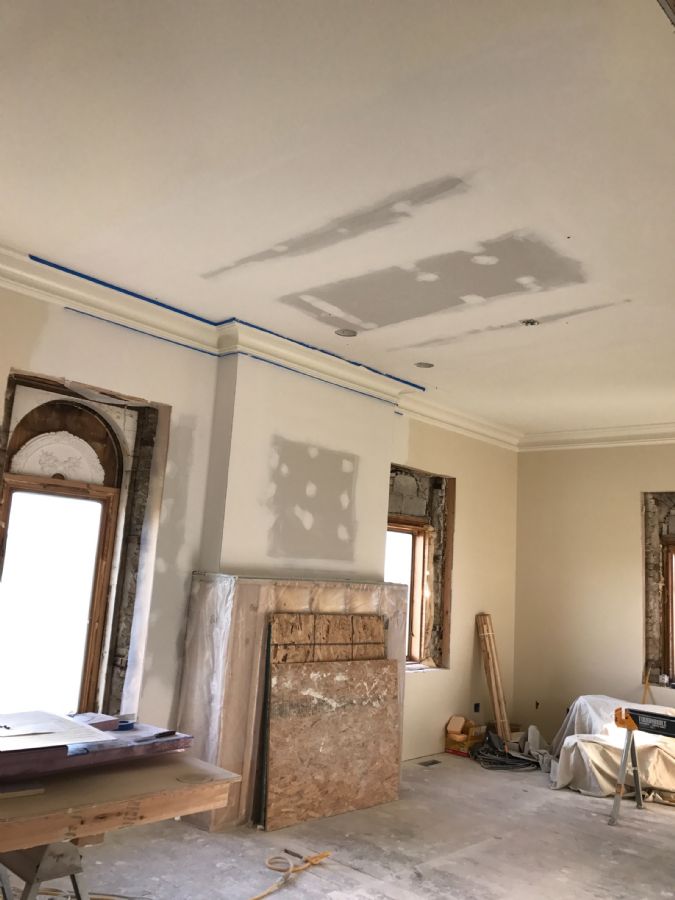
Last drywall patch up from our storm damage, once I get a chance to inspect this in the dark I'll texture and paint it (again)
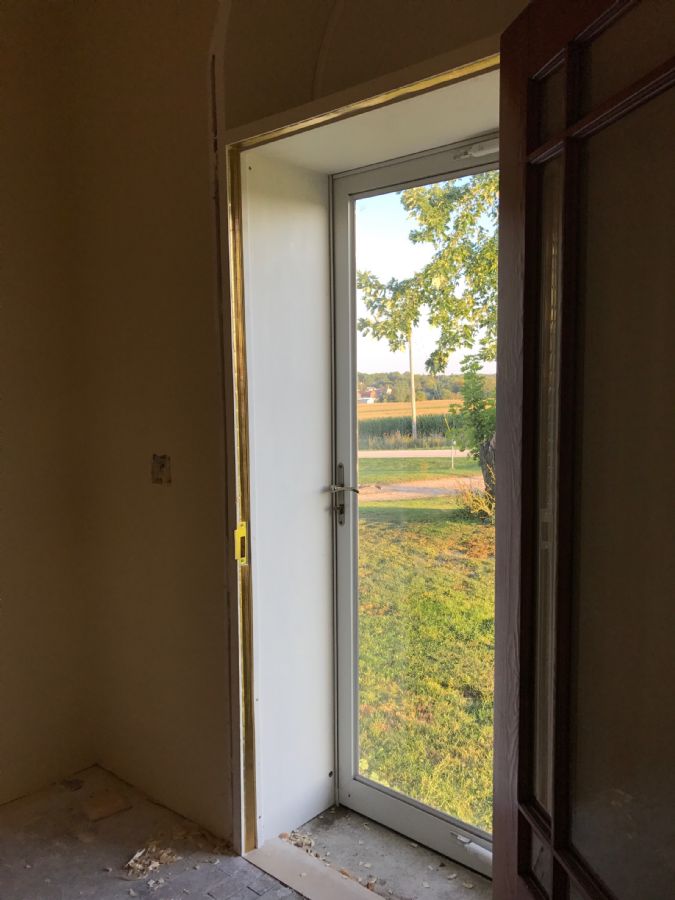
One of the next steps as we head towards trimming out the interior is to make our window sills. Since the brick walls are 16" thick in this house we have to have something which can span from the window through the framing and past the drywall. Rather than make window sills from wood I wanted something more robust, which could handle weight if someone sits or stands on one, and heaven forbid the wife places spot with flowers on the sill I didn't want to have to deal with water staining etc. about a year ago I experimented with different proportions of Portland cement, sand, and clay dug up from the yard. I cast 10 different samples and let the wife pick her favorite color, she picked a color which is very close to the limestone we have throughout the construction of our home. I use a 5/16" glass shower door I picked up from Craigslist to cast the sills, it leaves a smooth shiny surface on whatever you cast to it. The frame is 2x material cut and waxed to a rough dimension to the window sill. 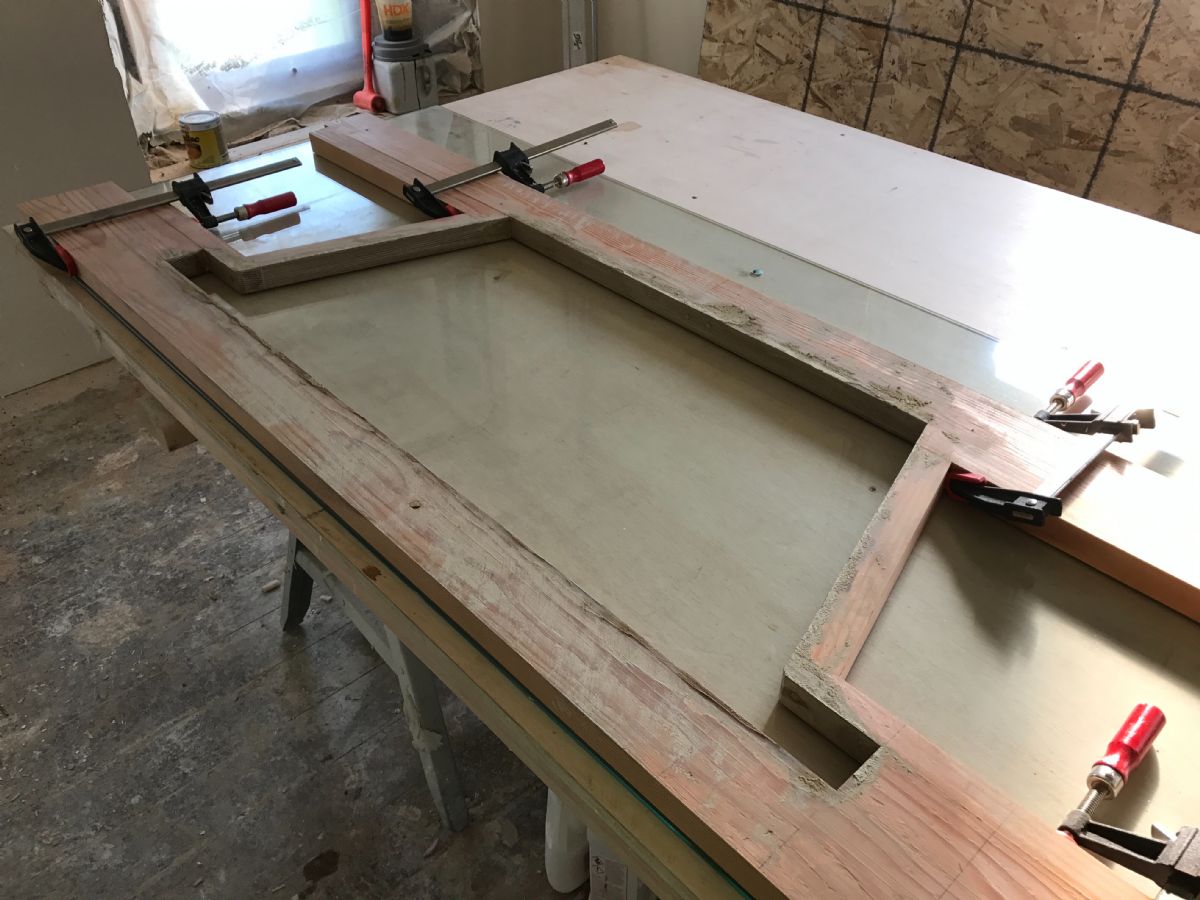
Something happened and I can't upload any more pictures 
|
|
|
|
|
[#30]
The materials I use:
Upper left - white Portland cement Upper right - clay literally dug out of the back yard Lower left - fiberglass fibers (used in concrete) Lower right - pool filter sand 
I start with the clay in the mixer and add my water, this allows me to remove big stones. Then I add the rest and fill the mold troweling it smooth (this will be the underside anyway) 

Here's a pic of the first one I did, cut to fit with the diamond wheel in a grinder. I sealed it with tile sealer. Only 34 more to go !
The trimming of these arched windows is going to be an adventure. The trim and casing will sit on the sill which is why I gotta make them first. 
Oh and I hung a big heavy ass chandelier for the wife today also. My back won't let me forget 
|
|
|
|
KS, USA
|
[Last Edit: Drifter75]
[#31]
No pics but replaced the dryer bearing today, finally we can dry clothes in peace..., fixed a flat on the zero turn, unclogged the dishwasher drain hose, found a penny in it (don't ask how a penny got in the dishwasher I have no idea) and spent four hours sitting at urgent care after taking my wife there. So not any big stuff but a lot of little ankle biters.
|
|
|
|
[#32]
Holy shit dude, how did you think that up? That's impressive. Are you just going to us more Portland to patch it up the little spots or leave it as is? I can't wait to see the finished windows.
16" thick!?! You guys live in a fortress. Chandelier and that centerpiece look fantastic. The place is coming together great. |
|
|
|
|
[Last Edit: jacobsk]
[#33]
Originally Posted By zegermanznew:
Holy shit dude, how did you think that up? That's impressive. Are you just going to us more Portland to patch it up the little spots or leave it as is? I can't wait to see the finished windows. 16" thick!?! You guys live in a fortress. Chandelier and that centerpiece look fantastic. The place is coming together great. In developing a mixture that would work I had three constraints of which #1&2 are interchangeable depending on whether you ask my wife first. 1) Wife had to like the look (she wanted marble) 2) It had to be cheap, I didn't budget for 140sqft of marble, granite, or stone window sills (read $4k+ with all the cutting & polishing) 3) It had to be strong enough to hold 200lbs with a load applied (me standing on it) I bought a bag of white portland cement and started thinking of ways to keep it cheap, since the brick of our house is made from is clay from this region I dug a bunch up figuring it was free. If it didn't work I'd just pour it back in the hole, it is a heck of a lot cheaper than $6/bag of filter sand and $25 bag of portland cement after all. I had the filter sand from my initial stab at bricklaying a few years ago. It ended up being too light colored for that project so it was just leftover, but I did remember it basically remained colorless when mixed into mortar - i.e. the perfect redily available box box store filler material. I did a batch with varying levels of the three components and fiberglass fibers (which are also super cheap) and while the wife thought she was picking out her favorite color I was actually assessing them for strength. I set them up and applied my weight in the middle. The pieces which had 50% or more clay (least expensive) fractured even with fiber reinforcement. The pieces with at least 35% portland cement were all strong enough, so wifey got to pick her color and the mix she liked was 50/50 sand/clay in addition to the cement. I was comfortable with the cost. Aside from my time they cost me $7-8 per sill. I can stomach that ...and yes this place is literally a fortress. Four courses of brick thick total for 16" thick. Add another 5-1/2" for internal framing and R-19 insulation it's 22" (with drywall) of pure silence except but the worst thunder storms. Foundation is 26-28" limestone. It's been standing strong for 144 years thus far and after this remodel it's probably going to last until someone lands a spaceship on the place. Wow, I just edited out a typo and realized that's a wall of text! |
|
|
|
|
[#34]
OP that's a sweet ass house and the work you're doing on it is inspiring.
I've been sand a 4x8 barn door build all weekend. Hope to have pictures up by the middle of the week of completed installation. New replacement windows and a new front door and sidelights installs starts Monday. This thread is awesome!!! |
|
|
|
|
[#35]
Great thread!
I've been working on setting up my workshop, repurposed some cabinets and just finished gluing up and fitting the doors. Once the tops, fence and stops are done I'll make a cabinet and dust shroud for the center. 
My daughter wanted a surf themed towel bar so put this together from the scrap bin. 
|
|
|
|
|
[#36]
Originally Posted By SouthernBeau:
OP that's a sweet ass house and the work you're doing on it is inspiring. I've been sand a 4x8 barn door build all weekend. Hope to have pictures up by the middle of the week of completed installation. New replacement windows and a new front door and sidelights installs starts Monday. This thread is awesome!!! |
|
|
|
|
[#37]
Originally Posted By larrys:
Great thread! I've been working on setting up my workshop, repurposed some cabinets and just finished gluing up and fitting the doors. Once the tops, fence and stops are done I'll make a cabinet and dust shroud for the center.https://www.dropbox.com/s/e8vnug2qbokwvkg/Photo%20Sep%2024%2C%204%2027%2014%20PM.jpg?raw=1 My daughter wanted a surf themed towel bar so put this together from the scrap bin. https://www.dropbox.com/s/qn3dzmaxks4gxt2/Photo%20Sep%2024%2C%204%2036%2021%20PM.jpg?raw=1 |
|
|
|
|
[#38]
Popped yesterday's sill from the glass.

Two more glass shower doors from craigslist (free) so I can make three sills at a time. 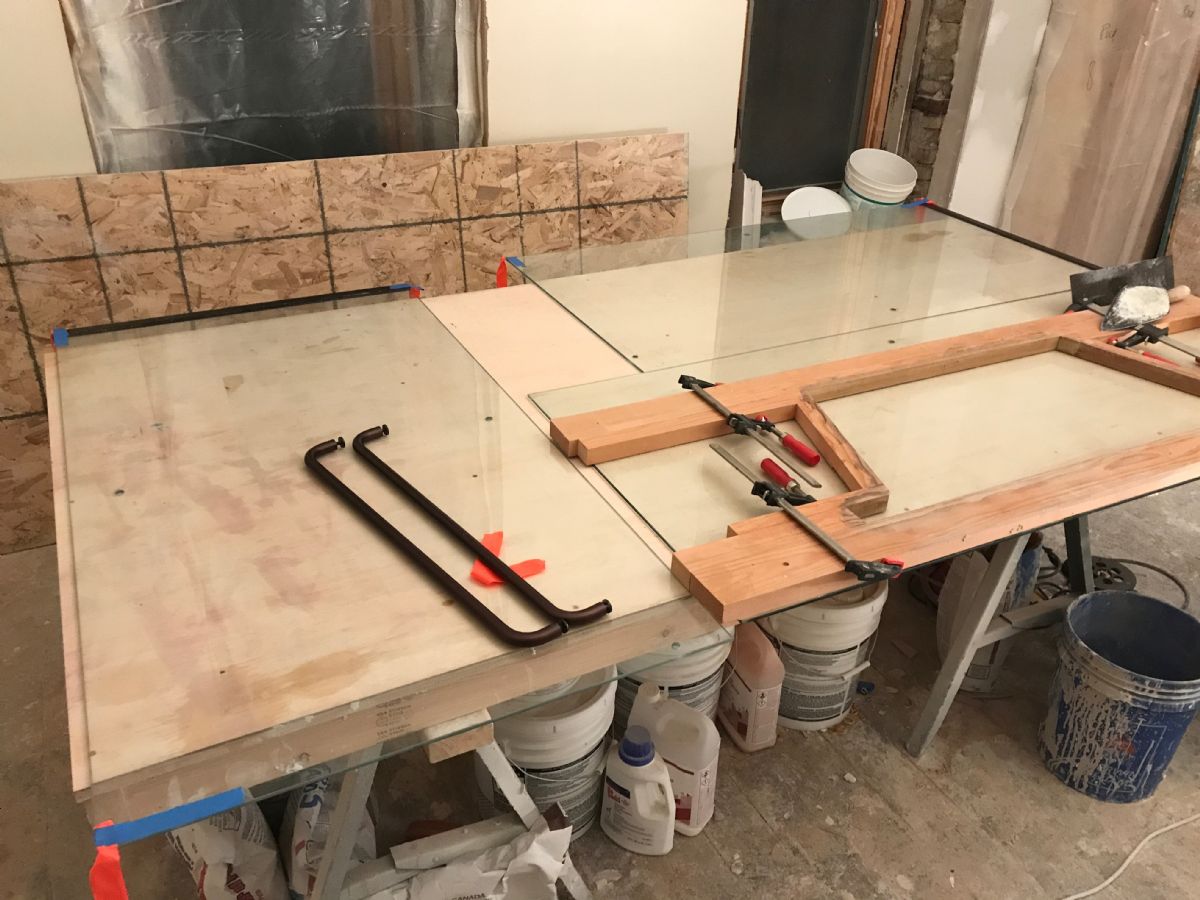
Mixing up another sill and the tub on the minimix finally gave in. So that halted the window sills for the time being. I'll have to pick up a new tub this week. 
Since I have a plethora of projects to choose from I switched gears and decided to te in some new maple hardwood to the old in our foyer hallway. I do my best to stagger the old pieces so it's not such a clean transition. 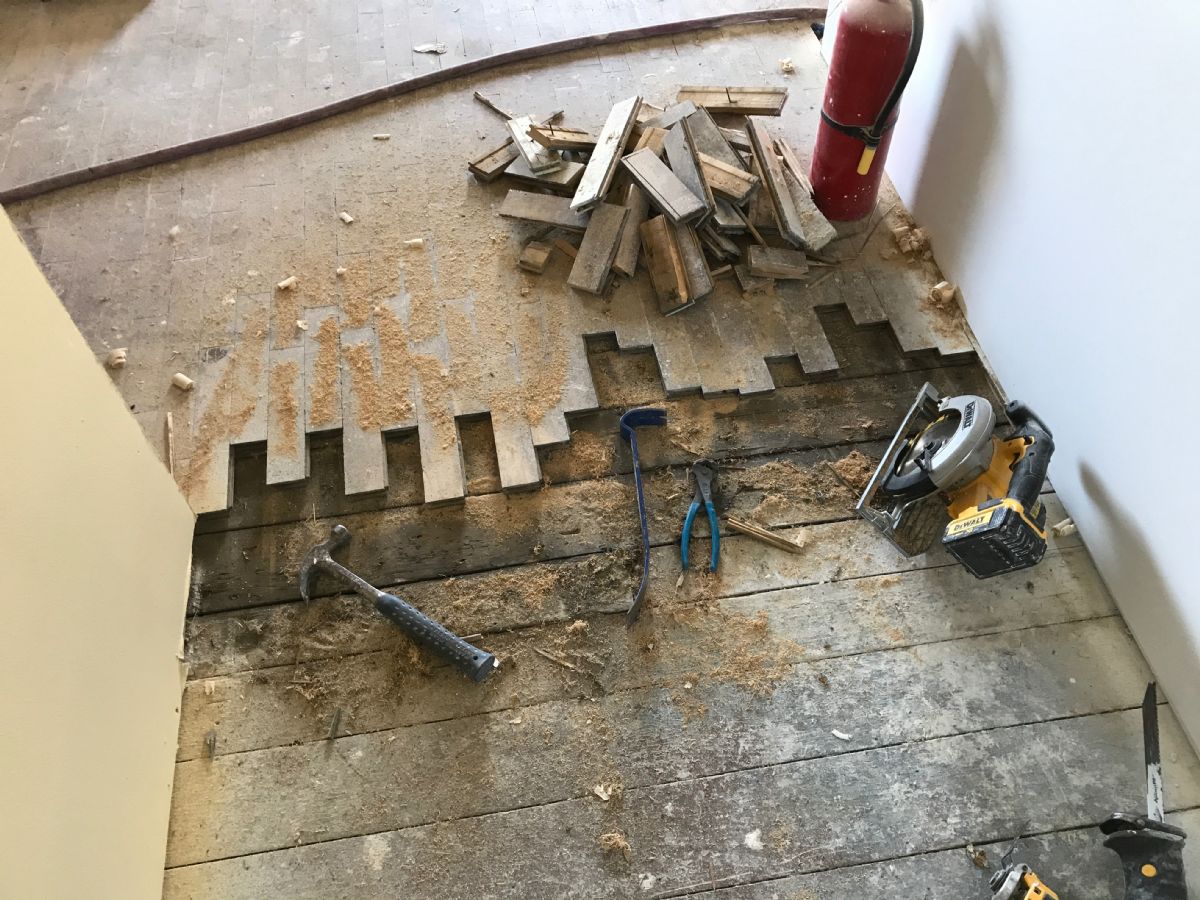
The floor beneath was terrible, so I had to grind & sand the high points down. 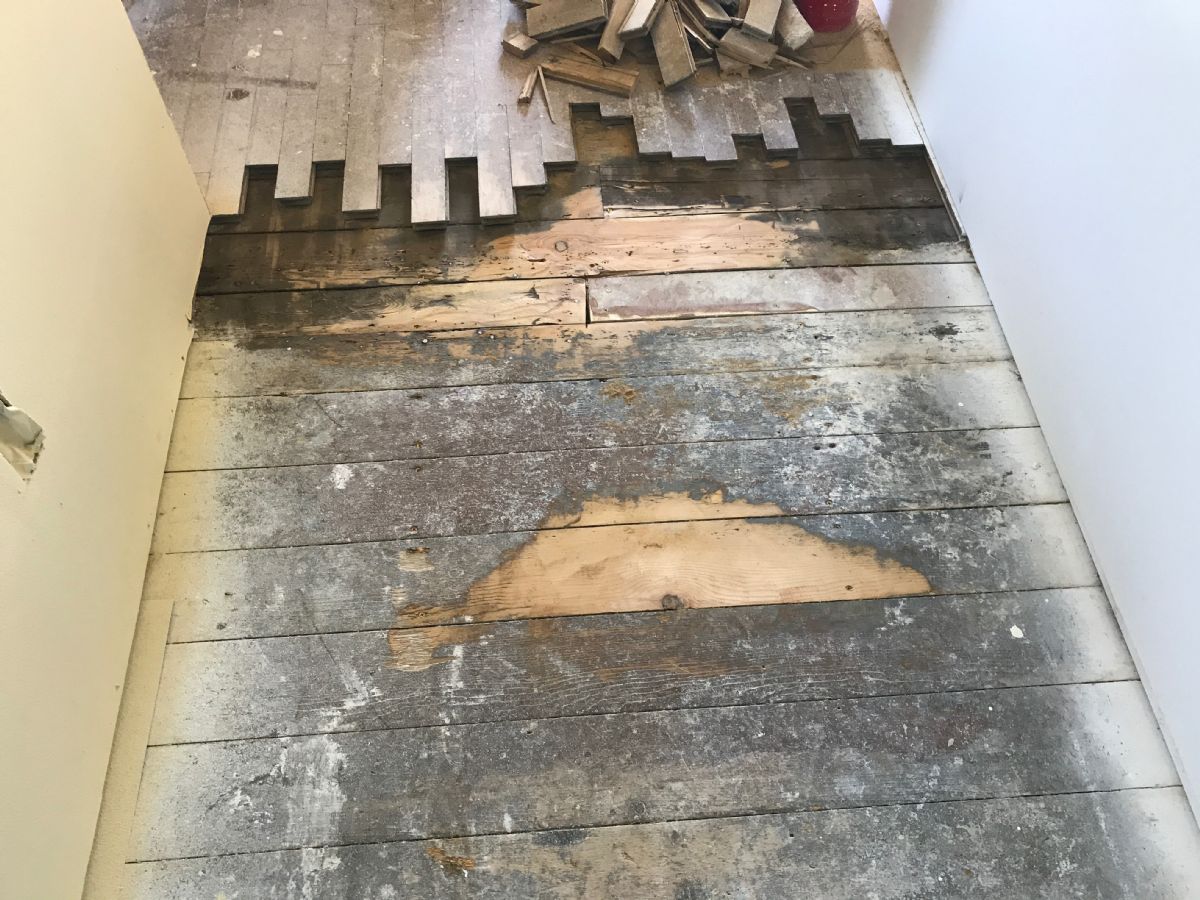
Laying some floor. 
Kiddos got in on the fun. 
My little guy will do anything if it involves his toy gator. Rather than walk the cutoffs back to the burn pile he loaded them up and hauled them off. 
Not a bad tie in for an afternoon. There are gaps along the right hand side where the difference in flooring width (just enough) forced me to space the flooring to keep some resemblence of alignment. I may fill the seams or I may just let them be as the 100y old flooring has plenty of gaps as it is. 
|
|
|
|
|
[#39]
Not as much of a project based effort today, but I brought more of my Dad's old tools up from GA. Not very heavily used Porter Cable bandsaw, which needs new tires and a table pin (on order); which I put on an old caster base for another table saw (changed it for the bandsaw). Eventually it will get a roller guide upgrade, though I do have a fence for it.
Part of his 1972 Craftsman tool chest, which is the only one that will fit my current shop. Cleaned it up a bit and am using it for lathe tools. This beast. And a metric ton of files, which I have to sort, organized and figure out storage. |
|
|
|
|
[#40]
Originally Posted By jacobsk:
I am in love with that saw setup, what are you going to use for the top on the left and right of the saw? The top will be 3/4 MDF with edge bands finished to match the doors. I'll have a fence with shop made material stops. I'm limited on length I can cut due to the size of my shop, but use a different saw on a stand for larger jobs. |
|
|
|
|
[#41]
Pressed another couple of bushels of apples for apple cider!
|
|
|
|
PA, USA
|
[#42]
I worked on a VB program for a customer. I don't think it quite has the impact of the projects ya'll have been working on ...
|
|
|
|
[#43]
Originally Posted By ChickenDaddy:
Pressed another couple of bushels of apples for apple cider!https://www.AR15.Com/media/mediaFiles/118342/IMG_0410-317357.JPG |
|
|
|
|
[#44]
Put in some recessed accent lighting over the stove. I also relocated the lighting and started drop ceiling on the other side of the basement, if I finish today I'll get some pics up..
|
|
|
|
|
[#45]
Those recessed lights look nice. Great placement. I love the look of painted brick.
I've been busy. New mount and soundbar for the TV. Very pleased. Was able to run a new box and hide wires etc so it's a clean install I think. Mount comes forward and down for less neck craning viewing and goes back and up to be out of the way. |
|
|
|
|
[#46]
Then had the new windows installed. Had to reorder the upstairs half rounds unfortunately so it won't be done done for a couple more weeks. Then got the new door in. It's a freaking heavy beast. Took 3 of us to carry it and even then it was a struggle.
Old windows New windows Old door New door Little paint. Little trim work, and a new Ring Pro video doorbell and it should be good to go. |
|
|
|
|
[#47]
Beautiful. I love the door and the new windows without the grilles do wonders for the overall appearance of the whole house.
|
|
|
|
|
[#48]
Thanks very much and I think so too. Getting rid of the window dividers made my wife extremely happy. The old aluminum windows were from 99 and completely shot. Moisture in 75% of them with failed seals etc. they did not go quietly though. They did a good job installing those crappy windows when the place was built.
|
|
|
|
|
[#49]
The pay off. It got a little chilly yesterday, probably not chilly enough but I've been itching to get it lighted. The 1600sq' house was 64 at 7pm when I lit it and it was 60 outside and falling. It only got up to 55 today.
The house was 75 when I went to bed at 10, it burned out over night and we woke up to the house being 73 (49 outside) and it was still 72 when I got home today. Victory. |
|
|
|
MI, USA
|
[#50]
Wow!!! That is tough work!! Looks great. Nice job!!
|
|
|
 Win a FREE Membership!
Sign up for the ARFCOM weekly newsletter and be entered to win a free ARFCOM membership. One new winner* is announced every week!
You will receive an email every Friday morning featuring the latest chatter from the hottest topics, breaking news surrounding legislation, as well as exclusive deals only available to ARFCOM email subscribers.

AR15.COM is the world's largest firearm community and is a gathering place for firearm enthusiasts of all types.
From hunters and military members, to competition shooters and general firearm enthusiasts, we welcome anyone who values and respects the way of the firearm.

Subscribe to our monthly Newsletter to receive firearm news, product discounts from your favorite Industry Partners, and more.
Copyright © 1996-2024 AR15.COM LLC. All Rights Reserved.
Any use of this content without express written consent is prohibited.
AR15.Com reserves the right to overwrite or replace any affiliate, commercial, or monetizable links, posted by users, with our own.


