|
Posted: 7/29/2017 3:31:13 PM EDT
[Last Edit: jacobsk]
It's a beautiful 73 degrees today here in Wisconsin. I have the house opened up and I'm trying to finish the last bit of plaster molding in our renovation.
Low humidity is helping the mud set and I'm skipping right along. I've always been inspired by others innovation, creativity, and work ethic, this practically defines the successful modern DIY'er mentality. I KNOW I'm not the only one tackling projects on the house, car, yard or whatever. What did you do today? Cutting an 8ft molding down: 
Assistant is lazily basking in the sun while I mix up plaster to hang the molding: 
First corner up in the air: 
Second piece ready to go, after a beer of course: 
|
|
|
|
|
[#1]
|
|
|
|
TX, USA
|
[#2]
I fixed my busted trolling motor.
But it's 99 degrees and humid as shit here. You bastard. |
|
|
|
[#3]
Originally Posted By IE-EastTexas:
I fixed my busted trolling motor. But it's 99 degrees and humid as shit here. You bastard. 
|
|
|
|
|
[#4]
Mowed three lawns. One in the rain. One in full sun. The other was three feet high and wet. Its also 93°.
|
|
|
|
|
[Last Edit: zegermanznew]
[#5]
Suede wrapped a part of this Sparco steering wheel. The leather was long gone, it was just down to the foam. The Sparco engraving also had some shitty red paint fill and there was some overspray so I cleaned that up.
ETA: Ill probably do the spokes eventually, too. |
|
|
|
|
[#6]
Originally Posted By zegermanznew:
Suede wrapped a part of this Sparco steering wheel. The leather was long gone, it was just down to the foam. The Sparco engraving also had some shitty red paint fill and there was some overspray so I cleaned that up. ETA: Ill probably do the spokes eventually, too. https://www.AR15.Com/media/mediaFiles/252780/IMG-1283-265993.JPG https://www.AR15.Com/media/mediaFiles/252780/IMG-1284-265994.JPG https://www.AR15.Com/media/mediaFiles/252780/IMG-1080-265997.JPG |
|
|
|
|
[Last Edit: zegermanznew]
[#7]
Originally Posted By jacobsk:
Do you wrap the leather and stitch it together in place? How do you tuck the seams where the leather ends? I'm not too picky about the seam on the wheel because it's entirely out of sight. The leather was stock from Sparco, I just did the suede top piece. But it appears they used the same technique. |
|
|
|
|
[Last Edit: zegermanznew]
[#8]
Here's a picture or Sparcos factory leather seams and a shot of my seam with the suede. So you can see, I would overlap the suede about a 1/4" to 1/2" and then cut through the two layers at the same time. You can see my seam doesn't line up with theirs. I don't actually like how theirs is on a visible part of the wheel. So I offset mine to the backside.
|
|
|
|
|
[#9]
Well this is where I left my plaster project for the day:

Decided to take advantage of the weather and spend some time in the shop on another project which has been in the works for a bit. I bought a 1960's panel saw off Craigslist for $75 about a year ago and just finished blasting the frame and painting it. 
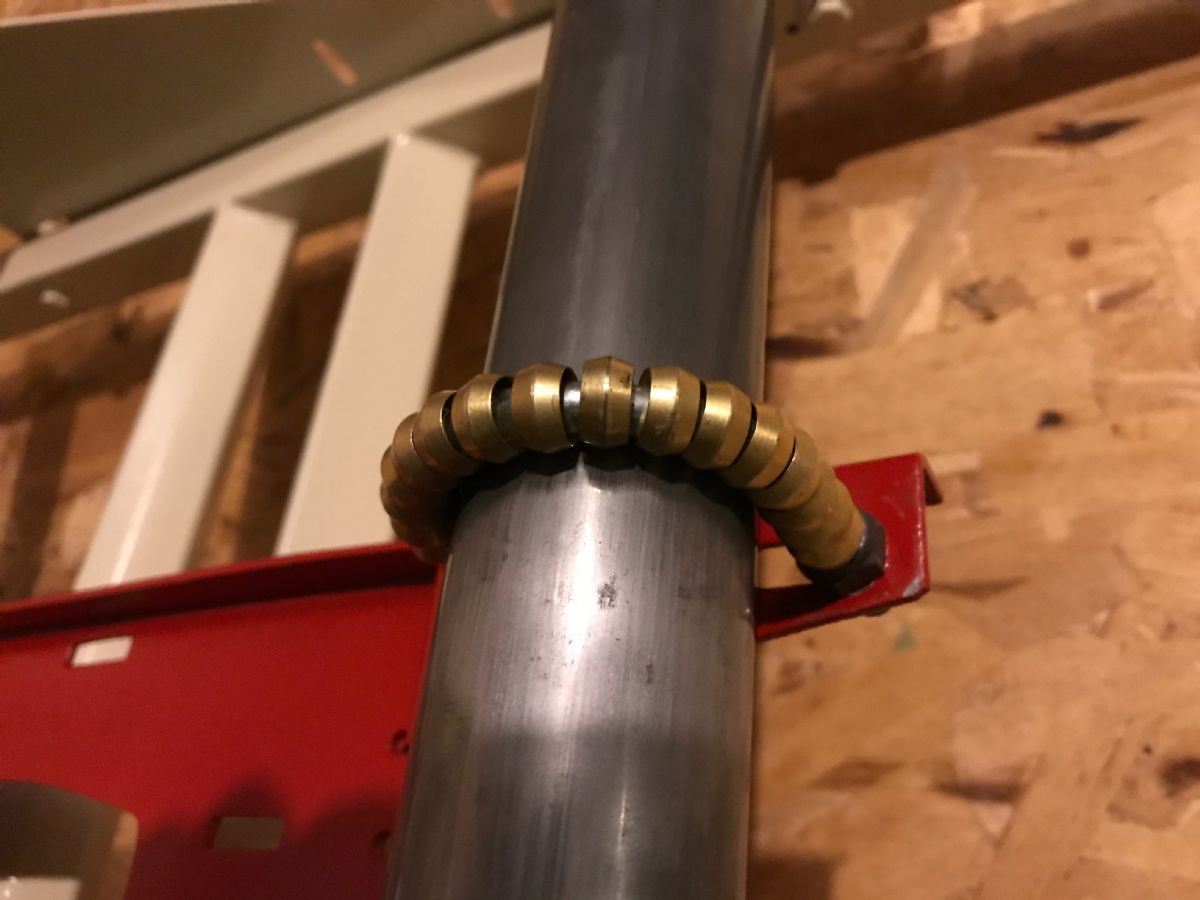
I blasted & painted the sled also, bought new U-bolts, but couldn't find a good replacement for the mostly missing rollers. While working on plumbing two weeks ago I had a revalation, I could use brass 3/8" compression sleeves as rollers. Got those installed and next will be figuring out how to mount the saw. 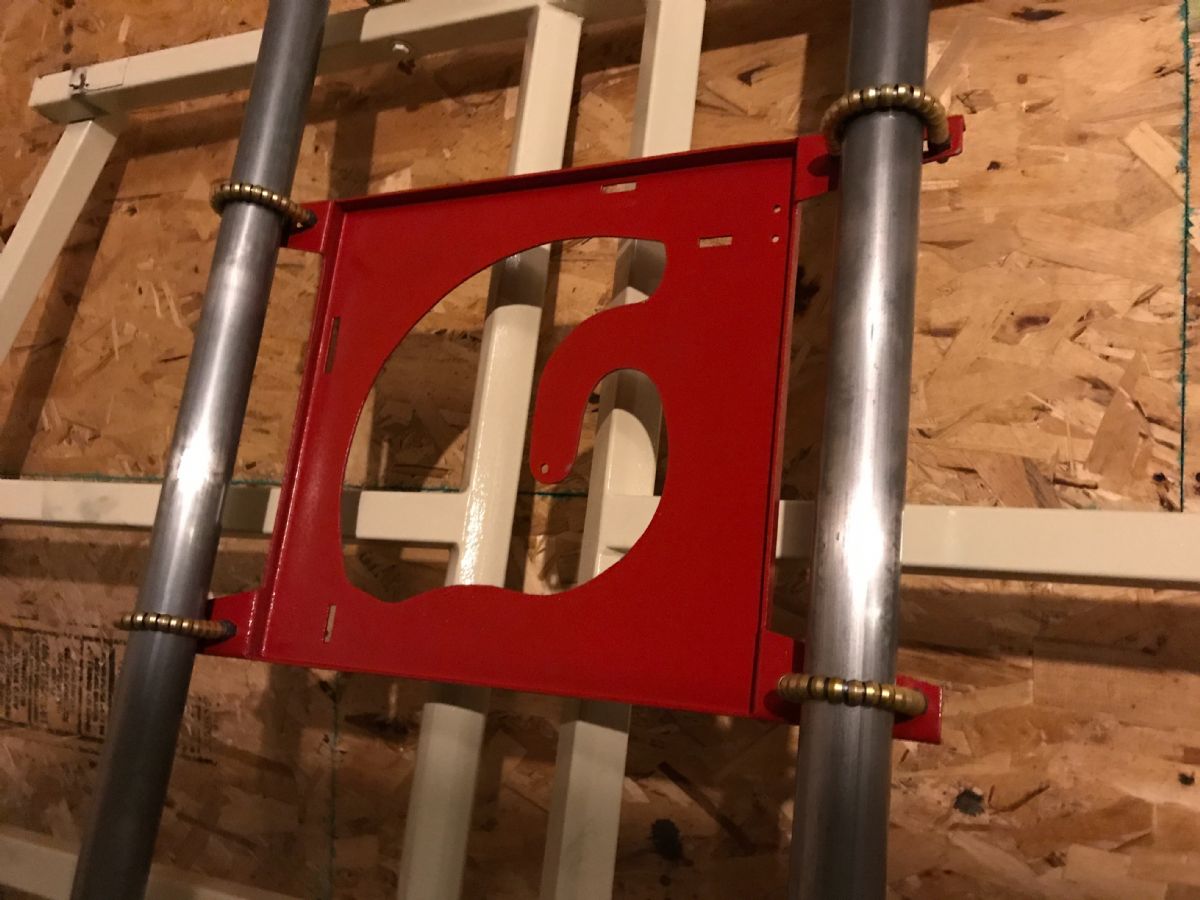
Lastly, finished out my Saturday by picking up a nice used tile saw on Craigslist for $100. This'll lead to another post someday 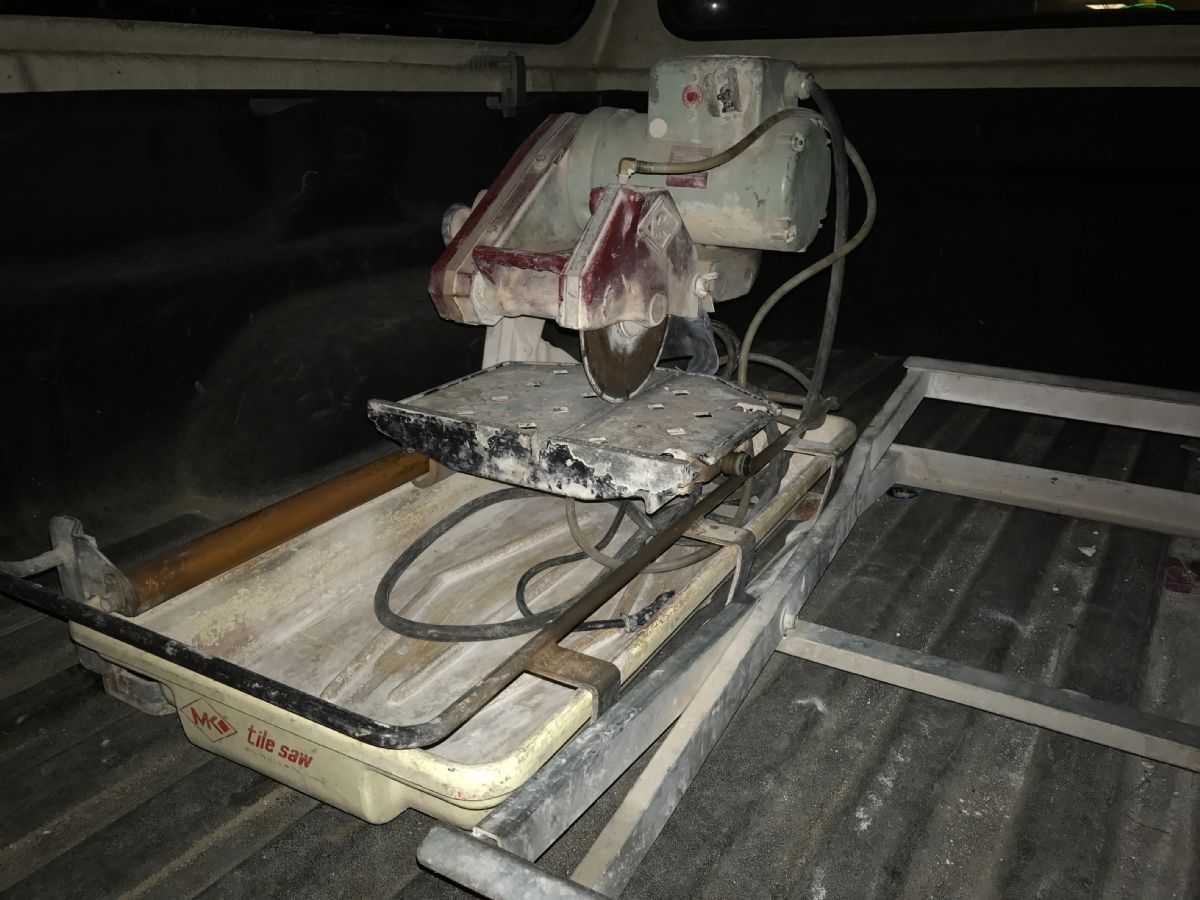
|
|
|
|
|
[#10]
That panel saw is awesome
|
|
|
|
|
[#11]
No pictures, but I changed the CV axle on the driver side on my 2006 VW Jetta TDI.
I got sick of being ripped off by the nearest import specialty garage, and the mechanic closests to me is scared to death I swear of working on german cars. So I did it myself, with a little help from a couple youtube videos, and parts and a few tools from ebay. The CV axle was only about $80, and it took me a couple hours in my driveway. The only bad thing - I sheared off one of the bolts on the ball joint. I made a run to the hard ware store for a replacement 10mm bolt, and it looks like my project in a weekend or two will not be replacing that ball joint. Its original equipment, so I'm sure its pretty well worn out anyways. Doesn't look like it will be too difficult to do. Then after that, get it re-aligned. But it ran good and smooth on my test drive. No clunking on the front leff side, and no sihmmy like it was going to lose a wheel. Now two major - minor annoyances left. The turbo will drop out when climbing a hill in 5th gear. If I shift down to fourth, I,m generally good. If it drops out, I can shut the car down for a second and the fault clears. Obviosuly that is something you cannot always do. It really is a dog with no turbo going up a hill. The VW dealer wanted to sell me a whole new turbo, $2200 a coulle years ago. Its some sort of computer module. Already had oxygen senosrs replaced. But no one takes the time tpwith an analyzer to really run the car out until it has a fault. And the other is the AC compressor probably is bad. |
|
|
|
|
[#12]
Pics to come later.
I replaced the rear leaf springs on my 01 jeep Cherokee. Also got rid of the rear swaybar and used the mounts as bar pin eliminators on my rear shocks. Then all four 1/4" upper shock mount bolts sheared and I had to drill them out to 5/16 and tap them 3/8-16 and buy new grade 8 bolts to mount my shocks. A rousing success if I do say so myself. I also hewed a 36" red oak log to square in preparation for planing. Earlier this week I replaced my front brakes and changed my oil. |
|
|
|
|
[#13]
Replaced my kitchen sink drain all the way to the stack. Could have probably snaked it, but it was leaking at a couple joints and the Yahoo's that put it in long before I owned the house didn't slope it right.
Gross. |
|
|
|
|
[#14]
Originally Posted By paul463:
Replaced my kitchen sink drain all the way to the stack. Could have probably snaked it, but it was leaking at a couple joints and the Yahoo's that put it in long before I owned the house didn't slope it right. Gross. More plaster for me today, sanded yesterday's seams and threw another 10 or so feet up. 
Then back to the panel saw project. Bought a new Milwaukee 7-1/4" saw and reversed the direction of the handle (pretty fun little adventure) 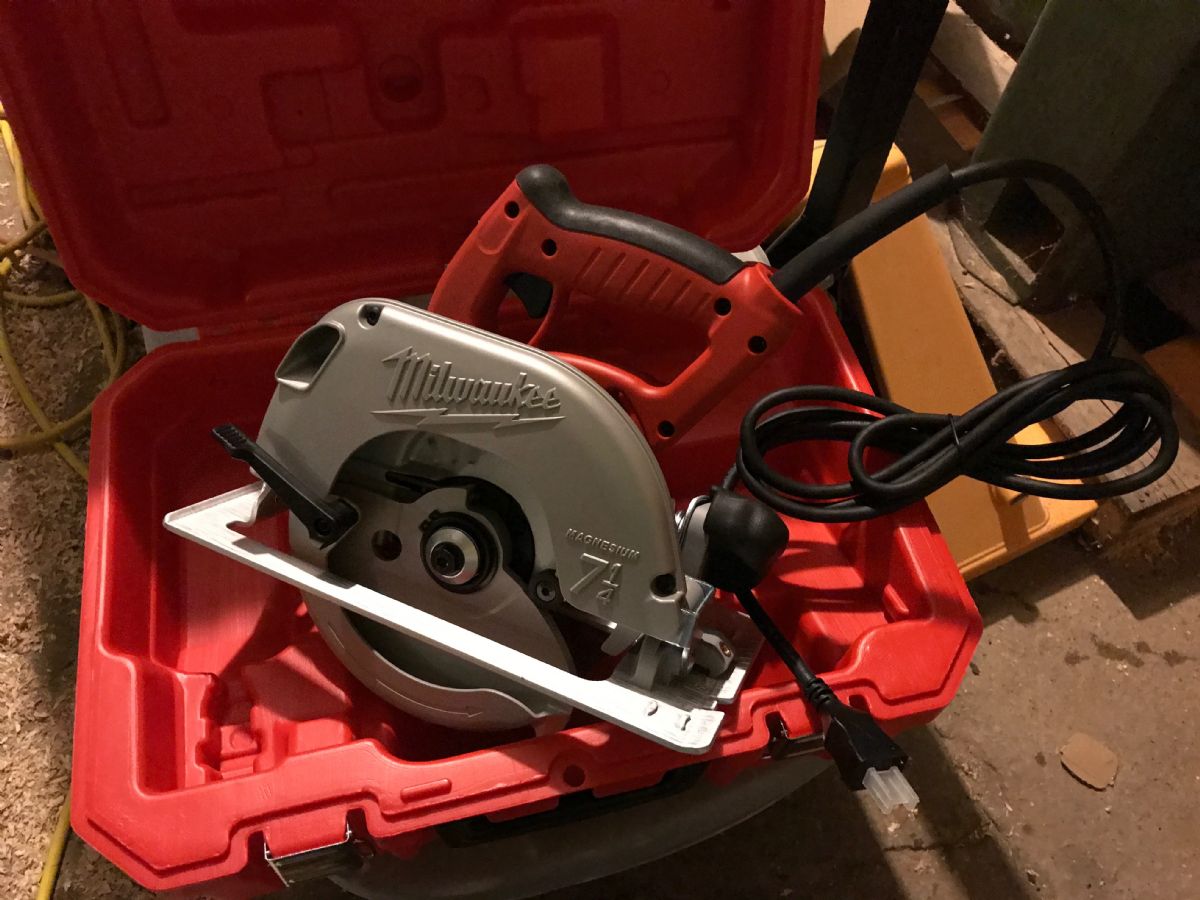
Now I just gotta figure out how I'm going to mount it to the carriage: 
|
|
|
|
|
[Last Edit: jacobsk]
[#15]
Late night for me but worth it. Got my last bit of plaster up so it can dry during the day tomorrow. I made some corbels for this room (dining room) so i hope to get the moldings sanded and then get to play with the detailed stuff.


|
|
|
|
|
[Last Edit: zegermanznew]
[#16]
Very nice.
I just about finished the laundry room for my wife. I demo'D two walls in this room and it was all 70's panel board. Did all the drywall and (cheap) trim, tile etc.. I picked the cabinets up on Facebook for $100 because they had smoke damage, quick spray and they're ok. I'm going to do dropped ceiling but it's gonna wait. The kitchen (directly above) is my fall project and there's a ton of electrical to move so I won't do the ceiling until after. Service upgrade is next weekend. Supposed to be tomorrow but it's gonna rain bad. Supervisor making sure it's up to snuff. |
|
|
|
|
[#17]
Originally Posted By zegermanznew:
Very nice. I just about finished the laundry room for my wife. I demo'D two walls in this room and it was all 70's panel board. Did all the drywall and (cheap) trim, tile etc.. I picked the cabinets up on Facebook for $100 because they had smoke damage, quick spray and they're ok. I'm going to do dropped ceiling but it's gonna wait. The kitchen (directly above) is my fall project and there's a ton of electrical to move so I won't do the ceiling until after. Service upgrade is next weekend. Supposed to be tomorrow but it's gonna rain bad. https://www.AR15.Com/media/mediaFiles/252780/IMG-1258-271172.JPG https://www.AR15.Com/media/mediaFiles/252780/IMG-1257-271173.JPG Supervisor making sure it's up to snuff. https://www.AR15.Com/media/mediaFiles/252780/IMG-1256-271174.JPG |
|
|
|
|
[Last Edit: jacobsk]
[#18]
Today I'm sanding the last bit of moldings and doing touch ups on any seams that need it.
In addition I'm finishing a batch of corbel inserts that will get added to the dining room molding to spruce it up a bit. Silicon mold (this stuff is really cool) 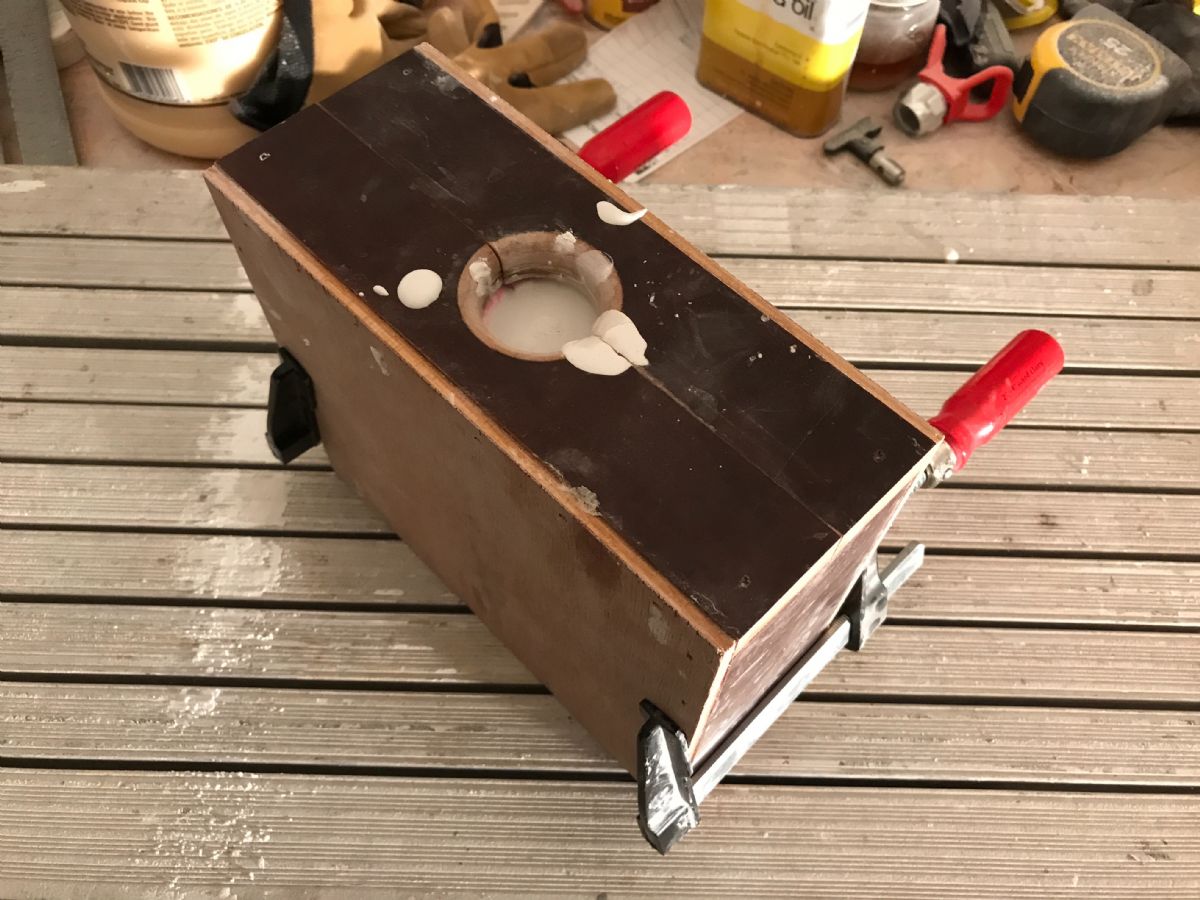
Demolding a corbel, I find that I can pop them free in about 40 minutes, though they take about 3 days to fully dry. 
23 down, two more drying in front of the fan, one setting in the mold. I need 34 total for the room. 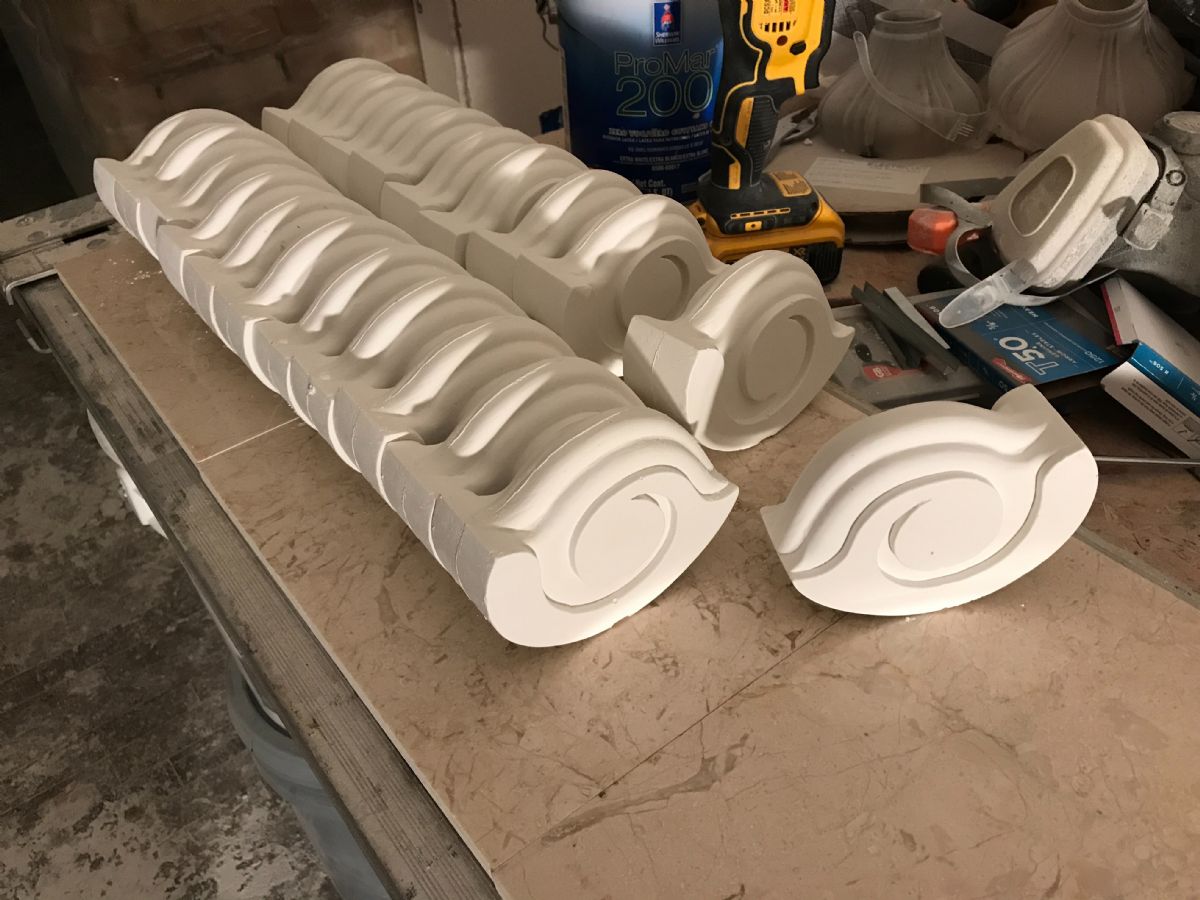
Hopefully I can get some up tomorrow. |
|
|
|
|
[#19]
That's really cool, where'd you turn up a mold for that? I can't wait to see the finished product, that's an amazing room. I love the brick.
|
|
|
|
|
[Last Edit: jacobsk]
[#20]
Originally Posted By zegermanznew:
That's really cool, where'd you turn up a mold for that? I can't wait to see the finished product, that's an amazing room. I love the brick. The gallon kit was way too much as this is only about 8"x6"x3" but I have left overs for other stuff now I think the mold making material was between $60-70 if I remember correctly, and totally worth it! |
|
|
|
|
[Last Edit: jacobsk]
[#21]
Well today went differently than I planned. I had breakfast at a local resteraunt with my wife and the old man this morning & while sitting there I came across a craigslist ad for a bunch of Kiln dried lumber with the seller asking $0.40 a board foot.
Off to the races we went, grabbed a uhaul and hooked up the trailer to drive across the state. Fella had a neat surplus Terex loader which we got creative with to load the box truck. 
2200bf of 8' 1x white pine & 1000bf of 16' 1x poplar (perfect for trim) 
400bf of 2x6 poplar (perfect for face frames, mouldings and doors) we later moved the top bundle to the box truck because this really over loaded the trailer. 
While me and the old man were gone for the day my wife made good use of that tile saw cutting the mosaic marble for our master bath. I'm not the biggest fan of the color but happy wife = happy life. 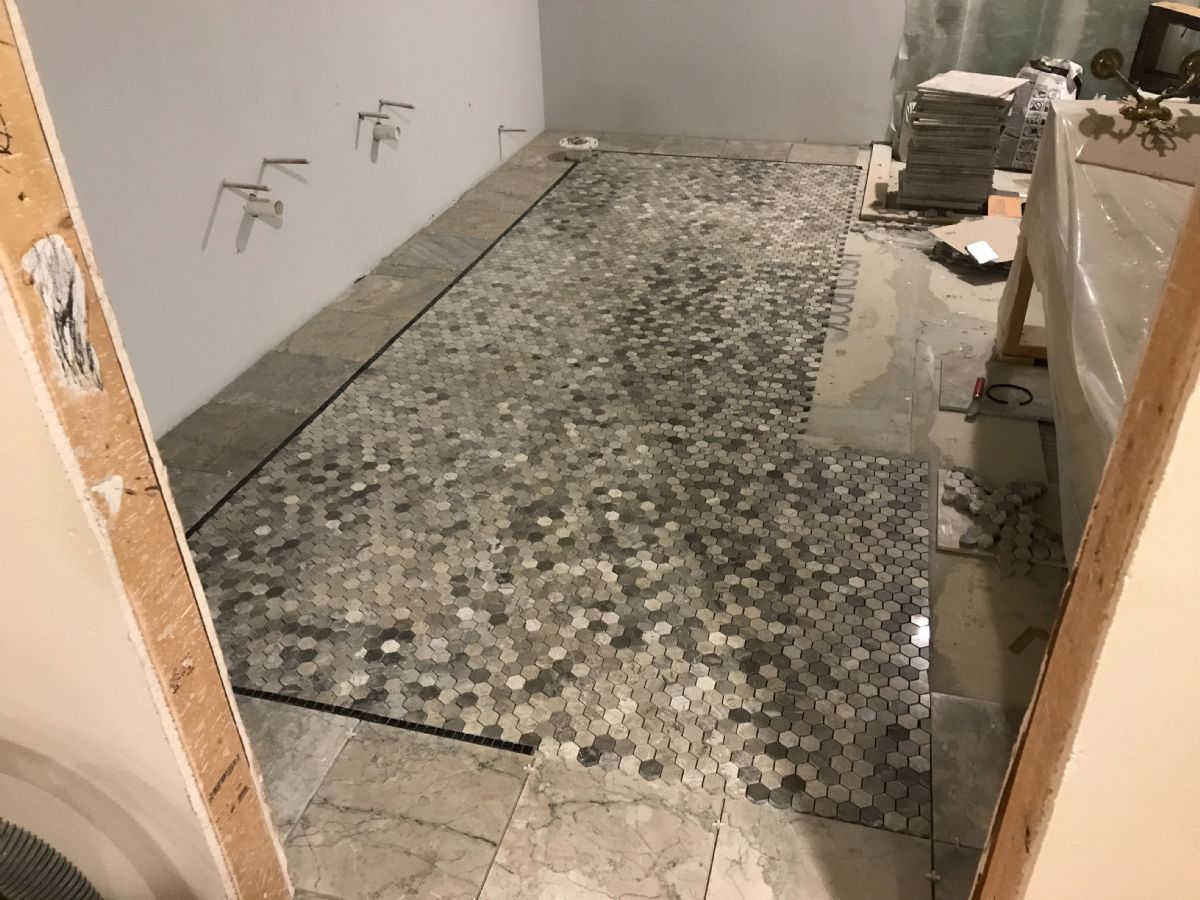
Having a high quality saw with a thin kerf diamond blade really helps to cut the mosaic. A saw with a sliding table really helps keep things straight too. None the less these little 1" tiles are pretty tough to cut straight and even as they always seem to move around on you. My wife impressed me today! 
|
|
|
|
|
[#22]
WOW what a score and that's a great job by the wife unit. I feel like this is becoming the zegermanznew & jacobsk thread (ha!)
I liked the way the laundry room came out so much I kept the momentum rolling onto the other half of the basement. We've had panelboard in the whole basement since we bought the house two years ago and I've always hated it. I decided it's time to get this done before we have to get the wood stove going again, and football season starts and I get banished to the basement. 
I had to reinforce the stairs from underneath, too, so that jammed me up for a couple hours (they creaked like a mofo). I had to use a bottle jack to lift them into place before blocking them out again. I got all the rock up between Friday evening and yesterday. |
|
|
|
|
[#23]
|
|
|
|
|
[#24]
Originally Posted By zegermanznew:
WOW what a score and that's a great job by the wife unit. I feel like this is becoming the zegermanznew & jacobsk thread (ha!) I liked the way the laundry room came out so much I kept the momentum rolling onto the other half of the basement. We've had panelboard in the whole basement since we bought the house two years ago and I've always hated it. I decided it's time to get this done before we have to get the wood stove going again, and football season starts and I get banished to the basement.
I had to reinforce the stairs from underneath, too, so that jammed me up for a couple hours (they creaked like a mofo). I had to use a bottle jack to lift them into place before blocking them out again. I got all the rock up between Friday evening and yesterday. https://www.AR15.Com/media/mediaFiles/252780/IMG_1303-273125.JPG https://www.AR15.Com/media/mediaFiles/252780/IMG_1304-273126.JPG https://www.AR15.Com/media/mediaFiles/252780/IMG_1305-273127.JPG https://www.AR15.Com/media/mediaFiles/252780/IMG_1306-273128.JPG Good call on the greenboard, smart move. |
|
|
|
|
[#25]
Originally Posted By GySgt_D:
About to scrape some bird guts off of a 767 nose landing gear https://www.AR15.Com/media/mediaFiles/3906/20170806_084835-273147.JPG 
|
|
|
|
|
[#26]
All day project...


|
|
|
|
|
[#27]
Late night but worth it. Got all of the seams sanded out and was able to lay out and place the first couple of corbels.

|
|
|
|
|
[Last Edit: FrozInAK]
[#28]
Great work.
Linear bearings are what you want for the panel saw. |
|
|
|
|
[#29]
No pics but changed out the upstream O2 sensor on my 06 chevy Cobalt
|
|
|
|
|
[#30]
 Jeep Cherokee Rear Suspension Lift |
|
|
|
|
[Last Edit: zegermanznew]
[#31]
No pics, it's super un-glorious, but the other half of my stairs no longer make a wretched squeak when you walk up/down them. Oh my God, what a pain in the ass and relief.
|
|
|
|
|
[#32]
I hate taping/mudding but I got the first coat up today. Sand and second coat tomorrow, then going to pick up paint when the wifey gets home from work. Hopefully painting mid-week. I want this room done by the end of August.
Few spots higher than I'd like and it's gonna take some extra sanding but all in all, not bad. |
|
|
|
|
[Last Edit: Cytic]
[#33]
Installed brick mold on a door I installed several weeks ago.
I had to remove the brick mold prior to installing the door as it wouldn't fit into the door opening in the brickwork. Also had to trim the brick mold and build up a spacer for the opening. First time installing a door or doing any trim work and I am pleased with it. Gonna do the paint, caulk, and interior trim later this week. |
|
|
|
|
[#34]
I made a holder for the Sun filter film. This will fit on my telescope. Hopefully I will get some decent pics of the eclipse.
|
|
|
|
|
[#35]
Installed the blades on an old belsaw planet I rebuilt last year. Forgot that it was missing a steel spacer for one of the gibs so I had to get creative with some steel pieces laying around.
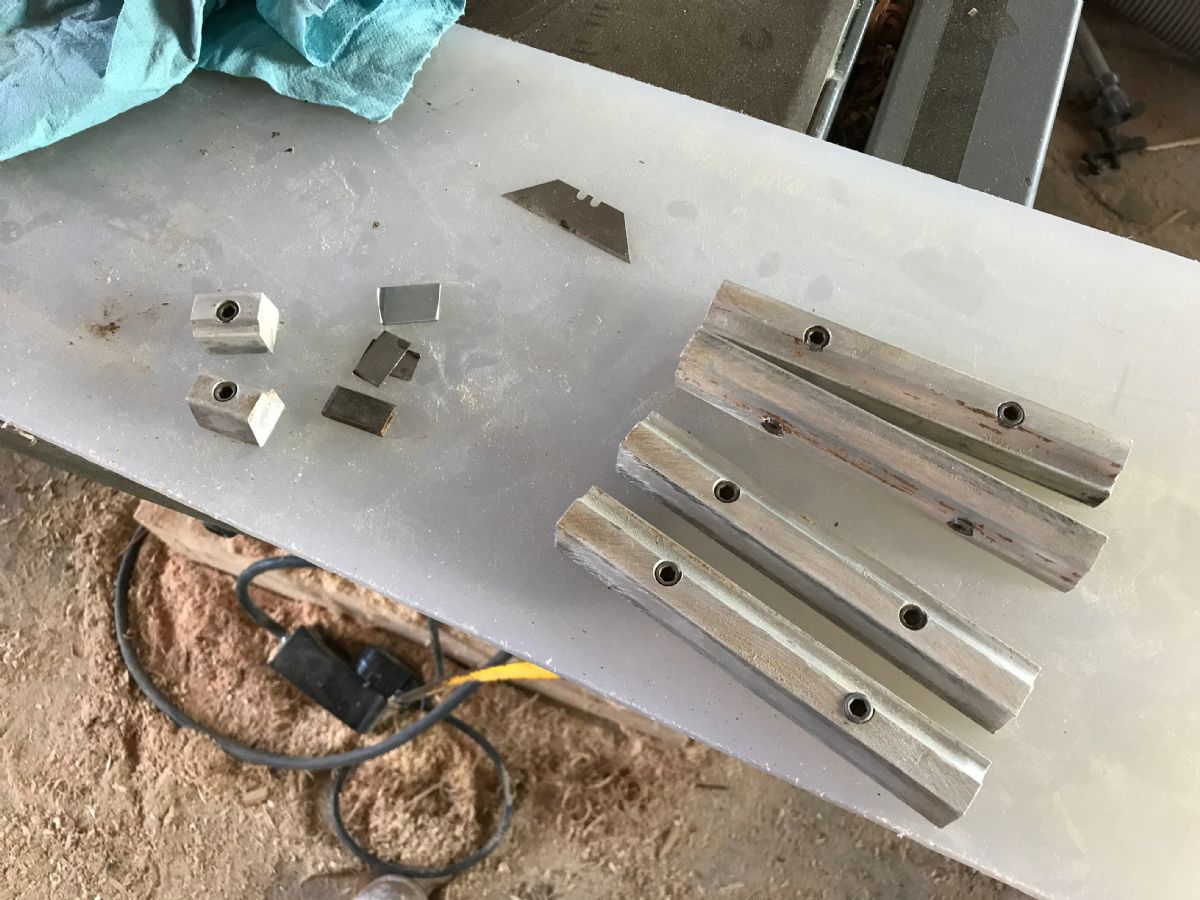
These planer/molders are built like tanks: 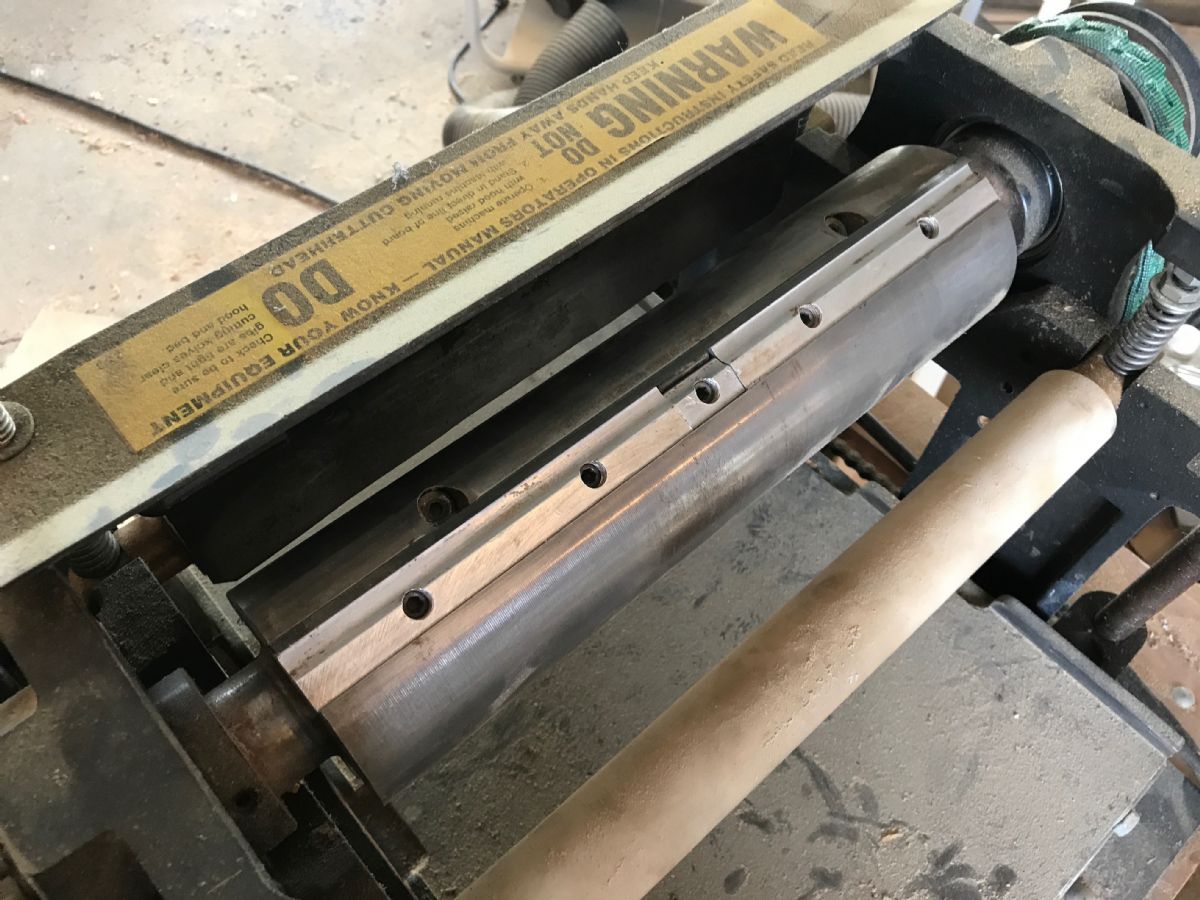
A few passes later some of that lumber from the other day is looking pretty good! 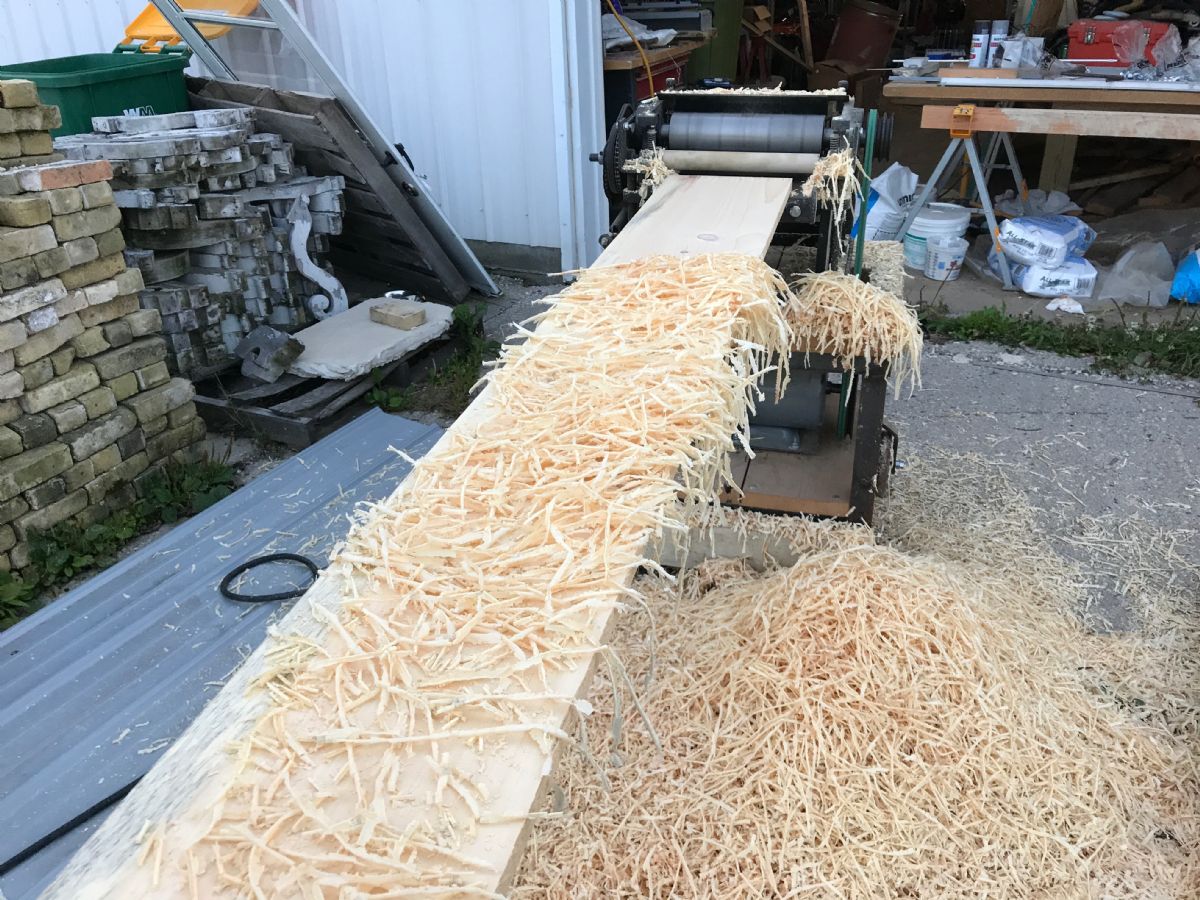
Just need to figure out a way to make $ from sawdust, I'm going to be buried in it soon... |
|
|
|
|
[#36]
Originally Posted By jacobsk:
Installed the blades on an old belsaw planet I rebuilt last year. Forgot that it was missing a steel spacer for one of the gibs so I had to get creative with some steel pieces laying around. https://www.AR15.Com/media/mediaFiles/116241/IMG_1026_JPG-281459.jpg These planer/molders are built like tanks: https://www.AR15.Com/media/mediaFiles/116241/IMG_1025_JPG-281461.jpg A few passes later some of that lumber from the other day is looking pretty good! https://www.AR15.Com/media/mediaFiles/116241/IMG_1027_JPG-281462.jpg Just need to figure out a way to make $ from sawdust, I'm going to be buried in it soon... I use the shavings to start my wood stove. A few years ago I tried a money making venture by mixing water and ash to create a "glue" or binder. Then I'd mix it with the shavings, and compress it in cupcake tins. I sold them as stove starters, they even looked like cupcakes. I sold a couple dozen for $1 each before I got bored and lost interest. |
|
|
|
|
[#37]
Dug out and replaced a water hydrant for the shop
|
|
|
|
|
[#38]
Originally Posted By zegermanznew:
Nice! I use the shavings to start my wood stove. A few years ago I tried a money making venture by mixing water and ash to create a "glue" or binder. Then I'd mix it with the shavings, and compress it in cupcake tins. I sold them as stove starters, they even looked like cupcakes. I sold a couple dozen for $1 each before I got bored and lost interest. By my calculations over the next 12 months I'm about to make nearly 3,000 gallons of shavings... |
|
|
|
USA
|
[#39]
Pile them up and compost them down. Properly composted, they will collapse down into very little but will add immensely to the fertility of your garden soil.
|
|
|
ME, USA
|
[#40]
Bale your shavings with a trash compactor and sell to pet stores or advertise them on social media for a few extra bux.
|
|
|
|
[#41]
Helluva day. Finally got some time to get back downstairs.
Painted the ceiling finished sanding the joints so the walls are ready for paint. Whitewashed the brick on the fireplace. Had to pull out my 400+ lb bear of a stove. Stove painted the inside bricks black. Sanded the ledge and got some stain on. Second coat is still dripping wet in the pic, waiting for it to set in right now. |
|
|
|
|
[#42]
Originally Posted By zegermanznew:
Helluva day. Finally got some time to get back downstairs. Painted the ceiling finished sanding the joints so the walls are ready for paint. Whitewashed the brick on the fireplace. Had to pull out my 400+ lb bear of a stove. Stove painted the inside bricks black. Sanded the ledge and got some stain on. Second coat is still dripping wet in the pic, waiting for it to set in right now. https://www.AR15.Com/media/mediaFiles/252780/IMG_1346-282999.JPG https://www.AR15.Com/media/mediaFiles/252780/IMG_1347-283000.JPG Thanks for the ideas on the chips fellas, I may post them on Craigslist to see if anyone needs animal bedding this winter. Today was another late night with corbels on my mind. Every step seems to take longer than I'd like. Got the medallion up around the light socket too. 
|
|
|
|
|
[#43]
We'll just got home and the shower kit has been delivered. I guess we'll figure out how this all works...

|
|
|
|
|
[#44]
Tomorrow I rip the porcelain out of my current vanity, replace it with a Boos Block countertop, drill holes for the new faucet and vessel sink.
While I'm doing that, gonna drop in a new lvp floor, rip up the toilet and redo the wax ring, trim the new floor, and while everything is out, probably paint and replace the vanity light as well. Oh, and probably drink a 12 pack of beer. 
|
|
|
|
|
[#45]
Originally Posted By ChuckD05:
Tomorrow I rip the porcelain out of my current vanity, replace it with a Boos Block countertop, drill holes for the new faucet and vessel sink. While I'm doing that, gonna drop in a new lvp floor, rip up the toilet and redo the wax ring, trim the new floor, and while everything is out, probably paint and replace the vanity light as well. Oh, and probably drink a 12 pack of beer. 
|
|
|
|
|
[#46]
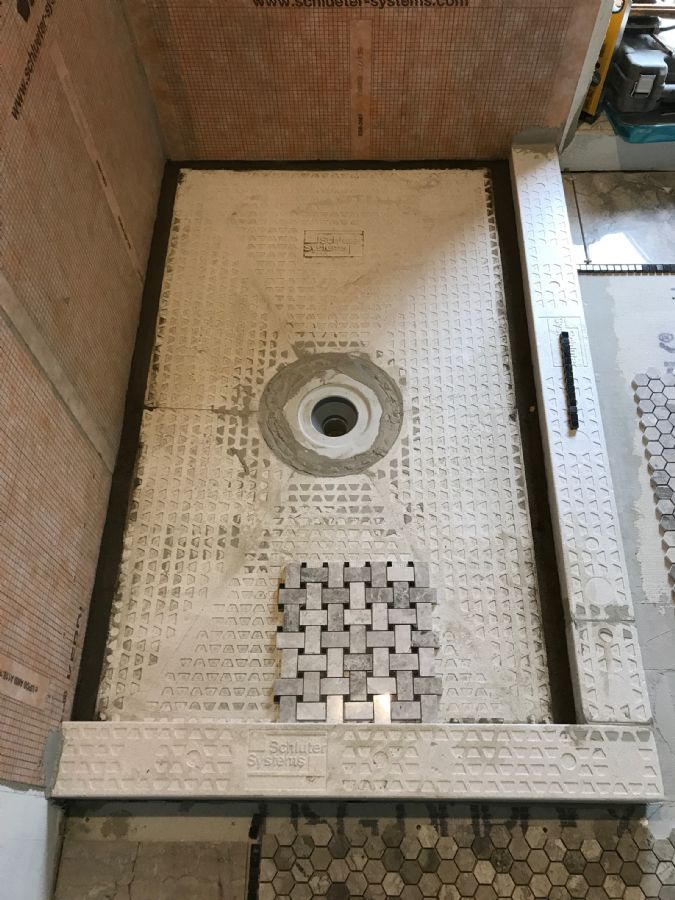
I gotta say folks, this Schluter-Kerdi shower kit is really flipping easy to work with. It's like the folks at Kerdi took all the things which make work like this suck and eliminated them.
First off I had to remove my previously installed shower drain to replace with the kerdi. The kit made layout and figuring out the height super easy. 
Laid out the walls, and cut the membrane. They print a grid pattern on the stuff so you can mark and cut easily. 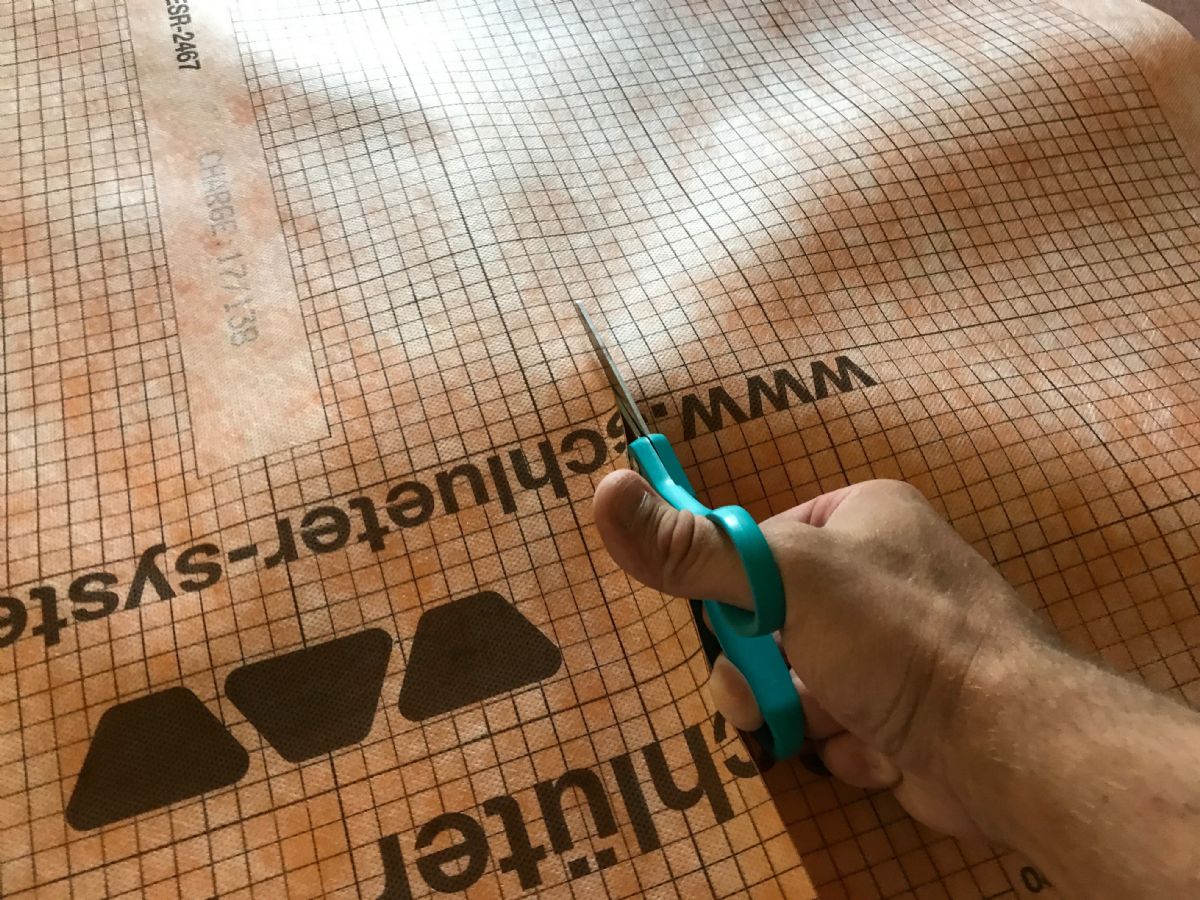


Learned what non-modified mortar was, went back to the store in order to return the modified stuff and purchase the correct stuff and mixed it up. Mud the walls up with a flat trowel then use a 3/16 notched trowel so the surface grabs the membrane. I used a 6" drywall knife to remove all air bubbles and form the membrane up to the wall. Instructions said 2" overlap between pieces so that's what I followed it was also marked out on the roll which was convienient. 
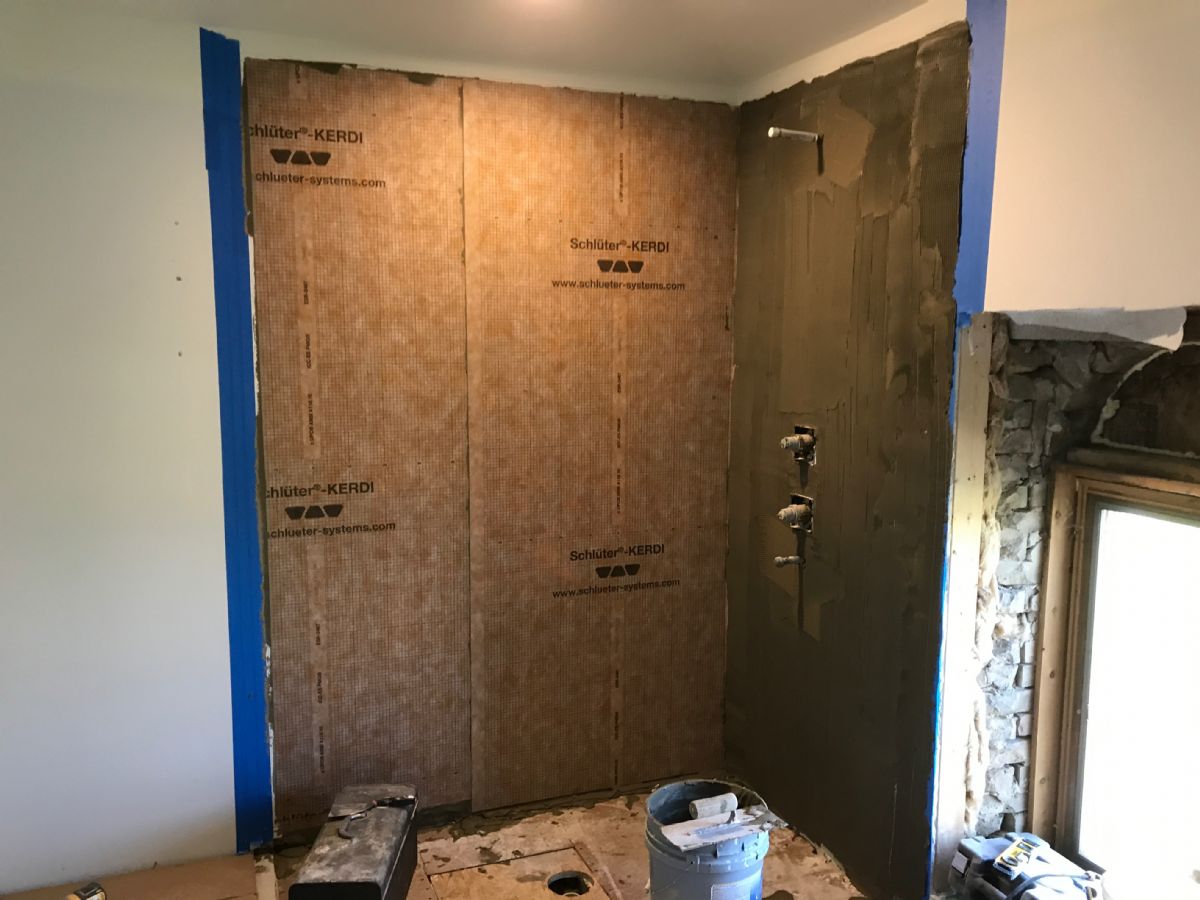

I realized after the first sheet that I'm not very good with a trowel so blue tape was appropriate. After I was done I removed the tape and it was cool to see how the membrane adheres with such a thin layer of mortar. 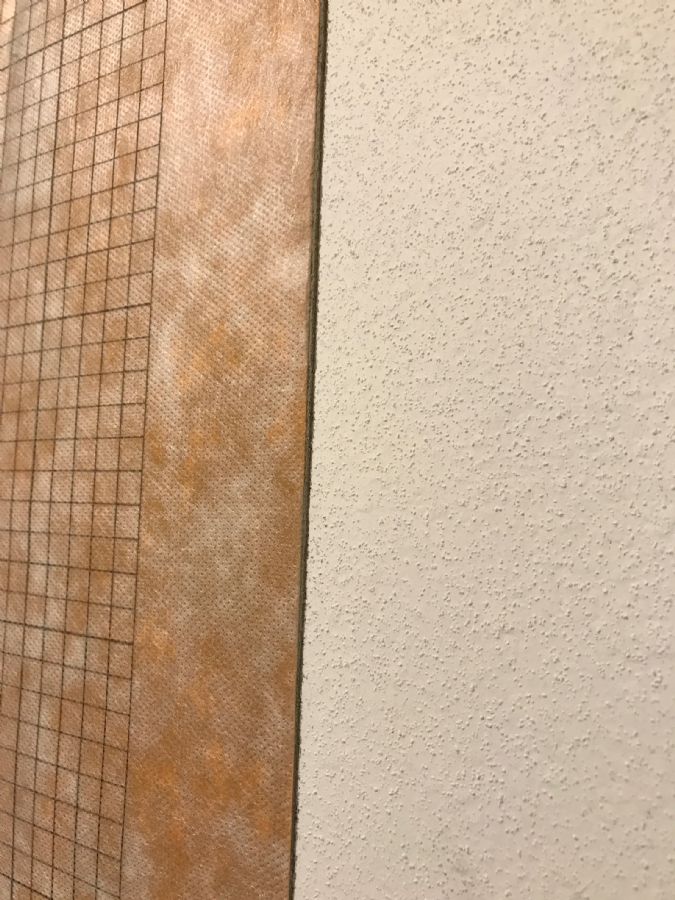
Now it's 830 and I'm feeling lazy but I really should set the tray & curb so I can dry pack around it tomorrow.... 
|
|
|
|
|
[#47]
Originally Posted By jacobsk:
Originally Posted By jacobsk:
Originally Posted By ChuckD05:
Tomorrow I rip the porcelain out of my current vanity, replace it with a Boos Block countertop, drill holes for the new faucet and vessel sink. While I'm doing that, gonna drop in a new lvp floor, rip up the toilet and redo the wax ring, trim the new floor, and while everything is out, probably paint and replace the vanity light as well. Oh, and probably drink a 12 pack of beer. Paint will have to wait. Ran into plumbing problems with old fucking compression fittings on galvanized steel pipe. |
|
|
|
|
[#48]
Tray set in mortar as well as curb. P-trap was slightly crooked so the drain wanted to raise on the left hand side. Hence the tubs of grout holding it down just a wee bit till the mortar sets.

Going to take a shower after a successful day, I turned the hot water knob on the tub faucet and was immediately sprayed with water. Gaaaar the cast brass valve body has a flippin crack! 
Must be a casting defect... 
I've always been a big fan of Kingston Brass products. I've received great customer service (shipping replacement parts I've lost to me for free before) so I guess I'll give them a call Monday. 
|
|
|
|
|
[#49]
|
|
|
|
|
[#50]
Dry packed the mortar in the shower pan (easy) and helped the other half cut the rest of the floor tile.
Uncovered the jacuzzi tub and put some black plastic on the curb. I think we'll go with black on the top of the curb and around the tub. Not going to lie, I'm dreading having to lay all these little mosaics... 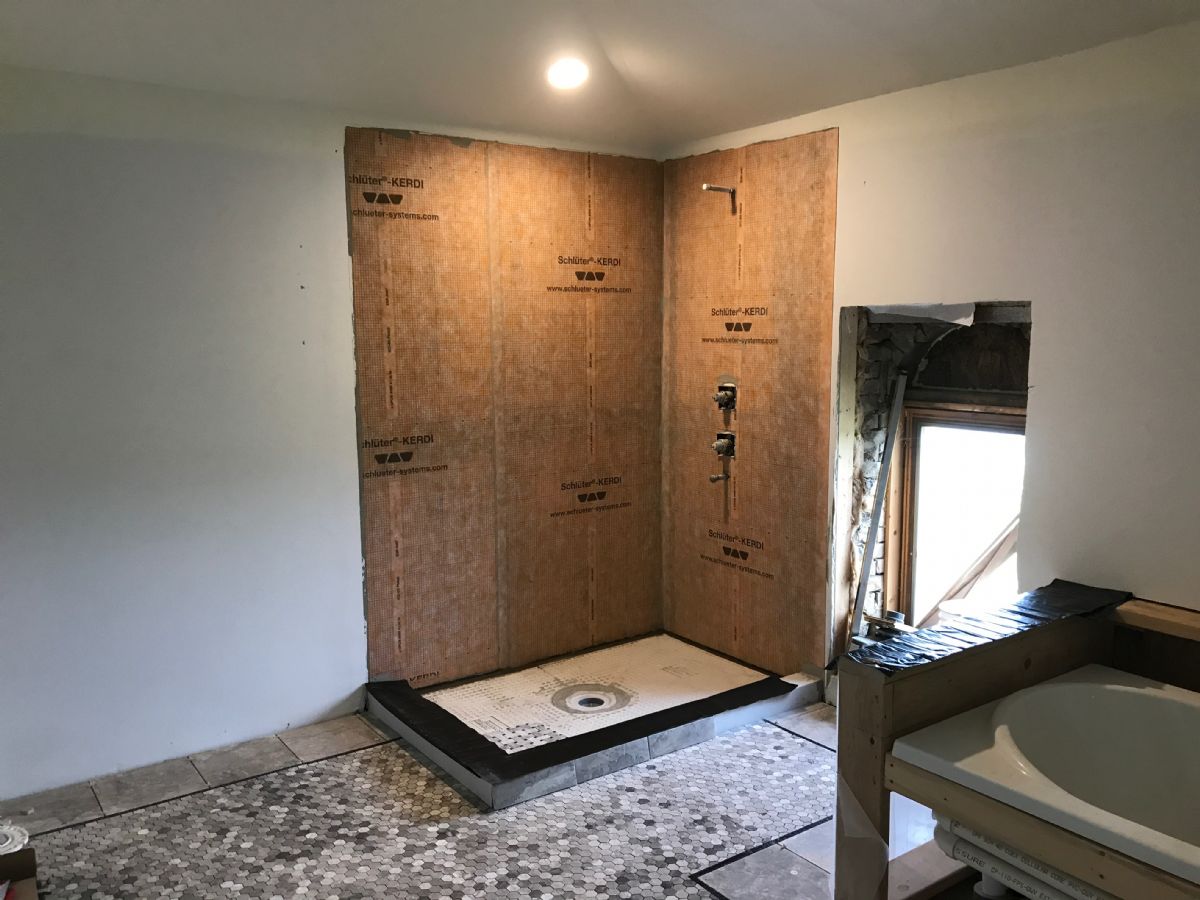
|
|
|
|
 Win a FREE Membership!
Sign up for the ARFCOM weekly newsletter and be entered to win a free ARFCOM membership. One new winner* is announced every week!
You will receive an email every Friday morning featuring the latest chatter from the hottest topics, breaking news surrounding legislation, as well as exclusive deals only available to ARFCOM email subscribers.

AR15.COM is the world's largest firearm community and is a gathering place for firearm enthusiasts of all types.
From hunters and military members, to competition shooters and general firearm enthusiasts, we welcome anyone who values and respects the way of the firearm.

Subscribe to our monthly Newsletter to receive firearm news, product discounts from your favorite Industry Partners, and more.
Copyright © 1996-2024 AR15.COM LLC. All Rights Reserved.
Any use of this content without express written consent is prohibited.
AR15.Com reserves the right to overwrite or replace any affiliate, commercial, or monetizable links, posted by users, with our own.


