|
[#1]
It was around $1000 for both. That included the undercut, stippling, beavertail, blending, and cerakote. Really nice work, and pretty unique.
|
|
|
|
USA
|
[Last Edit: Trooper0007]
[#2]
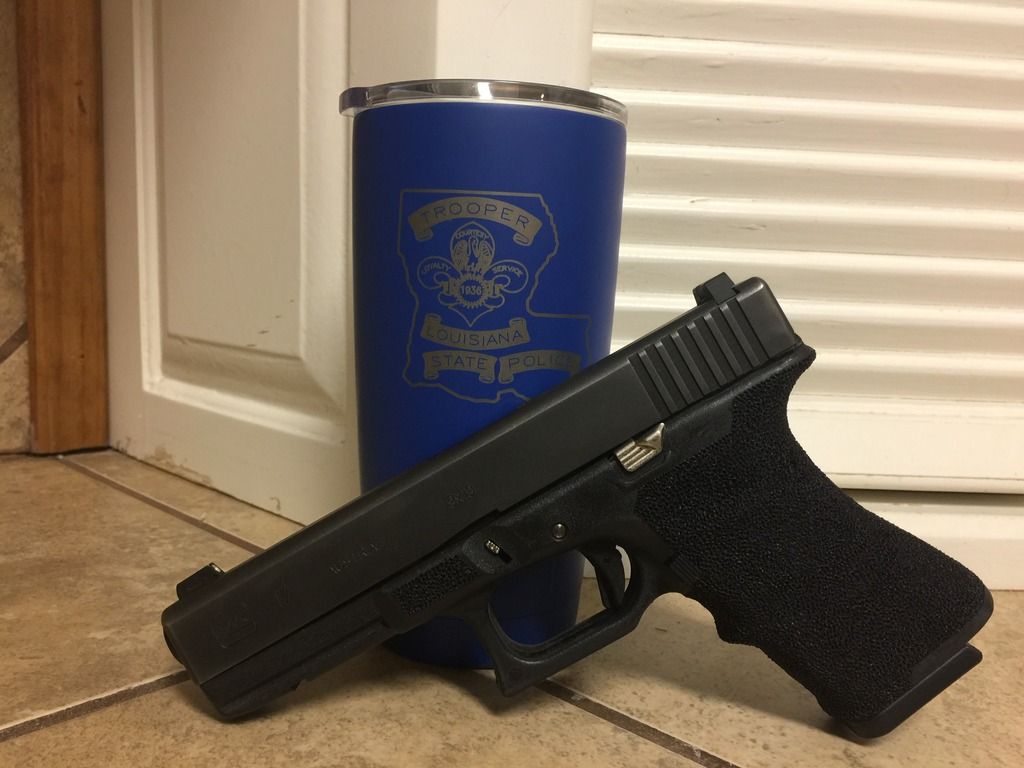
17 to 19 chop, undercut, lower finger lug removal, and stipple. My first time doing any grip mods. |
|
|
LA, USA
|
[#3]
Originally Posted By Trooper0007:
http://i1249.photobucket.com/albums/hh512/ry_da1/IMG_1284_zpsqstxuzlr.jpg 17 to 19 chop, undercut, lower finger lug removal, and stipple. My first time doing any grip mods. I hope you don't like magwells. |
|
|
USA
|
[#4]
Originally Posted By DAVE_M:
I hope you don't like magwells. Why is that? I have a cheap one that still attaches correctly. |
|
|
OH, USA
|
[Last Edit: lyodbraun]
[#5]
Originally Posted By Trooper0007:
http://i1249.photobucket.com/albums/hh512/ry_da1/IMG_1284_zpsqstxuzlr.jpg 17 to 19 chop, undercut, lower finger lug removal, and stipple. My first time doing any grip mods. Looks good, very nice work... |
|
|
USA
|
[#6]
Originally Posted By lyodbraun:
Looks good, very nice work... Thank you. My buddy has already slated me to do his G22. |
|
|
LA, USA
|
[#7]
Originally Posted By Trooper0007:
Why is that? I have a cheap one that still attaches correctly. From the first pic, it looked like you chopped off the bottom flared portion of the front strap. A lot of magwells "hook" onto that. |
|
|
|
[Last Edit: Gdirty5]
[#8]
Attempted to stipple for the first time this week. Wanted to match my factory Zev pistol's texture and pattern
|
|
|
|
|
[#9]
That was the first frame I tried and overall I've been happy, in the past week I've done 4 of my frames. And here's the one from last night, which included a double undercut that is my first time attempting.
Double undercut, "Zev" style checker stipple, and memory pad stipple |
|
|
|
USA
|
[#10]
Looks good! What mag release is that?
|
|
|
|
[#11]
Originally Posted By Trooper0007:
Looks good! What mag release is that? It's the gen 3 zev mag release. |
|
|
|
|
[#12]
Originally Posted By Gdirty5:
Attempted to stipple for the first time this week. Wanted to match my factory Zev pistol's texture and pattern https://www.AR15.Com/media/mediaFiles/159941/IMG-0609-132738.JPG Looks great, even better than the ZEV version, IMHO! Can you tell us what tools and tip you used to get that pattern? |
|
|
|
IL, USA
|
[#13]
Originally Posted By Yojimbo:
Looks great, even better than the ZEV version, IMHO! Can you tell us what tools and tip you used to get that pattern? I'm not sure if it's what he used, but OTDefense has waffle tips for stippling. |
|
|
|
[#14]
Originally Posted By Yojimbo:
Looks great, even better than the ZEV version, IMHO! Can you tell us what tools and tip you used to get that pattern? I used a dremel and 20 lpi checkered bit. Brother checkered a screw head. |
|
|
|
|
[Last Edit: Yojimbo]
[#15]
Originally Posted By Gdirty5:
I used a dremel and 20 lpi checkered bit. Brother checkered a screw head. It worked great! Someone should start professionally made checkered bits... ETA: Link to OTDefense tips mentioned in the post above. http://shop.otdefense.com/t/stippling |
|
|
|
|
[Last Edit: Gdirty5]
[#16]
Originally Posted By Yojimbo:
It worked great! Someone should start professionally made checkered bits... The guy posted right after your previous post. OTDefense makes checkered bits. I'm getting a bigger one made so I can cover more area in and use a smaller one for the edges. |
|
|
|
|
[#17]
Originally Posted By Gdirty5:
The guy posted right after your previous post. OTDefense makes checkered bits. I'm getting a bigger one made so I can cover more area in and use a smaller one for the edges. https://www.AR15.Com/media/mediaFiles/159941/IMG-0605-133069.JPG I like the size of yours. I also think a square one would be good to minimize the overlapping. I need to get a Glock lower receiver and try this... 
|
|
|
|
|
[#18]
Originally Posted By Yojimbo:
I like the size of yours. I also think a square one would be good to minimize the overlapping. I need to get a Glock lower receiver and try this... That's the one my brother is making for me. The larger one I requested to make the center section go quicker. If I'm sanding down and stippling the frame in 45 minutes now, that might be able to drop me down to ~30 minutes. |
|
|
|
LA, USA
|
[#19]
Originally Posted By Gdirty5:
That's the one my brother is making for me. The larger one I requested to make the center section go quicker. If I'm sanding down and stippling the frame in 45 minutes now, that might be able to drop me down to ~30 minutes. Looks good, Noob! Glad you went through with it! It makes things a lot mo betta!
|
|
|
KS, USA
|
[Last Edit: ek_cruiser_316]
[#20]
Originally Posted By Gdirty5:
That's the one my brother is making for me. The larger one I requested to make the center section go quicker. If I'm sanding down and stippling the frame in 45 minutes now, that might be able to drop me down to ~30 minutes. Damn can he make one for me. I'll pay. Seriously. I have quite a few of the OTD tips but one that size would be awesome. PM me if he can. 
|
|
|
|
[#21]
Originally Posted By DAVE_M:
Looks good, Noob! Glad you went through with it! It makes things a lot mo betta! Thanks Dave. Wouldn't have mustered up the courage to do it, if I haven't seen your post. |
|
|
|
MI, USA
|
[Last Edit: dwcopple]
[#22]
Yeah, if someone would make a good sized square brass waffle tip, that'd be sweet! Less than $15 too of course.
There are some neat tips designs in this kit too: wood burner bit kit A gun could look cool with a bunch of the iron cross designs or the top left one |
|
|
|
[#23]
Got the magwell in to complete the frame.
Here's my pair of trilobyte 17's. Ones set up for suppressed range fun and other it set up if I ever wanna carry it owb. |
|
|
|
KY, USA
|
[#24]
Got the recessed cuts complete. I still need practice. I'm very happy with the crater stipple work, shot a match in a little rain, no gloves, zero worries.
|
|
|
|
[#25]
Just got it done!

|
|
|
|
MI, USA
|
[#26]
Originally Posted By WyattEarp:
Just got it done! https://www.AR15.Com/media/mediaFiles/66889/IMG-0356-145454.jpg |
|
|
|
[#27]
Originally Posted By dwcopple:
did you mean to stipple all the way up the beavertail or just get carried away? Ouch! I wonder about that. None of the factory guns put texture at the web on your hand. And some people stipple there. I would imagine it's not comfortable or would tear some skin after a while since that skin is thinner. |
|
|
|
OH, USA
|
[#28]
I stipple all my glocks up into the beaver tail, it helps me get a better grip on the draw personally and it feels more locked in. Its never caused any issues to my hand or during carry.
|
|
|
|
[#29]
Originally Posted By dwcopple:
did you mean to stipple all the way up the beavertail or just get carried away? Ouch! Lol. No I asked for it. I like it that way. Used it on another pistol awhile back. It's not that aggressive, so it doesn't feel rough. |
|
|
|
|
[#30]
|
|
|
|
|
[Last Edit: ridewaves]
[#31]
Originally Posted By Gdirty5:
I wonder about that. None of the factory guns put texture at the web on your hand. And some people stipple there. I would imagine it's not comfortable or would tear some skin after a while since that skin is thinner. Concur. A smooth finish backstrap/beavertail is sore enough after enough rounds. I suppose if you don't have any extended range sessions or wear gloves it doesn't matter. I personally don't see the benefit in additional friction in that area. Likewise on triggerguard undercuts. |
|
|
|
MI, USA
|
[#32]
Originally Posted By ridewaves:
Likewise on triggerguard undercuts. Yep! Never understood why people stipple there. I cringe when I see that 
|
|
|
LA, USA
|
[#33]

|
|
|
LA, USA
|
[#34]

|
|
|
|
[#35]
Originally Posted By DAVE_M:
https://c2.staticflickr.com/4/3743/32065407814_d259e1e48a_c.jpg looks good! now send it off to primary machine and let them do some work to it. |
|
|
|
LA, USA
|
[#36]
Originally Posted By Gdirty5:
looks good! now send it off to primary machine and let them do some work to it. I'm tempted to send the G17 off to them. I like their work. |
|
|
AR, USA
|
[#37]
Here is a G19 g4 that I did for a buddy.
  
|
|
|
|
[#38]
Originally Posted By DAVE_M:
https://c1.staticflickr.com/3/2275/32091212423_e416133cb8_z.jpg Very clean especially for a "dot" texture. |
|
|
|
|
[#39]
Originally Posted By ArkansasScout3187:
Here is a G19 g4 that I did for a buddy.http://i.imgur.com/BRNYr1v.jpghttp://i.imgur.com/DD5Cyge.jpghttp://i.imgur.com/kNPnvni.jpg Next time you do a waffle texture, burn your borders in with a needle tip first. Then work the waffle tip up to it. You'll get really clean lines. |
|
|
|
|
[#40]
Finished this one up tonight. I think it's my favorite by far.
|
|
|
|
|
[#41]
Originally Posted By ARJJ:
Finished this one up tonight. I think it's my favorite by far. https://www.AR15.Com/media/mediaFiles/106828/IMG-4601-154357.JPG Looks really nice. If you don't mind, how are you doing those borders and what type of tip are you using? |
|
|
|
|
[#42]
Did another one last night. Went thinner on the trigger guard than my previous frame I did |
|
|
|
|
[#43]
Originally Posted By Marksman14:
Looks really nice. If you don't mind, how are you doing those borders and what type of tip are you using? Originally Posted By Marksman14:
Originally Posted By ARJJ:
Finished this one up tonight. I think it's my favorite by far. https://www.AR15.Com/media/mediaFiles/106828/IMG-4601-154357.JPG Looks really nice. If you don't mind, how are you doing those borders and what type of tip are you using? Dremel with the medium ball cutter tip (#106 I think). I use a sharpie to mark my lines and then lightly work close to the line at a low angle. Once I get a "trough" going I use more pressure and change angles until it looks right. This is not my first time cutting borders, either. Total time to do this frame was about 12-13 hours. I've also cut a hard border with a reverse cone tip (#108/110). It produces a different look and is much easier quite frankly. It also helps make the stippling flush with the surrounding frame. Here's a 42 with the hard border: |
|
|
|
|
[#44]
Originally Posted By dwcopple: Man that's rough. |
|
|
|
|
[#45]
Originally Posted By ARJJ:
Dremel with the medium ball cutter tip (#106 I think). I use a sharpie to mark my lines and then lightly work close to the line at a low angle. Once I get a "trough" going I use more pressure and change angles until it looks right. This is not my first time cutting borders, either. Total time to do this frame was about 12-13 hours. I've also cut a hard border with a reverse cone tip (#108/110). It produces a different look and is much easier quite frankly. It also helps make the stippling flush with the surrounding frame. Here's a 42 with the hard border:https://www.AR15.Com/media/mediaFiles/106828/IMG-4362-154503.JPG Originally Posted By ARJJ:
Originally Posted By Marksman14:
Originally Posted By ARJJ:
Finished this one up tonight. I think it's my favorite by far. https://www.AR15.Com/media/mediaFiles/106828/IMG-4601-154357.JPG Looks really nice. If you don't mind, how are you doing those borders and what type of tip are you using? Dremel with the medium ball cutter tip (#106 I think). I use a sharpie to mark my lines and then lightly work close to the line at a low angle. Once I get a "trough" going I use more pressure and change angles until it looks right. This is not my first time cutting borders, either. Total time to do this frame was about 12-13 hours. I've also cut a hard border with a reverse cone tip (#108/110). It produces a different look and is much easier quite frankly. It also helps make the stippling flush with the surrounding frame. Here's a 42 with the hard border:https://www.AR15.Com/media/mediaFiles/106828/IMG-4362-154503.JPG Not surprised it took so long, it they look great. Would you mind sharing the tips you use? I'm looking to try something different. I've been doing *individual* sharp point stippling, and I need to switch it up. Both of your textures look very nice and sure seem that they would give the feel I like. |
|
|
|
|
[#46]
Originally Posted By Marksman14:
Not surprised it took so long, it they look great. Would you mind sharing the tips you use? I'm looking to try something different. I've been doing *individual* sharp point stippling, and I need to switch it up. Both of your textures look very nice and sure seem that they would give the feel I like. Man I'm just an amateur (for right now anyway), but I could write a book on what I've learned. My best advice is to take an old Glock box and the tips in your kit and try them at multiple angles and use "tip dragging", which basically means scribbling or doing figure eights and the like on your material. When using a Dremel, make note of which direction/side it produces the flash on, and always try to work so that the flash produced is on the unfinished side of your work. |
|
|
|
MA, USA
|
[#47]
Gen3 22 got some freshening up.


|
|
|
|
[#48]
Originally Posted By dwcopple:
did you mean to stipple all the way up the beavertail or just get carried away? Ouch! I was worried mine would be uncomfortable stippled all the way up the beavertail, but it doesn't bother me at all. I have sissy office worker hands too, so it's not because I'm so tough and rugged.
|
|
|
|
MS, USA
|
[#49]
This is my first attempt at stippling. Just done this 19 yesterday.
 
|
|
|
MI, USA
|
[#50]
Originally Posted By hvydg:
This is my first attempt at stippling. |
|
|
 Win a FREE Membership!
Sign up for the ARFCOM weekly newsletter and be entered to win a free ARFCOM membership. One new winner* is announced every week!
You will receive an email every Friday morning featuring the latest chatter from the hottest topics, breaking news surrounding legislation, as well as exclusive deals only available to ARFCOM email subscribers.

AR15.COM is the world's largest firearm community and is a gathering place for firearm enthusiasts of all types.
From hunters and military members, to competition shooters and general firearm enthusiasts, we welcome anyone who values and respects the way of the firearm.

Subscribe to our monthly Newsletter to receive firearm news, product discounts from your favorite Industry Partners, and more.
Copyright © 1996-2024 AR15.COM LLC. All Rights Reserved.
Any use of this content without express written consent is prohibited.
AR15.Com reserves the right to overwrite or replace any affiliate, commercial, or monetizable links, posted by users, with our own.


