|
Posted: 3/30/2008 1:09:08 AM EDT
Well I own about 20 PMAGs and was contemplating buying some windowed ones when i decided to try making my own version of a windowed PMAG. This modification takes about 15 minutes total. Here is a brief tutorial on how to make your own:
Items needed - -PMAG magazine (any color, disassembled) -drill -dremel tool -1/8" Carbide flat cutter/endmill -1/4" drill bit -1/4" half round hobby file -1" flat, fine tooth file -3"x1/16"x1" aluminum flat stock -beeswax -a 4-5" vise -a pad for the vise to prevent damage to the magazine (i used a piece of scrap rubber matting) -a 1-2" C-clamp -Devcon 5 minute Epoxy (buy the bottled stuff, it lasts a lot longer than the syringe type) -something to mix the epoxy with, i used a hobby paintbrush, a popsicle stick works too. -a small piece of cardboard to mix the epoxy on. Here are the steps: 1. There are three index holes in the non-windowed PMAG where the window would normally be. I'm not sure if these were part of the die process or for other reasons, regardless they make great pilots for the cutting. Take your drill and chuck up the 1/4" bit and center over these three pilots, drill them out slowly, speed isn't needed. 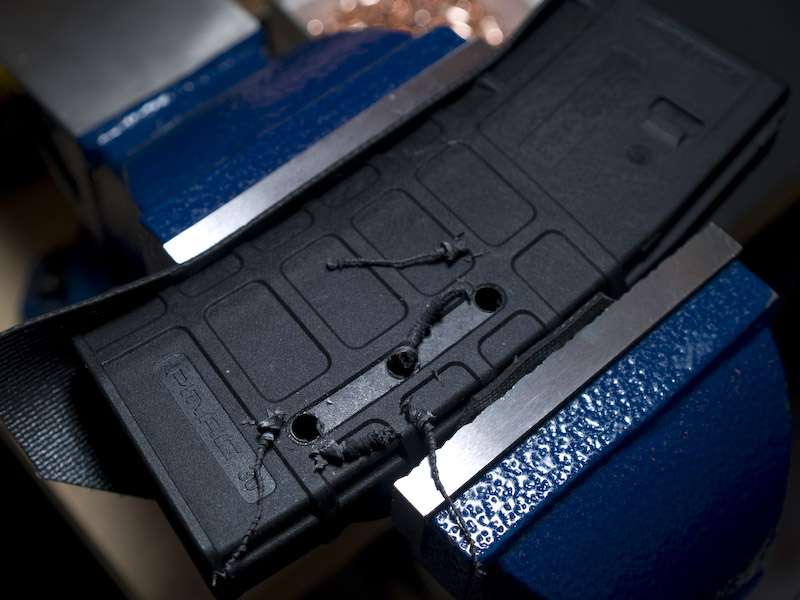 2. Plug in the dremel and attach the endmill. I use a higher speed setting on this to prevent chatter, this bit will destroy a magazine quickly, so move slowly and deliberately. Make your way from one hole to another trying to stay as close as possible to the lower edge of the outside chamfer. 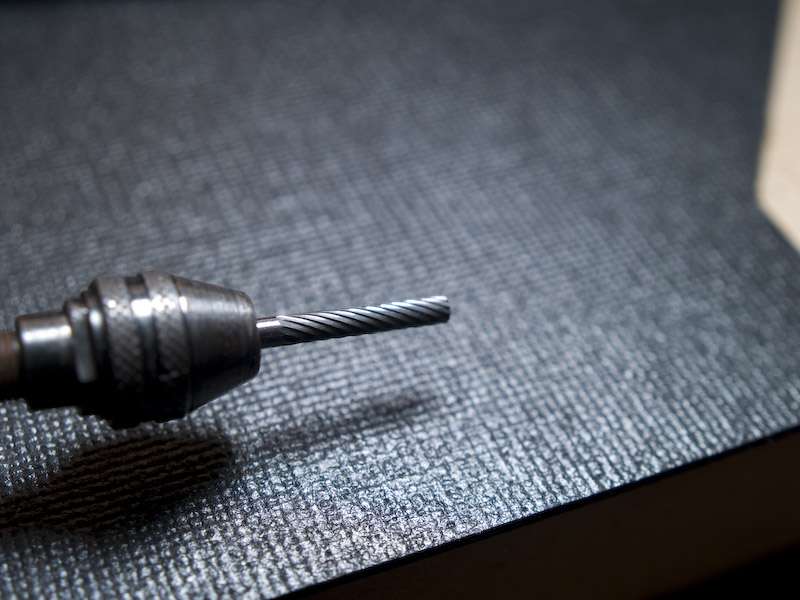 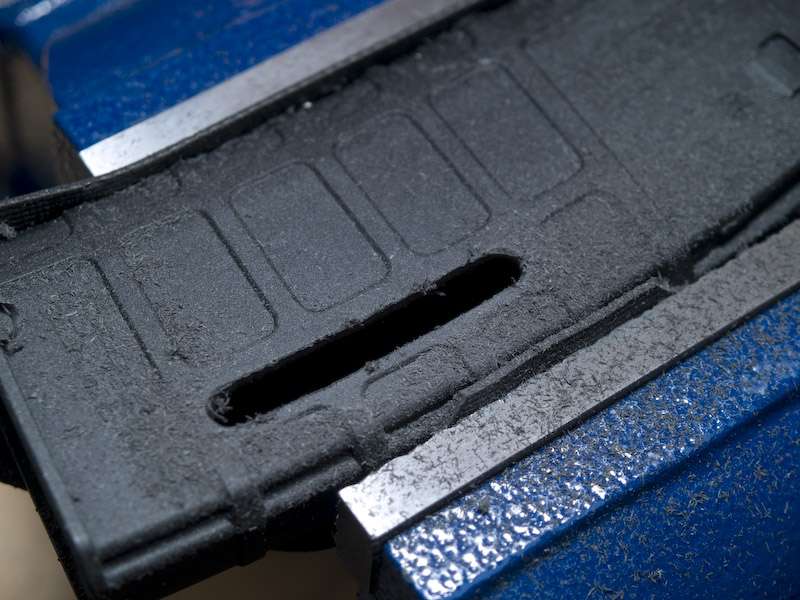 3. Once you have the window cut out and relatively cleaned up you can dress up any bumps or chatter marks with the flat file.   4. After cleaning the edges up well enough you can begin the process of creating an inner and outer chamfer along the edge of the new window. This creates a tapered edge allowing the epoxy to lock up with the magazine and prevent it from breaking free. 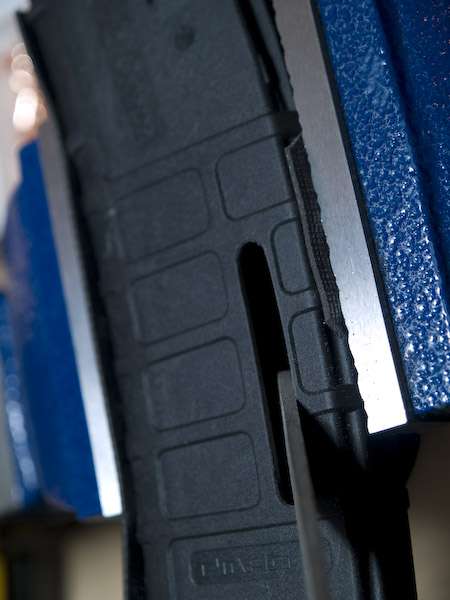 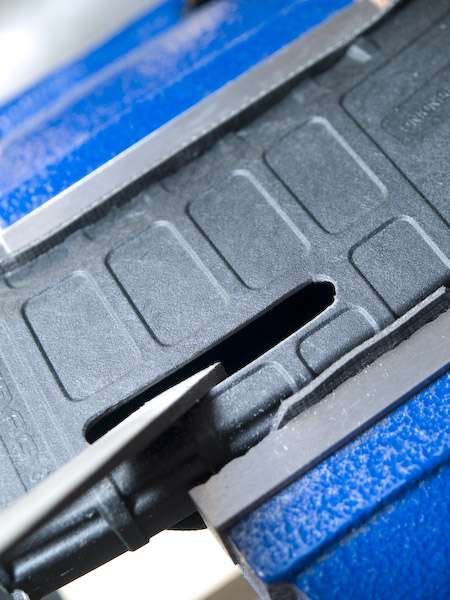 5. On the radius ends i use the 1/4" half round file to smooth out the edges and create a nice transition on the chamfers. 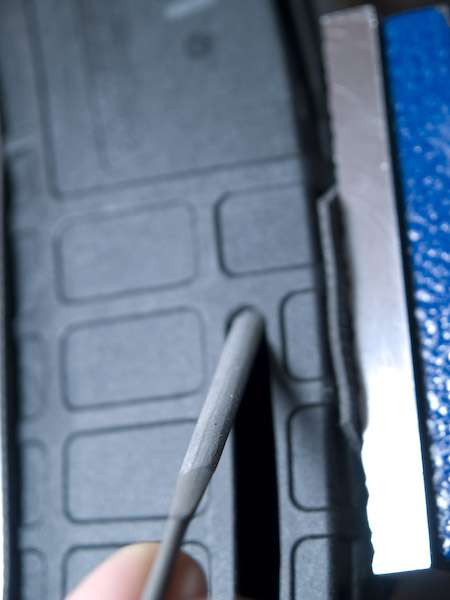  6. Once the edges are clean and smooth you can setup for the epoxy. first you want to use the aluminum flat stock for a backing plate, so the epoxy doesn't creep into the follower's ways. It is important that you smear a thin coat of beeswax across the aluminum so the epoxy won't stick to the aluminum...otherwise you'll end up with a non-functional and useless PMAG. here is a pic of the beeswax, flat stock, C-Clamp and PMAG ready to go:  7. when applying the beeswax try using some rubber or nitrile gloves, as your fingerprint will leave striations in the epoxy (you can see these striations in the final pics). If you don't have gloves a piece of saran wrap stretched across you finger will do the trick. You don't want the beeswax too thick, it may prevent thorough coverage of the epoxy and cause adhesion problems. here is the beeswax coated aluminum flatstock loosely fit in the magazine:  8. Once you have the magazine completely setup for the epoxy you can prepare it for mixing. good stuff right here:  9. cut the caps and break the seals:  10. dispense even amounts of epoxy and hardener, mix thoroughly for 30 seconds and use your paintbrush or other applicator to fill in the window area of the PMAG, being careful not to put too much on at once (it can get messy and overflow onto the magazine)  11. window has been filled in with an ideal amount of epoxy:  Now this is labeled as 5 minute epoxy, but i would wait at least 1 hour for cure time. Once cured the C-Clamp and flatstock can be removed, then you can wipe off the beeswax from inside the window...here are some pics of the end result: you can see the fingerprint striations real well in this one... 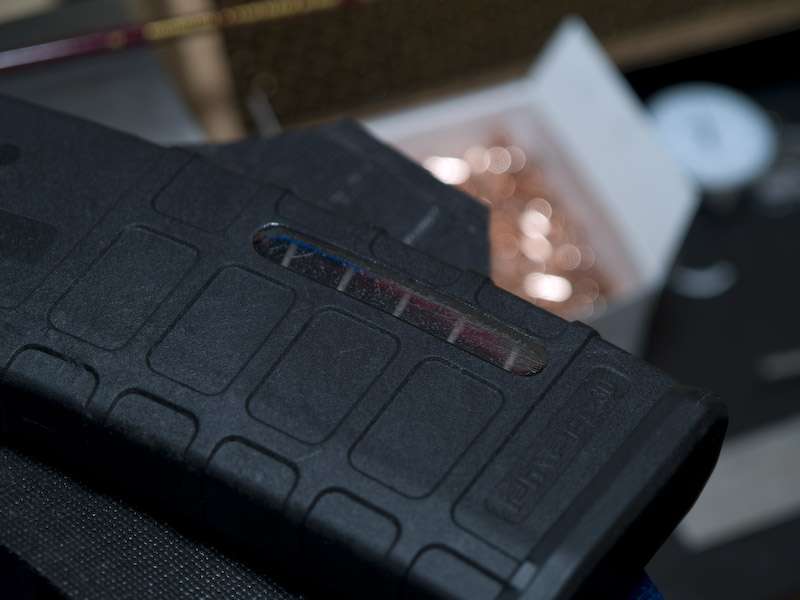 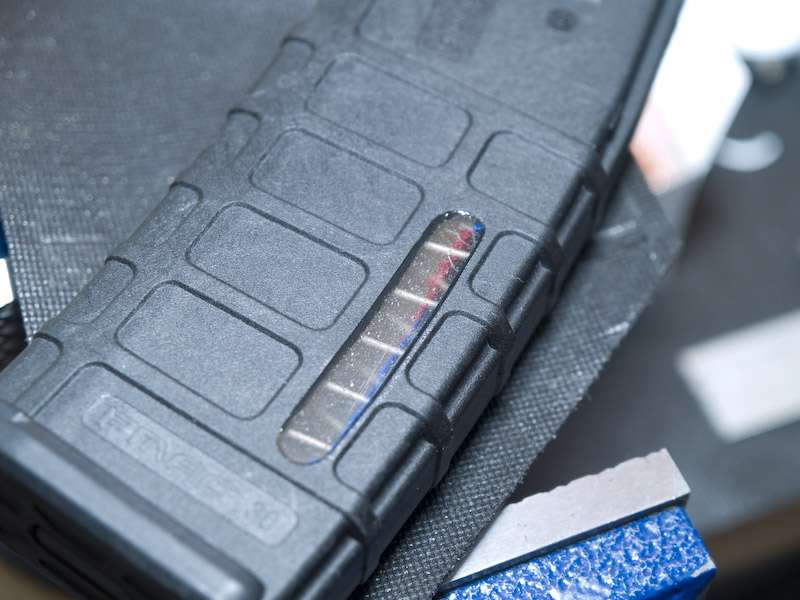 Loaded: 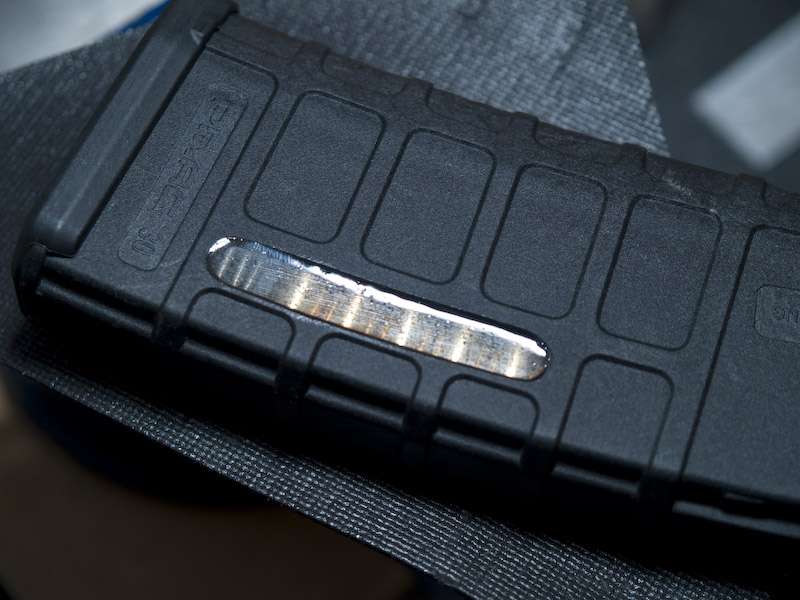 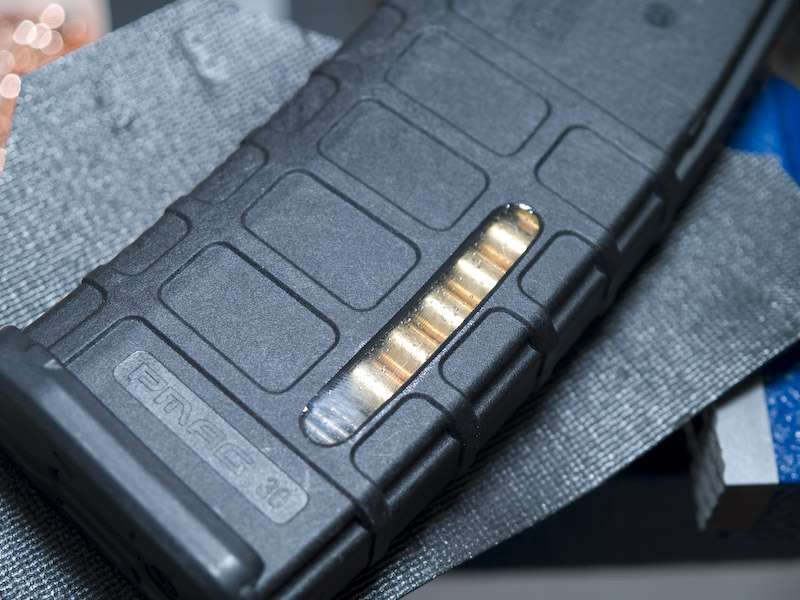 Overall, i think it's a viable solution to those who don't want to spend the extra few dollars on windowed PMAGs. Also note that in the long run the materials purchased for this will be way cheaper than choosing to upgrade. The modification is stable and simple. I only did one side of the magazine as a personal choice more than anything. EDIT - No pics, but i had left the magazine loaded with some 75gr goodness since the original post. I went to the range last Saturday and it was the first to be fired, zero failures. The follower ran smoothly, there is absolutely no bulging or cracking and a full magazine drop to the pavement proved to be uneventful. |
|
|
|
[#1]
Neat.
It looks professional and if it works then that's all that matters! |
|
|
|
[#2]
Sweet. Good thinkin'.
|
|
|
|
[#3]
Good job and good idea.
On a side note...I wouldnt use cardboard to mix epoxy. It will absorb the resins and cause the mixture to cure incorrectly. You may not notice but it does do it. Your best bet is to use scrap metal or plastic. |
|
|
|
[#4]
Wow, the actually looks pro-fesh-nul enough.
|
|
|
|
[#5]
Great job, looks pimp!
|
|
|
|
[#6]
Job well done, look great
|
|
|
|
[#7]
This ranks right up there with the genius who tapped and threaded his selector switch detent channel for a hex-head screw.
|
|
|
|
[#8]
You should be a professor at WECSOG.
Good class. |
|
|
|
[#9]
|
|
|
|
[#10]
Damn good craftsmanship!
Congrats on a great idea, successful outcome and well written detailed instructional post! |
|
|
|
[#11]
Cool idea. Now drop it fully loaded onto concrete and see if the window cracks out. I hope it won't. If it does, go with a longer set epoxy, as they're typically going to "grab" the base material a little better, and may have some more flex to them.
|
|
|
|
[#12]
you did a wonderful job.
but I have a question, how much did your base materials cost? I would think for the extra $2 per mag it would be cheaper to buy the propper window mags, than to invest in all of the materials to do the home job. not to mention all of your time invested and the devaluing of the resale on the mag. looks good though, I hope the epoxy doesn't cloud up or scratch up to the point that you can't see through it. it would kind of defeat the purpose of it. |
|
|
|
[#13]
You should paint a red stripe on the spring.
|
|
|
|
[#14]
+1 I wish I had that much spare time. Excellent job BTW. |
|
|
|
|
[#15]
good idea...
|
|
|
|
[#16]
Like myself, some people enjoy taking pride in their projects regardless of things such as "devaluing". Great job...this deserves a sticky.
|
|
|
|
[#17]
the cardboard is fine for this application, as the tapered edge of the window holds it in place, but I agree that it could affect a proper cure....
I haven't taken them to battle testing yet, but will post results after my next range trip. I have however whacked them with a hard rubber mallet and they are stout. 
honestly, most of the materials used were just laying around in my disorganized man cave 
|
|||
|
|
|
[#18]
Pretty neat idea and an excellent photo tutorial to explain the process!
I don’t know if I would trust a mag modified in that fashion for serious work, but none the less a neat idea. Thanks for sharing. |
|
|
|
[#19]
Very high cool factor . . . . but it isn't a ghetto mod. No bling.
Great work, though. Very creative. |
|
|
|
[#20]
+1 on the do it yourself project factor.
Nice job and great tutorial. |
|
|
|
[#21]
I admire your Do-it-yourself spirit.
Your windows look more clear than a factory windowed PMag, by the way. |
|
|
|
[#22]
I'll send you my barrel to be fluted
|
|
|
|
[#23]
give me a break man, i'm not a fucking tard 
|
|
|
|
|
[#24]
brilliant!
|
|
|
|
[#25]
That's a fantastic job. Good work.
|
|
|
|
[#26]
Very nice job. Thanks for sharing.
|
|
|
|
[#27]
great work and great results. im glad it turned out well for you.
for me, it would be cheaper to just buy the p-mags with windows. but that is only because i don't have any yet. thanks for taking the time to mess with the camera and post a tutorial for us. looking forward to hearing how it hold up in the long run. |
|
|
|
[#28]
This is true for some... and I don't know if i would mod my mags... but there are a lot of other things I enjoy doing that would be "cheaper" to just buy... Great post and congrats on the ingenuity. |
||
|
|
|
[#29]
thanks fellas, looks like i got moved to a lesser area in the forum
|
|
|
|
[#30]
bump for me
|
|
|
|
[#31]
Nice! I never even thought about something like that!
|
|
|
|
[#32]
How well can you tell how many rounds are left in the mag?
Excellent post, thanks for sharing. |
|
|
|
[#33]
I like plastic coffee can lids. For cleanup, wait for the epoxy to dry, then flex the lid and the dried residue breaks off. Learned this years ago with stock bedding compound. |
|
|
|
|
[#34]
Maybe some color-matching glitter sprinkled into the epoxy. |
|
|
|
|
[#35]
I NEVER thought I would see a thread on ARFCOM that involved a dremel and epoxy that would ever leave the realm of epic fail and rise beyond, all the way to such major win.
You, sir, are very talented. ETA: This might be fun to try on other plastic mags, like a Bulgarian AK-47 waffle mag.... 
|
|
|
|
[#36]
 I loved that thread. I loved that thread.Great job on the Pmags. 
|
||
|
|
|
[#37]
actually it was quite entertaining   that fluting was somewhat scary
excellent idea...hmmm, never thought of that! Thank you, i will store this in my database |
|||||
|
|
|
[#38]
You can't just say that and not link it for those of us who missed it!!!!! BTW OP, nice job, if I didn't post earlier. |
|||
|
|
|
[#39]
wow, good job. Thats not worth the effort for two bucks
|
|
|
|
[#40]
it is if you already own 20 of the windowless ones |
|
|
|
|
[#41]
I'll tack this for now, later on with the OP's permission, I'll copy everything and make it a "resource Thread" for at the top of the page
|
|
|
|
[#42]
wow, thanks! I'd like to add some benchmarking/range report info as well before though. |
|
|
|
|
[#43]
Send me a IM when it is ready to go |
||
|
|
|
[#44]
Holy tacked threads, Batman!
I too wish I had the time to do all the non-windowed PMAGS I have, but then again, I could give a rats a$$ if I have a window... especially for an untested workaround possibly causing mag feed failure if it pops out... But +1 for ingenuity and motivation... Rmpl |
|
|
|
[#45]
I think that the ingenuity is amazing.
The shared tutorial is clear and easy to follow. All in all this deserves an A+! |
|
|
|
[#46]
Some guy put really narrow "flutes" in his AR barrel by hand with a dremel. It was full of fail. He was flamed roundly. |
||||
|
|
|
[#47]
I just finished mine. The P-Mag mod, not the barrel fluting...
Came out very nice. Didn't cost me a penny, as the materials were all on hand. There was no orange paint laying around, so I used Gloss White. Painted the coils above and below black in order to give excellent contrast. |
|
|
|
[#48]
Excellent!! the only reason i performed this mod is because i had the resources on hand and i have 20 of these magazines and wanted to see if i liked them or not. Glad someone else tried it out and congrats on your success.
|
|
|
|
 Win a FREE Membership!
Sign up for the ARFCOM weekly newsletter and be entered to win a free ARFCOM membership. One new winner* is announced every week!
You will receive an email every Friday morning featuring the latest chatter from the hottest topics, breaking news surrounding legislation, as well as exclusive deals only available to ARFCOM email subscribers.

AR15.COM is the world's largest firearm community and is a gathering place for firearm enthusiasts of all types.
From hunters and military members, to competition shooters and general firearm enthusiasts, we welcome anyone who values and respects the way of the firearm.

Subscribe to our monthly Newsletter to receive firearm news, product discounts from your favorite Industry Partners, and more.
Copyright © 1996-2024 AR15.COM LLC. All Rights Reserved.
Any use of this content without express written consent is prohibited.
AR15.Com reserves the right to overwrite or replace any affiliate, commercial, or monetizable links, posted by users, with our own.


