|
[Last Edit: DamascusKnifemaker]
[#1]
I'm waiting on parts for the AMX and can't do much until they come in. I recently had my 53rd birthday and my right hip has started giving me problems. The ache really manifests itself when I take the 74 Javelin on long trips. To help keep myself sane when driving the Javelin I decided to install a Rostra Electric Global Cruise Control system.
The kit I bought ($267.00 on Amazon) contains a servo unit, switch control unit and a speed sensor. I spent the morning and early afternoon installing the servo and switch unit. I installed the servo unit on the passenger side inner fender apron. I then ran the servo control cable to the throttle and connected it. I routed the wiring into the harness to keep everything clean looking. I also drilled a 3/4" hole in the firewall and passed the servo connectors through. 
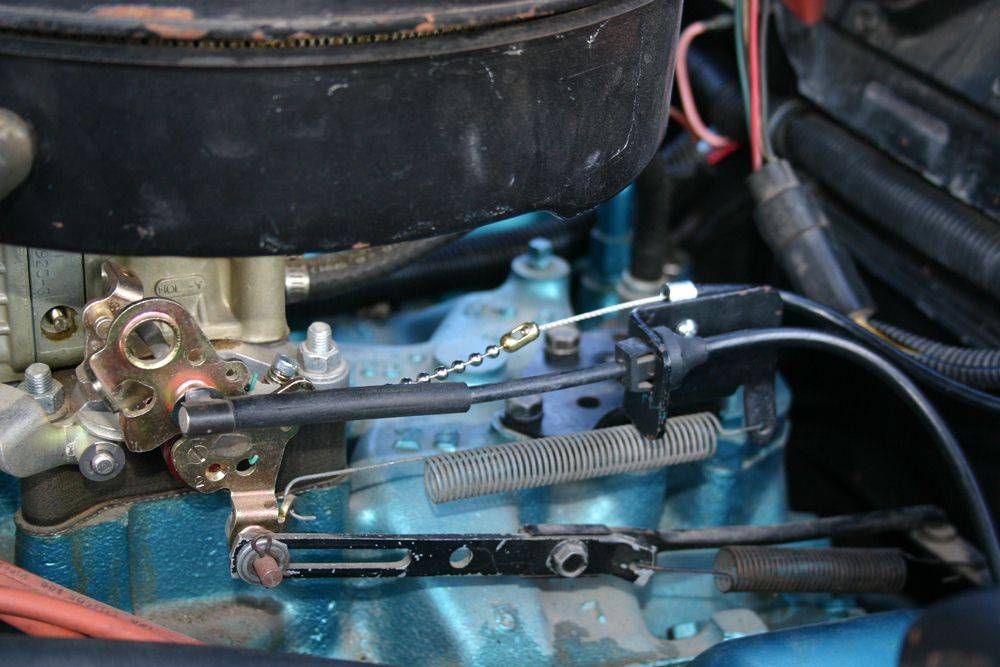
This is an early GM style switch control. AMC used the same style Saginaw steering column that GM used. The control switch fit perfectly. The instructions called for running the wires outside and taping them to the column.  I snaked them through the column with the other wires used for the signal switch. Tomorrow I plan on installing the speed sensor and completing the wiring inside the car. I snaked them through the column with the other wires used for the signal switch. Tomorrow I plan on installing the speed sensor and completing the wiring inside the car.


|
|
|
|
|
[#2]
I finished the install this morning. I installed the speed sensor under the car and attached the magnet provided in the kit to the drive shaft. I then routed the sensor wires into the engine bay and connected it to the servo unit wiring. It is plug and play for that connection. Next I made the control switch and under dash harness connections. These are also plug and play. All that was left was a few connections under the drivers dash. At a minimum you will need to make three connections. Two of them connect to the brake light switch and one to a keyed 12v power source. There are two others that are recommended for use. One connects to the tach signal and one connects to the neutral safety switch. This way if the tach surges or the car gets knocked into neutral the system disengages. I did not connect these today as I need to contact tech support to ensure that I connect to the proper wires.
All that was left was to test the system. I cruised to the highway and engaged the cruise control. Under 60mph the system surged. The servo unit has 12 dip switches that determine how the unit function. Switches 7, 8 and 9 tell the servo if you have a 4, 6 or 8 cyl engine and determines the reaction speed of the servo. I had the switches all in the off position. This is low V8 if you have surging you move switch 9 to on which is high V8. This eliminated the surge problem. :) |
|
|
|
|
[Last Edit: DamascusKnifemaker]
[#3]
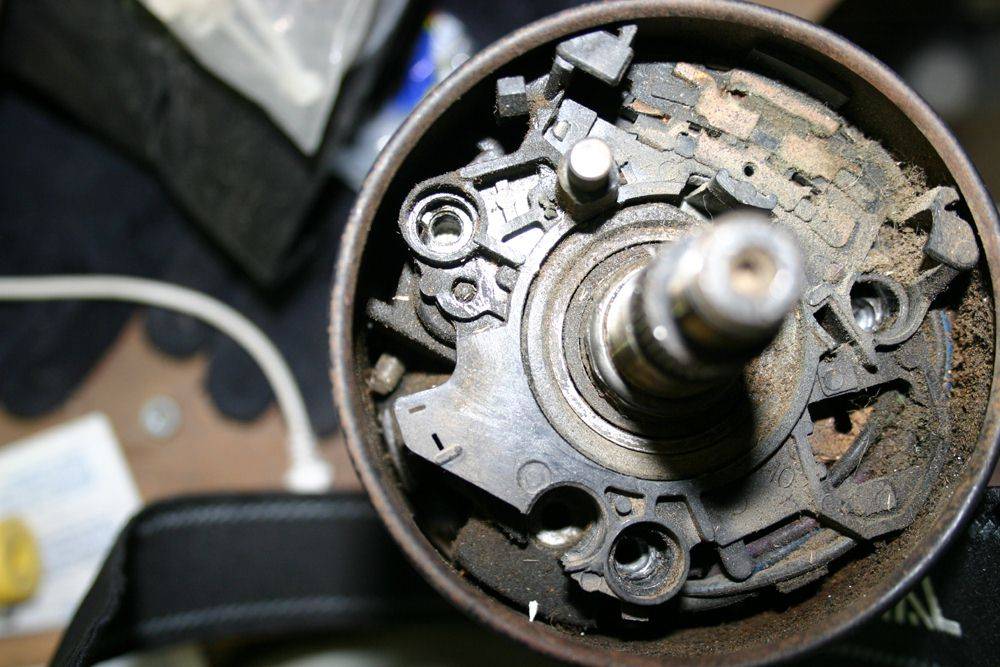
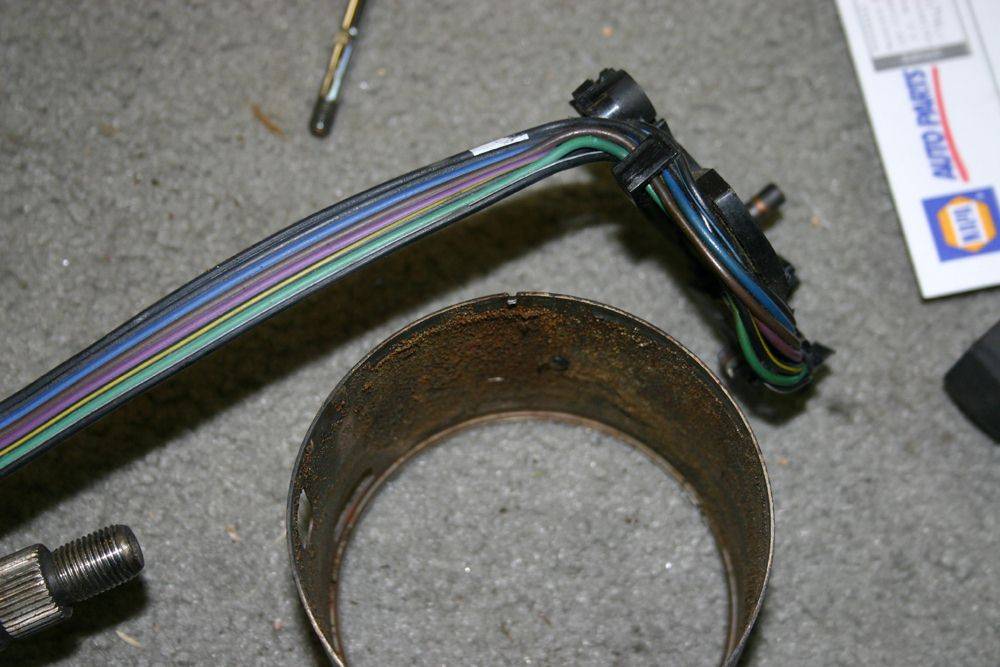
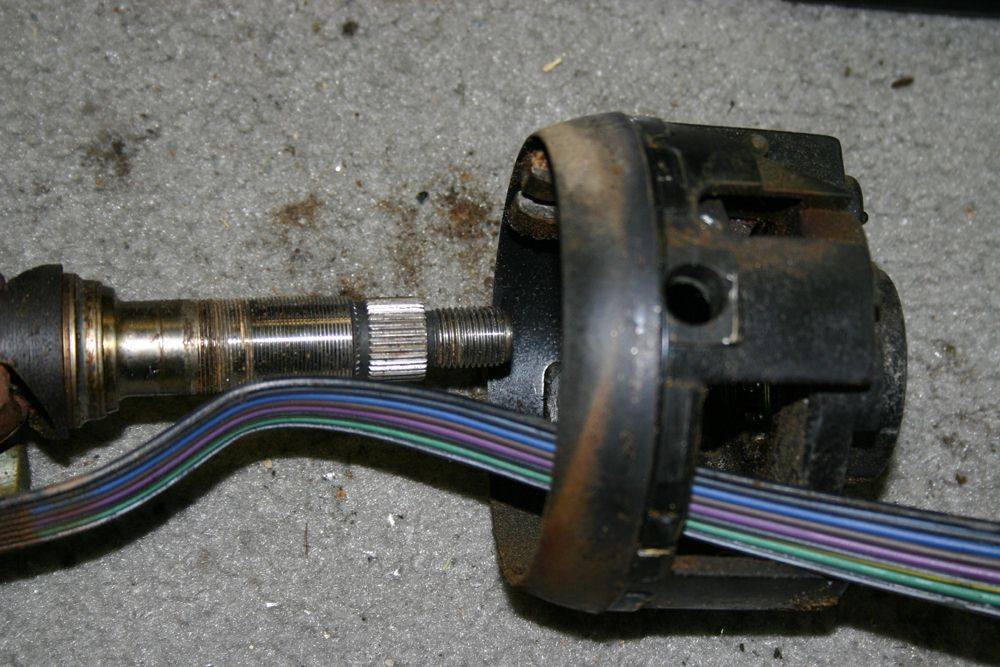
I tackled disassembling the AMX tilt steering column this weekend. If you haven't had the pleasure of messing with a Saginaw tilt steering column count yourself lucky. These columns will make you insane and it does not help that the service manuals do not go into great detail on how everything comes apart. The later keyed tilt columns with the transmission lock are even more fun. I took over 30 pictures to ensure I could assemble everything once the parts are cleaned up and painted.
The first step is to remove the Steering wheel. This car came with the Sport Steering wheel Option. The Center cap pulls off revealing the horn mechanism. The various screws are removed along with the large retaining nut then a steering wheel puller is used to remove the wheel. 


The horn slip ring is then removed. You can't see it in this picture but the slip ring is toast. Fortunately they are reproduced so I ordered a new one. The slip ring is removed and the three large phillips screws are holding down the signal switch mechanism are removed. The switch is 47 years old and toast also. I new unit set me back 80 bucks. The wires for the signal switch thread through the tilt mechanism so you can't remove it completely until the entire column is disassembled. I was able to get the switch out because it was damaged. Normally the upper housing needs to be removed first. The large spring is for the tilt mechanism. The cap has a screw driver slot that allows you to push down and turn releasing the spring. The spring can cause some damage so you have to be careful when releasing it. 

The column bearing nut needs to be removed. It is a weird 12 sided nut that a standard 12 point socket won't fit, plus it needs to be extra deep. AMC called out a special tool but the chances of ever finding one are slim to none. I ended up taking a 7/8 12 point deep socket and cutting the 3/8 drive end off so it would fit over the threaded shaft. I then chucked it up in my lathe and slowly removed material internally creating 12 flat spots on the points. After several tries I had enough material removed and the socket fit on the nut. I was then able to put a pipe wrench on the socket and remove the nut.


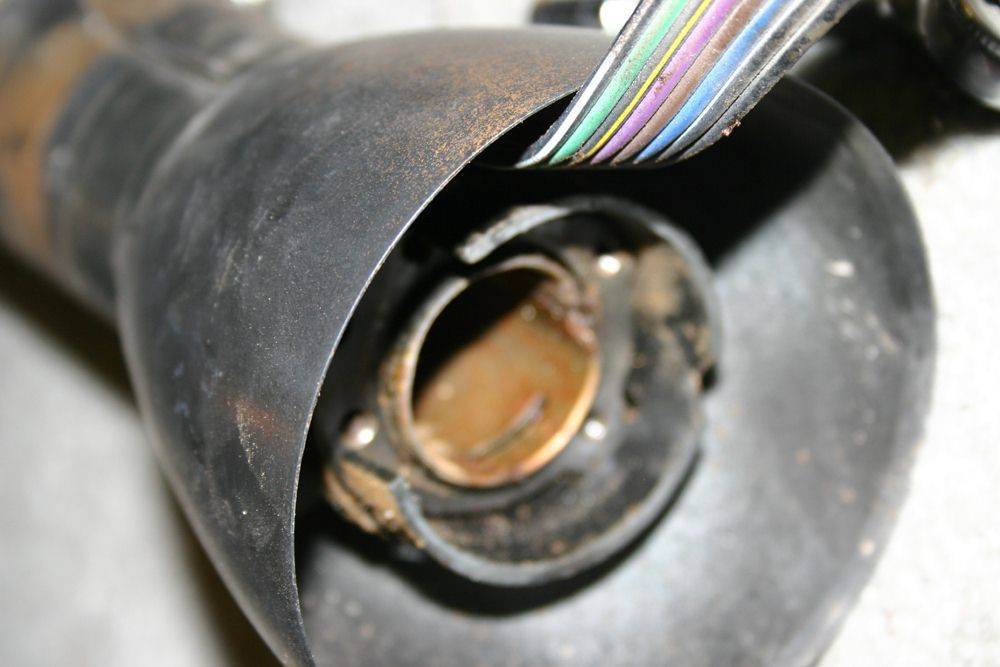
The column support bracket is removed allowing you to pop one of the wire covers off. 

The upper housing is a snug fit but some gentle tapping with a dead blow hammer and it will come off. It is indexed with the little divot to a slot on the tilt mechanism. With the upper housing off you expose the tilt pivots one on each side. A slide hammer can be used to remove them or a column specific pivot puller but I have neither. I just threaded the appropriate screw into it and popped them out with a screw driver. 


In order to remove the center column shaft the lower bearing and coupler hardware have to be removed. Once it is all removed the center section slides out the top of the column. The ball tilt assembly can be disassembled for careful cleaning as the nylon can be brittle. 

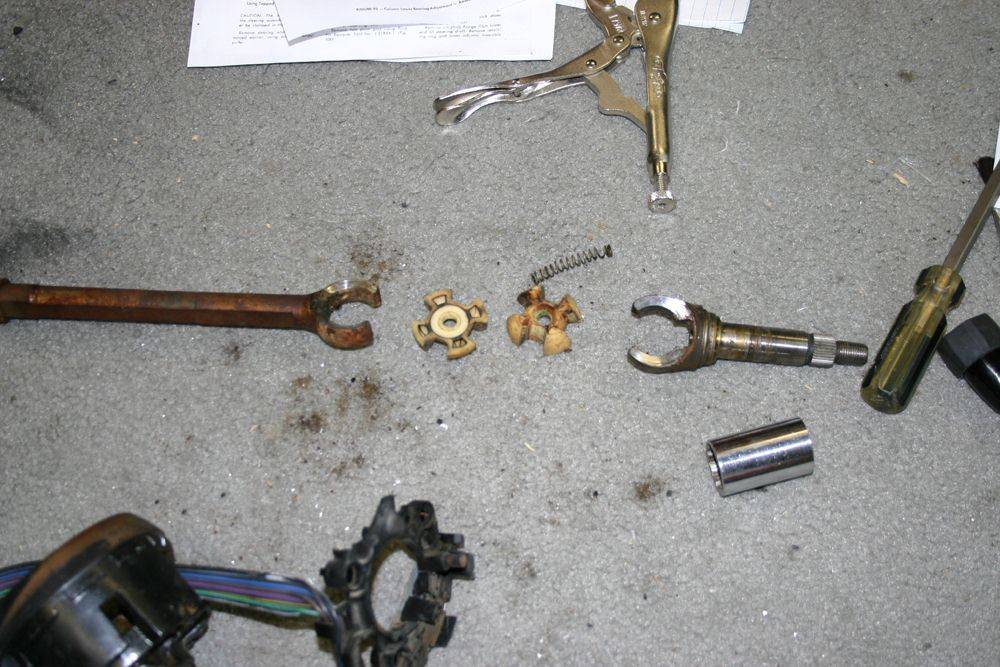
Removing the four bolts lets you remove the remainder of the tilt mechanism. Once that is removed all that remains are a clip and pressure spring holding in the inner tube. With the inner tube removed the nut plate and another pressure spring can be removed. Once the inner tube is separated from the outer tube you can finally remove the last wire cover and free the signal switch. 


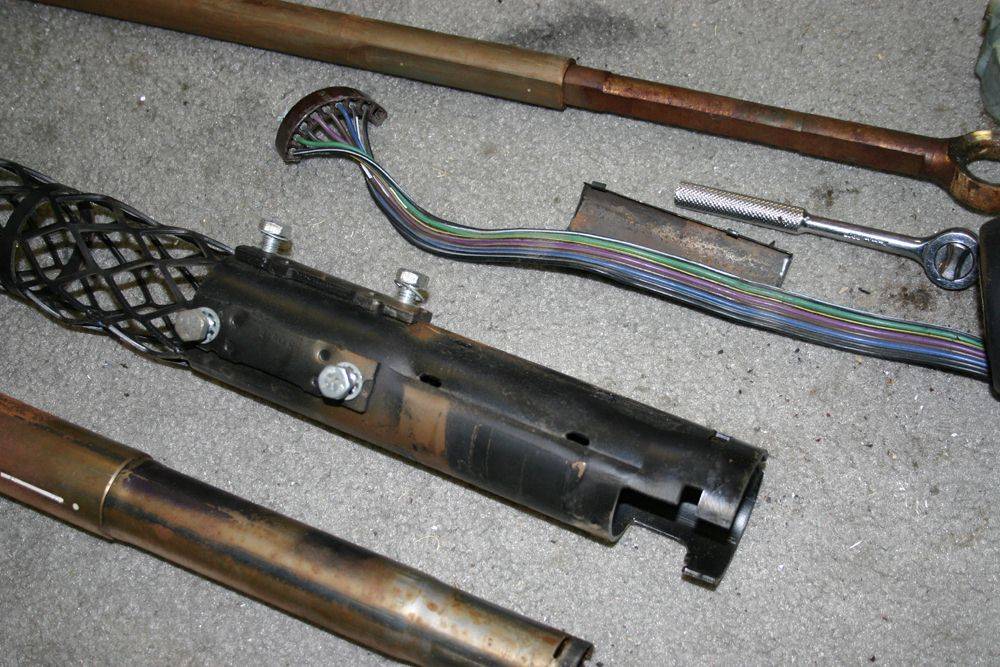
This bushing is part of the lower bearing assembly. it is no longer available. I am going to machine a new one from nylon. 
I media blasted everything that needed it, primed and painted the parts satin black. Once I get a new lower bearing and machine the nylon part that is no longer available I will assemble and install the column. |
|
|
|
UT, USA
|
[#4]
Looks like a PIA. My Ambassador had a bad column. Ignition switch all broken up. I'm glad I was able to find a used one. Looks like things are coming along well.
|
|
|
|
[Last Edit: DamascusKnifemaker]
[#5]
The parts after painting and the tilt column mostly assembled. I'm waiting on a new lower bearing to complete the assembly.


|
|
|
|
|
[Last Edit: DamascusKnifemaker]
[#6]
Last week I dropped the transmission off in Vegas with my re-builder. I'm putting a 727 Torque Command in the AMX. it is basically a Chrysler Torque Flight with an AMC specific case. I had this transmission in my Javelin for a while and drove it all over the state. I can't believe I made it to Reno and back after getting these pictures.


|
|
|
|
|
[Last Edit: DamascusKnifemaker]
[#7]
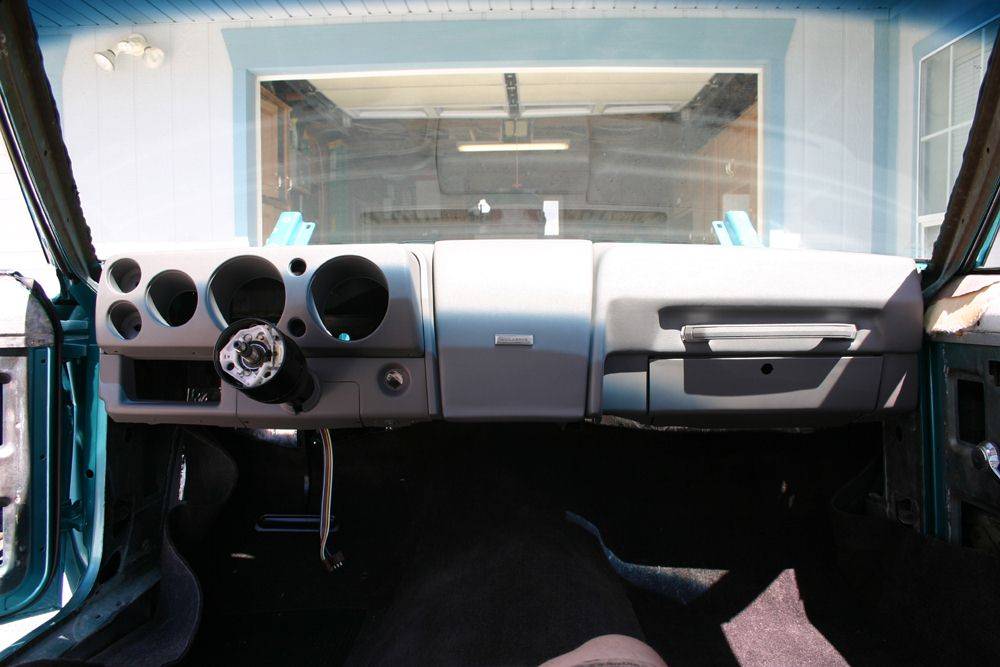
Tuesday the FEDEX guy delivered a package from Just Dashes. It contained my refinished crash pad an speaker cover. I got them dyed and installed on the dash shell. A buddy and myself installed the dash today.

|
|
|
|
|
[#8]
looking awesome
|
|
|
|
|
[#9]
Love it! 727s are pretty easy to rebuild. I am in the middle of a 69 GTX driver restoration so I know how daunting it is to get all the parts disassembled, cleaned, repaired, and put back together. So many parts but it looks like you have it licked.
|
|
|
|
UT, USA
|
[#10]
Dash looks pretty good! AMC stuff isn't like getting parts for the old Camaro/Mustang. I'm glad there is a little more interest in them these days. There might be what I need when I get around to the Ambassador.
|
|
|
|
[#11]
My first car was a 69 Javelin SST, 343 auto with air. Had a 70 AMX which I really miss.
|
|
|
|
UT, USA
|
[#12]
Progress????
I was hoping maybe a debut look at Swiss Days in Santa Clara this past weekend. Next year? |
|
|
|
[#13]
Originally Posted By 1cheapshot:
Progress???? I was hoping maybe a debut look at Swiss Days in Santa Clara this past weekend. Next year? Still waiting on the head liner to be repaired. I ordered the door, rear kick and sail panels from Legends Interiors. It will be six weeks before I get them. They may be the last parts I get for a while. My wifes handicapped sister passed away Friday. I had to write a check to the funeral home yesterday for 7k and we still have to pay for the plot and headstone. This year has sucked for unexpected large expenses. |
|
|
|
|
[#14]
Our savings has recovered a bit so the wife green lighted some expenditures for the exterior.
Nose trim for the hood. 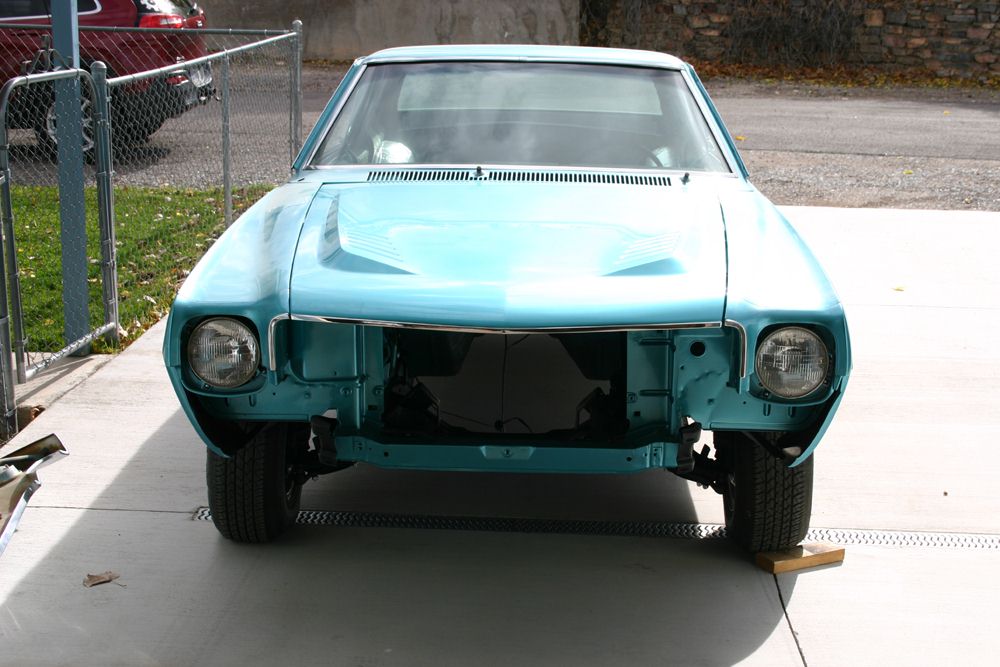
Rocker trim cleaned, masked, painted and installed along with the AMX emblems and the quarter window chrome extension. 

Tail light housing, lenses and trim. 
Left side AMX trim. 
|
|
|
|
TN, USA
|
[#15]
Looking good
|
|
|
|
[#16]
Very nice
|
|
|
|
|
[#17]
Thanks for updating
|
|
|
|
UT, USA
|
[#18]
Nice.
|
|
|
|
[#19]
Nice.
|
|
|
|
|
[#20]
Sweet!
|
|
|
|
|
[Last Edit: DamascusKnifemaker]
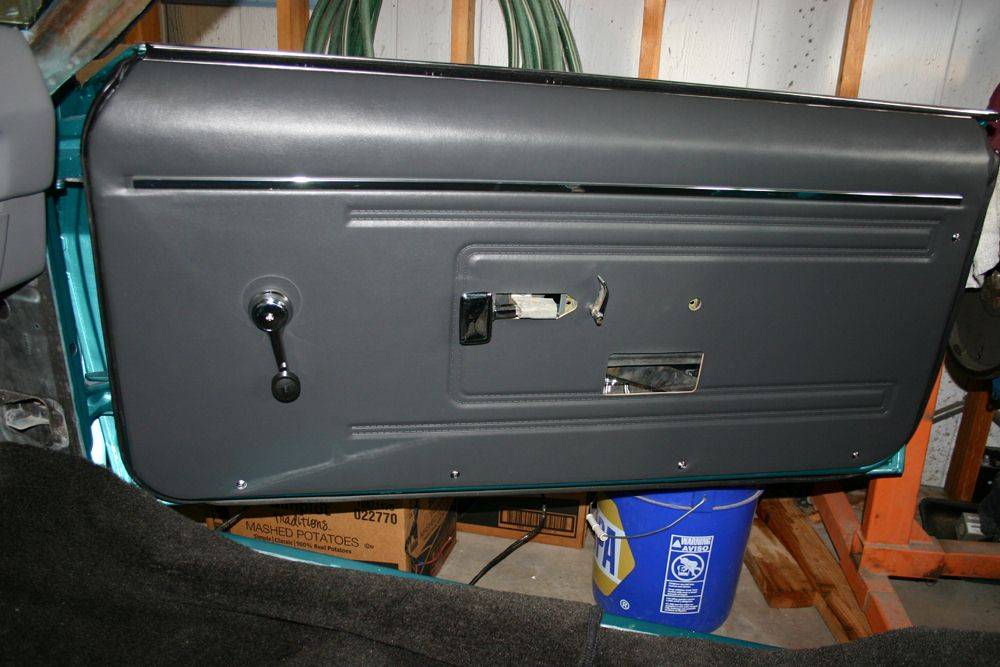
[#21]
It's been a while since I updated this thread. I got the headliner back from the upholstery shop and the rest of the interior stuff from Legendary Interiors. Unfortunately the money I spent on trying to use the original headliner was wasted. The shop did a beautiful job of reconditioning it as far as appearance went but it does not fit properly. I ordered a reproduction head liner and will be installing it in the future. Once I get the new headliner trimmed and covered I will be able to get the rest of the interior in. As of now I was able to get the new door panels installed. I wanted to get the carpet fitted but that's on hold now as I've got sub-frame connectors on order that will need to be welded in. After the connectors are welded in I can get the carpet fitted. I also ordered a Control Freaks independent front suspension to replace the trunions suspension. I should get the new suspension system mid march. There are pics of the new suspension posted.


|
|
|
|
|
[#22]
Looks beautiful!
The first gen Javelins and especially the AMX were my favorite body style AMCs. |
|
|
|
TN, USA
|
[#23]
Death to trunions!
|
|
|
|
[#24]
Looking incredible
|
|
|
|
UT, USA
|
[#25]
That new front suspension looks awesome. Sucks to have the work in the old stuff go to waste, but for the new and improved, I'm sure it will make the car much more enjoyable to drive.
|
|
|
|
[Last Edit: DamascusKnifemaker]
[#26]
Originally Posted By 1cheapshot:
That new front suspension looks awesome. Sucks to have the work in the old stuff go to waste, but for the new and improved, I'm sure it will make the car much more enjoyable to drive. I'm going to look into selling the old stuff to offset the cost of the new IFS. |
|
|
|
OH, USA
|
[#27]
Looking Fakking GOEY M8
|
|
|
WA, USA
|
[#28]
I love seeing AMCs getting love.
Some day I'll get my 72 javelin underway. Sits in storage for now. Had to sell my 69. Used to call it "the hilighter " 
|
|
|
|
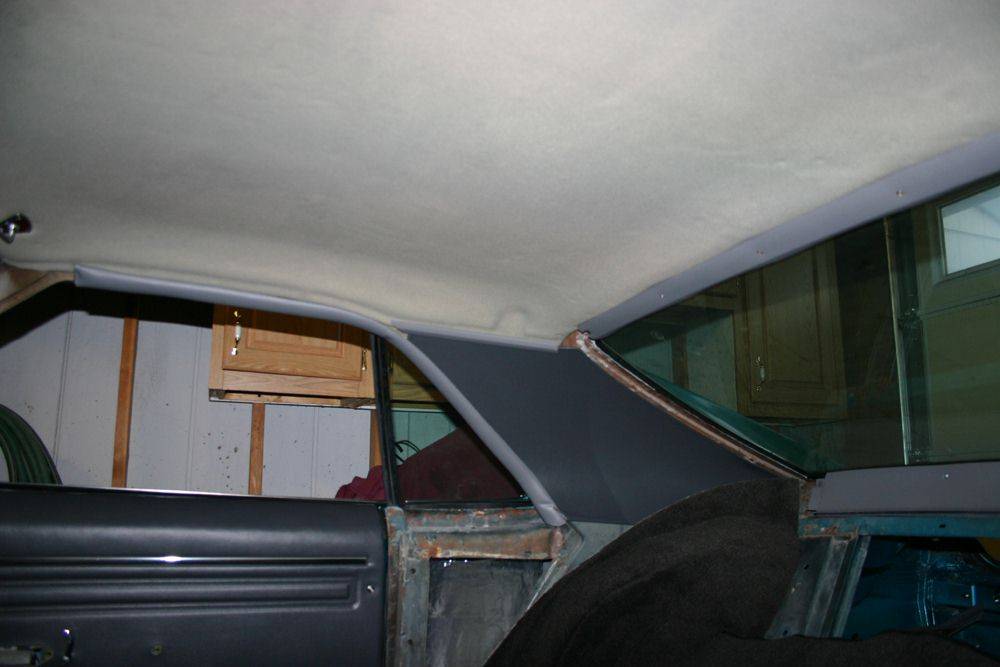
[#29]
I received the headliner last week and have started the prep for installing it.
There are hole depressions and an outline of the area where the sun visor hardware attaches. I used a 1 inch hole saw and cut the center hole. I then used a 1/8 drill bit to make pilot holes where the screws pass through. Next I enlarged the screw holes by hand to 3/16. The holes will need to be enlarged further but I will adjust them with the head liner in the car. I also removed a narrow strip of material where the mirror mount attaches. 
Next I had to to remove the excess flash around the perimeter of the head liner. You can see the line when looking at the back side of the head liner. I used a coping saw to remove the material. I removed all of the flash at the front and rear of the headliner first. Then I removed the flash where the headliner meets the rear sail panels. I left the flash that is above the doors and and quarter windows as the pinch weld trim will cover it. 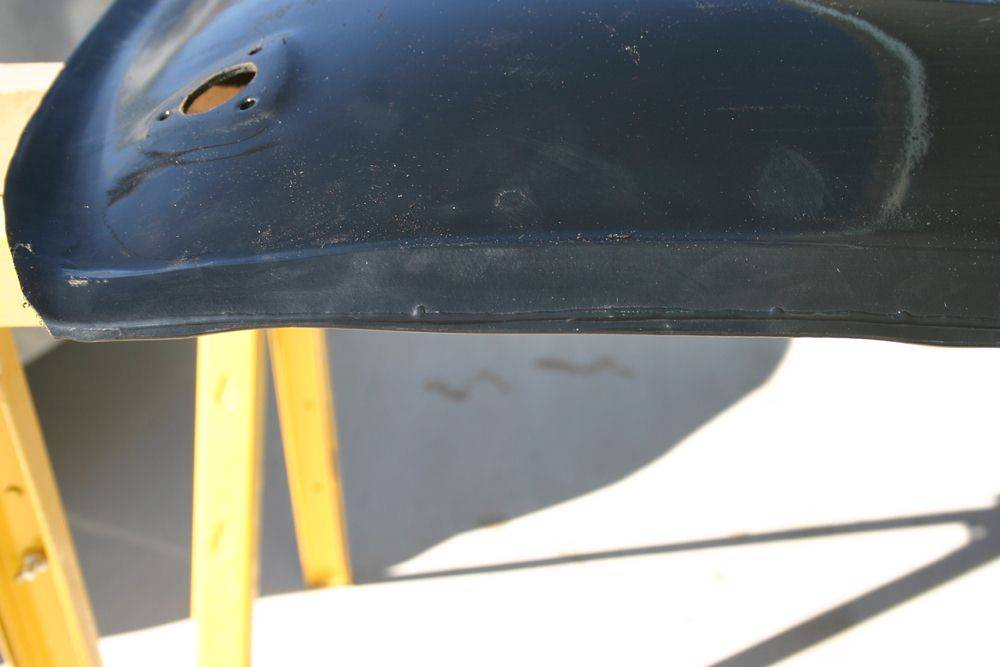
Next I installed it in the car to check fit. I loosely installed the long front trim rails and and stuck the front lip of the headliner between the roof and the long trim rails. I used the shower rods to prop up the rear. I then centered the panel by eye. I didn't have enough material removed for the mirror mount to fit proper so I used a magic marker to mark where I needed to remove more material, removed the panel and trimmed excess material. This time when installing I used the mirror mount to hold the front of the head liner and the spring rods to hold the rear. This way I could center the panel and kind of lock it in place. Using a dremel tool I slowly enlarged the holes for the sun visor hardware until everything lined up. Then I installed the sun visor brackets. I think I have it fitting very well at this point. Next week I will cover the headliner with some foam backed material to match the rest of the interior and finish the install. 
|
|
|
|
UT, USA
|
[#30]
Progress. It's looking good.
|
|
|
|
[#31]
Worked on the headliner yesterday and today. I got it covered and installed along with some of the trim. This interior is fighting me at every turn. Nothing seems to fit properly so I'm having to trim, install, trim, install, trim, install etc.


|
|
|
|
UT, USA
|
[#32]
AMC wasn't known for the best fit and finish in the industry. It will be better than new.
|
|
|
TN, USA
|
[#33]
Your AMX really is a thing of beauty. I've always liked the looks of the Javelin and AMX. When I was in high school, I almost bought a new Javelin, but my job did not pay enough to make the payments and insurance and be able to put gas in it. I've seen a Javelin around here in a parade, but it's not as nice as yours.
|
|
|
|
[#34]
UPS delivered some of the new front end parts. The rest should arrive by freight tomorrow.

|
|
|
|
OH, USA
|
[#35]
Would like to have an AMX in BBG or BBO color.
|
|
|
|
[#36]
I got the major IFS parts prepped and painted. I'm working on getting it installed.


|
|
|
|
|
[#37]
Looks great, thanks for the update.
|
|
|
|
UT, USA
|
[#38]
Awesome! I was wondering how the suspension was coming. I want to go for a ride to Austin and back when you're done.
|
|
|
|
[#39]
Gotta love those desert southwest (no rust) cars
Really nice work OP. I'm envious! I had the chance to buy one in the late-80s, and I could've had it for a song. For reasons I still cannot understand, I passed on it. Part of it was ignorance... I'd owned Chevrolets and Fords, but nothing else. Great project, thanks for posting |
|
|
|
|
[#40]
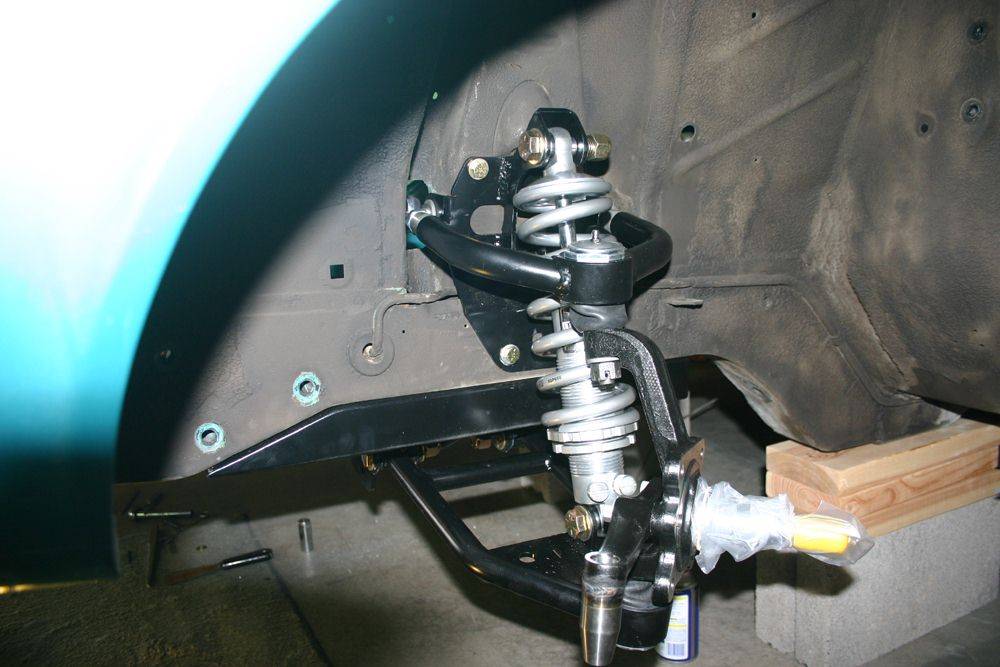
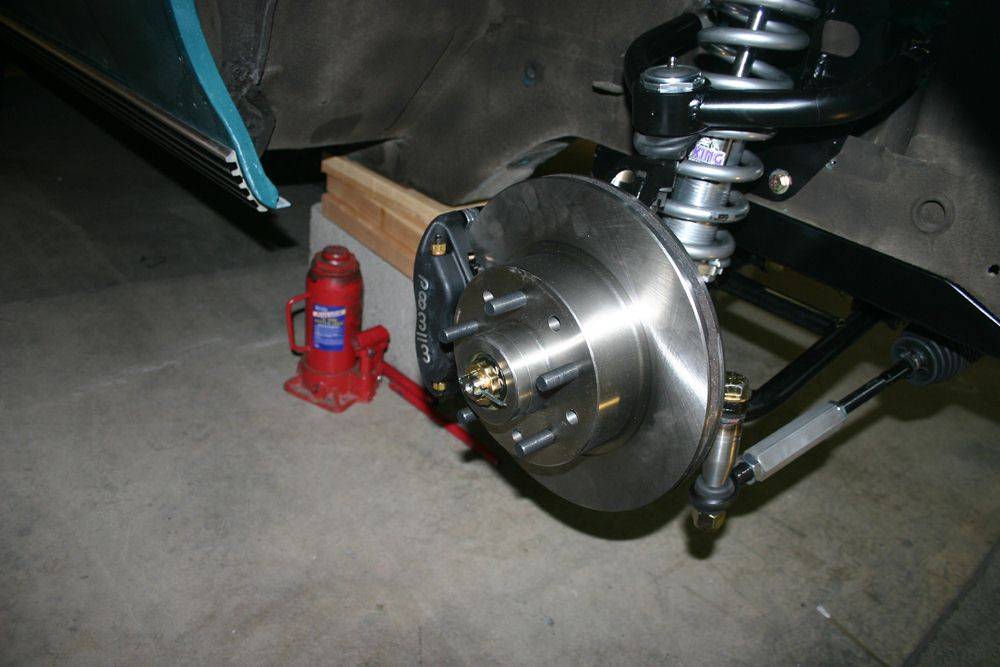
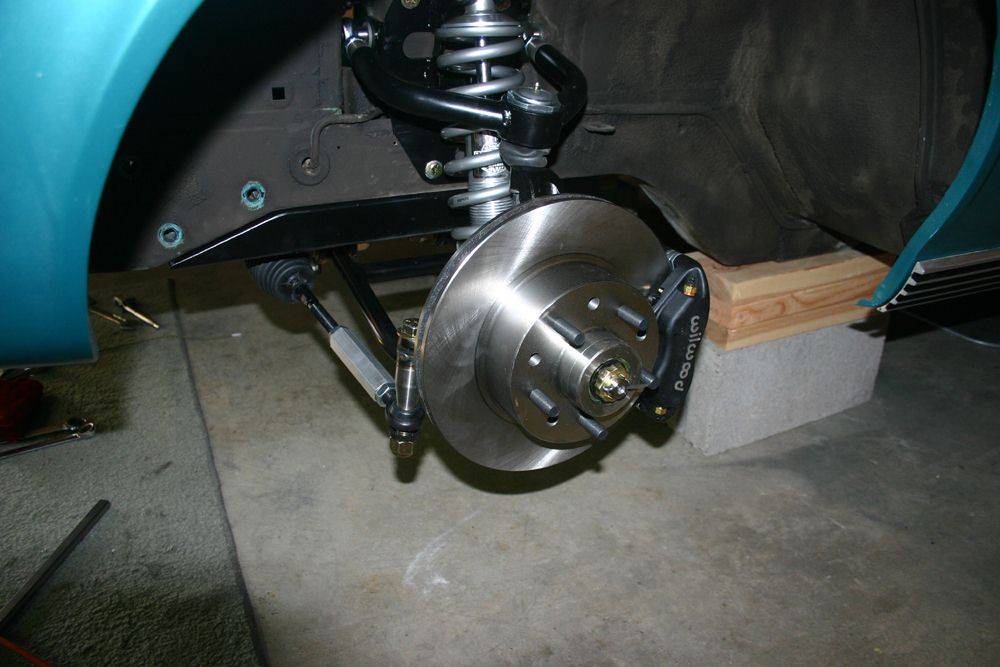
I got the upper and lower control arms, spindles, adjustable shocks and the steering rack in.


|
|
|
|
UT, USA
|
[#41]
I'm not liking that tie rod to spindle arrangement. Looks funky.
|
|
|
|
[#42]
Shocks can't be adjusted properly until the engine and transmission are in the car. That's why it looks funky.
|
|
|
|
|
[#43]
I finished up the installation. All I have left is the mods to connect the steering column.


|
|
|
|
|
[#44]
Looking great!
|
|
|
|
UT, USA
|
[#45]
Originally Posted By DamascusKnifemaker:
Shocks can't be adjusted properly until the engine and transmission are in the car. That's why it looks funky. |
|
|
MN, USA
|
[#46]
It is always nice to see another AMX being put back together. Great job so far.
|
|
|
QC, CAN
|
[#47]
Originally Posted By 1cheapshot:
I'm looking at the dropped spindle attachment point to tie rod end. Not liking how they did that. Looks like it would be a weak point with the side loads that will be put on it. I wonder if they could get a Chinese company to forge them some new spindles for this set up? Proof will be in the driving. You probably won't be auto crossing, so it should be ok. This is done to minimize bumpsteer. If your concern is for the actual riser used to connect the tie rod to the spindle I have a mustang with Steeda suspension that uses a similar setup. Mine has been road raced on crappy roads for over a decade without any issues. |
|
|
|
[#48]
Nice work. I like seeing AMC's getting some attention. When I was middle school, my older cousin had a Javelin that we would cruising in. I though it was one of the coolest cars. We still talk about that car when I see him from time to time.
|
|
|
|
|
[Last Edit: DamascusKnifemaker]
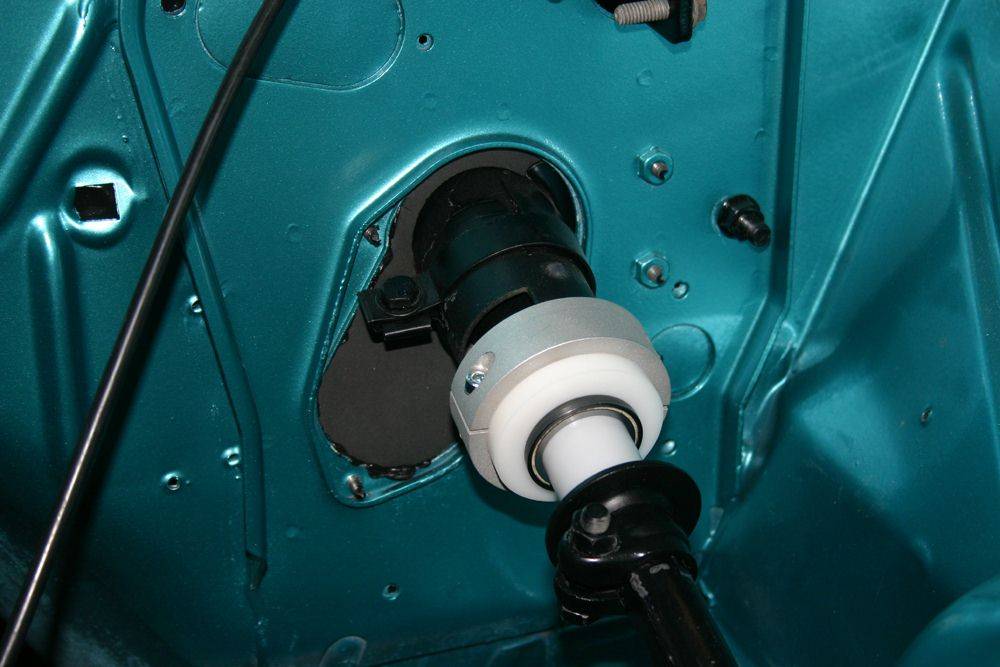
[#49]
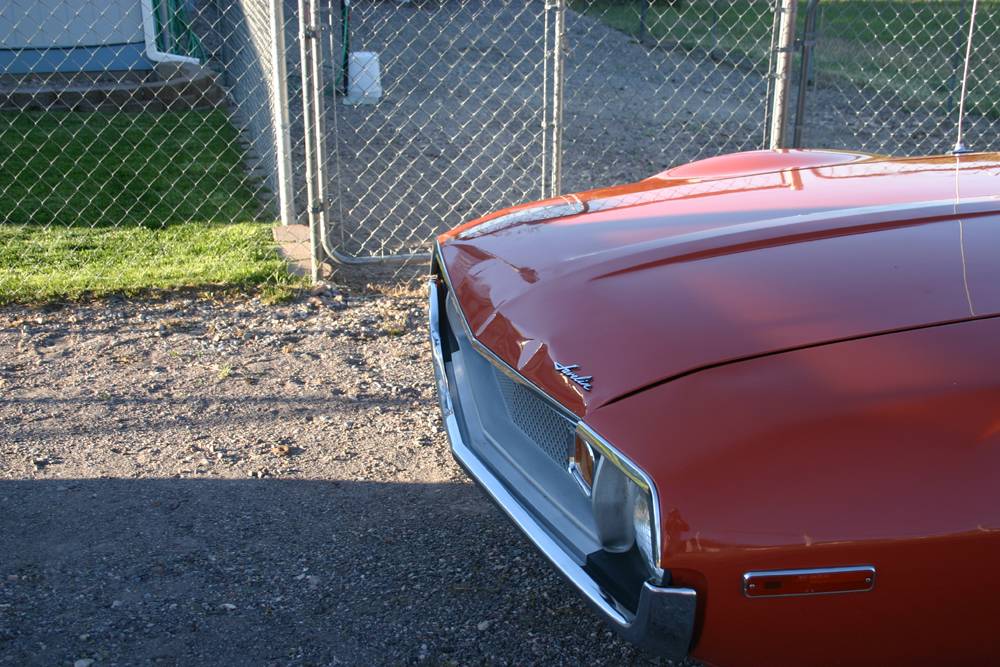
I got the steering linkage connected up. I had to cut part of the main shaft down to do so. Removing the shaft end caused A LOT of deflection due to the compound U-Joint. To eliminate the deflection I machined a collar clamp for the end of the steering column tube. The clamp eliminated a lot of the deflection but the original bearing design still allows more deflection than I want. I've ordered a 1x1.75x1 needle bearing to eliminate the remaining deflection. I will pull the nylon steering tube bushing and machine it to accept the new bearing. Doing this should stiffen everything up nicely. On a side note I backed my truck into my 74 Javelin this weekend. Fortunately I have another hood. I just need to prep it and get it to my body man for paint.

|
|
|
|
|
[Last Edit: J_Wynn]
[#50]
Very cool, love the color.
I went with my cousin this weekend and he picked up this 70 Javelin. It is absolutely PERFECT. Needs a bit of tuning though, but it ran good and looks incredible. It has a 390 and a 4 speed. He believes it's an actual Donahue, but does not have the window sticker so not able to be 100% certain. |
|
|
|
 Win a FREE Membership!
Sign up for the ARFCOM weekly newsletter and be entered to win a free ARFCOM membership. One new winner* is announced every week!
You will receive an email every Friday morning featuring the latest chatter from the hottest topics, breaking news surrounding legislation, as well as exclusive deals only available to ARFCOM email subscribers.

AR15.COM is the world's largest firearm community and is a gathering place for firearm enthusiasts of all types.
From hunters and military members, to competition shooters and general firearm enthusiasts, we welcome anyone who values and respects the way of the firearm.

Subscribe to our monthly Newsletter to receive firearm news, product discounts from your favorite Industry Partners, and more.
Copyright © 1996-2024 AR15.COM LLC. All Rights Reserved.
Any use of this content without express written consent is prohibited.
AR15.Com reserves the right to overwrite or replace any affiliate, commercial, or monetizable links, posted by users, with our own.


