|
Posted: 3/22/2010 11:57:19 AM EDT
I came to the realization that I needed a solid rest to shoot from when hunting coyotes. I started thinking about shooting sticks, but I wasn't very impressed by what I saw available in my local stores. I'm not by any means cheap, but I hate paying for products that don't fully suit my needs, when I can build something at home to my own specs for much less. I decided to build my own......
First off, I took my hunting methods into consideration before selecting materials: -I'm hunting coyotes in a rural midwestern area. -I'm hunting timber, pastures, and open fields near CRP acres. -I'll be hunting mostly from a seated or kneeling position. -I'll be using these to hunt at night, as well as during the day. -I'll be using the shooting sticks to support a 16" AR-15 mid-length or a lighter .22 rifle. So I decided I needed to meet the following criteria: -light-weight -thin, yet strong legs -tripod-design for maximum stability and adaptability -material that will not generate excessive noise -adjustable for support-height I also got very lucky, Craig Boddington had written a very good article on the subject that covered some of the more subtle areas of using shooting sticks. I adapted his thoughts and methods to my own design criteria. http://www.sportsafield.com/FAQ/Africanshootingsticks.htm Next, I went shopping at my local farm/home store for materials, where I came across some driveway markers similar to these: driveway markers The markers were perfect for the legs, with a 1/4" fiberglass shaft, roughly 48" long, and less than $4 each. Strong, light-weight, and relatively quiet compared to wood/metals. I bought three, and proceeded home to get to work. First off, I used a tubing-cutter to score a cut-line in the shafts, which I actually cut with a hack-saw. I eye-balled the height based off a sitting position, which came out to roughly 39" in length. That is coincidentally waist-high for me, so that might make a good reference point for cutting lengths. Next, I used a bench-grinder to shape the shafts into a shallow stake-point on one end, then gently rounded the other ends on the wire-wheel. Up next is painting. First, I striped the shafts with some flat-black and gray auto primer. Next up, I used a razor blade to cut some random patterns in a roll of blue painter's tape, which I then peeled and applied to the black/gray paint on the shafts to establish a bit of a tiger-stripe. Next up, I started working with earth-tone paints to create my camo. I selected colors based off the local terrain, earth-brown, flat green, and straw. I proceeded to spray the shafts with a general base layer, which I will work over later to help blend the tones. I sprayed the lower third in brown, the middle with green, then the tops with straw. We can start with the pictures now: Here, you can see the masked areas as I build up the layers: 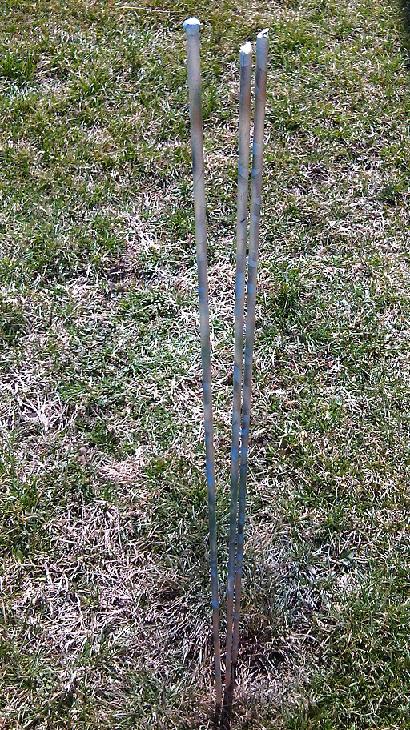
Once the base layers are established, we can mix in the different colors in stripes to break up the pattern: 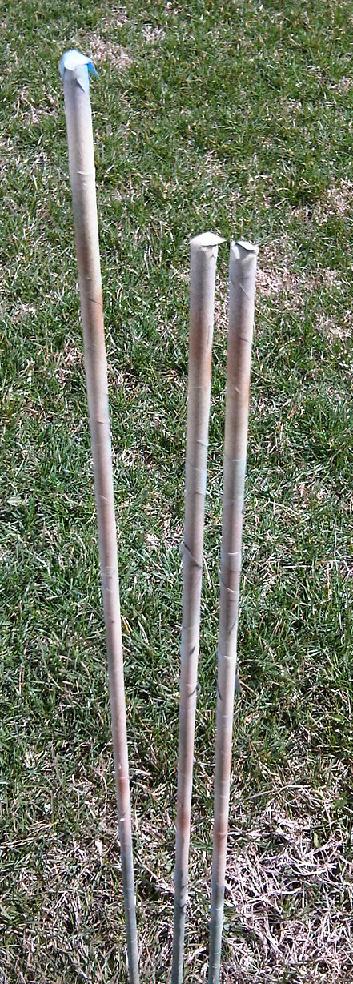
This pattern is turning out very well, since it's getting difficult to see the sticks against the background at short distances. I found that if your paint-job looks poor up close, it looks great at a distance. Remember, over-spray is your friend when it comes to camo. 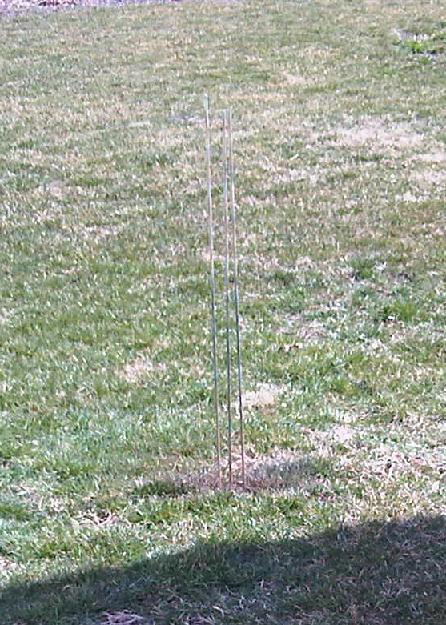
Next up, we'll peel off the tape to see how everything turned out: 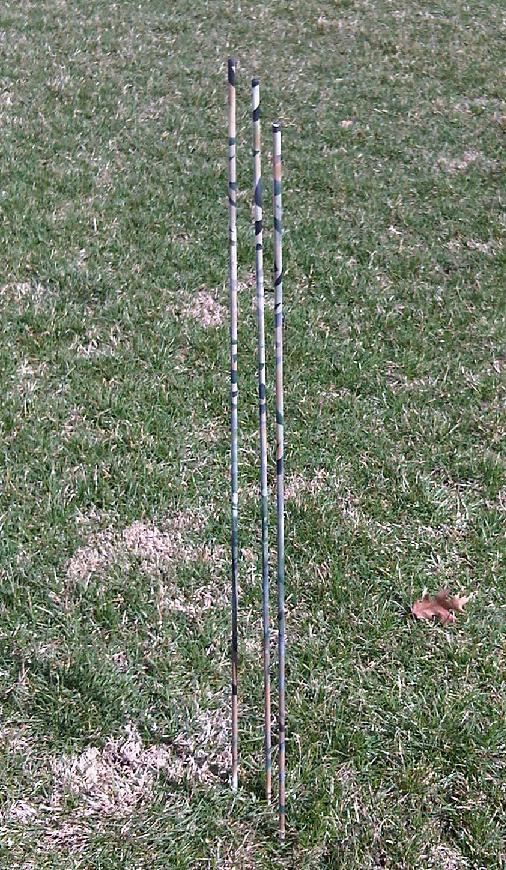
Again, blends right in...... 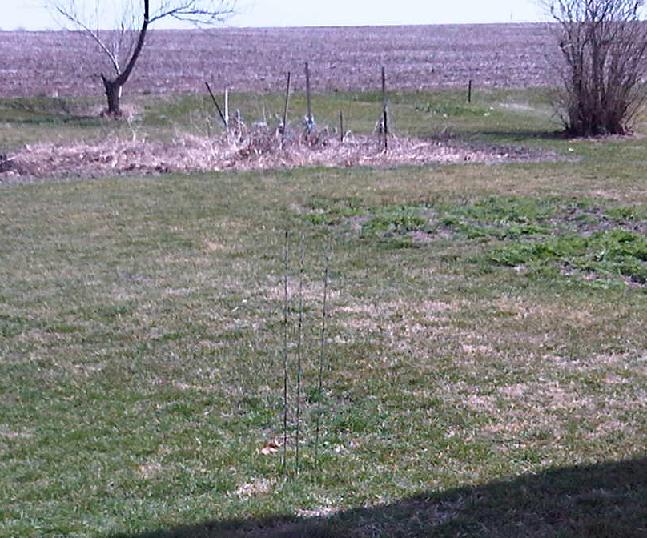
Next, I started lashing everything together. I used 550 cord with the inner-strands stripped-out for my project for resistance to the elements. I found a very good visual reference for the lashing method here: Tripod lashing And here's how it turned out: 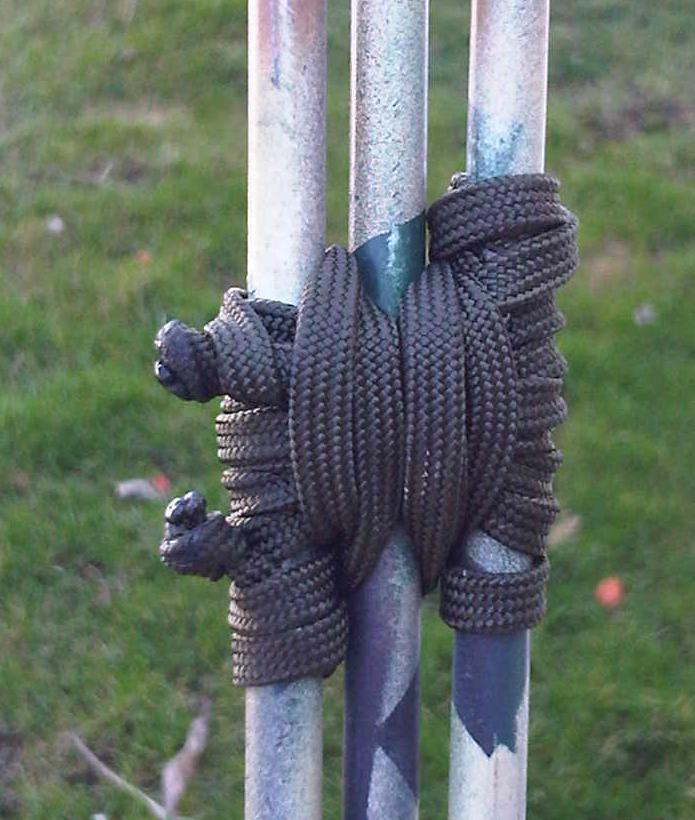

I also tied-up a small noose slider to serve as a binder for the lower sections, to keep them from rattling and flopping around: 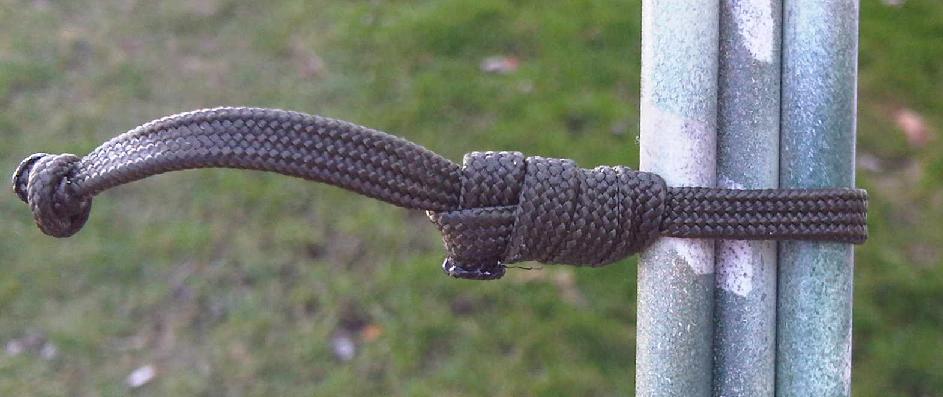
I was concerned the tripod would be a little wobbly due to the thin material, but it turned out to be surprisingly strong. Here's the finished product: 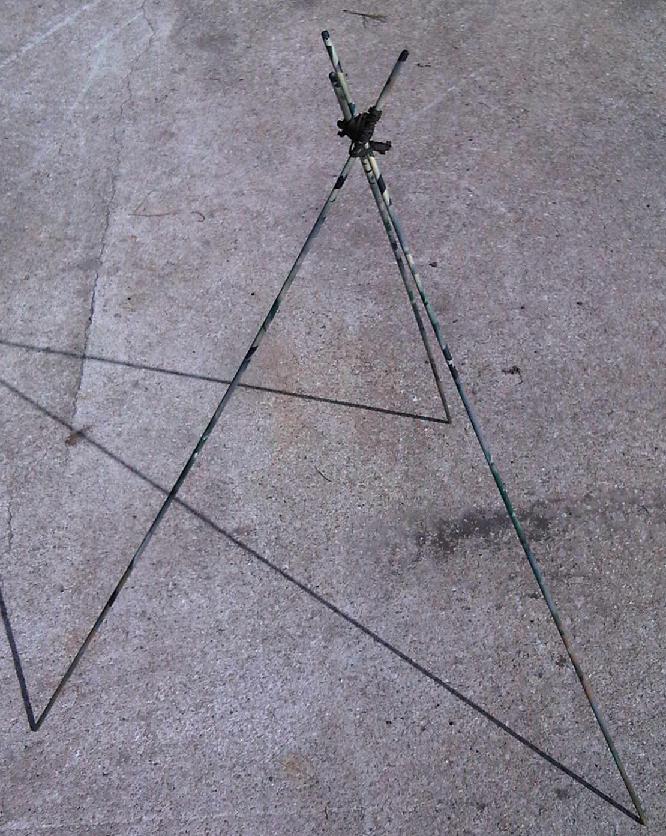
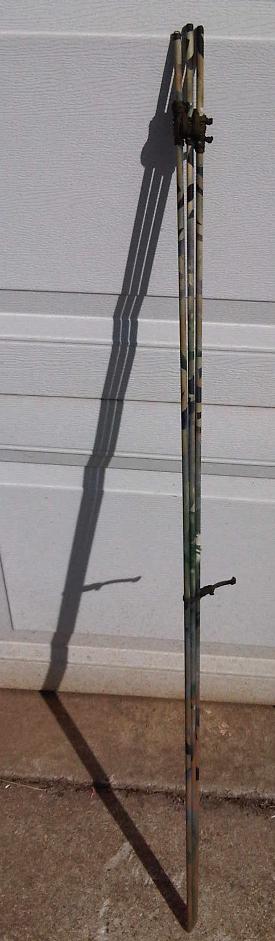
To adjust the height of the rest, collapse the legs and slide the shafts through the knot individually, one at a time. There should be a little slack in the knot when the rods are collapsed. To keep the 550 cord secured, melt the cut ends with flame to keep everything from unraveling. I also knotted my tag ends securely to keep the knots from working loose. Improvements I'm considering are to superglue/epoxy some small felt strips to the bottoms of the legs to act as scent-wicks for masking scent products. A person could also attach felt or foam rubber to the top of the structure to act as a cushion to keep contact-noise to a minimum, and to keep from marring the finish on wood stocks. I did not use rubber inner-tube sections for the lashing, as rubber does not stand-up well to the elements over time. It is an option, however. This design could also be easily used as a bipod, monopod, or emergency splint in the field. I like adaptability. |
|
|
|
[#1]
I used two tips from old ski poles for a bipod rest I use a bunch of smaller rubber bands to join it as you can adjust them by rolling the bundle up or down quickly. yours looks great if you have time to adjust it.
|
|
|
|
[#2]
Those look cool!
FWIW, I think your camo looked better before you took the tape off. IMHO, the dark areas with hard edges, make too obvious an outline. |
|
|
|
[#3]
I have been making my own for a few years now. I have lightweight ones made out of fiberglass driveway markers from HomeDepot, and also some made out of 1/4 steel rod also from HomeDepot. I cut them to 3feet long, wrap them in 100mph tape and electrical tape. I leave 5-7 inches at the top and tie them together with gutted 550cord. I use a clove hitch then take the ends of the 550 between the rods and tied with a square knot and burn the excess.
Here is some steel rods supporting a bull barrel RRA varmint AR, the fiberglass ones flex to much for heavy guns. 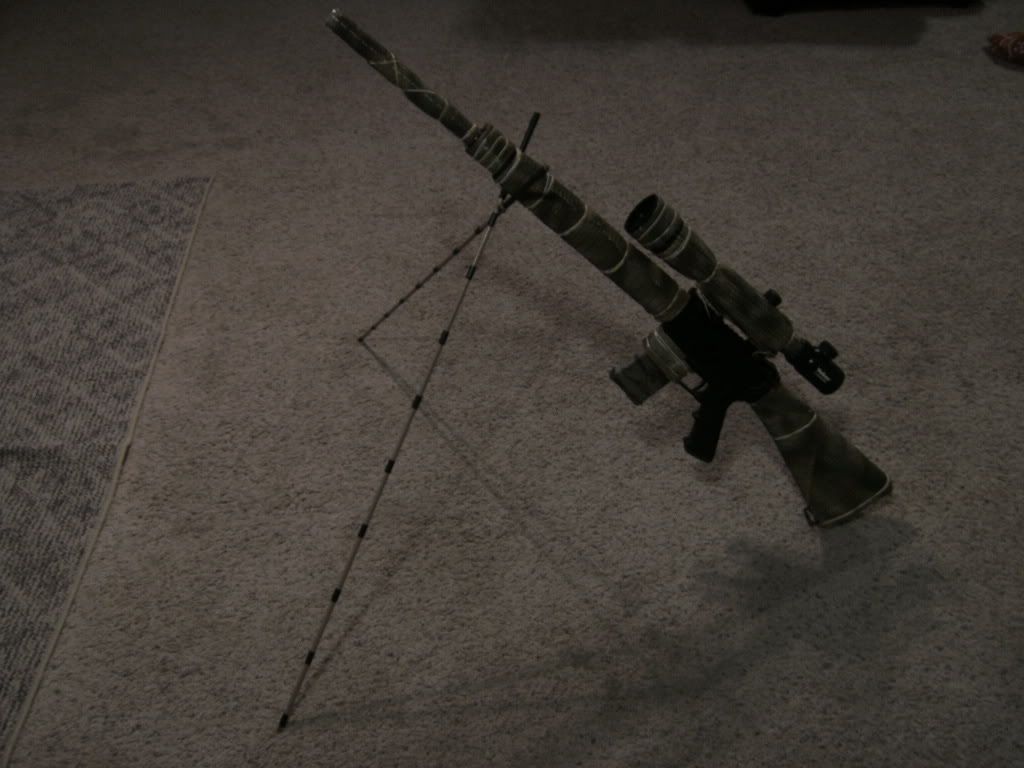
Close up showing how I tie them together. 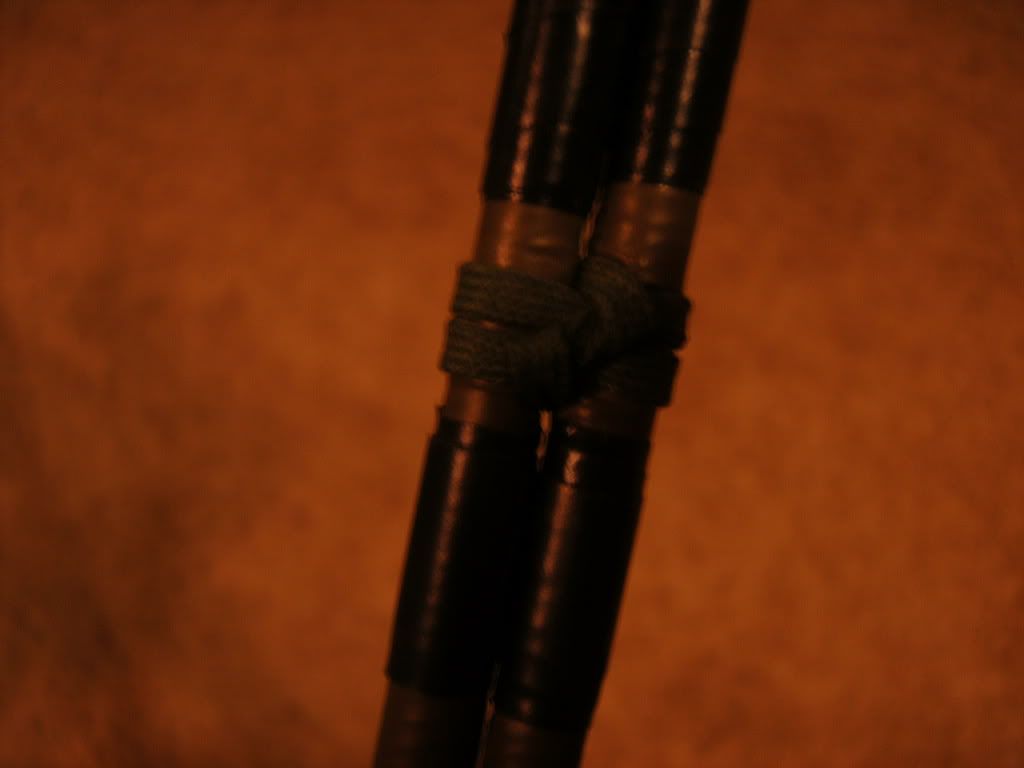
ETA: 4ft driveway markers are $1.98 a piece, so $4 to make a lightweight one, 1/4 steel rod is less than $2.50 for 3ft, so $5 for steel ones. Me and my fam/friends have been using them for years built this way they hold up very well. Also the steel ones have enough weight to them that once in a while I will use one to finish off a coyote with a whack to the skull and not damage any fur. |
|
|
 Win a FREE Membership!
Sign up for the ARFCOM weekly newsletter and be entered to win a free ARFCOM membership. One new winner* is announced every week!
You will receive an email every Friday morning featuring the latest chatter from the hottest topics, breaking news surrounding legislation, as well as exclusive deals only available to ARFCOM email subscribers.

AR15.COM is the world's largest firearm community and is a gathering place for firearm enthusiasts of all types.
From hunters and military members, to competition shooters and general firearm enthusiasts, we welcome anyone who values and respects the way of the firearm.

Subscribe to our monthly Newsletter to receive firearm news, product discounts from your favorite Industry Partners, and more.
Copyright © 1996-2024 AR15.COM LLC. All Rights Reserved.
Any use of this content without express written consent is prohibited.
AR15.Com reserves the right to overwrite or replace any affiliate, commercial, or monetizable links, posted by users, with our own.


