|
[#1]
Quoted: I did all of those things except the hotel room, again, had no problems. This was in 2009. Quoted: Quoted: That works perfectly until you decide to go into a restaurant, go sight-seeing, or treat yourself to a hotel room. The 5' of garage space or an enclosed deck, would be perfect, IMO. I did all of those things except the hotel room, again, had no problems. This was in 2009. I haven't had a problem since 1990 when a cooler was stolen from my campsite sitting just outside my tent. Still don't trust people. I get where you're coming from. Really do. But even with today's fire codes, proper building materials, and my average intelligence used to not let fires start in or around my home - I'm still insured if a fire ever breaks out. I've been a homeowner for thirty years now and not even close to having a fire break out - so far. Sorry for the hyjack OP. Your project is cool and I see myself doing the same thing with an 18'-20' enclosed trailer once my toy hauler shoots craps. |
|
|
|
[#2]
I don't think I mentioned it earlier, but I plan on having 5x 120v circuits and 8x 24v circuits for lights/chargers/fans.
Today a buddy came over and helped me put up the 5mm plywood ceiling, and we got five of the eight sheets installed.   We got five done, then finally figured it out "the trick" which we think is to mark the center line of the sheet and ensure the center line of the sheet goes up in the center of the ceiling. I think the next two will get put up VERY quickly. I may even be able to get the remaining ones up myself. For the side wall attachment points/wiring raceway, I'm going to make covers out of 3/4" plywood, I'll cut 8" strips off a single sheet, on the 4' edge so I can remove them as required to get to the wiring in the raceway. I'll probably be able to line up the edges of these covers with the walls, cabinets, etc. so I can easily get in there when I upgrade and add stuff. |
|
|
|
[#3]
More done... Slowly but surely I suppose.
I got a good deal on FB Marketplace for an oak cabinet set, it's 60" by 21" deep, and 35" tall, so it'll make a perfect tiny kitchen workspace. At 60" it's longer than I wanted, but it's hard to turn down good oak base cabinets with soft-close/semi-latching slides and doors for $75. Ket truck to the rescue, and I picked it up.   Then, I got home and started sanding it, because it looks horrible with that dark ass polyurethane/stain stuff on it, and I thought I'd need to rough it up to paint it. However, upon sanding a couple parts, I realized it actually looked pretty good, so I kept going.    Then, my wife came to look at it, and she actually really liked the look of it with the dark stain still on it in the corners and crevices. So... I'm going to slap some BLO on it, and call it a day.    And the view from the couch:  Next up is to get the final couple pieces of wood on the ceiling, figure out what to do for a counter top, and then finally get the electrical in. |
|
|
|
[#4]
Oak cabinetry is a lot of weight. How are you going to keep the drawers from opening?
|
|
|
|
[#5]
Smaller, but looks interesting:
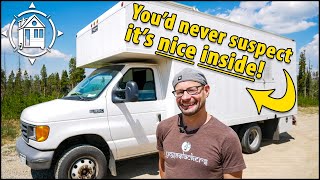 His fabulous studio apartment is hidden inside a work truck! |
|
|
|
[#6]
I didn't realize bus roofs were insulated like that.
Nice job, looking forward to the updates! |
|
|
|
[#7]
The plywood roof looks nice.
|
|
|
|
[#8]
Nice find on the cabinets, and they look nice too!
|
|
|
|
[#9]
Quoted: Oak cabinetry is a lot of weight. How are you going to keep the drawers from opening? It's only oak on the front, the rest is particle board - which is heavy too. Some sort of child locks should work or he can add the same type of catches they use on RV's. |
|
|
|
[#10]
Quoted: Oak cabinetry is a lot of weight. How are you going to keep the drawers from opening? Quoted: Oak cabinetry is a lot of weight. How are you going to keep the drawers from opening? Quoted: It's only oak on the front, the rest is particle board - which is heavy too. Some sort of child locks should work or he can add the same type of catches they use on RV's. It's not super heavy, it's easily movable with one person without the drawers installed, so I figure it'll balance out the weight of the water and motorcycles in the back behind the rear axle. ;) I was thinking something like one of these to try to keep the cabinets closed:   It doesn't need much, the slides are the fancy soft-close with a little bit of resistance upon opening too. I think the detent might be adjustable with a pair of pliers or hammer, so I'll play with that before I buy any new hardware. Quoted: I didn't realize bus roofs were insulated like that. Nice job, looking forward to the updates! I'm not sure what you mean, it was just fiberglass when delivered to the school district, I put the reflectrix on it. |
|
|
|
[#11]
Quoted: It's not super heavy, it's easily movable with one person without the drawers installed, so I figure it'll balance out the weight of the water and motorcycles in the back behind the rear axle. ;) I was thinking something like one of these to try to keep the cabinets closed: https://m.media-amazon.com/images/I/51VXEwgVoeL._AC_SL1000_.jpg https://m.media-amazon.com/images/I/61FJQ9qf9IL._AC_SL1300_.jpg It doesn't need much, the slides are the fancy soft-close with a little bit of resistance upon opening too. I think the detent might be adjustable with a pair of pliers or hammer, so I'll play with that before I buy any new hardware. I'm not sure what you mean, it was just fiberglass when delivered to the school district, I put the reflectrix on it. Magnets probably won’t stop the drawers from popping out, a couple of good bumps or sliding items banging against the drawer face and they’ll bang open. Push button latches may be a much better option. |
|
|
|
[#12]
Quoted: Magnets probably won’t stop the drawers from popping out, a couple of good bumps or sliding items banging against the drawer face and they’ll bang open. Push button latches may be a much better option. True. I'll have to get some of those when I get to that point. I've been working on it, but between studying for a comptia exam and the rest of life, I haven't had time to update. Currently, the focus is finishing the electrical closet:  Which, looks more like this right now:  I now have enough power to run all the tools I need off the bus itself, allowing me to use fewer extension cords, I have temporary onboard lighting (harbor freight 4ft LED lights) which I'll replace with zoned 3w puck lights and LED strip lighting around the edges, and the fridge. The fridge uses about 600wh to keep the entire fridge 14F (I didn't reset the temp control, lol) so I think it'll be fine for normal use. Right now I've got a 30a shore power outlet hooked up, and a 240w(10a charging) 12v to 24v charger so the bus alternator charges the 24v battery bank when underway. And, finally, while I'm talking about power...  1kw of solar panels, I expect to get about 800w out of them on an excellent day, 600-ish on a normal day. They're used panels from a commercial solar array from a company called santan solar. They're "snail trail" cosmetic blemished panels, but provide full output and should last me for a loooooooooooooong time. And if I have to change the panel array, I will be making a mounting rack:  Since the bus roof curves, there's a 4" drop from the center of the roof to the edges, I'm going to be using a uni-strut mounting system for the panels. Two 10ft sections from fore to aft between the front hatch and the back skylight, then four 7ft sections attached to that giving me the "platform" for the panel array. I'll be using some FRP or polycarbonate to create a front dam to reduce the wind noise and reduce the lift the panels will be making when driving. Since I couldn't hear the speakers when driving before, because they were so far back, so I put in new 6.5" speakers, and moved them. I think I'm going to paint the entire bulkhead black too.  I also started framing out the bunks, and as soon as I get the ceiling finished, I'll frame out the bathroom, which is going to be approximately 38"x28" in size, to hold a shower, small sink, toilet, and mirror. Here's the best I can do right now, with an outdated picture and then the bunks kinda framed out:   Until next time. |
|
|
|
[#13]
Nice, man. How much weight are you adding to the chassis w/ all the wood & batteries?
|
|
|
|
[#14]
No idea until I get done. Fully stripped out the bus weighed 15,080 lbs.
I will be happy if I'm sitting somewhere under 20k when finished, which seems totally do-able. |
|
|
|
[#15]
Got the strut for the solar panels up, panels up, and connected.
 If you know, you know. Lol.    Only bled a little bit getting them up on the bus. But the real money shot is here:    The panels are wired as a pair of panels in series, then those in parallel. So, they're 2s2p. Getting 847 watts out of a 1kw array in April, when mounted flat on the roof is pretty good. I'm wondering if these panels are might be able to output more than 1kw under ideal conditions. Now, I can run the bus on solar only, on grid, and charge the 24v battery bank via the engine's alternator. Next up is to finish the ceilings, bathroom, beds, and then move on to the water. |
|
|
|
[#16]
Very impressive results.
Are you keeping the external color scheme? |
|
|
|
[#17]
Great progress, thanks for sharing!
|
|
|
|
[#18]
|
|
|
|
[#19]
Looking good.
I'd put some sort of anchor on the ends of the panels to keep them from flexing while driving. A good cross wind could try pulling them off. |
|
|
|
[#20]
Quoted: Very impressive results. Are you keeping the external color scheme? Quoted: Very impressive results. Are you keeping the external color scheme? See, I considered painting the exterior, but I decided I really don't want to paint another car a few years ago, and a bus is like 5 cars worth of painting. So, yeah, it's gonna stay. I might paint the rub-rails black to give it some contrast, but I'm probably leaving the thicc blue stripe unless I'm forced to remove it. Quoted: Looking good. I'd put some sort of anchor on the ends of the panels to keep them from flexing while driving. A good cross wind could try pulling them off. I'm not sure what you mean? They're anchored to the strut in 4 places. I'll probably use some aircraft cable to tether them further to the strut. More progress... Kinda. I painted the bulkhead black, and painted the radio holder white, and then painted the cable chase white too. It looks OK, but I still might do something else eventually. I'd like to build them out of wood.  I also got the ceiling panels fully installed and now have to finish framing out the bathroom, adding walls, and building cabinets, beds, etc. I cut up the plywood for the covers of the cable-chase, and I think it's alright looking, even without paint. The wood look is growing on me. Maybe I'll use birch plywood for the walls too, I was originally considering white painted fiberboard.  Back on the power side of things, I can run it with cloudy skies, off and on rain, and just general not-great sun for two days using minimal things (power tools, vacuum, fridge running, listening to music, charging my phone, etc) and not drain the batteries more than about 60%, so I think this will do fine. I'm still going to get a generator so I can stuff 2kw into the battery bank when needed, but I think right now it'll be fine, especially with the way I have it setup to charge when the engine of the bus is running. About water/wastewater, I have a 48gal black tank that I'll be using as a greywater tank ready to go under the bus (on the curb side) when I devise a mounting system, which will catch the sink and shower, and two 30 gal freshwater tanks (mounted under the queen bed on each extreme side) that I'll be using for freshwater. Once I have the bathroom framed up, that'll be the next step, getting plumbing done. The toilet will be a 5.3gal Camco portable toilet, with water reservoir and waste reservoir -- at least until I figure out if I want to go full black tank or not. Shower... I have no idea. I'm thinking I'll build a shower stall into the whole bathroom, making the whole bathroom a "wet bath" and then trying to find a showerpan or making a showepan for it. It looks like showerpans are easily procurable, but I worry about the portable toilet being inside there all the time riding on top of the showerpan. Also, the "little sink" in the bathroom that's been requested, might be interesting to build in, lol. As far as flooring goes, I'm seriously considering a sheet of vinyl roll-out floor. Someone talk me out of this, lol. |
|
|
|
[#21]
Quoted: See, I considered painting the exterior, but I decided I really don't want to paint another car a few years ago, and a bus is like 5 cars worth of painting. So, yeah, it's gonna stay. I might paint the rub-rails black to give it some contrast, but I'm probably leaving the thicc blue stripe unless I'm forced to remove it. I'm not sure what you mean? They're anchored to the strut in 4 places. I'll probably use some aircraft cable to tether them further to the strut. More progress... Kinda. I painted the bulkhead black, and painted the radio holder white, and then painted the cable chase white too. It looks OK, but I still might do something else eventually. I'd like to build them out of wood. https://i.imgur.com/sCoRPwu.png I also got the ceiling panels fully installed and now have to finish framing out the bathroom, adding walls, and building cabinets, beds, etc. I cut up the plywood for the covers of the cable-chase, and I think it's alright looking, even without paint. The wood look is growing on me. Maybe I'll use birch plywood for the walls too, I was originally considering white painted fiberboard. https://i.imgur.com/hDqqHeE.png Back on the power side of things, I can run it with cloudy skies, off and on rain, and just general not-great sun for two days using minimal things (power tools, vacuum, fridge running, listening to music, charging my phone, etc) and not drain the batteries more than about 60%, so I think this will do fine. I'm still going to get a generator so I can stuff 2kw into the battery bank when needed, but I think right now it'll be fine, especially with the way I have it setup to charge when the engine of the bus is running. About water/wastewater, I have a 48gal black tank that I'll be using as a greywater tank ready to go under the bus (on the curb side) when I devise a mounting system, which will catch the sink and shower, and two 30 gal freshwater tanks (mounted under the queen bed on each extreme side) that I'll be using for freshwater. Once I have the bathroom framed up, that'll be the next step, getting plumbing done. The toilet will be a 5.3gal Camco portable toilet, with water reservoir and waste reservoir -- at least until I figure out if I want to go full black tank or not. Shower... I have no idea. I'm thinking I'll build a shower stall into the whole bathroom, making the whole bathroom a "wet bath" and then trying to find a showerpan or making a showepan for it. It looks like showerpans are easily procurable, but I worry about the portable toilet being inside there all the time riding on top of the showerpan. Also, the "little sink" in the bathroom that's been requested, might be interesting to build in, lol. As far as flooring goes, I'm seriously considering a sheet of vinyl roll-out floor. Someone talk me out of this, lol. Awesome updates. Couple suggestions. Maybe they'll work for you. Maybe not. First, make the ceiling and walls the same 'color'. The absence of contrast gives the illusion that the space is larger than it really is. Second, what if you used truck bed liner in the bathroom? In theory, it would make the flooring and walls completely waterproof and quite durable. Can't you get them in custom colors??? Third, the flooring. I have used this stuff on quite a few projects now with great results. Waterproof laminate. Pretty inexpensive and easy to work with. |
|
|
|
[#22]
Quoted: Awesome updates. Couple suggestions. Maybe they'll work for you. Maybe not. First, make the ceiling and walls the same 'color'. The absence of contrast gives the illusion that the space is larger than it really is. Second, what if you used truck bed liner in the bathroom? In theory, it would make the flooring and walls completely waterproof and quite durable. Can't you get them in custom colors??? Third, the flooring. I have used this stuff on quite a few projects now with great results. Waterproof laminate. Pretty inexpensive and easy to work with. 1. Yeah, I've considered that. I really like this same plywood, and it's only $23/sheet so I think I'll keep going with it. Good call. 2. I'm thinking I'm going to use those plastic wall panels, cut, glue, and caulk them into whatever shape I need to make it work. I need to buy a test piece, but I can't see a reason I can't use a torch to bend it like other thermoplastics, which might negate the need to cut to make the bends. I've read about people using flex-seal, I can't imagine truck bed liner urethane would be any different -- except for smell. When I did my truck bed it offgassed for months. 3. Flooring, yep. Message heard. I saw this the last time I was in the Homeless Death Spot 
|
|
|
|
[#23]
I would suggest putting at least some fresh water storage inside the cabin. Makes life much easier in the winter months when you've got no fresh water in the under floor tanks.
|
|
|
|
[#24]
You've got great skills and imagination.
Your project is top-notch my man! Thanks for sharing and - Keep going. |
|
|
|
[#25]
Quoted: I would suggest putting at least some fresh water storage inside the cabin. Makes life much easier in the winter months when you've got no fresh water in the under floor tanks. Under the bed, which is going to be elevated like 18 inches off the floor. |
|
|
|
[#26]
thanks for sharing your design, progress, and pictures.
I just found this thread. a few things we learned, though you may have already taken care of it 1) all wiring and ducting make accessible for servicing and pulling new stuff, after you use the rig for a while, you will want to make changes 2) all liquid storage if possible add heater strips so that in the winter they stay above freezing ( 4 season camping) 3) all water pipes stay in insulated areas or along heat ducting 4) all fixtures attached to survive sudden stops, bolt everything down with vigor 5) anything outside, design to mount for survival of 100+ mph winds, oncoming direction, and +60mph in other directions (driving down the road at 60, winds directly in front at 40. 100mph winds 6) place fire extinguishers in ready positions, and in areas where you sleep. if there is a fire, what do you need to escape 7) storing a motorcycle or other gas item inside, be wary of fumes and how to exhaust them. at some point, you will get fumes 8) if you are boon-docking with gas equipment, perhaps mount or include external gas tank or storage locker, with ventilation. 9) include tank monitors for all tanks. there is nothing like being able to read how much water is left, how full is the black water tank, how full is the grey water tank. 10) if you have black tank, include some sort of spray rail to clean out the tank. (or at the least, a black water wash out. basically, a hose attach that will spray the tank down and encourage the sh*t to flow out. include standard drain fitting so you are adaptable to standard rv hookups 11) have a water tank empty port so you can quickly empty the tank when needed for storage, winterizing, flushing, etc. otherwise, it is a lot of pumping out existing water 12) put a accumulator tank on the fresh water pressure line so that when you need water it is not constantly running the water pump. brrr,brr, brr to do anything, or silent to fill a cup or flush the toilet 12a) mount the water pump on an isolation plate. they are annoyingly loud. 13) if you are running during cold weather, get more heat that you think. it is a bummer being cold in the winter 14) leave room for a air conditioning unit on the outside. having a cool interior during the summer is wow 15) webasto makes excellent stoves, heating, equipment. designed for marine use and very durable. 16) insulate the exterior floor below if you are placing the tanks and any liquid lines. plus it will protect the equipment for road rash 17) find a way to mount a couple of exterior, under the bus storage lockers, that lock but you can keep gear in there. a good place to store your black water and external camping gear. 18) buy and install a long retractable rv canopy to put on one side. you will thank me the first big rain storm you are in. 19) install a bathroom vent and fan. or do what you are doing, it looks great. |
|
|
|
[#27]
Quoted: thanks for sharing your design, progress, and pictures. I just found this thread. a few things we learned, though you may have already taken care of it 1) all wiring and ducting make accessible for servicing and pulling new stuff, after you use the rig for a while, you will want to make changes 2) all liquid storage if possible add heater strips so that in the winter they stay above freezing ( 4 season camping) 3) all water pipes stay in insulated areas or along heat ducting 4) all fixtures attached to survive sudden stops, bolt everything down with vigor 5) anything outside, design to mount for survival of 100+ mph winds, oncoming direction, and +60mph in other directions (driving down the road at 60, winds directly in front at 40. 100mph winds 6) place fire extinguishers in ready positions, and in areas where you sleep. if there is a fire, what do you need to escape 7) storing a motorcycle or other gas item inside, be wary of fumes and how to exhaust them. at some point, you will get fumes 8) if you are boon-docking with gas equipment, perhaps mount or include external gas tank or storage locker, with ventilation. 9) include tank monitors for all tanks. there is nothing like being able to read how much water is left, how full is the black water tank, how full is the grey water tank. 10) if you have black tank, include some sort of spray rail to clean out the tank. (or at the least, a black water wash out. basically, a hose attach that will spray the tank down and encourage the sh*t to flow out. include standard drain fitting so you are adaptable to standard rv hookups 11) have a water tank empty port so you can quickly empty the tank when needed for storage, winterizing, flushing, etc. otherwise, it is a lot of pumping out existing water 12) put a accumulator tank on the fresh water pressure line so that when you need water it is not constantly running the water pump. brrr,brr, brr to do anything, or silent to fill a cup or flush the toilet 12a) mount the water pump on an isolation plate. they are annoyingly loud. 13) if you are running during cold weather, get more heat that you think. it is a bummer being cold in the winter 14) leave room for a air conditioning unit on the outside. having a cool interior during the summer is wow 15) webasto makes excellent stoves, heating, equipment. designed for marine use and very durable. 16) insulate the exterior floor below if you are placing the tanks and any liquid lines. plus it will protect the equipment for road rash 17) find a way to mount a couple of exterior, under the bus storage lockers, that lock but you can keep gear in there. a good place to store your black water and external camping gear. 18) buy and install a long retractable rv canopy to put on one side. you will thank me the first big rain storm you are in. 19) install a bathroom vent and fan. or do what you are doing, it looks great. Those are all great tips. I, for one, don't mind! |
|
|
|
[#28]
Quoted: The wood look is growing on me. Maybe I'll use birch plywood for the walls too, I was originally considering white painted fiberboard. It it was me, I'd go with wood - endless possibilities there. Seems like white fiberboard would be kind of sterile - Like the inside of an ambulance. |
|
|
|
[#29]
Quoted: thanks for sharing your design, progress, and pictures. I just found this thread. a few things we learned, though you may have already taken care of it 1) all wiring and ducting make accessible for servicing and pulling new stuff, after you use the rig for a while, you will want to make changes 2) all liquid storage if possible add heater strips so that in the winter they stay above freezing ( 4 season camping) 3) all water pipes stay in insulated areas or along heat ducting 4) all fixtures attached to survive sudden stops, bolt everything down with vigor 5) anything outside, design to mount for survival of 100+ mph winds, oncoming direction, and +60mph in other directions (driving down the road at 60, winds directly in front at 40. 100mph winds 6) place fire extinguishers in ready positions, and in areas where you sleep. if there is a fire, what do you need to escape 7) storing a motorcycle or other gas item inside, be wary of fumes and how to exhaust them. at some point, you will get fumes 8) if you are boon-docking with gas equipment, perhaps mount or include external gas tank or storage locker, with ventilation. 9) include tank monitors for all tanks. there is nothing like being able to read how much water is left, how full is the black water tank, how full is the grey water tank. 10) if you have black tank, include some sort of spray rail to clean out the tank. (or at the least, a black water wash out. basically, a hose attach that will spray the tank down and encourage the sh*t to flow out. include standard drain fitting so you are adaptable to standard rv hookups 11) have a water tank empty port so you can quickly empty the tank when needed for storage, winterizing, flushing, etc. otherwise, it is a lot of pumping out existing water 12) put a accumulator tank on the fresh water pressure line so that when you need water it is not constantly running the water pump. brrr,brr, brr to do anything, or silent to fill a cup or flush the toilet 12a) mount the water pump on an isolation plate. they are annoyingly loud. 13) if you are running during cold weather, get more heat that you think. it is a bummer being cold in the winter 14) leave room for a air conditioning unit on the outside. having a cool interior during the summer is wow 15) webasto makes excellent stoves, heating, equipment. designed for marine use and very durable. 16) insulate the exterior floor below if you are placing the tanks and any liquid lines. plus it will protect the equipment for road rash 17) find a way to mount a couple of exterior, under the bus storage lockers, that lock but you can keep gear in there. a good place to store your black water and external camping gear. 18) buy and install a long retractable rv canopy to put on one side. you will thank me the first big rain storm you are in. 19) install a bathroom vent and fan. or do what you are doing, it looks great. Thank you. I've done a lot of these and the ones I haven't have given me some food for thought. I appreciate it. |
|
|
|
[#30]
We took a trip in it this past weekend to see family. It was nice for my wife and daughter to not have to stop at all, but I didn't remember to turn the cruise control on in the ECU Configuration before the trip... So that sucked. But, I was able to put a 2x3 on the floor and get some relief.
Anyway, it worked pretty well, except for the 9.1MPG we got on the whole trip. Having a toilet inside was really nice, my wife didn't have to ask me to stop so she could pee, and we also didn't have to subject ourselves to any NJTP rest stops. However, since then, I've finished the bunk beds and framing out the bathroom. Now I'm going to frame out the master bedroom and try to figure out how to make the mattress fold up so I can get to everything like the water system, still access the cable trays easily, and get some additional space in the "garage" if required.   Almost ready for the flooring... Wooooo! |
|
|
|
[#31]
Cool thread OP.

|
|
|
|
[#32]
Murphy bed!

|
|
|
|
[#33]
For singles the old navy pipe rack from ww2 aint terrible as food for thought.

|
|
|
|
[#34]
Yep, I used those dimensions as the minimum. The bunks are 75" long by 30" wide, by 22" tall.
|
|
|
|
[#35]
Just read through the whole thread- looking good. I keep thinking about the same thing, but they're more practical on the west side of the country. I've got a couple of acquaintances that own them, a couple live in them (I used to belong to a VW camper club and travel with some eclectic types). One of the things I've heard all of them say is that the single pane windows suck, also have a way to make the interior private, even if it's as simple as a curtain behind the driver's seat/front entry area. Insulation and ventilation are extremely important, especially if you plan to use it in cold or hot areas. You can also convert them to 4wd if you want; great for ski bums and such (one of the people I know that owns one works all summer as a carpenter, then skis all winter).
|
|
|
|
[#36]
Can you also do us a favor, and measure your wheel humps? LxWxH, as well as the space between the wheel humps (aisle width)?
|
|
|
|
[#37]
Quoted: Can you also do us a favor, and measure your wheel humps? LxWxH, as well as the space between the wheel humps (aisle width)? Just an FYI - some of them don't have wheel humps on the inside. Maybe that is just the newer ones though. |
|
|
|
[#38]
Quoted: Just an FYI - some of them don't have wheel humps on the inside. Maybe that is just the newer ones though. Yeah, I was only thinking in terms of older buses. My little research so far seems to show that newer buses are WAY more expensive, which I personally couldn't justify for a "fun" project. As for the older buses, I do see people all over YT building them with sub-floors and a couple inches of insulation, but most still have to work around the hump, somehow. The specific reason I asked though was that I was playing with the idea of using a pick-up truck bed tank, like this one: https://www.ntotank.com/305gallon-acerotomold-white-pickup-truck-bed-tank-x3094944 which is a lot of water, but it would be great for boondocking, and you don't have to fill it up and haul it around full all the time. I also thought about using 4-5 much cheaper 55gal plastic barrels, and then plumbing them in such a way that they could each be isolated for cleaning or whenever you just need less water. But I just want to get an idea what's possible first (for example, any truck bed tank has to fit through the door, unless you plan on doing a roof raise and never taking it out ever again)! 
|
|
|
|
[#39]
Quoted: Yeah, I was only thinking in terms of older buses. My little research so far seems to show that newer buses are WAY more expensive, which I personally couldn't justify for a "fun" project. As for the older buses, I do see people all over YT building them with sub-floors and a couple inches of insulation, but most still have to work around the hump, somehow. The specific reason I asked though was that I was playing with the idea of using a pick-up truck bed tank, like this one: https://www.ntotank.com/305gallon-acerotomold-white-pickup-truck-bed-tank-x3094944 which is a lot of water, but it would be great for boondocking, and you don't have to fill it up and haul it around full all the time. I also thought about using 4-5 much cheaper 55gal plastic barrels, and then plumbing them in such a way that they could each be isolated for cleaning or whenever you just need less water. But I just want to get an idea what's possible first (for example, any truck bed tank has to fit through the door, unless you plan on doing a roof raise and never taking it out ever again)! Quoted: Quoted: Just an FYI - some of them don't have wheel humps on the inside. Maybe that is just the newer ones though. Yeah, I was only thinking in terms of older buses. My little research so far seems to show that newer buses are WAY more expensive, which I personally couldn't justify for a "fun" project. As for the older buses, I do see people all over YT building them with sub-floors and a couple inches of insulation, but most still have to work around the hump, somehow. The specific reason I asked though was that I was playing with the idea of using a pick-up truck bed tank, like this one: https://www.ntotank.com/305gallon-acerotomold-white-pickup-truck-bed-tank-x3094944 which is a lot of water, but it would be great for boondocking, and you don't have to fill it up and haul it around full all the time. I also thought about using 4-5 much cheaper 55gal plastic barrels, and then plumbing them in such a way that they could each be isolated for cleaning or whenever you just need less water. But I just want to get an idea what's possible first (for example, any truck bed tank has to fit through the door, unless you plan on doing a roof raise and never taking it out ever again)! You MAY be able to do away with the humps or maybe put some shorter/smaller ones since you would have to put a LOT of weight in/on the bus to get it to squat enough to need all of the wheel well space. I'll see if I can get a look at some newer ones to see how much clearance they have. |
|
|
|
[#40]
The wheel wells are 26" wide, 39" long, and 9" tall. For some reason I actually had that dimension written down on some scrap paper.
Some people do CRAZY things like just chopping them out and laying flat sheet metal down. I don't think I could do that without constantly worrying about rubbing. |
|
|
|
[#41]
Sorry updates have been slow. I've been working like a dog the past couple weeks, and we've really just used the bus as a portable toilet when we go out and do things for a whole day. So, like, going to a day-long festival, going out shopping and doing things with the kiddo, etc.
  I put up another wall and panel, and got some lighting installed, I still have to put in the 3" LED flush-mount lights. The LED strips are controlled with an RF remote, and there's another strip going in the bathroom, and I'll have a separately controlled one in my daughter's bunk.    I finally finished tinting all the windows, and it makes a pretty big difference in how the bus looks and how it "feels" inside. We bought some fabric to make curtains out of, and that'll further change the feel (and sound) inside. Speaking of sound... I got tired of people ignoring the horn when I use it to tell them "Please don't pull out in front of me, this won't be a payday, I have good insurance, a dash cam, and telemetry on this bus." and I'm also tired of people not feeling bad after they pull out in front of me and slam on the brakes, only to see how quickly a vehicle designed to be 10,000lbs heavier can stop on a dime. So...  Sound here: https://imgur.com/wqMQnFd |
|
|
|
[#42]
Quoted: The wheel wells are 26" wide, 39" long, and 9" tall. For some reason I actually had that dimension written down on some scrap paper. Some people do CRAZY things like just chopping them out and laying flat sheet metal down. I don't think I could do that without constantly worrying about rubbing. And the space between them? Also, thanks! |
|
|
|
[#43]
Quoted: Sorry updates have been slow. I've been working like a dog the past couple weeks, and we've really just used the bus as a portable toilet when we go out and do things for a whole day. So, like, going to a day-long festival, going out shopping and doing things with the kiddo, etc. https://i.imgur.com/9b0cEPi.png https://i.imgur.com/lDcsunn.png I put up another wall and panel, and got some lighting installed, I still have to put in the 3" LED flush-mount lights. The LED strips are controlled with an RF remote, and there's another strip going in the bathroom, and I'll have a separately controlled one in my daughter's bunk. https://i.imgur.com/eQJY293.png https://i.imgur.com/gvDSScW.png https://i.imgur.com/rJm507b.png I finally finished tinting all the windows, and it makes a pretty big difference in how the bus looks and how it "feels" inside. We bought some fabric to make curtains out of, and that'll further change the feel (and sound) inside. Speaking of sound... I got tired of people ignoring the horn when I use it to tell them "Please don't pull out in front of me, this won't be a payday, I have good insurance, a dash cam, and telemetry on this bus." and I'm also tired of people not feeling bad after they pull out in front of me and slam on the brakes, only to see how quickly a vehicle designed to be 10,000lbs heavier can stop on a dime. So... https://i.imgur.com/tYn2l6c.png Sound here: https://imgur.com/wqMQnFd Bravo Zulu. |
|
|
|
[#44]
Quoted: Sorry updates have been slow. I've been working like a dog the past couple weeks, and we've really just used the bus as a portable toilet when we go out and do things for a whole day. So, like, going to a day-long festival, going out shopping and doing things with the kiddo, etc. https://i.imgur.com/9b0cEPi.png https://i.imgur.com/lDcsunn.png I put up another wall and panel, and got some lighting installed, I still have to put in the 3" LED flush-mount lights. The LED strips are controlled with an RF remote, and there's another strip going in the bathroom, and I'll have a separately controlled one in my daughter's bunk. https://i.imgur.com/eQJY293.png https://i.imgur.com/gvDSScW.png https://i.imgur.com/rJm507b.png I finally finished tinting all the windows, and it makes a pretty big difference in how the bus looks and how it "feels" inside. We bought some fabric to make curtains out of, and that'll further change the feel (and sound) inside. Speaking of sound... I got tired of people ignoring the horn when I use it to tell them "Please don't pull out in front of me, this won't be a payday, I have good insurance, a dash cam, and telemetry on this bus." and I'm also tired of people not feeling bad after they pull out in front of me and slam on the brakes, only to see how quickly a vehicle designed to be 10,000lbs heavier can stop on a dime. So... https://i.imgur.com/tYn2l6c.png Sound here: https://imgur.com/wqMQnFd Haha, that train horn is great! |
|
|
|
[#45]
That guy did a fantastic job. One of the best home built setups I've seen. Looking forward to seeing OP's finished product. Looks like you're doing a darn nice job. |
|
|
|
[#46]
Quoted: That guy did a fantastic job. One of the best home built setups I've seen. Looking forward to seeing OP's finished product. Looks like you're doing a darn nice job. That guy has SUPER specific requirements, most of which I don't have. But agreed, he did an excellent job. His thought to make it blend in really show his attention to detail. |
|
|
|
[#47]
Quoted: And the space between them? Also, thanks! 90" wide interior, 28" wide humps * 2 = 34" between them. |
|
|
|
[#48]
I've been gone working for a while now, so no updates lately. However, my wife has been coming up with trip ideas.
Next on the list of stuff to do is plumbing, then the master bed (queen), then flooring. Once the flooring is done, then I'll add the vents/fans. Then install the mini split. Before I left for work, we did go on a mild adventure, and I caused an error code with the scanguageD. Which wasn't fun at all...  When it goes into this error state, it disables the torque converter lockup... For all you non-gearheads, that means it just spins at max RPM no matter what speed you're travelling, and it caused the transmission fluid temp to go from 140F to 180F in under 10 miles. After limping it home, I scanned it for codes, and then I realized why it had thrown a code and gone into limp mode.  The transmission works in j1939 mode, and the engine works in j1708... Which explained why I can't get reliable MPG and GPH information from the scangauge when it's in "both" modes for protocol... When I set it to use both, it shows me something like this:  When I set it to j1708, it shows me something like this, giving me everything but transmission information:  When I set it to j1939, it just shows me transmission information. And after a mile of only j1708, it threw the "check trans" light, made a buzzer go off, and was really annoying. So... I won't be doing that again. After changing the ScangaugeD back to "both" mode, it doesn't throw any codes.  Despite having the software, it still irks me that it could happen again, and I may have to build my own j1708 and j1939 display and sell the scangaugeD, because it's not worth this happening while I'm out somewhere a ways away from places to buy fluids, parts, etc. |
|
|
|
[#49]
The other night I bought the mini split, a bunch of odds and ends, finished building out more walls, and started on the master bedroom.
  I put the handles up, because when we're underway, sometimes my wife will be getting some food/drink or going to the bathroom and we'll hit a bump. Oh, and I started on the curtains... That's gonna take FOREVER to make them, there's so many windows. |
|
|
|
[#50]
Do they make a ‘cover’ for that sized roof vent?
It keeps the rain out even when open. They’re usually equipped with screens to keep the bugs away as well. |
|
|
 Win a FREE Membership!
Sign up for the ARFCOM weekly newsletter and be entered to win a free ARFCOM membership. One new winner* is announced every week!
You will receive an email every Friday morning featuring the latest chatter from the hottest topics, breaking news surrounding legislation, as well as exclusive deals only available to ARFCOM email subscribers.

AR15.COM is the world's largest firearm community and is a gathering place for firearm enthusiasts of all types.
From hunters and military members, to competition shooters and general firearm enthusiasts, we welcome anyone who values and respects the way of the firearm.

Subscribe to our monthly Newsletter to receive firearm news, product discounts from your favorite Industry Partners, and more.
Copyright © 1996-2024 AR15.COM LLC. All Rights Reserved.
Any use of this content without express written consent is prohibited.
AR15.Com reserves the right to overwrite or replace any affiliate, commercial, or monetizable links, posted by users, with our own.


