|
[#1]
anyone...I want to start this project tomorrow...

|
|
|
|
[#2]
|
|
|
|
[#3]
yeah i know, i posted that...i was too lazy to try and find the post...as I couldnt find it offhand...ive posted too many since then to see it on "my topics" list.
|
|
|
|
[#4]
a search of the archive server yielded a link to here which is a C&R stock refinishing forum.
I couldnt really find much in way of a stock refinishing how to(on arfcom), though most seem to recommend a good stripping/ cleaning followed by some Boiled Linseed Oil (BLO). |
|
|
|
[#5]
i gotta pick up some nice fine sandpaper tomorrow.....along with somethin to refinish it with....i love small projects, these things are rewarding.
when its done ill definitly post pictures of it... thanks for the link and info. 
|
|
|
|
[#6]
no problem, id like to refinish my M48 in the future, so please update with any tips as well, and maybe some lessons learned, and definatly pics.
|
|
|
|
[#7]
i want to refinish my enfields and K98 also,..but im affraid of like reducing the 'value' of them....do you think this reduces the collectability of them at all or?
|
|
|
|
[#8]
I refinished my Russian Capture K98. I didn't like that shellac shit they slathered all over it. I just took it down to the original wood with one of those cheapo palm sanders then finished it with some clear satin finish and turned out really good.
|
|
|
|
[#9]
Ok you cant tell me all that.....................without pics I want to see how it turned out....I want another K98 (on a sidenote haha) |
|
|
|
|
[#10]
yeah do you have some nice before/ after pics, or maybe just a nice after pic, so we can see what the "Clear satin" looks like. |
|
|
|
|
[#11]
Ok, happy to help.
I did this to my Czech 24-47 Mauser, using some helpful hints from SurplusRifle.com (I think). First, buy a can of regular old Easy Off. You are going to need a reasonably warm (over 50*) and dry place to use this. Cleanup depends on where you use it. You will also need about a pint of standard polyurethane (NOT MARINE GRADE), pantyhose (trust me, it applies it nicely), and some sandpaper and steel wool. Get some 60gr, 120gr, 200gr, 1000gr wet/dry, 0guage steel wool, and 0000steel wool. Dissassemble the gun entirely. I assume you will not be cleaning the metal. Place the stocks on plastic bags or hang them over plastic bags if you can, to get the drips. Coat hangers stretched out through the main hole in teh stock will do nicely. Spray the stock liberally, and wait about a half hour. Wipe it off with rags you dont mind throwing away. Rinse with water, if the finish is off to your satisfaction. Do not apply Easy Off more than twice. Let dry for a day. Sand with 60gr and 120gr to get out the bumps and imperfections to your satisfaction. Let rest for 30min or so, dust off with lint-free cloth. Get out pantyhose, wad into a ball and dip into FRESHLY STIRRED Polyurethane lightly. Apply lightly to entire stock still hanging on clotheshanger. ONE COAT only. Let dry. Sand with 120gr VERY LIGHTLY, as you will take off what you just did. Apply another coat of polyurethane, careful to avoid getting drips running down the stock. Sand with 200gr. Dust. Apply polyurethane. Sand with 1000gr. Dust. Apply Polyurethane. 0 guage steel wool. Dust. Dust again with different cloth. Apply polyurethane lightly. 0000ga steel wool. ETA: LET IT DRY AT LEAST A DAY BETWEEN COATS. IF YOU ARE IN A HURRY, NO LESS THAN 12 HOURS DEPENDING ON HOW THICK YOU DID IT. You should have a damn nice stock by now. I know I do. If you want to stain it before hand, follow the directions after you Easy Off it. |
|
|
|
[#12]
wow, sounds...like a lengthy process.....
I was looking at doing a quick job on this...but ill read that over again tomorrow, go over with it and show my father it, then pick out what to do exactly, get some supplies and start. 
|
|
|
|
[#13]
Pics of the finished rifle, no stain (but in crappy lighting {kitchen table} and a Canon digicam):
 
|
|
|
|
[#14]
wow, turned out good...is that the original military finish type? is that what they would of looked like back during the war or? I just want something thats accurate/true to the original config
|
|
|
|
[#15]
DOH! I completely forgot I asked O_P how he did his a month or 2 ago via IM, here is what he did and a pic of the finished product. I hope he doesnt mind me reposting this:
 ETA: an orignal finish will most likely be BLO or linseed oil (i think) you may want to ask the C&R guys they should know. |
|
|
|
|
[#16]
sounds like a shorter method...
|
|
|
|
[#17]
No, original finish means Tung Oil. I just didn't like the way it looked and felt. I prefer a more glassy texture, rather than a slate-feel. That turned out nice sWs2! I tend to over do things, and my Grandpa who showed me a few things (along with some PBS carpentry shows) about woodworking, and one of the things was "If you are going to do it, make sure it lasts for everyone to see and appreciate. Quality work begets quality results." |
|
|
|
|
[#18]
how would one do the tung oil treatment?
|
|
|
|
[#19]
Actually that's Old_painless' rifle, I have yet to do mine, but I hope to accomplish something similer. |
||
|
|
|
[#20]
Its worth the time and effort, believe me. I took that gun to a THR shoot in Nashville a couple years back, and had about a half-dozen THR members wanting me to refinish their stocks. I really didn't know what to say. |
|||
|
|
|
[#21]
Yeah I think it will be a winter project for me before next semester starts.
|
|
|
|
[#22]
Clean with lacquer thinner and acetone after baking in the oven at 175 degrees until cosmoline stops oozing out. Then stain if you want. Get pure tung oil and mix 1:1 with mineral spirits. Rub on with your hand and let sit for ten minutes and wipe off excess. Let dry for a few hours and re-apply. Continue until you get the desired finish. Try not to sand as you erase the rifles history. Use nothing more than 0000 wool to knock down the raised hairs and buff the finish. Remember this isn't a remington or winchester, it's an old piece of history. |
|
|
|
|
[#23]
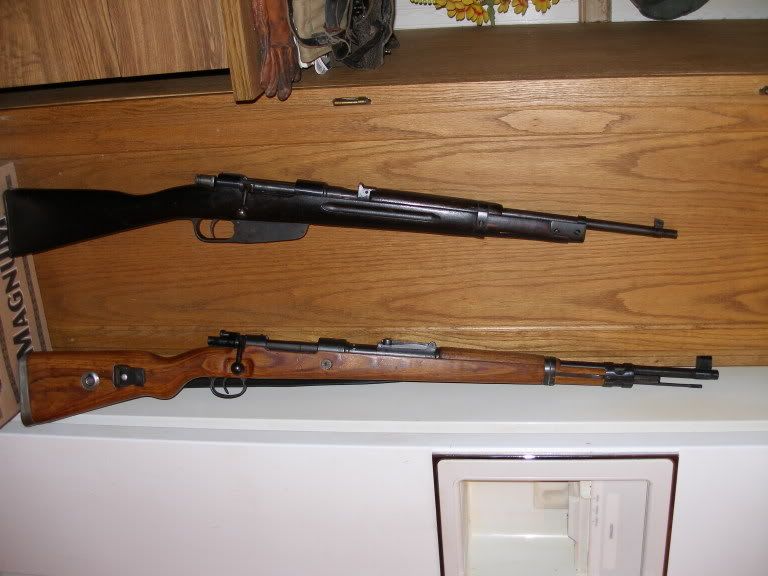
The K-98 on the bottom was done this way:
|
|
|
|
[#24]
Here's my M48A that I refinished. I cleaned the stock by spraying it with oven cleaner and letting it set over night and then washing it off with hot water (don’t soak it in the water, just scrub with a brush and rinse), it took two cleanings to remove all the cosmo. Next I sanded it down to a very smooth finish after letting it dry for a day. Then it was coat after coat of boiled linseed oil until I got the desired finish. I applied each coat of linseed oil with rag and rubbed it in good and let it set overnight before applying the next coat. I put at least 10 coats on it. It's wasn’t a quick process, but I'm very happy how it turned out.

|
|
|
|
[#25]
Imagine my surprise as I scrolled down and saw my own rifle. I thought, "Man! Somebody sure did a fine refinish job on that one!" |
|
|
|
|
[#26]
some really sharp refinishing jobs....wow...ill do my best

|
|
|
|
[#27]
Ok I started on mine today. I Used mineral spirits on the metal stuff and Easy Off on the wood, did it twice, the first time was probably on for 10-20 minutes (not sure how long as I was cleaning the metal parts during this time). The 2nd time I only left it on for about 5-10 minutes (I missed some spots earlier I guess). I used some old socks to wipe off the residue, seemed to work ok.
Then I hosed the stock parts off really well until the water stopped coming off cosmo- colored. I then wiped them down with dry rags and put them to dry on newspaper (the stock was butt side down leaning against a wall and was still drippign some cosmo). I finished up by using paper towels to go over everything trying to soak up the last bit of cosmoline. I'll take some pictures tomorrow (when it finishes drying). Im not trying to hijack this thread, but though we could turn it into our newbie winter stock refinishing thread or something. I also decided to stick with BLO for the finish. |
|
|
|
[#28]
good idea about the thread...yea post pics when you can |
|
|
|
|
[#29]
Ok did the sanding and first BLO coat today.
First off, I used the sandpaper I had availible, didnt go buy some for this so I used 150, 220, and 400 grit paper. I started with the 150 to get the big rough edges out, then progressed to the 220, then 400. I didnt make everything as smooth as possible, that would have taken quite a while. Also I didnt sand any of the markings off of the stock. Also, part of my stock chipped off when I was giving it a final "Dust off" from the sanding with a rag, so I had to modify it a little ot make it look pretty We'll see how it turns out later. I'll take a pic later. As for the BLO, I applied it with more clean rags (old socks) while wearing the gloves I used for stripping the stock (properly risned of course). BLO smells not so good and looks like condensed urine But, here are the promised pictures. I'm only going to post one of each to save space, but you can follow This link to access all of them. I'll add pictures as I add coats of BLO. Also I think there was a spec of something on the camera lens, so some of the pictures have a rnadom dark spot on the stock (which doesnt exist). Stripped stock, before sanding.  After being sanded, and having the dust wiped off.  Drying after the first coat of BLO.  |
|
|
|
[#30]
I love boiled linseed.
The only thing I love better than boiled linseed is throwing a healthy chunk of pure, real beeswax into a pot of linseed, and warming it up to use for the final coat. Lay on medium-thick, let sit overnight, then get to work with the buffing cloth and elbow grease. |
|
|
|
[#31]
wow turned out great
|
|
|
|
[#32]
I'm not done yet, I think with BLO you're supposed to put on several coats. |
|
|
|
|
[#33]
The more coats that you put on, the better it will look. I put at least 10 coats on my M48. |
||
|
|
|
[#34]
Do you have any pictures handy? I did coat one today, but will continue to do 1 coat daily till it seems done. |
|||
|
|
|
[#35]
Look on the first page of this thread. |
||||
|
|
|
[#36]
tag
|
|
|
|
[#37]
well I put on the 2nd coat, and it looks pretty much the same, so I'll just wait till I'm done with all the coats to post another pic. Only problem I'm running into is some lint/ fibers from my application rags sometimes catches on rough parts I couldnt sand down (like arsenal markings and the stamped #s).
|
|
|
|
[#38]
I got a question. I'm refinishing a Yugo M59/66 SKS & I applied the first coat of BLO then decided to read the side of the can & it has all of these warnings about flammability & stuff; But is it safe to store the BLO in a sealable plastic (Rubbermaid) container?
|
|
|
|
[#39]
I dont see how it is any different being in one sealed container or another, so long as the BLO doesnt break down the plastic. I was kinda freaked out by the flamability warning too, but my dad told me not to worry about it too much. Also an update on my stock; between coats 2 & 3 I sanded the whole stock lightly with 400 grit paper (my dad's suggestion to smooth it out more), wiped it down with a dry, clean rag, then applied a coat of BLO. Today I put on the 5th coat. I'm not sure when I'm supposed to stop putting on more BLO coats, hopefully someone can chime in on that (10 almost seems excessive). I'll post pics when I'm done, which should hopefully only be a few more days. |
|
|
|
|
[#40]
Here are a few articles from Culver's Shooting pages on refinishing M1 Garand Wood. These guys are M1 Garand Addicts and very careful about wood stocks on collectible rifles. I have followed these tips and redone many rifles over the years with great success.
Enjoy, Echap Here's the link is you want to bookmark it www.jouster.com/Bulletin/refinishing.htm Method One: HOW TO REFINISH A MILITARY GUN STOCK, BY "T.HE F.INISHER" * Remove all metal parts * Get some Kleen-Kutter Varnish, Lacquer, and Shellac Remover, from "Home Depot". * Pour about 8 ounces into a 2 1/2 gallon metal bucket. * Stand the stock in the bucket. * Put on thick rubber gloves, and use a 2 1/2 inch paintbrush to coat the stock with the liquid. Coat the hand guards, too. Let sit for 30 minutes. * Repeat the process with the paintbrush. * Use fresh liquid, and use #1 steel wool instead of the paintbrush to scrub the stock. Do not scrub hard to smooth the surface, just enough force to get the liquid into the remaining finish. * Let the stock dry overnight. * Repeat this process 1 or more times until there is no finish remaining. * Let it dry overnight. * Look for any dents, dings or scratches. You will now attempt to steam these out. * Put the stock in the bathtub and cover it with water for 15 minutes. * Put the stock on an ironing board. Heat up the iron so when it touches a damp cloth, the water will steam. * Press the hot iron against the dents. This will heat up the water and create steam, which will expand and get rid of some of the dents. Leave the iron on the stock until the steam stops hissing. * Put the stock back in the tub for 15 minutes. Repeat the process until the dents are gone or you are tired of doing this. I do this about 6 times. * You cannot replace missing wood by steaming. * Let the stock dry for 1 day to get any water out. The steaming process may have gotten rid of some of the dents. For those it didn't. * Sand the stock with 150 grit sandpaper. This will get rid of the shallow ones plus shallow scratches on dents that remain, sand them with 100 grit sandpaper only where the dents are. This can get rid of some deeper dents and scratches. * If this works, go over the area with 150 grit after you're done with the 100 grit. If there are any dents too deep for sandpaper, it is now time to fill them in with a mixture of Brownell's Acraglas. Mix this up like the instructions, and mix some of the sawdust from sanding with the Acraglas. This will make the Acraglas look as close to the wood as possible, but it won't be a perfect match. When finished the Acraglas won't really stand out, but it won't be invisible, either. When the Acraglas is dry, sand the whole stock with 150 grit sandpaper. You may have to spread the Acraglasing out over several days, as there might be dents all over the stock which would require you to sit it a certain way so the Acraglas doesn't run, let dry, sit another way for more Acraglas, etc. Until all the dents are filled. When sanding the stock, there may be dents that are too shallow for the acraglas to stick in, and it will sand out. Then the dent may be too deep to sand out with sandpaper. When this happens, leave the dent, and live with it. This would not have prevented the japs from falling over when hit with the bullets from the rifle. Go to the Tandy leather craft store, and get some Fiebing's dark brown leather dye. Get the alcohol based, not the water based. This is the stain to use. * Rub it on the stock using the rubber gloves and a bath towel (the one that came with the washcloth). Rub the dye over the inside and outside of the stock and hand guards. Do not apply a heavy coat. * Let it and the hand guards dry overnight. * Apply another coat of dye, and let it dry overnight. The stock should be completely covered with dye. * Sand the stock and hand guards with #0000 steel wool compare the coloring of the stock and hand guards. If they match go on to the next step. If they don't match, one is lighter than the other.Here is where the artistry comes in. If the stock is too light: * Sand the dark hand guards with #0000 steel wool to lighten the color until they match the stock. * If the stock is too dark, put another coat of dye on the hand guards rub with wool, and see if they match. If they are still too light, rub the stock with wool where the hand guards fit on the stock, and lighten the stock until it matches the hand guards. I have found that the color is not consistent in wood, and part of a stock can be lighter or darker from another part of it. With a little experimentation, you should be able to match the stock and hand guards. * After this matching/rubbing is done, put 2 coats of Formby’s low gloss tung oil on the wood. This will seal in the dye. The process is now complete, and the stock should look better than when it began. Method Two: M1 STOCK REFINISHING By Walt Kuleck As published on the Fulton Armory Website with permission of Walt. This can also be seen on the Fulton Armory Site along with some pictures of the results. QUESTION: My CMP M1 stock has a few dings and is very sticky. What can I do to clean the stock? Do I sand it? What do I put on it after all is said and done? ANSWER : : The M1 Rifle was originally manufactured with one of two finishes: linseed oil or China/Tung oil. Towards the end of WWII the linseed oil was supplanted by Tung Oil, a finish which was used, I believe, during '50's production. Refinished stocks were, however, generally refinished with linseed oil. In all cases the finished stock was simply dipped in a tank of linseed or Tung oil for a few minutes and then allowed to drain dry. Stocks that come from the CMP, whether as parts or on a rifle, are often coated with that sticky goo called cosmoline. Even those that are not are likely to be oil soaked or stained in one area or another. Here's what I do. To strip the old finish and remove oil & dirt, I use Easy-Off Oven Cleaner (the Heavy Duty variety). Spray it on, let it soak for 10-15 minutes, and then rinse off with very warm water while scrubbing with a Scotch-Brite pad. Usually one go with the EasyOff is sufficient, but I have had to repeat the treatment up to twice more. When the stock has dried I follow up with a coat or two of Minwax Natural Stain (unless I'm getting creative) and finish with two or three coats of Minwax Tung Oil finish. Minwax Natural is clear; it simply seals the grain. Except in extreme cases the strongest abrasive I will use is 00 steel wool. Usually a mild going-over with 00 before and after the first coat of Natural stain, then 0000 thereafter. I use my thumb to cover the cartouche and Proof stamp, in turn, to assure I don't further degrade it. I repeat the process with the Tung Oil; after buffing damp (10-15 minutes after application) with a balled-up nylon stocking or pantyhose (really!), allow drying for 24 hours then buff with 0000 steel wool. After the second coat, buff with 0000. After the last coat, buff with the stocking. The result looks military but is more durable. I've done more than a dozen M1 and M14 stocks this way, with total satisfaction. If you're able to attend the OGCA shows (e-mail me if you wish to be sponsored as a guest), stop by the GCA booth. I generally have my CMP rifle and my wife's CMP rifle there, refinished with this method. This method works for me! But for God's sake, don't sand it!!!! -- Walt Kuleck Method Three: Refurbishing Old M1 (or M1903) Stocks By Dick Culver There are a couple of ground rules here: 1. If the stock is in reasonably good shape, and looks right for the rifle, sometimes it’s well to just leave it alone. 2. If it definitely needs cleaning, Walt Kuleck recommends the use of oven cleaner (see Walt’s article in this dissertation). While I haven’t personally tried oven cleaner, I have seen the results and it does a most serviceable job. If you are gonna’ go that far, make sure you don’t screw up or degrade any remaining (existing) cartouche(s) (usually located on the left side of the stock, sorta’ below the rear sight and/or receiver horseshoe). The very early IHC stocks have an "Ordnance Wheel" cartouche on the RIGHT hand side of the stock and a small (un-circled) "p" on the BOTTOM of the pistol grip... DO NOT REMOVE THESE! 3. Being a basically lazy character, instead of using oven cleaner, I usually take a really dirty and oily walnut stock down to the local furniture stripper and have them throw it in the hot tank (this works for Birch Stocks also). The hot tank boils all the old oil and dirt out of the stock, and at least partially steams the smaller dents out... It truly cleans a stock down to its "undernothings". I usually wait a day or two before starting the finishing process if the stock was exceptionally oily, as sometimes a little bit of oil will bleed out after the initial treatment. These small oily "bleed outs" could probably be taken off/out handily using the oven cleaner treatment, or make a deal with the furniture stripper to dip the stock a second time after a week or so if it does start to get a little "after immersion seepage" – if you arrange for it before hand, they will usually throw in the second dipping gratis. After using the furniture stripping method, I then refinish the stock as described below. 4. Many dings and dents can be steamed out of the stock using a wet wash cloth and a steam iron. It’s par for the course to have to do this several times for each dent. If the edges of the dent are "broken", the dent will usually not come all the way out. 5. Once you have steamed out as many of the dents as possible, it’s time to "whisker" the stock. Filling the remaining small indentations that defy the "steaming out" method can be filled as outlined in "T.he F.inisher's method above. "Whiskering" is best done with a sopping wet washcloth. Just thoroughly wet down the outside of the stock and let it dry. When the stock dries, it will leave a raised grain (usually known as "whiskers"). These can be gently taken off with very fine steel wool (OOO or OOOO) – CAREFUL with those cartouches. This process should be repeated until the dry stock no longer has any raised grain. The stock should now be as smooth as a baby’s posterior, and ready for the application of the finish. I am told that the Scotch-Brite pads do an even better job than the ‘steel fur’ (0000 steel wool) and doesn’t leave those pesky little metallic little pieces of the steel wool hanging in the irregularities of the stock grain. 6. Once you have used the hot tank or oven cleaner treatment on the stock, it will probably be considerably lighter in color than it was when you started. If you wish to bring it back to its original (and traditional) color, I personally use Dixie Antique Gun Stock Stain (made for them by the Fiebing’s Dye Company and costs about $2.00 per bottle). This stuff is obtained from the Dixie Gun Works in Union City, Tennessee. One bottle will do several stocks! You will probably have to use several coats, but make sure to let each coat dry thoroughly! After you have attained the desired color, wipe the stock down with OOOO steel wool followed by a clean dry (old) skivvy shirt. This stock stain will come as close as any I have ever seen to exactly duplicating the Springfield Stock Color. 7. If you have a very early M1, the original finish was RAW linseed oil. According to the story, the linseed oil tended to smoke under the heat of prolonged firing (from the handguards, I assume) which was seen as an undesirable trait in a combat rifle ('03s did not usually get hot enough to cause such problems). I once charred the handguards of an M1 during a live fire Squad-in-the Assault exercise and bubbled the Linspeed Oil finish I had applied to the handguards. It looked pretty, but wasn’t the most practical military finish I ever used (except for inspections!). The Springfield Armory solution to the "smoking problem" was to use a 5 minute submersion of the M1 stocks in "China-wood Oil" (vice Linseed Oil). China-wood Oil is/was sometimes called Japanese Dryer, (better known as "Tung Oil" today – made from the nut of the Tung Tree). The Tung Oil finish was tested in early to mid 1941 and approved in the latter part of 1941. Using Tung Oil as the base coat is a really easy way to finish a walnut stock, as it dries rapidly and is essentially waterproof... "Tung Oil" can be rubbed in with the palm of the hand (until it starts to dry). If you wish to remove any shininess, this can be done with the 0000 Steel Wool, again wiped with an old towel. The end result can then be wiped down with a silicone cloth. This is the correct finish for an "as issued" stock (after 1941) from Springfield Armory... I will go through my personal "hand rubbed" finish below. NOTE: NOTE: As far as I know, all stocks finished by Springfield (and others - Win, HRA and IHC) after 1941, were finished with Tung Oil including the post WWII production rifles (including the M14). It would be hard to pin an exact date on the total changeover to the new finish, but surely by early 1942, all stocks were Armory finished utilizing the TUNG Oil process. It was intended that all FIELD maintenance of rifle stocks would continue to be linseed oil (Boiled Linseed was the favorite since it contained a drying agent, and was much more practical for the individual soldier) My personal advice is to make the stock finish fit the era and wear of the (individual) M1, and add a little character to the amount of remaining metal finish, rather than try to make a piece of furniture out of the stock. Doing too good a job is much like a gal who dyes her hair jet black when she’s in her ‘70s... It MAY be her natural color, but... If you are doing a total restoration, then it’s OK to pull out the stops. If you want a finish that rivals the most meticulous hand rubbed finish applied by the professional soldier (or Marine) in the days prior to WWII, you might want to try the following: This is a finish I got from an old-timer at Perry back in the mid-50s who appeared to be old enough to have used it on his issue Trapdoor Springfield in the Indian Fighting Days. I went home and tried it and am still using it to this day: 1. Go through the cleaning process described above, whisker the stock as outlined and apply the Dixie Antique Gun Stock Stain. Make sure all the dents are steamed out (or filled) and you are happy with the finish. 2. Apply Tung Oil liberally to the inside of your stock and let dry (this is basically a "waterproofing" treatment. Apply a light hand rubbed coat of Tung Oil to the outside of the stock and allow to dry (this acts to do a preliminary sealing of the grain/pores of the wood.. Use the 0000 Steel Wool (or the Scotch Brite pads) to remove any evidence of the Tung Oil from the outside of the stock. Allow the dried Tung Oil to remain on the inside surfaces. 3. The "magic finish formula" consists of equal parts of Boiled Linseed Oil, Turpentine (essentially a solvent) and Beeswax. (1/3rd Linseed, 1/3rd Turpentine, and 1/3rd Beeswax. Melt the mixture over a "flameless" heat source (hot plate, radiator or the manifold of your vehicle). Stir the concoction and allow to cool into a paste. Put the paste in a convenient container (I used to use a typewriter ribbon can when they still had such things). You might get a can of Brie Cheese in the Grocery Store, those round cans work well and will fit in your shooting stool most handily inside of a zip-lock bag. 4. Take your prepared stock and start to rub the Beeswax mixture into the outside of the stock with the palm of your hand. Allow the friction (and generated heat) of your hand to melt the paste into the grain of the wood. You can do this while watching the "tube" and not screw anything up. After you have rubbed in the first coat, rub it down with an old towel. Repeat the process until you are satisfied (you can always add more, and this is one of the beauties of the finish, as it can be used until you get tired of rubbing). The last coat is always burnished with an old (Terrycloth) towel. The final "piece-d-resistance" is a quick final rubdown with a silicone cloth. The finish gives the appearance of a hand rubbed stock with 20 years of effort applied. The Beeswax imparts a waterproof finish to the stock, and any minor scrapes, or scratches can easily be rubbed out of it with a small addition of the Magic Paste. The finish looks good, has a non shiny military appearance, it’s waterproof, doesn’t smoke or bubble the finish in rapid fire and appears to be an original well rubbed rifle stock from the days prior to WWII. It truly IS a hand rubbed finish! This method works equally well with any military stock and is a really practical finish for your hunting or "head for the hills" stock. NOTE: Beeswax can usually be found in shoe and saddle makers shops (they wax their sewing machine thread with it), leather stores (Tandy, The Leather Factory, etc.) or even from bee keepers... You ain’t gonna’ need a bunch. I’m still using a block I found 25 years ago. Beeswax can usually be found in shoe and saddle makers shops (they wax their sewing machine thread with it), leather stores (Tandy, The Leather Factory, etc.) or even from bee keepers... You ain’t gonna’ need a bunch. I’m still using a block I found 25 years ago. |
|
|
|
[#41]
ok well i sanded down the rifle, now should i just start applying tung oil to it or? Im looking to get this done in a rather short amount of time mind you. Thanks
|
|
|
|
[#42]
cool project, I've been considering a VZ for myself, how do you like yours?
|
|
|
|
[#43]
I dunno about the specifics of tung oil. I actually got lazy and put my mauser back together after only 5 or 6 coats of BLO. I took pics, but I'll have to go get them online sometime.
|
|
|
|
[#44]
please do, i want to see |
|
|
|
 Win a FREE Membership!
Sign up for the ARFCOM weekly newsletter and be entered to win a free ARFCOM membership. One new winner* is announced every week!
You will receive an email every Friday morning featuring the latest chatter from the hottest topics, breaking news surrounding legislation, as well as exclusive deals only available to ARFCOM email subscribers.

AR15.COM is the world's largest firearm community and is a gathering place for firearm enthusiasts of all types.
From hunters and military members, to competition shooters and general firearm enthusiasts, we welcome anyone who values and respects the way of the firearm.

Subscribe to our monthly Newsletter to receive firearm news, product discounts from your favorite Industry Partners, and more.
Copyright © 1996-2024 AR15.COM LLC. All Rights Reserved.
Any use of this content without express written consent is prohibited.
AR15.Com reserves the right to overwrite or replace any affiliate, commercial, or monetizable links, posted by users, with our own.


