|
Posted: 2/6/2006 6:20:42 PM EDT
I’ve been thinking of getting some tan/coyote gear for a while now. I have a bunch of stuff in woodland, but ya got to have the latest ubertacticool. What I will use the vest for is:
1. volunteer search & rescue 2. deployment use (being AF my unit doesn’t really care what I use) 3. work (I do some aggressor stuff at work) 4. SHTF What I need to carry: 1. navigation, comm equipment, & survival gear for up to 48 hrs in the field 2. ammo, nav, & survival gear for 24-48 hrs in the field 3. some nav & survival stuff & a few mags 4. 6-12 mags, & as much other crap as I can get into it The features I was looking for are: mesh construction, MOLLE, padded shoulders, front closer, ability to carry at least a 70oz bladder, tan/coyote color, all buckles tan/coyote, under $100 (for the vest alone). I considered the PT-03 MESA, Spec Ops Battle Rig, SDS FLC,TT MAV, and TT Modular Tac-Vest. None of them were exactly what I was looking for. All of these are good vests, but none of them had everything I wanted (plus I’m cheap). Solution – make my own vest. Material: From Tactical Concealment: tan nylon mesh 36”x56” tan nylon 36”x60” tan nylon thread 1 roll 2” tan webbing 2 yards 1” tan webbing 8 yards (for best prices on TC stuff use their print catalogue) From Supply Captain: 1" ladder locks 1 pack 1" slide release 1 pack 1” d-rings 1 pack 2" triglides 1 pack From J Caroline: 1” tan Grossgrain ribbon 6 yards Hobby Lobby: ¾” tan Velcro 1 yard Sears: Closed cell foam Introducing the Vest, Combat Uniform (VCU). Here is all the material ready to go. 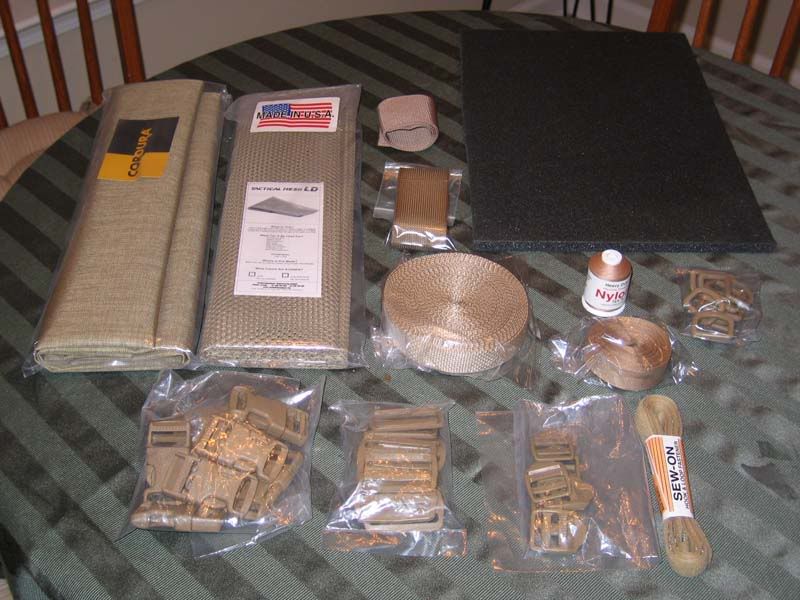 The completed vest body. 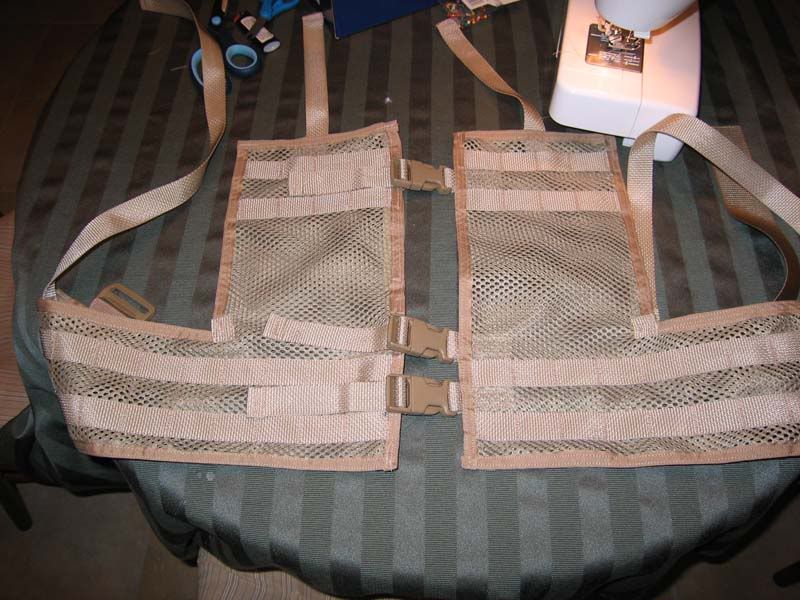 The shoulder assembly. 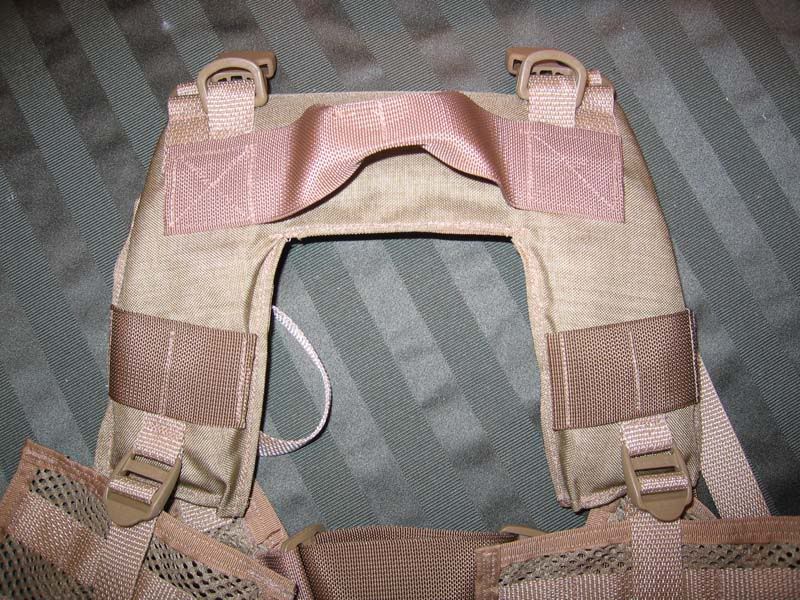 Finished product. 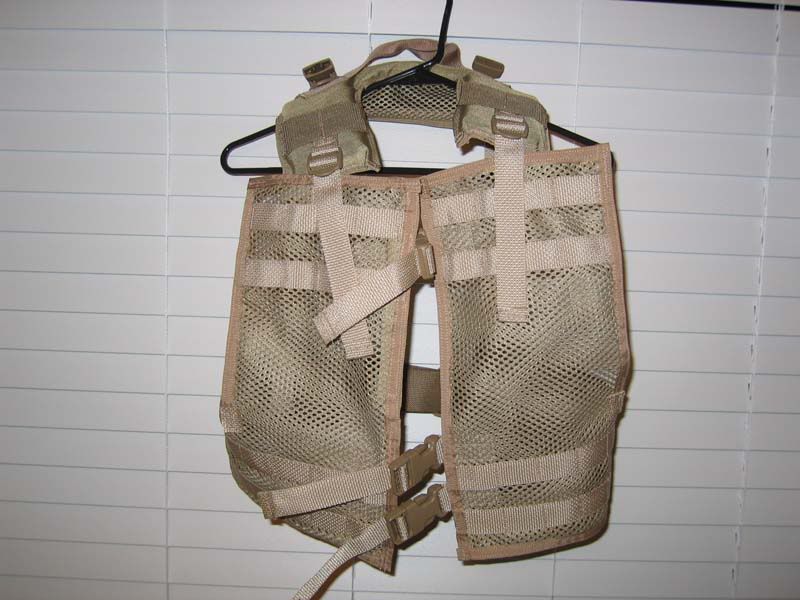 On my dummy. 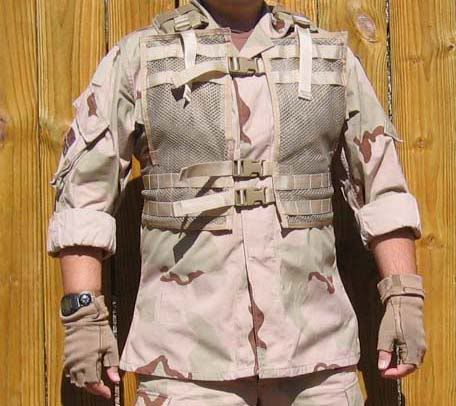 With some of the pouches. Some of the pouches I ordered are backordered. The tan duty belt visible in the front is not integral to the vest. 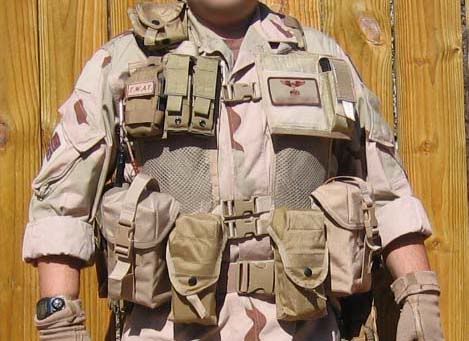 I still have to make the hydration pouch. It will connect into the slide releases on the back of the shoulder assembly, and d-rings on the back (still need to add those). It felt pretty good running around in my back yard with my son in-between taking pictures. I had 12 loaded AR mags, 3 loaded P226 mags, and a strobe in it. I hope to get a chance to test it out at work this week. Hope ya’ll enjoy. |
|
|
|
[#1]
Nice work man, looks great.
|
|
|
|
[#2]
damn, i thought i mas thrifty. great work. id move the first aid pouch away from the top of your shoulder, itll drive you nuts. total cost?
|
|
|
|
[#3]
nice work,
but this is the reason i buy stuff already made |
|
|
|
[#4]
By you wearing your watch on your right hand, I am assuming that you are left handed. Either way, it looks like you have too much crap where your butt stock would go when you shoulder a rifle.
Just a thought. SCOUTS OUT |
|
|
|
[#5]
Would you be up for a 5 minute design review?
EGG |
|
|
|
[#6]
This guy doesn't know shit about gear, don't listen to him!!    I keeeed, I keeeed!! |
|
|
|
|
[#7]
I love this guy! He just proves my point that I make to others all the time. You CAN be a guy who can shoot out the "Q" with 3 shots in three seconds, AND STILL know how to use a sewing machine!
I wish Makita or Craftsman would make a Fire engine red w/ diamond skid plate sewing machine though. Guys, it IS a powertool afterall! |
|
|
|
[#8]
You got skills...very nice work. |
|
|
|
[#9]
Can you please elaborate on this. Total cost, & rough plans so we can make some of these...
|
|
|
|
[#10]
Kudo's, I'd sew my fingers together trying to make a napkin.
|
|
|
|
[#11]
Egg – please feel free to provide any feedback. I’ve done duty belts, and slings before, but this is the first time I’ve attempted anything this complex.
Total cost of all the materials + shipping was a little under $70. That’s almost the price of most of the vests I considered. I did end up with a lot left over though. This ended up being a admin pouch, and I’m working on a dump pouch. The more you make the more you save. If you don’t want a mesh body that’ll save you $15 – the nylon is more than big enough to do both chest panels (double sided even), shoulders, and hydration bladder carrier. I got to try shouldering and firing a weapon with it on today. The admin pouch got in the way a little, but not enough to bother me. The great thing about MOLLE is that if I don’t like the way the pouches are I can move them. Basic dimensions: 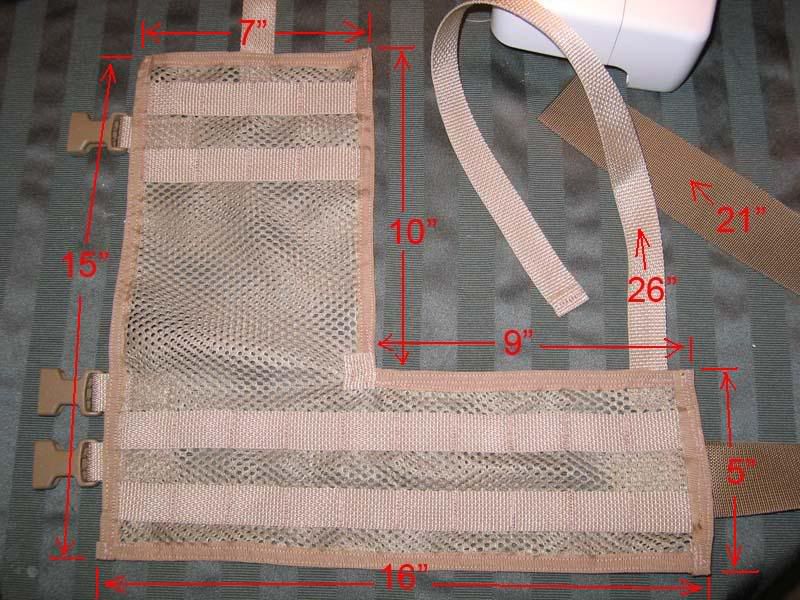 For the opposite side just reverse everything. I made the upper portion of the panels tall enough that I can mount an AR mag pouch and the bottom of it will not interfere with getting a mag out of the lower pouch. So if you have no desire to do that you can reduce the height. About the construction: 1) If sewing on a strap would interfere with the MOLLE webbing the strap had to be sewn on first. Remember to not sew it flush with the edge of the body. Give yourself an inch because you have to get the grosgrain ribbon over the edge. 2) Attach the MOLLE webbing before the grosgrain ribbon on the edge. 3) The spacing for the MOLLE webbing is 1.5 inches between the vertical stitches. From the other MOLLE stuff I have the spacing is anywhere from 1.5” to 1.75”, with the majority being 1.75”. 1.5” seems to me to be the bare minimum. 4) Once I got one piece of MOLLE webbing sewn on I used clear tape to position the second piece 1 1/16” from the first one. 5) Once one panel is done line up the second panel with the finished one to figure out where to place the buckles and MOLLE webbing. 6) For adjustable straps add the following amount: 2” for connecting it to the vest body, and 1” to fold in half at the end. So for a 24” shoulder strap you need 27” of webbing. 7) To attach the female portion of a buckle, or a ladder lock you need 4”-5” of webbing. 8) The mesh body is two layers thick. I took a 16”x30” piece and folded it into a 16”x15” piece and then cut it to the proper dimensions. 9) For the adjustment in the back I used 2” webbing with two sliders. One slider is permanently attached to the right panel with 5” of webbing. The 21” piece is attached to the back of the left panel, thread through the slider on the right side, with the second slider used to set the adjustment. Picture of the back: 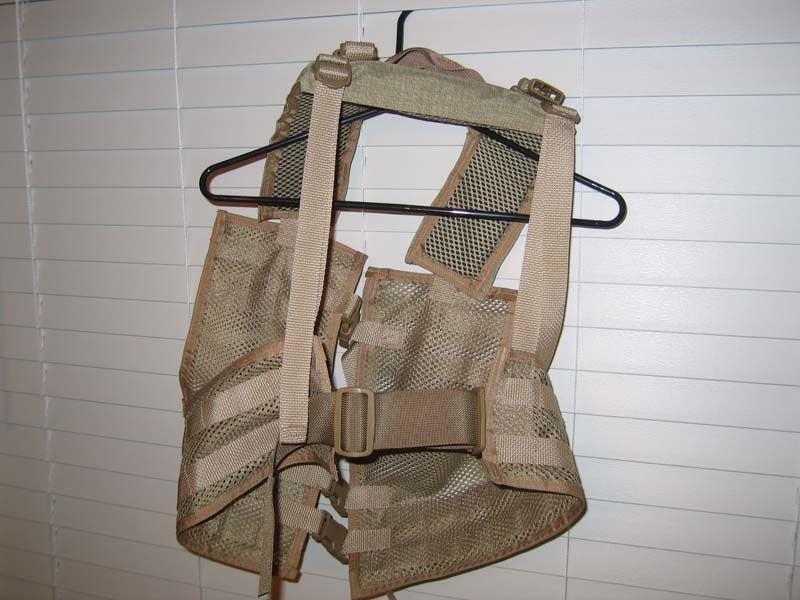 10) For the shoulder assembly I just tried to copy something I already had (SPEAR ELCS). So I really don’t have any dimensions. I’m leaving for a TDY tomorrow so if there is interest I’ll post info when I get back. Time to do the vest – 3-4 hours. OFCJAX, that would be great if some company would make a sewing machine in a color other than cream with lavender accents. The AFSOC guys I work with call me “stitch b***h”. But when they need a BDU shirt modified they know where to go. I don’t charge for my work. Just a cool piece of kit in trade, or knowing that they owe me one. |
|
|
|
[#12]
A few things
specs should be be 1.5" on center between vertical tacks, and 1" spacing between webbing. roll your webbing ends under drag handle WILL pop off once loaded when sewn in its current manner, unfortunately you have not left enough room to extended the webbing to distribute the weight loading. the webbing 'handle' should be reversed so that the 'flat' side of the handle faces towards the users back knock off the top corners, they are useless and will flap about. extend the 1" webbing down past the top edge apprx 2-4" reinforce with a 2" web backing. wrap 1" webbing around the second bar of your ladder locks drop the top center fastex 4 inches. omit the center buckle top rows of webbing should be moved down approx 4" allowing for stock clearance. |
|
|
|
[#13]
Nice work. I've done a few basic mods to my gear, but nothing that complex. Maybe I'll give it a try.
If it turns out OK, I'll post some pics. If it's not so good.......well, just forget I said anything.h.gif |
|
|
|
[#14]
oh yeah I'll be the first to say it "you're a stitchbeeyotch" haha

|
|
|
|
[#15]
When is Butterick going to start producing a series of "tactical" patterns?
|
|
|
 Win a FREE Membership!
Sign up for the ARFCOM weekly newsletter and be entered to win a free ARFCOM membership. One new winner* is announced every week!
You will receive an email every Friday morning featuring the latest chatter from the hottest topics, breaking news surrounding legislation, as well as exclusive deals only available to ARFCOM email subscribers.

AR15.COM is the world's largest firearm community and is a gathering place for firearm enthusiasts of all types.
From hunters and military members, to competition shooters and general firearm enthusiasts, we welcome anyone who values and respects the way of the firearm.

Subscribe to our monthly Newsletter to receive firearm news, product discounts from your favorite Industry Partners, and more.
Copyright © 1996-2024 AR15.COM LLC. All Rights Reserved.
Any use of this content without express written consent is prohibited.
AR15.Com reserves the right to overwrite or replace any affiliate, commercial, or monetizable links, posted by users, with our own.


.jpg)