|
[#1]
Quoted:
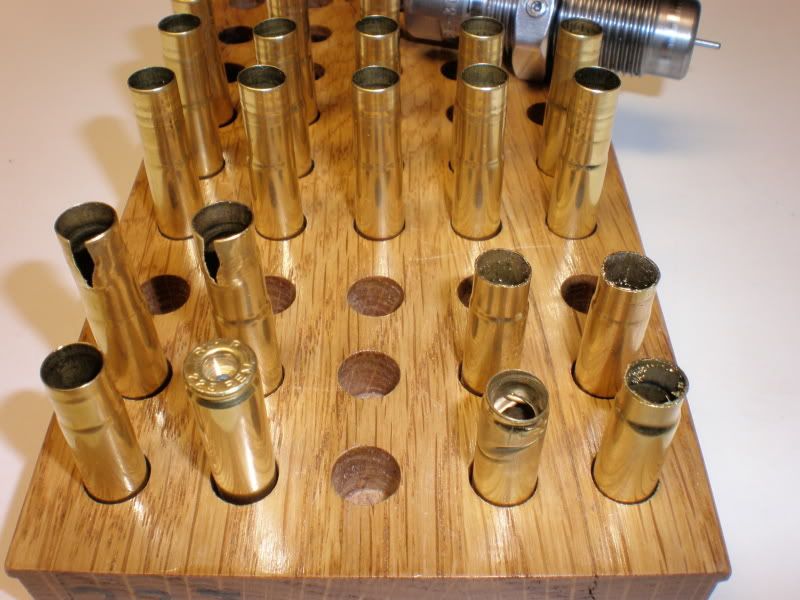
I received my cut off jig to convert .223/5.56 brass to 300 BO yesterday. In preparation of converting the cases, I started sorting my brass into like headstamps. I first sorted all of my lake city brass from everything else. Then, I decided that I would refine the sort to matching years. In doing this, I cam across two different 2011 headstamps. One head stamp was L C 1 1 with a character at 12, 3, 6, and 9 o'clock positions. The other was a smaller headstamp that had the NATO symbol (I believe) and the stamp LC 11. There might have been a dot or two at other positions. Would you consider the two different stamps produced by Lake City to be the same or are they different somehow? I haven't measured neck thickness obviously. To take that a step further, do you think I will find variation in my full length forming of lake city brass from different years? For additional information: I will be cutting the brass using the cut off jig made by VZ58 on the harbor freight cut off saw and doing the initial deburr on a RCBS prep station. For forming the brass I will be using the homemade lanoline/alcohol solution and running the brass in my Lee single stage press with Lee dies. Final trim will be with a Worlds Finest trimmer (second gen). I sized and trimmed my first piece yesterday to act as the case to set the WFT cutter in the future. I used a wilson case gage to verify headspace and trim length. I compared case length to SAMI spec using my calipers and it was perfect. Also, I measured the neck thickness on the piece I set up as my reference case and it was 0.011, which seems right from other threads I have looked at. Anything I might be missing? You really aren't missing anything. If the headstamp marking is a cross inside a circle then yes that's the NATO headstamp. Some do have it and some don't. The way I do it is take the sizer ball out of my FL sizing die run it through after cleaning of course to form the brass to 300 BO and then cut with my HF chop saw. That way you are only deburring and chamfering once. Saves a little time. |
|
|
|
[#2]
You sorted the LC cases way more than I do, unless I have a large amount. Over 500 for me.
Rest of my sorting is by headstamp name. To me a WCC is a WCC regardless to year. I anneal my cases before forming the shoulder. If your not getting the accuracy you expect, try annealing and crimping. |
|
|
|
[#3]
Thanks to both of you for your responses.
I investigated the removal of the decapper/sizing ball method and am interested in trying it out. It seems like I need to make the decision of deburring every case twice or just running them all through the press twice. Since I hate deburring/chamfering and it takes longer than running the ram on the press, that method makes sense to me. Only issue I am not sure about is whether the second sizing with the sizing ball might affect finished length at all since that occurs after final trim and chamfering. Also, since the VZ58 jig references off of the rim of the cartridge and the WFT references off the shoulder, then it seems I am still set up to go, just need to alter the steps a little. Correct? by the way, I tend to decap everything using a universal decapper before doing anything else. I know this is an extra step, but I don't like decapping and resizing simultaneously. Willing to hear opinions on this though. Thanks for the info on the WCC is a WCC (or LC is LC) headstamp info as well. If that is the case, I might roll all of my current LC brass to 300 BO, use a selected headstamp (maybe FC) for my longer range gun/rounds, and leave the rest for plinking. Also, I plan to use a crimp (lee crimp die). I'm not sure I am set up to properly anneal. I've watched videos on the process, just not sure about it quite yet. Thanks for the suggestion. This has been very helpful! |
|
|
|
[#4]
Quoted: Thanks to both of you for your responses. I investigated the removal of the decapper/sizing ball method and am interested in trying it out. It seems like I need to make the decision of deburring every case twice or just running them all through the press twice. Since I hate deburring/chamfering and it takes longer than running the ram on the press, that method makes sense to me. Only issue I am not sure about is whether the second sizing with the sizing ball might affect finished length at all since that occurs after final trim and chamfering. Also, since the VZ58 jig references off of the rim of the cartridge and the WFT references off the shoulder, then it seems I am still set up to go, just need to alter the steps a little. Correct? Be sure to cut off long, form shoulder, then trim to length. You should adjust your process as you go to find the cut off length/trim length that works best for you. by the way, I tend to decap everything using a universal decapper before doing anything else. I know this is an extra step, but I don't like decapping and resizing simultaneously. Willing to hear opinions on this though. The reason I debur twice is that my cutting method (bandsaw) leaves a ragged edge and trying to form them without deburring ended up scratching the cases until the brass build up was removed. Thanks for the info on the WCC is a WCC (or LC is LC) headstamp info as well. If that is the case, I might roll all of my current LC brass to 300 BO, use a selected headstamp (maybe FC) for my longer range gun/rounds, and leave the rest for plinking. Also, I plan to use a crimp (lee crimp die). That's what I use. I'm not sure I am set up to properly anneal. I've watched videos on the process, just not sure about it quite yet. Thanks for the suggestion. This has been very helpful! I only decap first is because I wet tumble. If your dry tumbling, it's a waste of time. Dry tumbling will not clean the primer pocket like wet tumbling. Guess I'm going to have to do a thread on basic low cost annealing. It is definitely a skill that is worth while to learn, especially if you are going to form cases. |
|
|
|
[#5]
I use the same jig as the OP, on the same saw. I follow VZ58's instructions for how to set the length - that gives me plenty of leeway for the occasional odd case with an issue. While it usually cuts pretty smooth, it's still rough enough that it'll give the expander ball some trouble - as you lower the ram, which is right where you don't need any extra drag. So I do a quick spin with my deburring tool and it's done. I do that before annealing (using dryflash3's method). After annealing, I form the cases, then trim with a Giraud trimmer. Pretty darn quick and easy, really.
By the way, you WILL want to get spare blades for that saw. It's good, but when the blades start to get a little dull, it doesn't cut nearly as well. Fortunately, the blades aren't too expensive. |
|
|
|
[#6]
Questions from the OP, (1)Cut brass on the long side (2) Debur/chamfer (3) Lube (4) form (5) trim (6) debur/chamfer I'm intrigued by the suggestion of forming before cutting to eliminate a dubur/chamfer step as follows (1) remove decapper/sizing ball from die (2) lube cases (3) form cases (4) cut cases (5) trim cases (6) debur/chamfer cases (7) insert decapper/sizing ball into die (8) finish sizing cases You can run cases through sizing die before cutting, but you better lube cases well (I use Imperial), but there is a lot of fail with this method. I gave it up pretty fast. Also do any primer pocket work, removing the crimp and uniforming, before cutting cases. Easier to work with full length 223 than a shorter 300 blk case. One step you are missing is annealing, here is a pic of my process; I changed the way I formed my cases several times, do experiment and find the process that works best for you. Good luck. |
|
|
|
[#7]
Thank you for addressing the particulars.
Last night I worked with some brass. I tried a couple by forming them first, cutting them, sizing them, then trimming, but I feel more comfortable cutting before forming. Therefore, I followed the same steps you provided in picture form with the exception of annealing. Once I had the die set correctly, I was able to get the cases situated in the Wilson case gage correctly and the final trim had them at 1.358-1.361. This is within the specs as far as I know for SAAMI. I'll say that I do have a heck of a time trying to see/read my wilson case gages. even putting a metal pocket ruler across and putting it up to the light. I supposedly have very good eyes and spent more than my fair share of time looking through a microscope identifying insects, but those things are a bugger for me. Also, I spent a lot of time looking at annealing and always end up focusing more on the contraptions people have built. I have a propane torch, a cordless drill, and a stopwatch, so I have the essentials. I guess now I need to get the product that will help indicate the approximate time it takes the brass to reach about 700 degrees (according to one video I found). ETA: Can someone link to dryflash3's method for annealing. I'm looking and missing it. |
|
|
|
[#9]
Thanks again. Although I understand the basics of the gauges, I appreciate your thoroughness in explaining them and that you don't take anything for granted. Looking at them at the angle you suggested is a good approach, and likely quicker than me putting a straight edge across them every time in two directions. For me verifying the case is above the bottom is more difficult; however, if your gauge were rotated 180 degrees the same concept would apply, but I would not want to see silver. Simple enough.
Thanks in advance for the thread on annealing. |
|
|
|
[#10]
I use plenty of light, and often an engineer's rule to double-check my findings with the Wilson/Dillon type gauge. For me, the light is critical (as are my @^#$ reading glasses...). Don't use too much magnification, or you'll confuse yourself with what you're looking at. I use the engineer's rule like this: Once the case is in the gauge, I place the rule flat on the highest portion of the gauge and slide it across the gauge toward the low side. It should slide on or drop to the case head, and once at the edge of the case head it should drop to the low part of the gauge cut. With modest pressure, you can feel the drops pretty easily.
There's a second test to do if the case head sticks up out of the gauge. Take the case out, turn it around and try to insert the head into the opening. If the case head enters the gauge easily, it confirms that the case failed because of insufficient sizing. On the other hand, if the case head doesn't go in, start looking for burs and nicks in the rim. |
|
|
|
[#11]
Quoted:
I use plenty of light, and often an engineer's rule to double-check my findings with the Wilson/Dillon type gauge. For me, the light is critical (as are my @^#$ reading glasses...). Don't use too much magnification, or you'll confuse yourself with what you're looking at. I use the engineer's rule like this: Once the case is in the gauge, I place the rule flat on the highest portion of the gauge and slide it across the gauge toward the low side. It should slide on or drop to the case head, and once at the edge of the case head it should drop to the low part of the gauge cut. With modest pressure, you can feel the drops pretty easily. There's a second test to do if the case head sticks up out of the gauge. Take the case out, turn it around and try to insert the head into the opening. If the case head enters the gauge easily, it confirms that the case failed because of insufficient sizing. On the other hand, if the case head doesn't go in, start looking for burs and nicks in the rim. GHP, I have used a ruler in so many different ways, including the way you do. I'll also stand it on edge on the lower flat and run it in toward the head of the case. If it catches, then its good. If it slides right over, then it may still be good (right on the limit), but then I would slide it over and inspect to see if I can see light through the gap. Being new to reloading, my paranoia is high and I want to verify everything several ways. As I get more experience, I'll begin to trust my visual checks better (repetition of seeing correct vs. incorrect). This stuff is very basic, I know, but sound basics will keep me and people around me safe. You lost me a little bit on the second test, but once I play around with it, I'll probably understand what you are saying. Thanks for the info. |
|
|
|
[#12]
Quoted:
GHP, I have used a ruler in so many different ways, including the way you do. I'll also stand it on edge on the lower flat and run it in toward the head of the case. If it catches, then its good. If it slides right over, then it may still be good (right on the limit), but then I would slide it over and inspect to see if I can see light through the gap. Being new to reloading, my paranoia is high and I want to verify everything several ways. As I get more experience, I'll begin to trust my visual checks better (repetition of seeing correct vs. incorrect). This stuff is very basic, I know, but sound basics will keep me and people around me safe. You lost me a little bit on the second test, but once I play around with it, I'll probably understand what you are saying. Thanks for the info. Quoted:
Quoted:
I use plenty of light, and often an engineer's rule to double-check my findings with the Wilson/Dillon type gauge. For me, the light is critical (as are my @^#$ reading glasses...). Don't use too much magnification, or you'll confuse yourself with what you're looking at. I use the engineer's rule like this: Once the case is in the gauge, I place the rule flat on the highest portion of the gauge and slide it across the gauge toward the low side. It should slide on or drop to the case head, and once at the edge of the case head it should drop to the low part of the gauge cut. With modest pressure, you can feel the drops pretty easily. There's a second test to do if the case head sticks up out of the gauge. Take the case out, turn it around and try to insert the head into the opening. If the case head enters the gauge easily, it confirms that the case failed because of insufficient sizing. On the other hand, if the case head doesn't go in, start looking for burs and nicks in the rim. GHP, I have used a ruler in so many different ways, including the way you do. I'll also stand it on edge on the lower flat and run it in toward the head of the case. If it catches, then its good. If it slides right over, then it may still be good (right on the limit), but then I would slide it over and inspect to see if I can see light through the gap. Being new to reloading, my paranoia is high and I want to verify everything several ways. As I get more experience, I'll begin to trust my visual checks better (repetition of seeing correct vs. incorrect). This stuff is very basic, I know, but sound basics will keep me and people around me safe. You lost me a little bit on the second test, but once I play around with it, I'll probably understand what you are saying. Thanks for the info. The second test is for if the case doesn't go all the way into the gauge. It might be that the case doesn't have the shoulder pushed back enough, but it might be that the rim doesn't quite go all the way in. The way you tell is by seeing if the rim goes into the gauge...if it does, the shoulder isn't pushed back enough, but if you try to just put in the rim and it doesn't go, it's probably the rim that's at fault, and you should look at it for dings and burs. I hope that helps. |
|
|
|
[#13]
Quoted:
If both your gauge and your engineer's rule are square (the gauge really should be) then you won't see any light between the rule and the gauge unless the case head sticks out - and you'll feel that with the ruler. The second test is for if the case doesn't go all the way into the gauge. It might be that the case doesn't have the shoulder pushed back enough, but it might be that the rim doesn't quite go all the way in. The way you tell is by seeing if the rim goes into the gauge...if it does, the shoulder isn't pushed back enough, but if you try to just put in the rim and it doesn't go, it's probably the rim that's at fault, and you should look at it for dings and burs. I hope that helps. Quoted:
Quoted:
Quoted:
I use plenty of light, and often an engineer's rule to double-check my findings with the Wilson/Dillon type gauge. For me, the light is critical (as are my @^#$ reading glasses...). Don't use too much magnification, or you'll confuse yourself with what you're looking at. I use the engineer's rule like this: Once the case is in the gauge, I place the rule flat on the highest portion of the gauge and slide it across the gauge toward the low side. It should slide on or drop to the case head, and once at the edge of the case head it should drop to the low part of the gauge cut. With modest pressure, you can feel the drops pretty easily. There's a second test to do if the case head sticks up out of the gauge. Take the case out, turn it around and try to insert the head into the opening. If the case head enters the gauge easily, it confirms that the case failed because of insufficient sizing. On the other hand, if the case head doesn't go in, start looking for burs and nicks in the rim. GHP, I have used a ruler in so many different ways, including the way you do. I'll also stand it on edge on the lower flat and run it in toward the head of the case. If it catches, then its good. If it slides right over, then it may still be good (right on the limit), but then I would slide it over and inspect to see if I can see light through the gap. Being new to reloading, my paranoia is high and I want to verify everything several ways. As I get more experience, I'll begin to trust my visual checks better (repetition of seeing correct vs. incorrect). This stuff is very basic, I know, but sound basics will keep me and people around me safe. You lost me a little bit on the second test, but once I play around with it, I'll probably understand what you are saying. Thanks for the info. The second test is for if the case doesn't go all the way into the gauge. It might be that the case doesn't have the shoulder pushed back enough, but it might be that the rim doesn't quite go all the way in. The way you tell is by seeing if the rim goes into the gauge...if it does, the shoulder isn't pushed back enough, but if you try to just put in the rim and it doesn't go, it's probably the rim that's at fault, and you should look at it for dings and burs. I hope that helps. Yes sir. That makes total sense to me now. |
|
|
|
[#14]
More than one way to read a gauge.
Nice series of posts GHPorter.
|
|
|
 Win a FREE Membership!
Sign up for the ARFCOM weekly newsletter and be entered to win a free ARFCOM membership. One new winner* is announced every week!
You will receive an email every Friday morning featuring the latest chatter from the hottest topics, breaking news surrounding legislation, as well as exclusive deals only available to ARFCOM email subscribers.

AR15.COM is the world's largest firearm community and is a gathering place for firearm enthusiasts of all types.
From hunters and military members, to competition shooters and general firearm enthusiasts, we welcome anyone who values and respects the way of the firearm.

Subscribe to our monthly Newsletter to receive firearm news, product discounts from your favorite Industry Partners, and more.
Copyright © 1996-2024 AR15.COM LLC. All Rights Reserved.
Any use of this content without express written consent is prohibited.
AR15.Com reserves the right to overwrite or replace any affiliate, commercial, or monetizable links, posted by users, with our own.