|
Posted: 4/13/2018 3:07:01 PM EDT
No strong reason for me to do this other than it is inexpensive & does make running the dump process a little easier (no heavy cable remote to drag around).
Tractor Supply (TSC) carries a Traveller brand wireless remote for use with Traveller brand winches with an 8000lb + capacity (i.e. those with a contactor already mounted) with a claimed 100' range & selling for about $26. The local store had some, so I picked one up. The remote comes with a 4 pin female plug (i.e power +, power -, in & out). The remote handset is nice & large, has a rubber jacket & runs on a standard 9v battery. The remote has 3 buttons: "ON", "IN" & "OUT". A pilot light comes on when you first press "ON", a second press turns it off. The "IN" & "OUT" buttons only work if the "ON" light is lit. It also has an auto-off function after a period of inactivity (15 minutes?). The wired dump remote also has 4 wires, but these are power +, up, down & motor run. These signals go to solenoid valves that determine which way the hydraulic ram moves and to the hydraulic pump solenoid to switch it on. To make the winch remote work with the dump I needed to add a motor run output. I did this by making an "OR" switch using a couple of diodes from a batch I bought a while back for use with solar panels. Diodes let you run a line from each of the function select wires to the motor run stud so that the motor runs whenever a solenoid valve is energized, but don't get a back feed that would energize the OTHER solenoid valve as the diode on that line prevents the back feed. This is what the stock contactor wiring for the the hydraulic motor looks like, using feeds from the wired remote: 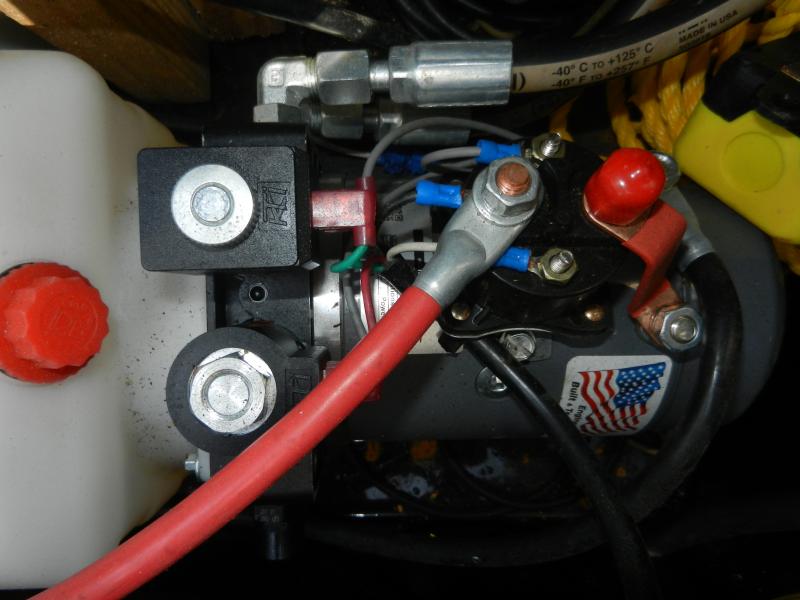
The wire from the remote runs under the red battery cable. The cable has black, white, brown & green wires. Brown & green go to solenoid valves (up/down), the black wire goes to the same stud as the red battery cable, the white wire goes to the motor run stud on the contactor. All the gray wires are grounds & are common to the stud where the black battery cable terminates. This is what I prepared to adapt the wireless remote wiring to the trailer hydraulics, everything is together except for the final connection to wireless remote & in-line crimp connectors are ready for that: 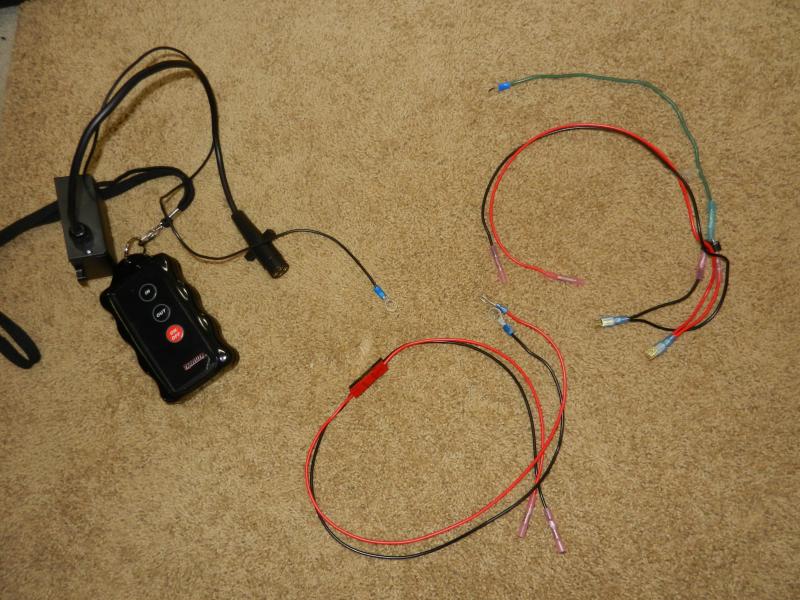
The unaltered wireless remote kit is the black items at the left. I have a black/red pair with a set of Anderson powerpole connectors in the middle. This is for the +/- wires on the wireless remote. I could have put a switch in line, but using powerpoles was an easy way to know for sure the wireless remote is disabled when not in use. 
The black/red/green set is for the in/out wires on the wireless remote (red/black for the existing wires, green for the OR'd feed to the motor run stud. Since I want to leave the wired remote functional, I needed to share the connectors on the solenoids. I accomplished this with a couple of spade connector "add-a-circuit" adapters. They consist of a female spade connector built with two male spade terminals. This allows both wired remote & wireless remote female spade connectors both a space. I pre-attached these to the harness to keep track of them. 
This is a close-up of the "OR" circuit being fed by a wire from each solenoid connector & connected to the green wire that will attach to the motor run stud. 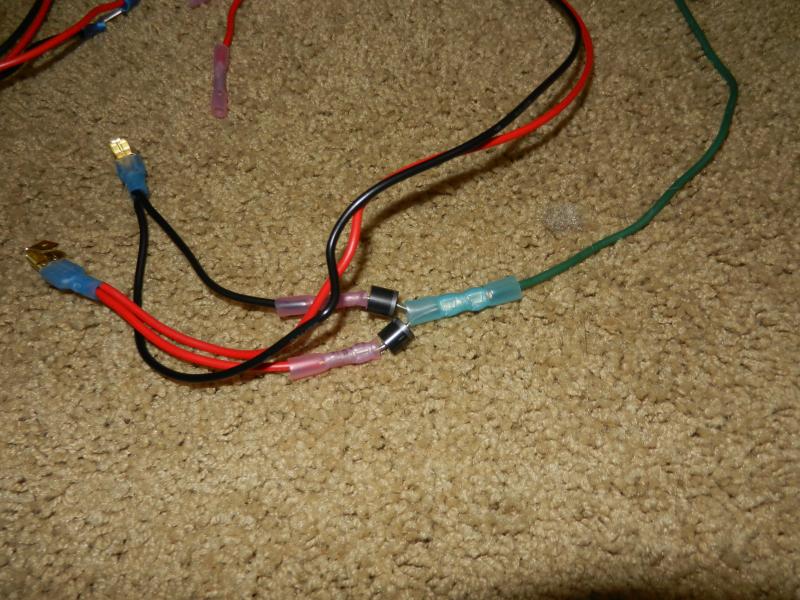 Here we have the harness mounted on the hydraulic motor. You can see the green wire from the "OR" circuit attached to the motor run stud. The red harness set is attached to the solenoid controlled by the green wire from the wired remote. The black harness set is attached to the solenoid controlled by the brown wire from the wired harness. You can see how both wired & wireless feeds share a connection to the solenoids. 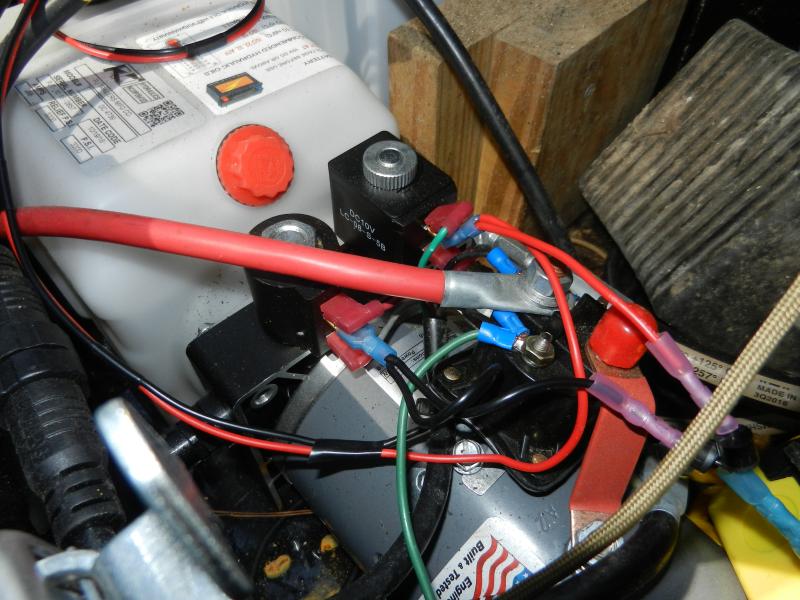
Here I have cut off the plug from the wireless remote receiver & separated out the four wires (red/black/brown/green). 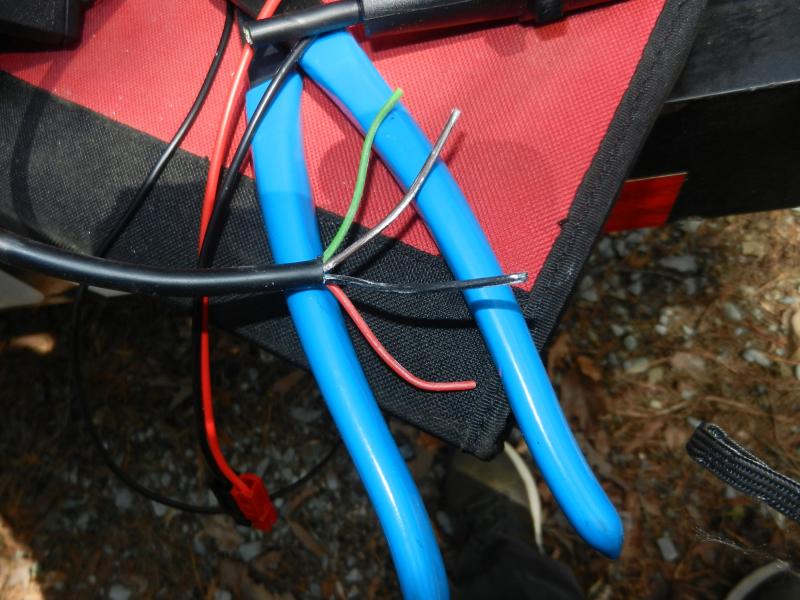
These were crimped onto the prepared harness wires. 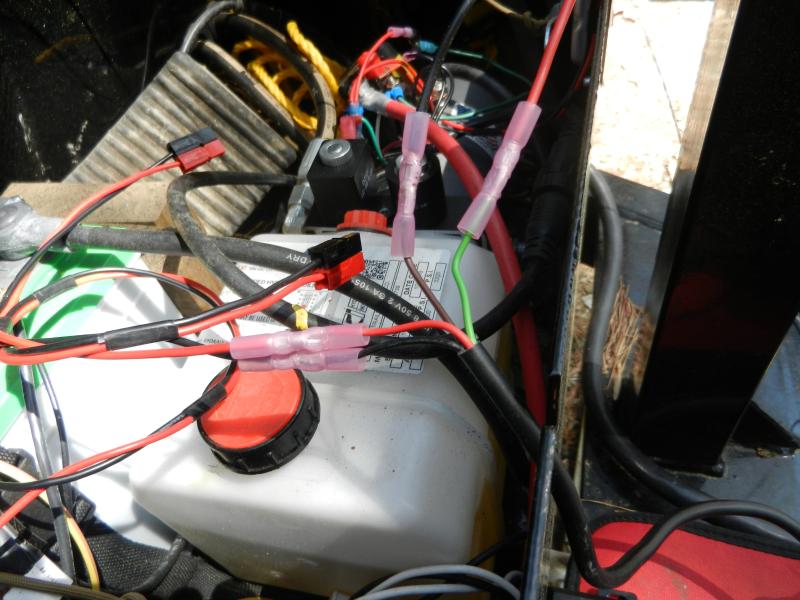
You can see the "not connected" powerpoles that will power the wireless receiver. At this point, I connected the power & tested function - Sucess! - I was lucky & did not even need to swap solenoid connections - the top button "IN" raised the bed, the bottom button "OUT" lowered it. I'll put some P-Touch labels on the controller to cover the IN/OUT with UP/DOWN The receiver was then attached to the front of the box. 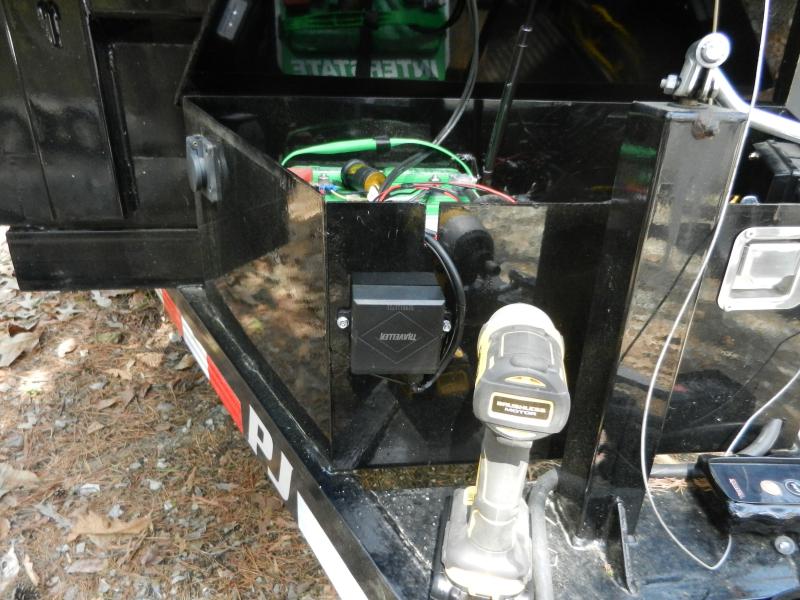
FWIW, PJ offers a wireless remote add-on, but they want $173 for it ... |
|
|
|
[#1]
I have a wireless on my dump and it's the best thing ever.
Must have IMHO. |
|
|
|
[#2]
Now you just need remote tailgate.
|
|
|
|
[#3]
I really like the wireless up/down upgrade. I added one to my winch on my trailer and i am not super happy with it. winch rolls for a few seconds after I let go of the remote.
BTW get some split loom on all that and clean it up it will help protect wires from chafing bouncing down the road |
|
|
|
[#4]
Yeah, I need some small loom - all I have on hand is the larger stuff for AV cables. Until then, I may immobilize with zip ties. In addition to the wireless remote, there is also wiring in the box for a solar panel feed & controller, plus a small on demand voltage readout.
Should have included this earlier, the box the remote came in for better product ID : 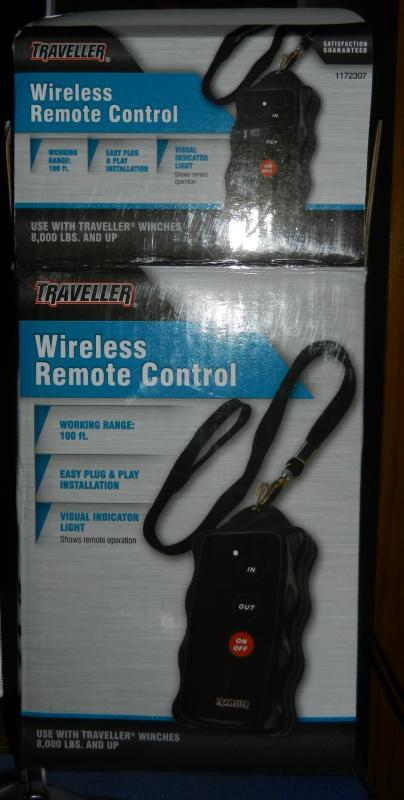
|
|
|
 Win a FREE Membership!
Sign up for the ARFCOM weekly newsletter and be entered to win a free ARFCOM membership. One new winner* is announced every week!
You will receive an email every Friday morning featuring the latest chatter from the hottest topics, breaking news surrounding legislation, as well as exclusive deals only available to ARFCOM email subscribers.

AR15.COM is the world's largest firearm community and is a gathering place for firearm enthusiasts of all types.
From hunters and military members, to competition shooters and general firearm enthusiasts, we welcome anyone who values and respects the way of the firearm.

Subscribe to our monthly Newsletter to receive firearm news, product discounts from your favorite Industry Partners, and more.
Copyright © 1996-2024 AR15.COM LLC. All Rights Reserved.
Any use of this content without express written consent is prohibited.
AR15.Com reserves the right to overwrite or replace any affiliate, commercial, or monetizable links, posted by users, with our own.


