|
Posted: 12/6/2004 2:28:58 PM EDT
[Last Edit: Fox]
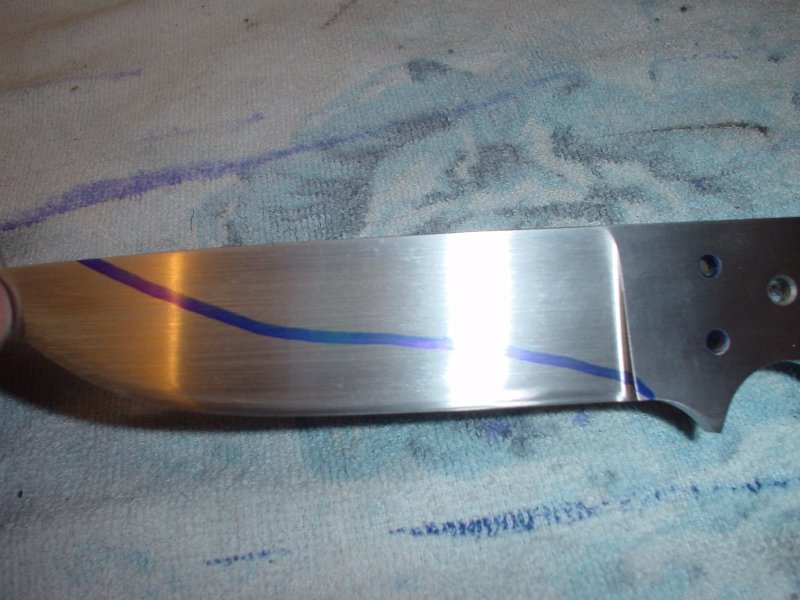
In my opinion, there is nothing more important to a good quality knife than the heat treating process. If the maker has not mastered the process for the steel being used, even good grinding or forging cannot make a good blade. I use a digitally controlled electrical furnace for fully hardened blades, whether oil quenched, stainless or alloy. My knives are fully hardened from the tip to the butt unless a customer requests edge hardening only. I am not one who believes in the flexible blade and the edge quench. However, I do offer it when requested. For edge hardened blades I do a full quench, but I only heat the edge of the blade to critical. The spine, ricasso and handle of the knife are left dead soft. For this tutorial and this customer the blade is edge hardened. I always recommend a fully hardened blade because of the high quality of heat treatment available via precise temperature control and industrial quenchants. However, the customer is the boss. We will be using a #2 torch tip with an oxy/acetylene mix. I have drawn a line along the bevel to show the approximate area we will be heating.
A soft flame will be used to "paint" the area on both sides until critical temperature is reached, at which point the blade will be quenched in Brownell’s Tough Quench, a product made by Houghton Oil. It takes patience to heat the blade correctly and not overheat the area around the tip, which can cause grain growth and possibly ruin the steel. I will be using a magnet to constantly check the steel for its critical temperature. Carbon steels have a very unique property. When they are heated to their critical temperature and are "in solution", they lose their magnetic attraction. Before hardening, the blade must be normalized. The furnace is used for this process since it allows me to follow the industrial guidelines for a particular steel. Normalizing refines the grain size in the steel and removes all stresses. I typically normalize three times, each cycle at a reduced temperature to give the steel a fine, even grain. In brief, the steel is heated to a specific temperature, held for a prescribed period of time and then allowed to cool to room temperature in still air. After normalizing, the blade looks something like the picture below. Sometimes it will have some scale build-up and be a much darker grey. 
The quench oil needs to be heated before it can be used or it will not cool the blade quickly enough to achieve proper hardness. Tough Quench offers different quenching speeds depending upon the heat of the oil. For O1, the oil is heated until it reaches 125 F. I have a couple of small pieces of mild steel that I heat to a red color then place them in my fairly small tank, which you will notice is a drywall mud pan. For large blades I use a steel, 5-gallon bucket and heat the oil with an electrical barbecue starter. With either method you must keep an eye on the temperature and remove the heat source quickly when you reach your target. Note that alloy steels like O1 and 5160 should actually be “soaked” at a prescribed temperature for a specified period of time before quenching. With the edge hardening method, this is very difficult. I now light the torch and start reheating the knife by “painting” the spine, flats and ricasso, taking special care with the tip. When I start to see a little color in the spine and ricasso I start painting the edge itself. I take my time and go back and forth from one side to the other and along the edge with the knife held edge up. I check the magnetism frequently. When the steel becomes non-magnetic I continue to make passes with the flame keeping it above critical. This is my “soak” and I try to keep it in the critical range for 1 – 2 minutes then move it to the tank and quench. This part can be very exciting when you get an oil fire! 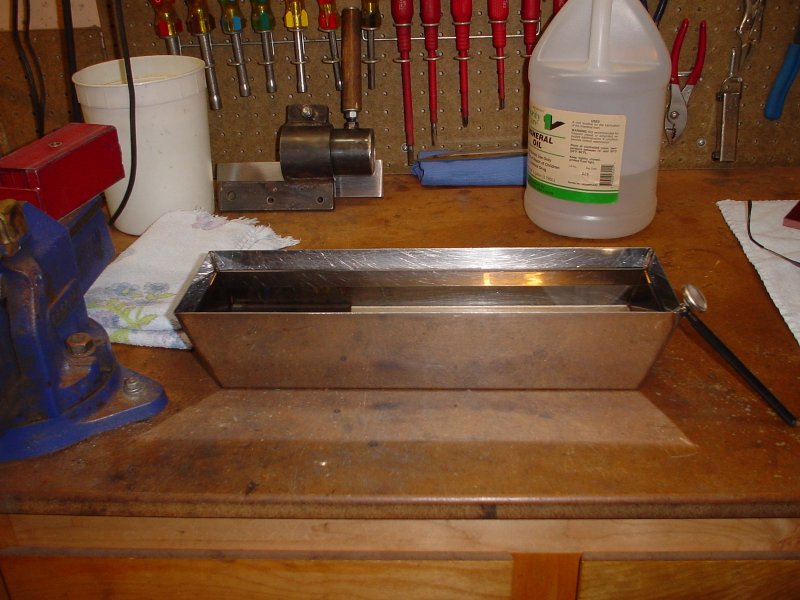


In this example I cleaned up the knife a little before tempering to show the hardening line and to observe the steel color during the tempering cycles. The knife is very hard at this point and the edge very brittle. I used a very slow grinder speed and a 320-grit belt for the quick cleanup, making sure the steel does not heat up. 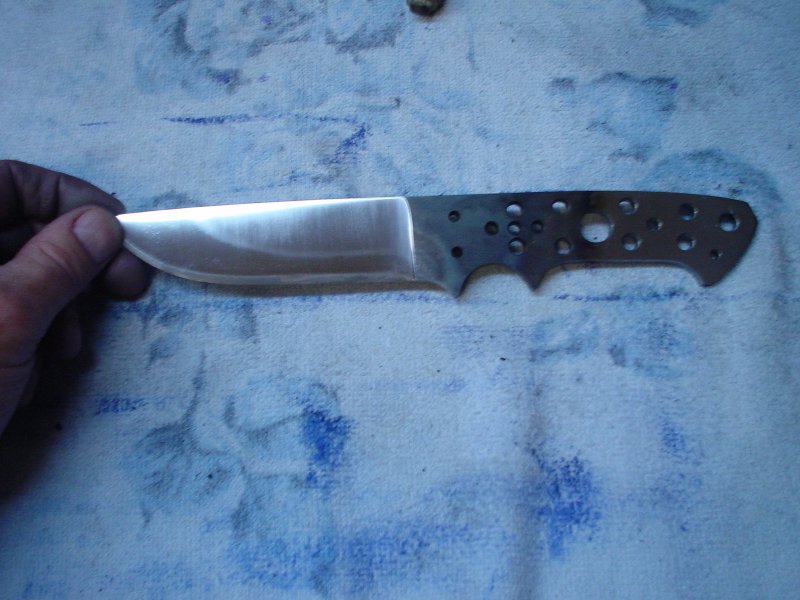
I temper three times, cooling for 30 minutes between cycles. Tempering is also called “drawing” and removes brittleness, also lowering the hardness. The first cycle is for two hours at 400 F. The second and third are one hour at the same temperature. This will yield a hardness of approximately Rc 60. I use the kitchen oven and a high quality industrial thermometer. I turn on the oven before beginning the quench cycle and by the time I am ready to temper the oven temperature has stabilized. IMPORTANT NOTE: Failure to obtain permission from the spousal unit before tempering in the kitchen oven can have dramatic effects on your general health and well being! Now it is time for testing. I clean up the blade on the leather platen then take 400-grit belt to put on a good convex edge and polish with an 800-grit belt. I lightly buff the edge with some white buffing compound then strop it on leather loaded with the same compound until it is hair shaving sharp. I like to vary my tests and am often guided by what I have around. Sometimes I will cut manila or sisal rope if available. I usually have a lot of cardboard to cut up, which is a great test. I sometimes will chop a few boards or limbs, especially for larger knives like fighters or Bowies. Most of the time I do the brass-rod, edge-flex test. I have found that for my knives this test is a good indicator of the blade quality, which is a combination of heat treatment and edge geometry. Ed Caffrey gives an excellent description of the process here: http://www.caffreyknives.net/testingart.htm. I have included a photograph of my test using a copper rod since I ran out of brass. If you look carefully you can see a slight deflection in the edge. 
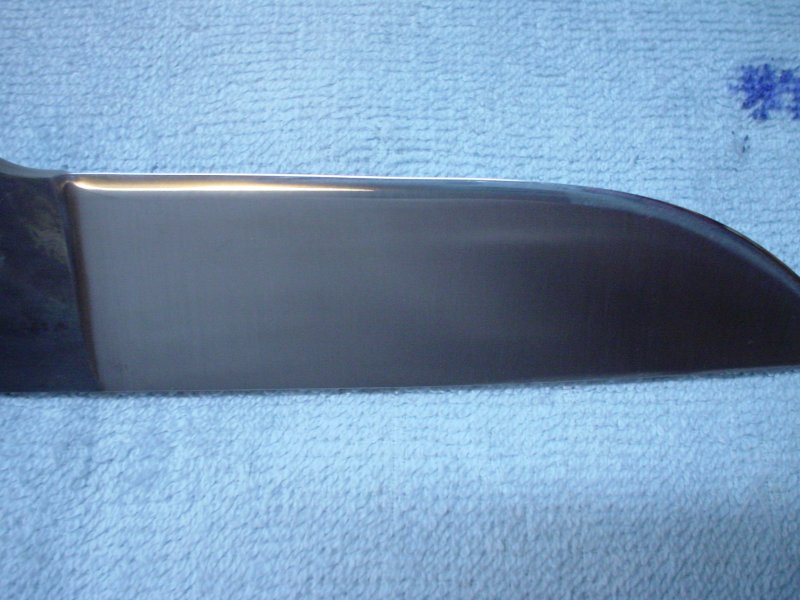
If the edge does not pass it must either be tempered at a slightly higher temperature or rehardened and the whole thermal process repeated with the tempering cycle set to a lower temperature. I also do periodic destruction testing for two reasons: to see how much abuse a knife can take and to look at the grain of the steel. For this test I cut some newsprint, chopped some wood and then shaved the hair. The final picture shows a close-up of the blade edge after testing. There are no chips, deflections, flat spots, etc. 

The blade passed and is ready for a hand finish. The first thing I do is gently stone or grind off the edge of the blade with a very fine belt, just enough to dull it. I never do finish or assembly with a sharp knife. Next, I hollow grind the handle. This lightens the knife considerably and leaves a nice cavity for the adhesive when I bond the handles. It also makes it much easier to do the final flat sanding due to the smaller surface area. I use the small-wheel attachment with a 1.25” wheel and a slightly worn 50-grit belt. 
I will use the Bader and a new 400-grit belt and the leather-covered platen to do the final cleaning of the bevels, then switch to hand sanding. With all of the preparation done before heat treatment and the belt cleanup, I usually only have to use one or two grits to finish a knife. I finish my knives to 400-grit, with a few additional passes using 600-grit paper to make the lines look clean and smooth. When done with the Bader I put the knife in the knife vice for hand finishing. The knife vice is by Rick Leeson, owner of Custer Forge and Welding. He also built my forge. http://www.blacksmithrick.com/index.html. 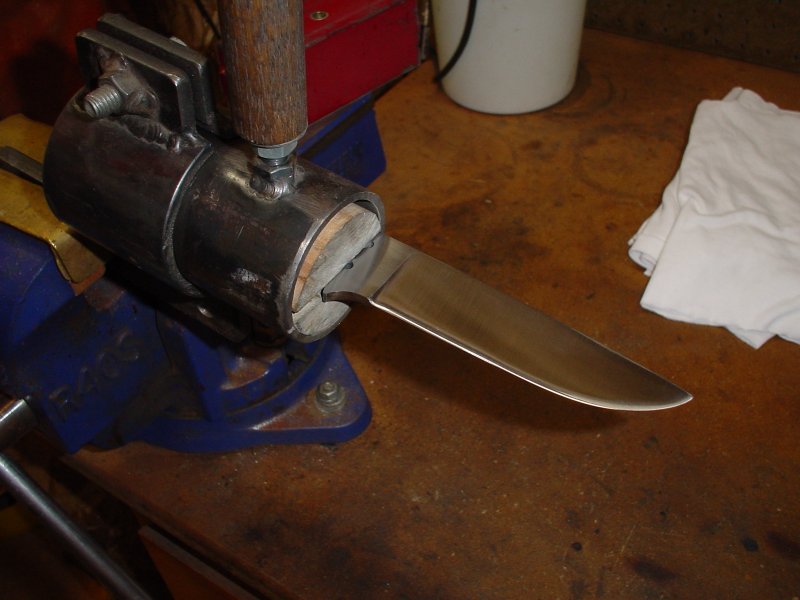
All of my finishes are longitudinal, from ricasso to tip. For the final finish I use oil or Windex. Don't laugh, Windex really works as a cutting fluid! Engnath has a great description on his site. Select the "Handsanding" choice for a detailed lesson on hand finishing. There are some great diagrams that show the process. I pay particular attention to the plunge area and the area of the ricasso that will be visible between the handle and the plunge, once the handle is in place. The blade is almost ready. Notice that there are still a few scratches in the blade. I will sand these out, make sure the handle is flat, and when all of the scratches are out and the blade looks right, I wipe it with WD-40, dry it off and wrap it with masking tape from ricasso to tip to protect the finish during handle assembly. Unfortunately, I have found that in my damp NW environment I would occasionally get rust on the blade between finishing and handle installation if I get delayed for any reason. The WD-40 seems to work well for preventing the rust in the short-temp without having undue effect on the epoxy. 
|
|
|
|
|
[#1]
BTT
|
|
|
|
NY, USA
|
[#2]
Cool read.
|
|
|
 Win a FREE Membership!
Sign up for the ARFCOM weekly newsletter and be entered to win a free ARFCOM membership. One new winner* is announced every week!
You will receive an email every Friday morning featuring the latest chatter from the hottest topics, breaking news surrounding legislation, as well as exclusive deals only available to ARFCOM email subscribers.

AR15.COM is the world's largest firearm community and is a gathering place for firearm enthusiasts of all types.
From hunters and military members, to competition shooters and general firearm enthusiasts, we welcome anyone who values and respects the way of the firearm.

Subscribe to our monthly Newsletter to receive firearm news, product discounts from your favorite Industry Partners, and more.
Copyright © 1996-2024 AR15.COM LLC. All Rights Reserved.
Any use of this content without express written consent is prohibited.
AR15.Com reserves the right to overwrite or replace any affiliate, commercial, or monetizable links, posted by users, with our own.


