|
Posted: 7/11/2018 5:21:26 PM EDT
Here is a quick DIY I threw together on how to make a mount for either a Surefire Scout or Steamlight Pro Tac light to be mounted to your team Wendy helmet in conjunction with QD Peltor adapters. This will also work with a Princeton Tec Switch/Point by simply adding velcro to where the Scout would typically be mounted. Hopefully this DIY will make sense and some people get some use out of it. You can make a handful of these mounts for about $12
Materials: The template I provided 16ga Steel, I picked up a 18x6 plate at Lowes for $7 (its where their angle iron is) 2x 1/4x20 by 3/8" bolts 2x 8-32 x 3/16" button cap bolts 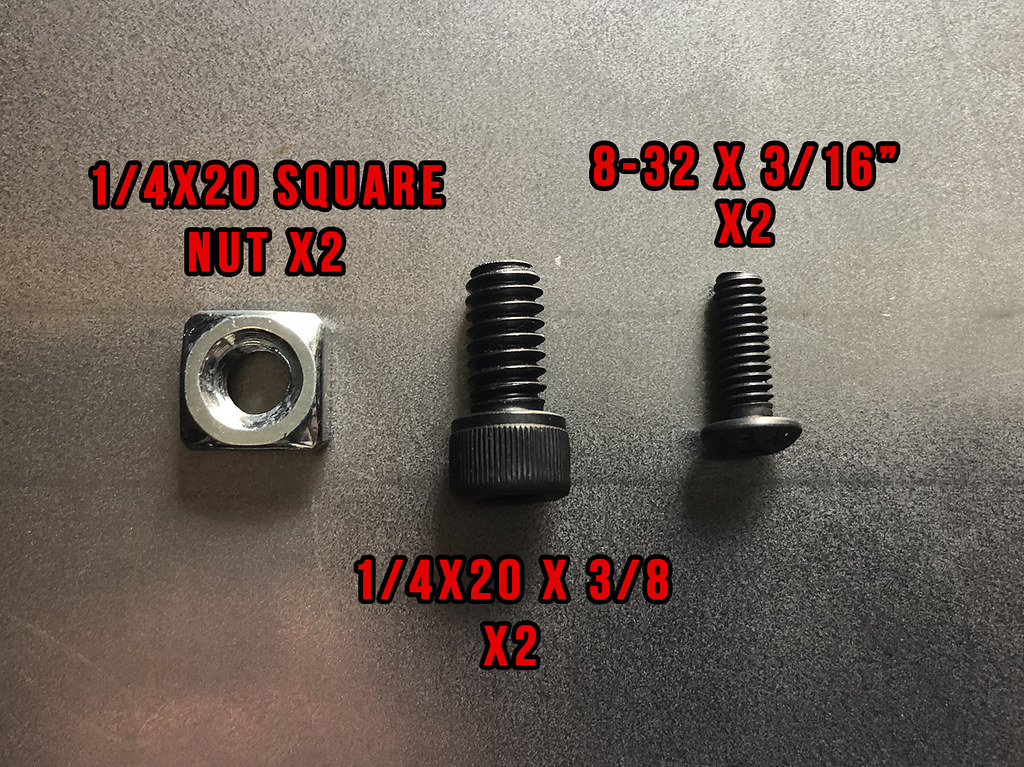
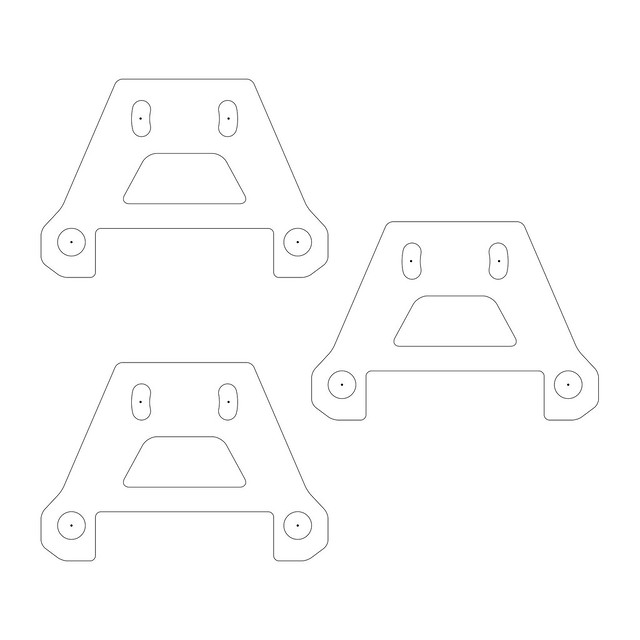
Tools: Auto Punch 1/4" Drill Bit 3/16" Drill Bit Dremel with metal cutting disks, sanding drums and some small grinding bits Sand paper Paint, cerakote, plasticip or whatever you want to coat it with. Start buy cutting around the outside of the template and gluing it down to a corner of your steel plate. Then center punch each of the tiny black dots (four in total) Then go ahead and drill out each hole. After that you can cut out your plate. 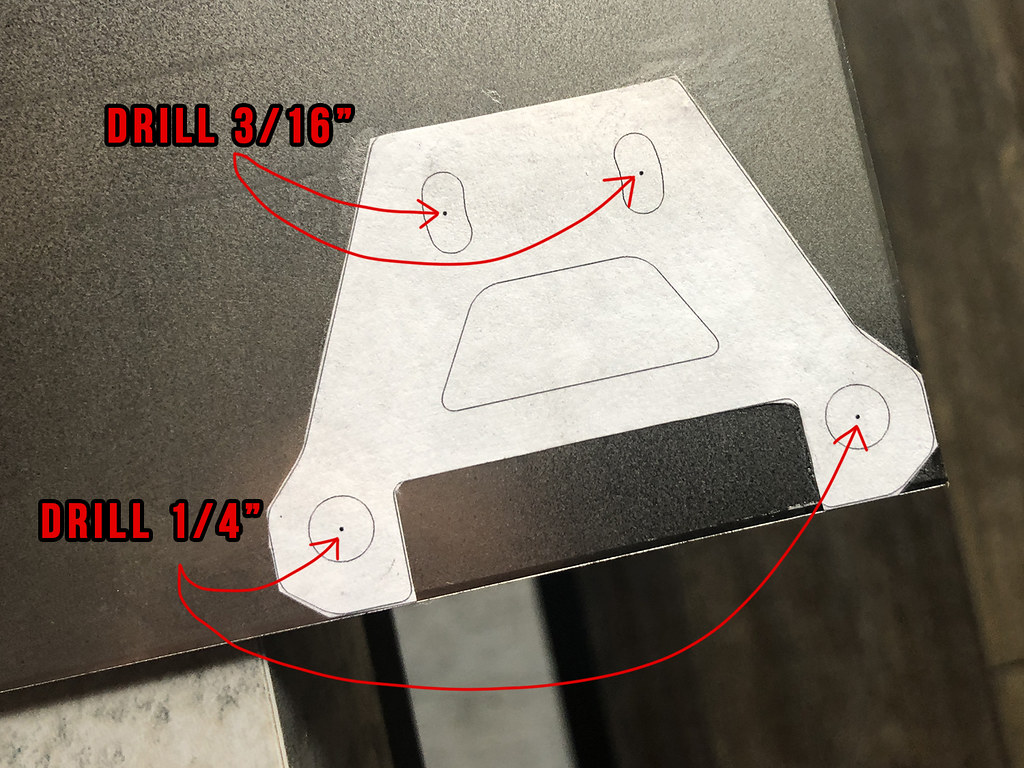
After you get it cut out, you want to make sure all your holes line up. If they don't, use a small grinding or cutting bit to open your holes in the direction they need to be moved. You can also oval out the front Scout hole in a vertical direction to allow angular adjustments of your light. 
When you are all done and you've checked alignment you can clean up all the edges using a sanding drum on a Dremel. Then go ahead and sand both faces of your plate to prep for paint. Clean it well then coat it however you wish. After you are satisfied with your coating you can mount your light to the plate. 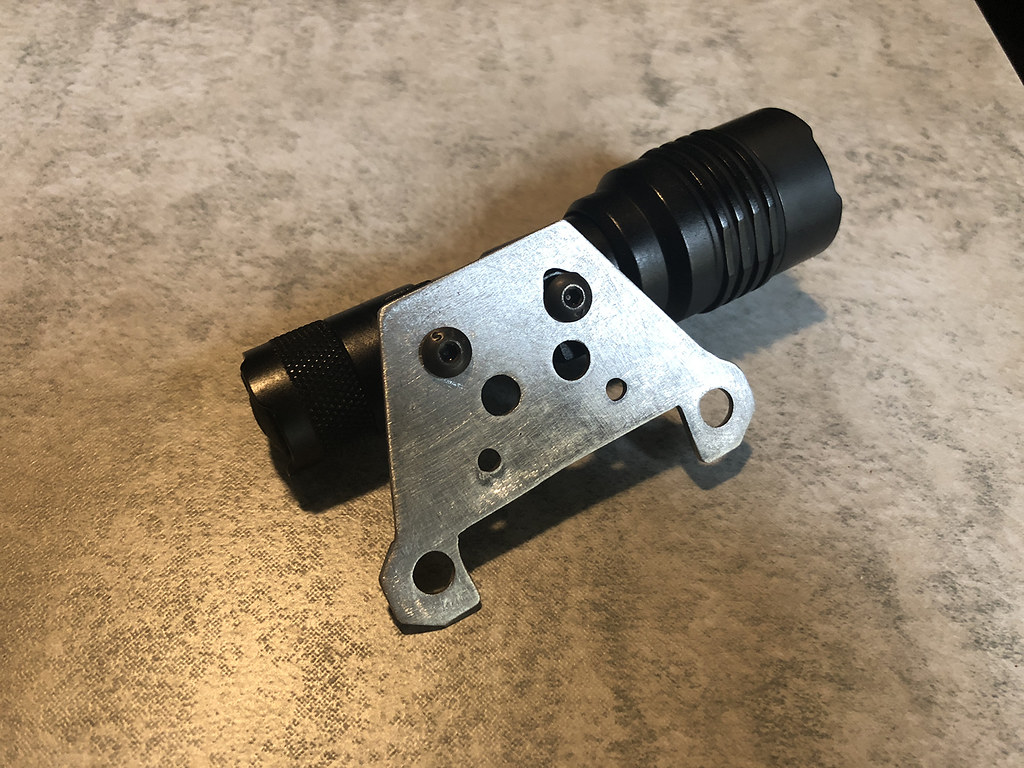
Then drop the square nuts in the rail system and mount the plate to the helmet. 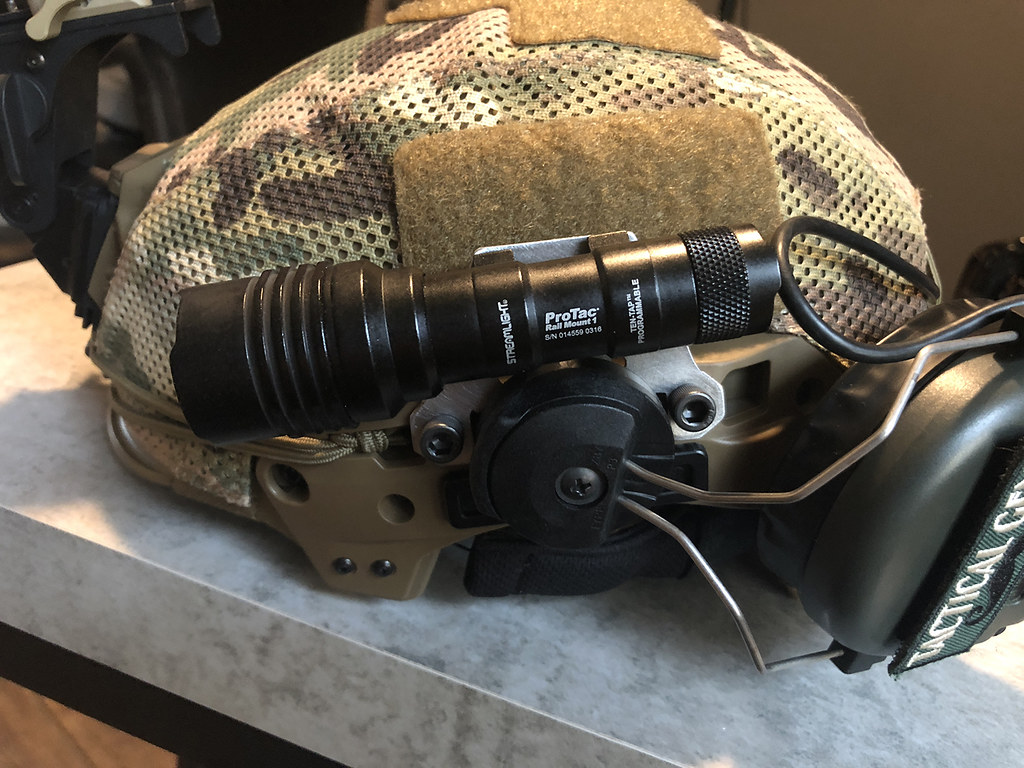

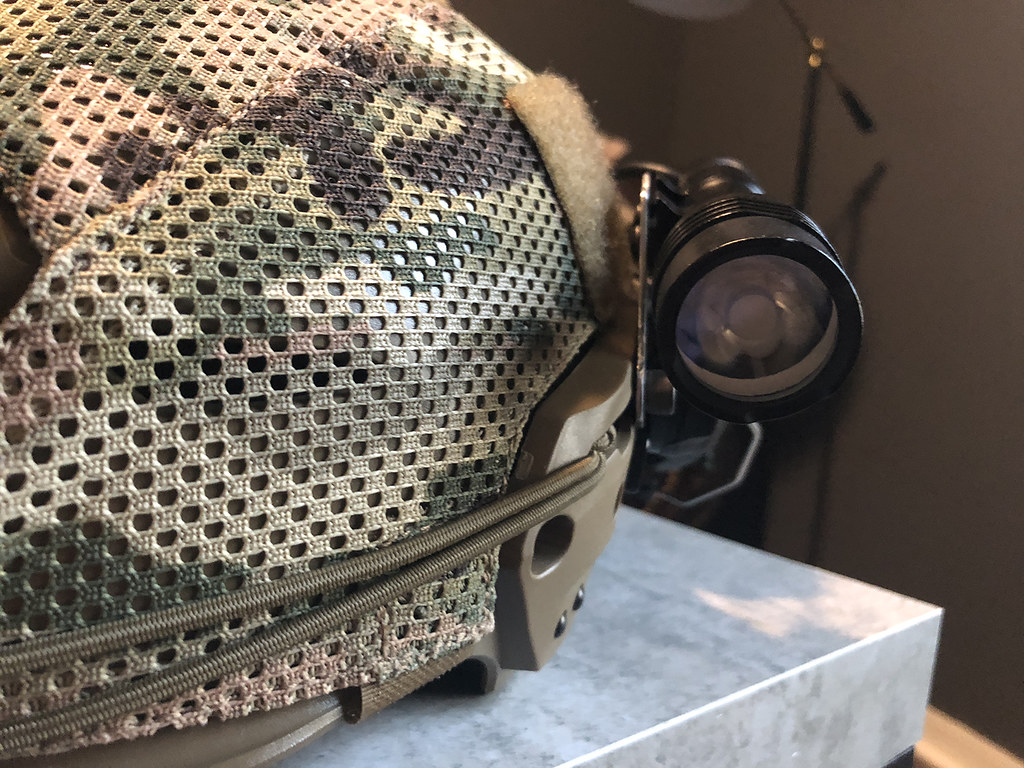
If you have a vice, I would recommend putting a slight bend in your plate to get the light even closer to your helmet. |
|
|
|
[#1]
Very nice write up! And very cool you included a template.
I had to do mine from scratch and shape it as I went. I also don’t have the QD adapters so I had to piggy back it on the existing thumb screws. |
|
|
|
[#2]
Quoted:
Very nice write up! And very cool you included a template. I had to do mine from scratch and shape it as I went. I also don’t have the QD adapters so I had to piggy back it on the existing thumb screws. https://www.AR15.Com/media/mediaFiles/207473/28B263B8-8E24-4AC8-B694-587E6F46E452-604617.JPG https://www.AR15.Com/media/mediaFiles/207473/984CB234-5D97-455F-BED6-30392EA19A8D-604618.JPG |
|
|
|
[#3]
Nice!
|
|
|
|
[#4]
Nice gunna have to give this a go
|
|
|
|
[#5]
Thanks for the tutorial!
|
|
|
|
[#6]
thanks for the inspiration
Price=zero since I had everything laying around 


|
|
|
|
[#7]
I saw your PM asking about my DIY TW mount on page 66 of the helmet rig thread (Here) Glad you got it figured out, looks great. Send me some Edit: If you put a bend in it, it will suck tighter into the helmet. I need to update those pics with the PVS15 |
|
|
|
[#8]
Quoted:
I saw your PM asking about my DIY TW mount on page 66 of the helmet rig thread (Here) Glad you got it figured out, looks great. Send me some Edit: If you put a bend in it, it will suck tighter into the helmet. I need to update those pics with the PVS15 I can't bend the 16 gauge steel I used, I need a vise to hold it while I smack with a hammer. I just moved so I haven't gotten a new workbench figured out yet. |
|
|
|
[#9]
fivefivesixphoto, thank you for the idea, materials list and template. I put them to good use and made a set of mounts for my self. I did modify them a bit by using 1/4-20 round head screws and I mounted short pieces of polymer picatinny rail. The rails were for MLock handguards so I filed off the bosses on the back side and used regular #8 machine screw nuts to retain them. I made them pretty quickly, so not the cleanest work, but they are functional and will look fine once I paint them.
Here is a link to the album of the under construction and a couple almost finished product photos: https://imgur.com/a/FxugaGp 


|
|
|
|
[#10]
Quoted:
fivefivesixphoto, thank you for the idea, materials list and template. I put them to good use and made a set of mounts for my self. I did modify them a bit by using 1/4-20 round head screws and I mounted short pieces of polymer picatinny rail. The rails were for MLock handguards so I filed off the bosses on the back side and used regular #8 machine screw nuts to retain them. I made them pretty quickly, so not the cleanest work, but they are functional and will look fine once I paint them. Here is a link to the album of the under construction and a couple almost finished product photos: https://imgur.com/a/FxugaGp |
|
|
|
[#11]
Thats awesome, I need to get to work on making mine. It makes you wonder though why TW hasn't though of something like this to sell. From all the feedback on here you know it would be an accessory that would move off the shelf.
|
|
|
|
[#12]
Quoted: Hell yeah dude!! Looks great. I’m glad the templates worked! 

|
|
|
 Win a FREE Membership!
Sign up for the ARFCOM weekly newsletter and be entered to win a free ARFCOM membership. One new winner* is announced every week!
You will receive an email every Friday morning featuring the latest chatter from the hottest topics, breaking news surrounding legislation, as well as exclusive deals only available to ARFCOM email subscribers.

AR15.COM is the world's largest firearm community and is a gathering place for firearm enthusiasts of all types.
From hunters and military members, to competition shooters and general firearm enthusiasts, we welcome anyone who values and respects the way of the firearm.

Subscribe to our monthly Newsletter to receive firearm news, product discounts from your favorite Industry Partners, and more.
Copyright © 1996-2024 AR15.COM LLC. All Rights Reserved.
Any use of this content without express written consent is prohibited.
AR15.Com reserves the right to overwrite or replace any affiliate, commercial, or monetizable links, posted by users, with our own.


