PA, USA
|
[Last Edit: Gurn]
[#1]
Well, got my pvs-2 lens today, and if you don't have one,...get one.
Bought mine online (not ebay) for $85. Good gravy, this thing is big! I expected a tiny little ocular like on the PVS-14...nope. 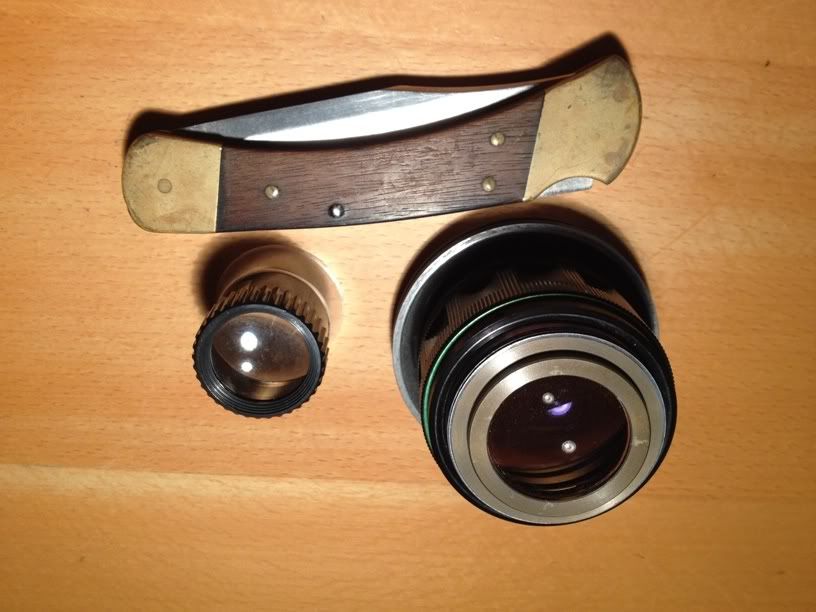
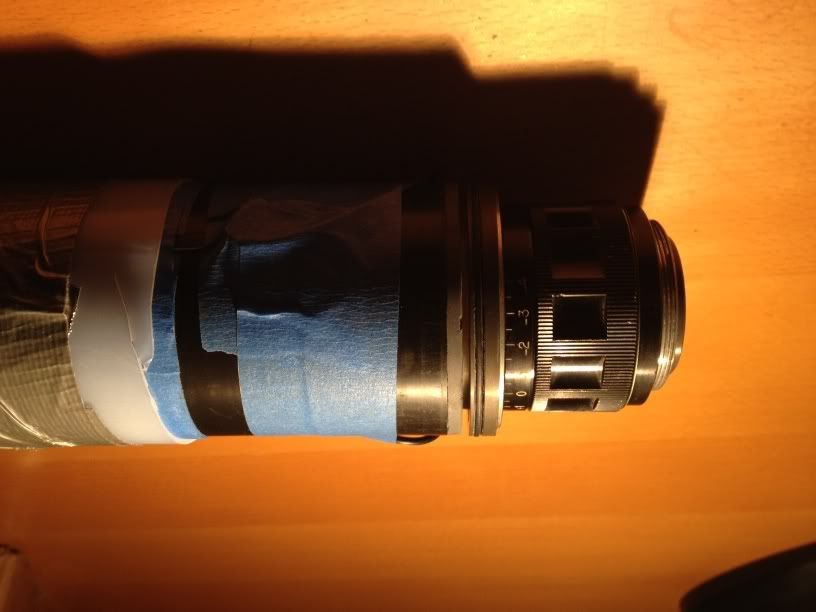
That's it, compared to the loupe I was using, and an old Buck knife for scale. Even has the "green ring" so I guess I'm protected from radiation Secondly, it (as mentioned before) fits right into the tube with a press fit (and a retaining ring is included but will need a threaded housing) Here's a few pics of that...sorry 'bout them being upside down 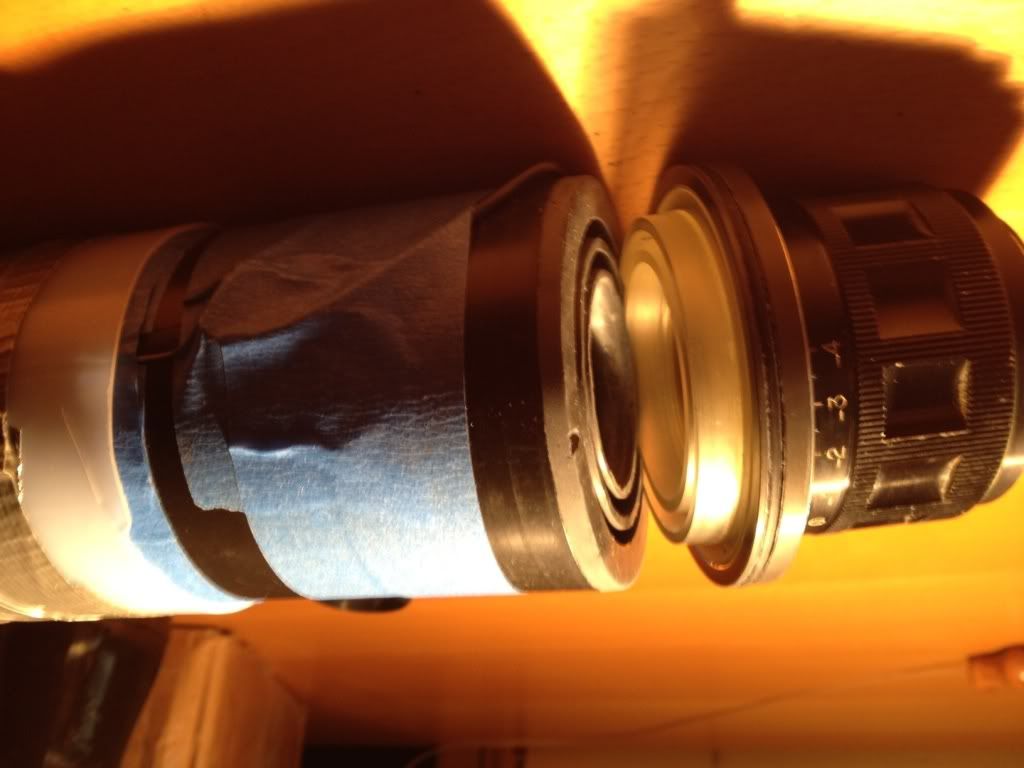
The picture is awesome, much better than the loupe and a bit more FOV albeit still more magnified than the PVS-14 Here's a pic with the loupe ocular 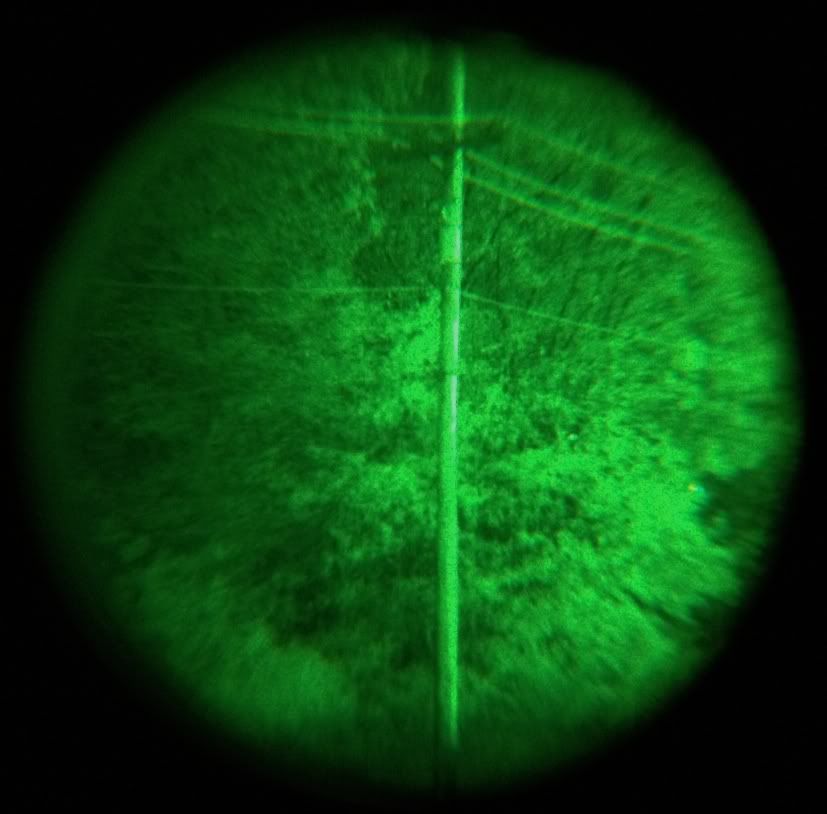
And with the PVS-2 ocular (with TNVC Da Torch aimed at the transformer) 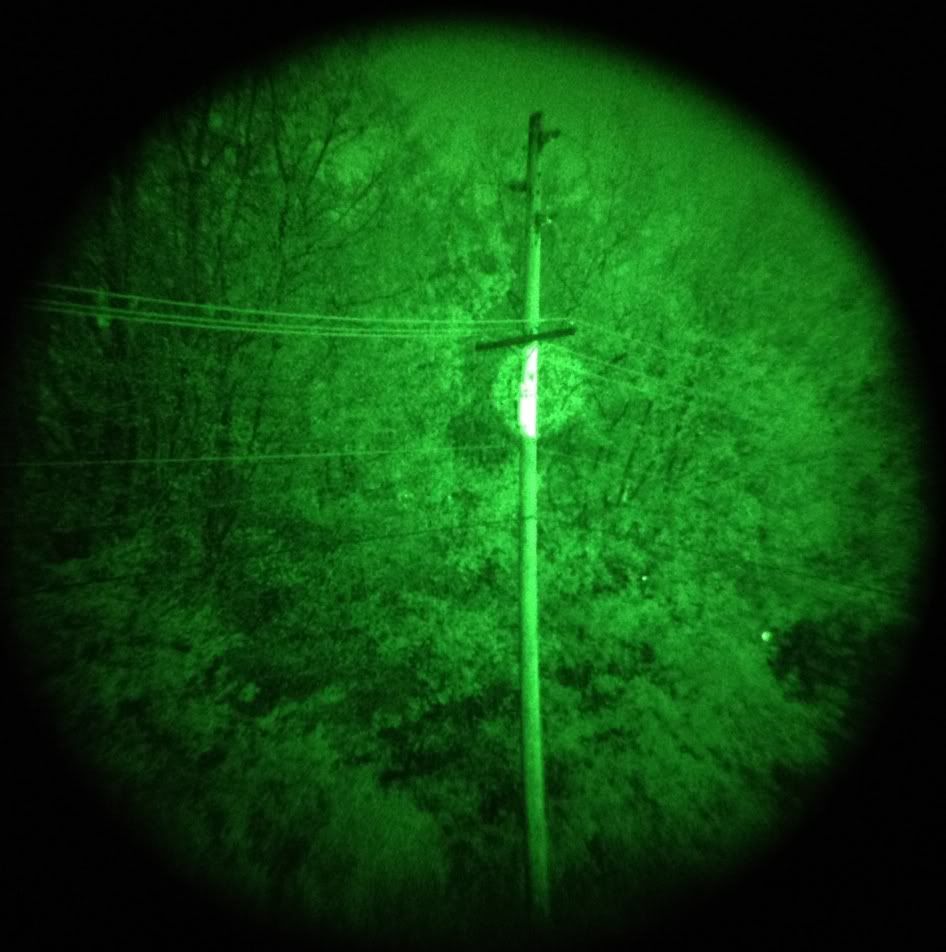
Again, starlight (second pic slightly overcast) 50 yards, rural. In other words, dark. I can only see the treeline silhouetted against the faint skyline glow with the naked eye. This thing rocks. Now all I need to do is make a housing! What a great project. Thanks again, cj7hawk! |
|
|
|
[Last Edit: b_rogers]
[#2]
Originally Posted By Gurn:
Well, got my pvs-2 lens today, and if you don't have one,...get one. Bought mine online (not ebay) for $85. Good gravy, this thing is big! I expected a tiny little ocular like on the PVS-14...nope. http://i1267.photobucket.com/albums/jj560/gurnio737/IMG_1312.jpg That's it, compared to the loupe I was using, and an old Buck knife for scale. Even has the "green ring" so I guess I'm protected from radiation Secondly, it (as mentioned before) fits right into the tube with a press fit (and a retaining ring is included but will need a threaded housing) Here's a few pics of that...sorry 'bout them being upside down http://i1267.photobucket.com/albums/jj560/gurnio737/IMG_1308.jpg http://i1267.photobucket.com/albums/jj560/gurnio737/IMG_1309.jpg The picture is awesome, much better than the loupe and a bit more FOV albeit still more magnified than the PVS-14 Here's a pic with the loupe ocular http://i1267.photobucket.com/albums/jj560/gurnio737/cascadeloupe.jpg And with the PVS-2 ocular (with TNVC Da Torch aimed at the transformer) http://i1267.photobucket.com/albums/jj560/gurnio737/cascadetorch.jpg Again, starlight (second pic slightly overcast) 50 yards, rural. In other words, dark. I can only see the treeline silhouetted against the faint skyline glow with the naked eye. This thing rocks. Now all I need to do is make a housing! What a great project. Thanks again, cj7hawk! Now that looks good! Heres some housings.. http://www.ebay.com/itm/Night-Vision-Parts-Gen-I-II-some-III-New-Old-Stock-Obsolete-/230778594900?pt=LH_DefaultDomain_0&hash=item35bb79e654#ht_500wt_1413 |
|
|
|
USA
|
[#3]
I think I fried my tube. I got a picture through the scope now that looks like worms crawling everywhere, if that makes any sense. Maybe I got it overexposed, or maybe its a power supply issue. I have no idea. HELP!
|
|
|
|
[#4]
Originally Posted By Zoomies: I think I fried my tube. I got a picture through the scope now that looks like worms crawling everywhere, if that makes any sense. Maybe I got it overexposed, or maybe its a power supply issue. I have no idea. HELP! Any chance of uploading a video of the effect to youtube? David.
|
|
|
|
USA
|
[#5]
I'll wait till it gets dark and try to shoot some video, but I don't have a YouTube account. Can I just email it to you at blackice?
|
|
|
|
[#6]
Originally Posted By Zoomies: I'll wait till it gets dark and try to shoot some video, but I don't have a YouTube account. Can I just email it to you at blackice? Sure, but please keep it under 10Mb :) Do you have the address? David |
|
|
|
USA
|
[#7]
False alarm, just had a bad connection on the power supply
|
|
|
TX, USA
|
[Last Edit: sfax39]
[#8]
Finally have a field testable version to play with. Previous versions had the power supply separate and tethered by the wire and it was cumbersome. Now all I have to do is pick it up and throw a switch and I’m ready to go. All in all this is/was a really cool project, thank you cj7hawk for passing this on to us. I really enjoy doing this kind of stuff and the final product is something I can really use.
Here’s what I have so far. The power supply would be more permanent but somehow I’m leaking .17V and I can’t figure out exactly where so the power supply attachment remains temporary. 
I spent more time than I thought I would on the power supply. Seems like a simple device but I managed to over think it and it failed the first couple of tries. It’s very hard for me to solder the tiny switch leads as well as keep everything inside the copper tube. I picked everything for the power supply up at a local hardware store for under 8 bucks. 
I remember someone earlier in the thread asking if there was a workable solution to getting the camera lens centered in the scope body. Since the outside diameter of the cascade tube is 2.75” I used a 3” aluminum tube since that’s it’s inside diameter, the tube fit was snug. The local Home Depot had most of the other stuff I needed. Regular PVC pipe fittings worked great for me. Since everything seems to have a 1/8” wall thickness the parts kind of fell together for me. The inside diameter of 3” aluminum tubing is 2.75” and the outside diameter of a 2” PVC coupler is also 2.75”. Taking a small piece of 2” PVC pipe I was able to cut some 1/8” spacers with my chop saw. All that came together to center my camera lens C-mount adapter very close to dead center. I glued the C-mount adapter in place with JB Weld (is there anything that stuff can’t do?). My application of the JB Weld isn’t pretty at all, have you ever tried to run a consistent bead with a toothpick applicator? Not easy. One more thing, you can barely see a hint of aluminum tape around the outside edge of the PVC pipe in the aluminum tube. I did this to take up any slack there was between the PVC and the inside of the aluminum tube. This made threading the aluminum tube and PVC together more consistent. The trick to putting this whole thing together was getting the 17.5mm spacing cj7hawk spoke of, but when you get it its very repeatable. 
Just put this one in there for anyone looking for details. The unused hole to the right of the set screw is proof that if you drink and fun-craft at the same time you’ll make mistakes. Those holes were supposed to be on the other end to attach the eyepiece…oops. 
|
|
|
|
[#9]
Originally Posted By sfax39: Finally have a field testable version to play with. Previous versions had the power supply separate and tethered by the wire and it was cumbersome. Now all I have to do is pick it up and throw a switch and I’m ready to go. All in all this is/was a really cool project, thank you cj7hawk for passing this on to us. I really enjoy doing this kind of stuff and the final product is something I can really use. Here’s what I have so far. The power supply would be more permanent but somehow I’m leaking .17V and I can’t figure out exactly where so the power supply attachment remains temporary. http://img856.imageshack.us/img856/4726/img2848k.jpg I spent more time than I thought I would on the power supply. Seems like a simple device but I managed to over think it and it failed the first couple of tries. It’s very hard for me to solder the tiny switch leads as well as keep everything inside the copper tube. I picked everything for the power supply up at a local hardware store for under 8 bucks. http://img155.imageshack.us/img155/2651/img2854og.jpg I remember someone earlier in the thread asking if there was a workable solution to getting the camera lens centered in the scope body. Since the outside diameter of the cascade tube is 2.75” I used a 3” aluminum tube since that’s it’s inside diameter, the tube fit was snug. The local Home Depot had most of the other stuff I needed. Regular PVC pipe fittings worked great for me. Since everything seems to have a 1/8” wall thickness the parts kind of fell together for me. The inside diameter of 3” aluminum tubing is 2.75” and the outside diameter of a 2” PVC coupler is also 2.75”. Taking a small piece of 2” PVC pipe I was able to cut some 1/8” spacers with my chop saw. All that came together to center my camera lens C-mount adapter very close to dead center. I glued the C-mount adapter in place with JB Weld (is there anything that stuff can’t do?). My application of the JB Weld isn’t pretty at all, have you ever tried to run a consistent bead with a toothpick applicator? Not easy. One more thing, you can barely see a hint of aluminum tape around the outside edge of the PVC pipe in the aluminum tube. I did this to take up any slack there was between the PVC and the inside of the aluminum tube. This made threading the aluminum tube and PVC together more consistent. The trick to putting this whole thing together was getting the 17.5mm spacing cj7hawk spoke of, but when you get it its very repeatable. http://img9.imageshack.us/img9/2458/img2858b.jpg Just put this one in there for anyone looking for details. The unused hole to the right of the set screw is proof that if you drink and fun-craft at the same time you’ll make mistakes. Those holes were supposed to be on the other end to attach the eyepiece…oops. http://img822.imageshack.us/img822/8716/img2868n.jpg Very few people make their own battery holder, but that looks exceptional - And keeps it all neat. In the end, that's the idea, so you can just pick it up and take it with you without having to adjust tape and other things. A nice job :) David |
|
|
|
|
[#10]
Just got an IR LED flashlight in from China to use as an illuminator.
It's amazing, I can use the scope in pitch black with the aperture nearly completely closed. |
|
|
|
FL, USA
|
[#11]
I am wanting to have some night vision capabilities to allow me to hunt hogs a few times a month here in Florida. The problem is that like most of you in this thread i cannot justify $2000- 3000 for a gen 3 weapons system. My question is if i pursue this project, will i be able to mount this on my 5.56. Next question is i saw a DIY project CJ7HAWK did with the xgen monocular and was wondering which one of these projects would suit my needs?
|
|
|
|
[#12]
I realize I never posted my flanges. These were laser-cut from 3mm birch plywood; I also cut smaller flanges that are Nikon standard, but they didn't work very well (or at all), so I don't show them.
First, the assembled flange stack. The lens is just sitting on the end. The flanges are not stacked correctly - when they are stacked right, they form a straight tube. 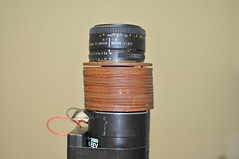
Night vision flange stack detail by Ry Jones, on Flickr Here is the end-on view. As you can see, the last two flanges are tightly fit to the objective, while the rest are more open. 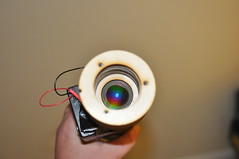
Night vision flange detail by Ry Jones, on Flickr Here is a happy accident: the screw heads are one RCH taller than the little stud, so everything matches up without interference. 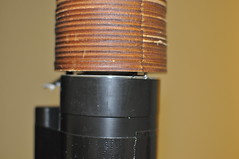
Night vision offset detail by Ry Jones, on Flickr So what's next? I bought a bunch of macro adapters for parts, only to find they're mostly worthless. I'll be buying a Nikon lens flange for the objective end of the stack, then gluing the stack together and affixing the flange. On the other end, I've given up getting a Nikon to mount correctly on the ocular end - the detail of the image doesn't support the amount of cropping needed to get a full-frame exposure (and getting the entire screen in the frame results in a lot of black border and lost detail). I don't need a two-foot-long lens stack hanging off my camera; what I will probably do is mount a video camera back there (go pro or similar). We'll see. |
|
|
|
|
[#13]
The quote tree is AFU, but I found I had to remove one whole flange in order to get my infinity focus squared away - forget sanding!
Now I have a perfectly focused telescope, using a 50mm Nikon 1.8 lens I had around. Adjusting the iris lets me see more stars or less, etc. I had a hell of a time trying to take a picture of it - so now that the objective side is squared away, I'll start work on the ocular. I think a simple strap mount will work wonders for putting a video camera a few inches off the back. 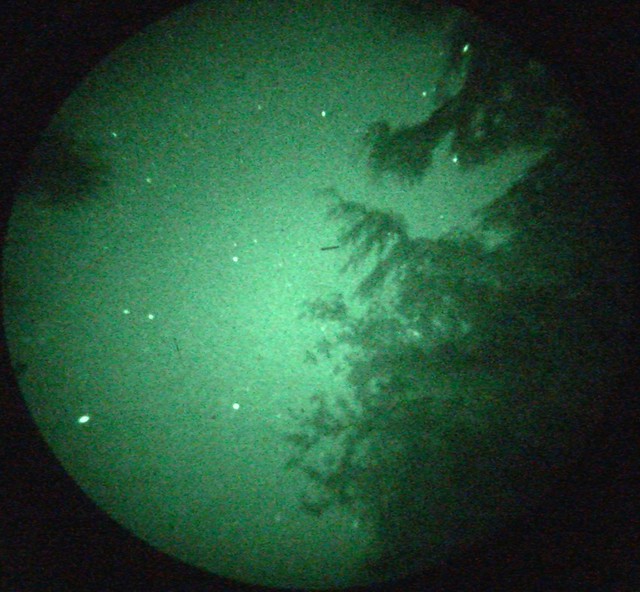
First shot from night vision by Ry Jones, on Flickr this is the sky, from my back yard. I assume the little lines are dust and shit and I need to clean things. |
|
|
|
|
[#14]
Originally Posted By RyJones: The quote tree is AFU, but I found I had to remove one whole flange in order to get my infinity focus squared away - forget sanding! Now I have a perfectly focused telescope, using a 50mm Nikon 1.8 lens I had around. Adjusting the iris lets me see more stars or less, etc. I had a hell of a time trying to take a picture of it - so now that the objective side is squared away, I'll start work on the ocular. I think a simple strap mount will work wonders for putting a video camera a few inches off the back. http://farm8.staticflickr.com/7096/7194861520_c5ebab6460_z.jpg First shot from night vision by Ry Jones, on Flickr this is the sky, from my back yard. I assume the little lines are dust and shit and I need to clean things. First light from your own hand-built NV scope is pretty awesome isn't it :) The first time you get an image that's viewable :) That's perhaps the single best thing about this project - :) David |
|
|
|
|
[#15]
Originally Posted By sfax39:
Finally have a field testable version to play with. Previous versions had the power supply separate and tethered by the wire and it was cumbersome. Now all I have to do is pick it up and throw a switch and I’m ready to go. All in all this is/was a really cool project, thank you cj7hawk for passing this on to us. I really enjoy doing this kind of stuff and the final product is something I can really use. Here’s what I have so far. The power supply would be more permanent but somehow I’m leaking .17V and I can’t figure out exactly where so the power supply attachment remains temporary. http://img856.imageshack.us/img856/4726/img2848k.jpg I spent more time than I thought I would on the power supply. Seems like a simple device but I managed to over think it and it failed the first couple of tries. It’s very hard for me to solder the tiny switch leads as well as keep everything inside the copper tube. I picked everything for the power supply up at a local hardware store for under 8 bucks. http://img155.imageshack.us/img155/2651/img2854og.jpg I remember someone earlier in the thread asking if there was a workable solution to getting the camera lens centered in the scope body. Since the outside diameter of the cascade tube is 2.75” I used a 3” aluminum tube since that’s it’s inside diameter, the tube fit was snug. The local Home Depot had most of the other stuff I needed. Regular PVC pipe fittings worked great for me. Since everything seems to have a 1/8” wall thickness the parts kind of fell together for me. The inside diameter of 3” aluminum tubing is 2.75” and the outside diameter of a 2” PVC coupler is also 2.75”. Taking a small piece of 2” PVC pipe I was able to cut some 1/8” spacers with my chop saw. All that came together to center my camera lens C-mount adapter very close to dead center. I glued the C-mount adapter in place with JB Weld (is there anything that stuff can’t do?). My application of the JB Weld isn’t pretty at all, have you ever tried to run a consistent bead with a toothpick applicator? Not easy. One more thing, you can barely see a hint of aluminum tape around the outside edge of the PVC pipe in the aluminum tube. I did this to take up any slack there was between the PVC and the inside of the aluminum tube. This made threading the aluminum tube and PVC together more consistent. The trick to putting this whole thing together was getting the 17.5mm spacing cj7hawk spoke of, but when you get it its very repeatable. http://img9.imageshack.us/img9/2458/img2858b.jpg Just put this one in there for anyone looking for details. The unused hole to the right of the set screw is proof that if you drink and fun-craft at the same time you’ll make mistakes. Those holes were supposed to be on the other end to attach the eyepiece…oops. http://img822.imageshack.us/img822/8716/img2868n.jpg Where did you source the tube from? |
|
|
|
|
[#16]
Cool thread!!!
|
|
|
|
TX, USA
|
[#17]
Originally Posted By AJ_Dual:
Where did you source the tube from? the cascade tube from Julian at Starlight NV the aluminum tube from ebay |
|
|
|
[Last Edit: Kyoami]
[#18]
Shot a quick video with the new macro lens. Lets me see every flaw in the photo-multiplier.
|
|
|
|
|
[#19]
Nice :) Good video too. Regards David
|
|
|
|
FL, USA
|
[Last Edit: BrokenR1]
[#20]
For those that bought from starlight how long has it been taking from purchase date to delivery?
Would this work as a lens? It would give me some adjustable zoom as well. 5mm - 100mm CS Auto Iris Lens for CCTV7 |
|
|
|
[#21]
Originally Posted By BrokenR1:
For those that bought from starlight how long has it been taking from purchase date to delivery? I got mine in 9 days. Would this work as a lens? It would give me some adjustable zoom as well. 5mm - 100mm CS Auto Iris Lens for CCTV7
I'd get something with a manual iris. |
|
|
|
FL, USA
|
[#22]
So this would be better... F7J-NEW CCTV MANUAL IRIS 5-100mm
Or there is a F/1.8 in the US for a few bucks less. Would there be a noticeable difference between F/1.4 and F/1.8? |
|
|
|
[#23]
I sure hope this thread gets archived as it contains some awesome ingenious information!
|
|
|
|
|
[#24]
This is the recommended lens type for the project:
http://www.ebay.com/itm/Fast-c-mount-lens-Ernitec-of-Denmark-75mm-f-1-3-Navitar-Tarcus-Computar-75-/140751052345?pt=UK_Lenses_Filters_Lenses&hash=item20c56a9e39#ht_937wt_1397 Just search for 75mm Cmount Anything close should do, though lenses for smaller formats will suffer significant vignetting. Regards David
|
|
|
|
|
[Last Edit: AJ_Dual]
[#25]
I'm still on the hunt for a C-CS adapter mount/plate.
Does anyone know what the nominal diameter of a Canon EF or EF-S socket is? I'm just trying to line it up with the 2.75"/70mm ID of the aluminum tube I've bought for the body, to make a build like sfax did above. I'm having a hard time googling it, because nobody's site, the wiki, or the PDF spec sheets actually care to tell me what the actual diameter is, because if it's Canon EF, well it'll fit a Canon EF mount. 
I can grind it down if it's more than 70mm on it's OD, or build it up with a PVC spacer ring around the outside if it's smaller, but I'd like to do as little of that work as possible. |
|
|
|
|
[#26]
Originally Posted By AJ_Dual: Does anyone know what the nominal diameter of a Canon EF or EF-S socket is? The internal diameter of the Canon EF mount is 54 mm. |
|
|
|
|
[Last Edit: AJ_Dual]
[#27]
Originally Posted By Sturmgewehr-58:
Originally Posted By AJ_Dual:
Does anyone know what the nominal diameter of a Canon EF or EF-S socket is? The internal diameter of the Canon EF mount is 54 mm. WHOOPS. Idiot... I edited this, thinking I was quoting... If anyone is getting the Aluminum tubes and doing a "sfax39" style build, I found a GREAT flange adapter that fits 2" PVC perfectly. http://www.ar15.com/forums/t_6_18/359614_DIY_Cascade_Tube_Thread___.html&page=9#i3403094 A Canon EOS bayonet mount, on a C-mount adapter flange will be a TIGHT press fit into a 2" ring cut from a PVC pipe, I should have measured it with my micrometer, but the bayonet flanges on the C-mount adapter kind of scratch their way into the ID just a bit, and can be hammered in with a plastic mallet really tight into the PVC stand-off, that alone is almost strong enough at least to mock it up and make sure your measurements fit and focus is right. After that, a bead of cyanoacrylate glue, or your preferred epoxy will make it very tight and strong. Example... Then that 2" PVC pipe piece set into a cut piece of a 2" PVC coupler, which fits the ID of the 3" aluminum tubing with 1/8" walls almost perfectly. 


|
|
|
|
NY, USA
|
[#28]
Here are my two last builds. Both use PVS-2 eyepieces. The top a 75mm F1.4 TV lens, the bottom, a PVS-2 objective.
I use 3 inch PVC for the housings and shim the tubes with balsa wood strips to get a good fit. For a TV lens, I use plastic end caps to hold the c-mount ring, and the end cap and eyepieces are held on by 3 inch tube clamping rubber end pieces with the centers cut out. The PVS-2 objective is over 3" in diameter, so I used a 3 inch pipe coupler and a cardboard bushing to hold the lens in by friction to allow moving it in and out for focus. Radio shack battery holders complete the units. The PVS-2 clone will probably go on a tripod mount eventually. As far as objective lenses, I've noticed a lot of old Minolta SLT/MC/MD 58mm F1.4 lenses on Ebay for fairly cheap. BHP photo and others have a c-mount adapter that will fit these lenses. Might be worth a try for a low cost lens. 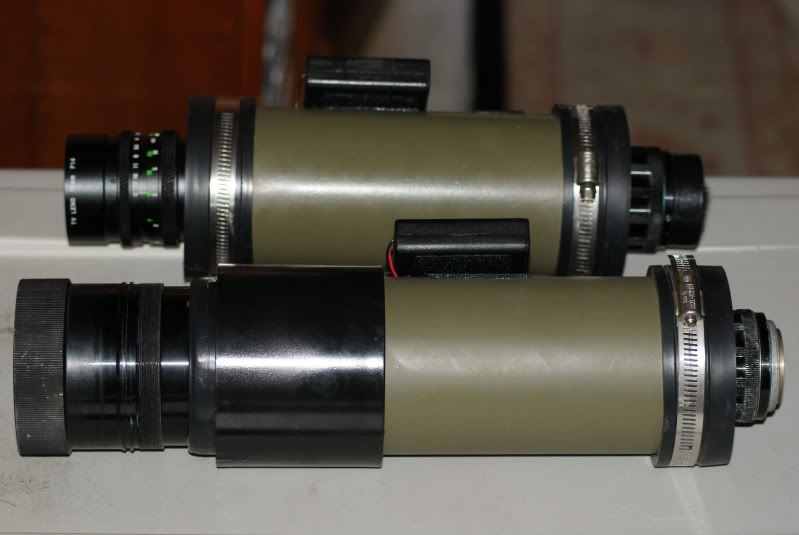
|
|
|
NY, USA
|
[Last Edit: ACDer]
[#29]
dupe
|
|
|
|
[#30]
Nice work - they both look great! - is that the threaded lens without focal adjustment? How did that turn out? Regards
David |
|
|
|
NY, USA
|
[#31]
thank you. yes that's the one -It works well, lightweight for it's size. I do like having an adjustable F stop however.
|
|
|
|
[#32]
Originally Posted By ACDer:
Here are my two last builds. Both use PVS-2 eyepieces. The top a 75mm F1.4 TV lens, the bottom, a PVS-2 objective. I use 3 inch PVC for the housings and shim the tubes with balsa wood strips to get a good fit. For a TV lens, I use plastic end caps to hold the c-mount ring, and the end cap and eyepieces are held on by 3 inch tube clamping rubber end pieces with the centers cut out. The PVS-2 objective is over 3" in diameter, so I used a 3 inch pipe coupler and a cardboard bushing to hold the lens in by friction to allow moving it in and out for focus. Radio shack battery holders complete the units. The PVS-2 clone will probably go on a tripod mount eventually. As far as objective lenses, I've noticed a lot of old Minolta SLT/MC/MD 58mm F1.4 lenses on Ebay for fairly cheap. BHP photo and others have a c-mount adapter that will fit these lenses. Might be worth a try for a low cost lens. http://i106.photobucket.com/albums/m250/acder/045.jpg Those look really nice, great job. |
|
|
|
NY, USA
|
[#33]
I found a source for an aluminum housing that I am going to use next-
alvin mailing tube I just picked one up- ID is 2.75 inches and is a hair bigger then the cascade tube so it will fit right in. Nice thin- walled galvanized aluminum. I should be able to get 4 housings out of one of these. You get two end caps to work with and a carry strap as well. |
|
|
|
[Last Edit: cj7hawk]
[#34]
Originally Posted By ACDer: I found a source for an aluminum housing that I am going to use next- alvin mailing tube I just picked one up- ID is 2.75 inches and is a hair bigger then the cascade tube so it will fit right in. Nice thin- walled galvanized aluminum. I should be able to get 4 housings out of one of these. You get two end caps to work with and a carry strap as well. That's a great suggestion. :) Unfortunately they don't ship to Australia or I'd advise people here to try them too! :( Are the end caps aluminium or plastic? Regards David |
|
|
|
|
[#35]
For those of you mounting these on Picatinny rails-
What kind of mount are y'all using? |
|
|
|
NY, USA
|
[#36]
End caps are Plastic and you can get additional ones from the manufacturer.
|
|
|
|
[#37]
Originally Posted By twestbrook10: For those of you mounting these on Picatinny rails- What kind of mount are y'all using? It is possible, but best use for this project is stick them on a tripod and use them as a spotter - Regards David
|
|
|
|
|
[#38]
Ah gotcha. I would imagine the weight would be an issue. I'm still interested though. If it doesn't work out then it will be a good spotting scope and a fun project.
|
|
|
|
|
[#39]
Originally Posted By twestbrook10: Ah gotcha. I would imagine the weight would be an issue. I'm still interested though. If it doesn't work out then it will be a good spotting scope and a fun project. Yeah, the weight is pretty noticeable. I figured it would be fun to play with for a weekend on my .22  I just used Gorilla Glue to glue a cheap removable ACOG knock-off mount to the bottom of the scope. Since I'm using a laser as the aiming point, absolute stability wasn't necessary. |
|
|
|
|
[#40]
4 tubes showed up at my door today. Not bad for ordering on Monday.
|
|
|
|
|
[#41]
Hmmmm..
can't seem to get it to glow. 6v, AA connected to the silver ring in the front -, and the yellow ringed threaded hole +.  |
|
|
|
|
[#42]
Originally Posted By rangermonroe:
Hmmmm.. can't seem to get it to glow. 6v, AA connected to the silver ring in the front -, and the yellow ringed threaded hole +.
You need to connect the negative to the ring immediately around the glass input screen, not the large ring around the outside of the tube. |
|
|
|
|
[Last Edit: rangermonroe]
[#43]
Ahhh. Thanks
ETA: Green Glow on The Kitchen Table has been achieved! |
|
|
|
|
[#44]
Originally Posted By rangermonroe:
Ahhh. Thanks ETA: Green Glow on The Kitchen Table has been achieved! Plans for lenses? |
|
|
|
|
[Last Edit: rangermonroe]
[#45]
Originally Posted By RyJones: Originally Posted By rangermonroe: Ahhh. Thanks ETA: Green Glow on The Kitchen Table has been achieved! Plans for lenses? I have the PVS 2 occulars. Several more than I need, as I bought a batch. Recommendations on the objective? I am going to build a pedestrian "observer" and as time and desire permits, make a housing out of either carbon, but most likely fiberglass cloth. Having bought 4 tubes, 2 for me and 2 for my buddy. IDK what Occular is on the table for this build. I let the guy who knows the "out front" stuff do his job, I bought the easy part. he is also making battery packs either LiPo or NiMhd... re-fucking-chargable, either way. I am pretty excited. It still sucks that his wife gets to build NVGs before either of us get to see all the parts in one zip code. |
|
|
|
|
[Last Edit: AJ_Dual]
[#46]
Originally Posted By Sturmgewehr-58:
Originally Posted By AJ_Dual:
Does anyone know what the nominal diameter of a Canon EF or EF-S socket is? The internal diameter of the Canon EF mount is 54 mm. WHOOPS. Idiot... I edited this above..., thinking I was quoting...
If anyone is getting the Aluminum tubes and doing a "sfax39" style build, I found a GREAT flange adapter that fits 2" PVC perfectly. http://www.ar15.com/forums/t_6_18/359614_DIY_Cascade_Tube_Thread___.html&page=9#i3403094 A Canon EOS bayonet mount, on a C-mount adapter flange will be a TIGHT press fit into a 2" ring cut from a PVC pipe, I should have measured it with my micrometer, but the bayonet flanges on the C-mount adapter kind of scratch their way into the ID of the PVC pipe just a bit, and can be hammered in with a plastic mallet really tight into the PVC stand-off. That friction or interference fit alone is almost strong enough at least to mock it up and make sure your measurements fit and focus is right. After that, a bead of cyanoacrylate glue, or your preferred epoxy will make it very tight and strong. Example... Then that 2" PVC pipe piece with the flange glued in, and set into a cut piece of a 2" PVC coupler, which fits the ID of the 3" aluminum tubing with 1/8" walls almost perfectly. |
|
|
|
|
[#47]
Just getting ready to start this DIY.
Anchor is £34.50 Starlight is £80 + £5 shipping. From Starlight, do I order the "High Resolution Gen 1 cascade Tubes"? They aren't labeled as the P8079HP.... Which place would be better to order from if I was to buy 2 tubes? |
|
|
|
|
[Last Edit: AJ_Dual]
[#48]
Originally Posted By coctailer:
Just getting ready to start this DIY. Anchor is £34.50 Starlight is £80 + £5 shipping. From Starlight, do I order the "High Resolution Gen 1 cascade Tubes"? They aren't labeled as the P8079HP.... Which place would be better to order from if I was to buy 2 tubes? For me, Anchor's shipping worked out to being a few dollars more than Starlight. I don't know if Anchor is avoiding UK taxes or what by rear-loading the price on shipping like that, but I didn't like it, so went with Starlight, which was also a dedicated NV place. AFAIK, they're all the same tubes. The one I got from Starlight is a P8079HP. |
|
|
|
|
[Last Edit: rangermonroe]
[#49]
I bought 4 tubes from Anchor. They combined shipping.
ETA: it took 5 days from my PP transfer for the box to show up on my door in Georgia. |
|
|
|
|
[#50]
Originally Posted By rangermonroe:
I bought 4 tubes from Anchor. They combined shipping. ETA: it took 5 days from my PP transfer for the box to show up on my door in Georgia. Ah... Maybe they've got a fixed handling fee structure to encourage sales in larger lots. Then I'd revise my advice and say Starlight if it's Q1, but Anchor if it's multiple tubes. |
|
|
|
 Win a FREE Membership!
Sign up for the ARFCOM weekly newsletter and be entered to win a free ARFCOM membership. One new winner* is announced every week!
You will receive an email every Friday morning featuring the latest chatter from the hottest topics, breaking news surrounding legislation, as well as exclusive deals only available to ARFCOM email subscribers.

AR15.COM is the world's largest firearm community and is a gathering place for firearm enthusiasts of all types.
From hunters and military members, to competition shooters and general firearm enthusiasts, we welcome anyone who values and respects the way of the firearm.

Subscribe to our monthly Newsletter to receive firearm news, product discounts from your favorite Industry Partners, and more.
Copyright © 1996-2024 AR15.COM LLC. All Rights Reserved.
Any use of this content without express written consent is prohibited.
AR15.Com reserves the right to overwrite or replace any affiliate, commercial, or monetizable links, posted by users, with our own.


