|
[#1]
Quoted:
Esox, or anyone else knowledgeable... Is a relief cut in the rear of the receiver (like right before the buffer tube threads) necessary? I've seen some people do this and some just do the ears relief near the selector (which is all I have done on mine). Looking to include as much info in my "consolidation" as possible. Gracias in advance! YMMV, Esox |
|
|
|
[#2]
Thanks! I searched a bunch of RLL stuff on here to find info and saw you had the idea of creating a website to dedicate towards RLL info - same idea with consolidating as much as I can with references to threads
|
|
|
|
[#3]
Quoted:
I personally highly prefer that relief cut because I theorize that most of the damage to RLLs in 'tearing the ears off' was actually due to the ears hitting that back wall of the FCG pocket. I have NO DATA OR FACTS to prove this theory though. This is largely overcome with the use of the KNS-style protector (it protects the rear of the ears as well). But why not give it some clearance? There is no downside to adding this clearance other than it would not be possible to use the 'No-M16 parts' select fire system...which I wouldn't recommend anyhow. YMMV, Esox Quoted:
Quoted:
Esox, or anyone else knowledgeable... Is a relief cut in the rear of the receiver (like right before the buffer tube threads) necessary? I've seen some people do this and some just do the ears relief near the selector (which is all I have done on mine). Looking to include as much info in my "consolidation" as possible. Gracias in advance! YMMV, Esox |
|
|
|
[#4]
Since M60 Joe isn’t in business anymore who could repair broken rLL ears? I was looking at picking up a rLL but that’s holding me back. I don’t want a broken link that no one will repair.
|
|
|
|
[#5]
Quoted:
I don't want a broken link that no one will repair. |
|
|
|
[#6]

This is all that’s done to mine. Don’t have the link yet but it was tested with the lower I’ll check the hammer clearance when I get the link to see if there needs to be more clearance added at the back of the lower I guess |
|
|
|
[#7]
Quoted:
If you want to ensure longevity for your RLL, the clearance cuts are highly, highly recommended. It's pretty inexpensive to have it done and will certainly protect the RLL investment, which is important as they continue to climb in price. I've seen a RLL that was broken, and it was from a non-clearanced lower. The individual sent it to M60Joe to have it welded back together and now it sits in a clearanced lower with a few thousand rounds on it with no signs of breaking. Save yourself the worry and put it in a lower with clearance cuts. |
|
|
|
[#8]
Quoted:
Since M60 Joe isn’t in business anymore who could repair broken rLL ears? I was looking at picking up a rLL but that’s holding me back. I don’t want a broken link that no one will repair. |
|
|
|
[#9]
Quoted: Do you mean the cuts I have showing above or in addition to? The picture above only shows the 'shoulder' cuts to allow clearance for the widest part of the RLL. The additional cuts that I referred to earlier are in the very rear of the FCG pocket and help to prevent the possibility of the fragile 'ears' that the paddle locks into from banging against the receiver near the rear take-down pin. I like that area to be a little deeper/longer toward the buffer, not wider side to side or deeper down toward the grip. Hope that helps, Esox |
|
|
|
[#10]
Quoted: @dragpro, The picture above only shows the 'shoulder' cuts to allow clearance for the widest part of the RLL. The additional cuts that I referred to earlier are in the very rear of the FCG pocket and help to prevent the possibility of the fragile 'ears' that the paddle locks into from banging against the receiver near the rear take-down pin. I like that area to be a little deeper/longer toward the buffer, not wider side to side or deeper down toward the grip. Hope that helps, Esox |
|
|
|
[#11]
Just in case anyone is looking, a guy has colt 3rd burst fcg up in EE. I'll probably video converting the one I grabbed , and see about posting t up here.
https://www.ar15.com/forums/equipment-exchange/Colt-3-Round-Burst-FCGs-Complete-LPKs-100-175-each/118-1823078/ |
|
|
|
[#12]
Quoted:
I'll probably video converting the one I grabbed , and see about posting t up here. |
|
|
|
[#13]
Well that saved me some time! I think people overestimate how difficult it is.
|
|
|
|
[#14]
Bust FCG mod for RLL select fire is the easy part, and the hard part is finding a lower receiver to be the Host receiver instead.
Note, use a mill so it does not look like a basement hack joob with dremil to the FCG parts. But, there are only a few low shelf receivers being offered, and then you get into if the receiver has the stop tab on the side that will allow the selector to be switch to full auto, and when the RLL is installed into the tripped receiver, that you can pull the Link all the way back to touch the back cut wall of the shelve cut out wall before the front round part of the back link will bind out on main receiver void walls isntead. So if your start with one of the $50 Anderson lower receivers that has the correct selector stop tab locations for the three needed selector positions, 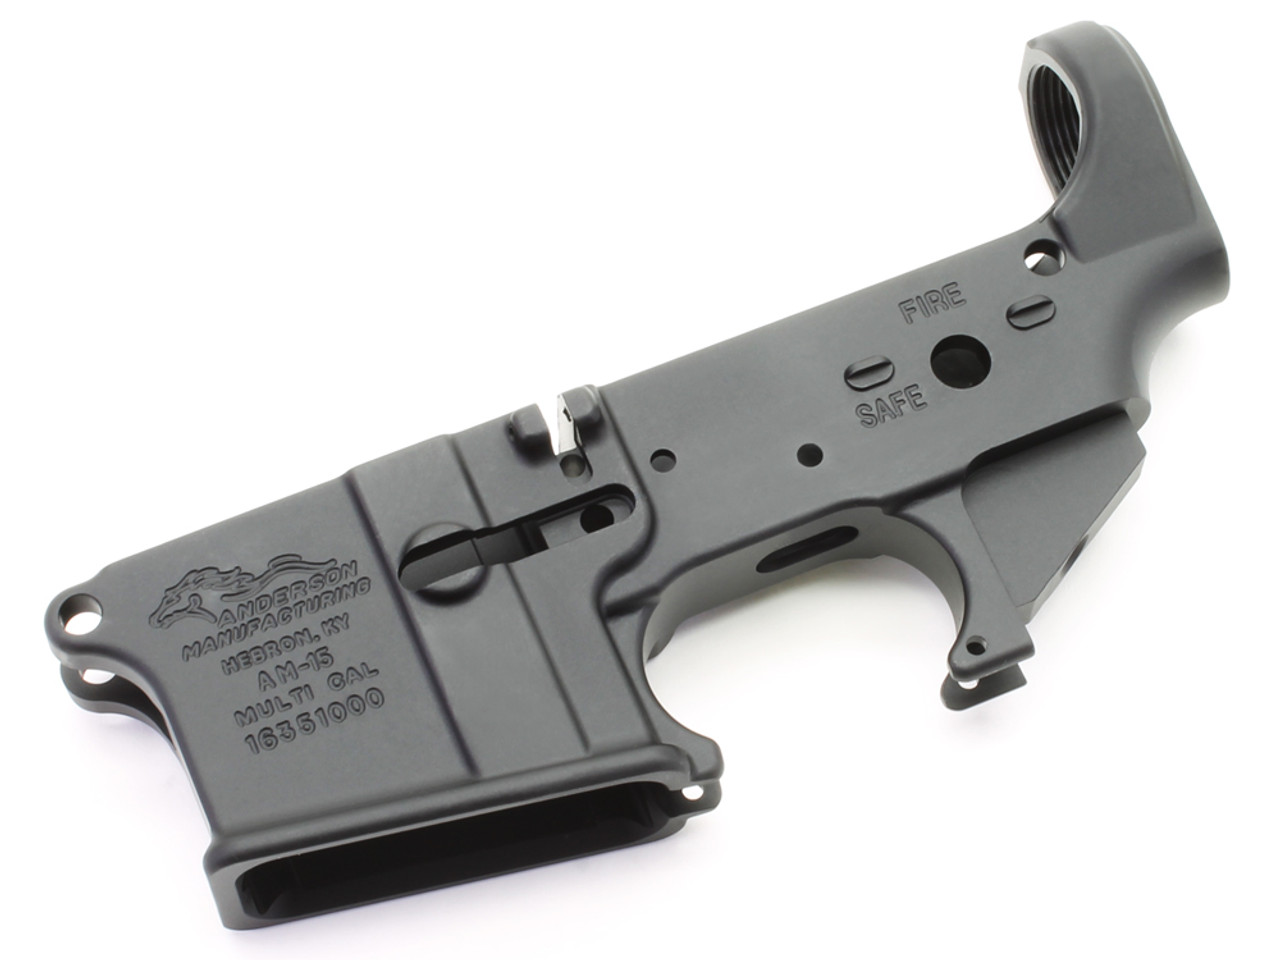
Your good on the outside of the receiver, but since its a high shelf receiver, then you have to mill the back shelf down to turn it into a low shelf receiver. Also, since the RLL was right hand shaped for a SP1 receiver, you may have to mill the back walls of the trigger void areas as show above in the other post, so the back tail of the RLL can travel back all the way to touch the back shelf wall. In Chris's photo from Quarterbore sight, you can see that it's boarder line if the Rll in that receiver will be able to travel all the way back to touch the shelf back wall before biding out the back FCG cut out section isntead. Hence link will work fine to pull the disco back , but since the paddle tends to over pull the link backwards in actual full auto cycle, we do want the Lightning Link Re-Enforcer back paddle section to be able to tag the shelf back wall, before the front round section binds out on the back of FCG void radius walls. 

As for ones you have all that worked out, then is just a mater of smithing/shimming the FCG for a clean crimp semi auto trigger break to 3lbs with zero creep, as well as adjust the disco timing so you don't end up with hammer follow through with the hammer and triggers sears squared, milled and polished in the semi auto function. So set screw up the pistol grip channel solves any pre creep from selector on safe when trigger is pulled, and regarding trigger over travel, since the M16 trigger does not have a back wall, you have to off set the over travel after hammer break seat screw to pick up one of the trigger side walls for adjustment isntead. |
|
|
|
[#15]
Does anyone have a video of doing the timing for the paddles with the different drill bits? I have a pic and an explanation, jw if there is footage
|
|
|
|
[#16]
Anyone that has a jig for an 80% lower can lower the shelf. Just set your bit to the desired depth. I only have one low shelf lower so all of my high shelf lowers were either done on an jig or a mill.
|
|
|
|
[#17]
Quoted:
The RLL works by the top end of the paddle being cam'd forward via a SP1 carrier bottom shelf/top of rear take down lug at the bolt clocks up, to pull a standard Disconnector back to release the hammer as the bolt locks up. Hence design wise with the disco pulled back to release the hammer as the bolt locks up, it functions just like that off how a M14 works in full auto as well. So geometry wise, really needs to have a stock disco/FCG to allow it to work correctly. As for select fire kit with kit, you use a M16 A2 burst fire control group, but do not use the burst cam on the side of the hammer, and grind off the bust cam hook of the secondary disconnector. http://www.quarterbore.com/nfa/lightninglink.html Now having said this, you can take a M16 A2 RLL mod'd FCG, and smith the sears/reset the disco free gap timing so the trigger break is crisp 2lbs for break weight, and which will run fine in both semi and full auto as well. Quoted:
The RLL works by the top end of the paddle being cam'd forward via a SP1 carrier bottom shelf/top of rear take down lug at the bolt clocks up, to pull a standard Disconnector back to release the hammer as the bolt locks up. Hence design wise with the disco pulled back to release the hammer as the bolt locks up, it functions just like that off how a M14 works in full auto as well. So geometry wise, really needs to have a stock disco/FCG to allow it to work correctly. As for select fire kit with kit, you use a M16 A2 burst fire control group, but do not use the burst cam on the side of the hammer, and grind off the bust cam hook of the secondary disconnector. http://www.quarterbore.com/nfa/lightninglink.html Now having said this, you can take a M16 A2 RLL mod'd FCG, and smith the sears/reset the disco free gap timing so the trigger break is crisp 2lbs for break weight, and which will run fine in both semi and full auto as well. As for ones you have all that worked out, then is just a mater of smithing/shimming the FCG for a clean crimp semi auto trigger break to 3lbs with zero creep, as well as adjust the disco timing so you don't end up with hammer follow through with the hammer and triggers sears squared, milled and polished in the semi auto function. So set screw up the pistol grip channel solves any pre creep from selector on safe when trigger is pulled, and regarding trigger over travel, since the M16 trigger does not have a back wall, you have to off set the over travel after hammer break seat screw to pick up one of the trigger side walls for adjustment isntead. I’m interested in the portion highlighted above. Can you link me to a detailed source of information on how to get the timing and such set so that there is a crisp smooth 2.5-3.5 pound break? Any particular brand/type springs or LPK components needed? I’ve got a RLL in waiting on NFA approval and have a bunch of months to go. I want to spend this time preparing a pair of host lowers for it; a registered SBR lower I’d already made from an 80% (so that any shorty upper mounted on it is still legal with the link removed) and also a non-NFA Spikes Snowflake unicorn lower (because lol). I’m still on the fence about just buying a Hard Chromed Young RLL BCG or machining an actual Colt BCG and touching it up with cold blue. The young bolt looks nice... but $200-nice? Especially compared to a Colt BCG? 
As I understand it, Quarterbore’s burst FCG method (cutting the the ratchet pawl off the burst disco and notching the auto disco) is still 100% legal to keep the FCG installed in either lower without the RLL installed. This is in fact true, right? Are these all the parts I would need? I found them at Bayou - are they quality parts? |
|
|
|
[#18]
Check out buhler ballistics for RLL work
|
|
|
|
[#19]
l wasn’t planning on sending anything out as I’ve got my own shop. Doing the work isn’t the problem. I just need the pertinent info.
|
|
|
|
[#20]
You can piece out the FCG parts, but make sure that the hammer you get is a modified M16A3 hammer.
Hence auto sear tab on it ground off, but you need to make sure that the rear disco sear has the edge to the right surface. Rear disco sear like this is not going to work, 
This is the hammer you need, since it has the extra edge on the right hand side side of the disco sear to work with the mod'd trigger burst cam instead. -800x800.jpg) As for trigger work, it mostly smitting of the sear to get the crisp break, a few take up bolt to solve take up and over travel, and since very few have the needed mills or talent so set the sears correctly in the first place, I tend to not post a "how to's for this work on the fourms isntead. If you want to PM with a name and phone number, and talk you through the process if you are a machinist/have the tallent on the mill to do such needed precise work. Short version, we set up the FCG to remove the extra take up, over travel after hammer release to begin with with allen set screws, shim out side walk of the hammer and trigger to ID of receiver down to .001", set the engagement of the trigger to hammer primary sear at .020" square, then re-time the semi disco's for last of trigger release back to home postion for hammer release/reset in semi, then time the full auto disco to work with the RLL. Also, some light work on polishing the FCG pins and the ID channel of the FCG that they are going to ride in, and this will bring the trigger down to 2.5lbs every time. |
|
|
|
[#21]
Seems like my hammer is hitting my KNS protector and having some trigger slap on my disconnector as well. Small marks on disconnector and I put sharpie on KNS to check for wear... Planning to mill off the back of my hammer to avoid this further.
Any thoughts or opinions on this? |
|
|
|
[#22]
Quoted:
Seems like my hammer is hitting my KNS protector and having some trigger slap on my disconnector as well. Small marks on disconnector and I put sharpie on KNS to check for wear... Planning to mill off the back of my hammer to avoid this further. Any thoughts or opinions on this? I also mill the barrel of my safety selector flat so that the barrel of the safety is no higher than the rear shelf pocket so its one flat runway from the rear of the pocket to the end of the selector barrel body. This way my RLL sits as low in the FCG pocket as possible so it doesnt get hit by the hammer, doesnt teeder-todder over the selector barrel, get pinched by or worn by the rear lug, and doesn't get the wear marks that the selector can put onto the bottom edges of the link body. I also use a reduced power disco spring to minimize the amount of stress it puts on the link to pull the disco back. Anything you can do to prevent parts unnecessarily hitting the RLL, reduce the amount of stress or strain by reducing the disco spring tension or any friction the link will get from an improperly sized rear fire control pocket is a good think IMHO. I have two RLLs, one of which I have owned for probably 12+ years and have never broken either vs. other folks who seem to be able to damage them in short order. |
|
|
|
[#23]
Thanks!
Ya I think the lower part of the hammer is contacting the very front of the link too. I’ll need to figure that out |
|
|
|
[#24]
Quoted:
Thanks! Ya I think the lower part of the hammer is contacting the very front of the link too. I’ll need to figure that out I will pull a hammer from one of my guns this evening and snap a picture to show how the whole think it shaped. |
|
|
|
[#25]
Quoted: I relieve the backside of the hammer under the disconnector ledge as well to keep it from hitting the front edge of the link. I will pull a hammer from one of my guns this evening and snap a picture to show how the whole think it shaped. |
|
|
|
[#26]
Yes! Please post some close up pic!
That surely will help a lot of guys here. Quoted: I relieve the backside of the hammer under the disconnector ledge as well to keep it from hitting the front edge of the link. I will pull a hammer from one of my guns this evening and snap a picture to show how the whole think it shaped. |
|
|
|
[#27]
Pic of the hammer mods on one of my hosts.
The spur is on the back of the hammer is shaved down to reduce the odds of an impact at spot #1 and the reduced profile disco spur for the same reason at spot #2. My Hammer: You can also see the milled down selector barrel so the link no longer teeder-todders over the selector and has a continuous flat plane to actuate from the back of the rear lug pocket all the way to the end of the selector barrel. It also lets the link sit lower in the receiver so you get more clearance for the protector. Hope this helps. |
|
|
|
[#28]
That’s totally ingenious!
Probably one of the best mods for RLL owners. Still not quite understand how to make a selector barrel but love the idea. I was always wondering about the wear at the bottom of the link but it looks like I just found a new solution. Is there anyway we can get some more details about how to make a selector barrel? Quoted:
Pic of the hammer mods on one of my hosts. The spur is on the back of the hammer is shaved down to reduce the odds of an impact at spot #1 and the reduced profile disco spur for the same reason at spot #2. https://www.AR15.Com/media/mediaFiles/3567/RLL_Wear_2_jpg-983504.JPG My Hammer: https://www.AR15.Com/media/mediaFiles/3567/RLL_Hammer_Mods_jpg-983489.JPG You can also see the milled down selector barrel so the link no longer teeder-todders over the selector and has a continuous flat plane to actuate from the back of the rear lug pocket all the way to the end of the selector barrel. It also lets the link sit lower in the receiver so you get more clearance for the protector. Hope this helps. |
|
|
|
[#29]
Quoted:
Pic of the hammer mods on one of my hosts. The spur is on the back of the hammer is shaved down to reduce the odds of an impact at spot #1 and the reduced profile disco spur for the same reason at spot #2. https://www.AR15.Com/media/mediaFiles/3567/RLL_Wear_2_jpg-983504.JPG My Hammer: https://www.AR15.Com/media/mediaFiles/3567/RLL_Hammer_Mods_jpg-983489.JPG You can also see the milled down selector barrel so the link no longer teeder-todders over the selector and has a continuous flat plane to actuate from the back of the rear lug pocket all the way to the end of the selector barrel. It also lets the link sit lower in the receiver so you get more clearance for the protector. Hope this helps. Work with my select fire for the selector barrel. |
|
|
|
[#30]
Quoted:
That’s totally ingenious! Probably one of the best mods for RLL owners. Still not quite understand how to make a selector barrel but love the idea. I was always wondering about the wear at the bottom of the link but it looks like I just found a new solution. Is there anyway we can get some more details about how to make a selector barrel? Its really straight forward modification with a Safe/Fire arrangement as you don't have to worry about multiple surfaces to cut. On a select fire arrangement you have to mill down two surfaces as you rotate the selector twice, once from safe to semi (90 degrees) and again from semi to auto (another 90 degrees -180 total). To add complication the second rotation to the auto position now representing 180 degrees of rotation, so the area where the link slides on when in "auto" is also the same trigger engagement surface when set to safe. In order to compensate for modded 0-1-A selector, you have to add a small protrusion onto the rear of the trigger so that it will still properly engage the now modified selector barrel to ensure the trigger can't be depressed when in the safe position. |
|
|
|
[#31]
Thanks for the detailed info!
Is there any way you could snap couple more close up pic? Quoted: The selectors are just locked into a vertical end mill and a slot milled down to match the depth of the receiver pocket they are going into. You can still see the circular cutter tooling marks. Its really straight forward modification with a Safe/Fire arrangement as you don't have to worry about multiple surfaces to cut. On a select fire arrangement you have to mill down two surfaces as you rotate the selector twice, once from safe to semi (90 degrees) and again from semi to auto (another 90 degrees -180 total). To add complication the second rotation to the auto position now representing 180 degrees of rotation, so the area where the link slides on when in "auto" is also the same trigger engagement surface when set to safe. In order to compensate for modded 0-1-A selector, you have to add a small protrusion onto the rear of the trigger so that it will still properly engage the now modified selector barrel to ensure the trigger can't be depressed when in the safe position. |
|
|
|
[#32]
Quoted: Are you running full auto only? Don’t think that would Work with my select fire for the selector barrel. It does take a bit more work to mill two surfaces on the auto selector and make sure the safety portion still engages properly. Over time, I found I pretty much just shoot the link guns on auto and have been a bit shy about having a bunch of hosts with modded full auto fire control parts in them and no link installed. I have two links so one is usually always with the select fire host and the other one bounces around to auto-only configured hosts. I also have two registered receiver M16s if I really want the select fire option. |
|
|
|
[#33]
Quoted:
Thanks for the detailed info! Is there any way you could snap couple more close up pic? |
|
|
|
[#34]
That would be awesome.
Thank you!! Quoted: I can try and take more pictures with the parts pulled out for you but it probably won't be until next week as I am leaving town later this week and am not sure if I will have time to pull guns out and disassemble them for pics before I leave. |
|
|
|
[#35]
Thanks a ton man.
Ya I only have the 1 lower set up right now and it always has the link in it so not an issue at the moment |
|
|
|
[#36]
I wonder if a small strip of duct tape would protect the link from the selector movement lol HMMMM
|
|
|
|
[#37]
It’s funny... I’m already doing it.
Covering it with very thin cloth material tape. Duck tape or electrical tape will simply slide off after firing. Quoted:
I wonder if a small strip of duct tape would protect the link from the selector movement lol HMMMM |
|
|
|
[#38]
Oh hell ya what kind? I was fairly serious haha
|
|
|
|
[#39]
This is the tape that I used.
Just cut out very thin piece and then affix on both the center body and opposite side of ear. https://www.amazon.com/gp/aw/d/B00VVHZZQU?psc=1&ref=ppx_pop_mob_b_asin_title Quoted:
Oh hell ya what kind? I was fairly serious haha |
|
|
|
[#40]
Awesome. When you say opposite side of ear do you just mean the top and bottom of the link?
Any pics? I was going to just wrap one piece around the middle of the link where the selector rides |
|
|
|
[#41]
Sorry, I wasn’t very clear.
I was referring to the area where LL pulls the disconnector. Quoted:
Awesome. When you say opposite side of ear do you just mean the top and bottom of the link? Any pics? I was going to just wrap one piece around the middle of the link where the selector rides |
|
|
|
[#42]
Gotcha
|
|
|
|
[#43]


Giving this a shot... |
|
|
|
[#44]
I just use only 1/4 of tape and go around it.
|
|
|
|
[#45]
Quoted:
I just use only 1/4 of tape and go around it. |
|
|
|
[#46]
A fellow member sent me some hammers to modify earlier this week, so I thought I would chime in with my opinion on the subject and post a video of why I think its important to do and my approach...
First off, if any of your RLL hosts are experiencing trigger slap from being way overgassed, weak/worn hammer spring, direct blowback, etc. - STOP! That's a problem that needs to be fixed on the host gun or it could really cause damage to your RLL. I always use a good quality semi-auto hammer in my modified burst select fire FCGs. While probably most people use a burst hammer, I have found that to be unnecessary as there is plenty of sear shelf width on the semi hammer to catch both of the disconnectors. Plus, I'm a cheapskate and why buy a more expensive burst hammer? I like to modify my hammers like shown below. Since I was cutting hammers this morning I decided to donate a crappy old notched semi hammer I had to the cause for educational purposes to show why IMHO you should NOT cut the spur/tail off your hammer. I've heard of some guys doing this thinking that is is the best way to prevent the hammer from hitting your RLL, but it actually could create a problem if there was trigger slap present before cutting it off. I tried to mark the areas I cut out in blue marker, but it doesn't show up that well. I use my mill, but you can do all of this with a bench grinder or a dremel tool. I posted a video a few years ago with this hammer mod, but it was a good length into a 40+ minute video and probably hard to find. I thought this would be a good chance to retake some video just on this subject.  RLL Hammer Mod This is just how I do it. Maybe there are better ways. I am NOT a gunsmith, I just play one in my garage. :) Two things that I was slightly concerned about at first were 1) the hammer's disconnector sear ledge breaking off and 2) weakening the hammer spring by having it slightly less wound sitting in the cut-out for the disco sear area. I don't shoot much, but so far those have not been issues. Hope this helps and YMMV, v/r, Esox |
|
|
|
[#47]
Excellent information! Well done video. I have a RR but have always been intrigued by the LL. I have a friend who has a LL and will show him this.
Thanks for your time. |
|
|
|
[#48]
That video is amazing. I need to download/save haha. I’ll add the info to that document I started way back. You’re a hero
|
|
|
|
[#49]
Anyone doing anything new with their link? I miss this thread...
|
|
|
|
[#50]
I was shooting mine with my Guard 45 quite a bit but have since slowed down. $6 per mag dump was starting to add up.
I have plans for a trip bar in order to use the link with "bufferless" systems like a 22 conversion and/or Rock River PDS but haven't done much with it yet. |
|
|
 Win a FREE Membership!
Sign up for the ARFCOM weekly newsletter and be entered to win a free ARFCOM membership. One new winner* is announced every week!
You will receive an email every Friday morning featuring the latest chatter from the hottest topics, breaking news surrounding legislation, as well as exclusive deals only available to ARFCOM email subscribers.

AR15.COM is the world's largest firearm community and is a gathering place for firearm enthusiasts of all types.
From hunters and military members, to competition shooters and general firearm enthusiasts, we welcome anyone who values and respects the way of the firearm.

Subscribe to our monthly Newsletter to receive firearm news, product discounts from your favorite Industry Partners, and more.
Copyright © 1996-2024 AR15.COM LLC. All Rights Reserved.
Any use of this content without express written consent is prohibited.
AR15.Com reserves the right to overwrite or replace any affiliate, commercial, or monetizable links, posted by users, with our own.


