PA, USA
|
[#1]
|
|
|
MI, USA
|
[#2]
Originally Posted By jbizzle:
My "ghetto" bench compared to others I see here 
Did some minor updates to my bench 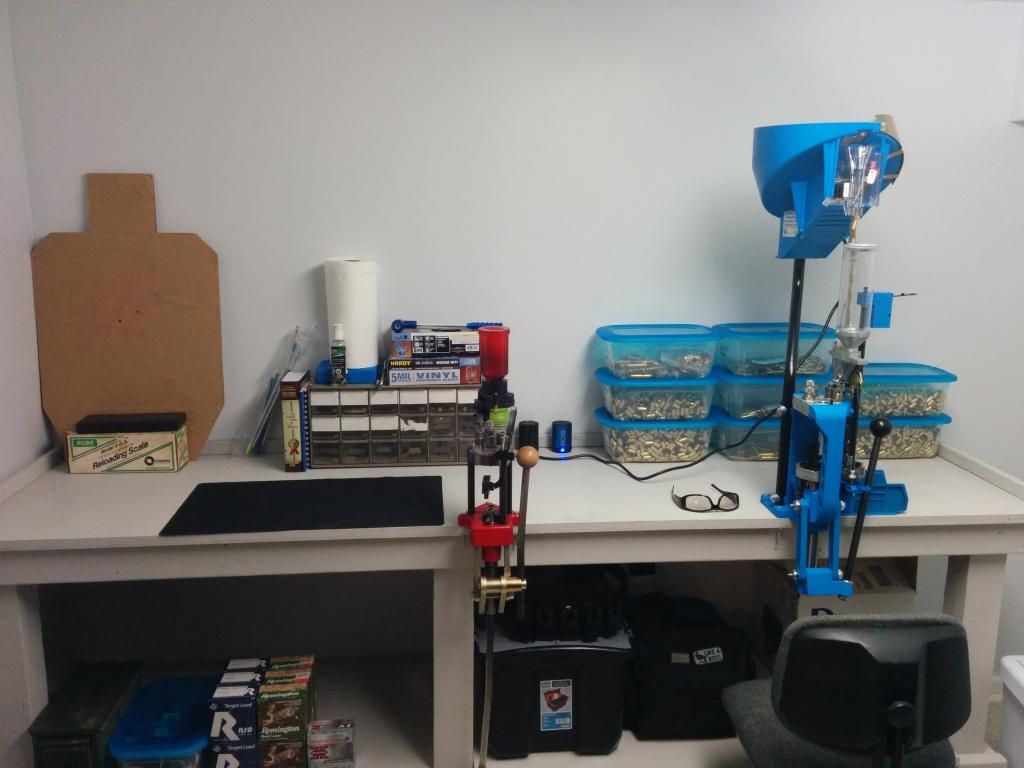
Almost done have some small stuff to do still. Will prolly reload my first rounds of 9mm tomorrow night. I've got the dies setup already though. |
|
|
|
[#3]
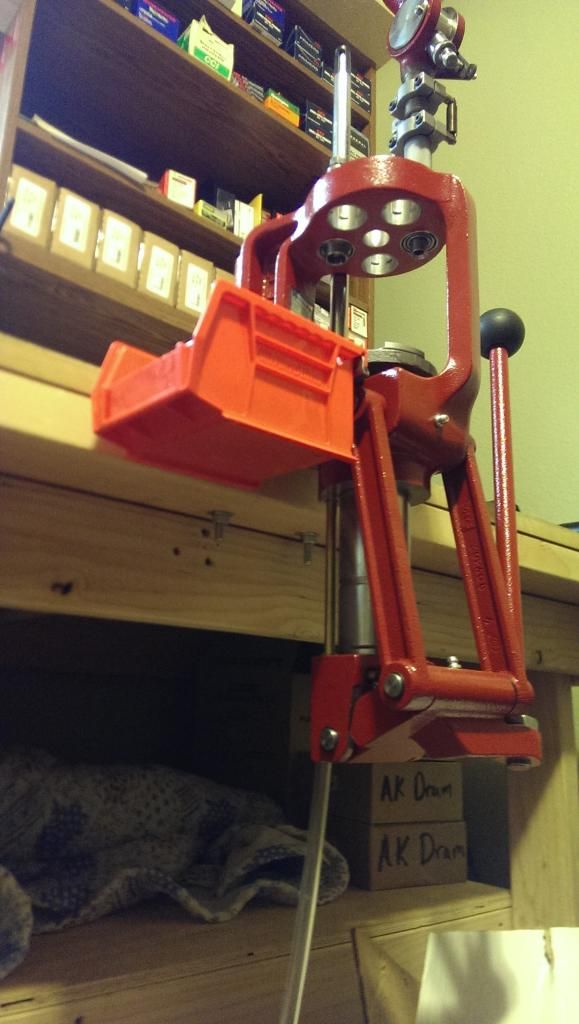
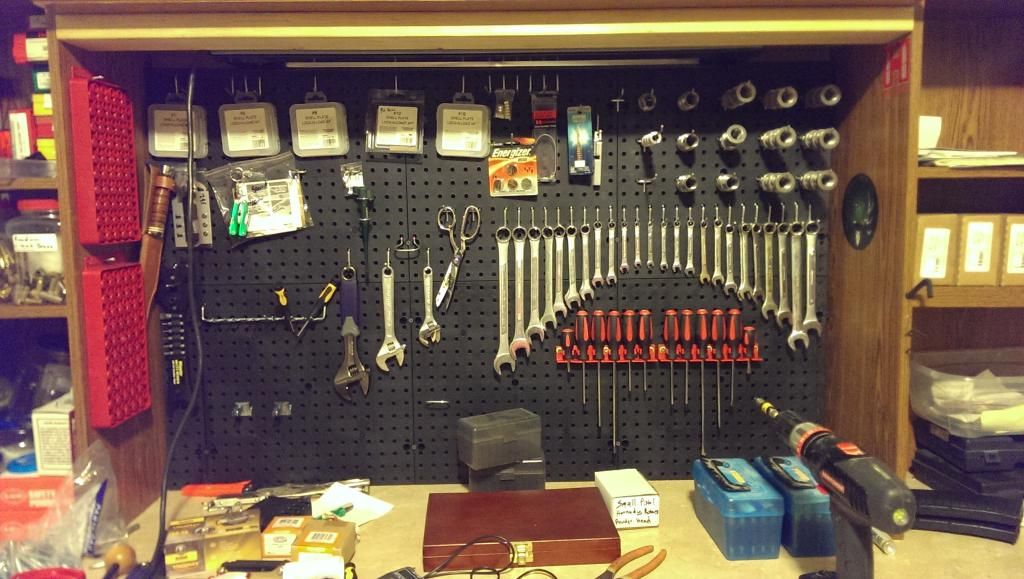
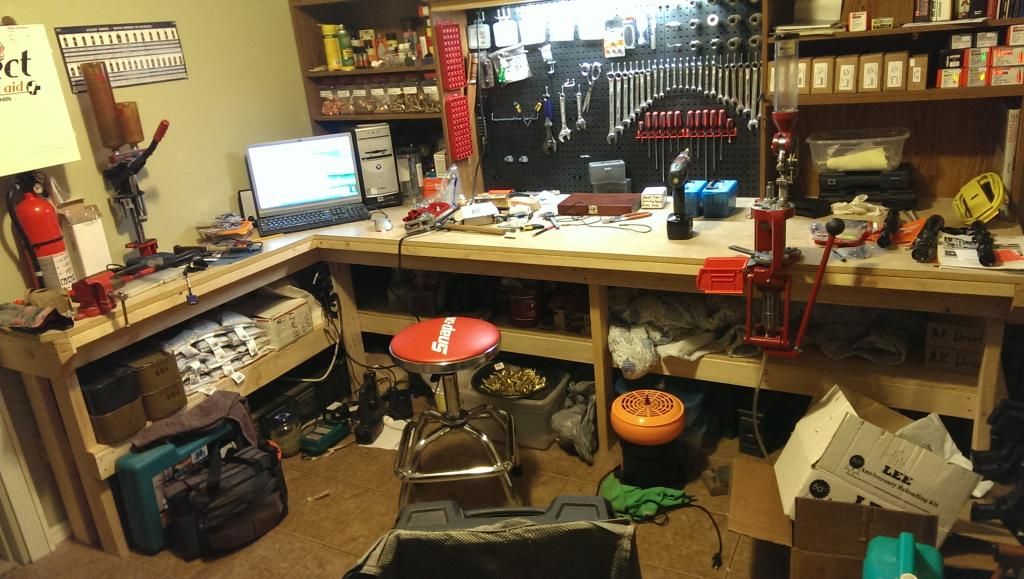
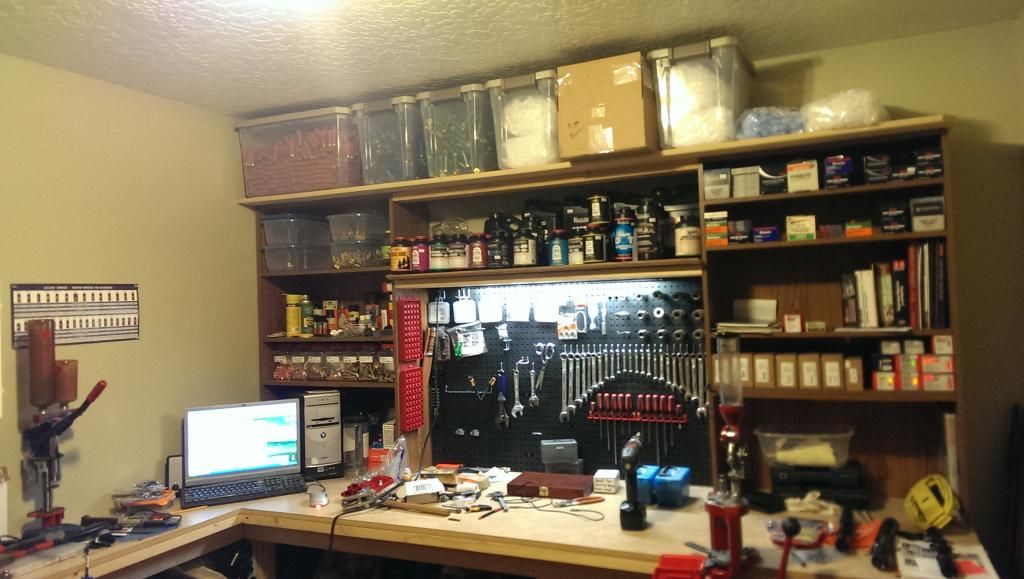
I guess it's time to post mine up. I still need to paint the walls, and finish some artwork, but most of the "bench setup" is now completed.


|
|
|
|
|
[#4]
Originally Posted By 00Ghost00:
I guess it's time to post mine up. I still need to paint the walls, and finish some artwork, but most of the "bench setup" is now completed. http://i45.photobucket.com/albums/f98/spdr8cer/95_zps24881ea8.jpg http://i45.photobucket.com/albums/f98/spdr8cer/92_zpse9573472.jpg http://i45.photobucket.com/albums/f98/spdr8cer/88_zpsf0ba6cd3.jpg one of the best i have seen, very well done sir 
|
|
|
|
|
[#5]
Originally Posted By ozzie839:
one of the best i have seen, very well done sir Originally Posted By ozzie839:
Originally Posted By 00Ghost00:
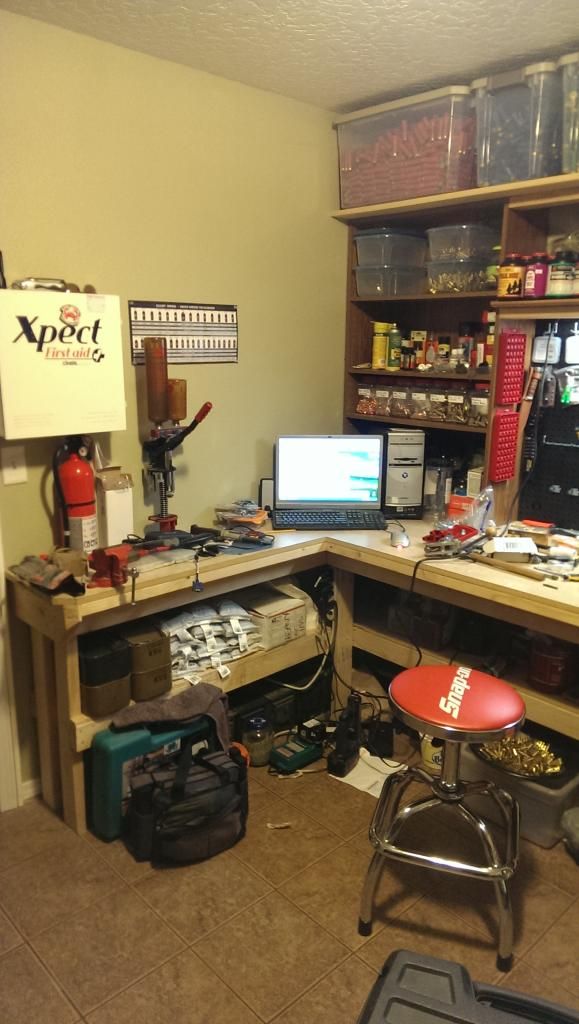
I guess it's time to post mine up. I still need to paint the walls, and finish some artwork, but most of the "bench setup" is now completed. http://i45.photobucket.com/albums/f98/spdr8cer/95_zps24881ea8.jpg http://i45.photobucket.com/albums/f98/spdr8cer/92_zpse9573472.jpg http://i45.photobucket.com/albums/f98/spdr8cer/88_zpsf0ba6cd3.jpg one of the best i have seen, very well done sir Thanks! I finally got the LED lighting under the lowest shelving level on the main bench area done today. I still plan on adding some drawers and shelving to the two sections where the brass and extra powder currently sits. I have a safe dedicated to just powder/ammo storage being delivered this week, which will allow me to finish that work. |
|
|
|
KS, USA
|
[#6]
Originally Posted By 00Ghost00:
I guess it's time to post mine up. I still need to paint the walls, and finish some artwork, but most of the "bench setup" is now completed. http://i45.photobucket.com/albums/f98/spdr8cer/95_zps24881ea8.jpg http://i45.photobucket.com/albums/f98/spdr8cer/92_zpse9573472.jpg http://i45.photobucket.com/albums/f98/spdr8cer/88_zpsf0ba6cd3.jpg Is that a bench set? If so, which one? I am looking to do something similar to that and I was considering the Seville set from Sam's. Would be nice to see what other options there are. |
|
|
|
[Last Edit: 00Ghost00]
[#7]
Originally Posted By MrFluffaluffagus:
Is that a bench set? If so, which one? I am looking to do something similar to that and I was considering the Seville set from Sam's. Would be nice to see what other options there are. Originally Posted By MrFluffaluffagus:
Originally Posted By 00Ghost00:
I guess it's time to post mine up. I still need to paint the walls, and finish some artwork, but most of the "bench setup" is now completed. http://i45.photobucket.com/albums/f98/spdr8cer/95_zps24881ea8.jpg http://i45.photobucket.com/albums/f98/spdr8cer/92_zpse9573472.jpg http://i45.photobucket.com/albums/f98/spdr8cer/88_zpsf0ba6cd3.jpg Is that a bench set? If so, which one? I am looking to do something similar to that and I was considering the Seville set from Sam's. Would be nice to see what other options there are. No, I wish it was. I spent a lot of time looking for an "off-the-shelf" solution (including the Seville at Sam's). I have limited space, as this is my home office, so it is shared with my office desks (which are just out of frame in the pictures). It's a 10x12 room. I ended up going with 3 of these router table/stands from Rockler (got them on-sale for 50% off each) Believe me when I say they are solid/heavy, and not cheap Chinese stamped steel frames. Link to Rockler router stands With this 1.5" butcher block counter top from Ikea, that I had cut in half/to my dimensions, that I then sanded and oiled. Link to IKEA Numerar counter top The shelving is built using another Rockler solution. Link to Rockler I-Semble Shelf Blocks Link to small shelf blocks to the left of the press And "driftwood" colored malmine shelving from The Container Store. Link to TheContainerStore My wife once asked me where I got the inspiration to come up with this build? I sent her the following response in an email: It was the Aliens! 
I blamed them for the fingerprints on the screen as well. 
ETA : She wasn't amused. |
|
|
|
IL, USA
|
[#8]
4x8 bench with tongue and groove flooring as a top. Still working on getting more lighting.


|
|
|
OH, USA
|
[#9]

the newest addition |
|
|
ID, USA
|
[#10]
long time reader fist time poster
this is my simple cheap bench only have about 100 dollars into it and a bit of time http://i649.photobucket.com/albums/uu219/studmuffinusa/IMAG0566.jpg http://i649.photobucket.com/albums/uu219/studmuffinusa/IMAG0565.jpg http://i649.photobucket.com/albums/uu219/studmuffinusa/IMAG0564.jpg http://i649.photobucket.com/albums/uu219/studmuffinusa/IMAG0574.jpg http://i649.photobucket.com/albums/uu219/studmuffinusa/IMAG0572.jpg http://i649.photobucket.com/albums/uu219/studmuffinusa/IMAG0573.jpg let me know what you think |
|
|
ID, USA
|
[#11]
let me try this again and see if i understand how to embed the pics this time
<a href="http://s649.photobucket.com/user/studmuffinusa/media/IMAG0565.jpg.html" target="_blank"><img src="http://i649.photobucket.com/albums/uu219/studmuffinusa/IMAG0565.jpg" border="0" alt=" photo IMAG0565.jpg"/></a> <a href="http://s649.photobucket.com/user/studmuffinusa/media/IMAG0566.jpg.html" target="_blank"><img src="http://i649.photobucket.com/albums/uu219/studmuffinusa/IMAG0566.jpg" border="0" alt=" photo IMAG0566.jpg"/></a> <a href="http://s649.photobucket.com/user/studmuffinusa/media/IMAG0564.jpg.html" target="_blank"><img src="http://i649.photobucket.com/albums/uu219/studmuffinusa/IMAG0564.jpg" border="0" alt=" photo IMAG0564.jpg"/></a> <a href="http://s649.photobucket.com/user/studmuffinusa/media/IMAG0574.jpg.html" target="_blank"><img src="http://i649.photobucket.com/albums/uu219/studmuffinusa/IMAG0574.jpg" border="0" alt=" photo IMAG0574.jpg"/></a> <a href="http://s649.photobucket.com/user/studmuffinusa/media/IMAG0572.jpg.html" target="_blank"><img src="http://i649.photobucket.com/albums/uu219/studmuffinusa/IMAG0572.jpg" border="0" alt=" photo IMAG0572.jpg"/></a><a href="http://s649.photobucket.com/user/studmuffinusa/media/IMAG0573.jpg.html" target="_blank"><img src="http://i649.photobucket.com/albums/uu219/studmuffinusa/IMAG0573.jpg" border="0" alt=" photo IMAG0573.jpg"/></a> and my ammo storage an old pantry with doors removed <a href="http://s649.photobucket.com/user/studmuffinusa/media/IMAG0570.jpg.html" target="_blank"><img src="http://i649.photobucket.com/albums/uu219/studmuffinusa/IMAG0570.jpg" border="0" alt=" photo IMAG0570.jpg"/></a> |
|
|
ID, USA
|
[#12]
ok i guess you will just have to click on the link as i do not know how to make the pictures post in the site like you all do
|
|
|
|
[Last Edit: ChevelleDave]
[#13]

There Ya go. I am very bored at work. |
|
|
|
|
[#14]

|
|
|
|
ID, USA
|
[#15]
what is the way to post pic like that what code or whatever or a link to the forum that explains it would be nice please
|
|
|
|
[Last Edit: Logicgear]
[#16]
|
|
|
|
|
[#17]
From photobucket or so, copy the "Direct link", then hit Reply, and below in the white box, click on the picture button, 4th from the right. Backspace the blue out, then paste Your link in the pop up box.
|
|
|
|
|
[#18]
|
|
|
|
ID, USA
|
[#19]
thanks for your help
sorry for beeing a noob and finally forgive me testing my new knowledge one last time 
|
|
|
ID, USA
|
[#20]
hum still not working worked in the preview |
|
|
|
[#21]
Originally Posted By studmuffinusa: hum still not working worked in the preview It works, newer members need a few team members to approve images to be shown to prevent spam. |
|
|
|
ID, USA
|
[#22]
oh ok
so what do i have to do to not have to be approved of each time? |
|
|
ID, USA
|
[#23]
ive been reading posts for years even tried to join a time or to but only had a yahoo mail and couldn't. i don't think i can even get a email form my isp if i tried. anyway saw they approved of gmail finally and so i signed up for a gmail just to finally join this awesome site!
|
|
|
IL, USA
|
[#24]
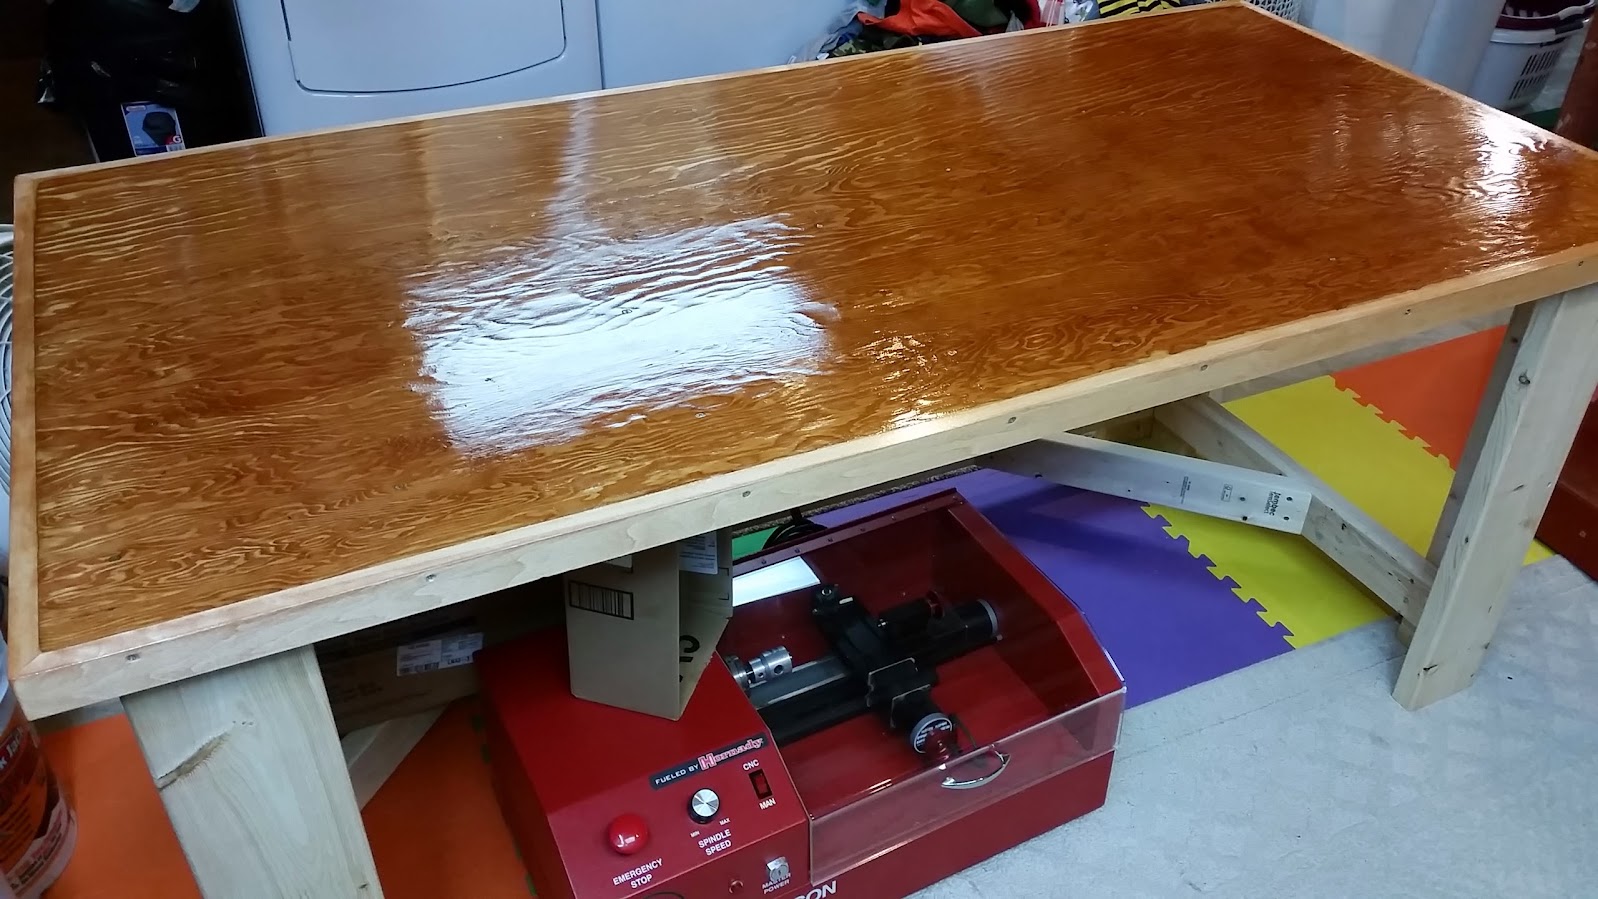
Built another desk/bench over the weekend. It's just a simple 2x4 and 2x6 frame. The piece of plywood was actually my Grandfather's. He passed away in 1979, so it's been around a while. This should hold my mini mill and mini lathe, and still some room for other projects when the need arises. It still needs some cleanup, stain, and finish.


|
|
|
|
[#25]
Originally Posted By studmuffinusa: ok i guess you will just have to click on the link as i do not know how to make the pictures post in the site like you all do Go up to FAQ's, top of the page, and read how it's done. You are just copying/pasting the wrong link.
|
|
|
|
|
[#26]
Originally Posted By studmuffinusa: oh ok so what do i have to do to not have to be approved of each time? |
|
|
|
IL, USA
|
[#28]
Finished the topcoat on the new desk/bench.
|
|
|
|
[#29]
Just thought I'd show off my poor man's reloading set up.

|
|
|
|
FL, USA
|
[#30]
Do you have nay more pics of the build, also what is the little red box underneath the desk?
|
|
|
|
[Last Edit: ontime1969]
[#31]
I have been doing some major reloading bench renovations and expansions, here is where I am at now. The stuff on top of bench is ultra temp. Its 8 feet long, and those are 40mm ammo cans on the bottom shelf
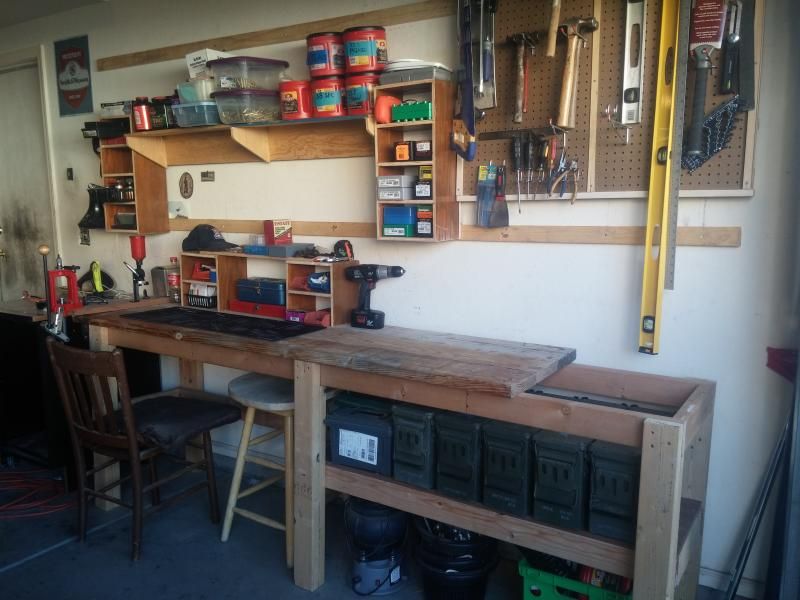
The bench is nice and heavy duty and the wall stuff is all using the cleat system. I can move everything around with Interchange componants. I still have a lot of things to do on it still. Work in progress. 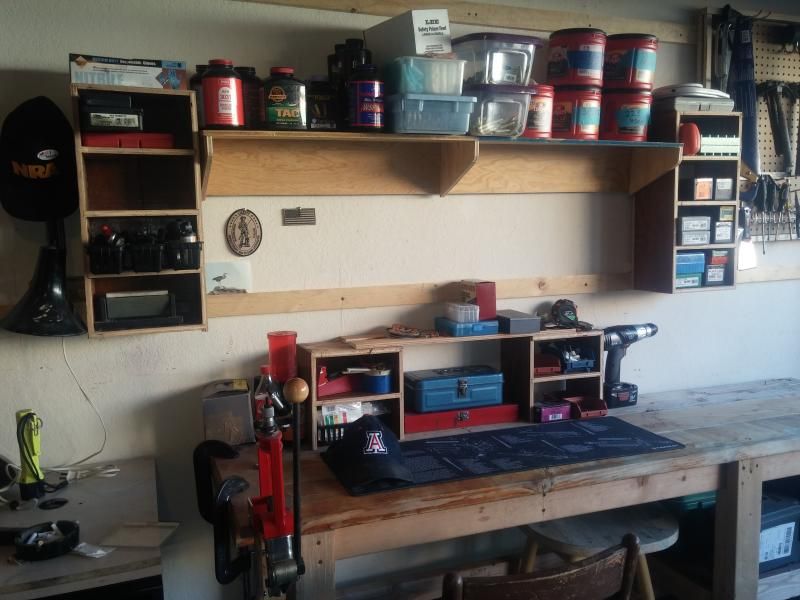
|
|
|
|
IL, USA
|
[#32]
Originally Posted By Sgt_Savage2003:
Do you have nay more pics of the build, also what is the little red box underneath the desk? I had a couple of pics before the finish back a page. No real pics of the build process. I just sketch out some plans on paper, then try to calculate what size 2x4 and 2x6 boards will cut down to what I need with the least waste (8', 10', etc.). The outer banding edge is just some aspen, just to hide the rough edge of the plywood. Front and rear facing legs are 2x6, and all rest is 2.4. There is a diagonal cross brace under the top. All screwed together with Torx head deck screws, except for the top, which are stainless. There are 2 coats of stain on top followed by 4 coats of Polycrylic. The little red box is a CNC mini lathe and I also have a matching CNC mini mill. I use them in manual mode for now, but hopefully I'll get it set up for proper CNC work someday. I also use the lathe with a WFT trimmer to trim my brass. It makes quick work of it. My youngest machinist explaining it all to me. (Disregard the very messy primary bench in the background.) 
|
|
|
|
[#33]

Finally got my man cave rebuilt after my last move. Ready to feed the children. |
|
|
|
|
[#34]
Originally Posted By vanrichten:
http://www.ar15.com/media/viewFile.html?i=73784 Finally got my man cave rebuilt after my last move. Ready to feed the children. Nicely done! Only thing I would add is shelves for the ammo cans to make it easier to grab the can you want without unstacking. |
|
|
|
|
[#35]
Originally Posted By Vegitan:
Nicely done! Only thing I would add is shelves for the ammo cans to make it easier to grab the can you want without unstacking. Originally Posted By Vegitan:
Originally Posted By vanrichten:
http://www.ar15.com/media/viewFile.html?i=73784 Finally got my man cave rebuilt after my last move. Ready to feed the children. Nicely done! Only thing I would add is shelves for the ammo cans to make it easier to grab the can you want without unstacking. Yeah, I need to do something with them. I hate all the lost space behind the cans too. Still working it out. |
|
|
|
|
[#36]
|
|
|
|
|
[#37]
What do you recommend I put on the top layer of my bench (plywood) - Seems like it has gotten dirty and grimy over the past few years. I was thinking of adding another 1/2" piece of plywood and maybe staining it before I glue/screw it on to the existing piece.
Thanks, SS |
|
|
|
|
[Last Edit: dangerdan]
[#38]
Originally Posted By Stephen7942: What do you recommend I put on the top layer of my bench (plywood) - Seems like it has gotten dirty and grimy over the past few years. I was thinking of adding another 1/2" piece of plywood and maybe staining it before I glue/screw it on to the existing piece. Thanks, SS If you got the coin, resurface it with laminate counter tops. Not really that expensive, but alot more expensive than just replacing some ply board. Plus it's easy to clean and looks nice. Or cover the existing ply board or whatever you've got with laminate sheeting for counter tops |
|
|
|
|
[#39]
I primed and painted mine with a neutral gray. It shows a little dirt, but mostly it only takes a quick brush off to get it clean. Since I did that - probably 6-8 months ago - the bench has stayed pretty clean.
No new pictures now, but I'm working on the layout for my benchtop die storage. I've gone from "die boxes pointing out" to having them sideways to reduce the footprint. I've tested out things like where to put the shell plates, my scale, etc., and have advanced my plans from there. Hopefully, time and weather allowing, I'll have some actual physical work done on it soon... |
|
|
|
|
[#40]
Originally Posted By Stephen7942:
What do you recommend I put on the top layer of my bench (plywood) - Seems like it has gotten dirty and grimy over the past few years. I was thinking of adding another 1/2" piece of plywood and maybe staining it before I glue/screw it on to the existing piece. Thanks, SS I always stain mine with a dark color stain, this last time was Walnut. Sand it good first and you will have no problems out of it. It still gets a little dirty but the dark stain hides it really well. |
|
|
|
IL, USA
|
[#41]
Originally Posted By Stephen7942:
What do you recommend I put on the top layer of my bench (plywood) - Seems like it has gotten dirty and grimy over the past few years. I was thinking of adding another 1/2" piece of plywood and maybe staining it before I glue/screw it on to the existing piece. Thanks, SS Sacrificial sheet of masonite. |
|
|
|
[#42]
Originally Posted By Stephen7942: What do you recommend I put on the top layer of my bench (plywood) - Seems like it has gotten dirty and grimy over the past few years. I was thinking of adding another 1/2" piece of plywood and maybe staining it before I glue/screw it on to the existing piece. Thanks, SS You could add a layer of melamine to the top. Available at the box stores. Comes in various thicknesses. It is laminate on 2 sides and a core of pressed board. Not much more than plywood. My bench top is make up of 2 pieces of 3/4 thickness glued and screwed together. Link of my bench on pg 6 of this thread. http://www.ar15.com/forums/t_6_42/262015_Official_Reloading_Bench_Picture_Thread___Now_with_100__more_Pictures_.html&page=6#i2388810 |
|
|
|
|
[#43]
Originally Posted By peligro113:
The last kid moved out a few days ago which allows me to convert his room into my man cave. Glad to see you wasted no time at all getting started. |
|
|
|
|
[#44]
Originally Posted By Stephen7942:
What do you recommend I put on the top layer of my bench (plywood) - Seems like it has gotten dirty and grimy over the past few years. I was thinking of adding another 1/2" piece of plywood and maybe staining it before I glue/screw it on to the existing piece. Thanks, SS Another option would be 1/4" tempered hardboard. It is a dark brown, hard surface. For my bench I used two layers of 3/4 MDF with the hardboard on top. Then sealed the hardboard with Minwax wipe on polyurethane. |
|
|
|
NH, USA
|
[#46]
hear is my set up sorry for the bad cell pic


|
|
|
|
[Last Edit: SERVED_USMC]
[#47]
Originally Posted By vanrichten:
http://www.ar15.com/media/viewFile.html?i=73784 Finally got my man cave rebuilt after my last move. Ready to feed the children. Thats super clean. I really like that. Also, you guys with carpentry skills make me jelly. ETA: Drywall went in today, Ill get a few pictures up soon. |
|
|
|
CT, USA
|
[Last Edit: User55645]
[#48]
Originally Posted By vanrichten:
Finally got my man cave rebuilt after my last move. Ready to feed the children. Originally Posted By vanrichten:
Finally got my man cave rebuilt after my last move. Ready to feed the children. Rustic and solid looking, nice. Looks like your powders are on drawer slides, yes? My only disappointment is that old, yellow, Ni-Cad drill on the wall! Paint it blue, for god's sake Originally Posted By freitasjorge:
Is that vise the Irwin one from Home Depot? If it is, be careful, I broke 3 of them! They shatter into extremely sharp shards of cast metal... Just letting you know... |
|
|
|
[#49]
Here's the updated progress as of today. Drywall will be finished Thursday so paint will come next week followed by flooring. All the wires hanging out of the wall are for the security cameras, internet,cable, etc..


|
|
|
|
|
[Last Edit: vanrichten]
[#50]
Originally Posted By User55645:
Rustic and solid looking, nice. Looks like your powders are on drawer slides, yes? My only disappointment is that old, yellow, Ni-Cad drill on the wall! Paint it blue, for god's sake Originally Posted By User55645:
Originally Posted By vanrichten:
Finally got my man cave rebuilt after my last move. Ready to feed the children. Rustic and solid looking, nice. Looks like your powders are on drawer slides, yes? My only disappointment is that old, yellow, Ni-Cad drill on the wall! Paint it blue, for god's sake Ha! I need to get a new drill, that one is starting to have issues keeping a solid battery charge. Yes, the powder is on drawer slides. I actually re-purposed computer rack drawer slides. Works great. |
|
|
|
 Win a FREE Membership!
Sign up for the ARFCOM weekly newsletter and be entered to win a free ARFCOM membership. One new winner* is announced every week!
You will receive an email every Friday morning featuring the latest chatter from the hottest topics, breaking news surrounding legislation, as well as exclusive deals only available to ARFCOM email subscribers.

AR15.COM is the world's largest firearm community and is a gathering place for firearm enthusiasts of all types.
From hunters and military members, to competition shooters and general firearm enthusiasts, we welcome anyone who values and respects the way of the firearm.

Subscribe to our monthly Newsletter to receive firearm news, product discounts from your favorite Industry Partners, and more.
Copyright © 1996-2024 AR15.COM LLC. All Rights Reserved.
Any use of this content without express written consent is prohibited.
AR15.Com reserves the right to overwrite or replace any affiliate, commercial, or monetizable links, posted by users, with our own.


