|
[#1]
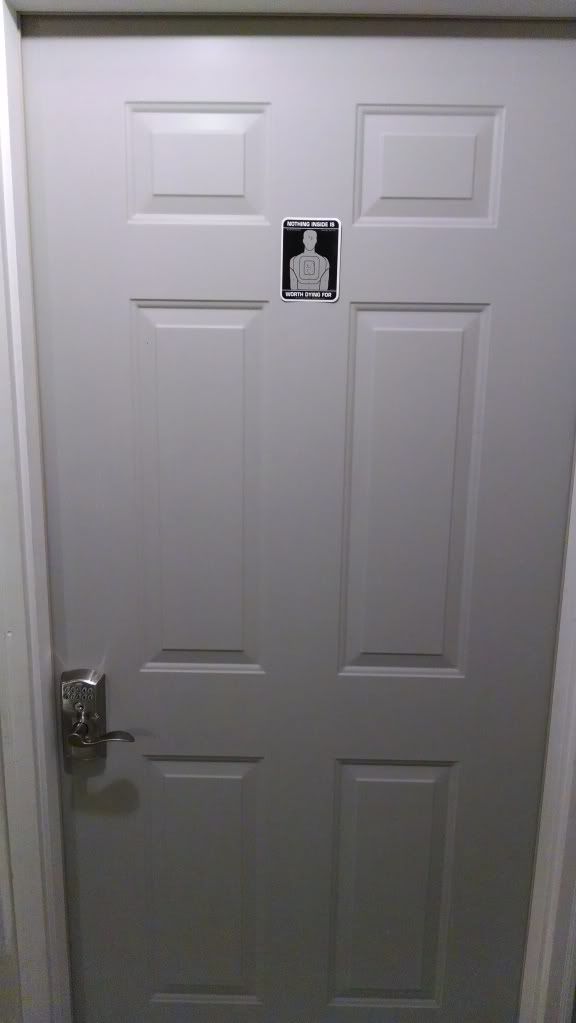
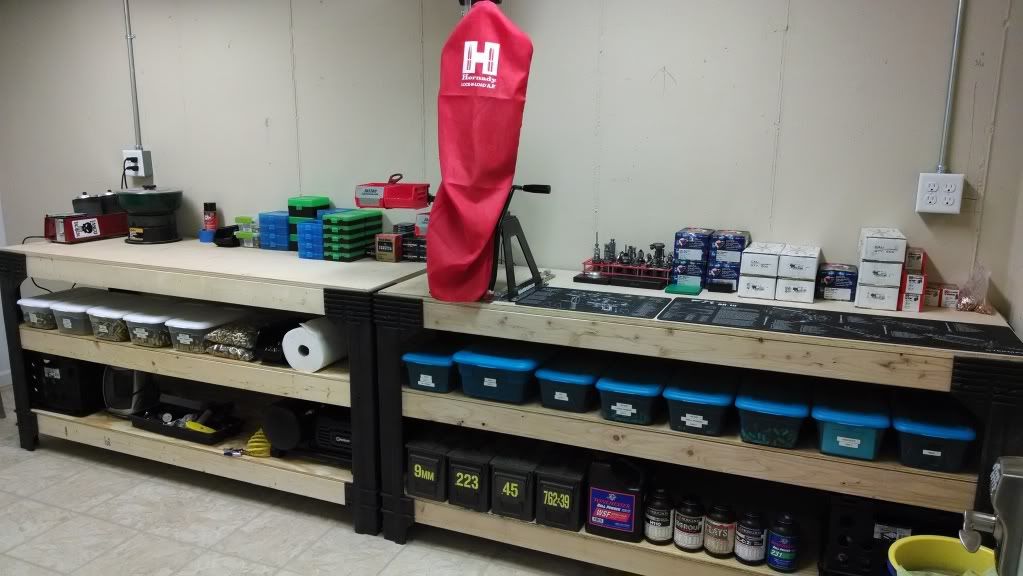
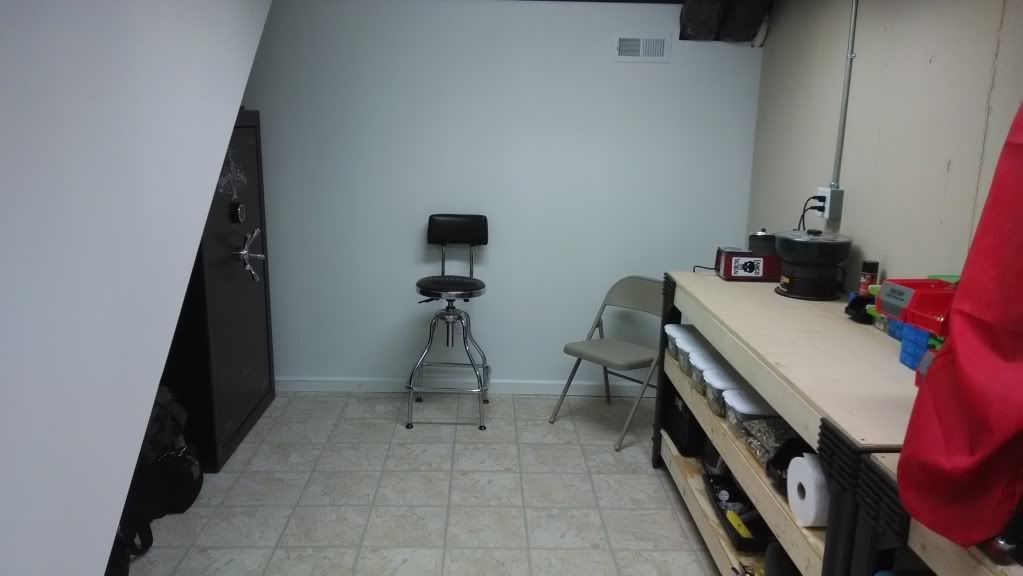
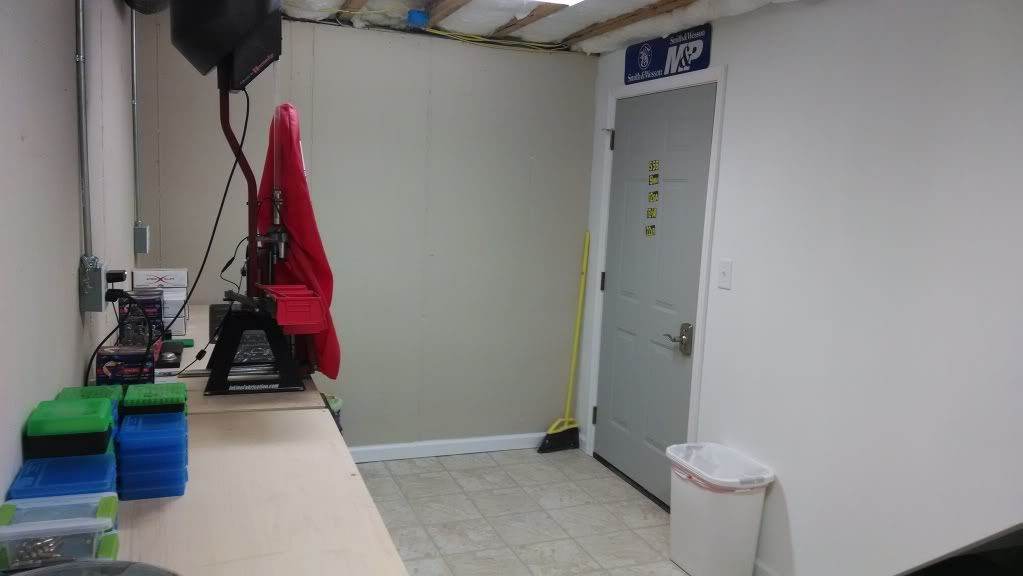
Originally Posted By Landshark9025:
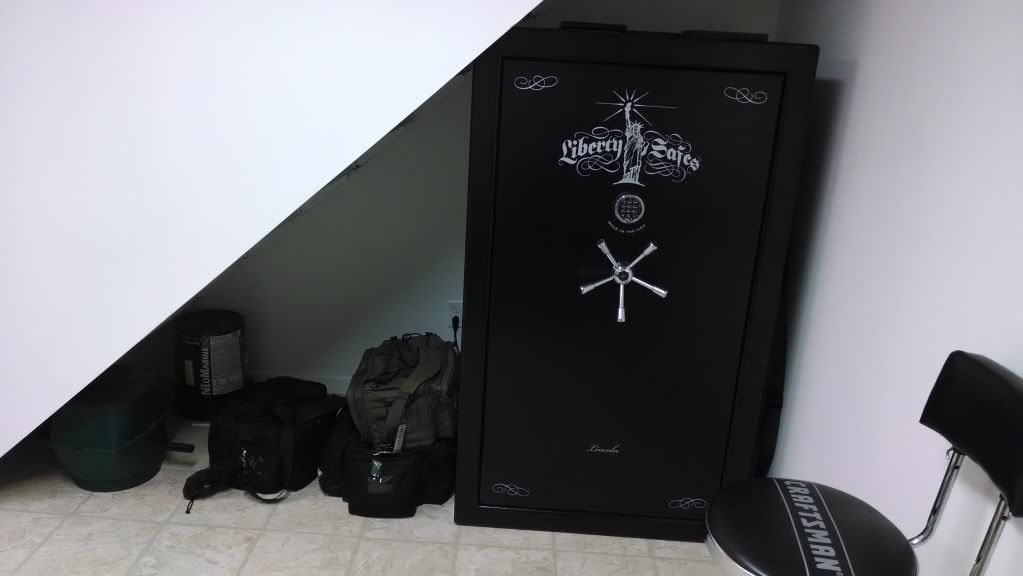
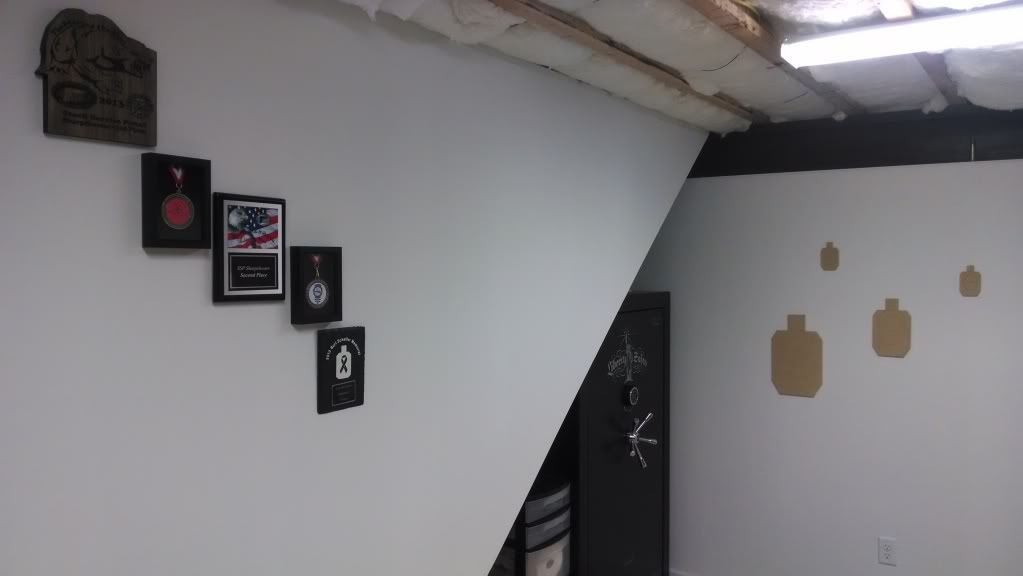
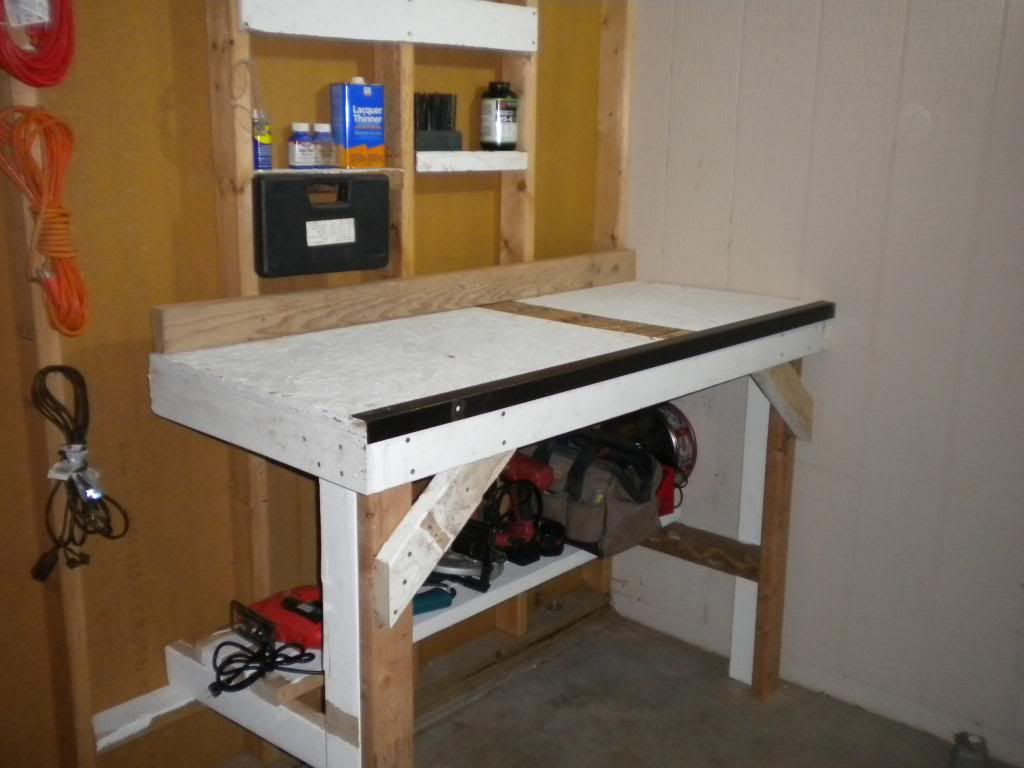
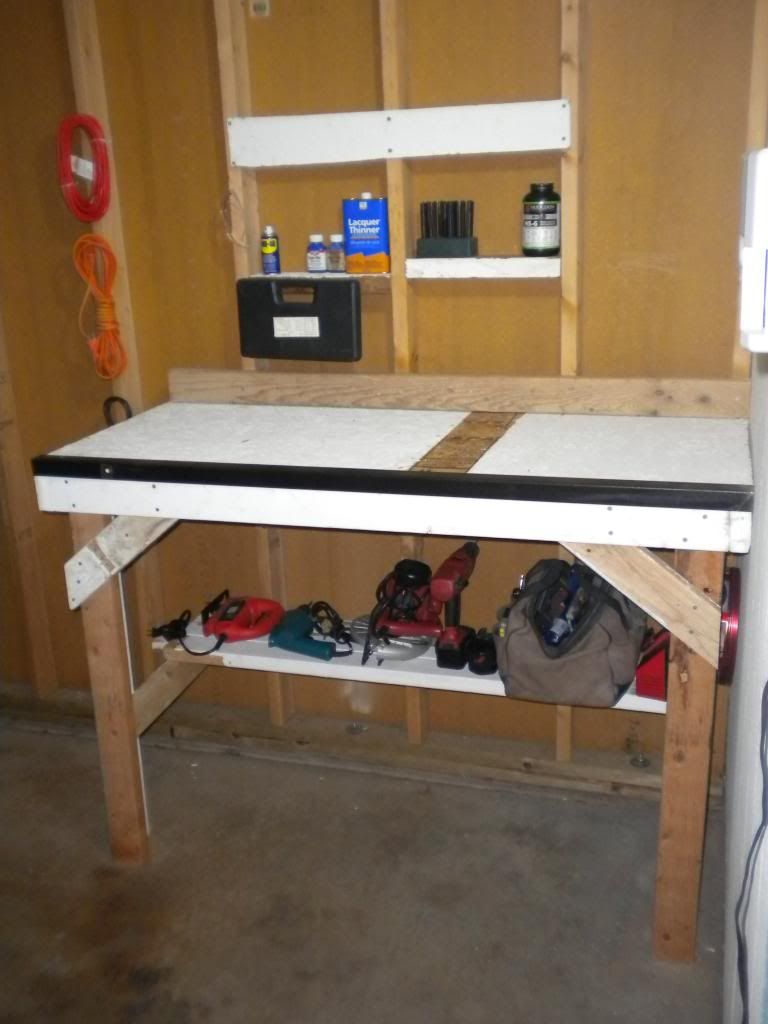
OK, so it is more of a "room". As I am just starting out, and will need to share space on the project table, I needed to make everything removable. Windows face east and south. Forgive the glare. Flammables (primer and powder) are stored so there will never be direct sunlight shining on the cans. Eventually, we will be putting doors on the closet. I store the primers, powder and bullets off the bench that way it forces me to have only one of each out at a time. I only have two types of powder now, but figure it is best to start the process now. Mostly a big, empty space with empty bins, but based on what I am seeing from everyone else's it is just a matter of time. http://i995.photobucket.com/albums/af80/landshark9025/ReloadingRoom11_zpsfd5caf33.jpg http://i995.photobucket.com/albums/af80/landshark9025/ReloadingRoom21_zps9f8a2343.jpg http://i995.photobucket.com/albums/af80/landshark9025/ReloadingRoom31_zps8f7b2729.jpg Here is a better image of the bench from the manufacturer's website: http://www.baysidefurnishings.com/cms_uploads/product_photos/onintable2.jpg That's the costco one isn't it? I've got the same thing as my computer desk haha. |
|
|
|
USA
|
[#2]
Yep, that's the one! Great desk/table, eh?
|
|
|
|
[#3]
Here's my setup....A before and a couple of afters


|
|
|
|
|
[#4]
Originally Posted By Grasslander:
Here's my setup....A before and a couple of afters <a href="http://s1254.photobucket.com/user/Grasslanderok/media/OldBench.jpg.html" target="_blank">http://i1254.photobucket.com/albums/hh613/Grasslanderok/OldBench.jpg</a> <a href="http://s1254.photobucket.com/user/Grasslanderok/media/036-1.jpg.html" target="_blank">http://i1254.photobucket.com/albums/hh613/Grasslanderok/036-1.jpg</a> <a href="http://s1254.photobucket.com/user/Grasslanderok/media/045.jpg.html" target="_blank">http://i1254.photobucket.com/albums/hh613/Grasslanderok/045.jpg</a> very nicely organized |
|
|
|
USA
|
[#5]
Finally have something worth posting in this thread, so I wanted to show a little before and after.
Started off with very humble beginnings: 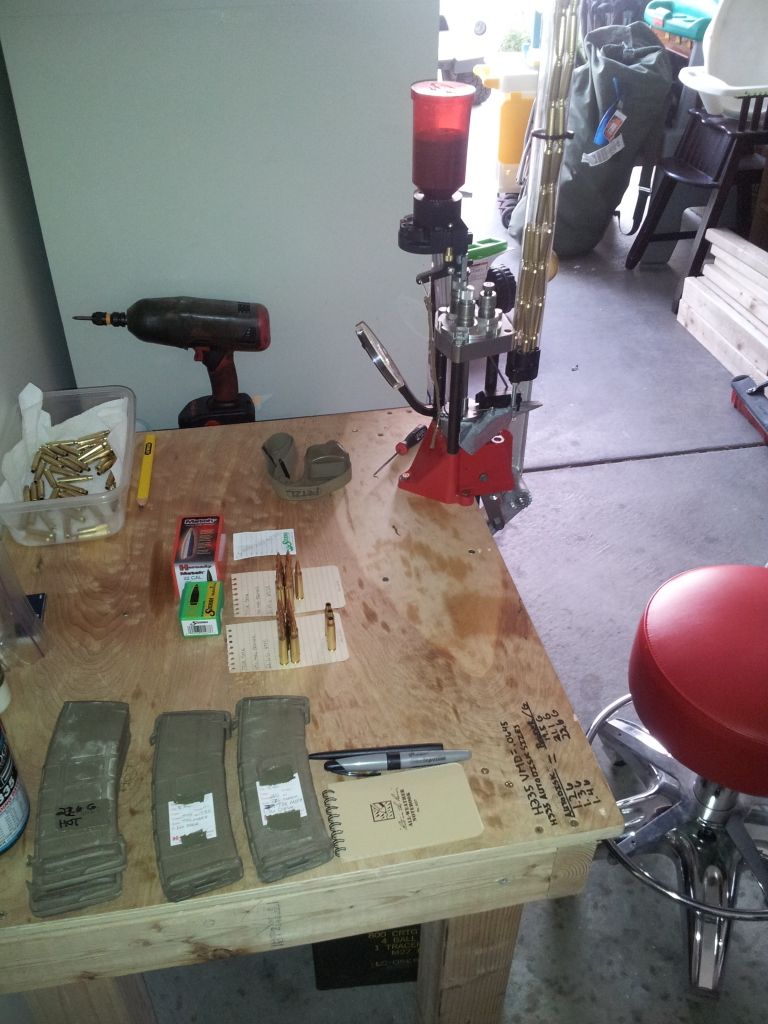
Got a few Upgrades: 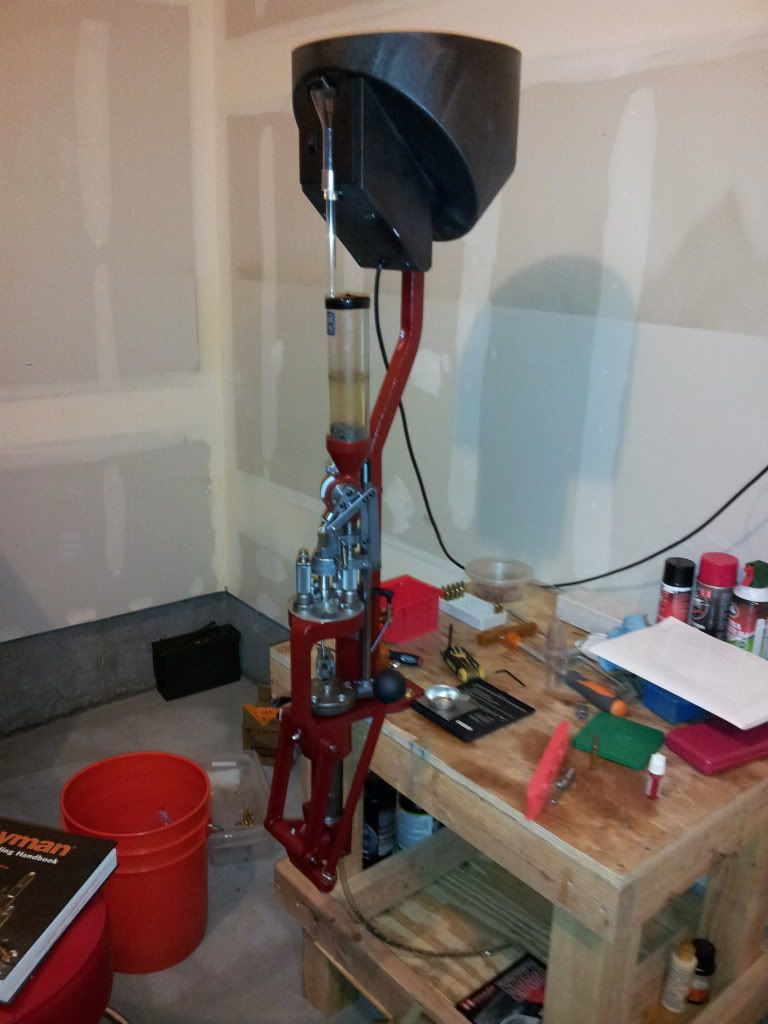
Wasnt happy with the LNL, So I finally took the advice of the wise sages here and am extremely happy I did 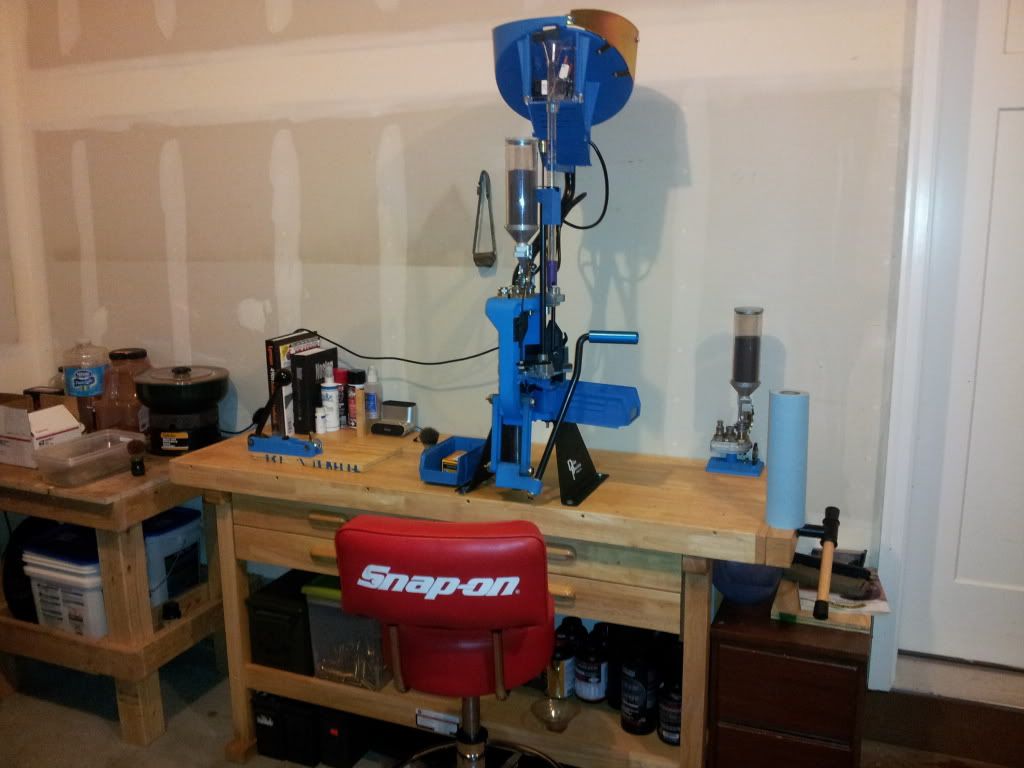
Could not be happier with the Dillon and the HF bench aint bad either |
|
|
|
[#6]
My bench in the dining room, since we never used the table.
I got it at Costco, ridiculously heavy and sturdy. I had it in the garage, but it's too hot here to be reloading outside, so I managed to drag this thing outside and around the outside of the house through the grass and dirt. The entire dining room has become a mancave with my computer desk as well as a smaller full size fridge for beverages. It can't really be seen, but I got a magnet bar at HF for $5 or so that I hung up, and keep my Allen wrenches and other magnetic tools attached to all in one place. Pegboard is metal, so it's plenty sturdy as well. 
|
|
|
|
USA
|
[#7]
Originally Posted By PhilChordoma:
My bench in the dining room, since we never used the table. I got it at Costco, ridiculously heavy and sturdy. I had it in the garage, but it's too hot here to be reloading outside, so I managed to drag this thing outside and around the outside of the house through the grass and dirt. The entire dining room has become a mancave with my computer desk as well as a smaller full size fridge for beverages. It can't really be seen, but I got a magnet bar at HF for $5 or so that I hung up, and keep my Allen wrenches and other magnetic tools attached to all in one place. Pegboard is metal, so it's plenty sturdy as well. http://www.ar15.com/media/viewFile.html?i=57360 Need Pics! really interested in your metal pegboard and where you got it |
|
|
|
[#8]
It came with the bench. It's only available inside Costco, they don't have it online. It's made by Whalen.
|
|
|
|
|
[#9]
looks like home depot sells some steel peg board among other places according to my google connection
here 
|
|
|
|
|
[Last Edit: Warhawk]
[#10]
Has anyone used the 3/4 inch laminated "hobby board" from Lowes as a bench top? 96x20 piece of it is $36
I might double it with plywood underneath. |
|
|
|
IN, USA
|
[Last Edit: NineBear]
[#11]
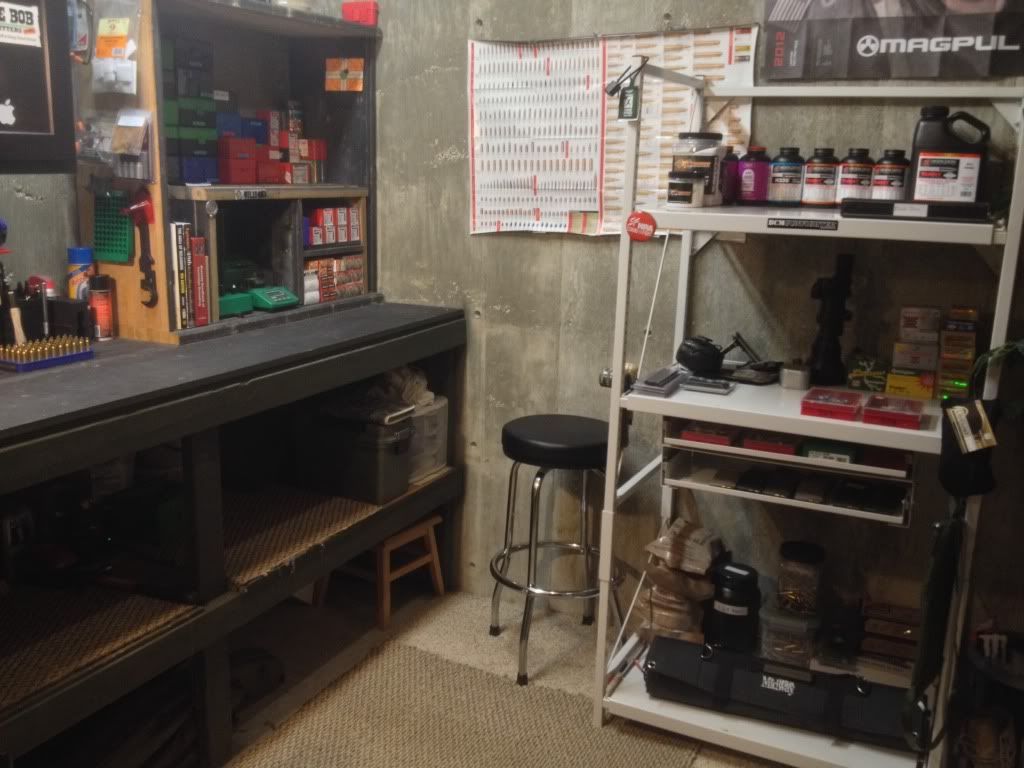
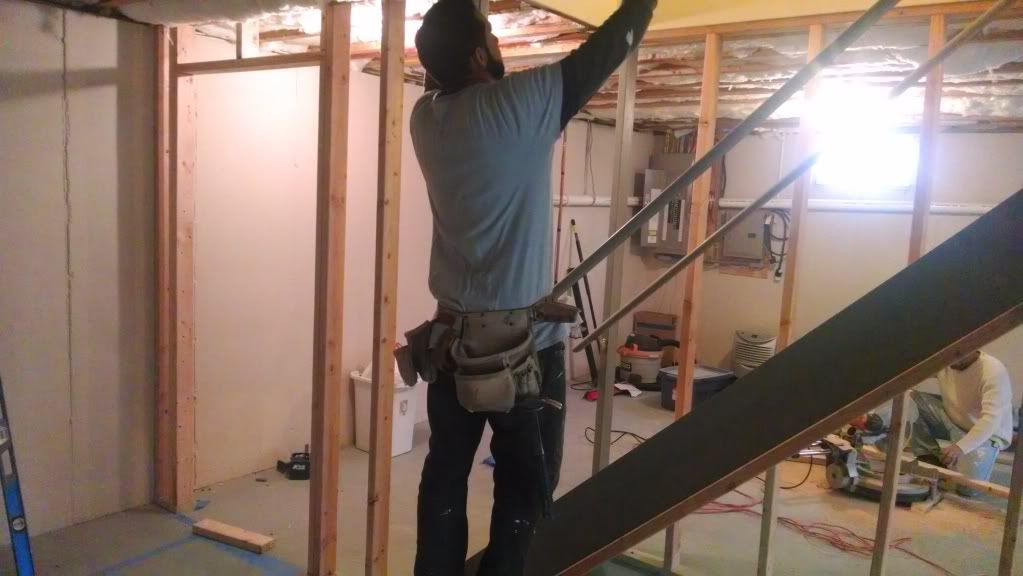
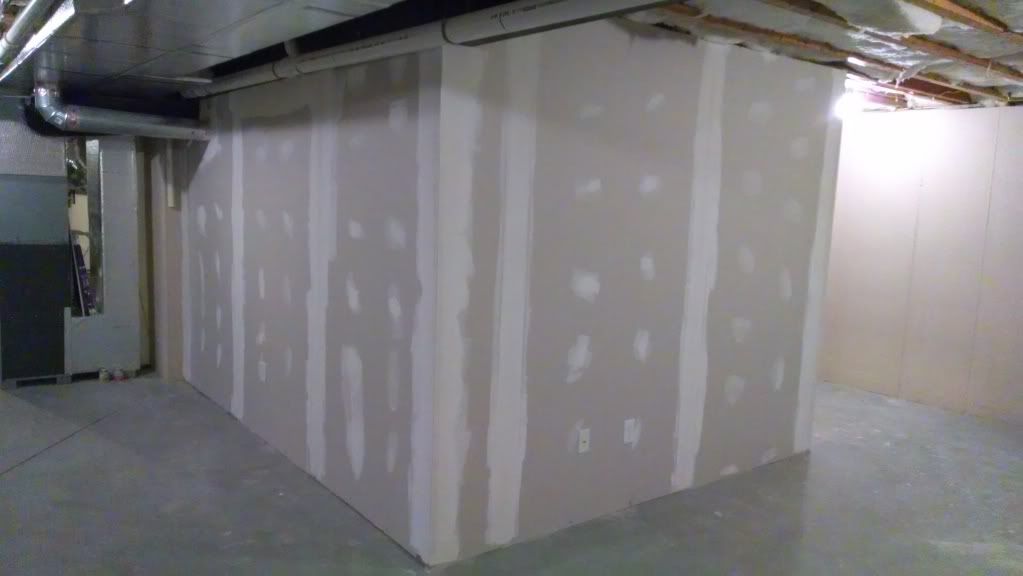
I sure love to look at all the great benches and rooms on this site. I have "borrowed" many ideas from you folks, and it motivated me to try my hand at a dedicated bench and small area for reloading.
View the photos here, and check out the captions at the bottom of each photo. https://skydrive.live.com/?cid=d98250d7248ef2a2&id=D98250D7248EF2A2%215395 |
|
|
|
[#12]
Originally Posted By NineBear: I sure love to look at all the great benches and rooms on this site. I have "borrowed" many ideas from you folks, and it motivated me to try my hand at a dedicated bench and small area for reloading. View the photos here, and check out the captions at the bottom of each photo. https://skydrive.live.com/?cid=d98250d7248ef2a2&id=D98250D7248EF2A2%215395 One of my favorite things is to welcome folks in after their first post. Instructions on posting pics are up in FAQ's.
|
|
|
|
|
[#13]
Originally Posted By NineBear:
I sure love to look at all the great benches and rooms on this site. I have "borrowed" many ideas from you folks, and it motivated me to try my hand at a dedicated bench and small area for reloading. View the photos here, and check out the captions at the bottom of each photo. https://skydrive.live.com/?cid=d98250d7248ef2a2&id=D98250D7248EF2A2%215395 Very nice job on your bench and especially your peg backboard with shelving and cabinet. Organized and keeps the bench free of clutter. |
|
|
|
|
[#14]
Originally Posted By NineBear:
I sure love to look at all the great benches and rooms on this site. I have "borrowed" many ideas from you folks, and it motivated me to try my hand at a dedicated bench and small area for reloading. View the photos here, and check out the captions at the bottom of each photo. https://skydrive.live.com/?cid=d98250d7248ef2a2&id=D98250D7248EF2A2%215395 That's a beautiful bench. Given my own personal bench habits, it would definitely be too pretty for me to work on! I've worked with Plexiglas in the past, and it is indeed a real pain to work with. My only current Plexiglas project (still on hold) is an enclosure for my powder scales to keep my ceiling fan from messing with my measurements; that's a lot smaller and more manageable a job than covering a whole, large loading bench. It looks like you thought hard about the leverage and angles involved in mounting your press. Any reason you didn't extend the aluminum plate all the way to the front edge of the bench? |
|
|
|
IN, USA
|
[#15]
It looks like you thought hard about the leverage and angles involved in mounting your press. Any reason you didn't extend the aluminum plate all the way to the front edge of the bench?
I wanted to do that, but the Hornady press sticks out quite far. There is a small lip on the base of the press that butts up against the edge of the bench, or in my case, against the face of the aluminum plate. I probably would have cut a small recess for the press if I did it over again. |
|
|
WA, USA
|
[#16]
I just got my new Rockchucker Supreme press to replace my JR2(1969) and JR3(1974). I wish I would have done it sooner.
I still need to remove the reducer bushing on the press and install the new Hornady LNL bushing. 


The other two plastic lockers are for hunting gear. 
|
|
|
NY, USA
|
[#17]
BTTT I'll have to tidy up my bench and submit a picture someday. Shouldn't this be a sticky?
|
|
|
IN, USA
|
[#18]
  |
|
|
|
[#19]
Originally Posted By DancingBear: BTTT I'll have to tidy up my bench and submit a picture someday. Shouldn't this be a sticky? We don't do stickies in this forum. What's already at the top of the page is ignored by the people who should read it the most anyway.
|
|
|
|
IA, USA
|
[#20]
http://cdn.homebrewtalk.com/images/4/1/4/0/8/imag0144-61279.jpg
Doubles as my gunsmithing bench. Waiting on a delivery from x-treme right now. |
|
|
|
[#21]
I use the plastic Folger's cans to organize my brass too. They work awesome!! I made a rotary tumbler that I can lay them on as well to tumble the brass.
Originally Posted By Boosted98gsx:
She's messy because I've been active a lot lately, but here's the man cave... http://i.imgur.com/I28w6j8.jpg Posted Via AR15.Com Mobile |
|
|
|
|
[#22]
Originally Posted By EB_311:
I just got my new Rockchucker Supreme press to replace my JR2(1969) and JR3(1974). I wish I would have done it sooner. I still need to remove the reducer bushing on the press and install the new Hornady LNL bushing. http://farm6.staticflickr.com/5538/10581439043_20c7f05509_c.jpg http://farm6.staticflickr.com/5476/10581162795_74164ac9aa_c.jpg http://farm8.staticflickr.com/7351/10581242855_4210ff4fe2_c.jpg http://farm4.staticflickr.com/3785/10581683903_f8c7bc10b4_c.jpg The other two plastic lockers are for hunting gear. http://farm8.staticflickr.com/7444/10581466424_46dd971d29_c.jpg What do you keep in your Stack-On boxes? It looks like all the reloading stuff is in your plastic cabinets. Talk about that bench/table; it looks very sturdy, and very roomy. I agree with using containers instead of bags to organize and store brass. I use mostly 2qt containers that started out full of cashews. They have screw on tops and are transparent too. I tape a label on the container to identify caliber, and I have a little form that lets me keep track of processing status (clean, sized, trimmed, etc.) that I toss in with the brass. For small bunches, I use the cheap sandwich boxes you can get at Wal-Mart - my .32 Auto brass is in those because the cases are so small. I find that containers, because they have structure, let me organize and get at my brass much easier. |
|
|
|
WA, USA
|
[Last Edit: EB_311]
[#23]
Originally Posted By GHPorter:
What do you keep in your Stack-On boxes? It looks like all the reloading stuff is in your plastic cabinets. Talk about that bench/table; it looks very sturdy, and very roomy. I agree with using containers instead of bags to organize and store brass. I use mostly 2qt containers that started out full of cashews. They have screw on tops and are transparent too. I tape a label on the container to identify caliber, and I have a little form that lets me keep track of processing status (clean, sized, trimmed, etc.) that I toss in with the brass. For small bunches, I use the cheap sandwich boxes you can get at Wal-Mart - my .32 Auto brass is in those because the cases are so small. I find that containers, because they have structure, let me organize and get at my brass much easier. Originally Posted By GHPorter:
Originally Posted By EB_311:
I just got my new Rockchucker Supreme press to replace my JR2(1969) and JR3(1974). I wish I would have done it sooner. I still need to remove the reducer bushing on the press and install the new Hornady LNL bushing. http://farm6.staticflickr.com/5538/10581439043_20c7f05509_c.jpg http://farm6.staticflickr.com/5476/10581162795_74164ac9aa_c.jpg http://farm8.staticflickr.com/7351/10581242855_4210ff4fe2_c.jpg http://farm4.staticflickr.com/3785/10581683903_f8c7bc10b4_c.jpg The other two plastic lockers are for hunting gear. http://farm8.staticflickr.com/7444/10581466424_46dd971d29_c.jpg What do you keep in your Stack-On boxes? It looks like all the reloading stuff is in your plastic cabinets. Talk about that bench/table; it looks very sturdy, and very roomy. I agree with using containers instead of bags to organize and store brass. I use mostly 2qt containers that started out full of cashews. They have screw on tops and are transparent too. I tape a label on the container to identify caliber, and I have a little form that lets me keep track of processing status (clean, sized, trimmed, etc.) that I toss in with the brass. For small bunches, I use the cheap sandwich boxes you can get at Wal-Mart - my .32 Auto brass is in those because the cases are so small. I find that containers, because they have structure, let me organize and get at my brass much easier. I kept firearm related tools and cleaning supplies in the tool boxes. It was a bit much, so I swapped it with the Rubbermaid cart I was using in my garage. 
The steel-framed bench is from my dad's shop. He used it to work on restaurant equipment, so it is very sturdy and roomy. I had my eye on it and he knew I wanted it, so when I told him I was overhauling my reloading room he offered it to me. It's 6' wide, 3' deep, and 33" tall (after I cut the legs down). The top is made from two 1/2" sheets of plywood with something hard in the middle. I'm not sure what he used for the top surface, but it seems tougher than the masonite I have on my garage bench. The edge is capped with a plastic trim. |
|
|
WI, USA
|
[#24]
Here is mine. Just started getting into reloading. Still need a few more things, but it's coming along nicely.


|
|
|
TX, USA
|
[#25]
Space was at a premium for me, so I wanted a setup that could be multi-functional. I'm just starting out so I went with the single stage so I can really learn the process, and then I will upgrade to a progessive. I have my eyes on a dillon 550b, but that is down the road.


|
|
|
|
[#26]

|
|
|
|
OR, USA
|
[#27]
The beginnings of my reloading bench. Been wanting to do this for a while. I have invaded the wife's office space with my reloading addiction and the natives are getting restless. :smile:
It is a 20 x 10 blank canvas that I will enjoy filling up. On a side note, anyone here use the Dillon RF-100 primer filler? If so, what are your thoughts? Recommend it? 


|
|
|
|
[#28]
Originally Posted By 1in9twist16:
The beginnings of my reloading bench. Been wanting to do this for a while. I have invaded the wife's office space with my reloading addiction and the natives are getting restless. :smile: It is a 20 x 10 blank canvas that I will enjoy filling up. On a side note, anyone here use the Dillon RF-100 primer filler? If so, what are your thoughts? Recommend it? <a href="http://s412.photobucket.com/user/1in9twist/media/IMG_6058_zps9f22865e.jpg.html" target="_blank">http://i412.photobucket.com/albums/pp206/1in9twist/IMG_6058_zps9f22865e.jpg</a> <a href="http://s412.photobucket.com/user/1in9twist/media/IMG_6112_zps9ec0ccf6.jpg.html" target="_blank">http://i412.photobucket.com/albums/pp206/1in9twist/IMG_6112_zps9ec0ccf6.jpg</a> <a href="http://s412.photobucket.com/user/1in9twist/media/IMG_6121_zps5bd0637a.jpg.html" target="_blank">http://i412.photobucket.com/albums/pp206/1in9twist/IMG_6121_zps5bd0637a.jpg</a> <a href="http://s412.photobucket.com/user/1in9twist/media/IMG_6198_zps72262551.jpg.html" target="_blank">http://i412.photobucket.com/albums/pp206/1in9twist/IMG_6198_zps72262551.jpg</a> <a href="http://s412.photobucket.com/user/1in9twist/media/IMG_6199_zps2e8f0b23.jpg.html" target="_blank">http://i412.photobucket.com/albums/pp206/1in9twist/IMG_6199_zps2e8f0b23.jpg</a> <a href="http://s412.photobucket.com/user/1in9twist/media/IMG_6201_zpsa562014f.jpg.html" target="_blank">http://i412.photobucket.com/albums/pp206/1in9twist/IMG_6201_zpsa562014f.jpg</a> very cool cant wait to see it finished |
|
|
|
|
[#29]
Originally Posted By ozzie839: very cool cant wait to see it finished Originally Posted By ozzie839: Originally Posted By 1in9twist16: The beginnings of my reloading bench. Been wanting to do this for a while. I have invaded the wife's office space with my reloading addiction and the natives are getting restless. :smile: It is a 20 x 10 blank canvas that I will enjoy filling up. On a side note, anyone here use the Dillon RF-100 primer filler? If so, what are your thoughts? Recommend it? very cool cant wait to see it finished Good job on the bench height receptacles! It seems like there's never enough! |
|
|
|
|
[#30]
Looking good.
I must have a tidy up so I can put up some pics of my reloading area. I use the Dillon Primer filler and it is great. After spending years doing it the old way I wouldn't go back. |
|
|
|
|
[#31]
Originally Posted By 1in9twist16:
The beginnings of my reloading bench. Been wanting to do this for a while. I have invaded the wife's office space with my reloading addiction and the natives are getting restless. :smile: It is a 20 x 10 blank canvas that I will enjoy filling up. On a side note, anyone here use the Dillon RF-100 primer filler? If so, what are your thoughts? Recommend it? <a href="http://s412.photobucket.com/user/1in9twist/media/IMG_6058_zps9f22865e.jpg.html" target="_blank">http://i412.photobucket.com/albums/pp206/1in9twist/IMG_6058_zps9f22865e.jpg</a> <a href="http://s412.photobucket.com/user/1in9twist/media/IMG_6112_zps9ec0ccf6.jpg.html" target="_blank">http://i412.photobucket.com/albums/pp206/1in9twist/IMG_6112_zps9ec0ccf6.jpg</a> <a href="http://s412.photobucket.com/user/1in9twist/media/IMG_6121_zps5bd0637a.jpg.html" target="_blank">http://i412.photobucket.com/albums/pp206/1in9twist/IMG_6121_zps5bd0637a.jpg</a> <a href="http://s412.photobucket.com/user/1in9twist/media/IMG_6198_zps72262551.jpg.html" target="_blank">http://i412.photobucket.com/albums/pp206/1in9twist/IMG_6198_zps72262551.jpg</a> <a href="http://s412.photobucket.com/user/1in9twist/media/IMG_6199_zps2e8f0b23.jpg.html" target="_blank">http://i412.photobucket.com/albums/pp206/1in9twist/IMG_6199_zps2e8f0b23.jpg</a> <a href="http://s412.photobucket.com/user/1in9twist/media/IMG_6201_zpsa562014f.jpg.html" target="_blank">http://i412.photobucket.com/albums/pp206/1in9twist/IMG_6201_zpsa562014f.jpg</a> That is awesome! I wish I had the room to do something like that. I can't wait to see it when it is done. Keep us posted of the progress. I haven't used the RF-100 personally but the LGS I go to all of the time has one they use all of the time. They guys there load a ton of ammo all of the time on their 1050, 650, and SDB presses. They love the thing as it takes almost no time to fill up the pick up tubes. |
|
|
|
OR, USA
|
[#32]
Progress!


|
|
|
|
[#33]
I cleaned my bench off to organize everything and mount my single stage press.
Nothing like few pictures while it's cleaned up. 


|
|
|
|
WA, USA
|
[#34]
I finished building the portable bench that I made to mount my RCBS.
Just need to paint it now. Hope to take it out shooting to work up some loads soon. 

|
|
|
|
[#35]
Originally Posted By 1in9twist16:
The beginnings of my reloading bench. Been wanting to do this for a while. I have invaded the wife's office space with my reloading addiction and the natives are getting restless. :smile: It is a 20 x 10 blank canvas that I will enjoy filling up. On a side note, anyone here use the Dillon RF-100 primer filler? If so, what are your thoughts? Recommend it? Have one and love it, with CCI Primers I have not gotten a flipped one in 6000 so far, with Tula I have had maybe 4 in 3000 so far. They are set up with a 2 minute run time, mine usually fills the tube in 1 minute and I hit the button to make it stop, it's sitting right next to my 1050 so I can see it easily while I'm running ammo. |
|
|
|
PA, USA
|
[#36]
Have been loading on a bench in the basement for a few months now but wanted to give everything a fully dedicated space
4 days start to finish ... Will be adding a Super 1050 to the second bench next year and when the collection requires, a second safe in the spot we left after the benches. Storage seems ample enough for now and when/if that changes we will hang some cabinets 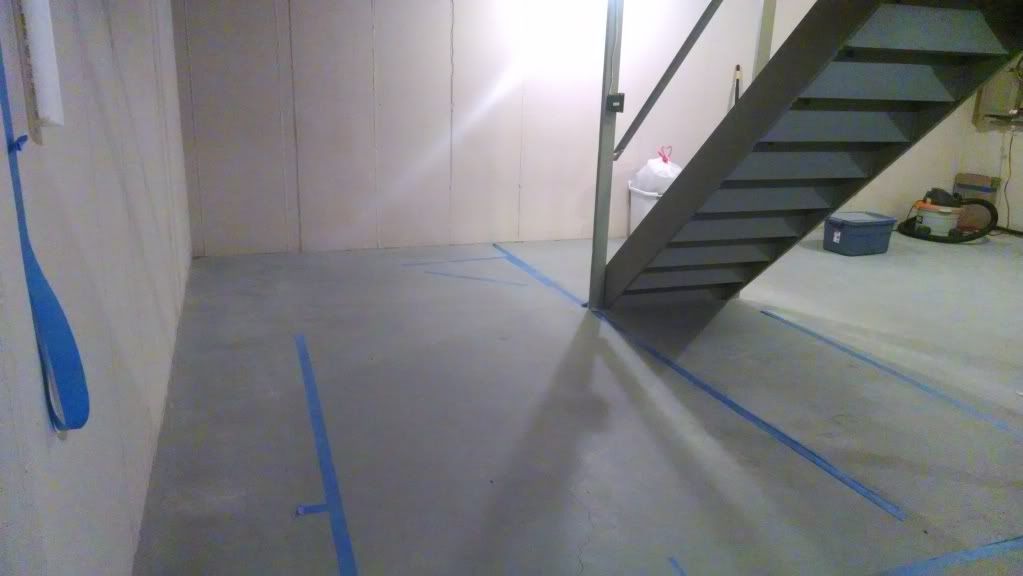
|
|
|
|
[#39]

Yup, I'm terrible at taking pictures... |
|
|
|
|
[#41]
Originally Posted By nicktheww2fanatic: http://i221.photobucket.com/albums/dd81/nicktheww2fanatic/IMAG0061.jpg Yup, I'm terrible at taking pictures... Welcome to the Reloading Forum.
|
|
|
|
|
[#42]
Bench is just about done, built with repurposed lumber from what use to be my chicken coop. Nearly done bench and 1lb of powder, I'm almost ready to reload
 . .
|
|
|
|
|
[#43]
Originally Posted By dryflash3:
Now that is a thick bench top. Welcome to the Reloading Forum. Originally Posted By dryflash3:
Originally Posted By nicktheww2fanatic:
http://i221.photobucket.com/albums/dd81/nicktheww2fanatic/IMAG0061.jpg Yup, I'm terrible at taking pictures... Welcome to the Reloading Forum. And under the Classic Turret & Dillon 450 are 4x6's. I was planning on half the thickness for the top, but when Lowe's messed up a cut a little they gave me the sheet for half price... couldn't pass it up. |
|
|
|
|
[#44]
All these other photos in this thread are so neat and tidy. Here is a picture of my basement reloading/electronics/all around work area.
  |
|
|
|
|
[#45]


|
|
|
|
|
[#46]
Originally Posted By TXOUTLAW32:
http://i44.photobucket.com/albums/f32/cbcs232/IMG_1526_zpsdd04e6dd.jpg http://i44.photobucket.com/albums/f32/cbcs232/IMG_1550_zps6f1b3c05.jpg http://i44.photobucket.com/albums/f32/cbcs232/IMG_1553_zps82103457.jpg http://i44.photobucket.com/albums/f32/cbcs232/IMG_1554_zps60432b06.jpg Very nicely done, gives me some ideas. |
|
|
|
|
[#47]
Originally Posted By TXOUTLAW32:
http://i44.photobucket.com/albums/f32/cbcs232/IMG_1526_zpsdd04e6dd.jpg http://i44.photobucket.com/albums/f32/cbcs232/IMG_1550_zps6f1b3c05.jpg http://i44.photobucket.com/albums/f32/cbcs232/IMG_1553_zps82103457.jpg http://i44.photobucket.com/albums/f32/cbcs232/IMG_1554_zps60432b06.jpg That is very nice, I like the shelves up top with extra room left on the bench top. |
|
|
|
|
[#48]
Originally Posted By Warhawk:
Very nicely done, gives me some ideas. Originally Posted By Warhawk:
Originally Posted By TXOUTLAW32:
http://i44.photobucket.com/albums/f32/cbcs232/IMG_1526_zpsdd04e6dd.jpg http://i44.photobucket.com/albums/f32/cbcs232/IMG_1550_zps6f1b3c05.jpg http://i44.photobucket.com/albums/f32/cbcs232/IMG_1553_zps82103457.jpg http://i44.photobucket.com/albums/f32/cbcs232/IMG_1554_zps60432b06.jpg Very nicely done, gives me some ideas. Thank you very much! |
|
|
|
|
[#49]
Originally Posted By AJE:
That is very nice, I like the shelves up top with extra room left on the bench top. Originally Posted By AJE:
Originally Posted By TXOUTLAW32:
http://i44.photobucket.com/albums/f32/cbcs232/IMG_1526_zpsdd04e6dd.jpg http://i44.photobucket.com/albums/f32/cbcs232/IMG_1550_zps6f1b3c05.jpg http://i44.photobucket.com/albums/f32/cbcs232/IMG_1553_zps82103457.jpg http://i44.photobucket.com/albums/f32/cbcs232/IMG_1554_zps60432b06.jpg That is very nice, I like the shelves up top with extra room left on the bench top. Thank you. Yeah those shelves are a nice addition, my wife actually suggested the bottom little one and it works very well holding ammo that I will shoot on the weekends. The top is now completely across with ammo cans and there is pegboard in every cubby. |
|
|
|
|
[#50]
My first. RCBS Rock Chucker kit on a Northern Tool $69 black Friday work bench.
The workbench was great, except for the top sheathing. I had to replace the top 3/8" MDF sheathing with good 3/4" ply. Under the ply, I added a 2x4 in the rear and a 2x10 in the front. I ran a #10 3/8" self tapping screw in each connection. It is rock solid now. I have about $150 in the work bench. The oven down below is for making kydex goodies. 
|
|
|
|
 Win a FREE Membership!
Sign up for the ARFCOM weekly newsletter and be entered to win a free ARFCOM membership. One new winner* is announced every week!
You will receive an email every Friday morning featuring the latest chatter from the hottest topics, breaking news surrounding legislation, as well as exclusive deals only available to ARFCOM email subscribers.

AR15.COM is the world's largest firearm community and is a gathering place for firearm enthusiasts of all types.
From hunters and military members, to competition shooters and general firearm enthusiasts, we welcome anyone who values and respects the way of the firearm.

Subscribe to our monthly Newsletter to receive firearm news, product discounts from your favorite Industry Partners, and more.
Copyright © 1996-2024 AR15.COM LLC. All Rights Reserved.
Any use of this content without express written consent is prohibited.
AR15.Com reserves the right to overwrite or replace any affiliate, commercial, or monetizable links, posted by users, with our own.


