|
[#1]
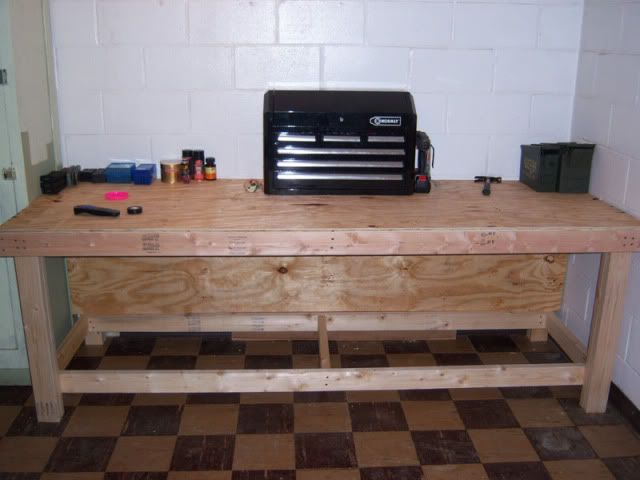
Update
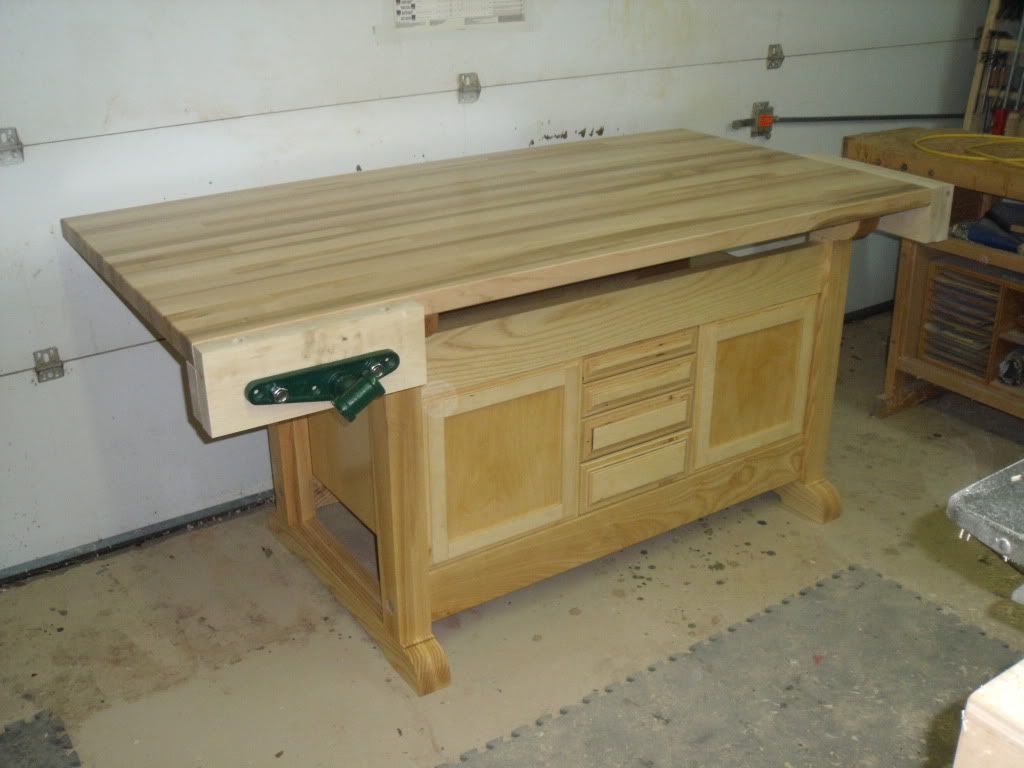
Top is 1 3/4" Maple, 36" x 72" |
|
|
|
WI, USA
|
[#2]
That looks like one sturdy bench!
(and bump) Taco |
|
|
|
[#3]
Originally Posted By CmdrTaco:
That looks like one sturdy bench! (and bump) Taco Welcome back to your epic thread. |
|
|
|
|
[Last Edit: CLICKBANGBANG]
[#4]
My humble contribution. It is 42.5" of my space. This, the gun safe, the toilet, and my truck are the only places I can call mine.

|
|
|
|
CA, USA
|
[Last Edit: ireload]
[#5]
Here's my humble entry:
Small wall mounted bench made out of 2x4s, 3/4" plywood lined with melamine for the counter top, the sides are 3/4" particle board held together with glue and lag screws. 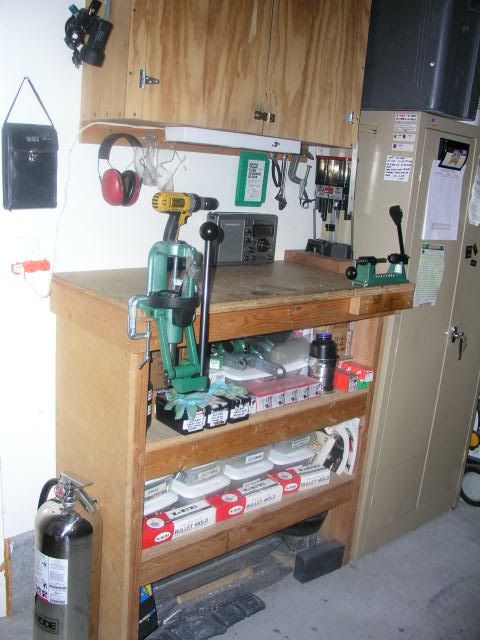
Here's my ghetto cabinet that holds the rest of the equipment. Everthing is manual. I use the battery operated drill for trimming so I don't tire as much. 
|
|
|
CA, USA
|
[#6]
Originally Posted By Covertness:
Update http://i1096.photobucket.com/albums/g326/Covertness/Workbenchwithtop1.jpg Top is 1 3/4" Maple, 36" x 72" You did not make that bench. You bought that from Nieman Marcus..... Nice work. I like the doors and butcher block top |
|
|
|
[#7]
It's reloading season... keep those pics coming!
|
|
|
|
|
[#8]
Originally Posted By Covertness:
Thanks everybody. Looks better with the finish on it http://i1096.photobucket.com/albums/g326/Covertness/WorkbenchBase1.jpg http://i1096.photobucket.com/albums/g326/Covertness/WorkbenchBase2.jpg Damn! I'm lucky if I can nail to boards together straight. Many years later, I now wish I'd taken that wood shop class in high school instead of typing. Nice work. I'd love to have those skills. Maybe in retirement haha. |
|
|
|
|
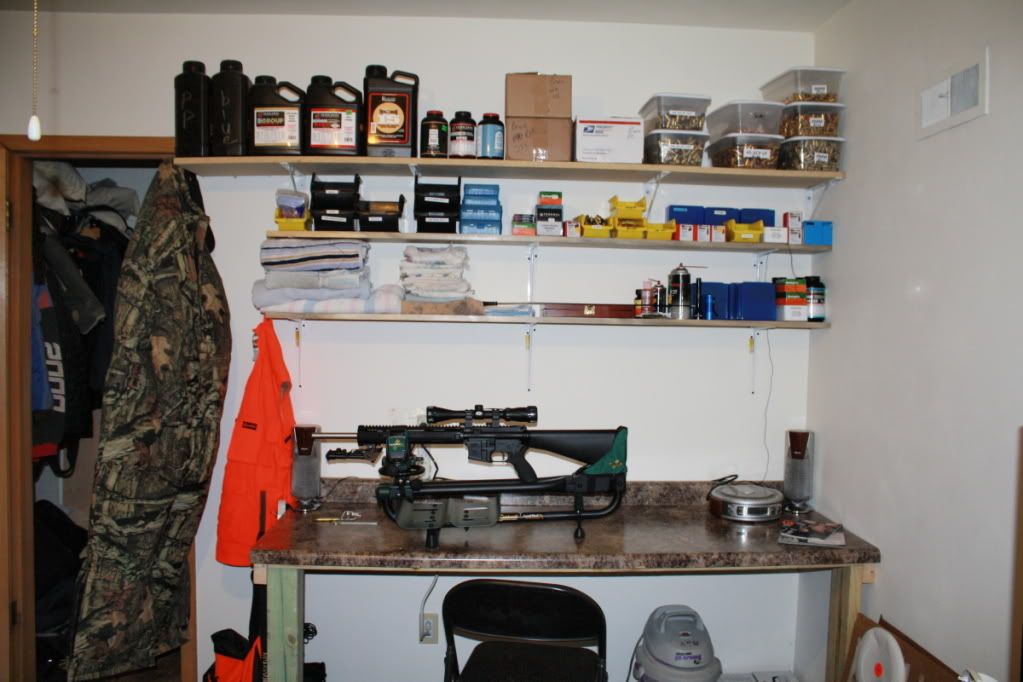
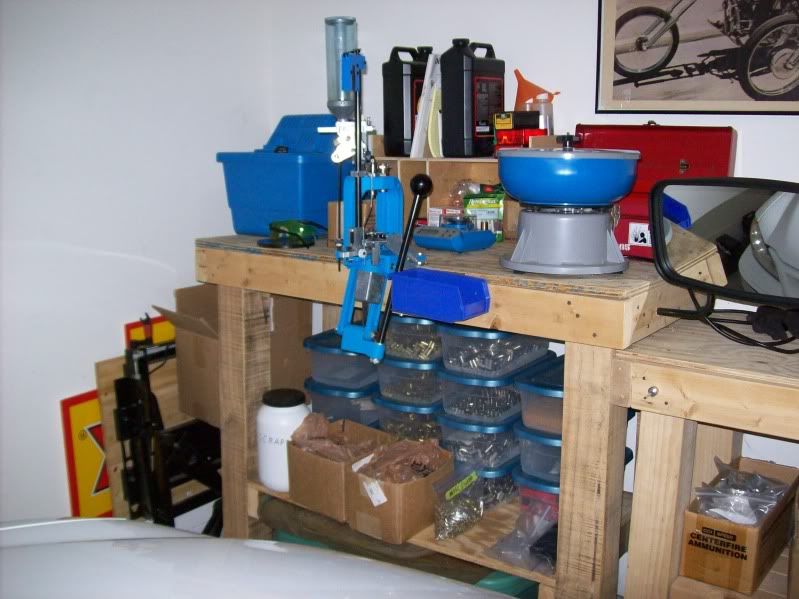
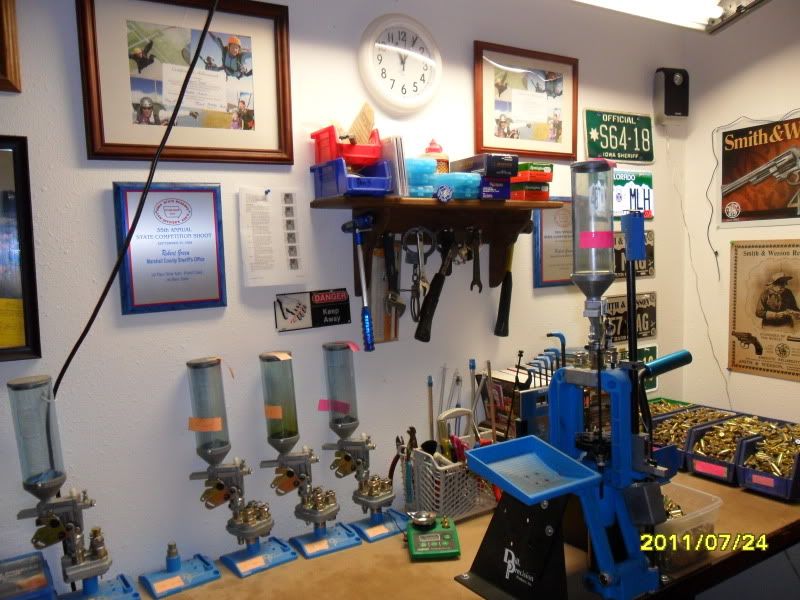
[#9]
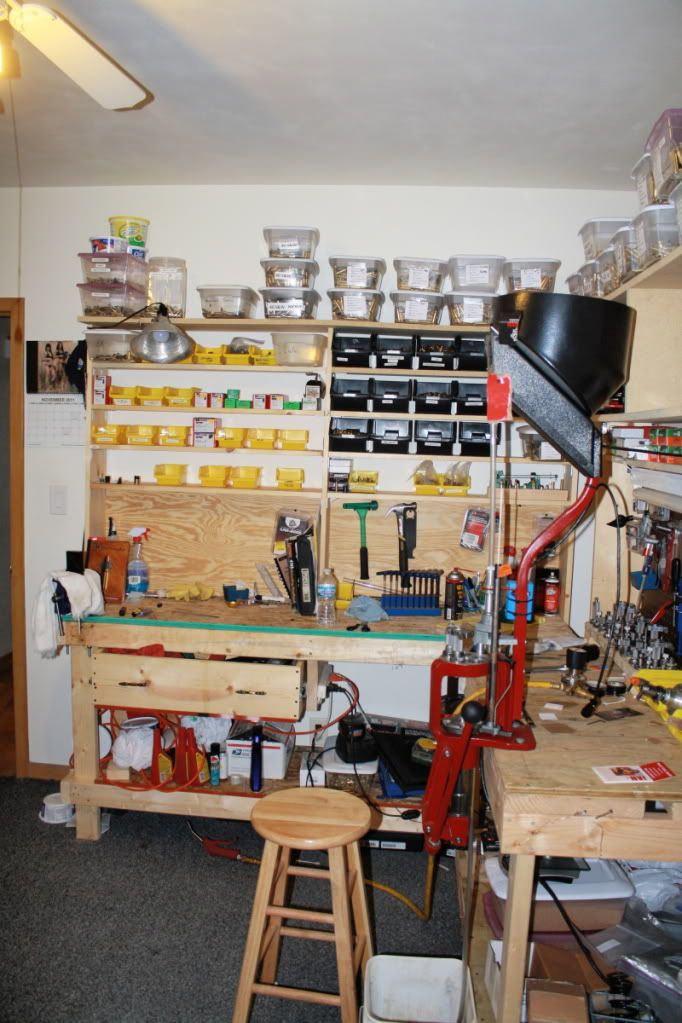
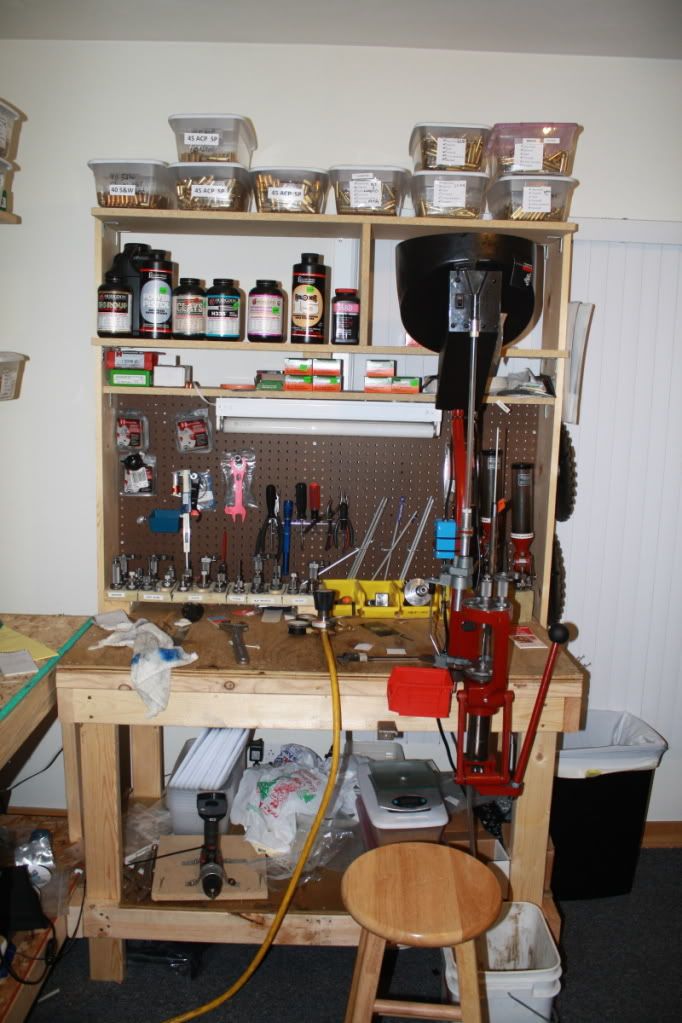
As many of you know, I have a small space to since I added 30-06 and 308, each with their 2 toolheads to the mix, they would've cramped my space on the bench so I decided to add a shelf for them and tidy things up a bit. Getting all of the toolheads off the bench gives me more room than before and at $3.10 it cost me, I'm happy with the update.
Before:  After:  |
|
|
|
|
[#10]
That is looking great COSteve! Organized and clean!
|
|
|
|
|
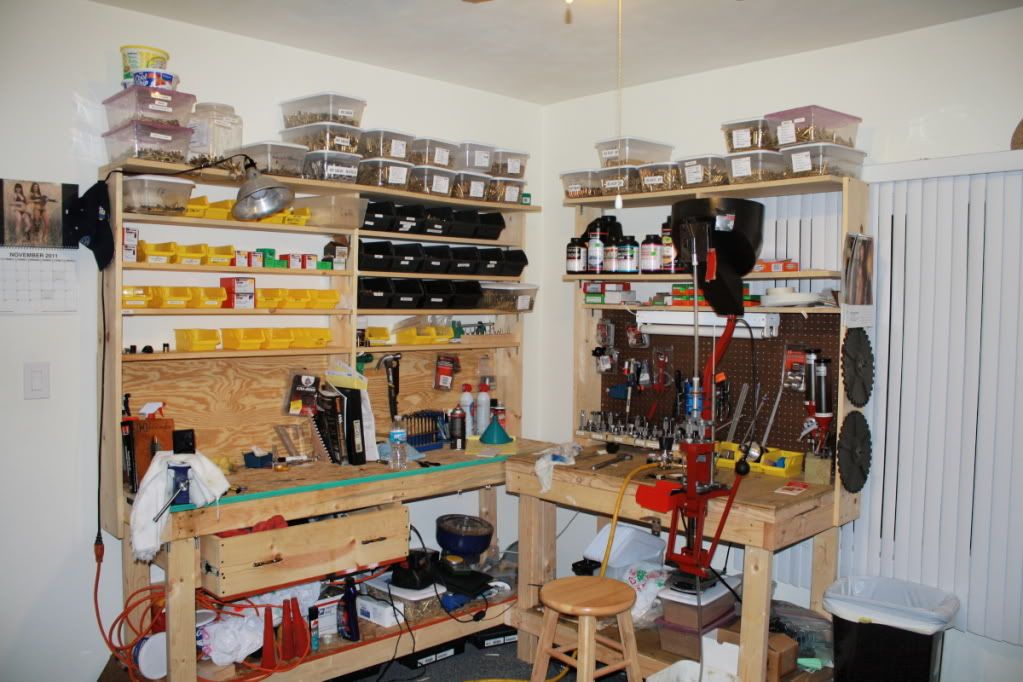
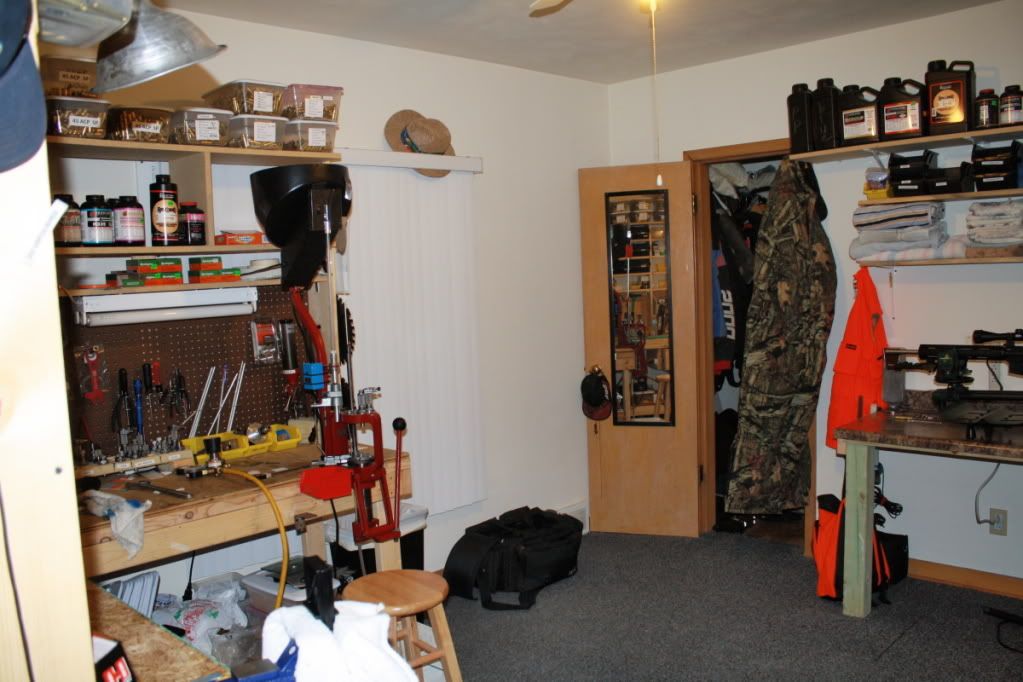
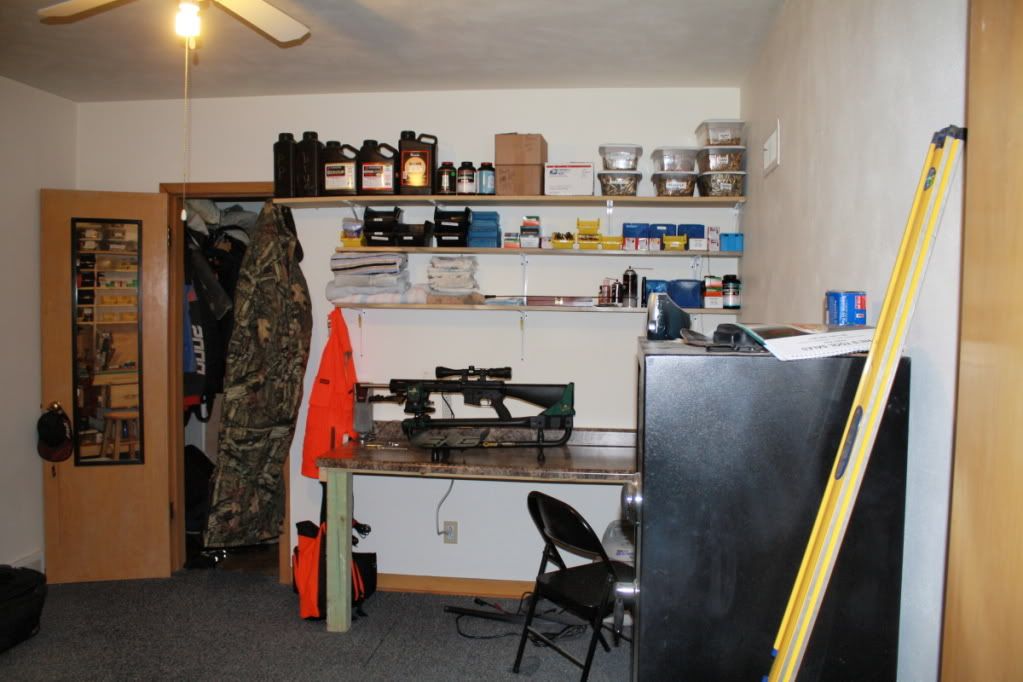
[#11]
i also updated my room. it is officially the reloading room man cave. got rid of the bed and added another bench and shelves this will be my gun cleaning/ building bench.
|
|
|
|
|
[Last Edit: dnmccoy]
[#12]
I just moved into a new place and now have a small spare bedroom to my own! Im commencing on daydreaming and planning stages. Unfortunately it will double as office and I might hafta let the wife do her scrapbooking in there, so Im thinking Im gonna need a big countertop!
ETA: I wonder if I could make a contest out of it? Submit design Ideas, winner gets "x" kinda thing?. Off to check the COC |
|
|
|
|
[Last Edit: BiggEZ]
[#13]
Originally Posted By dnmccoy:
I just moved into a new place and now have a small spare bedroom to my own! Im commencing on daydreaming and planning stages. Unfortunately it will double as office and I might hafta let the wife do her scrapbooking in there, so Im thinking Im gonna need a big countertop! ETA: I wonder if I could make a contest out of it? Submit design Ideas, winner gets "x" kinda thing?. Off to check the COC Something like GTO688 posted back on pg 27 might be to your liking. Large counter top, all equipment mounted on removable blocks of wood, bunch of storage. Might could work. Also I know i've seen pictures of a bench with a track system around here somewhere before (ETA: Pg 4 about a quarter of the way down the pg). That might also work so you could remove your equipment and allow for wif to scrap book there. |
|
|
|
|
[#14]
I took the lessons learned from my old bench:
...and built a new one. This bench, like my old one, was built with scrap lumber. The exception was the top of the new bench, I bought a sheet of the good plywood, cut it in half and doubled it up. I split a sheet of formica with a buddy and now I have a smooth, easy to clean surface. I made it higher so I wouldn't have to lean down anymore to pull the press handle all the way. I also put some support under the top so no more flexing bench each time I pull the handle. 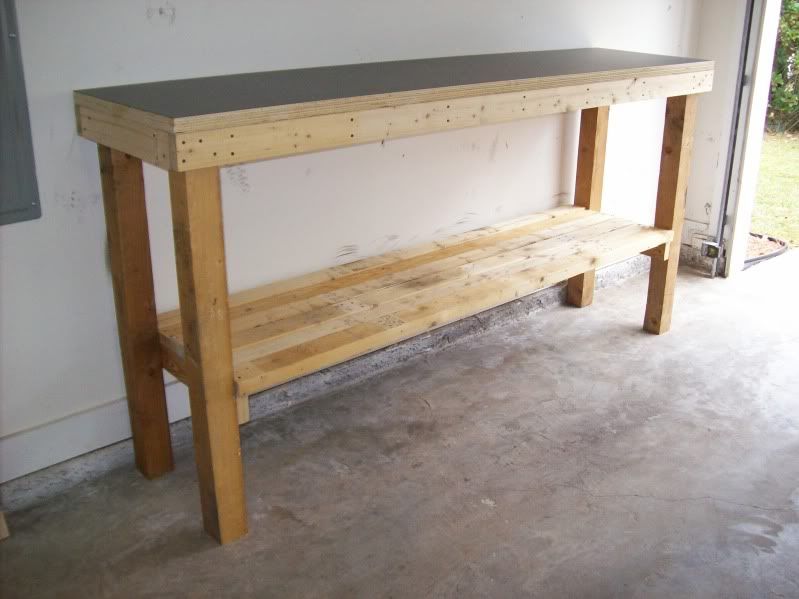
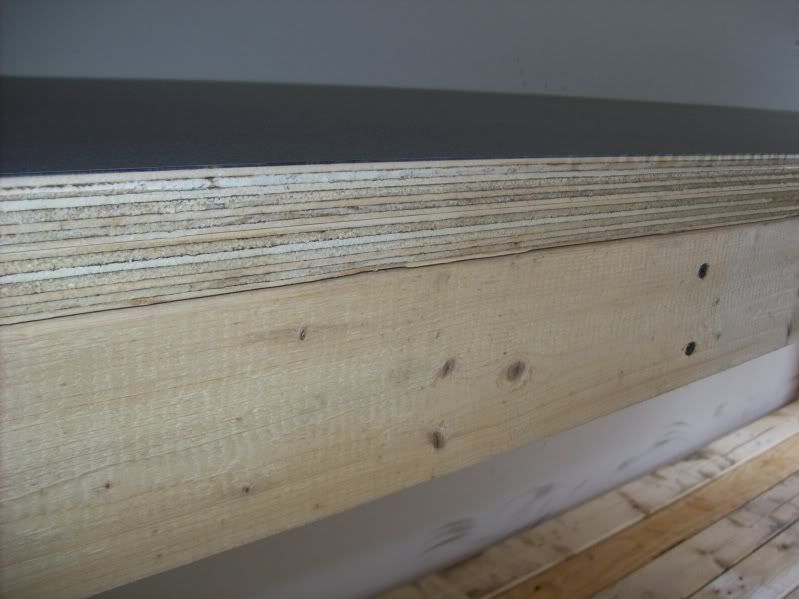
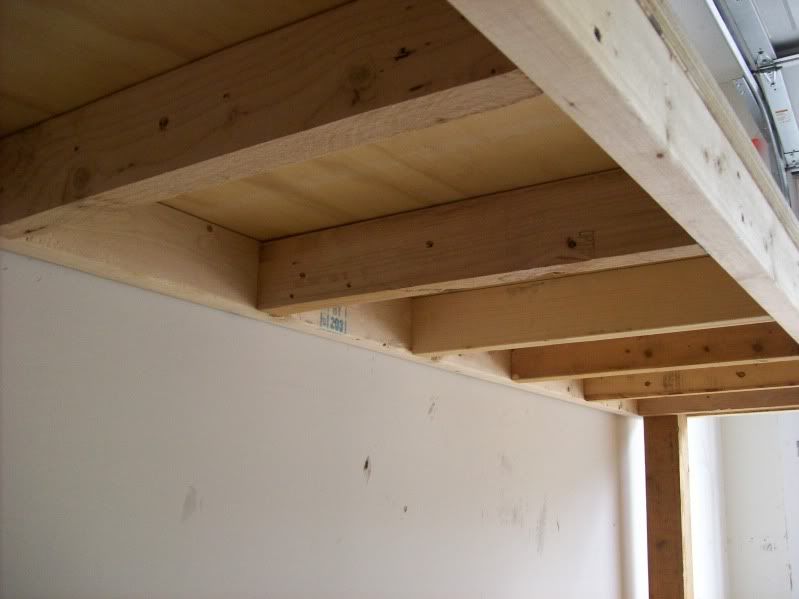
Now I just need to find the time to move everything over. |
|
|
|
|
[#15]
Originally Posted By echofivekilo:
I took the lessons learned from my old bench: http://i103.photobucket.com/albums/m149/adamkusmc/100_1383.jpg ...and built a new one. This bench, like my old one, was built with scrap lumber. The exception was the top of the new bench, I bought a sheet of the good plywood, cut it in half and doubled it up. I split a sheet of formica with a buddy and now I have a smooth, easy to clean surface. I made it higher so I wouldn't have to lean down anymore to pull the press handle all the way. I also put some support under the top so no more flexing bench each time I pull the handle. http://i103.photobucket.com/albums/m149/adamkusmc/100_2593.jpg http://i103.photobucket.com/albums/m149/adamkusmc/100_2595.jpg http://i103.photobucket.com/albums/m149/adamkusmc/100_2594.jpg Now I just need to find the time to move everything over. Nice strong, well built bench. I like it. |
|
|
|
|
[#16]
Originally Posted By dnmccoy:
I just moved into a new place and now have a small spare bedroom to my own! Im commencing on daydreaming and planning stages. Unfortunately it will double as office and I might hafta let the wife do her scrap booking in there, so Im thinking Im gonna need a big counter top! ETA: I wonder if I could make a contest out of it? Submit design Ideas, winner gets "x" kinda thing?. Off to check the COC Nothing wrong with having a contest and giving a prize at the end. As long as no buying, selling, or trading is done in your thread you will be COC compliant. Off to look for contest. |
|
|
|
|
[Last Edit: dnmccoy]
[#17]
I'm gonna hafta wait a little, i just got a fully loaded Dillon 550 and that took a huge chunk out of my remodeling budget. But what's the saying, buy once cry once?
I can't wait to get her all setup! |
|
|
|
|
[#18]
Originally Posted By dnmccoy:
I'm gonna hafta wait a little, i just got a fully loaded Dillon 550 and that took a huge chunk out of my remodeling budget. But what's the saying, buy once cry once? I can't wait to get her all setup! 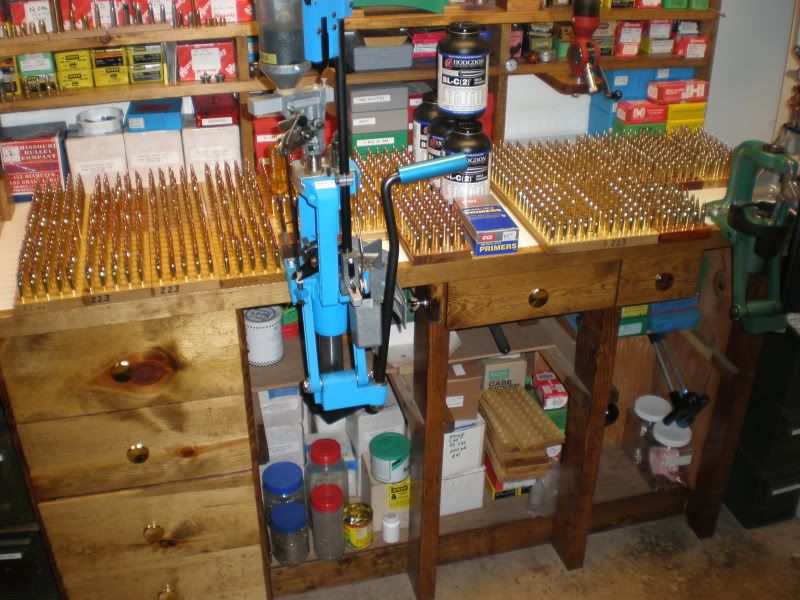
Ok, so I'll post my 550 motivational p0rn pic. |
|
|
|
UT, USA
|
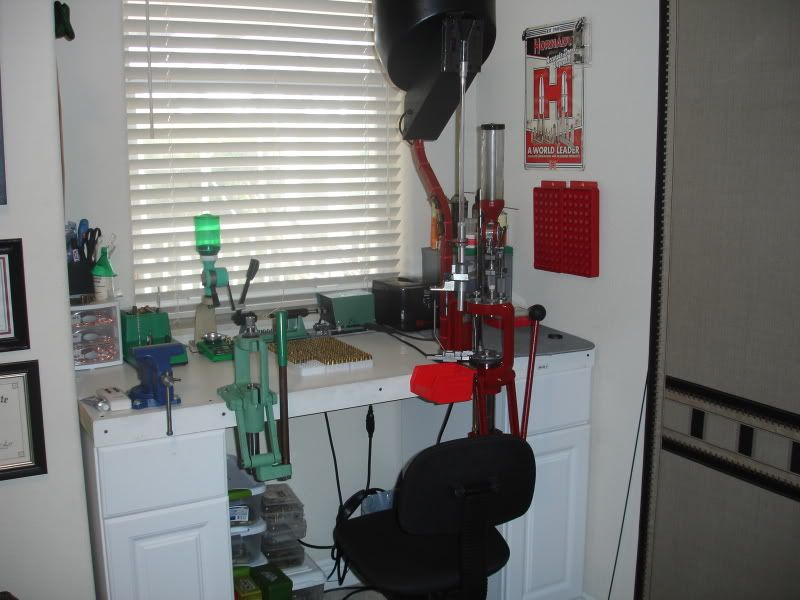
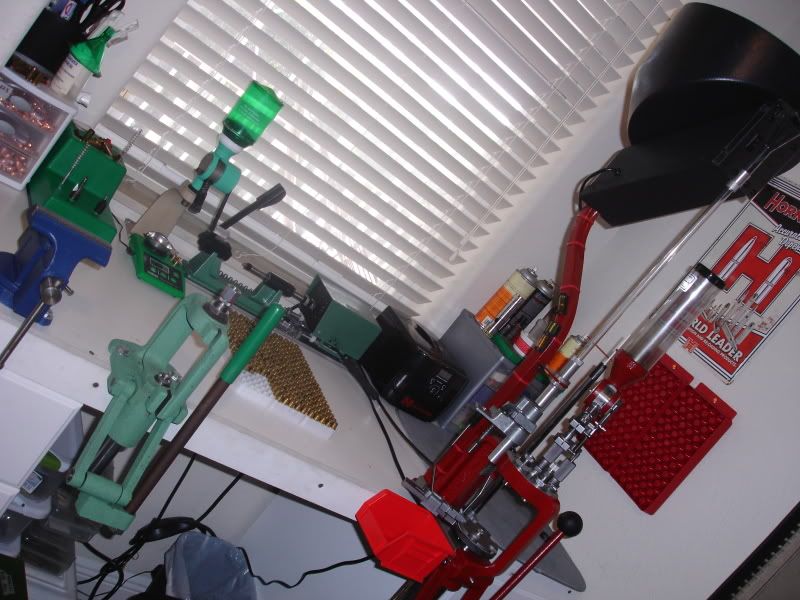
[#19]
Here is my humble entry.
Do everything bench, currently the reloading bench. 
Bench top tool bench currently used as the brass cleaning station. 
The newest addition to the reloading effort. 
|
|
|
|
[#20]
Originally Posted By echofivekilo:
I took the lessons learned from my old bench: http://i103.photobucket.com/albums/m149/adamkusmc/100_1383.jpg ...and built a new one. This bench, like my old one, was built with scrap lumber. The exception was the top of the new bench, I bought a sheet of the good plywood, cut it in half and doubled it up. I split a sheet of formica with a buddy and now I have a smooth, easy to clean surface. I made it higher so I wouldn't have to lean down anymore to pull the press handle all the way. I also put some support under the top so no more flexing bench each time I pull the handle. http://i103.photobucket.com/albums/m149/adamkusmc/100_2593.jpg http://i103.photobucket.com/albums/m149/adamkusmc/100_2595.jpg http://i103.photobucket.com/albums/m149/adamkusmc/100_2594.jpg Now I just need to find the time to move everything over. if you have not done so, fasten it to the wall and it will be way more steady then ever I have basically the same top and it is rock solid |
|
|
|
OR, USA
|
[#21]
Show off your reloading bench.


My reloading area with my slightly modified Hornady LNL. |
|
|
TN, USA
|
[#22]
Nice work the time you spent paid off!!
|
|
|
|
[#23]
Originally Posted By 1in9twist16:
Show off your reloading bench.
What is this setup? |
|
|
|
|
[#24]
Originally Posted By 1in9twist16: Show off your reloading bench. http://i412.photobucket.com/albums/pp206/1in9twist/IMG_3200.jpg My reloading area with my slightly modified Hornady LNL. Where did you get that handle, did you make it yourself? Nice setup BTW |
|
|
|
CT, USA
|
[#25]
Originally Posted By imtheflash:
Originally Posted By 1in9twist16:
Show off your reloading bench. http://i412.photobucket.com/albums/pp206/1in9twist/IMG_3200.jpg My reloading area with my slightly modified Hornady LNL. Where did you get that handle, did you make it yourself? Nice setup BTW looks almost like this one roller handle |
|
|
|
[#26]
Their new handle is black in color. Mine is Red.
|
|
|
|
|
[#27]
Originally Posted By dnmccoy: I'm gonna hafta wait a little, i just got a fully loaded Dillon 550 and that took a huge chunk out of my remodeling budget. But what's the saying, buy once cry once? I can't wait to get her all setup! Here's another motivational picture of my old 550B before I got my 650 setup. 70,000+ rds and it was just getting broken in!  |
|
|
|
|
[#28]
Originally Posted By 1in9twist16:
Show off your reloading bench. http://i412.photobucket.com/albums/pp206/1in9twist/IMG_5069.jpg http://i412.photobucket.com/albums/pp206/1in9twist/IMG_3273.jpg http://i412.photobucket.com/albums/pp206/1in9twist/IMG_3200.jpg http://i412.photobucket.com/albums/pp206/1in9twist/IMG_3278.jpg http://i412.photobucket.com/albums/pp206/1in9twist/IMG_3277.jpg http://i412.photobucket.com/albums/pp206/1in9twist/IMG_5076.jpg http://i412.photobucket.com/albums/pp206/1in9twist/IMG_3273.jpg My reloading area with my slightly modified Hornady LNL. Nice use of a closet, and I like the colors. I would add some "art" to that blank wall. Gun p0rn, calendar, something. |
|
|
|
|
[#29]
You guys are killing me!! Mine should be here today!
|
|
|
|
CT, USA
|
[#30]
Originally Posted By imtheflash:
Originally Posted By 1in9twist16:
Show off your reloading bench. http://i412.photobucket.com/albums/pp206/1in9twist/IMG_3200.jpg My reloading area with my slightly modified Hornady LNL. Where did you get that handle, did you make it yourself? Nice setup BTW actually i think its this one roller handle |
|
|
|
[#31]
Blue Kool Aid is here!

|
|
|
|
FL, USA
|
[#32]
Heres an update on my little bench
|
|
|
|
[Last Edit: dnmccoy]
[#33]
Hey Peace, any other pics of your room/space? I kind of like the setup youve got going there and am in the planning stages myself and like the setup of your bench. Are those just utility cabinets?
|
|
|
|
|
[#34]
Originally Posted By dnmccoy:
Blue Kool Aid is here! http://i129.photobucket.com/albums/p216/dnmccoy/af16d854.jpg That 45 case belongs on the end of the plastic primer follower. Place follower under lever to keep the buzzer from going off. Welcome to the club. |
|
|
|
|
[#35]
Yes sir it's in staging holding the arm up since there's no primers in there at the moment. When it's loaded I'll put it on top of the arm. Yeah the guy I bought it from has been super helpful in making sure it's what I want before he will let me pay him. It's good to know there are good people in the world still
|
|
|
|
FL, USA
|
[#36]
Originally Posted By dnmccoy:
Hey Peace, any other pics of your room/space? I kind of like the setup youve got going there and am in the planning stages myself and like the setup of your bench. Are those just utility cabinets? Too late to take more picstures now, but those cabinents holding up the bench have draws and then cabinet space below with shelves. Still working on other storage ideas . |
|
|
VA, USA
|
[Last Edit: kcobean]
[#37]
I had a week off from work last week and my lovely bride just tolerated my spending a bunch of money on a Dillon XL650, so I figured it was time to build a bench:


Total cost, about $150. Here are some specs for anyone interested in building something similar: Work surface is an 80x36 solid core door with a laminate overlay. Cost: $55 for the door, $15 for the laminate. Legs are treated 4x4's. 36" in the front, 72" in the back. Cost: $18 Top frame is 2x6. 80" wide, 33" deep. Cost: $18 Foot rail is 2x4. 80" wide, 33" deep. Cost: $12 Pegboard supports are 2x4. 70" wide. Cost: $8 Pegboard sheet cut to 77x34. Cost: $12 2 boxes of 4" decking screws. Cost: $12 Total cost: $150 I can post up some plans if anyone is interested. |
|
|
|
[#38]
That's a nice set up now all you need is some pics with a few rounds of finished ammo to go with that new press.

|
|
|
|
VA, USA
|
[#39]
Originally Posted By Rugby3:
That's a nice set up now all you need is some pics with a few rounds of finished ammo to go with that new press. Yeah, I agree. I bought the 650 used and it was set up for .45. I'm in the process of figuring out how to do the caliber conversions so I can load .40, which is my primary caliber. Can't wait to get started reloading. |
|
|
|
[#40]
Youtube is your friend...mixed in with the Herp and Derp are some helpfull videos on setting up the presses. I bought my press used too and instead of paying 20$ for the setup DVD i was able to find some videos that cleared my questions up
|
|
|
|
|
[#41]
Originally Posted By dryflash3:
Originally Posted By dnmccoy:
Blue Kool Aid is here! http://i129.photobucket.com/albums/p216/dnmccoy/af16d854.jpg That 45 case belongs on the end of the plastic primer follower. Place follower under lever to keep the buzzer from going off. Welcome to the club. 
This is what I meant. |
|
|
|
MO, USA
|
[#42]
Don't have my reloading equipment yet. However, I have the bench mostly built. Still need plywood on the bottom shelf.
|
|
|
|
[#43]
Originally Posted By dudeinmo:
Don't have my reloading equipment yet. However, I have the bench mostly built. Still need plywood on the bottom shelf. http://i210.photobucket.com/albums/bb286/dudeinmo/Reloading%20Stuff/ReloadingBench.jpg Good start. Read the Tutorials and FAQ's at the top of the page and get a copy of ABC's of Reloading for a great how to book. Welcome to the Reloading Forum. |
|
|
|
|
[#44]
Well I finally moved my setup indoors for the most part,
Trimming and tumbling still going to be in the garage but this is much better 

|
|
|
|
|
[Last Edit: skyflyer]
[#45]
Out with the old
In with the new 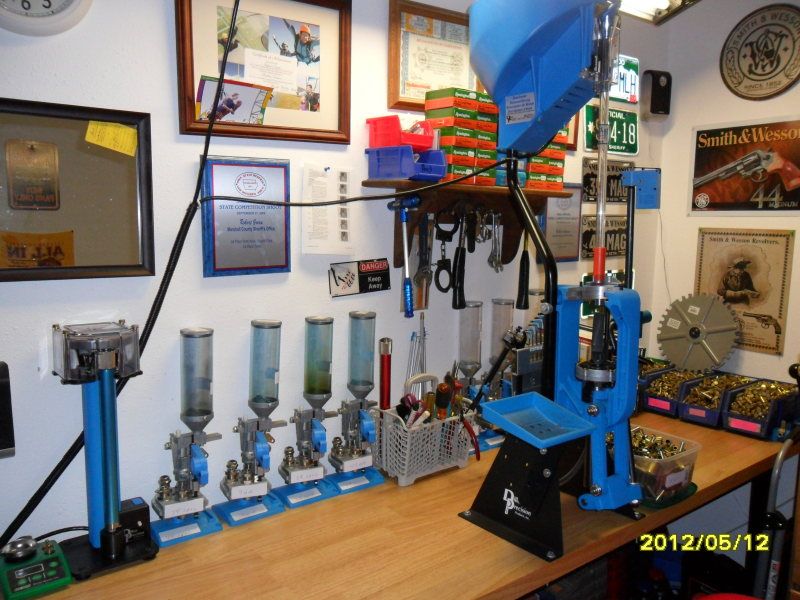
Thanks Scott_R for the correct color 
|
|
|
|
OR, USA
|
[#46]
Originally Posted By Warhawk:
What is this setup? Single stage Hornady with Redding GRX die & catch can. ( Removes "bulge" from brass fired thru a glock) .40 in my case. Redding GRX |
|
|
OR, USA
|
[#47]
Originally Posted By KD185:
Originally Posted By imtheflash:
Originally Posted By 1in9twist16:
Show off your reloading bench. http://i412.photobucket.com/albums/pp206/1in9twist/IMG_3200.jpg My reloading area with my slightly modified Hornady LNL. Where did you get that handle, did you make it yourself? Nice setup BTW actually i think its this one roller handle This is correct. Inline Fabrication |
|
|
|
[#48]
My gift to Arfcom reloaders.... ha ha    |
|
|
|
WI, USA
|
[#49]
|
|
|
|
[#50]
Nice, very nice!
|
|
|
|
 Win a FREE Membership!
Sign up for the ARFCOM weekly newsletter and be entered to win a free ARFCOM membership. One new winner* is announced every week!
You will receive an email every Friday morning featuring the latest chatter from the hottest topics, breaking news surrounding legislation, as well as exclusive deals only available to ARFCOM email subscribers.

AR15.COM is the world's largest firearm community and is a gathering place for firearm enthusiasts of all types.
From hunters and military members, to competition shooters and general firearm enthusiasts, we welcome anyone who values and respects the way of the firearm.

Subscribe to our monthly Newsletter to receive firearm news, product discounts from your favorite Industry Partners, and more.
Copyright © 1996-2024 AR15.COM LLC. All Rights Reserved.
Any use of this content without express written consent is prohibited.
AR15.Com reserves the right to overwrite or replace any affiliate, commercial, or monetizable links, posted by users, with our own.


