|
[#1]
Just completed my first lower build. Great post. Thank you.
|
|
|
|
CO, USA
|
[#2]
Can I get a suggestion on a competent gunsmith who can drill the tapered holes in my front sight and barrel? Thanks.
|
|
|
|
[#3]
Originally Posted By aardvark_ratnick:
Can I get a suggestion on a competent gunsmith who can drill the tapered holes in my front sight and barrel? Thanks. Rainierarms.com |
|
|
|
|
[#4]
Originally Posted By aardvark_ratnick:
Can I get a suggestion on a competent gunsmith who can drill the tapered holes in my front sight and barrel? Thanks. ADCO as long as it's not a melonite or other "hardened" barrel. Rainier told me they weren't set up to do it and I'm local. I ended up doing it myself, made me incredibly nervous. |
|
|
|
CO, USA
|
[#5]
When the sights and barrels are drilled in an armory is there a fixture of some sort used to guarantee proper alignment? Where can the tapered bit be purchased? Did you use a mill or drill press or hand drill when you did this? Adco is not an option.
|
|
|
|
[Last Edit: Desert_AIP]
[#6]
Originally Posted By aardvark_ratnick:
When the sights and barrels are drilled in an armory is there a fixture of some sort used to guarantee proper alignment? Where can the tapered bit be purchased? Did you use a mill or drill press or hand drill when you did this? Adco is not an option. There is a fixture out there. I'm not sure how it's done in an armory. I have a drill press with a sliding vice and aluminum barrel blocks. But I think you could use a standard vice. The sliding vice just makes positioning easier. I got all the bits and cutting fluid from Midway. You need a #31 drill and a 2/0 taper reamer. I bought one drill bit for each hole, just to be sure. (I never used the second bit). Because I had a melonite barrel, I also bought a 1/8" end mill. After I got everyting set up, I drilled into the FSB until it just touched the barrel. I removed the drill bit and installed the end mill, and then ran it down to "break the surface of the barrel". Then I replaced the drill bit and finished drilling through the barrel and the other side of the FSB. Using the end mill made a flat spot to prevent the drill bit from walking along the curve of the barrel. I tapped the gas port access hole on the bottom of the FSB and used a set screw to help hold the FSB to the barrel (used the Rainier gas block tool to dimple the barrel). The setscrew prevented the FSB from rotating while drilling, it also helped align the gas hole and the sight itself. I don't know the size of the set screw off top of my head. I used a really slow speed, I believe something like 900 rpm (memory sketchy), and lots of cutting fluid. Here are a couple of archive threads I used: http://www.ar15.com/forums/t_3_123/529473__ARCHIVED_THREAD____Drilling_my_FSB.html&page=1#i5021596 http://www.ar15.com/archive/topic.html?b=3&f=123&t=470461 And a Youtube Video |
|
|
|
SC, USA
|
[#7]
First, Thanks for some great instructions! They really helped.
A quick question please. I am fairly new to the AR game so please help me out. If I wanted to rebarrel an AR upper from 300 BLK to 5.56, do I only have to change out the barrel? |
|
|
TX, USA
|
[#8]
Correct barrel only
|
|
|
MN, USA
|
[#9]
Thanks for all the great info guys. This all helped a lot on my latest build.
|
|
|
CO, USA
|
[#10]
Another satisfied user of assembling my own lower, thanks to these instructions!
Thanks for the info! |
|
|
OH, USA
|
[#11]
|
|
|
MI, USA
|
[Last Edit: VA-gunnut]
[#12]
I'm an idiot that was banned for spamming.
|
|
|
LA, USA
|
[#13]
Its amazing what you can accomplish with the internet, tape, an ink pen, a hammer and screwdriver, and 1 hour. I just assembled a DPMS .308 lower receiver (and I have minimal mechanical experience). Awesome post - the video was especially helpful.
I also used the following links: http://www.realguns.com/Commentary/comar196.htm http://308ar.com/assemble_308_lower.htm |
|
|
OH, USA
|
[#14]
Great guide-- thanks for helping make my first upper receiver swap quick & painless. Took the flat-top A3 receiver from my new 20" PSA complete upper and replaced it with an A2. Continually amazed by how well-engineered a weapons system the AR is.
|
|
|
|
[#15]
Just completed my 3rd lower following the directions from page 1.
|
|
|
|
TX, USA
|
[Last Edit: rick458]
[#16]
I completed a Noveske N4 Lower with Spikes LPK, Geissele SSA-E trigger, STS 60* safety, Houge grip, BAD lever, and A2 stock.
I have a Noveske upper receiver waiting on Noveske SPR 18" barrel, NSR rail and BCG. I Built up a Mega Gator lower, with Houge grip, Stag LPK, Spikes trigger group, BAS lever, and have a PRS stock inbound. I still need to find a Mega Upper receiver, Shilen 6.5 Grendel Barrel, BCG, and nice rail (looking for Rainier seeking evo 15" or possibly Todd Jarret 15") Both will be precision rigs with LaRue mounts and nice glass. 

|
|
|
|
[#17]
|
|
|
|
TX, USA
|
[#18]
As many has said before thanks for all the great info & putting forth the effort for this write up. I will hopefully be getting my barrel & last of the few things I need for my 15. Glad to see that you used the cutting board for a make up receiver block, I will have to do that because nobody has a receiver block instock. Again thanks oh and 1st post
|
|
|
|
[#19]
Originally Posted By TBJK:
As many has said before thanks for all the great info & putting forth the effort for this write up. I will hopefully be getting my barrel & last of the few things I need for my 15. Glad to see that you used the cutting board for a make up receiver block, I will have to do that because nobody has a receiver block instock. Again thanks oh and 1st post Welcome to ARFCOM and to the Black Rifle Disease! BigDozer66 |
|
|
|
|
[#20]
Thank you for this thread.
|
|
|
|
VA, USA
|
[Last Edit: Jake92YJ]
[#21]
delete
|
|
|
MO, USA
|
[#22]
This thread is amazing, thanks!
Just finished ordering all the parts for my first build, and I have one questions about the gas block/tube length. With a 20" barrel, and a rifle length gas system, as long as I have a low pro block, I will be able to cover the entire gas block with a 13.8" rail correct? |
|
|
|
[#23]
Originally Posted By ThreeStix:
This thread is amazing, thanks! Just finished ordering all the parts for my first build, and I have one questions about the gas block/tube length. With a 20" barrel, and a rifle length gas system, as long as I have a low pro block, I will be able to cover the entire gas block with a 13.8" rail correct? Yes. A 12" rail stops just at the edge of the gas block. You need another inch to cover a short gas block, and 2" to cover a longer gas block (LaRue style) |
|
|
|
|
[#24]
On my second build and am running into a little problem.
Put the safety selector in, placed selector detent in, then the spring. Added pistol grip and now I can not move the safety off of fire? I am wondering if I accidentally swapped the selector detent pin and the takedown pin. Is that possible? Also, the actual detents in the safety selector are really rough. Maybe out of spec? Off to pick one of my boys up from school, will swap out pins after lunch and see if that helps. (If this in the wrong spot, delete and i will start my own post) |
|
|
|
|
[#25]
Originally Posted By NCUrk:
On my second build and am running into a little problem. Put the safety selector in, placed selector detent in, then the spring. Added pistol grip and now I can not move the safety off of fire? I am wondering if I accidentally swapped the selector detent pin and the takedown pin. Is that possible? Also, the actual detents in the safety selector are really rough. Maybe out of spec? Off to pick one of my boys up from school, will swap out pins after lunch and see if that helps. (If this in the wrong spot, delete and i will start my own post) So, there are a couple of finer points that can cause this. First - the selector detent will not physical fit in the takedown pin or pivot pin holes in the lower, so it isn't possible to "swap" them. Next - sometimes this can be caused by: 1. The safety selector grooves being very rough and requiring a little work 2. The hole not drilled to proper depth in grip, causing spring to bind into selector detent and locking up selector. Sometimes there is junk in the hole that needs to be cleaned up. Sometimes I snip a tony amount off the spring to accommodate. Loosen the grip screw a fair bit and then see if you can work the selector back and forth, and loosen it up. You don't want to trim the spring and end up with a very loose selector once it breaks in a bit. The detent/selector surfaces will break in if they are rough. Sometimes, it is just a defective safety selector. |
|
|
|
|
[#26]
Public Service Announcement....
Read the instructions and LOOK at the pictures!!!!!!! Apparently the Selector Detent pin WILL fit in the Bolt catch area Thanks again Falarak for an excellent Tutorial, if only I could follow instructions. |
|
|
|
|
[#27]
|
|
|
|
TX, USA
|
[#28]
Originally Posted By VA-gunnut:
PLEASE RE-TACK THIS THREAD!!!!! |
|
|
IL, USA
|
[#29]
Many thanks for this.....I got my PSA lower and PSA classic build kit....
glanced at the instructions....then decided I was "ready" LOL took me about an hour and a half to completely assemble it....about 30 minutes of that was the pivot detent, another 20 for the trigger guard roll pin (didn't want to go in...and I didn't want to force it....I'm NOT happy with how it turned out, so I'll replace that at some point... but I DID get it all together, with no cursing, and no lost parts....more importantly, no SPARE parts :) thanks again....now to order my upper. If I get the one I'm looking at (about a 4 week lead time), I'll have a sub 700 dollar AR-15....(657 to be precise) |
|
|
GA, USA
|
[#30]
Cool..
|
|
|
OH, USA
|
[#31]
thanks again....now to order my upper. If I get the one I'm looking at (about a 4 week lead time), I'll have a sub 700 dollar AR-15....(657 to be precise)
Do share the details. I'm looking at a budget build myself and would like to compare notes. |
|
|
IL, USA
|
[#32]
Originally Posted By UKHoopsfan:
thanks again....now to order my upper. If I get the one I'm looking at (about a 4 week lead time), I'll have a sub 700 dollar AR-15....(657 to be precise)
Do share the details. I'm looking at a budget build myself and would like to compare notes. PSA stripped forged lower : 119 +7 shipping PSA classic LBK 129 + 7 shipping 10 for FFL fee Looking to get JSE surplus complete upper 16" for 390...(as soon as I can talk the wife into letting me spend it :) ) |
|
|
|
[#33]
BUMP
 had to refresh my memory on something someone else might to had to refresh my memory on something someone else might to
|
|
|
|
|
[#34]
i am getting ready to assemble my first AR lower and was going to watch the video first to get familiar but it is no longer available.
the site the video is stored needs to be renewed so hopefully someone will do that or put the video on a different server. |
|
|
|
|
[#35]
Originally Posted By Northerner: i am getting ready to assemble my first AR lower and was going to watch the video first to get familiar but it is no longer available. the site the video is stored needs to be renewed so hopefully someone will do that or put the video on a different server. If you're talking about the one linked in the second post, maybe try contacting DVDTracker and see if he's hosted it somewhere else. |
|
|
|
IL, USA
|
[Last Edit: pryan67]
[#36]
Originally Posted By Northerner:
i am getting ready to assemble my first AR lower and was going to watch the video first to get familiar but it is no longer available. the site the video is stored needs to be renewed so hopefully someone will do that or put the video on a different server. Part 1 Part 2 |
|
|
|
[#37]
i got most of my lower finished about 85% and i got the trigger in fine and put the hammer in and it is tight?
i cock it and pull the trigger and it goes ahead slow? what can be binding up? i put the hammer in by hand and even pushed the pin in by hand with one little hammer tap for the last 1/16" help! |
|
|
|
|
[#38]
Can you post a picture of the inside of the lower with the hammer in the non cocked and one in the cocked position. If not could you email them to me so I can look at them? [email protected]
Originally Posted By Northerner: i got most of my lower finished about 85% and i got the trigger in fine and put the hammer in and it is tight? i cock it and pull the trigger and it goes ahead slow? what can be binding up? i put the hammer in by hand and even pushed the pin in by hand with one little hammer tap for the last 1/16" help! |
|
|
|
|
[#39]
i went to take the pictures and noticed the hammer is operating much better but still not 100% i dont think, after leaving it sit over night (uncocked)
below are links to the pictures so please let me know if you see something wrong. http://i41.tinypic.com/2u8vvh3.jpg http://i41.tinypic.com/5vnn0m.jpg http://i40.tinypic.com/2z8rqxd.jpg |
|
|
|
|
[#40]
It's hard to see, but you do have the hammer spring resting correctly on the backside of the hammer (the side not going towards the firing pin). If you could get a picture at an angle so we can see the spring connection on the hammer uncocked.
|
|
|
|
|
[#41]
Originally Posted By Northerner:
i went to take the pictures and noticed the hammer is operating much better but still not 100% i dont think, after leaving it sit over night (uncocked) below are links to the pictures so please let me know if you see something wrong. http://i41.tinypic.com/2u8vvh3.jpg http://i41.tinypic.com/5vnn0m.jpg http://i40.tinypic.com/2z8rqxd.jpg That's not a normal trigger/hammer What kind is it? |
|
|
|
|
[Last Edit: Northerner]
[#42]
the LPK is CMMG
http://i41.tinypic.com/2ywwz9j.jpg http://i41.tinypic.com/2zgavb9.jpg also, which way does the hammer and trigger pin go? i did as the video showed but does it matter as the notches are offset? |
|
|
|
|
[#43]
Originally Posted By Northerner:
the LPK is CMMG I see two things.... however, you really should start a new thread in the forums for this issue. 1. Your receiver walls are scratched up - it could be the dimensions of the hammer are bad, or the receiver width is out of spec. Someone else recently reported the same problem. Was it a bitch to get the hammer in place? Who made the lower? 2. This picture is odd - it looks like an adjustment screw or something messed up in the hammer front notch area: http://tinypic.com/view.php?pic=2z8rqxd&s=5 |
|
|
|
|
[Last Edit: Shooter_Mc_Gavin]
[#44]
Every gun someone has brought me for upgrades has had scratches in the walls like that (DIY) with the one tool what is it....vise grips with green electrical tape. I have two business cards I use when I slide my hammer down to avoid that, I don't think it is too tight...but there is something in the J hook on the hammer as you pointed out.
|
|
|
|
|
[Last Edit: Northerner]
[#45]
those arent really scratches, they wipe right off. i pushed the hammer in by hand, held it in and pushed the hammer pin in with my thumb.
actually i wonder if the lower is out of spec? below is a pic with dimensions i took and the lower is a DSA what your seeing on the hammer is that detent spring that comes out and curves around the bottom but after taking a good look with a flashlight i think the coils on the hammer spring are to wide and its pinching against the lower wall and hammer? http://i42.tinypic.com/35mh5wk.jpg *EDIT* didnt mean to thread steal so if an admin can move this and give it a proper title. |
|
|
|
|
[#46]
Originally Posted By Northerner:
the LPK is CMMG http://i41.tinypic.com/2ywwz9j.jpg http://i41.tinypic.com/2zgavb9.jpg also, which way does the hammer and trigger pin go? i did as the video showed but does it matter as the notches are offset? Hammer and trigger pins are interchangeable and reversible. It doesn't matter which one goes in each hole and it doesn't matter which way they go in or from which side they go in. |
|
|
|
|
[Last Edit: Northerner]
[#47]
well sorry for the mass confusion but i sprayed a little CLP on the spring and hammer pin and cycled the hammer a bunch and it seems to be working fine now.
if an admin wishes to delete all these posts pertaining to this mess please feel free and thank you all for your help, its greatly appreciated! |
|
|
|
|
[Last Edit: Northerner]
[#48]
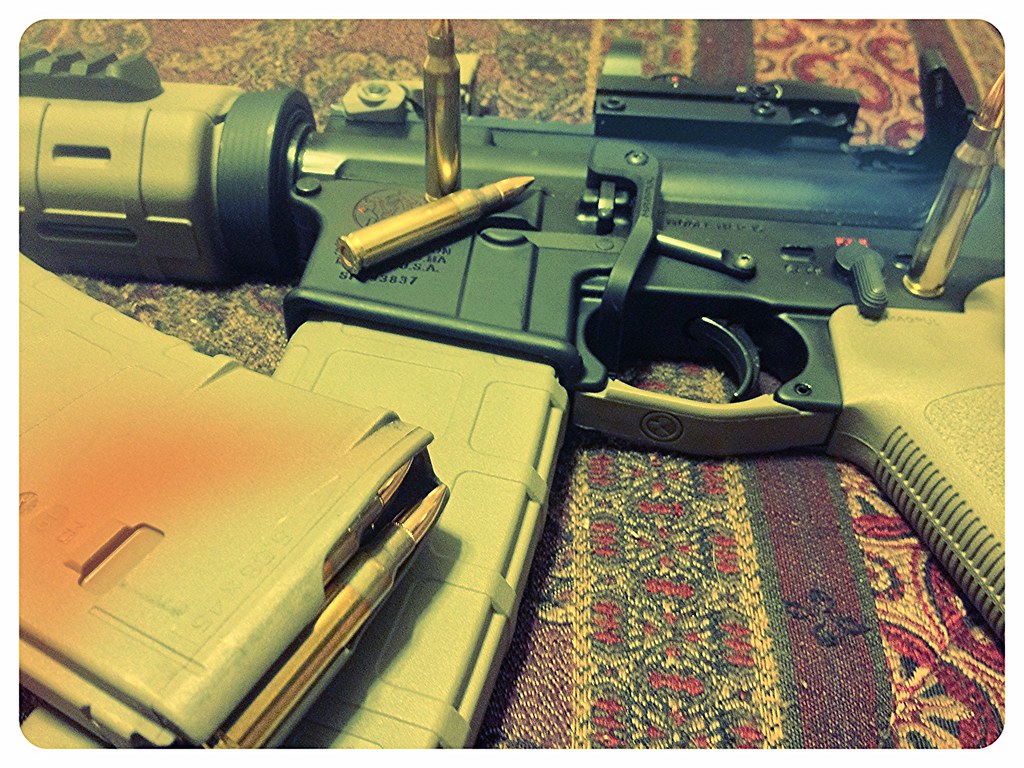
just a quick post to show my final product with a few aftermarket goodies
Hogue grip, CAA cheek riser, Magpul enhanced trigger guard 
|
|
|
|
MI, USA
|
[#49]
 " /> " />
 " /> " />
 " /> " />
 " /> " />
My first build thanks to this site and thread. I put the LPK in tonite. I took my time so as to not scratch it up and total time was 90 mins. My Aero blem lower mated to my PSA complete upper blem. Windham Weaponry LPK. All total so far including FFL fee and shipping is $531. Just need BCG, CH, and stock kit. |
|
|
OH, USA
|
[#50]
I installed a Midwest Industries 9" rail & everything went great until I overtightened the anti-backoff screw. If anything I usually under-tighten. This time I just kept snugging until I heard a "snap" and the screw rotated around loosely. It will still thread in and out, but the lower threads in the handguard have broken off and it won't tighten at all now. Any advice?
|
|
|
 Win a FREE Membership!
Sign up for the ARFCOM weekly newsletter and be entered to win a free ARFCOM membership. One new winner* is announced every week!
You will receive an email every Friday morning featuring the latest chatter from the hottest topics, breaking news surrounding legislation, as well as exclusive deals only available to ARFCOM email subscribers.

AR15.COM is the world's largest firearm community and is a gathering place for firearm enthusiasts of all types.
From hunters and military members, to competition shooters and general firearm enthusiasts, we welcome anyone who values and respects the way of the firearm.

Subscribe to our monthly Newsletter to receive firearm news, product discounts from your favorite Industry Partners, and more.
Copyright © 1996-2024 AR15.COM LLC. All Rights Reserved.
Any use of this content without express written consent is prohibited.
AR15.Com reserves the right to overwrite or replace any affiliate, commercial, or monetizable links, posted by users, with our own.