|
[#1]
Originally Posted By Trumpet:
What about a M4 stock wrench that accepts a torque wrench? Is there any other one besides the $50+ Brownell's? Why would you need one? Just tighten it down good and snug. Then - optionally - stake it if you want to. |
|
|
|
CO, USA
|
[#2]
Falarak, just wanted to say thanks for putting this together. Just wish I'd have read the whole thing before I started my lower. I had to trim the pivot detent spring and I fought with it for probably half an hour and launched it across the room several times before I finally decided to cut it to fit. Then I finished reading this thread and saw that it's not uncommon, I felt much better about my decision.
My build started with a CMMG stripped lower, bought a bushy 20" predator upper, and finally bought a Model 1 LPK and RRA 6 position adjustable stock. http://i191.photobucket.com/albums/z295/_russ/guns%20n%20stuff/P1000524.jpg |
|
|
|
[#3]
Originally Posted By FALARAK:
Originally Posted By Trumpet:
What about a M4 stock wrench that accepts a torque wrench? Is there any other one besides the $50+ Brownell's? Why would you need one? Just tighten it down good and snug. Then - optionally - stake it if you want to. I just thought going by the manual (40 in/lb -+2) was the "right" way. |
|
|
|
CO, USA
|
[#4]
LAst night I received two RRA lower parts kits from Rainier, an A2 stock assembly and CAR buffer tube assembly from PK. Put them together on a S&W MP 15 lower and a Doublestar lower with the instructions in the topic. Everything went together reasonably well, I even did the first one on the Doublestar lower with A2 stock without a punch set, using vice grips to slowly press the roll pins in place. I'm going to go get a set of punches today to finish getting those pins in all the way and to put the trigger guard pin and bolt release pin into the S&W lower. Thanks for posting this topic, it took me a little over two hours, and now I want to find another project to build!

|
|
|
NC, USA
|
[Last Edit: QuadBomb]
[#5]
FALARAK, thanks for the thread. I'm doing my first AR build, and I just assembled my lower receiver from a Stag 6.8mm stripped lower and a DPMS parts kit by following your directions. The only hitch is the mag release button - it's too broad, can't screw all the way in. Right now it functions, but it sticks out too far and sometimes I have to rotate it to get it to press in. My initial reaction is to sand it down, since the mag release button seems to be made of plastic. Any suggestions?
EDIT: Problem solved. Nothing a little rest and a fresh look couldn't fix. On to the upper! |
|
|
NC, USA
|
[#6]
I NEED HELP PUTTING THE REAR SIGHT IN A STRIPPED A2 RECEIVER.. I GOT THE PARTS KIT AND WAS SHOCKED AT HOW MANY PARTS IT TAKES TO ASSEMBLE THE REAR SIGHT.. I HAVE THE REAR SIGHT INSALLATION TOOL. BUT NEED STEP BY STEP HELP...
|
|
|
FL, USA
|
[#7]
Fantastic write up
|
|
|
HI, USA
|
[#8]
which way does the forward assist go in? Should it be able to flex towards, or away, from the bolt carrier?
|
|
|
|
[#9]
Very helpful - thanks
|
|
|
|
|
[#10]
What about a guide to installing an A1 sight?
|
|
|
|
AZ, USA
|
[#11]
Just finished my first Lower Receiver build!
I didn't mar the finish too bad when installing the bolt catch. Just one tiny nick that will hardly be noticeable. After reading the instructions on the website and launching the pivot pin detent across the room, I made my own pivot pin installation tool. Pics of the krazy straw i used and modified will be posted later this weekend. (yes, i happened to have krazy straws in my possession.) |
|
|
|
[#12]
I just put together my 3rd lower and have a problem (I'm using a RRA lower parts kit just so you know). The bolt catch sure catches the bolt alright....it actually prevents me from charging the rifle. I'm assuming the spring was too short so it allows the bolt catch to come up to high and thus blocks the BCG from moving rearward. This blowsssssssssss. I really don't feel like take the roll pin out, but I guess I have to.
Any help/advice? Anyone else ever have this problem? Thanks |
|
|
|
|
[#13]
Originally Posted By Nicademus: I just put together my 3rd lower and have a problem (I'm using a RRA lower parts kit just so you know). The bolt catch sure catches the bolt alright....it actually prevents me from charging the rifle. I'm assuming the spring was too short so it allows the bolt catch to come up to high and thus blocks the BCG from moving rearward. This blowsssssssssss. I really don't feel like take the roll pin out, but I guess I have to. Any help/advice? Anyone else ever have this problem? Thanks Most of the time this is caused by the bolt catch roll pin hole being WAY too tight... and the bolt catch does not freely pivot. If you push the bolt catch all the way down - does it work then? It is either assembled wrong (missing plunger), wrong spring used, bad lower (plunger hole drilled WAY too deep), bad lower (bolt catch out of position), bad bolt catch (size out of spec) or bad bolt catch (roll pin hole too small) I have done TONS of builds, where the bolt catch is out of spec... because of the pin hole size. Before assembling, you should take the roll pin, and it should be able to FALL through the hole in the bolt catch. If not - the bolt catch is bad. You have to replace it, or drill it out a hair larger, enough fo the roll pin to pass with ease. The roll pin should be tight on the LOWER RECEIVER, not on the bolt catch. |
|
|
|
|
[Last Edit: Nicademus]
[#14]
Originally Posted By FALARAK:
Originally Posted By Nicademus:
I just put together my 3rd lower and have a problem (I'm using a RRA lower parts kit just so you know). The bolt catch sure catches the bolt alright....it actually prevents me from charging the rifle. I'm assuming the spring was too short so it allows the bolt catch to come up to high and thus blocks the BCG from moving rearward. This blowsssssssssss. I really don't feel like take the roll pin out, but I guess I have to. Any help/advice? Anyone else ever have this problem? Thanks Most of the time this is caused by the bolt catch roll pin hole being WAY too tight... and the bolt catch does not freely pivot. If you push the bolt catch all the way down - does it work then? It is either assembled wrong (missing plunger), wrong spring used, bad lower (plunger hole drilled WAY too deep), bad lower (bolt catch out of position), bad bolt catch (size out of spec) or bad bolt catch (roll pin hole too small) I have done TONS of builds, where the bolt catch is out of spec... because of the pin hole size. Before assembling, you should take the roll pin, and it should be able to FALL through the hole in the bolt catch. If not - the bolt catch is bad. You have to replace it, or drill it out a hair larger, enough fo the roll pin to pass with ease. The roll pin should be tight on the LOWER RECEIVER, not on the bolt catch. Yeah if I push it all the way down it works and it will seem to work after that for a bit. The bolt catch freely pivots. I'm thinking now that the hole is drilled too deep because when I compare it to my other lowers it is able to pivot much deeper into the lower (if that makes sense). By the way its an SNS Industries lower, which I know people from here as well as lightfighter have a lot of hate for. I bought 2 of them for a really good deal off a guy with a bunch of other stuff. I do like the skull and cross bones roll marks that caused so much controversy 
|
|
|
|
|
[#15]
Originally Posted By Nicademus: Originally Posted By FALARAK: Originally Posted By Nicademus: I just put together my 3rd lower and have a problem (I'm using a RRA lower parts kit just so you know). The bolt catch sure catches the bolt alright....it actually prevents me from charging the rifle. I'm assuming the spring was too short so it allows the bolt catch to come up to high and thus blocks the BCG from moving rearward. This blowsssssssssss. I really don't feel like take the roll pin out, but I guess I have to. Any help/advice? Anyone else ever have this problem? Thanks Most of the time this is caused by the bolt catch roll pin hole being WAY too tight... and the bolt catch does not freely pivot. If you push the bolt catch all the way down - does it work then? It is either assembled wrong (missing plunger), wrong spring used, bad lower (plunger hole drilled WAY too deep), bad lower (bolt catch out of position), bad bolt catch (size out of spec) or bad bolt catch (roll pin hole too small) I have done TONS of builds, where the bolt catch is out of spec... because of the pin hole size. Before assembling, you should take the roll pin, and it should be able to FALL through the hole in the bolt catch. If not - the bolt catch is bad. You have to replace it, or drill it out a hair larger, enough fo the roll pin to pass with ease. The roll pin should be tight on the LOWER RECEIVER, not on the bolt catch. Yeah if I push it all the way down it works and it will seem to work after that for a bit. The bolt catch freely pivots. I'm thinking now that the hole is drilled too deep because when I compare it to my other lowers it is able to pivot much deeper into the lower (if that makes sense). By the way its an SNS Industries lower, which I know people from here as well as lightfighter have a lot of hate for. I bought 2 of them for a really good deal off a guy with a bunch of other stuff. I do like the skull and cross bones roll marks that caused so much controversy If the hole is drilled too deep - you can fill it with wadded paper, small ball bearing, plastic cut with wire cutters from a ball point pen, etc.... to get it to apply enough spring pressure to return it to the down position. |
|
|
|
|
[Last Edit: Nicademus]
[#16]
Originally Posted By FALARAK:
Originally Posted By Nicademus:
Originally Posted By FALARAK:
Originally Posted By Nicademus:
I just put together my 3rd lower and have a problem (I'm using a RRA lower parts kit just so you know). The bolt catch sure catches the bolt alright....it actually prevents me from charging the rifle. I'm assuming the spring was too short so it allows the bolt catch to come up to high and thus blocks the BCG from moving rearward. This blowsssssssssss. I really don't feel like take the roll pin out, but I guess I have to. Any help/advice? Anyone else ever have this problem? Thanks Most of the time this is caused by the bolt catch roll pin hole being WAY too tight... and the bolt catch does not freely pivot. If you push the bolt catch all the way down - does it work then? It is either assembled wrong (missing plunger), wrong spring used, bad lower (plunger hole drilled WAY too deep), bad lower (bolt catch out of position), bad bolt catch (size out of spec) or bad bolt catch (roll pin hole too small) I have done TONS of builds, where the bolt catch is out of spec... because of the pin hole size. Before assembling, you should take the roll pin, and it should be able to FALL through the hole in the bolt catch. If not - the bolt catch is bad. You have to replace it, or drill it out a hair larger, enough fo the roll pin to pass with ease. The roll pin should be tight on the LOWER RECEIVER, not on the bolt catch. Yeah if I push it all the way down it works and it will seem to work after that for a bit. The bolt catch freely pivots. I'm thinking now that the hole is drilled too deep because when I compare it to my other lowers it is able to pivot much deeper into the lower (if that makes sense). By the way its an SNS Industries lower, which I know people from here as well as lightfighter have a lot of hate for. I bought 2 of them for a really good deal off a guy with a bunch of other stuff. I do like the skull and cross bones roll marks that caused so much controversy If the hole is drilled too deep - you can fill it with wadded paper, small ball bearing, plastic cut with wire cutters from a ball point pen, etc.... to get it to apply enough spring pressure to return it to the down position. Thanks, I've been waiting for you to reply.......should have just sent you a message directly. Going to give it a try. Update* I used a clipping of an aluminum stud...........bad idea, it was too big and is now lodged deep in the hole. Not you're fault, mine, I'm a retard. An angry retard 
|
|
|
|
|
[#17]
Originally Posted By Nicademus: Update* I used a clipping of an aluminum stud...........bad idea, it was too big and is now lodged deep in the hole. Not you're fault, mine, I'm a retard. An angry retard I have done stuff like that before... unless you LODGED it in there, I have been able t tap things like that out hitting the lower down on a firm table protected by a towel, or using a fine pick. |
|
|
|
|
[#18]
Originally Posted By FALARAK:
Originally Posted By Nicademus:
Update* I used a clipping of an aluminum stud...........bad idea, it was too big and is now lodged deep in the hole. Not you're fault, mine, I'm a retard. An angry retard I have done stuff like that before... unless you LODGED it in there, I have been able t tap things like that out hitting the lower down on a firm table protected by a towel, or using a fine pick. Yeah I tried both of those :( then I got the grand idea to just try and flatten it out in there so it would work. Result, problem even worse. I'm going to drill it tomorrow. I'm also sending SNS an email about how their lowers are out of spec. |
|
|
|
AZ, USA
|
[#19]
I have a question about the instructions for making your own low pro gas block. After all the dremeling is complete, and it's time to paint/coat it, does the paint really hold up well? I have heard concerns about the temperature being too high and therefore too much for the paint to handle. Thus causing the paint to flake off or melt or whatever. I haven't heard of this problem on here so I just wanted to ask. If I judge based on feedback, there aren't many problems.
The reason I'm asking is because I have a standard 16" upper that I am looking to improve on. I am getting a YHM handguard in rifle length and thus the need for the low pro gas block. I am wanting to do as much as I can by myself. However, if something like anodizing needs to be done for durability sake, then I need to know. Thanks for the great post by the way. |
|
|
WA, USA
|
[#20]
great tutorial, thanks a bunch. My current setup has a midwest FF forearm with the standard "f" marked FSB. I've found a different forearm that I'm wanting to go to, so do I simply need to remove the fsb, the current forearm & then install the new forearm & the fsb? it would sure beat having to remove the barrel
|
|
|
CA, USA
|
[#21]
just got done putting together my cmmg lower thanks for all the info now its time to rock n roll

|
|
|
|
[#22]
Originally Posted By 5jeffro7: great tutorial, thanks a bunch. My current setup has a midwest FF forearm with the standard "f" marked FSB. I've found a different forearm that I'm wanting to go to, so do I simply need to remove the fsb, the current forearm & then install the new forearm & the fsb? it would sure beat having to remove the barrel Technically - you never have to remove the "barrel" to install a tube - except for JP float tubes, that I have seen. However - it is common to have to remove the barrel NUT. The only time you have to remove the barrel nut... is if you are installing a FF tube that comes with it's own proprietary barrel nut. If your current version clamps on to the standard barrel nut - and you are replacing it with another of the same type - you are good to go. Also - if your tube uses a proprietary barrel nut, but you are replacing the tube with another of the same type from the same manufacturer - then you dont have to swap nuts. |
|
|
|
UT, USA
|
[Last Edit: G26Jer]
[#23]
thanks for all the great info posted here! It has been a great resource. I got my YHM lower with RRA lpk put together with almost no trouble.
Thanks again! http://jeromycampphoto.smugmug.com/photos/623987293_Pcpbf-L.jpg |
|
|
WY, USA
|
[#24]
What's the secret for getting the roll pin out from the trigger guard? I've been using hammer and small screw driver for about 30 minutes now.
|
|
|
|
[#25]
Originally Posted By Mopseydocks6014: What's the secret for getting the roll pin out from the trigger guard? I've been using hammer and small screw driver for about 30 minutes now. Out? As in - removing it? Can you give more details? |
|
|
|
WY, USA
|
[#26]
Originally Posted By FALARAK: Originally Posted By Mopseydocks6014: What's the secret for getting the roll pin out from the trigger guard? I've been using hammer and small screw driver for about 30 minutes now. Out? As in - removing it? Can you give more details? I'm going to be taking off the standard trigger guard and putting on a MOE guard. |
|
|
|
[#27]
Originally Posted By Mopseydocks6014: Originally Posted By FALARAK: Originally Posted By Mopseydocks6014: What's the secret for getting the roll pin out from the trigger guard? I've been using hammer and small screw driver for about 30 minutes now. Out? As in - removing it? Can you give more details? I'm going to be taking off the standard trigger guard and putting on a MOE guard. Those can be very tight - due to many kits using a crappy and oversized roll pin. You need to support the back side ear VERY well. It is best to support it over a block of wood with a small hole drilled - and let the pin pound out in this hole - so we wont break that fragile ear off the lower. Then - using a punch size that JUST fits inside the lower and guard - tap it out. It can take a lot to get it started. Sometimes it helps to pop it loose on the detachable side - so you are sure it isnt in a bind. |
|
|
|
WY, USA
|
[#28]
Originally Posted By FALARAK: Originally Posted By Mopseydocks6014: Originally Posted By FALARAK: Originally Posted By Mopseydocks6014: What's the secret for getting the roll pin out from the trigger guard? I've been using hammer and small screw driver for about 30 minutes now. Out? As in - removing it? Can you give more details? I'm going to be taking off the standard trigger guard and putting on a MOE guard. Those can be very tight - due to many kits using a crappy and oversized roll pin. You need to support the back side ear VERY well. It is best to support it over a block of wood with a small hole drilled - and let the pin pound out in this hole - so we wont break that fragile ear off the lower. Then - using a punch size that JUST fits inside the lower and guard - tap it out. It can take a lot to get it started. Sometimes it helps to pop it loose on the detachable side - so you are sure it isnt in a bind. The smallest punch I have is 1/4" so I'll have to deal with it until I can get a smaller one. |
|
|
USA
|
[#29]
Jard Adjustable Trigger Install:
First order a Jard Adjustable AR-15 trigger ($120 from midwayusa with CR Discount, 150 without a CR) First all the tools and equipment you will need to install your trigger. Total time should take around 30-45mins
Step one: First disconnect the upper from the lower and make sure there is no magazine in the rifle and the weapon is unloaded. Step Two: [*]Using the flat head screwdriver remove the pistol grip (Take if off slowly and dont lose the detnet and spring, i put them in the box that the trigger came with) [*]Remove safety selector [*]Now take your punch and hammer and punch out your trigger pin and your hammer pin [*]Set the old hammer and trigger aiside as you wont need any of these parts Step Three: Once you get your pistol grip off and the old trigger out. Lay everytthing out with your new trigger http://img.photobucket.com/albums/v406/LancerV/DSCN0639.jpg Step Four: Take off all the screws on the new trigger, and degrease them. The silver pin that holds in the disconnector and spring Should be 3 of them http://img.photobucket.com/albums/v406/LancerV/DSCN0641.jpg Step Five: After you have degreased all your screws use the blue loctite (it wont cure before you get done as it takes around 30mins to install), and grease and grease the parts shown. And reinstall all screws, make the two outside screws flush with the bottom of the trigger http://img.photobucket.com/albums/v406/LancerV/DSCN0644.jpg Grease the hole on the bottom as it will hold the trigger spring in place http://img.photobucket.com/albums/v406/LancerV/DSCN0645.jpg Install all the screws and dissconector http://img.photobucket.com/albums/v406/LancerV/DSCN0647.jpg Step Six: Take your sear engagement screw and put it where the old pistol grip screw went. Let it protrude out as much as you can. It may get really hard to screw in once past a certain point as the threading stops. But you can just force it in as, it keeps it in tighter, and nothing else is ever going to go that far in http://img.photobucket.com/albums/v406/LancerV/DSCN0648.jpg http://img.photobucket.com/albums/v406/LancerV/DSCN0649.jpg Step Seven: Install the trigger in your lower receiver, and the hammer, see if the hammer cocks back and grease it according http://img.photobucket.com/albums/v406/LancerV/DSCN0650.jpg Step Eight: If you put the sear engagement screw in far enough the hammer shouldnt cock back, keep backing out the sear engagement screw until the hammer will cock back. After this rotate the sear engagement screw out one more full turn http://img.photobucket.com/albums/v406/LancerV/DSCN0654.jpg Step Nine: Remove the hammer using the punch and hammer, and adjust the first screw nearest towards the magwell. This will adjust the overtravel. This part takes the longest, keep backing it out tell it wont cock back anymore. Once this happens take out about half a turn and reinstall hammer should cock back just fine. You want the bottom of the hammer to just be traveling past the trigger http://img.photobucket.com/albums/v406/LancerV/DSCN0655.jpg Step Ten: Next is the disconnector screw this is the screw in the middle, tighten it all the way down at first. And try to move the hammer down, the hammer should just barley catch it where it will have enough force to come back up from the disconnector, if it looks like its going to catch it alot keep backing out the screw tell it looks like it barley catches. Once it looks ok push the hammer down and it should catch it and come back up. If it gets stuck you will have to take out the hammer, and back it out some more http://img.photobucket.com/albums/v406/LancerV/DSCN0658.jpg Step 11: The last screw is for the safety it lets you adjust how much travel you have in your trigger with the safety on, Jard says there should be none, but ive never got to that point wheres there none with still being able to put the safety selector in. You keep backing it out until you cant put the safety selector in and than you just go down 1/8 of turn and put in the safety lever. Dry Fire to make sure it works. Step Twelve Last Step: Put the dentent and than the spring in, and the pistol grip. And grab the modified pistol grip screw and blue loctite it. It should look like this http://img.photobucket.com/albums/v406/LancerV/DSCN0661.jpg Also grease up everything http://img.photobucket.com/albums/v406/LancerV/DSCN0660-1.jpg And a 10pull trigger average http://img.photobucket.com/albums/v406/LancerV/DSCN0662.jpg And video http://www.youtube.com/watch?v=XHcctzDfZJk |
|
|
FL, USA
|
[#30]
A few questions that poped up on my build....
When installing the buffer tube pin, how far should the buffer tube be screwed in? I read that it should touch the pin, & I read it should only touch just the round detent before the pin. How tight should the buffer tube nut be? Does it need a specific TQ? |
|
|
|
[Last Edit: Desert_AIP]
[#31]
Originally Posted By fuzzy03cls:
A few questions that poped up on my build.... When installing the buffer tube pin, how far should the buffer tube be screwed in? I read that it should touch the pin, & I read it should only touch just the round detent before the pin. How tight should the buffer tube nut be? Does it need a specific TQ? If, when you screw in the receiver extension, it just touches the buffer retainer, try screwing it in one more full turn. If the buffer retainer moves freely and the pin of the retainer is still above the receiver extension tube, then I usually use this position. It reduces the liklihood the buffer retainer will fly out on it's own. There is a specifc torque for the castle nut, but I think most people tighten it hand tight, then wrench on it a little and stake it there, or use blue loctite. I've never had one come loose and if I've ever removed one, the loctite was still holding fast. |
|
|
|
OH, USA
|
[#32]
Originally Posted By DVDTracker: I've finally split the lower receiver video into two and uploaded it to YouTube. Part 1: www.youtube.com/watch?v=iA_Vkb2UB1w Part 2: www.youtube.com/watch?v=jq4KfUaVp8M Thanks, I'll be starting my first build any day now and the video will help. |
|
|
CT, USA
|
[#33]
im in the process of my first build too and these videos r very helpful
|
|
|
FL, USA
|
[#34]
Ok, now I see how easy it is to do, I'll order the tools. What I want to do is simple, I think. Change the upper to a flat-top, change the barrel to a free-float. It's a Bushmaster ES 16. I'm assuming the bolt and charging handle will be the same. Not sure, but I can probaly buy the upper receiver from Bushmaster, but I'd like a high end, heavy barrel. Who do you suggest?
I thougt of buying a 16" heavy from Rock River, but this may be cheaper, getting a better barrel and doing it myself? |
|
|
TX, USA
|
[Last Edit: 1badmotorfinger]
[#35]
Thank you, thank you, thank you.... what an awesome post...hands down the best AR site in the world!!
Got my first complete build done last weekend.Using this post I had zero issues and learned a lot not to mention actually getting to enjoy the process and know my rifle inside and out. Special thanks to FALARAK for all your wisdom and also thank you to Desert_AIP for the clevis pin trick!!! |
|
|
|
[#36]
Originally Posted By Wangstang:
Superior Arms Lower: How do you properly set / adjust the set screw for the trigger? From this thread: www.ar15.com/forums/topic.html?b=3&f=4&t=353859 Superior Arms Lower: How do you properly set / adjust the set screw for the trigger?
0 Wangstang :: 12/15/2007 3:17:57 PM EST I have my lower assembled other than the pistol grip and stock. The only question I have run into is how to adjust the trigger set screw. Can anyone advise how to properly adjust the trigger screw? Thanks Wes 1 constitutionlvr :: 12/15/2007 6:25:35 PM EST I can't give advice on how to adjust it to improve the trigger, but I did screw mine down enough to get the pistol grip on. The screw was not comming out into the lower so it does not have an affect on the function of the lower. This way I did not lose the screw. I have heard some people say they just threw the screw away. If anyone can tell you exactly how it works or how to adjust it I would be interested as well. Sorry I cant give you any better advice but hopefully my advice willprevent you from letting this hold you up on a build. 2 Wangstang :: 12/15/2007 8:12:31 PM EST Originally Posted By constitutionlvr: I can't give advice on how to adjust it to improve the trigger, but I did screw mine down enough to get the pistol grip on. The screw was not comming out into the lower so it does not have an affect on the function of the lower. This way I did not lose the screw. I have heard some people say they just threw the screw away. If anyone can tell you exactly how it works or how to adjust it I would be interested as well. Sorry I cant give you any better advice but hopefully my advice willprevent you from letting this hold you up on a build. Thanks. I am not in a rush so I'll see if I can't get superior on the phone on Monday. I have to say that despite all of the posts I've seen where people thought these lowers weren't as well finished as others on the market with small issues here and there, I have had no issues at all. P-mags fit with no hanging at all, the pin holes are all in the righ locations and the general finish of the lower is just as high as my RRA AR. Compared to DPMS/Double Star the lower is smoother and lacks all of the manufacturing marks that are visable on the DPMS/Double Star units. I'll post pics in a few days. Wes 3 hunter121 :: 12/15/2007 10:45:53 PM EST Wes, I just adjusted mine last night when I was changing out my grip. All I did was tighten it until the safety selector wound not work and I backed off the adjustment screw until the safety selecter worked with out binding. I cheaked the hammer and made sure that it locked back in place and that the trigger would release the hammer before I put the grip back on. Now I have NO creep in my trigger. Also if you have a 2stage trigger dont use the adjustmant screw. I have heard it causes double taps and some time FA, which could be a safety issue as you no have a runaway rifle. Also make sure you keep your eye out on the detent and spring for the safety selector, damn near lost mine when I was messing around. Anyways hope this helps, Ryan 4 HEATH223 :: 12/16/2007 5:44:20 AM EST Originally Posted By hunter121: Wes, I just adjusted mine last night when I was changing out my grip. All I did was tighten it until the safety selector wound not work and I backed off the adjustment screw until the safety selecter worked with out binding. I cheaked the hammer and made sure that it locked back in place and that the trigger would release the hammer before I put the grip back on. Ryan Thats how I did mine also. 5 blackta6 :: 12/16/2007 9:25:52 AM EST As more rounds are fired through the gun, do function checks often. As the sear and hammer surfaces wear this could cause the screw to become "out of adjustment". This option is good IMO, but one must know what to expect. 6 Wangstang :: 12/16/2007 10:41:20 AM EST Originally Posted By hunter121: Wes, I just adjusted mine last night when I was changing out my grip. All I did was tighten it until the safety selector wound not work and I backed off the adjustment screw until the safety selecter worked with out binding. I cheaked the hammer and made sure that it locked back in place and that the trigger would release the hammer before I put the grip back on. Now I have NO creep in my trigger. Also if you have a 2stage trigger dont use the adjustmant screw. I have heard it causes double taps and some time FA, which could be a safety issue as you no have a runaway rifle. Also make sure you keep your eye out on the detent and spring for the safety selector, damn near lost mine when I was messing around. Anyways hope this helps, Ryan Thank you very much sir. Can you advise if you did the adjustments with the hammer cocked back or released? Also can you advise if you had your upper in place with the bolt forward or if you did it with the upper off of the reciever? For what it's worth, if you ever do find yourself with a run away AR if it somehow jams and won't stop shooting....if you have a large enough mag in there that you'll have time to grab the charging handle with your off hand and hold the bolt back from completing it's forward motion, you can get the rifle to stop shooting. Of course the rate of fire will be so high that by the time you think of it with a 30 round mag in there, it will be to late. An even easier solution to a "runaway" FA misfire would be to drop the mag, but if you have a tight mag well, that may not work for you. Wes 7 swen35 :: 12/16/2007 11:53:45 AM EST Originally Posted By Wangstang: Originally Posted By hunter121: All I did was tighten it until the safety selector wound not work and I backed off the adjustment screw until the safety selecter worked with out binding. Ryan Can you advise if you did the adjustments with the hammer cocked back or released? Also can you advise if you had your upper in place with the bolt forward or if you did it with the upper off of the reciever? I performed my adjustments just like hunter121. I made the adjustments with the hammer forward, do not think I tried it with it cocked. Keep the upper off. I think Superior Arms use to have instructions on how to make the adjustments on their website. Hope this helps. 8 hunter121 :: 12/16/2007 1:03:03 PM EST Originally Posted By swen35: Originally Posted By Wangstang: Originally Posted By hunter121: All I did was tighten it until the safety selector wound not work and I backed off the adjustment screw until the safety selecter worked with out binding. Ryan Can you advise if you did the adjustments with the hammer cocked back or released? Also can you advise if you had your upper in place with the bolt forward or if you did it with the upper off of the reciever? I performed my adjustments just like hunter121. I made the adjustments with the hammer forward, do not think I tried it with it cocked. Keep the upper off. I think Superior Arms use to have instructions on how to make the adjustments on their website. Hope this helps. Yep I had my hammer forward and upper off. I do remember Superior having those instructions but it was some time ago so they might be lost in no man land. Also I remember some people drilling another hole in the pistol grip so they can make adjustmants to the trigger when everything is put back together. On a side note, since we are messing with the trigger, when you go out to test it out at the range I would suggest to load up 2 rounds at first and make sure your not going to have any issues. 9 SniperCSA :: 12/16/2007 1:05:38 PM EST I am by no means an AR assembly expert, but here's what I did. With the hammer locked back, I engaged the set screw until the safety wouldn't rotate. Then I backed it off jjjuuusstt until it the safety would rotate. I also checked the trigger pull as I went. I gripped the lower and locked my thumb in place, pointing it toward the hammer (close to the hammer). Then I squeezed the trigger until the hammer was released and my thumb caught it before it smacked the lower. I did all this several times until I was satisfied with safety function and leaving just a *tad* bit of take up left. The before and after trigger pulls (again, making sure the hammer didn't smack the lower) made me a believer in that set screw for making a trigger just a bit nicer. 10 Wangstang :: 1/2/2008 9:17:15 AM EST Hunter and Sniper, thanks for the updates. Any chance the mods could sticky this thread so the question isn't repeatedly asked? Thanks Wes 11 wise_jake :: 1/2/2008 12:19:44 PM EST Wow. I was going to say "Go ask them in their Industry Forum," but it turns out they don't have one. So I just tagged the thread b/c I'm thinking of getting one of these in the coming months. 12 TaterSalad :: 1/2/2008 4:41:53 PM EST +1 OST Wes Not sure when Superior Arms added it to there website but instructions have been posted: http://www.superiorarms.com/ss_trigger.php Wes |
|
|
|
USA
|
[Last Edit: Sundevilgrad]
[#37]
1/2 hour, start to finish for a newb like me... Thanks!
|
|
|
|
[Last Edit: Amped]
[#38]
Ok first AR lower is built....Thanks to this thread. Next......upper on friday....then shooting on sunday :)
I have better photos but I am way to lazy to upload them... 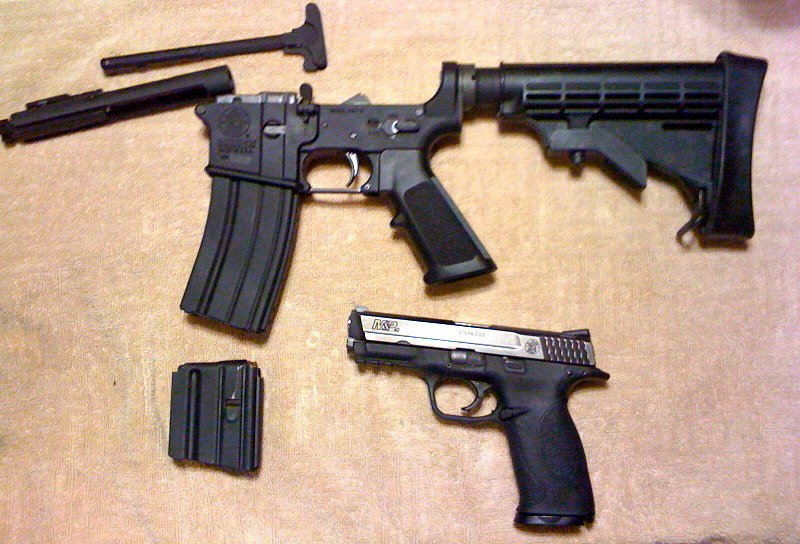
Smith and Wesson M&P15 Lower Rock River LPK Mil Spec Buffer tube and spring Smith and Wesson M4 Stock 10 Round Mag 10/30 Mag Upper Del-Ton Upper M4 Cuts Del-Ton M4 Barrel 1x7 CL Rock River BCG Rock River CH Next Check magpul shit 
|
|
|
|
FL, USA
|
[#39]
I know this may not be the page to ask this question on but is this a full Auto lower or does it just have the engraving of one for the selector? |
|
|
TN, USA
|
[Last Edit: augydog]
[#40]
It's a semi-lower with the pictogram markings for the selector.
Looks nice. |
|
|
HI, USA
|
[#41]
What's the secret to remove the front sight on a Noveske barrel? Are they pressed in? Pins don't seem to want to come out. (Yes I am trying to remove them from the correct side)
|
|
|
TX, USA
|
[#42]
Ok...this is my first AR build and I think I might have forgotten something when I put together my lower.
I have an extra takedown detent. I started my lower months ago and put everything together except the buffer tube/spring/buffer and stock because I hadn't bought mine yet/decided. I finally bought my stock and everything else needed. I looked in my bag of remaining parts and saw two detents!! WTF...am I missing something? Front takedown detent is installed, rear is installed...is there another detent that I'm neglecting to see? |
|
|
|
[#43]
Sometimes they give you a spare in case you launch it.
|
|
|
|
|
[#44]
Originally Posted By FALARAK:
Sometimes they give you a spare in case you launch it. +1 I had a LPK from RB PRecision and it had an extra. That particular lower went together perfect for me as far as not launching the detent. I was trying to figure out what the big deal was with the front takedown pin detent. Now my 2nd lower was a different story, I used a razor blade for that one I think to hold it down. |
|
|
|
WI, USA
|
[#45]
Originally Posted By FALARAK:
And just FYI - there is no need to "tag" this post..... it is, and will be, tacked at the top of the "Build It Yourself" forum. When you are done - always visit the Examination, Inspection, and Troubleshooting checklist, HERE The link to this checklist wont open, did it get moved? |
|
|
|
[#46]
Checklist was apparently moved - you know how they are always dorking with this site.
http://www.ar15.com/forums/topic.html?b=3&f=66&t=210213 |
|
|
|
TX, USA
|
[#47]
I just changed out my factory A-framed gas block for a low profile one with rails on it. I got lucky and the gas port lined up and it works like it should. Is there some easy secret to lining up the holes in thebarrel and new gas blocks?
|
|
|
WA, USA
|
[Last Edit: Cultgti]
[#48]
Looking good
|
|
|
TX, USA
|
[#49]
OK, I'm now waiting
|
|
|
|
[#50]
Ah...Tag it anyway. |
|
|
|
 Win a FREE Membership!
Sign up for the ARFCOM weekly newsletter and be entered to win a free ARFCOM membership. One new winner* is announced every week!
You will receive an email every Friday morning featuring the latest chatter from the hottest topics, breaking news surrounding legislation, as well as exclusive deals only available to ARFCOM email subscribers.

AR15.COM is the world's largest firearm community and is a gathering place for firearm enthusiasts of all types.
From hunters and military members, to competition shooters and general firearm enthusiasts, we welcome anyone who values and respects the way of the firearm.

Subscribe to our monthly Newsletter to receive firearm news, product discounts from your favorite Industry Partners, and more.
Copyright © 1996-2024 AR15.COM LLC. All Rights Reserved.
Any use of this content without express written consent is prohibited.
AR15.Com reserves the right to overwrite or replace any affiliate, commercial, or monetizable links, posted by users, with our own.


