|
Posted: 5/3/2016 7:45:42 PM EDT
Getting deeper into finishing an RO727 clone (yes, I know its A2), but I spend literally all my time here in the retro forum and my fellow retro heads are just an endless wealth of information. That being said, I'd like to do my 727 like in the below posted pic, which is fitted with an OPS inc 3rd model suppressor (i think). My question is does / has anyone made a FAUX OPS inc can or have the can's actual dimensions.? Building a fake can is possible as I have a lathe and bridgeport milling machine at home and I'm in need of a new project
 . Any help or comments from you gentleman is greatly appreciated. . Any help or comments from you gentleman is greatly appreciated. |
|
|
|
[#1]
I've inquired before and never found anything satisfactory. I'm very interested if anyone has or makes one.
Worst case, I've got an airsoft version I can measure for outer dimensions. |
|
|
|
[#2]
Quoted: I've inquired before and never found anything satisfactory. I'm very interested if anyone has or makes one. Worst case, I've got an airsoft version I can measure for outer dimensions. |
|
|
|
[#3]
I'm sure it's aluminum. Nothing I'd want to put on my actual gun. But yes, it's got the knurling, and markings of some sort (can't remember if they're correct or not).
|
|
|
|
[#4]
I'm in the process of making a fake can for my rifle.
Maybe we can share what we learn http://www.ar15.com/forums/t_3_123/694241_Retro_Suppressor_Build_for_M16A1_KAC_Mk4_blast_and_Hel_E4A_Dummy_Faux_Relica_Can.html ETA: Looks like maybe all you need to do is by the King Arms Ops Airsoft Can Maybe it won't take many mods to get it to work. Looks like they have several models including the 3rd http://shop.ehobbyasia.com/king-arms-ops-model-3rd-mbs-silencer-for-marui-m733-1.html#.Vymp8jHLJAM If I keep this up I'm gonna become known as some kind of airsoft junkie lol. Actually don't own any airsoft rifles, but dang if some if the stuff hasn't become useful in retro builds.  |
|
|
|
[#5]
It used a special locking mount.
|
|
|
|
[#6]
Quoted: I'm in the process of making a fake can for my rifle. Maybe we can share what we learn http://www.ar15.com/forums/t_3_123/694241_Retro_Suppressor_Build_for_M16A1_KAC_Mk4_blast_and_Hel_E4A_Dummy_Faux_Relica_Can.html ETA: Looks like maybe all you need to do is by the King Arms Ops Airsoft Can Maybe it won't take many mods to get it to work. Looks like they have several models including the 3rd http://shop.ehobbyasia.com/king-arms-ops-model-3rd-mbs-silencer-for-marui-m733-1.html#.Vymp8jHLJAM If I keep this up I'm gonna become known as some kind of airsoft junkie lol. Actually don't own any airsoft rifles, but dang if some if the stuff hasn't become useful in retro builds. http://shop.ehobbyasia.com/media/catalog/product/cache/1/image/9df78eab33525d08d6e5fb8d27136e95/k/a/ka-sil-24_1_mark.jpg Maybe I'll start looking at attachment methods in the meantime |
|
|
|
[#7]
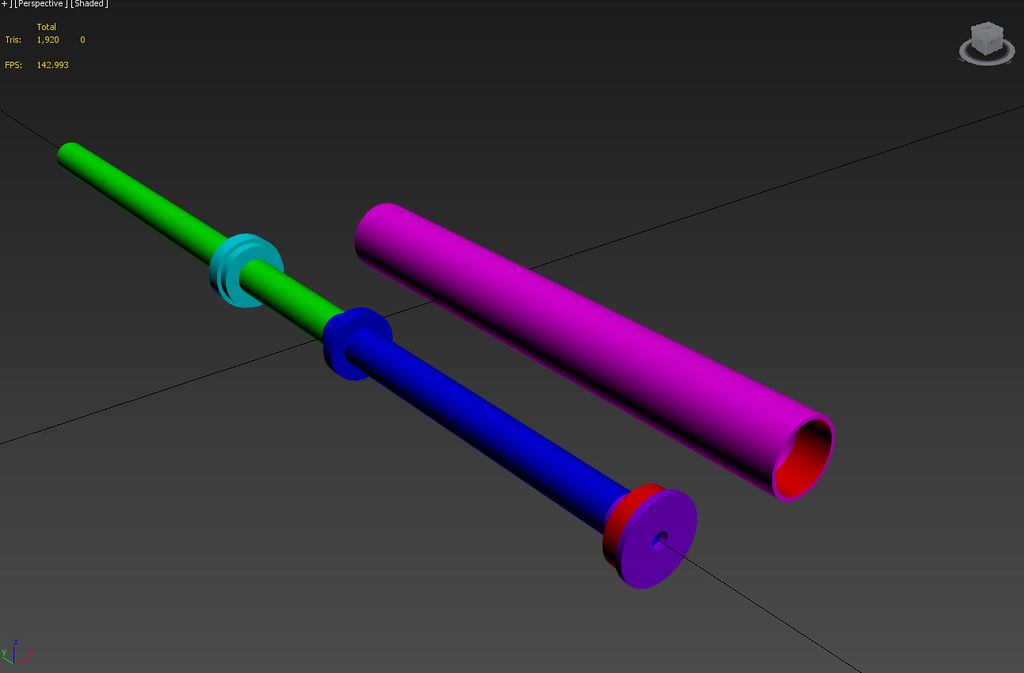
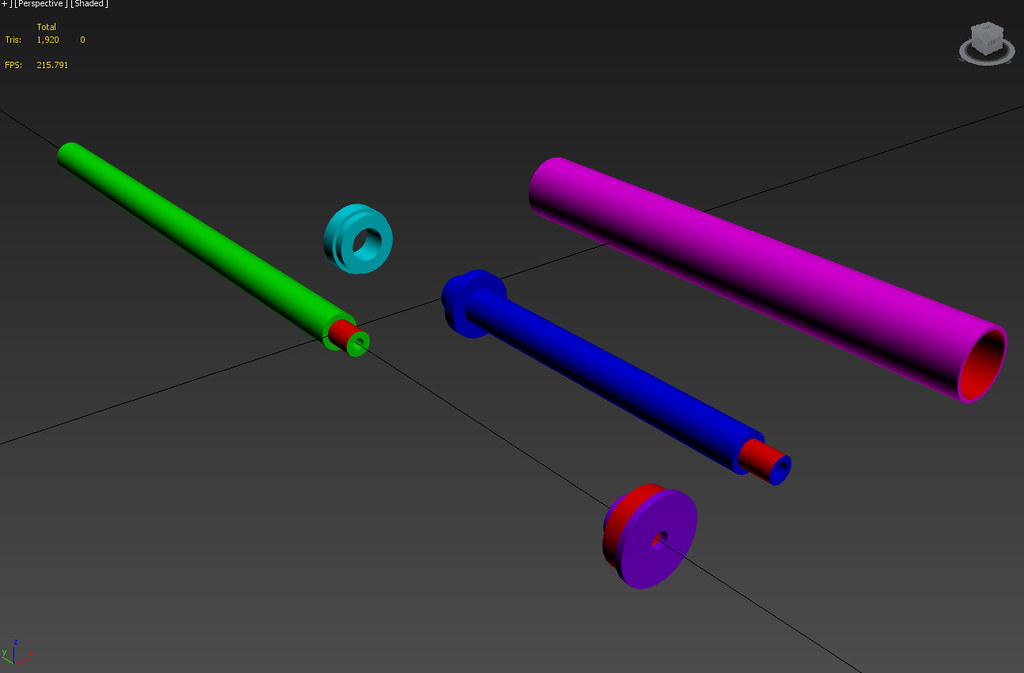
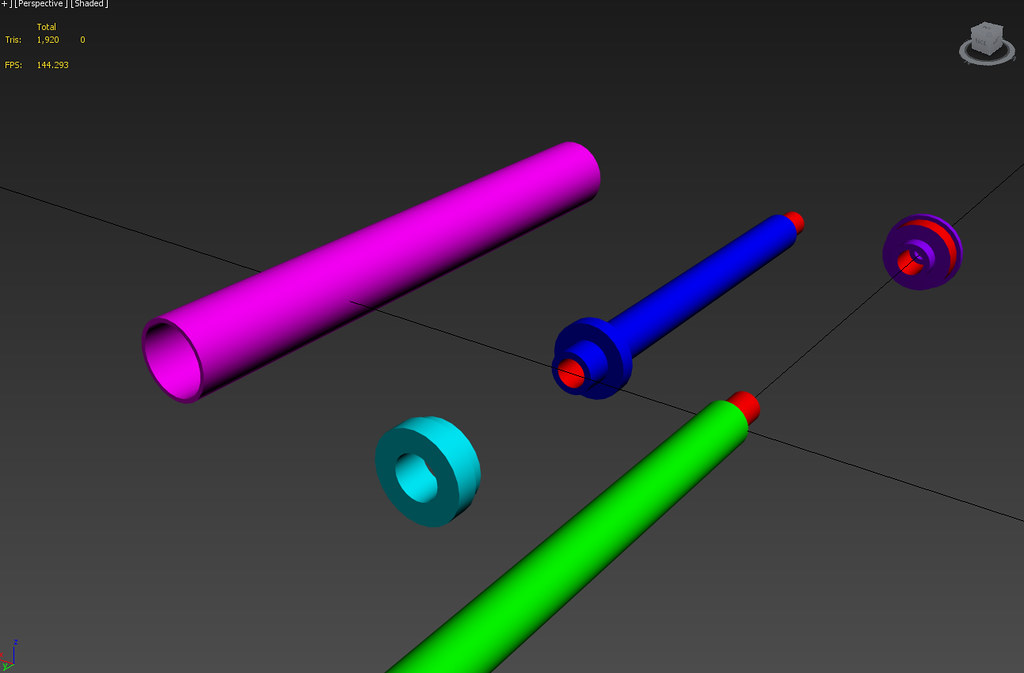
So, I'm no machinist, but I've thought about how to make this before, while complying with laws about what is/isn't a suppressor. I'm pretty sure I'd want something that could be disassembled to prove it's not venting anywhere. I'd also want something I knew I could snug up on my barrel to be fairly secure.
None of this is modeled to any specific dimensions, but is just to show the pieces I was thinking about. Red= Threads Green = Gun Barrel Blue = Barrel Extension. Cyan = Rear Mount Magenta = Sleeve Purple = Cap Originally I thought it would be useful to include a support flange on the barrel extension, but that may be moot given the rear support of the mount. Either way, the intent would be that one could use a lock washer behind the barrel extension, and the extension would have wrench flats for tightening. Same could be done for the cap. That way, one could mount the extension to the barrel, ensure it's snug and not moving. Then slip the sleeve over the barrel, install the cap, again snugging it down to the barrel extension, then slide the sleeve forward and screw it into place on the cap. Finally the Rear Mount (which is actually two pieces held together with hex screws, I believe) can be put in place. 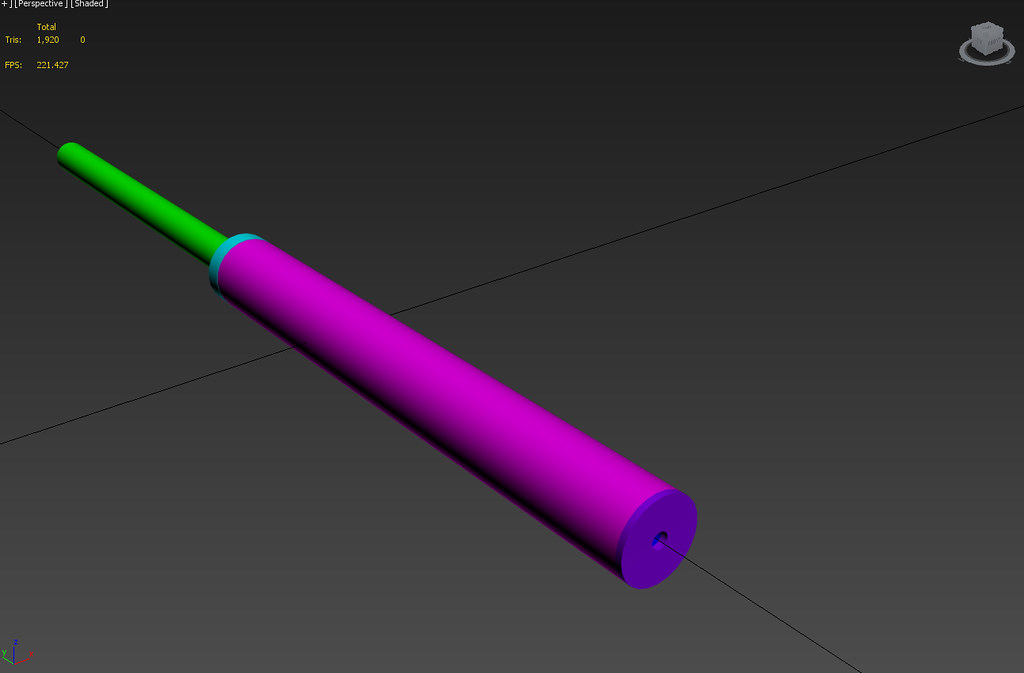
|
|
|
|
[#8]
Quoted: So, I'm no machinist, but I've thought about how to make this before, while complying with laws about what is/isn't a suppressor. I'm pretty sure I'd want something that could be disassembled to prove it's not venting anywhere. I'd also want something I knew I could snug up on my barrel to be fairly secure. None of this is modeled to any specific dimensions, but is just to show the pieces I was thinking about. Red= Threads Green = Gun Barrel Blue = Barrel Extension. Cyan = Rear Mount Magenta = Sleeve Purple = Cap Originally I thought it would be useful to include a support flange on the barrel extension, but that may be moot given the rear support of the mount. Either way, the intent would be that one could use a lock washer behind the barrel extension, and the extension would have wrench flats for tightening. Same could be done for the cap. That way, one could mount the extension to the barrel, ensure it's snug and not moving. Then slip the sleeve over the barrel, install the cap, again snugging it down to the barrel extension, then slide the sleeve forward and screw it into place on the cap. Finally the Rear Mount (which is actually two pieces held together with hex screws, I believe) can be put in place. https://c2.staticflickr.com/8/7319/26746071631_8691149b0b_b.jpg https://c2.staticflickr.com/8/7700/26540756550_e8d9c5c9ec_b.jpg https://c2.staticflickr.com/8/7590/26208028454_343b61b49c_b.jpg https://c2.staticflickr.com/8/7658/26208028544_3b1bf4e7bb_b.jpg If I did not have the small suppressor to enclose I would have made one to slip over my A1 flashhider and mount to the rings on the back of the hider possibly using ball bearings for toolless removal. |
|
|
|
[#9]
Quoted: So, I'm no machinist, but I've thought about how to make this before, while complying with laws about what is/isn't a suppressor. I'm pretty sure I'd want something that could be disassembled to prove it's not venting anywhere. I'd also want something I knew I could snug up on my barrel to be fairly secure. None of this is modeled to any specific dimensions, but is just to show the pieces I was thinking about. Red= Threads Green = Gun Barrel Blue = Barrel Extension. Cyan = Rear Mount Magenta = Sleeve Purple = Cap Originally I thought it would be useful to include a support flange on the barrel extension, but that may be moot given the rear support of the mount. Either way, the intent would be that one could use a lock washer behind the barrel extension, and the extension would have wrench flats for tightening. Same could be done for the cap. That way, one could mount the extension to the barrel, ensure it's snug and not moving. Then slip the sleeve over the barrel, install the cap, again snugging it down to the barrel extension, then slide the sleeve forward and screw it into place on the cap. Finally the Rear Mount (which is actually two pieces held together with hex screws, I believe) can be put in place. https://c2.staticflickr.com/8/7319/26746071631_8691149b0b_b.jpg https://c2.staticflickr.com/8/7700/26540756550_e8d9c5c9ec_b.jpg https://c2.staticflickr.com/8/7590/26208028454_343b61b49c_b.jpg https://c2.staticflickr.com/8/7658/26208028544_3b1bf4e7bb_b.jpg  woah! that is awesome CAD work! I'm gonna go ahead and buy the faux Ops Inc suppressor (full-size as that what it looks like in the pic I found). Too damn bad its coming from Asia, prolly will have to wait forever If were on the same page here (I hope we are) I agree with you on the possible need to machine some type of flange to go (perhaps midway?) down the tube to prevent wobble in the spaces between the tube and barrel. I'll wait and see what I've got when it actually comes, at the very minimal I'll mock it up mounted with can for non-firing display purposes. Still its very cool what your guys have brainstormed already woah! that is awesome CAD work! I'm gonna go ahead and buy the faux Ops Inc suppressor (full-size as that what it looks like in the pic I found). Too damn bad its coming from Asia, prolly will have to wait forever If were on the same page here (I hope we are) I agree with you on the possible need to machine some type of flange to go (perhaps midway?) down the tube to prevent wobble in the spaces between the tube and barrel. I'll wait and see what I've got when it actually comes, at the very minimal I'll mock it up mounted with can for non-firing display purposes. Still its very cool what your guys have brainstormed already |
|
|
 Win a FREE Membership!
Sign up for the ARFCOM weekly newsletter and be entered to win a free ARFCOM membership. One new winner* is announced every week!
You will receive an email every Friday morning featuring the latest chatter from the hottest topics, breaking news surrounding legislation, as well as exclusive deals only available to ARFCOM email subscribers.

AR15.COM is the world's largest firearm community and is a gathering place for firearm enthusiasts of all types.
From hunters and military members, to competition shooters and general firearm enthusiasts, we welcome anyone who values and respects the way of the firearm.

Subscribe to our monthly Newsletter to receive firearm news, product discounts from your favorite Industry Partners, and more.
Copyright © 1996-2024 AR15.COM LLC. All Rights Reserved.
Any use of this content without express written consent is prohibited.
AR15.Com reserves the right to overwrite or replace any affiliate, commercial, or monetizable links, posted by users, with our own.


