|
Posted: 4/10/2007 11:43:41 PM EDT
Okay guys I've taken lots of requests on making a how to on rattle canning the ol' rifle and some even wanted me to do it. Problem is by the time some could get the rifle to me it wouldn't be cost effective. (Going through an FFL and all). Therefore I'm posting this DIY step by step in order to try and help some that may want to take this project upon themselves. I can answer any questions some may have by having you email me or IM me or posting in this thread. I plan to do some mags down the road but for now I'm happy w/ just having the rifle. One thing should be noted...I am going to attempt to lay down some Alumahyde II Matte Clear to help protect the finish. I have heard mixed reviews on this stuff so I may try it on a mag first...so there is no guarantee if anyone tries the AHII before I do it. Some may have already tried it and feel free to chime in.
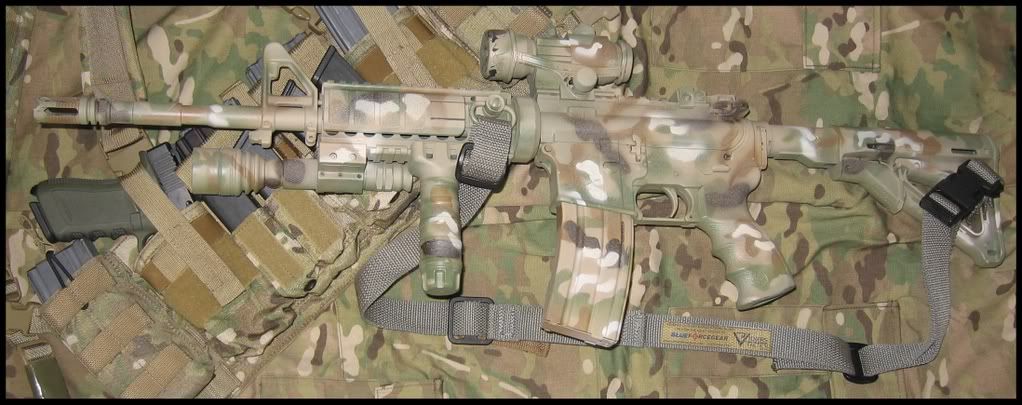
PHASE 1 Okay so lets go over the list of items you'll need. -A rifle/object/whatever you're painting -Wal-Mart brake cleaner (costs less than $2 and degreases your rifle) -Some heavy duty gloves...to keep your greasy paws off the rifle -Manilla folders (wal-mart or wherever) -Ink Pen -Exacto knife -Hanger -Cloth patches...to plug the muzzle -Something to rest the rifle on while painting -Paint For the paint you will need to find these Krylon Ultra Flat colors...I found them at Ace Hardware Online The colors you need will be these. -Brown #8142  -Khaki #8141  -Medium Brown (Coyote) #8147  -Sand Dune #8148  -Satin Hunter Green #2424  PHASE 2 Okay now that we have the items needed done. You need to prep the object that is being painted....in this case a rifle. I actually broke down all my parts and stripped most of the rifle as I wanted to get a good base coat on everything. To do this I threw on the gloves and began hosing down the parts with brake cleaner. Make sure you are outside when you do this and where gloves, mask, and eye protection. Once everything is degreased and dry you need to begin painting. For the first coat I threw on some Khaki. I used about three to four light coats. Light coats is the key to keeping the Krylon from running. REMEMBER!!! BE SURE AND ROTATE THE FIRE SELECTOR SWITCH SO YOU DON'T HAVE A BLACK SPOT UNDERNEATH WHEN YOU GO FROM SAFE TO FIRE OR VICE VERSA!!!! 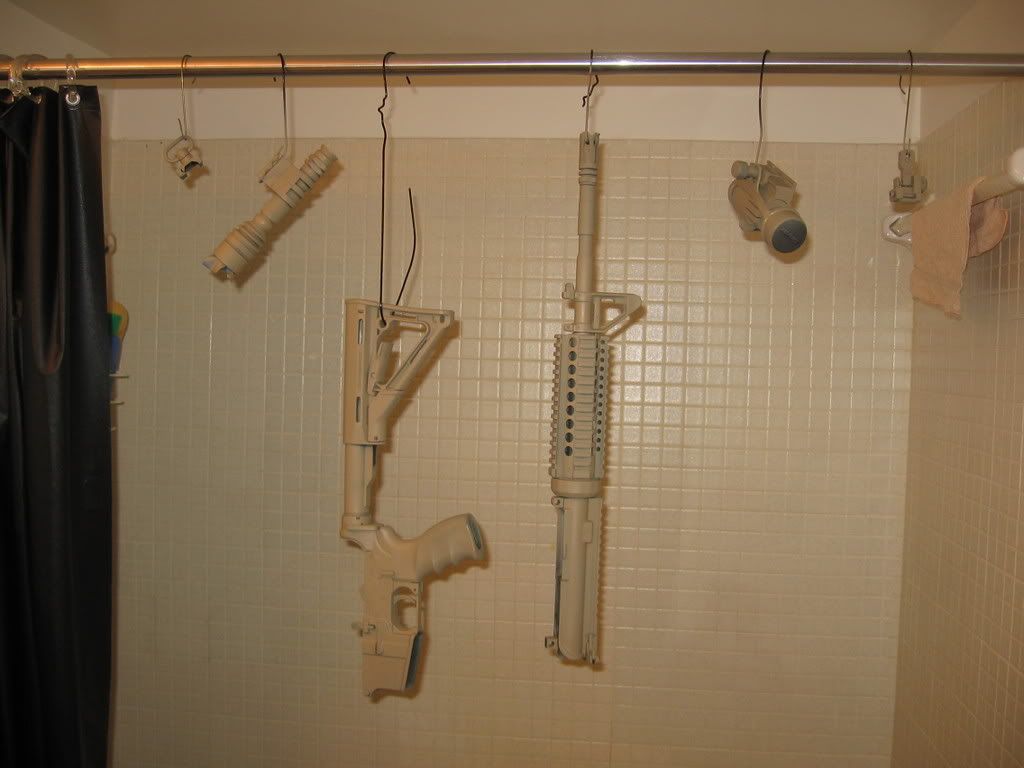 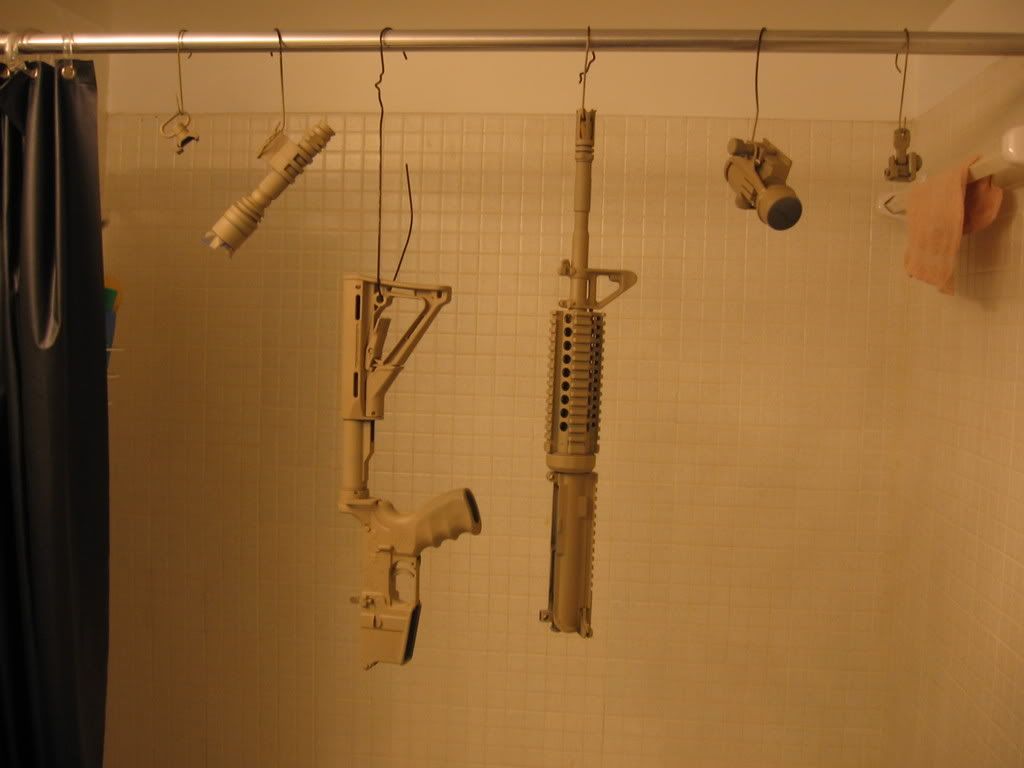 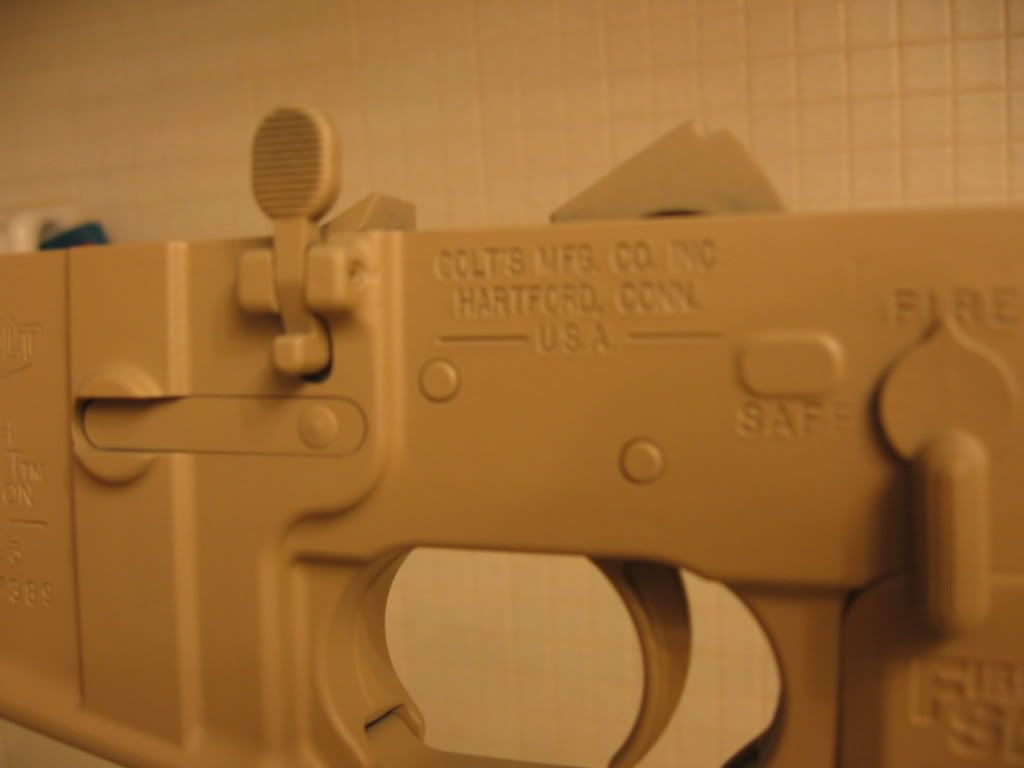 Once you have applied each coat and allowed proper time to dry, reassemble the rifle and take a deep breath. You seriously have completed the most mentally challenging part of the whole ordeal. The rest just involves taking your time and doing it right! Here are pics of the rifle assembled! 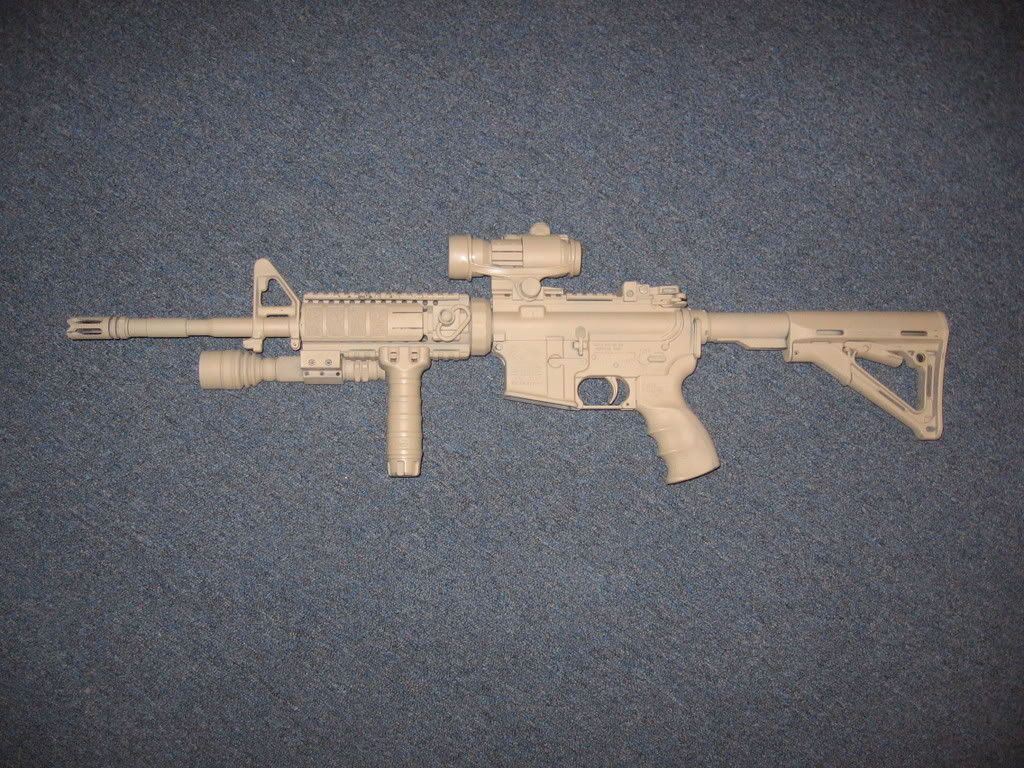 PHASE 3 Well I realized that this base coat was too light for the base coat of Multicam so I need to throw some satin green on there. This should be done by misting the satin green onto the Khaki. In the pics I will show what happens when you mist too much and therefore have to redo it with more misting..only using khaki to lighten it up. Keep doing this until you get your desired effect. 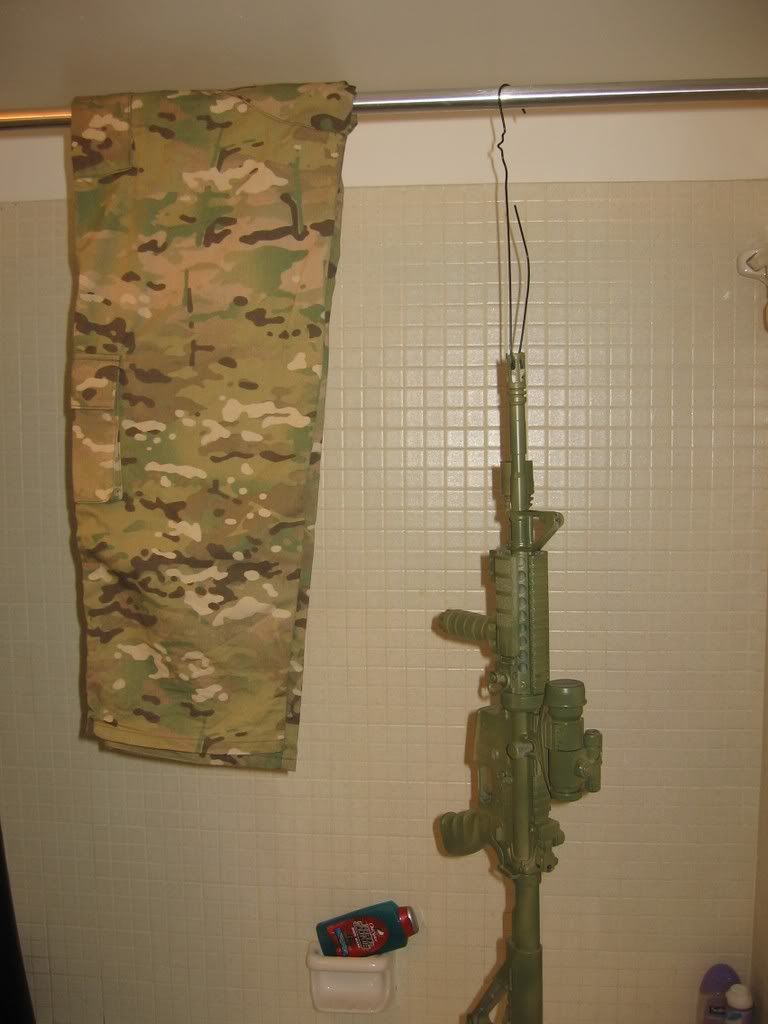 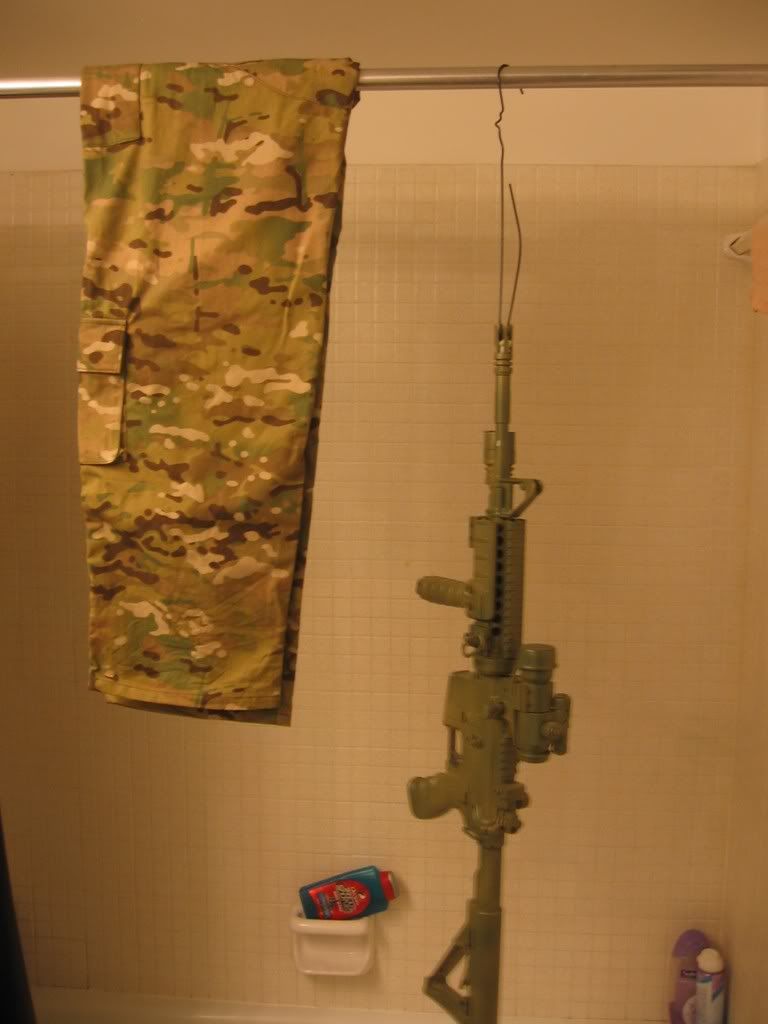 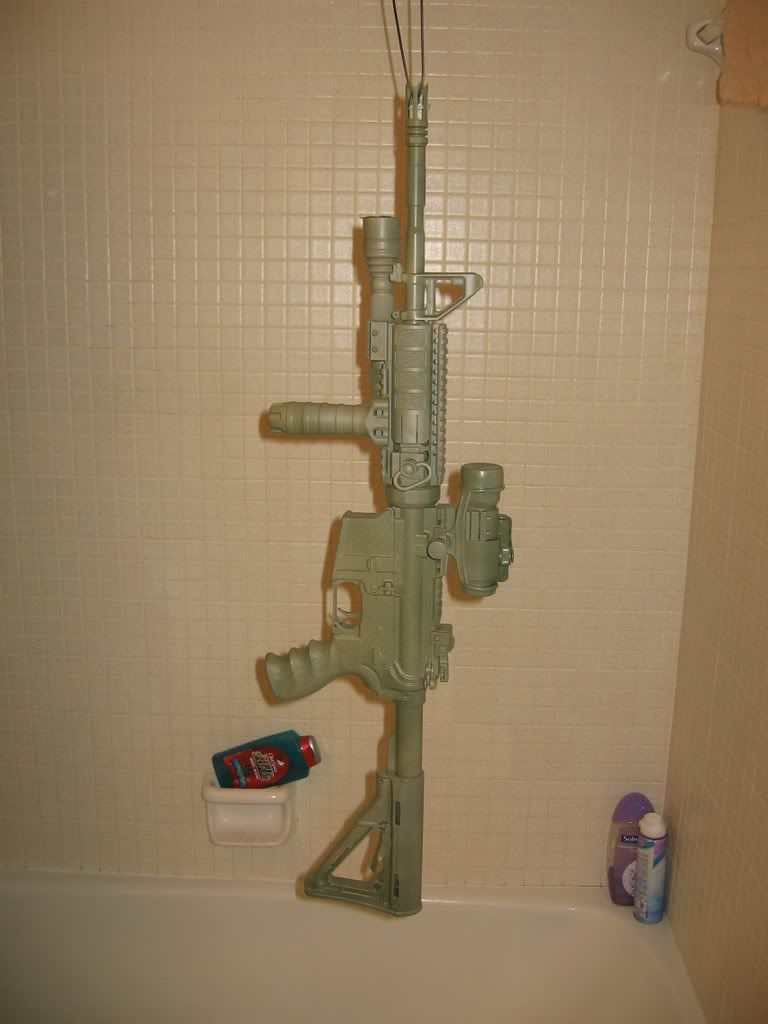 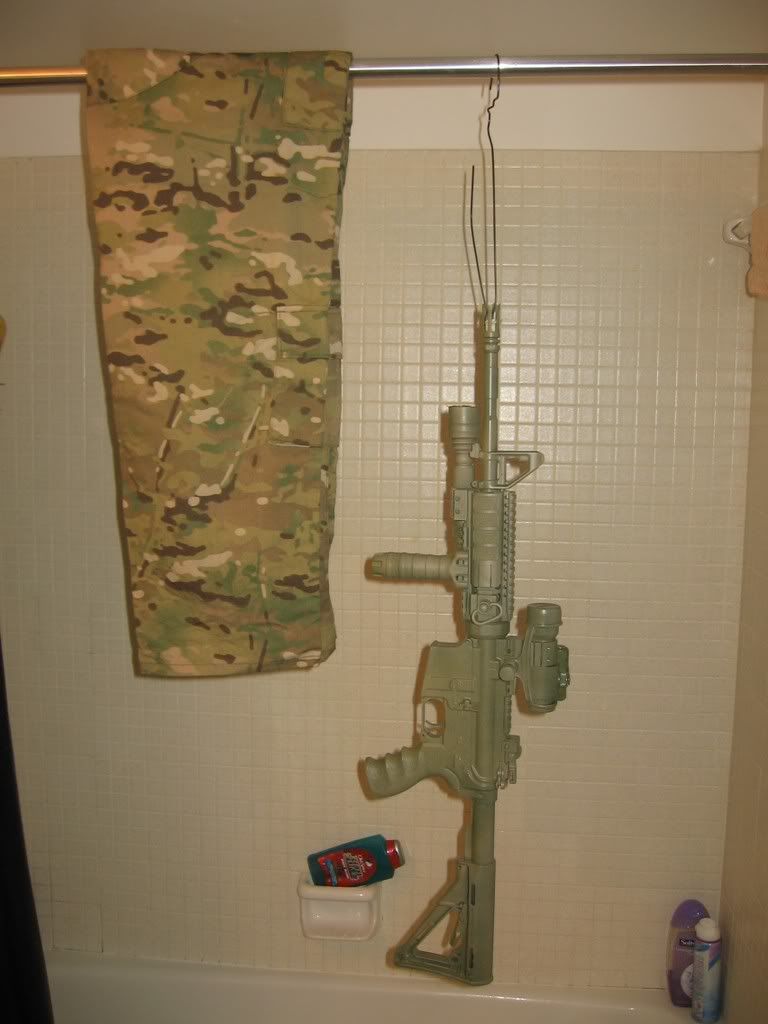 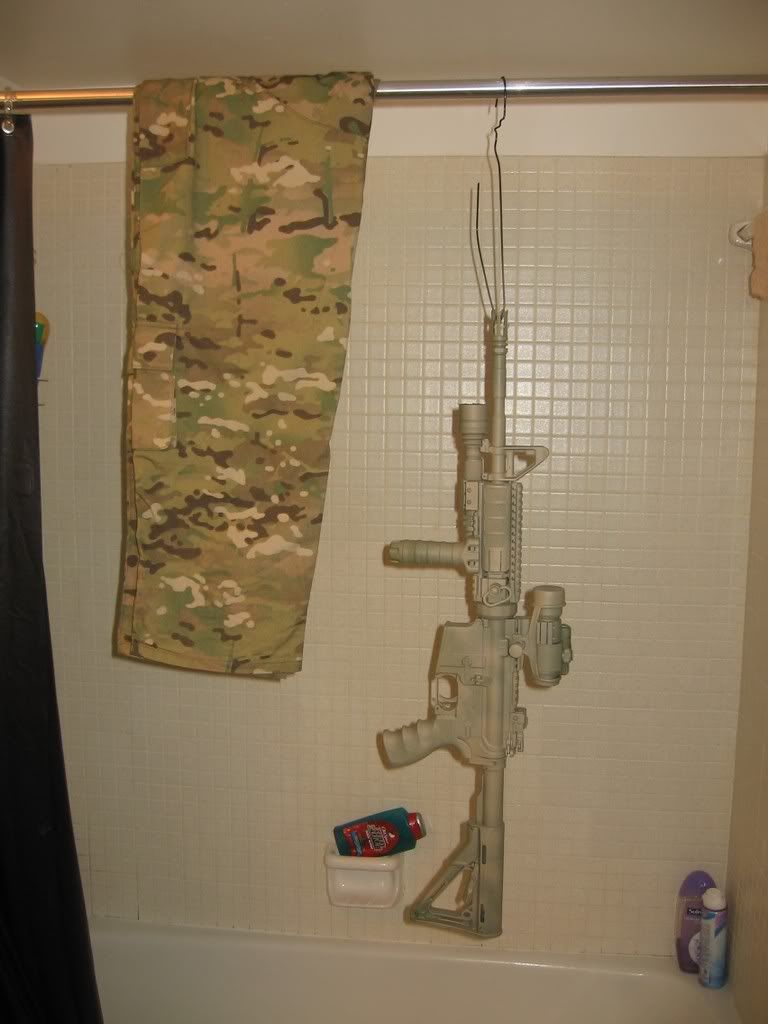 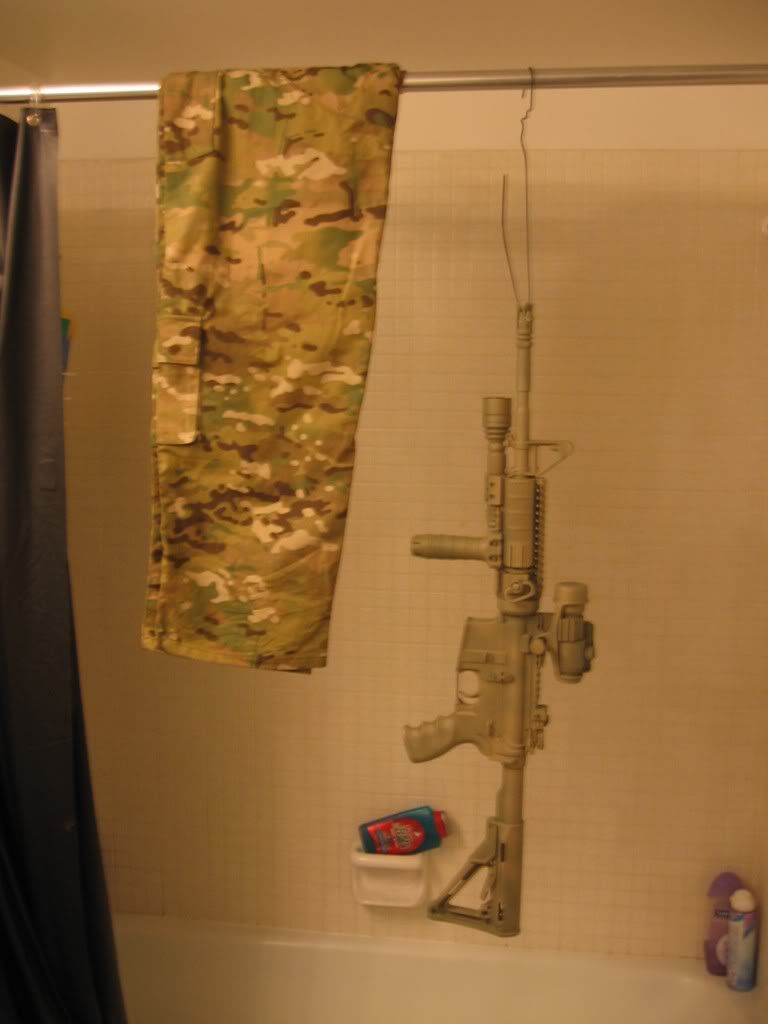 PHASE 4 Now you need to begin prepping yourself for the next phase of the Multicam Rattlecan Project. In this phase you will need the manilla envelopes, exacto knife, and ink pen. It also helps to have a patch of Multicam or print a large piece of the design off your printer/computer. This will help you free hand the stencils. Cut the manilla envelope in half as you're only going to need one piece at a time. I originally was putting two large designs on each piece but found it better to just use one large design for each piece...that way you don't actually spray two designs at the same time. So take your pen and start drawing/free handing the patterns. These don't need to be large as your rifle/object will probably not be that large. After drawing them out to your satisfaction place the sheet on a surface that gives a little but you don't mind cutting up and cut out the shapes. This is the end result in what you should have. The shapes do not need to look exactly like mine as the more variety the better but should give you an idea of what to do. Also I found that you only need 5 or 6 patterns and then you can rotate, use half a stencil or all of it to make your pattern on your rifle.  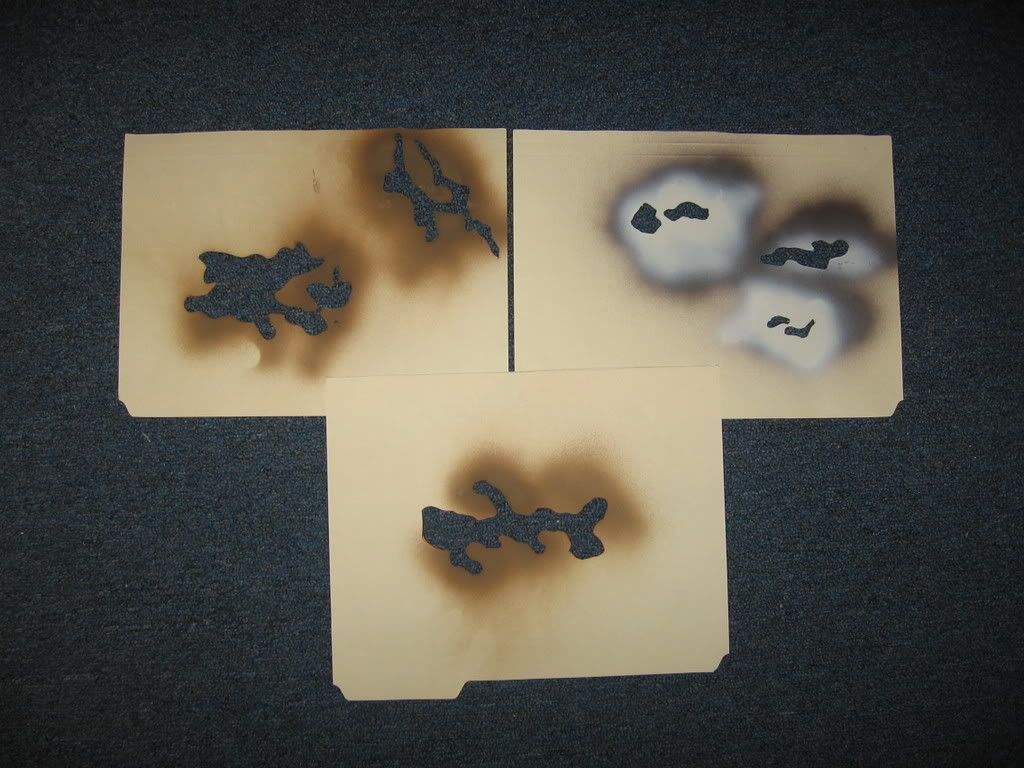 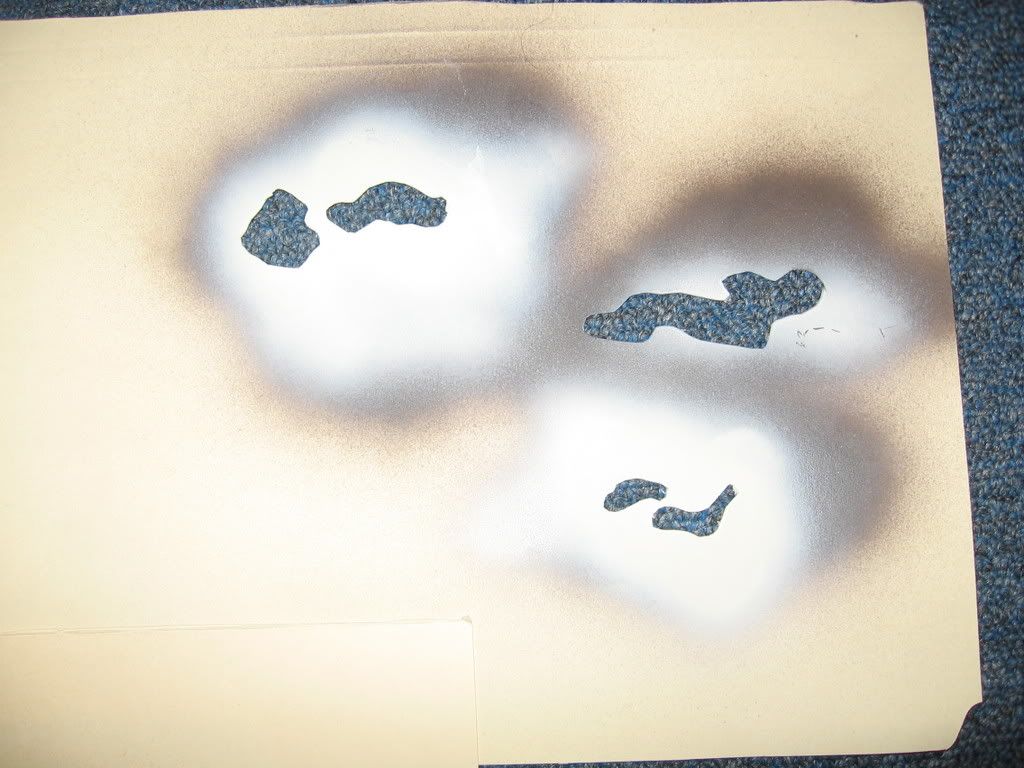 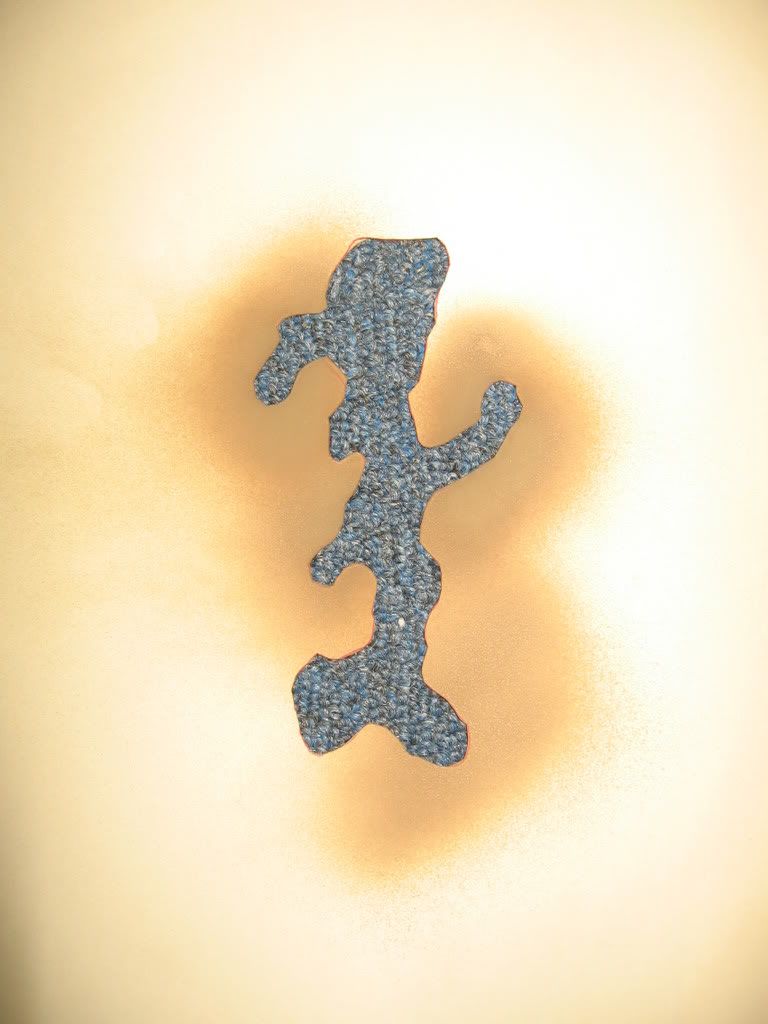 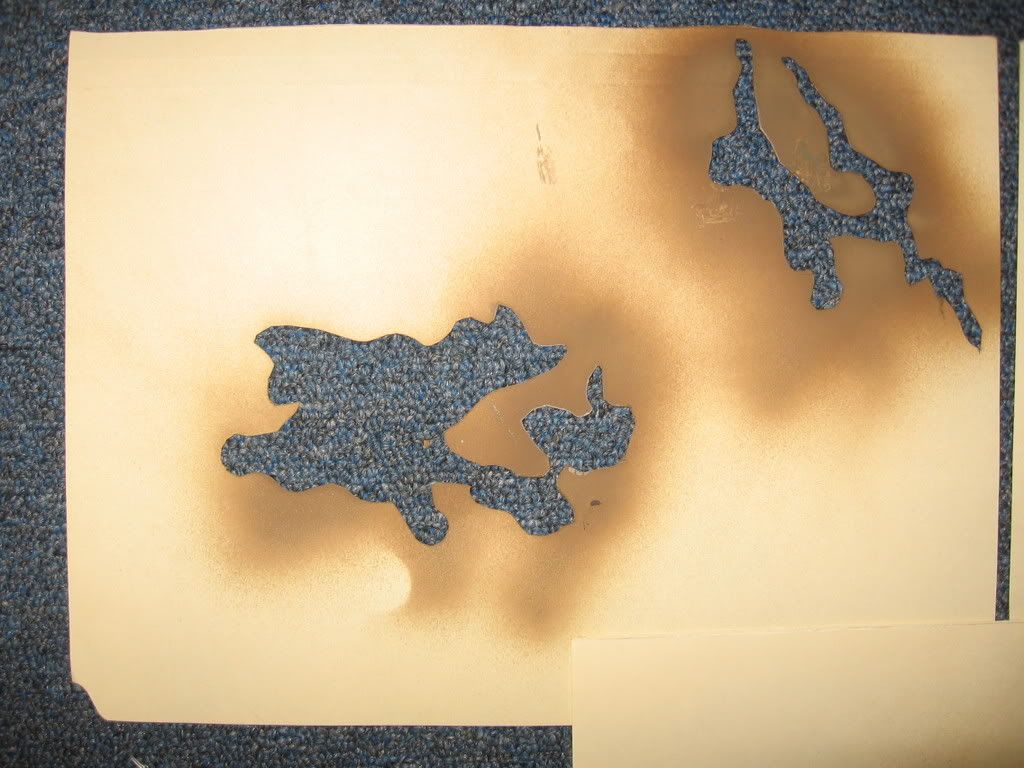 PHASE 5 Now you're ready to start laying on the colors. At this phase you can choose two different ways of going about it. You can lay down the Medium Brown first....or you can lay down the Satin Green patterns first. It is entirely up to you. I chose to lay down the Satin Green first, as my Medium Brown paint had not arrived in the mail yet. When painting on the patterns you should have your gloves on, lay the sheet as flat as you can on the rifle and then hold the can approximately about a foot away from the rifle. Just make sure you don't spray too much on the rifle that you don't intend on spraying w/ that color. Also it should be noted that the sheet/template will not lay perfectly flat as your rifle is not flat. I honestly think this is a good thing as it allows for colors to blend and keeps you from having to nice of defined lines. 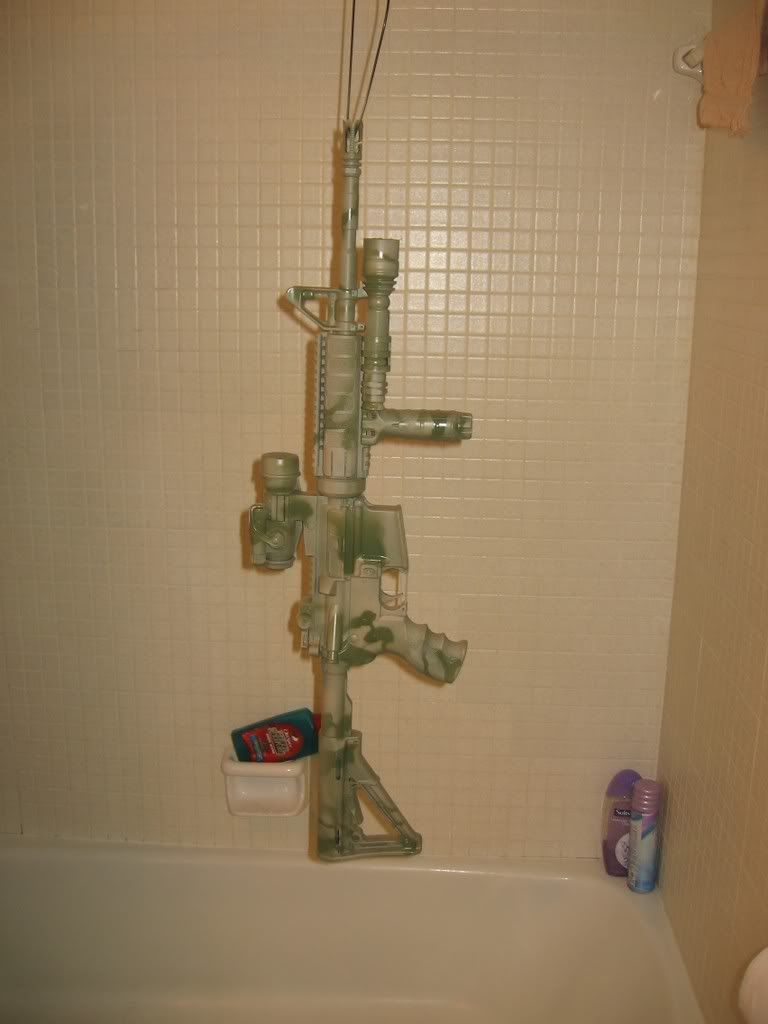  PHASE 6 At this phase, upon proper drying of the Satin Green pattern you are ready to throw on the Medium Brown...or if you chose the Medium Brown coat first...then you're ready for the Satin Green....in my case...the Medium Brown. Once again same as the Satin Green process. Just make sure you're doing this randomly and spread out. If you truly study a large piece of Multicam you will notice that the colors are not evenly dispersed which adds to its effectiveness. Here goes the Medium Brown.  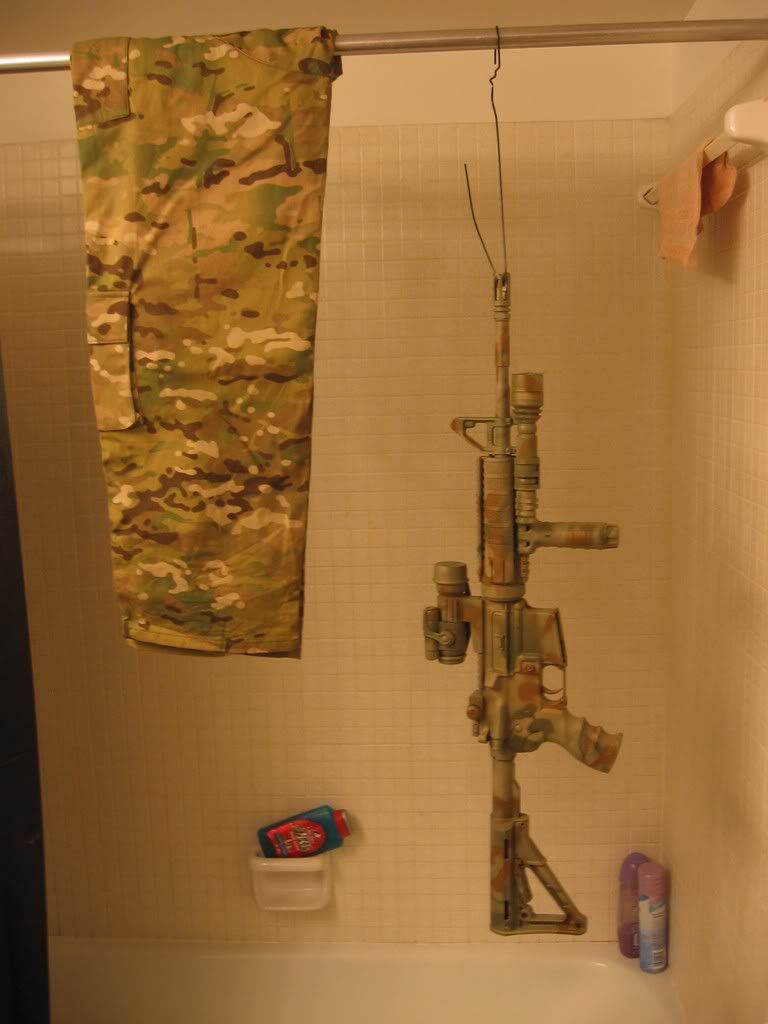 PHASE 7 Upon drying it is time to throw down some Brown. For this phase you will want to use some of the smaller templates you cut out. Once again...BE RANDOM!!!...and use the same process of applying as the other colors. Here is the Brown applied! 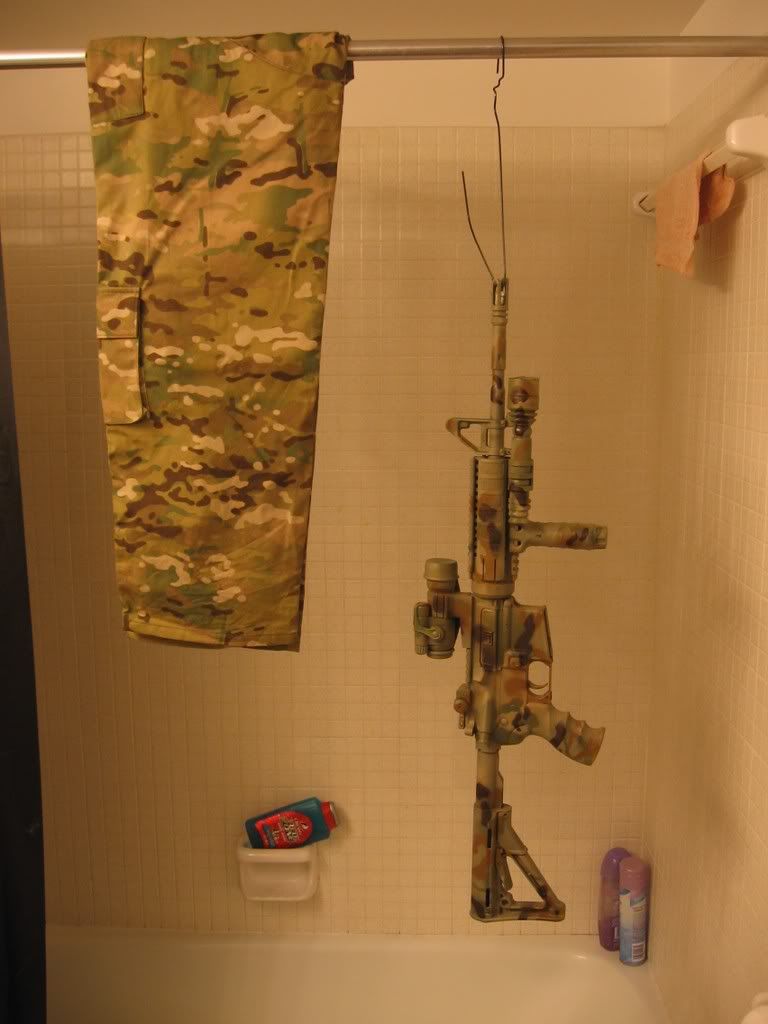 PHASE 8 The last phase is the Sand Dunes color. I actually used White in which I went back and misted with Khaki but I should have used Sand Dunes....but I did not have it. In your case...stick with the Sand Dunes. I will be going back and toning the white down more in a bit but not during this tutorial. Once again...use the small templates and be random!!! 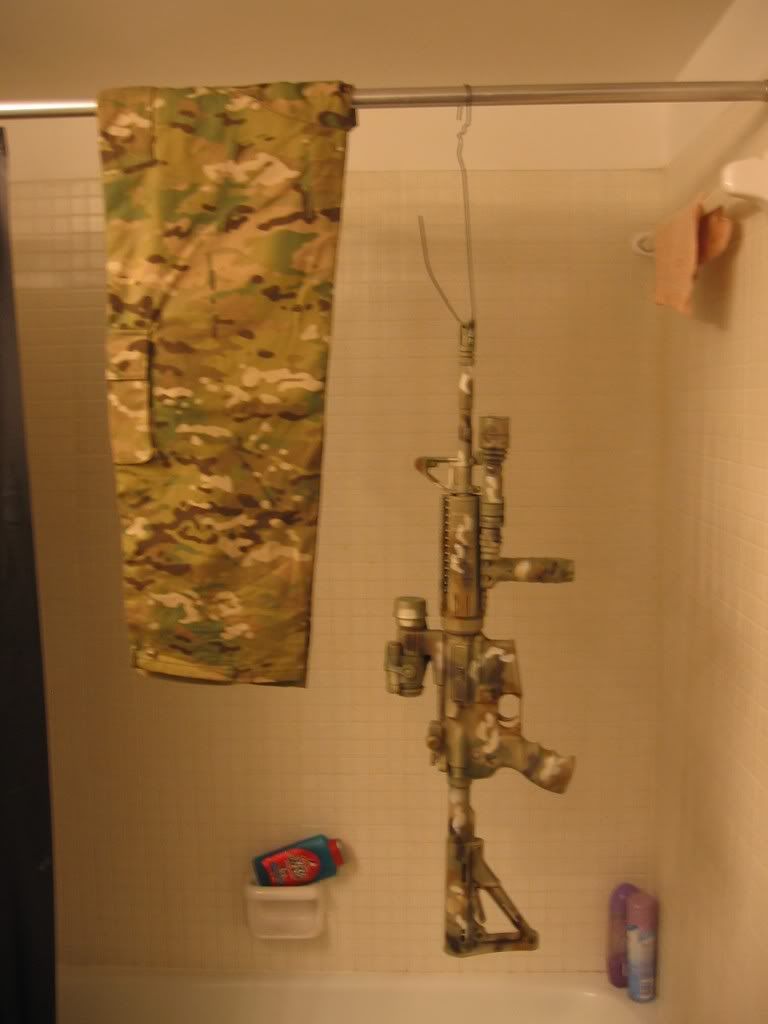 At this point your object/rifle should be looking pretty darn sweet and close to Multicam. If it's too bright at first let it dry...it will dull up a little bit. If it's still too bright LIGHTLY mist it w/ some khaki to tone it down! The end result should look something like this! 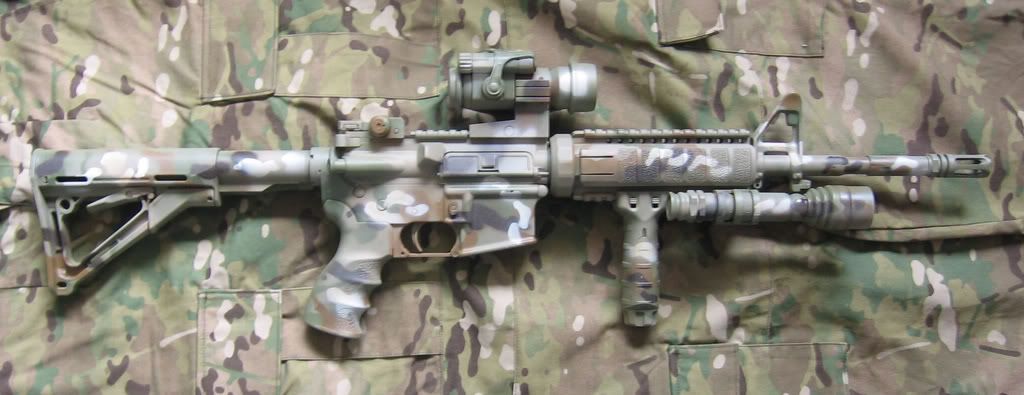 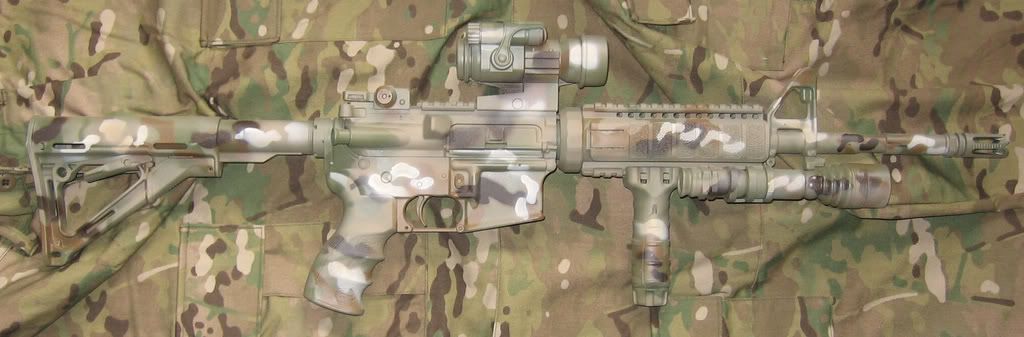 A COUPLE THINGS TO REMEMBER! Go slow and take your time. It's Krylon...if you mess up...wipe it off or paint over it! Once again it's Krylon, don't expect it to hold up to extreme conditions I recommend against using blue painters tape. It is too strong for the Krylon and will strip the finish (the paint...not your park) I have not tried mags yet so those will come soon. I also have not tried the Alumahyde II Matte Clear yet...that will come soon too. Don't get frustrated if you don't get it on your first time...PRACTICE ON SOMETHING ASIDE FROM YOUR RIFLE AT FIRST! |
|
|
|
|
[#1]
Wow, looks great!! I might have to man up and try painting one of mine
|
|
|
|
|
[#2]
Thanks!
|
|
|
|
|
[#3]
Yes it does  to you! to you!Sean |
||
|
|
|
[#4]
Looks very good.
|
|
|
|
|
[#5]
I also have not tried the Alumahyde II Matte Clear yet...that will come soon too
I remember some one else who used this to cover a cammo job, they were kinds disappointed as it was too "shiny" Just thought I pass it along, hate to see you mess up an awesome job, oh and thanks for posting the how to, things like this are why I pay a membership here. That someone would take the time to put this all together in a post. |
|
|
|
OK, USA
|
[#6]
fivepoint,
Thanks for taking the time to help us out on this. You did a great job explaining how to camo our rifles. I have an old bushmaster, eotech and surefire im going to try this on. The grip on the rifle is an ergo rubber grip, do you think I can paint it too? Like you said if it gets messed up you can always paint it again. I thought about painting an old 3 point sling too. One other thing, do you recomend placing the rifle and parts in the oven for a few minutes to bake the paint on after its finished, or is this retarded. Once again nice job and thanks. 
|
|
|
OK, USA
|
[Last Edit: PoopyPants603]
[#7]
No doubt Fivepoint IM me on this about 2 hours ago and stated he would hook us up with a how to. I thought it would be a few weeks or so before we could see this. Well lets just say Ill be starting my project tomorrow. LOL ETA: Most of the camo jobs ive seen here are ok but they suck compared to fivpoints. |
|
|
|
MO, USA
|
[#8]
Looks real good five.
I think I'll do my Ishy 2A in it. 
|
|
|
OK, USA
|
[Last Edit: PoopyPants603]
[#9]
It looks just like multicam.... Heck it is multicam. He painted his rifle in multicam!
|
|
|
|
[#10]
Wow...lots of responses so quickly! Thanks guys! You guys are the reason I put it up! This site has more than helped me and so I'm giving back.
Yes the info about the shiny finish of the AHII I have heard also. I've heard of some taking some superfine 0000 steel wool to dull up the AHII after they apply it but I'm not sure I really even wanna do it now. As I said earlier and it's holding true w/ the posts above...I've heard mixed reviews at best. I'll definitely try it on a mag first! BTW It is my pleasure helping you guys and I'll try to keep this thread updated w/ any more info or projects I do. If you need any help or info...just ask! |
|
|
|
|
[#11]
Good stuff. I'm definatly gonna try it now.
FWIW, I see alot of people worried about the Krylon's durability.... If you'll do a couple of coats of your base layer, and let it cure for awhile between coats, you'll probably never have any issues. I did one of mine in the standard green base, brown stripes with a heavy base coat. The only wear is around the magwell, brass deflector and on the rails where I'm mounting and unmounting optics/lights/etc. This is after a couple of years and a couple thousand rounds. |
|
|
|
|
[#12]
Cowboy I agree.
While the krylon didn't hold up well when I painted some furniture awhile back..I didn't use many coats. However when I did my Glock frame...I used about 5 light coats w/ about two days of curing in between coats and it has held up damn well for having about 3,000 rounds put through it since I painted it. I'm getting close to approaching 8,000 rounds now on the 17!!! Still looks damn near as good as the day I bought it and has had only one FTE and one FTF (feed). These were w/in the first 100 rounds and I suspect break in or ammo issues for those. |
|
|
|
|
[#13]
Wow, that looks amazing!
|
|
|
|
|
[#14]
rattle can tag
|
|
|
|
|
[#15]
Thanks Squeeboo |
||
|
|
|
[#16]
Great job. Now to do it with Dura Coat.
|
|
|
|
|
[#17]
Great looking camo job. I never thought about using the bathroom shower as a paint booth. I guess that the exhaust fan would work for paint fumes too.
Doc |
|
|
|
|
[#18]
When something is too shiny, you just take some 000 steel wool and very lightly buff it. It ends up matte in no time, but doesn't strip the camo coat unless you really rub the heck out of it. |
||
|
|
FL, USA
|
[#19]
Once again, absolutely beautiful. Fantastic work!
|
|
|
|
[#20]
Very Nice!
|
|
|
|
|
[#21]
Thank you all....well scratch the rain that has been holding me up from painting...now it's snow!
 Damn I hate April b/c Mother Nature can never make up her mind! |
|
|
|
TX, USA
|
[#22]
Wow!
Outstanding job! Thanks for taking thtime to post the step-by-step process. I did something similar, but greener , to a M-14 stock. It takes a bunch of time but is a lot of fun. J |
|
|
MO, USA
|
[#23]
I'm not particularly into multicam, but you did an excellent job recreating it.
|
|
|
|
[#24]
Hey, you use Old Spice Red Zone too? Isn't that stuff the best? The smell reminds me of Home Depot.
Oh, and the rifle looks great too. I think it looked good with just tan. I'm so sold on doing a all or mostly tan rifle next. |
|
|
|
OR, USA
|
[#25]
Just found this post and I gotta say, I am absolutely impressed! What a fantastic job! Not only that, but the tutorial you put along with it is absolutley great. Easy to understand, etc. Thank you for taking the time to put it all together. And thanks for the tips on the Krylon. I was actually NOT considering Krylon becuause I had heard so much about the lack of durability. It sounds like, I'd just need to use more coats and cure time. Thanks again!
|
|
|
|
[#26]
Hey thanks all. Path Yep...love that stuff! Thinsley: Krylon is by no means durable. But it holds its own where the price is concerned. I'm glad you and all the others enjoyed the tutorial and I look forward to the first pics up here of someone using this tutorial. Thanks again guys! |
||
|
|
TX, USA
|
[#27]
You have some serious balls for painting in your shower.
Well done though. Now you should try the ACU pattern |
|
|
|
[#28]
lol I didn't paint it where the parts are drying. Thank you though! But I do have balls for painting it outside an apartment complex made up of mostly college students....especially two weeks before the VT shootings.
|
||
|
|
MD, USA
|
[#29]
Thanks!
|
|
|
PA, USA
|
[#30]
 It's a work in progress.... |
|
|
|
[#31]
Lookin good bro! |
||
|
|
|
[#32]
thanks and great job on the tutorial! while i cant bring myself to do it to my babies, that looks SWEET!
|
|
|
|
|
[#33]
Thanks! Here's some more pics guys. 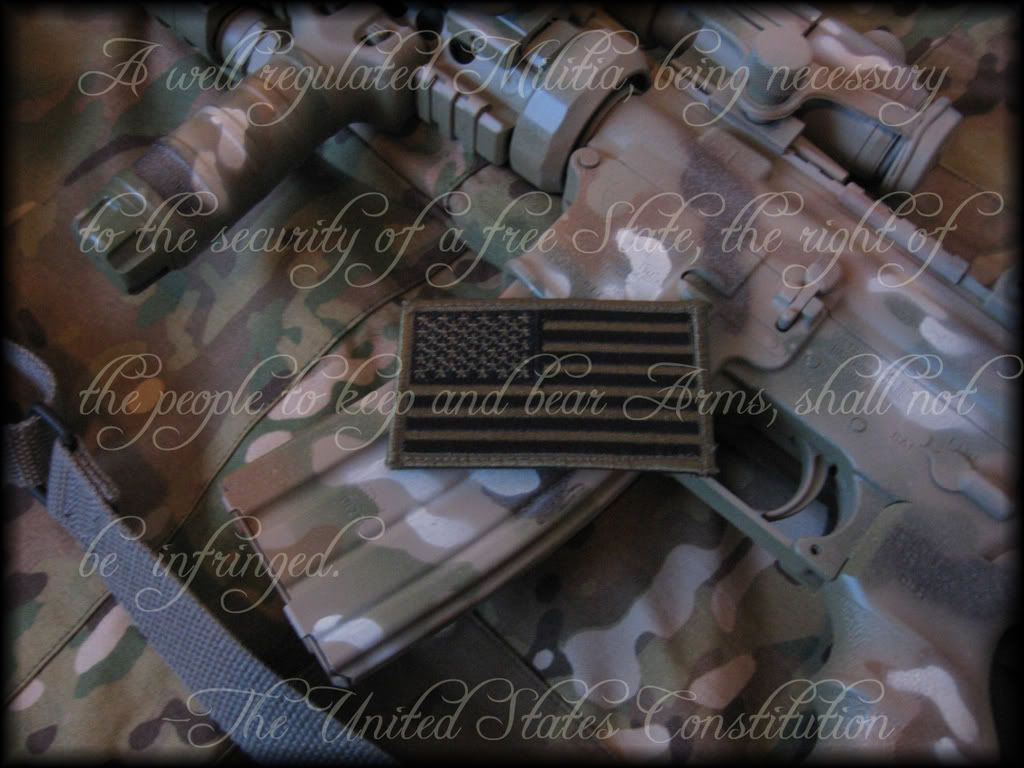 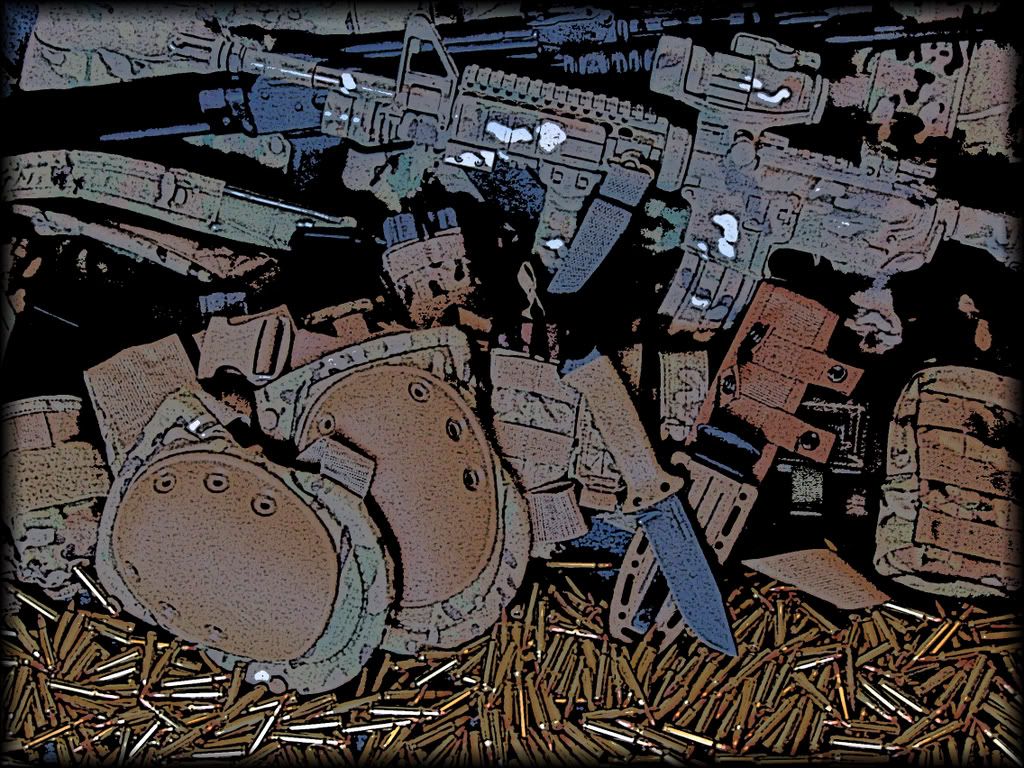 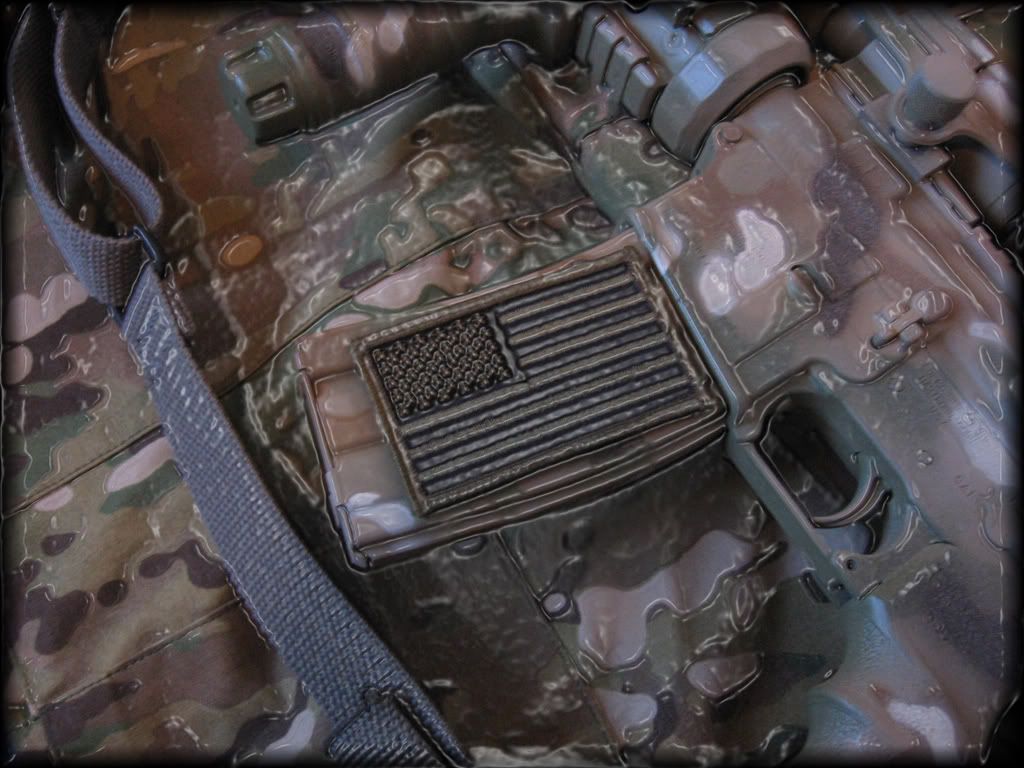 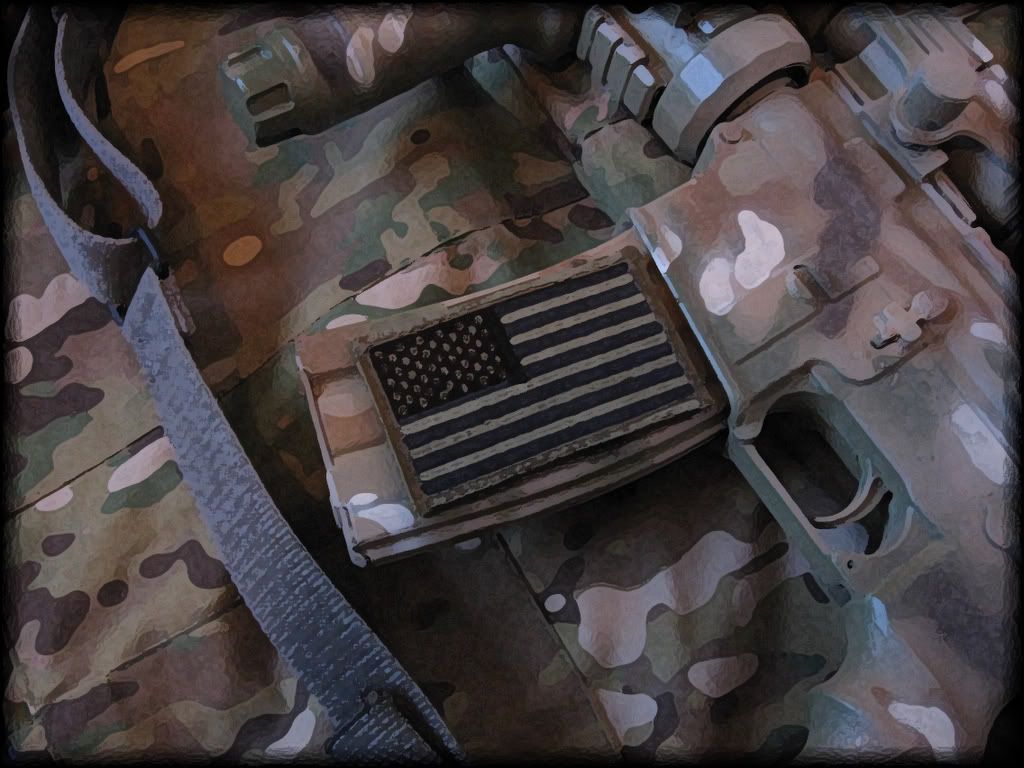 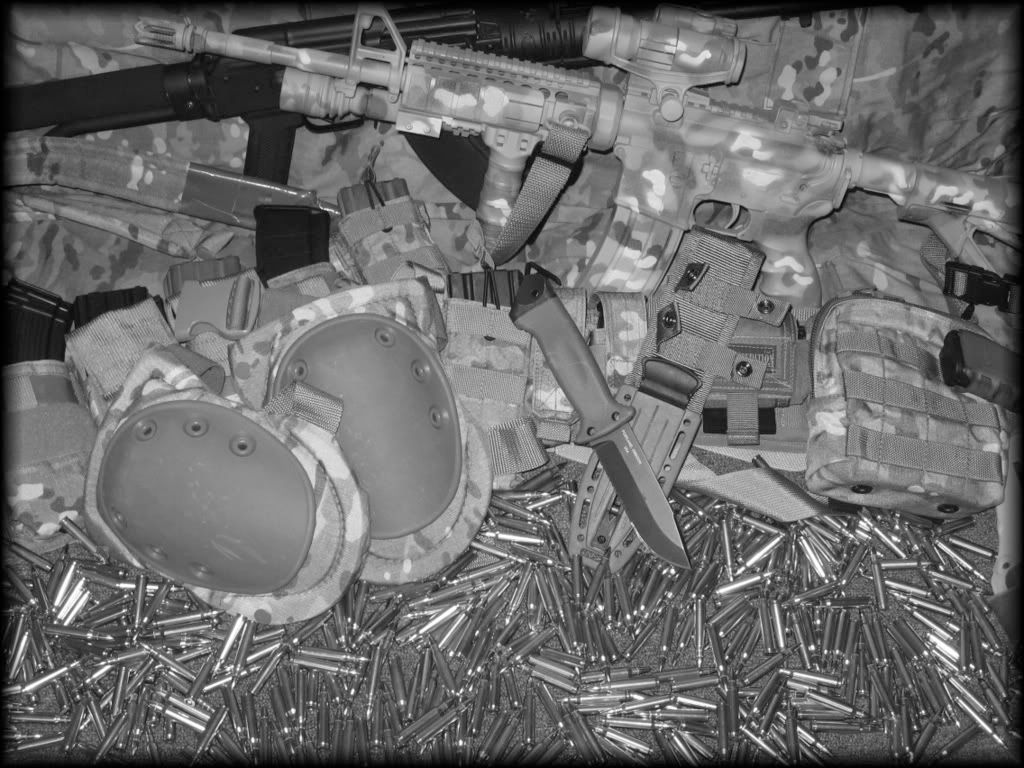  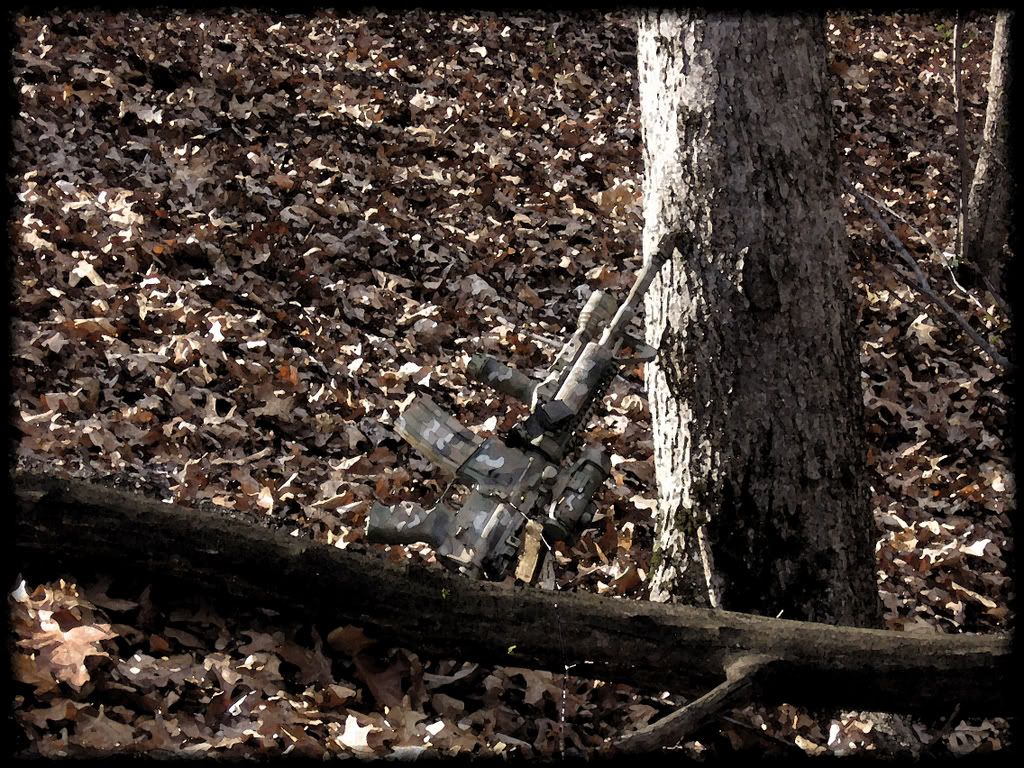 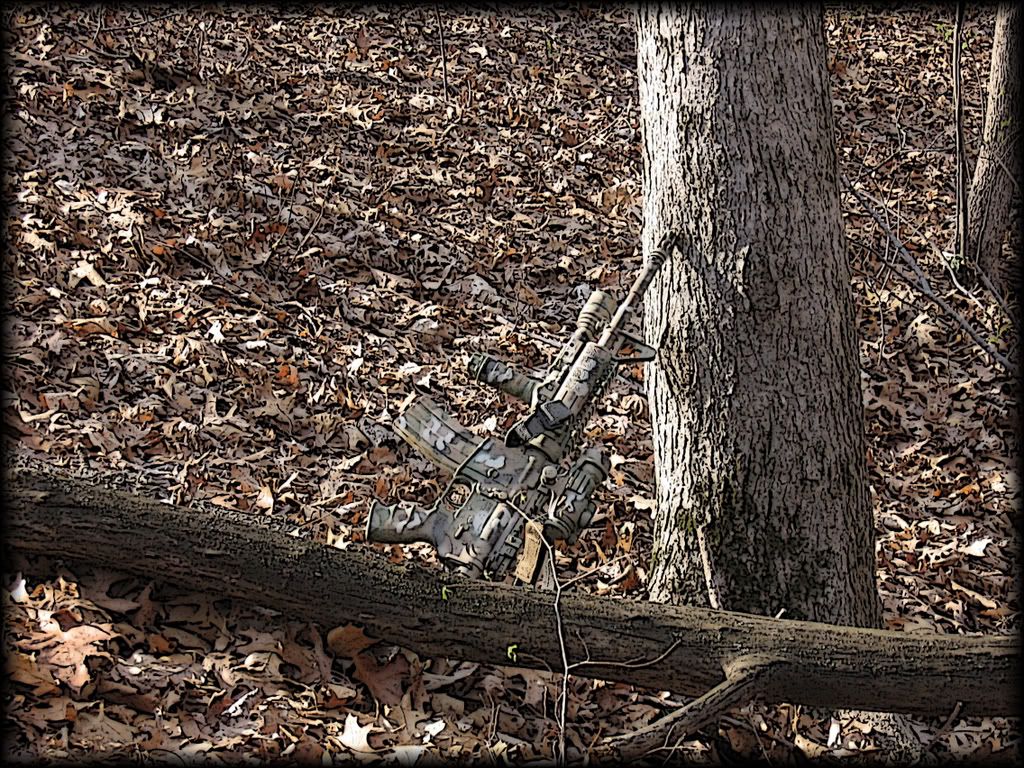 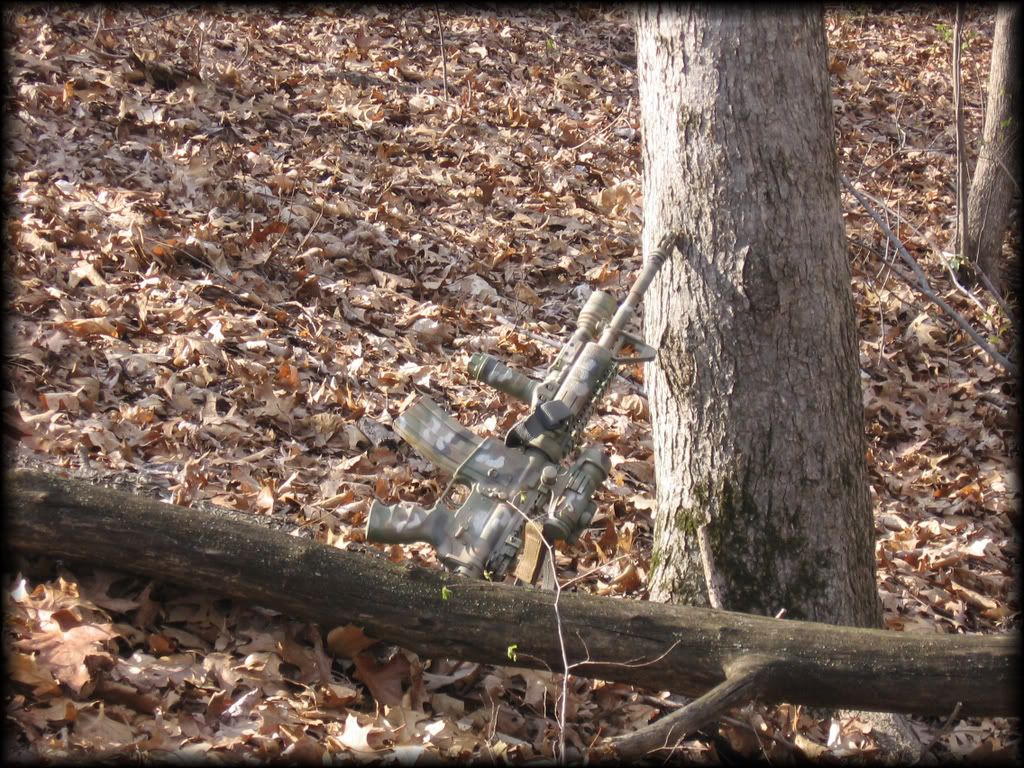  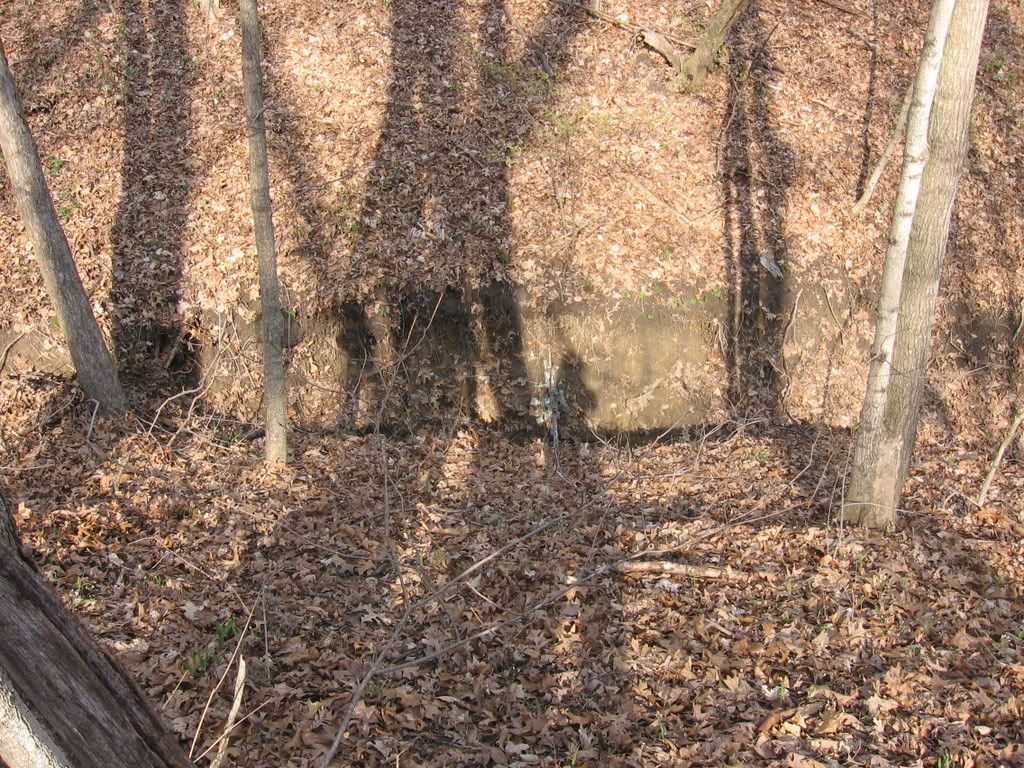 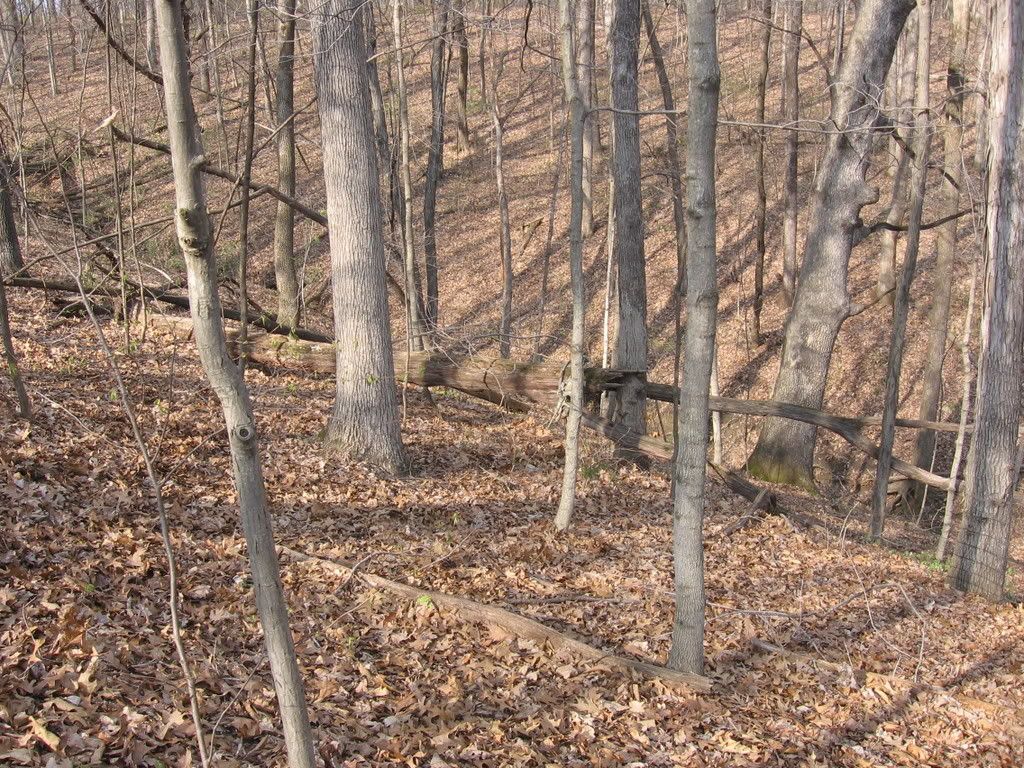 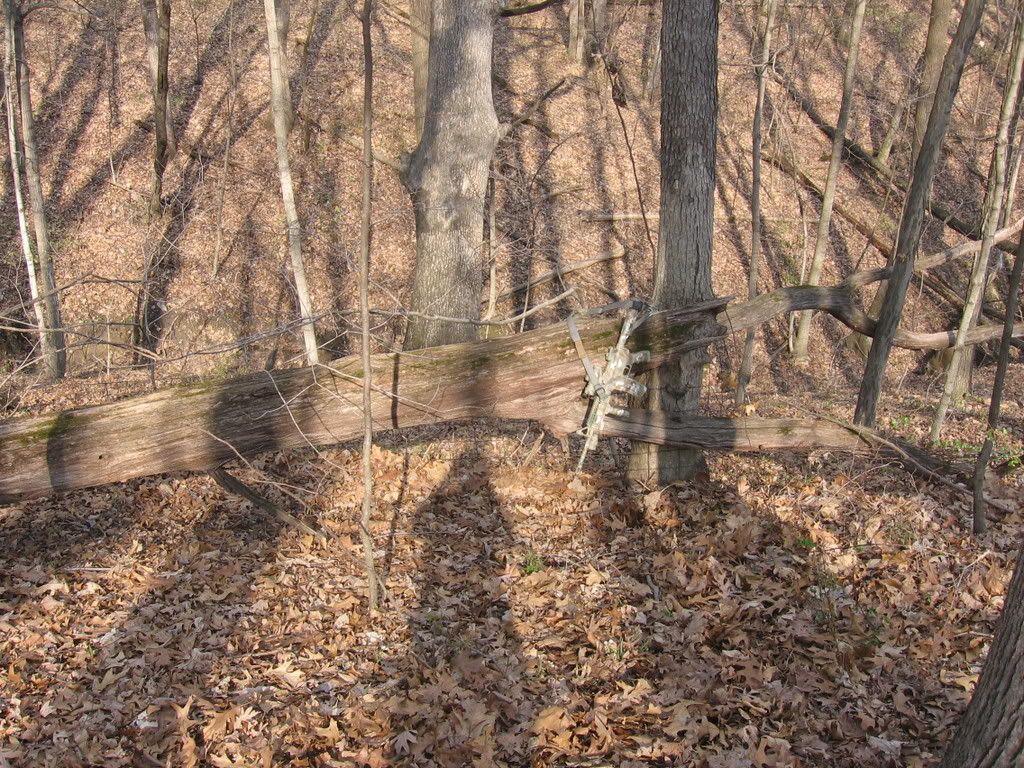   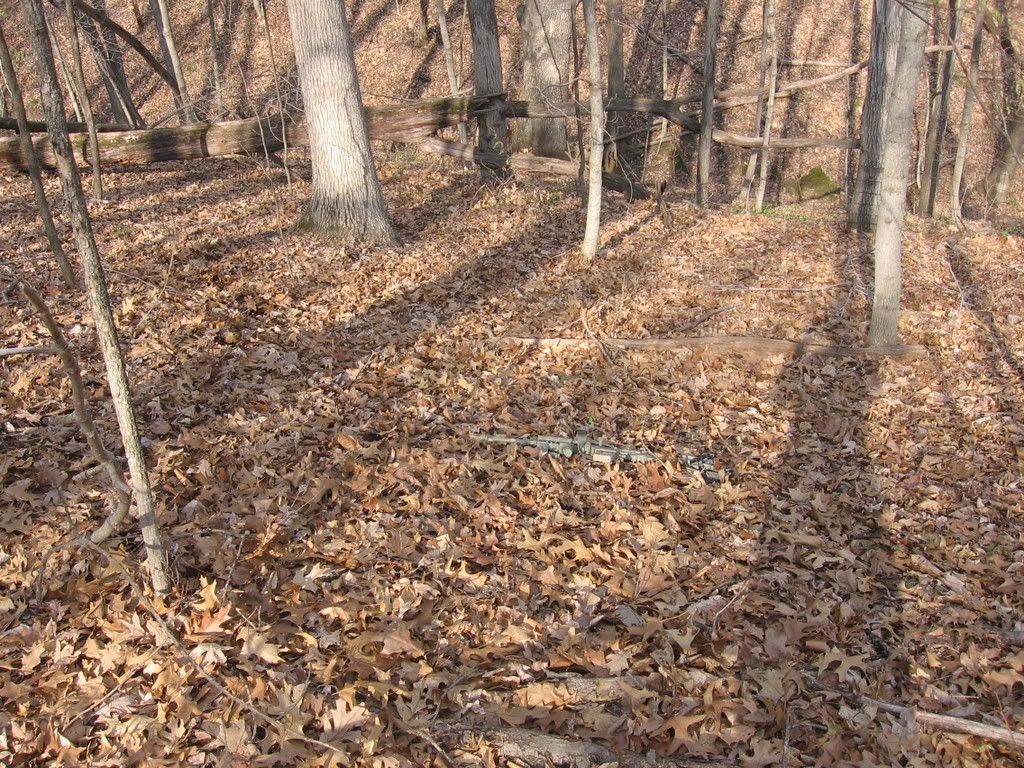  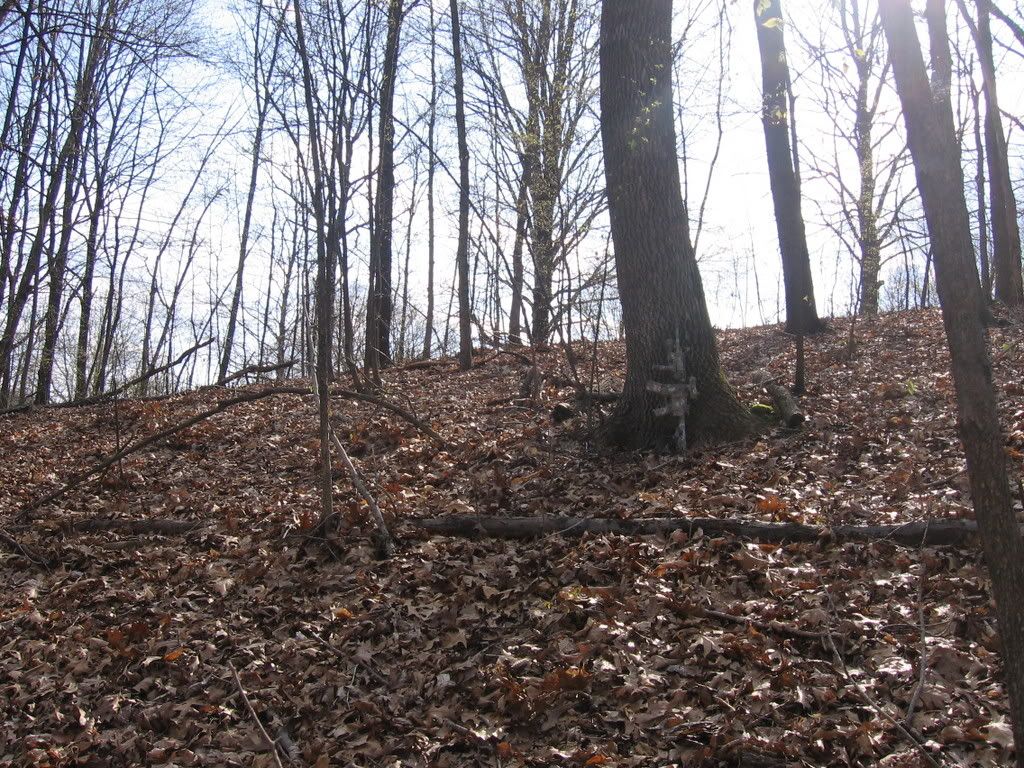 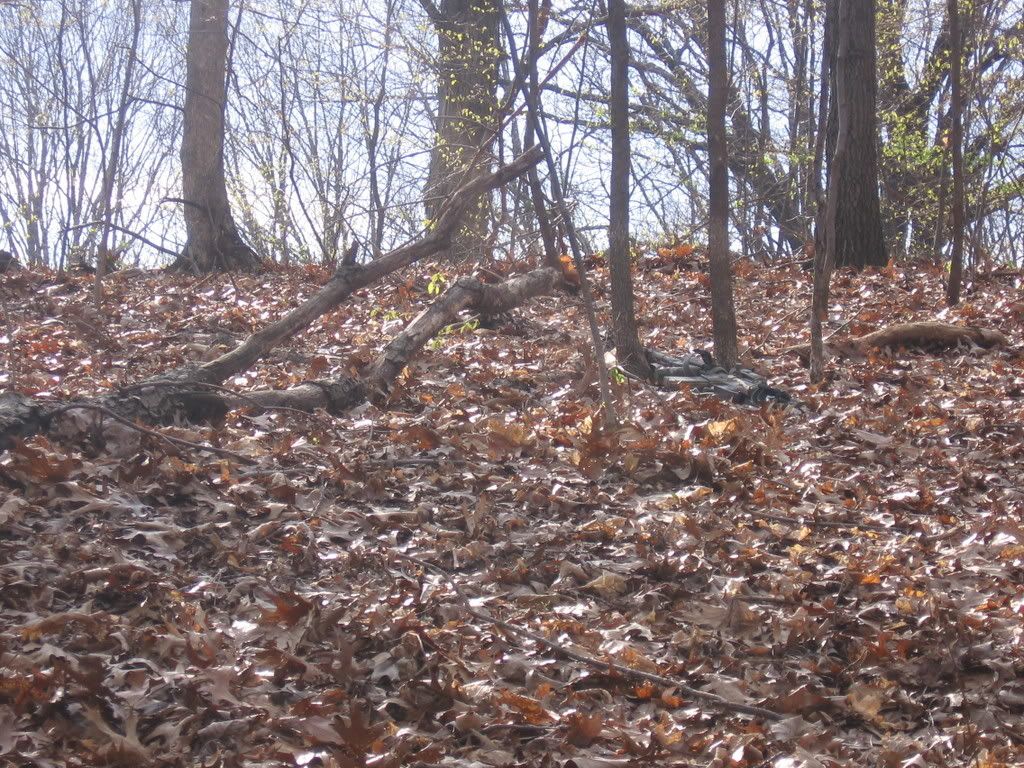 
|
||
|
|
|
[#34]
GREAT CAMO JOB, THAT LOOKS KICK A$$!!!!!!!!!!!!! THANKS FOR THE INFO!!!!!
|
|
|
|
|
[Last Edit: KCGunnr]
[#35]
Hey fivepointoh, that's kind of like playing where's Waldo!
Seriously, looking good!!! |
|
|
|
IN, USA
|
[#36]
awesome... tag for project gun
|
|
|
|
[#37]
I just saw this 5.0, great job! That is VERY impressive!
|
|
|
|
|
[#38]
Outstanding.
|
|
|
|
|
[#39]
Good instructions, nice job.
|
|
|
|
PA, USA
|
[#40]
This is exactly what I was looking for.
Nice work! |
|
|
IN, USA
|
[#41]
buying paint today............
|
|
|
TX, USA
|
[#42]
Day-Um!
That's super-sweet, fivepointoh! Great instructions, too. |
|
|
|
[#43]
Not enough guts to spray the AR, but the beater 870? Hell ya.
Krylon here I come............ |
|
|
|
|
[#44]
 ya I'm getting ready to refinish an ollllllld 870 Wingmaster...I mean we're talking two years into production old. Hardly any rust...just need to blast the finish. That would be weird seeing an MC 870. Anyways thanks guys! ya I'm getting ready to refinish an ollllllld 870 Wingmaster...I mean we're talking two years into production old. Hardly any rust...just need to blast the finish. That would be weird seeing an MC 870. Anyways thanks guys!
|
||
|
|
|
[#45]
|
|
|
|
|
[#46]
this should be tacked
|
|
|
|
|
[#47]
Im going to have to try it this way, looks great!
|
|
|
|
|
[#48]
we got a project neil - i'll volunteer the rifle :) |
||
|
|
|
[#49]
Thanks guys...if any of you are trying this plz post pics...and if along the way you find something I should change in the how to let me know plz!
|
|
|
|
|
[#50]
Great tutorial. I wish I'd of read it before my first try. NP, it was a daewoo dr200 and they are naturally ugly.
I just whipped up an flecktarn/woodland scheme for my neck o'da woods. Horrible pics. 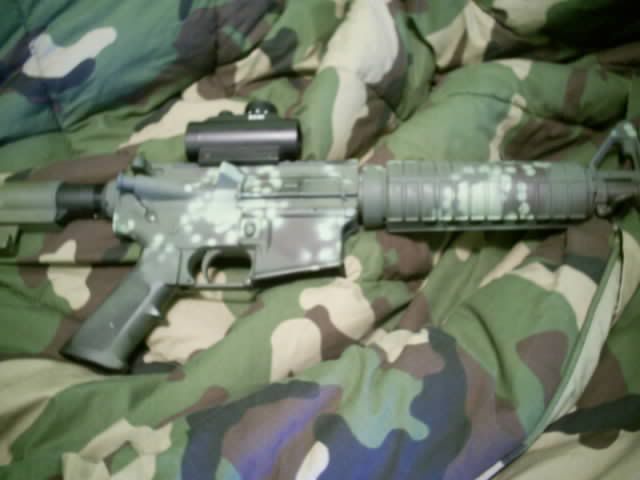 |
|
|
|
 Win a FREE Membership!
Sign up for the ARFCOM weekly newsletter and be entered to win a free ARFCOM membership. One new winner* is announced every week!
You will receive an email every Friday morning featuring the latest chatter from the hottest topics, breaking news surrounding legislation, as well as exclusive deals only available to ARFCOM email subscribers.

AR15.COM is the world's largest firearm community and is a gathering place for firearm enthusiasts of all types.
From hunters and military members, to competition shooters and general firearm enthusiasts, we welcome anyone who values and respects the way of the firearm.

Subscribe to our monthly Newsletter to receive firearm news, product discounts from your favorite Industry Partners, and more.
Copyright © 1996-2024 AR15.COM LLC. All Rights Reserved.
Any use of this content without express written consent is prohibited.
AR15.Com reserves the right to overwrite or replace any affiliate, commercial, or monetizable links, posted by users, with our own.


