


Written By: Thorgul
Photos By: BlueOrbit
Page 1 | Page 2 | Page 3
Many had asked on how to assemble and disassemble semi auto fire control group (FCG). It is actually pretty simple after you have done it at least once. Follow these steps to learn how to do it. In this example we will take apart SAR1 FCG. Let's name those FCG parts first:

O.K., now that we have agreed on what to call these parts, let's begin:
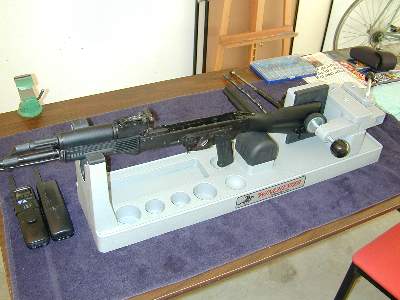
1. Set up your workplace. You will need both of your hands, so make sure your unloaded and field stripped gun sits securely in a gun vise.
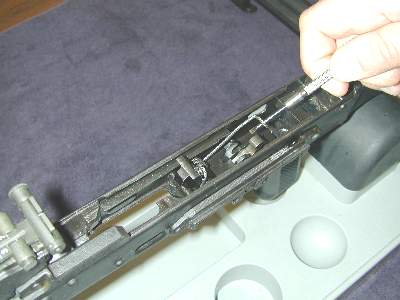
2. Release the hammer. Hold the hammer with your thumb and squeeze the trigger. Carefully let the hammer forward till it stops. [Some of my pictures may show different or modified parts, like that Double Hook Trigger versus Single Hook Trigger pictured in the parts view].
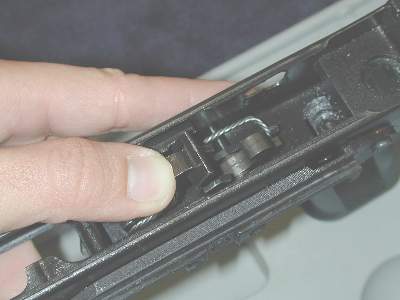
3. Remove the safety. Just turn it so that it points up, and remove.
4. Take a small screwdriver and uplift the hammer spring ends one by one, and place them on the hammer wings.
Click On Image For Closer Look
Page 1 | Page 2 | Page 3
Photos By: BlueOrbit
Page 1 | Page 2 | Page 3
Many had asked on how to assemble and disassemble semi auto fire control group (FCG). It is actually pretty simple after you have done it at least once. Follow these steps to learn how to do it. In this example we will take apart SAR1 FCG. Let's name those FCG parts first:
| A. Retainer Pin or Wire pin | E. Disconnector Spring or Trigger Spring |
| B. Hammer Pin (Axel) | F. Disconnector or Sear |
| C. Trigger Pin (Axel) | G. Hammer |
| D. Trigger | H. Main Spring or Hammer Spring |
O.K., now that we have agreed on what to call these parts, let's begin:
1. Set up your workplace. You will need both of your hands, so make sure your unloaded and field stripped gun sits securely in a gun vise.
2. Release the hammer. Hold the hammer with your thumb and squeeze the trigger. Carefully let the hammer forward till it stops. [Some of my pictures may show different or modified parts, like that Double Hook Trigger versus Single Hook Trigger pictured in the parts view].
3. Remove the safety. Just turn it so that it points up, and remove.
4. Take a small screwdriver and uplift the hammer spring ends one by one, and place them on the hammer wings.

Click On Image For Closer Look
Page 1 | Page 2 | Page 3


