|
Posted: 7/23/2005 1:28:44 PM EDT
How to reverse the Magazine Release on a SIG P226:
CAUTION: IT IS EXTREMELY EASY TO LOSE THE PARTS! I RECOMMEND WHEN YOU TAKE THINGS APART YOU DO IT IN A BIG ZIPLOC BAG, THAT WAY, IF SOMETHING DOES SPRING OUT THE BAG CATCHES IT. NOTE: IT’S A GOOD IDEA TO WEAR SAFETY GLASSES, ESPECIALLY WHEN YOU WORK WITH SPRINGS. NOTE: ARDOC said: "Also these instruction work for most SIG pistols. Especially the 225, 226, 228, 229, 220." NOTE: art7 said: "Note, these instructions do not apply exactly to the P-229. On this model, the detent for the mag release will be on the top/bottom of the mag release button (bottom if the release is on the left, top if the release is on the right), and the support plate is a funky shape that is supposed to snap itself into place, but actually prefers to bend so it rattles loose later. While SIG customer service will not give out instructions on doing this switch for the 229, a SIG armorer later told me they typically use a drop of Lock-Tite to keep this plate in place." NOTE: underdog75 said: "P225's have no right side release provision and cannot be reversed." Step 1: Take off the Slide Assembly and then take off the left and right Grip Plates (48, 49). (Numbers refer to Item Numbers in the Parts List of the Manual.) 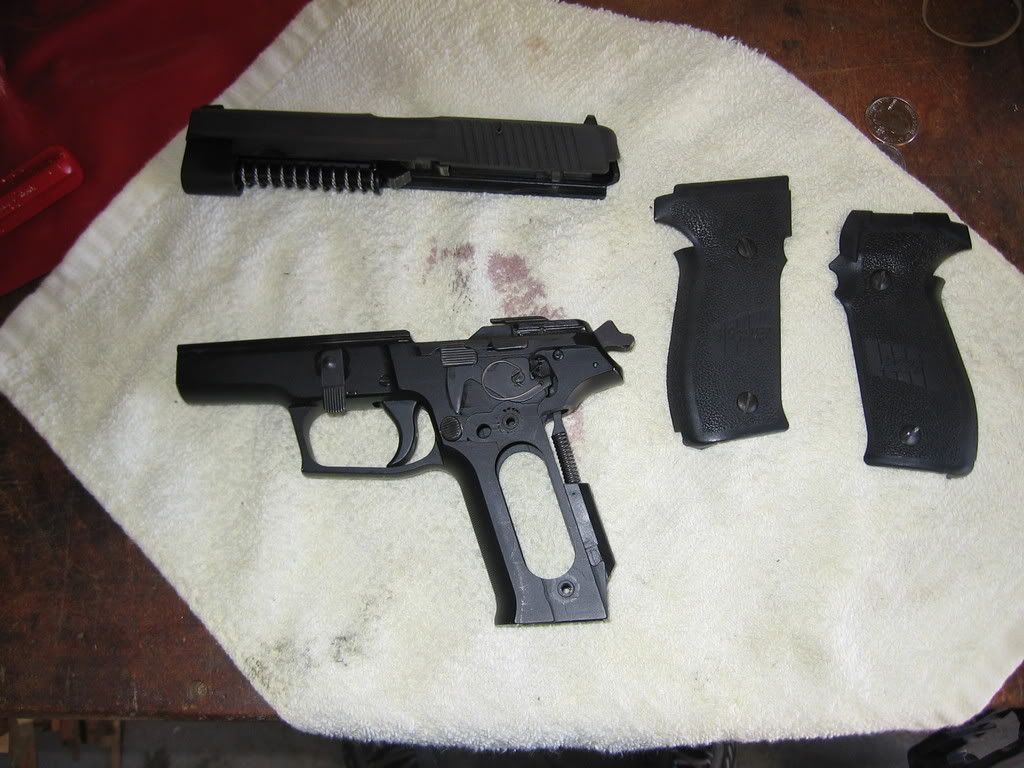 Step 2: Take out the Magazine Catch Assembly by pushing the Magazine Catch Stop (46) in until the Magazine Catch (43) springs out. You can see the Magazine Catch Stop directly behind the Trigger Guard in the magazine Catch. (I find using a corner of a small flat-blade screwdriver works really well for this step.) Be Careful here as it is extremely easy to lose parts.  The Magazine Catch Assembly. Step 3: Remove the Trigger Bar Spring (23) by pushing down on the upper portion of it and disconnect it from the Trigger Bar (22). Once you have it disconnected from the Trigger Bar, try to finesse it out of the hole in the Frame (15). 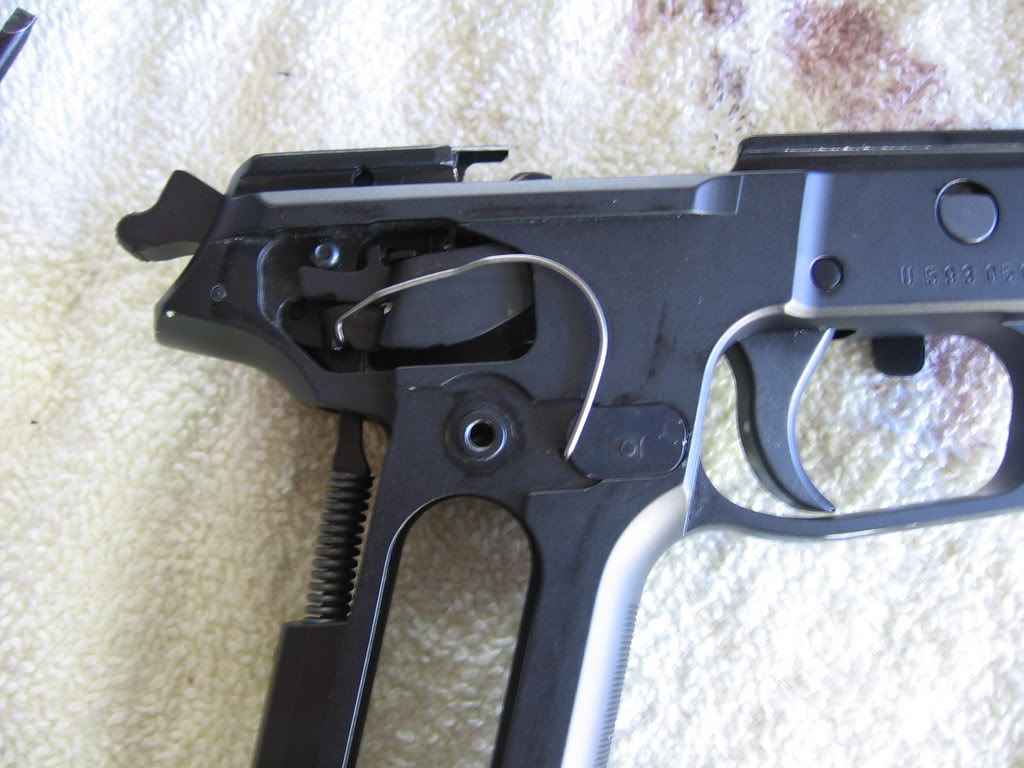 The Trigger Bar Spring inserted. Step 4: Remove the Support Plate (44) by sliding it out the back. 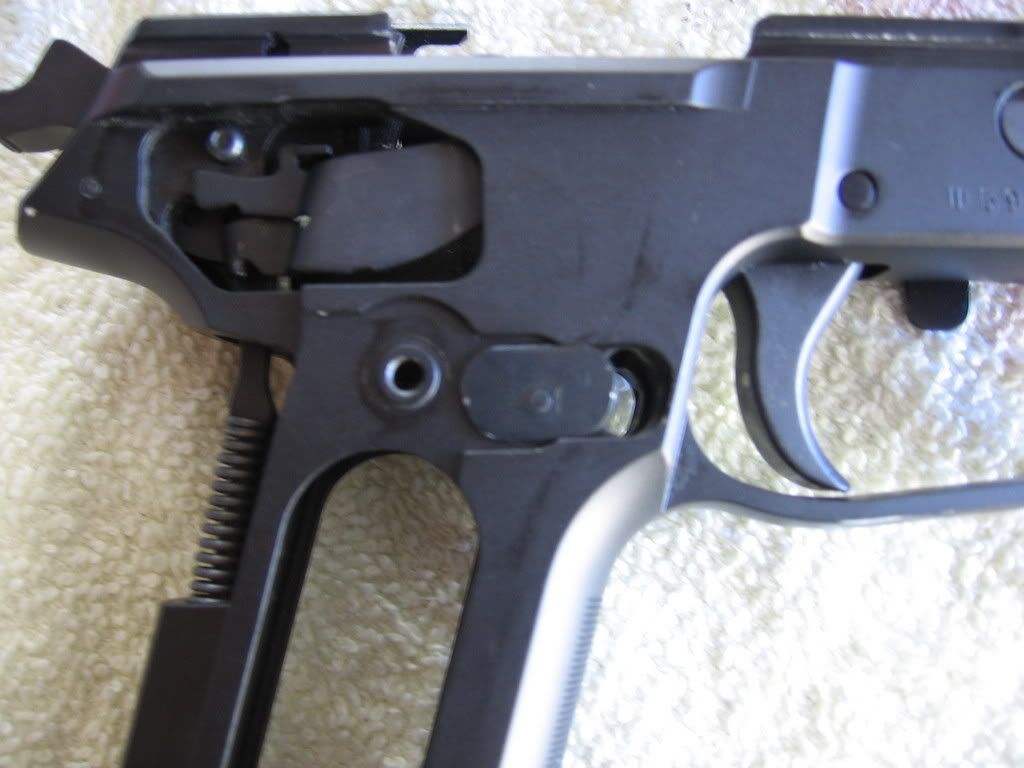 Step 5: Slide the Support Plate (44) in the opposite side of the Frame (15). (Where the Magazine Catch Assembly was) 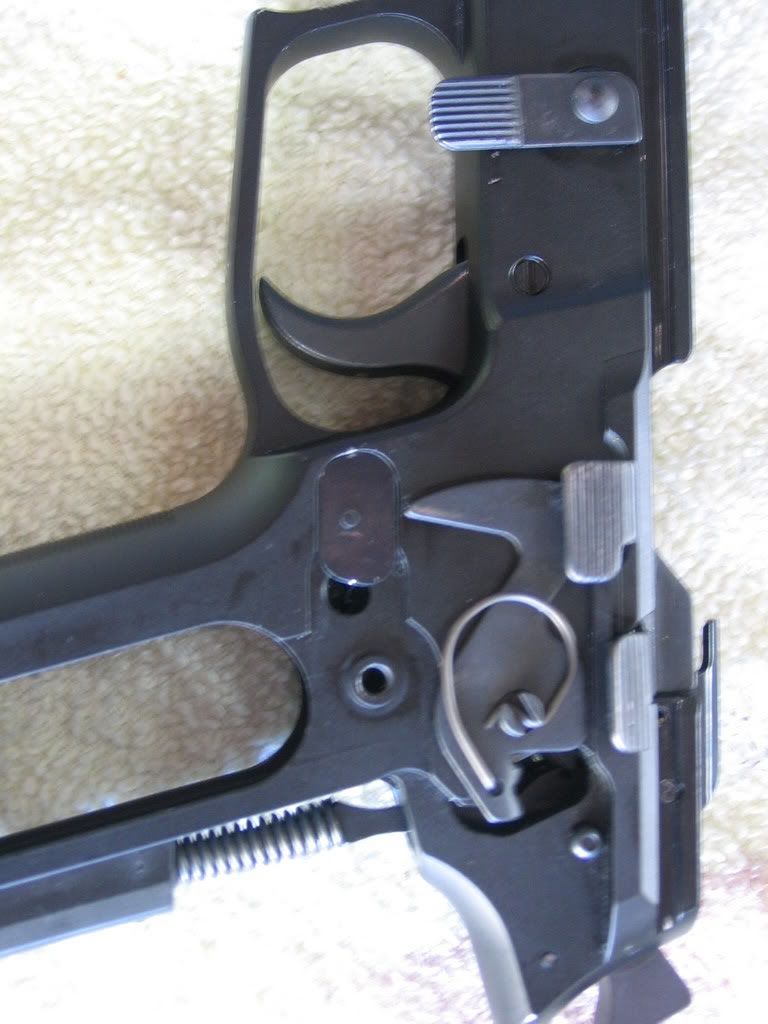 Step 6: Put the Magazine Catch Assembly into the hole that the Support Plate was in originally. Make sure the Magazine Catch Stop (46) is pointed forward, towards the trigger; with the ledge towards the inside part of the gun.  Step 7: Push the Magazine Catch Stop (46) in. Once it is all the way inside the Magazine Catch (43), depress the Magazine Catch. The Magazine catch should be in the hole securely now, as it was on the left side of the pistol originally. 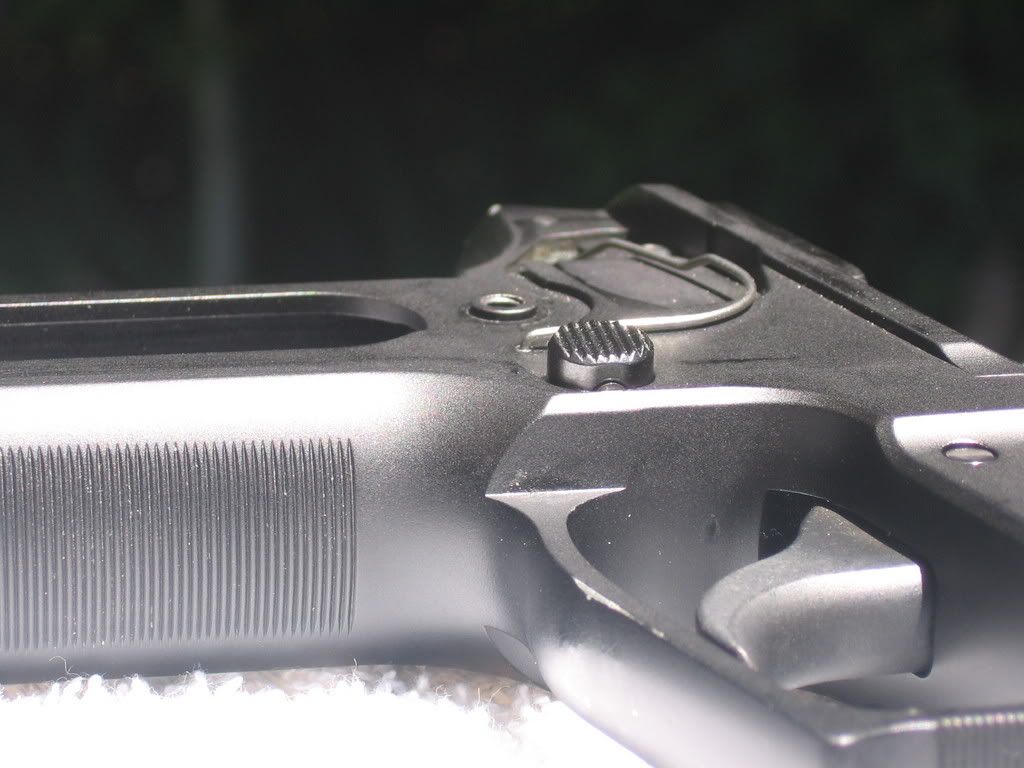 Step 8: Put the Trigger Bar Spring (23) back in the Trigger Bar by attaching the bottom part first to the hole in the frame and then to the a Trigger Bar. Step 9: Put the Grip Plates (48, 49) back on the frame and put the Slide Assembly back on as well. The Finished Pistol: 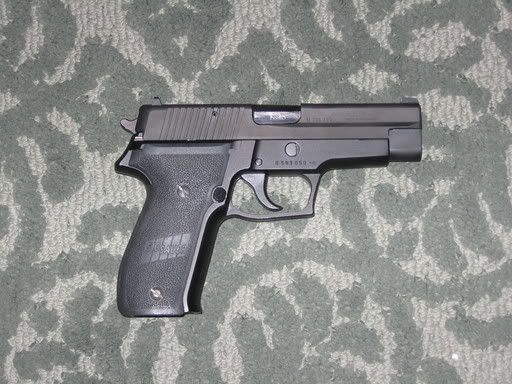 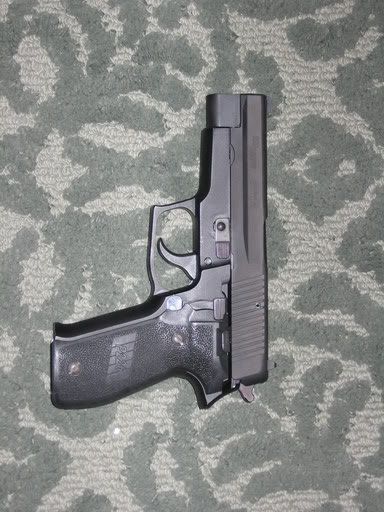 A tool that really helps in all manner of working on your SIG is the SIGARMS Semi Auto Combo Tool I got from Brownells. (Its on page 101 in catalog #57): 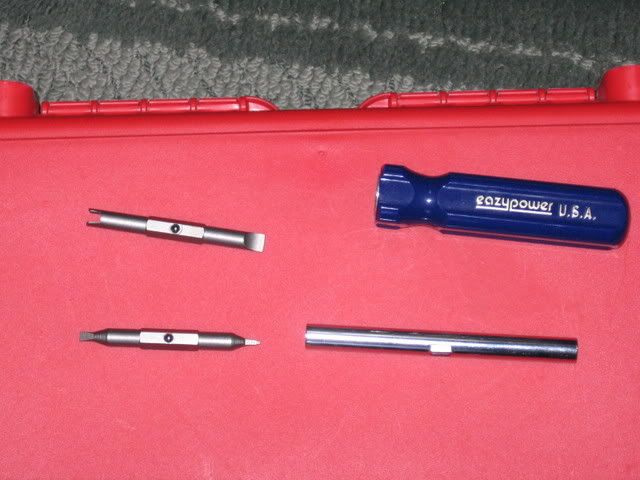 Let me give you a break-down of the parts: 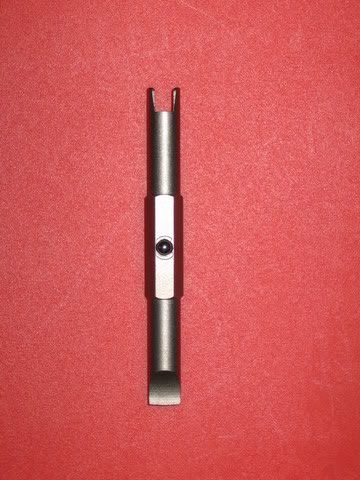 The left is for the Main Spring Seat (36) and the right is for the Grip Plate Screws (50)  The left is for the Sear Spring (25) and the right is for the Magazine Catch Stop (46) Sorry one of the Pictures is blurry. If anybody would like me to clarify anything or if there are typos, please tell me. I hope this helps out a lot of you.  Not bad for a 15 year old, huh? 
|
|
|
|
[#1]
Great job, thanks for taking the time to do this. Could you get a pic of the Magazine Catch in place?
Also thanks for clearing up which way the Support Plate came out I thougnt it meant out away from the mag release, back away from the trigger area.
|
|
|
|
[#2]
The post has been edited with the pic you requested, it is after step 7.
|
|
|
|
[#3]
Beefypeanut – WOW! Great instructions, and the pics helped out a lot. Thanks for doing this! I just reversed the mag release on my 226 and it was a snap. Well, I didn’t follow your instructions exactly. After ensuring the weapon was clear I didn’t remove the slide, then I forgot to remove the mag. Kind of difficult to remove the release with the mag in place.
 Mods, this should be tacked. |
|
|
|
[#4]
Thanks, Spaatz, I'm glad I could help you out.
|
|
|
|
[#5]
Bump, just in case someone needs it.
|
|
|
|
[#6]
BTT---Excellent post. I tried this on my Sig.
|
|
|
|
[#7]
I just did this to my P226r, and guess what happened. The #*@&! mag catch spring flew across the room when I attempted putting it back in. Good thing I was so careful when I took it out.
 Safety goggles good idea |
|
|
|
[#8]
BP, you are the man. Thanks for posting this. One of the reasons I stopped carrying my Sig 226 was because I had a hard time doing quick mag changes due to my small hands. This might solve that problem.
Of course, the last time I tried some home parts-switching, I ended up with a nonfunctioning Walther P22. Maybe I'll leave this to the professionals. |
|
|
|
[#9]
I never have done anything like this before, but it is really not hard. Just be careful of that mag catch spring. And I also found it very useful to use the numbers given in the instructions (they correlate with your manual) Good luck |
|
|
|
|
[#10]
Yes, good luck. I'm glad you all enjoy my post. ETA: James00, I did all of the steps shown above and then I decided to write up how to do it. I took it all apart and took the pictures and such, but when I was putting it back to gether again, the Magazine Catch Stop flew out and I had to delay the project for a week It's good to try and you really cant screw up the functoining of your gun unless you put the Trigger Bar Spring in wrong.
|
||
|
|
|
[#11]
Before I purchased my P226r I asked the dealer if they could do it (because I like to use my trigger finger for the mag release; that way I dont have to change my grip to release it) and they said sure...for $50 Thats when I asked around here. Someone should tack this |
|||
|
|
|
[#12]
Well I did my first transplant. Worked well and the spring and retainer popped hit my beer gut and landed at my feet. Thank goodness!
The plate was a little hestant to get into place but some taps got it in. Thanks for the directions. |
|
|
|
[#13]
Bump.
|
|
|
|
[#14]
I am pissed though. The damn LEO armorer scratched the frame to hell. He took some chunks out by the button.
|
|
|
|
[#15]
Thanks! Great post.
|
|
|
|
[#16]
May I recommend a tack for this thread?
|
|
|
|
[#17]
+1 it helped me alot; and saved me $50 |
|
|
|
|
[#18]
Also these instruction work for most SIG pistols. Especially the 225, 226, 228, 229, 220.
|
|
|
|
[#19]
This is correct. In fact, I think I'll add it to the original post. |
|
|
|
|
[#20]
Does this qualify as tack worthy? We seem to have these questions come up every now and again.
Good details and description! |
|
|
|
[#21]
Yay, the thread has been tacked! Thanks SGB.
|
|
|
|
[#22]
Note, these instructions do not apply exactly to the P-229. On this model, the detent for the mag release will be on the top/bottom of the mag release button (bottom if the release is on the left, top if the release is on the right), and the support plate is a funky shape that is supposed to snap itself into place, but actually prefers to bend so it rattles loose later. While SIG customer service will not give out instructions on doing this switch for the 229, a SIG armorer later told me they typically use a drop of Lock-Tite to keep this plate in place.
Art |
|
|
|
[#23]
I added your info to the top. |
|
|
|
|
[#24]
This is great, I got my first SIG (226) yesterday and was thinking of doing the switch. I decided not to though for the simple fact that I've shot all my life doing mag changes with my trigger finger, that it would be too awkward and would maybe create bad habits for my other pistols. I might try it one day just for shits and grins.
Great post. |
|
|
|
[#25]
I know what you mean, but once you switch the mag release to the right side, you'll never go back. |
|
|
|
|
[#26]
Can this be done to the Sig 220's as well?
|
|
|
|
[#27]
Yes, instrutions the same. NOTE:P225's have no right side release provision and cannot be reversed. |
|
|
|
|
[#28]
Are the Sigs designed to have the mag reversed or is this just somthing that was discovered by someone.
|
|
|
|
[#29]
They are designed to have the mags reversed. The only thing is, SIG doesn't tell you how o do it, the ask that you turn it into someone who is properly trained. But, who wants to spend the money on something that they can do easily by themselves. |
|
|
|
|
[#30]
Thanks for that. I've been meaning to flip that thing around for years.
It took me a bit to figure out where to press to release the magazine catch stop. For anyone who encountered the same problem, it's on the front of the magazine catch "button" on the outside of the frame and you can't see it unless the catch is fully extended. This was probably obvious to everyone but me. Also, found this link and thought I woud pass it along -- http://gunshowonthenet.com/Gun_Manuals/Gun_Manuals6/Sig_P220-245.pdf Thanks again. |
|
|
|
[#31]
Thanks for the walk through. I am gonna try and reverse the mag release on my 226 on my next day off... I think try is the operative term.
|
|
|
|
[#32]
Easy as pie !!! I used a Exto knife ( carefull ) to push in the mag catch detent . All went well , till I over torqued one grip screw
The support plate required a little tap with the blade of a flat tip screw driver on the knob to get it to come out . Had lots of gunk in the hole , qtip cleaned it up !! Great mod !!! |
|
|
|
[#33]
INACTIVE
|
|
|
|
[#34]
Post added to Forum Resources with OP's permission
|
|
|
 Win a FREE Membership!
Sign up for the ARFCOM weekly newsletter and be entered to win a free ARFCOM membership. One new winner* is announced every week!
You will receive an email every Friday morning featuring the latest chatter from the hottest topics, breaking news surrounding legislation, as well as exclusive deals only available to ARFCOM email subscribers.

AR15.COM is the world's largest firearm community and is a gathering place for firearm enthusiasts of all types.
From hunters and military members, to competition shooters and general firearm enthusiasts, we welcome anyone who values and respects the way of the firearm.

Subscribe to our monthly Newsletter to receive firearm news, product discounts from your favorite Industry Partners, and more.
Copyright © 1996-2024 AR15.COM LLC. All Rights Reserved.
Any use of this content without express written consent is prohibited.
AR15.Com reserves the right to overwrite or replace any affiliate, commercial, or monetizable links, posted by users, with our own.


