|
Posted: 8/18/2011 4:07:04 PM EDT
Maybe we can get a thread where Arfcom's finest and brightest(and maybe cheapest) show of their DIY mods. I've seen some custom sling mounts, cleaning rod mounts, grip enhancers, slings, and more from arfcom.
Recon Wrap. Take a section of bicycle innertube(18" is about what I used) and make it into two pieces(or you could leave it as 1 if you want it more bulky). Tightly wrap a piece around A2 grip to desired thickness and tuck it through it's own wrap to trap it. Easiest way is when there is 1 wrap left, to wrap your finger and a2 grip together with the tube; you can then tuck the innertube where your finger is on the next pass. If you do it tight it will hold or you can add a ranger band(cut intact innertube so it looks like a rubber band) for backup. 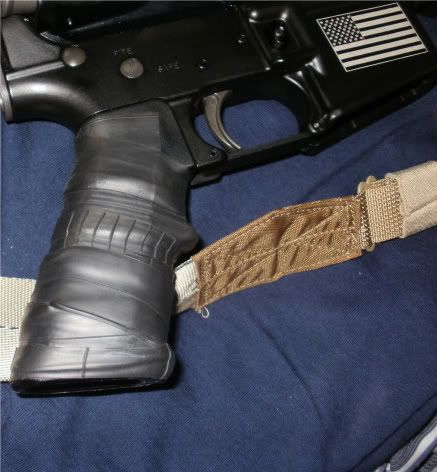
|
|
|
|
[#1]
I am thinking of the rear detent pin mod. That's a DIY
|
|
|
|
[#2]
Quoted:
I am thinking of the rear detent pin mod. That's a DIY Me too. There's the trigger guard mod to use screws instead of a roll pin. Trigger return travel mod with a set screw in the grip screw hole. Long set screw with nylon tip in lower to tighten the upper fit. Engage bolt stop with mag release, requires some machining skillz. Replace bolt stop roll pin with custom machined set screw. Home brew gas buster charging handle. That's all my brain can think of without more coffee. |
|
|
|
[#3]
Your castle nut is on backwards.
|
|
|
|
[#4]
Quoted: Maybe we can get a thread where Arfcom's finest and brightest.... Quoted: Your castle nut is on backwards. Great first post. Welcome to the nuthouse. |
|
|
|
[#5]
Quoted:
Your castle nut is on backwards. So, if he was to turn it around, what material would he deform down into the notches to lock the nut? There is nothing on the back side. Normally, the lock plate is what gets center punched down into the notches. |
|
|
|
[#6]
Quoted: That could be true, doesn't change the fact that it is on backwards.Quoted: Your castle nut is on backwards. So, if he was to turn it around, what material would he deform down into the notches to lock the nut? There is nothing on the back side. Normally, the lock plate is what gets center punched down into the notches. |
|
|
|
[#7]
Quoted:
Quoted:
That could be true, doesn't change the fact that it is on backwards.
Quoted:
Your castle nut is on backwards. So, if he was to turn it around, what material would he deform down into the notches to lock the nut? There is nothing on the back side. Normally, the lock plate is what gets center punched down into the notches. You are correct. I just had a brain fart. It is on backwards. |
|
|
|
[#8]
the staking notches are clearly visible in the photo.
|
|
|
|
[#9]
Quoted: the staking notches are clearly visible in the photo. Now don't go ruining Russ's whole night! He had a self admitted brain fart, it undoubtedly effected his eyesight, let's just let it go at that. |
|
|
|
[#10]
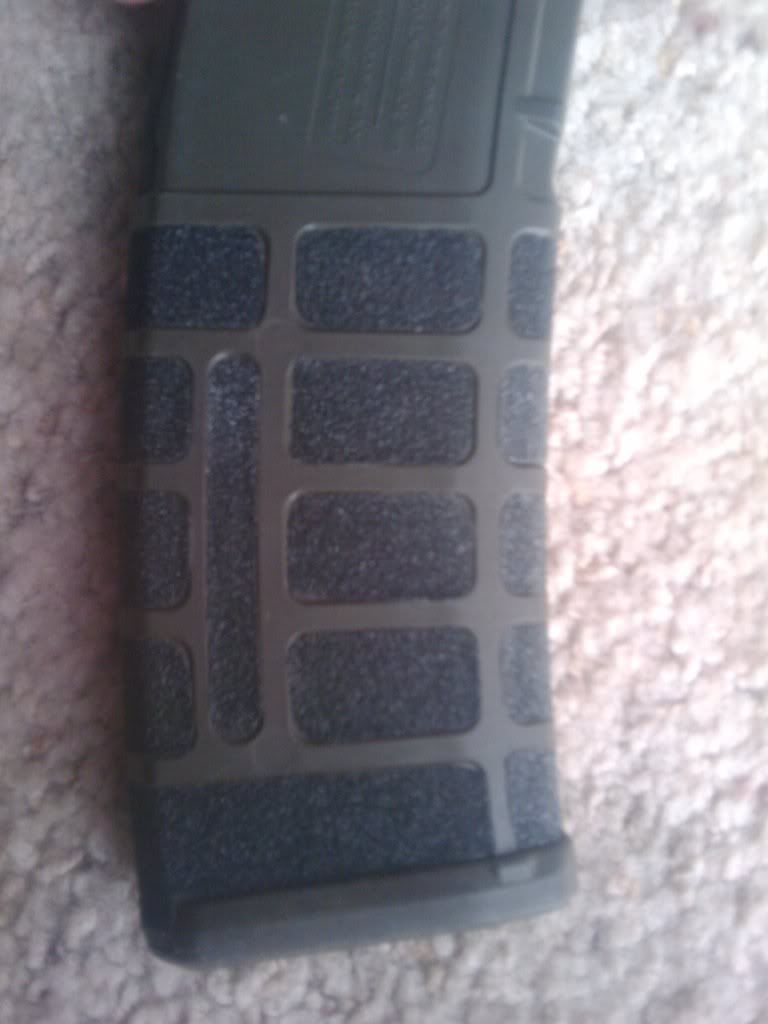
We had one that died...
 " "
|
|
|
|
[#11]
Quoted:
Your castle nut is on backwards. It's the Les Baer way to install a castle nut. 
|
|
|
|
[#12]
Quoted:
We had one that died... http://i1110.photobucket.com/albums/h456/diazaa1/2010-12-09151647.jpg" i started doing that once... took FOREVER. so i gave up. |
|
|
|
[#13]
I still love my modded trigger. Light & smooth.
100% reliable, with 5.56 & .22lr |
|
|
|
[#14]
Quoted:
Quoted:
Maybe we can get a thread where Arfcom's finest and brightest.... Quoted:
Your castle nut is on backwards. Great first post. Welcome to the nuthouse. I put it on "backwards" for a reason. I couldn't get it tightened and it kept coming loose. I used loctite to keep it from coming loose, it is much easier to apply loctite with the spaces when putting it on backwards. 
Maybe I should add that mod to my first post? Edit: I was hoping some people would put up some directions and pictures to the mods. |
|
|
|
[#15]
Quoted:
Quoted:
Quoted:
Maybe we can get a thread where Arfcom's finest and brightest.... Quoted:
Your castle nut is on backwards. Great first post. Welcome to the nuthouse. I put it on "backwards" for a reason. I couldn't get it tightened and it kept coming loose. I used loctite to keep it from coming loose, it is much easier to apply loctite with the spaces when putting it on backwards.
Edit: I was hoping some people would put up some directions and pictures to the mods. you do know thats why those little divets are on the opposite side? your supposed to stake and displace some metal into those to lock it down ETA: how did you get the innertube to stay in place, i want to do this to my pressure switch on my grippod, i just dont trust that 3m velcro |
|
|
|
[#16]
Quoted:
Quoted:
Quoted:
Quoted:
Maybe we can get a thread where Arfcom's finest and brightest.... Quoted:
Your castle nut is on backwards. Great first post. Welcome to the nuthouse. I put it on "backwards" for a reason. I couldn't get it tightened and it kept coming loose. I used loctite to keep it from coming loose, it is much easier to apply loctite with the spaces when putting it on backwards.
Edit: I was hoping some people would put up some directions and pictures to the mods. you do know thats why those little divets are on the opposite side? your supposed to stake and displace some metal into those to lock it down ETA: how did you get the innertube to stay in place, i want to do this to my pressure switch on my grippod, i just dont trust that 3m velcro Yes I know, but then it is more of a hassle(and $) to take it off later if I stake it. When you have 1 wrap left, wrap it around your finger and A2 grip(or whatever). Come back around and tuck it through where your finger is so the end will stick out of the bottom. Make sure you are pulling it tight when you are wrapping it and it will stay. You can also make a ranger band by cutting a piece off the intact innertube. That way it will be like a very strong rubber band. |
|
|
|
[#17]
Quoted:
Quoted:
Quoted:
Quoted:
Quoted:
Maybe we can get a thread where Arfcom's finest and brightest.... Quoted:
Your castle nut is on backwards. Great first post. Welcome to the nuthouse. I put it on "backwards" for a reason. I couldn't get it tightened and it kept coming loose. I used loctite to keep it from coming loose, it is much easier to apply loctite with the spaces when putting it on backwards.
Edit: I was hoping some people would put up some directions and pictures to the mods. you do know thats why those little divets are on the opposite side? your supposed to stake and displace some metal into those to lock it down ETA: how did you get the innertube to stay in place, i want to do this to my pressure switch on my grippod, i just dont trust that 3m velcro Yes I know, but then it is more of a hassle(and $) to take it off later if I stake it. When you have 1 wrap left, wrap it around your finger and A2 grip(or whatever). Come back around and tuck it through where your finger is so the end will stick out of the bottom. Make sure you are pulling it tight when you are wrapping it and it will stay. You can also make a ranger band by cutting a piece off the intact innertube. That way it will be like a very strong rubber band. awsome idea, this is just the solution to make sure that pressure switch doesnt go anywhere |
|
|
|
[#18]
This is why some people don't need to embark on amateur gun-smithing; a little bit of knowledge is a dangerous thing.
Soggy, spend $6 and get a rra buttstock wrench, put the damn castle nut on the right way, and stake it down per the mil-spec. Don't use loc-tite, or otherwise try re-inventing the damn wheel. You won't succeed, and they will all laugh at you. Save the jerry-rigging of critical parts for the airsoft crowd. |
|
|
|
[#19]
Quoted:
This is why some people don't need to embark on amateur gun-smithing; a little bit of knowledge is a dangerous thing. Soggy, spend $6 and get a rra buttstock wrench, put the damn castle nut on the right way, and stake it down per the mil-spec. Don't use loc-tite, or otherwise try re-inventing the damn wheel. You won't succeed, and they will all laugh at you. Save the jerry-rigging of critical parts for the airsoft crowd. hey the innertube idea is a pretty good one, but yea i agree on the castle nut, things like that i prefer to be right |
|
|
|
[#20]
Quoted:
This is why some people don't need to embark on amateur gun-smithing; a little bit of knowledge is a dangerous thing. Soggy, spend $6 and get a rra buttstock wrench, put the damn castle nut on the right way, and stake it down per the mil-spec. Don't use loc-tite, or otherwise try re-inventing the damn wheel. You won't succeed, and they will all laugh at you. Save the jerry-rigging of critical parts for the airsoft crowd. It was either not shooting(ie checking it constantly at the range) or fixing it with what I had. I will add the word temporary since some people aren't confident in it. I did this sometime last year and it hasn't been a problem. I will continue to use loctite on this particular AR unless I have a problem. YMMV. |
|
|
|
[#21]
Quoted:
Quoted:
This is why some people don't need to embark on amateur gun-smithing; a little bit of knowledge is a dangerous thing. Soggy, spend $6 and get a rra buttstock wrench, put the damn castle nut on the right way, and stake it down per the mil-spec. Don't use loc-tite, or otherwise try re-inventing the damn wheel. You won't succeed, and they will all laugh at you. Save the jerry-rigging of critical parts for the airsoft crowd. It was either not shooting(ie checking it constantly at the range) or fixing it with what I had. I will add the word temporary since some people aren't confident in it. I did this sometime last year and it hasn't been a problem. I will continue to use loctite on this particular AR unless I have a problem. YMMV. Which is why you stake it. |
|
|
|
[#22]
Quoted:
Quoted:
This is why some people don't need to embark on amateur gun-smithing; a little bit of knowledge is a dangerous thing. Soggy, spend $6 and get a rra buttstock wrench, put the damn castle nut on the right way, and stake it down per the mil-spec. Don't use loc-tite, or otherwise try re-inventing the damn wheel. You won't succeed, and they will all laugh at you. Save the jerry-rigging of critical parts for the airsoft crowd. hey the innertube idea is a pretty good one, but yea i agree on the castle nut, things like that i prefer to be right sorry to say it, but the innertube is bubba'd just like the castle nut is bubba'd. |
|
|
|
[#23]
Quoted:
Quoted:
We had one that died... http://i1110.photobucket.com/albums/h456/diazaa1/2010-12-09151647.jpg" i started doing that once... took FOREVER. so i gave up. Ghetto anti-slip is enamel paint with a handful of coarse sand mixed in. Just sayin'. Works great on stair treads too. |
|
|
|
[#24]
Quoted: Quoted: This is why some people don't need to embark on amateur gun-smithing; a little bit of knowledge is a dangerous thing. Soggy, spend $6 and get a rra buttstock wrench, put the damn castle nut on the right way, and stake it down per the mil-spec. Don't use loc-tite, or otherwise try re-inventing the damn wheel. You won't succeed, and they will all laugh at you. Save the jerry-rigging of critical parts for the airsoft crowd. It was either not shooting(ie checking it constantly at the range) or fixing it with what I had. I will add the word temporary since some people aren't confident in it. I did this sometime last year and it hasn't been a problem. I will continue to use loctite on this particular AR unless I have a problem. YMMV. That is a good backpedal for your mistake. Your explination simply doesn't make any sense either, loctite can be put on with the castle nut on the right way, it works exactly the same. |
|
|
|
[#25]
I had a FF tube installed on my Ar10, and Armalite sent me the new ejection port door rod.
I took it to the smith, and we discovered they sent a standard rod (the same length as was already on it), instead of the longer FF tube rod. The smith cut out a piece of semi-hard rubber and filled the gap between the rod and ff tube with it (friction fit). It's worked great for two years. Armalite did send the right part out, but I had to pay shipping. It's the second time they have sent me the wrong part and made me pay shipping for the right one. I'll take it back in and have the right rod put in some day, but I believe the FF tube has to be removed and it's gonna cost me a box of ammo, so I'll most likely shoot it like this til it fails or just run it with no ejection port door. |
|
|
|
[#26]
Quoted:
Quoted:
Quoted:
This is why some people don't need to embark on amateur gun-smithing; a little bit of knowledge is a dangerous thing. Soggy, spend $6 and get a rra buttstock wrench, put the damn castle nut on the right way, and stake it down per the mil-spec. Don't use loc-tite, or otherwise try re-inventing the damn wheel. You won't succeed, and they will all laugh at you. Save the jerry-rigging of critical parts for the airsoft crowd. It was either not shooting(ie checking it constantly at the range) or fixing it with what I had. I will add the word temporary since some people aren't confident in it. I did this sometime last year and it hasn't been a problem. I will continue to use loctite on this particular AR unless I have a problem. YMMV. That is a good backpedal for your mistake. Your explination simply doesn't make any sense either, loctite can be put on with the castle nut on the right way, it works exactly the same. It makes sense if you think about it or actually tried it yourself. If you don't have anything to add to DIY Mods, then don't post. Keep on topic. I modified my original post because of it. Arfcom also owes me a buffer retaining pin, since I decided to switch it; I really don't want to here about my castle nut if somebody closely inspects my rifle when I go shooting. Please post pictures of the mods you have done. |
|
|
|
[#27]
Quoted:
Quoted:
Quoted:
Quoted:
This is why some people don't need to embark on amateur gun-smithing; a little bit of knowledge is a dangerous thing. Soggy, spend $6 and get a rra buttstock wrench, put the damn castle nut on the right way, and stake it down per the mil-spec. Don't use loc-tite, or otherwise try re-inventing the damn wheel. You won't succeed, and they will all laugh at you. Save the jerry-rigging of critical parts for the airsoft crowd. It was either not shooting(ie checking it constantly at the range) or fixing it with what I had. I will add the word temporary since some people aren't confident in it. I did this sometime last year and it hasn't been a problem. I will continue to use loctite on this particular AR unless I have a problem. YMMV. That is a good backpedal for your mistake. Your explination simply doesn't make any sense either, loctite can be put on with the castle nut on the right way, it works exactly the same. It makes sense if you think about it or actually tried it yourself. If you don't have anything to add to DIY Mods, then don't post. Keep on topic. I modified my original post because of it. Arfcom also owes me a buffer retaining pin, since I decided to switch it; I really don't want to here about my castle nut if somebody closely inspects my rifle when I go shooting. Please post pictures of the mods you have done. next time i go to walmart im picking up an innertube and ill post pics after |
|
|
|
[#28]
Started a thread on this P-Mag mod, but it has since drifted into the archives.
Dust cover combined with a ranger floor plate: clips on the bottom of the new Rev-M mags 


|
|
|
|
[#29]
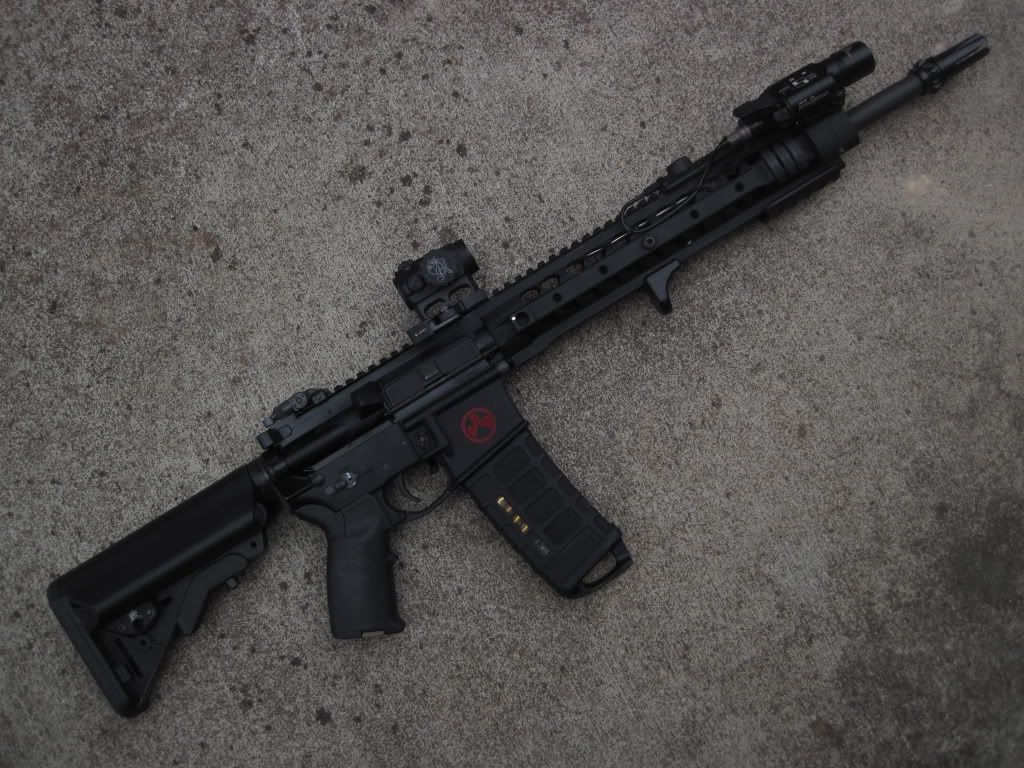
All my rifles get inner tube around the grip. Just a preference thing, nothing more.
 |
|
|
|
[#30]
Does painting count, lol.
One thing that is close to DIY is to make an early/mid-90s quick adjust two-point sling. Take the synching half of an ALICE pack shoulder strap and any sling material. I used a SAW sling from a surplus store ($5) with mine. Combine the two, and you have a quick adjust two-point. Someone will come along to explain better than I did, but it's pretty intuitive. This is the only picture I could find of the gun I had this sling on. Right now it's in a drawer as I'm currently using a Blue Force Gear Vickers sling on my go-to gun. 
|
|
|
|
[#31]
I was thinking of taking my forward assist out and making a little compartment there. I never use the FA anyways, and then the charging handle would be easier to manipulate.
|
|
|
|
[#32]
Quoted:
I was thinking of taking my forward assist out and making a little compartment there. I never use the FA anyways, and then the charging handle would be easier to manipulate. You're going to need that FA someday when you need to chamber a round quietly. Leave it on for just such an occasion... |
|
|
|
[#33]
If you want some more padding you could try that with the wraps they use for golf clubs or tennis racquets.
|
|
|
|
[#34]
Barrel fluting
|
|
|
|
[#35]
There's the one from the DIY faqs about cutting off the front sight post to make a low-pro gas block.
|
|
|
|
[#36]
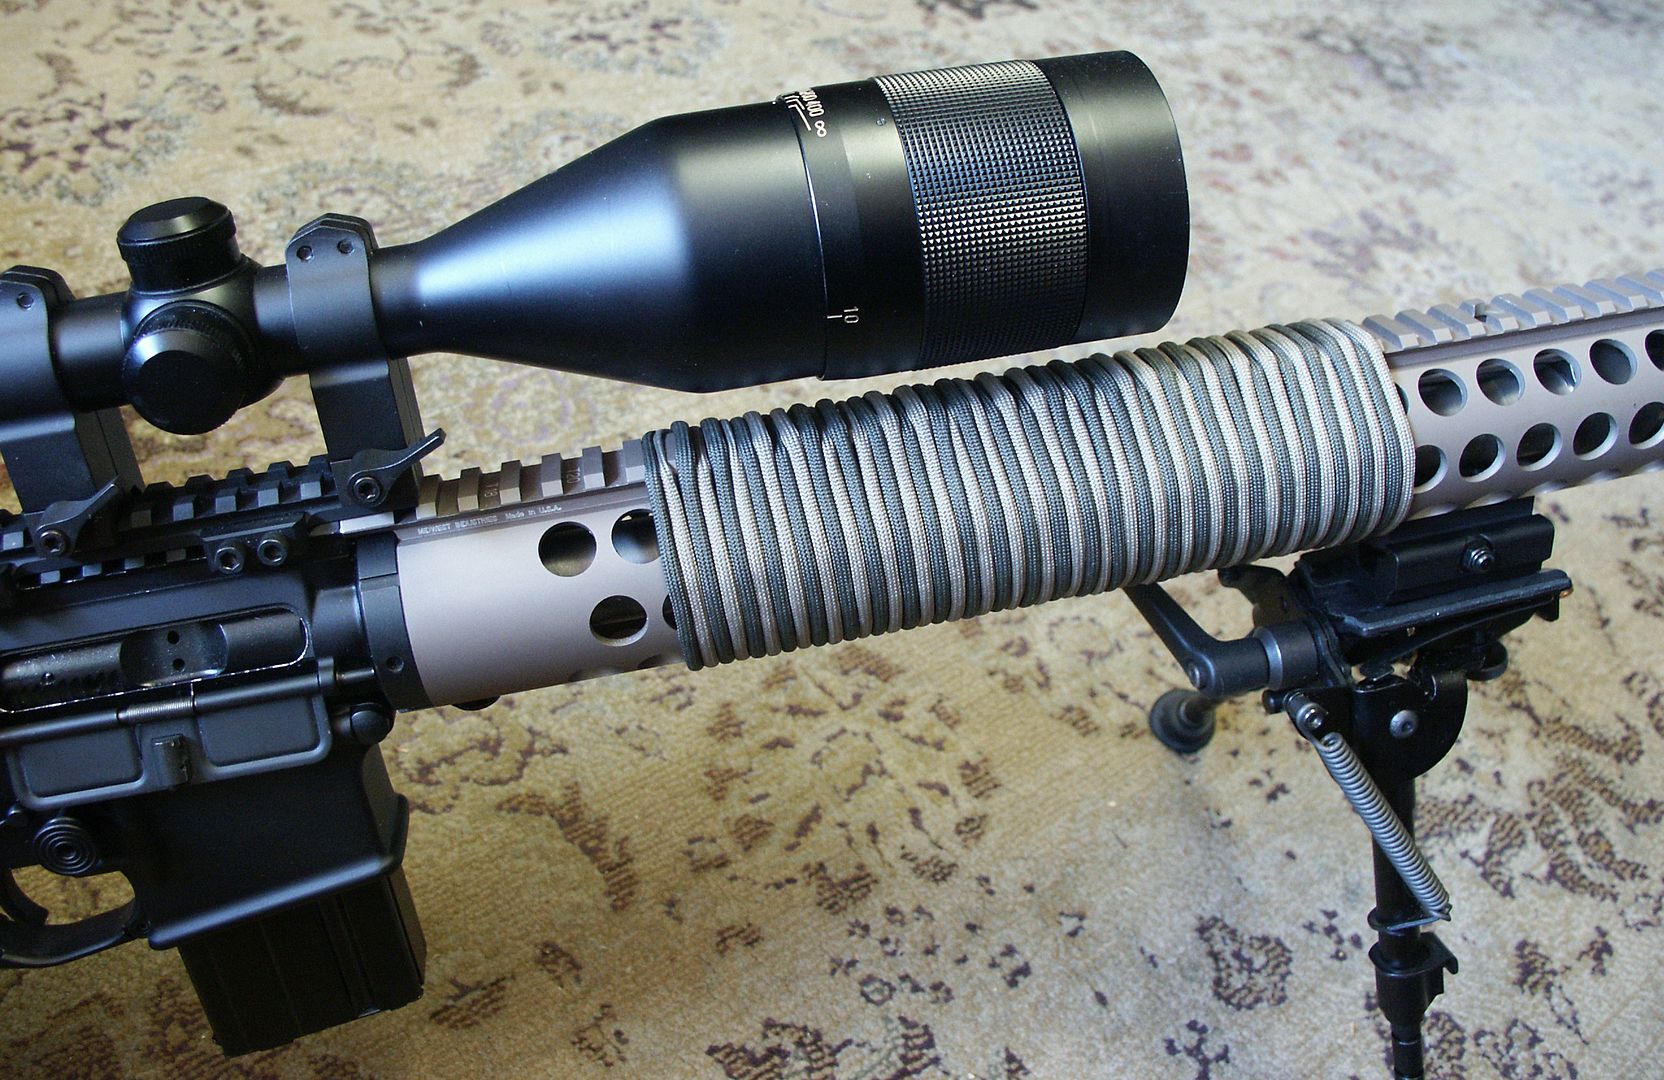
Paracord wrap would be DIY i guess. Cheap too.
|
|
|
|
[#37]
How's that wrap work out? How much heat until it burns off?
|
|
|
|
[#38]
Quoted:
How's that wrap work out? How much heat until it burns off? The Grendel does not get mag dumps so I see little heat build up. I wrapped it because the aluminum gets damn cold and drains the warmth from my hands in cold weather. I really don't care for gloves either. You do bring up a good point about how paracord well deal with a hot barrel in a tactical situation. I don't think you could get it close to melt temp, but it may stretch or shrink?? |
|
|
|
[#39]
Quoted:
How's that wrap work out? How much heat until it burns off? people paracord expensive optics to their rails and dont have issues |
|
|
|
[#40]
Quoted:
Quoted:
How's that wrap work out? How much heat until it burns off? people paracord expensive optics to their rails and dont have issues DO WHAT ? 
|
|
|
|
[#41]
Quoted:
Quoted:
Quoted:
How's that wrap work out? How much heat until it burns off? people paracord expensive optics to their rails and dont have issues DO WHAT ?
.mil folks do, if you ever notice they will usually tie down optics and peq's to keep from losing them in the rare case their mounts come loose pretty sure they use gutted paracord tied to the item and then tied to the rail |
|
|
|
[#42]
Quoted:
Quoted:
Quoted:
Quoted:
How's that wrap work out? How much heat until it burns off? people paracord expensive optics to their rails and dont have issues DO WHAT ?
.mil folks do, if you ever notice they will usually tie down optics and peq's to keep from losing them in the rare case their mounts come loose pretty sure they use gutted paracord tied to the item and then tied to the rail Stainless aircraft lock wire baby |
|
|
|
[#43]
Quoted:
I still love my modded trigger. Light & smooth. 100% reliable, with 5.56 & .22lr What is your trigger mod? |
|
|
|
[#44]
Quoted:
Quoted:
I still love my modded trigger. Light & smooth. 100% reliable, with 5.56 & .22lr What is your trigger mod? I believe its referred to as the 15 mintues trigger job. Basically I cut teh one hammer spring leg and I smoothed the surfaces on the trigger assembly. |
|
|
|
[#45]
Ah yes! Great modification! I have performed this several times. It rocks!
|
|
|
|
[#46]
Link to this trigger mod?
|
|
|
|
[#47]
Quoted:
Link to this trigger mod? Yes, do tell. Interested...... |
|
|
|
[#48]
I don't like the trigger mod. Just preference. It works great for a lot of people, but you can buy a trigger and hammer spring kit from JP that does the same thing, is more reliable, and takes about 3 minutes to put in. They only cost about $9.00. Not knocking the mod, just saying.
trigger spring kit JP Enterprises site |
|
|
|
[#49]
Quoted:
I don't like the trigger mod. Just preference. It works great for a lot of people, but you can buy a trigger and hammer spring kit from JP that does the same thing, is more reliable, and takes about 3 minutes to put in. They only cost about $9.00. Not knocking the mod, just saying. trigger spring kit JP Enterprises site I wouldn't recommend that in a serious duty gun. I still remember putting in my first franken AR and thinking I done good. The second time I pulled the trigger, it went "click" instead of bang. Light primer strikes. (i wasn't using Wolf or any of that garbage) "Click" is the loudest sound you'll ever hear from your gun. I've seen no reputable carbine course instructor or armorer recommend using lighter springs as a "just as good, cheaper, and more reliable too!" modification. Ever. However, I've heard PLENTY of them say to stick with a quality fire control group, because all manner of lightened whiz bang triggers and setups manage to go tits up. YMMV. |
|
|
|
[#50]
Quoted:
Quoted:
I don't like the trigger mod. Just preference. It works great for a lot of people, but you can buy a trigger and hammer spring kit from JP that does the same thing, is more reliable, and takes about 3 minutes to put in. They only cost about $9.00. Not knocking the mod, just saying. trigger spring kit JP Enterprises site I wouldn't recommend that in a serious duty gun. I still remember putting in my first franken AR and thinking I done good. The second time I pulled the trigger, it went "click" instead of bang. Light primer strikes. (i wasn't using Wolf or any of that garbage) "Click" is the loudest sound you'll ever hear from your gun. I've seen no reputable carbine course instructor or armorer recommend using lighter springs as a "just as good, cheaper, and more reliable too!" modification. Ever. However, I've heard PLENTY of them say to stick with a quality fire control group, because all manner of lightened whiz bang triggers and setups manage to go tits up. YMMV. What exactly are you disagreeing with me about? I never said anything about being more reliable than a stock trigger. There is nothing more reliable than a mil-spec trigger. Guess what? Mil-Spec triggers suck. I was just pointing out that the kit is MUCH more reliable than cutting off one leg of your standard hammer spring. It is much more reliable than a "modded stock trigger". I don't know what you put in yours. The JP that I mentioned works flawlessly in mine with every available ammo that I have tried so far. |
|
|
 Win a FREE Membership!
Sign up for the ARFCOM weekly newsletter and be entered to win a free ARFCOM membership. One new winner* is announced every week!
You will receive an email every Friday morning featuring the latest chatter from the hottest topics, breaking news surrounding legislation, as well as exclusive deals only available to ARFCOM email subscribers.

AR15.COM is the world's largest firearm community and is a gathering place for firearm enthusiasts of all types.
From hunters and military members, to competition shooters and general firearm enthusiasts, we welcome anyone who values and respects the way of the firearm.

Subscribe to our monthly Newsletter to receive firearm news, product discounts from your favorite Industry Partners, and more.
Copyright © 1996-2024 AR15.COM LLC. All Rights Reserved.
Any use of this content without express written consent is prohibited.
AR15.Com reserves the right to overwrite or replace any affiliate, commercial, or monetizable links, posted by users, with our own.


