|
Posted: 4/24/2010 10:30:43 AM EDT
This is all a generalization, I am not speaking or teaching on behalf of Project Appleseed, just providing general pointers for those interested to make it easier.
Remember - saftey first, last and always. Bring tylonol - you'll hate yourself on sunday if you don't. Bring lots of water, and a way to easily drink it without having to walk away from the firing line. Do not fret your choice of equipment, Appleseed teaches fundamentals that are universal to your firearm and gear choice - they WILL work with you one on one to improve and guide your technique, and if needed, rifle modification to fit YOU. The only real equipment recommendations I would make is run a USGI sling, if you run a rifle with an exposed box mag (like an AR) use the shortest mags you can - 30 round mags will keep you from being able to get into the proper position, and if your rifle doesn't have peep sights on it already see if some are available for it from http://www.tech-sights.com/. Appleseed teaches scope, peep sights, and leaf sights, but the accuracy advantage that peeps have over leafs, and the focus on fundamentals that you are forced to practice with irons make me say that if you're serious about going to learn how to shoot better, go with iron sights. Most folks take 3-5 Appleseeds to obtain a rifleman patch, but you're not going for the score, you're going for the experiance - right? That said, safety first, last, and always. Appleseed has 4 rules of safety. 1) ALWAYS keep the muzzle in a safe direction 2) DO NOT LOAD until given the load command 3) Finger OFF THE TRIGGER until your sights are on target. 4) Make sure those around know and abide by the first 3. Everybody wants to leave with the same number of holes they arrived with. This is a team effort, so be a team player. Appleseed also has 6 steps towards a safe rifle. 1) Mag out 2) Bolt back 3) Safety on 4) Flag in 5) Rifle grounded 6) Nobody touching This is a safe rifle: 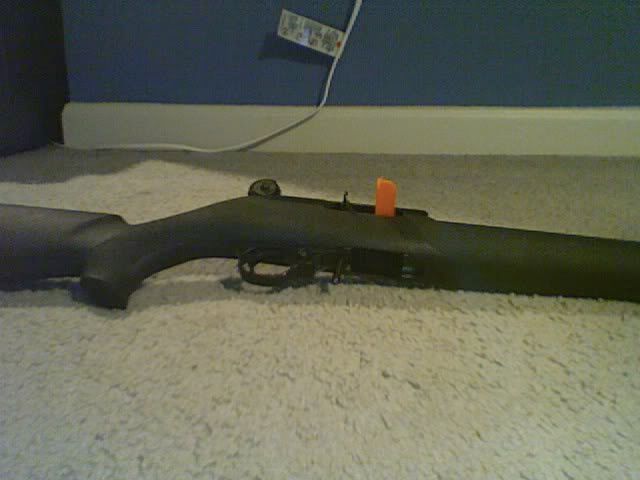
Appleseed recommends the use of a USGI web sling. It's a simple device that is easily used incorrectly if not given the proper instruction. I highly recommend that you utilize quick disconnect sling swivels. This jumbled mess is a USGI web sling with swivels. 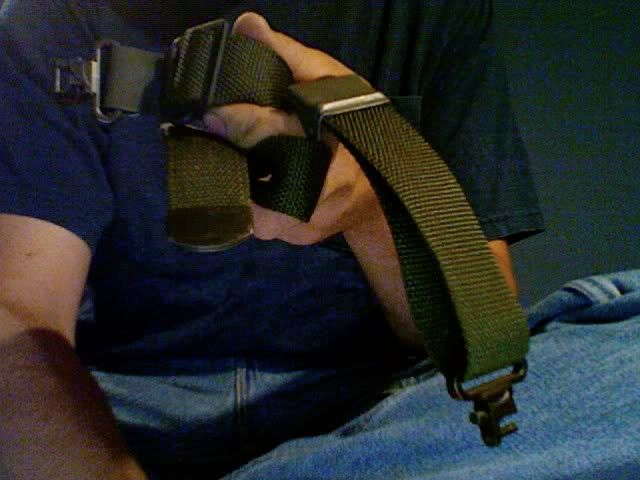
This is how you attach it on the front: 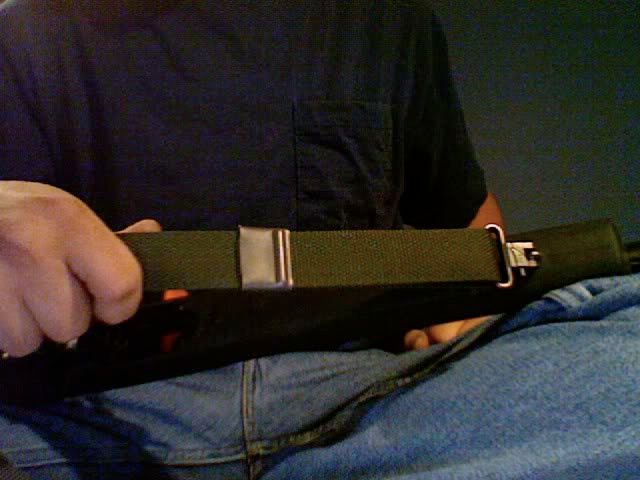
And the rear: 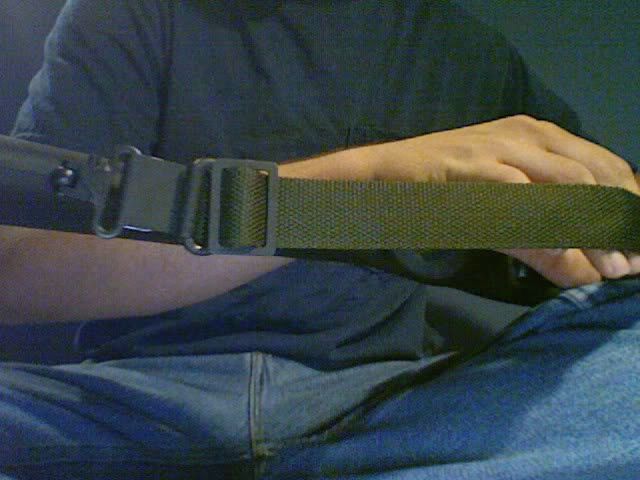
There is no twisting involved when mounted, it forms a straight line. This is the buckle you will use to change the length of the sling when mounted: 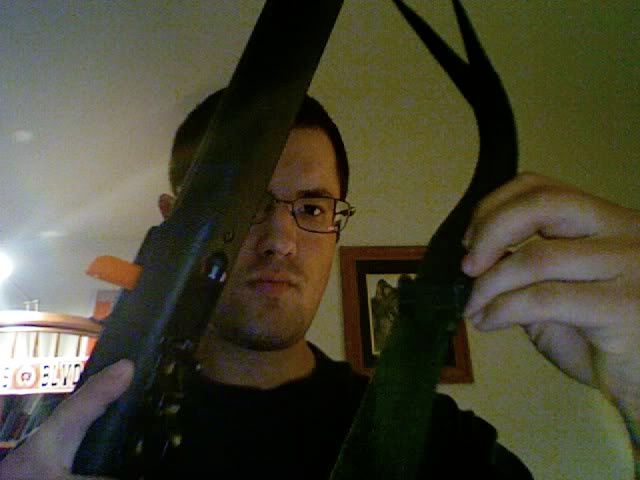
This is how you do that: 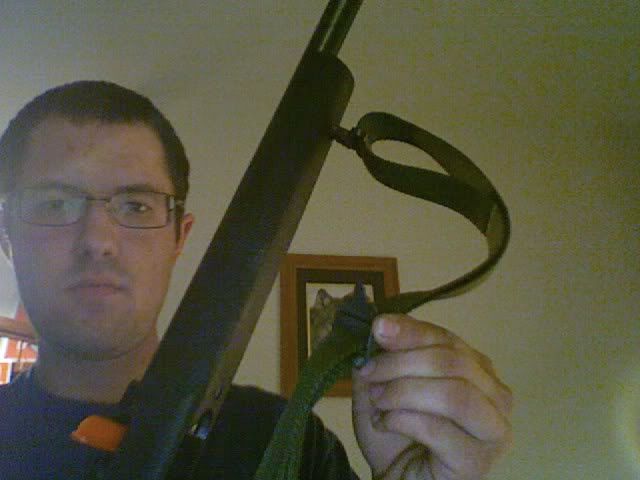
For a rule of thumb, with the rifle horizontal you want the sling to be long enough that there is about a hand's width (fully opened) between the trigger guard and the sling, like so: 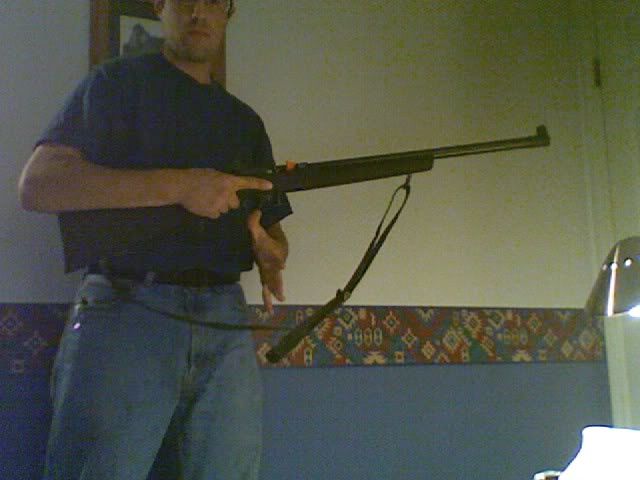
This concludes beginner's sling mounting and safety brief. If you attend an Appleseed (which you all should) there may be modifications to the above. Obey them. |
|
|
|
[#1]
USGI hasty sling use.
This sling method is not preferred in any position except for standing. It induces an unnatural cant to the rifle that you must combat, which leads to accuracy, when in the other positions. To perform the hasty sling, with the rifle verticle, reach through sling with your support arm, like you're trying to get to your favorite beverage in the back of the fridge (which for some reason is where it always seems to be) 
Then, pull your handback around the sling, and put your palm on the stock, running the stock between your wrist bone and the webbing between your thumb and index finger. It will take practice and patience to find a way to do this while keeping the sling flat against the back of your support hand, which is pretty important. 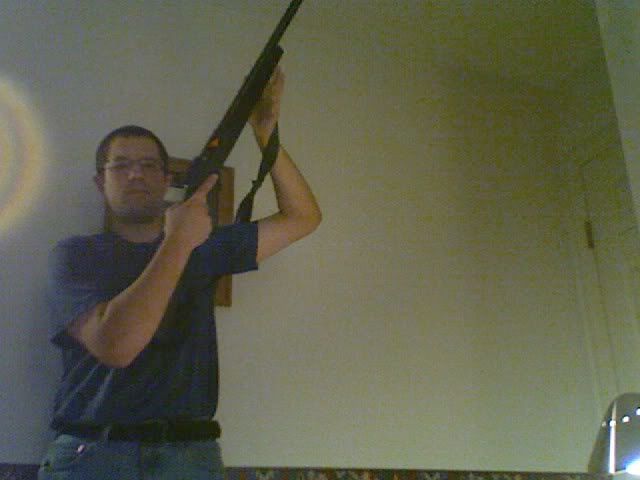
After this point, pull the rifle with your trigger hand, which will wind tighten up the sling around your support hand. While not gripping the forearm of the rifle with your support hand and standing naturally, pull the rifle to your eyes, and do not lower your head to the rifle. 
This will increase the tension on the sling more, and allow you to keep the rifle in a shooting position without the use of your trigger arm at all. It also ensures consistency when mounting the rifle, and when shooting a high power rifle, allows the tight sling across your chest to absorb a lot of the recoil of the rifle. You will find that for most people with most rifles, only the bottom rear corner of the stock will be in your shoulder. This is completely normal. Chicken wing, turkey neck, get your support elbow UNDER the rifle - if you were to drop a magazine, it should hit your arm, not drop clear to the ground. Focus on all of the steady hold factors that you will be taught at an Appleseed, and the 6 steps to firing a rifle, and make a nice tight group. 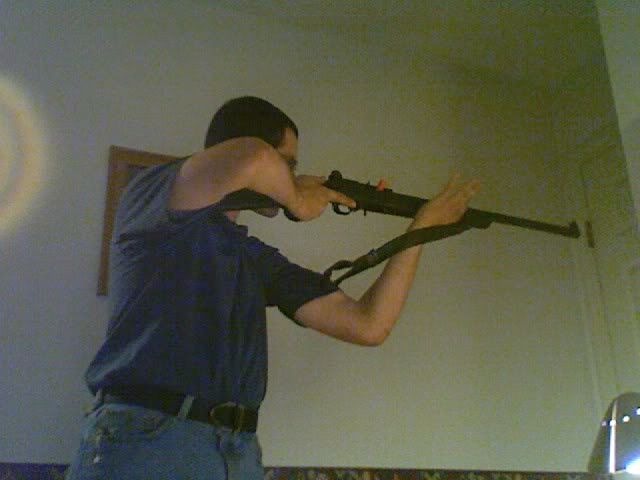
This concludes the use of a hasty sling and the standing position for Appleseed purposes. What are the four safety rules? What is a safe rifle? |
|
|
|
[#2]
USGI web sling, loop method
Here is how to utilize your USGI web sling properly using the loop method. First, start in a steady position with the rifle's muzzle pointed in a safe directly with the sling facing forward. 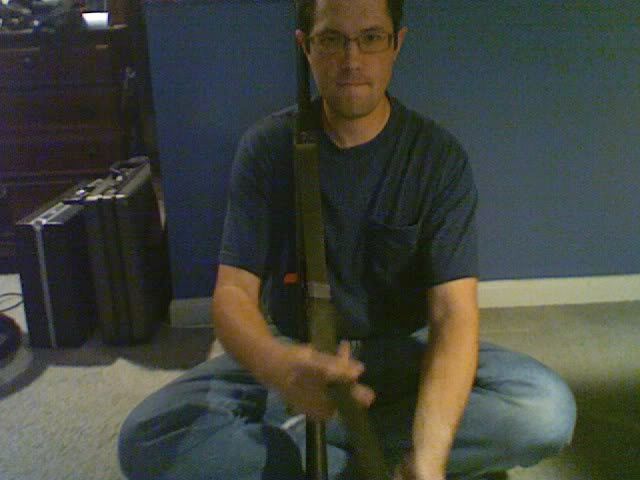
Remove the rear mounting of the sling. 
Look at your buckle. Cornfuzed? 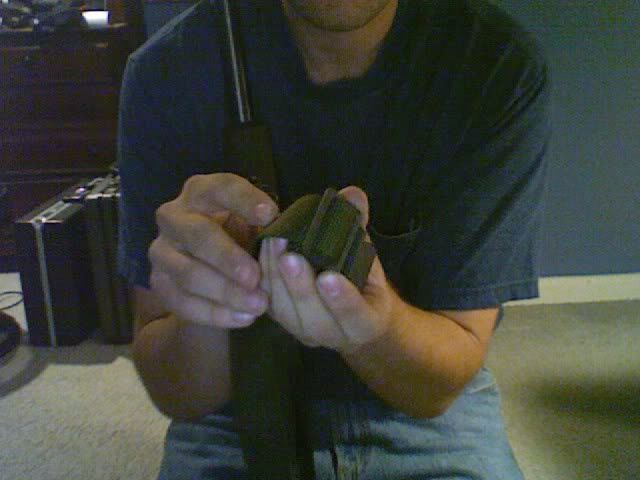
No worries, just make a loop with the cotton that's visible on the hump within the buckle. 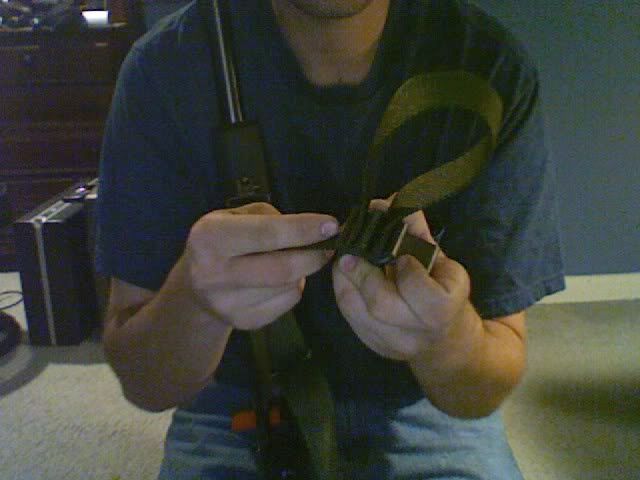
While holding the loop as large as you can make it and the sling with no twists in it 
rotate the sling 1/2 turn towards your trigger arm. Insert your arm through the bottom of the loop, keeping the buckle to the outside and the forward part of the loop (which attaches to the stock) facing forward. 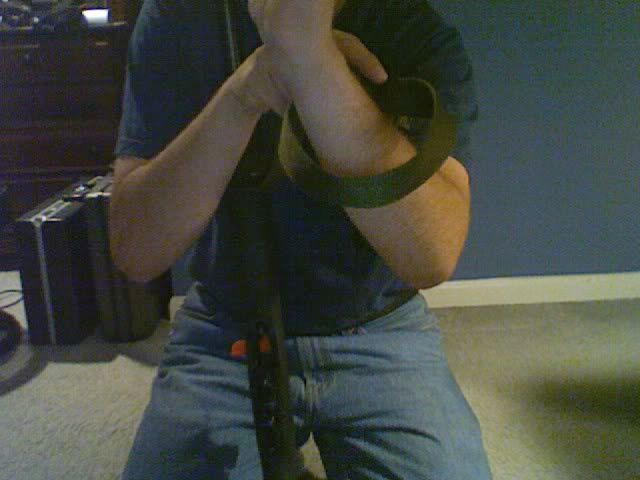
Get the sling as high as you can, above the bicep and into the arm pit 
Pull the sling tight and take out the slack, in effect 'cinching' the buckle 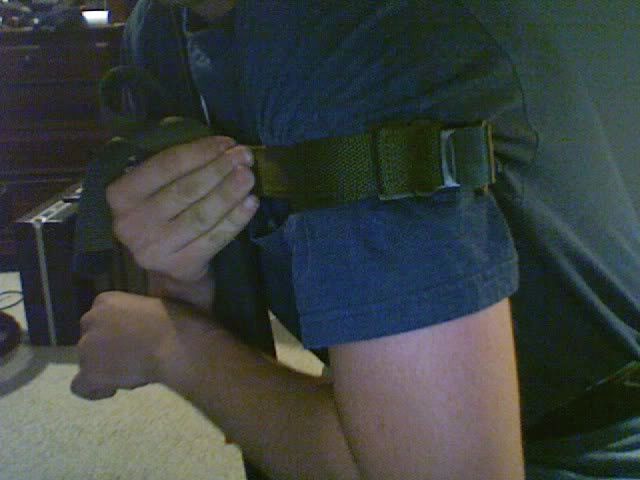
Wrap your support hand around the stock, and place the stock on the wrist bone and up to the webbing between your thumb and index finger. Don't grip the stock. 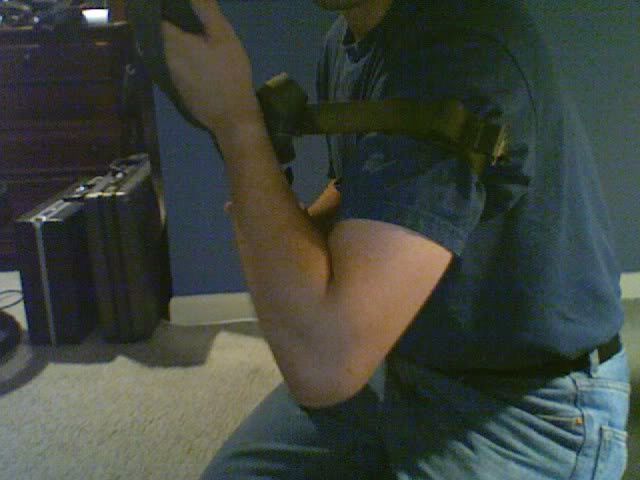
That 1/2 twist from earlier is important - it keeps the sling flat against your body. This keeps you comfortable, and allows you to shoot well. 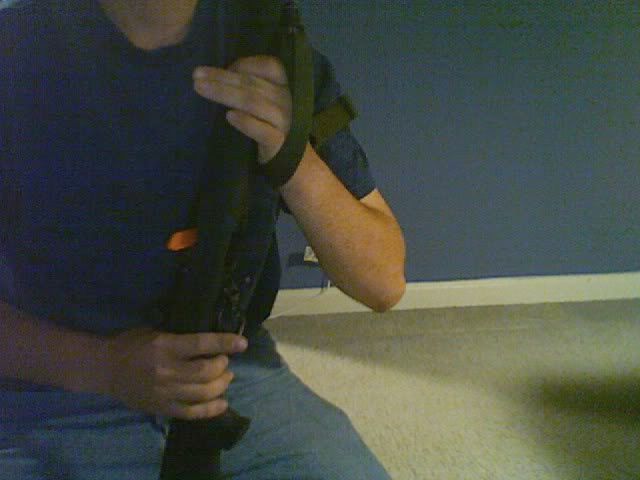
What are the 4 safety rules of Appleseed? What makes a rifle safe? |
|
|
|
[#3]
Prone position
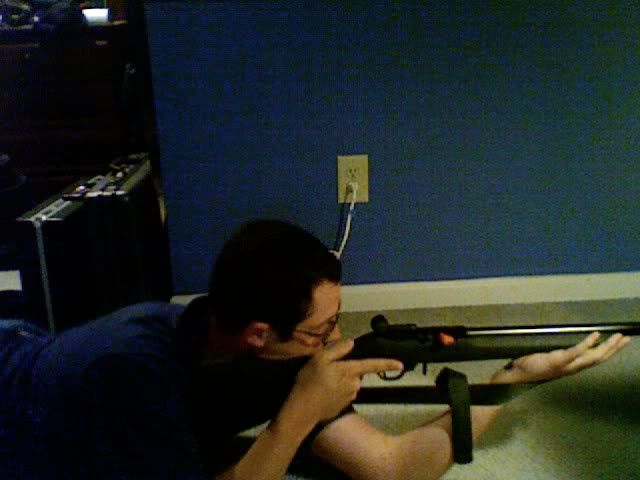
Keep your support elbow under the rifle. If you drop a mag, it should hit your arm. Keep the sling taught, and let it support the rifle, not your muscles. I like to keep my slings very tight, which can cause tingling in the arm during a long course of fire - but by keeping that loop high and very tight on my arm, I can completely relax the muscles in my support arm, allowing the sling to directly lock that arm in one position, and keep my groups tight. The moment you pull the arm off to the side, this skeletal/sling triangle support that you have going on is gone, and your groups will open up. Head is turkey necked forward for consistent cheekweld and recoil absorption, and the support hand is placed where the flat of the elbow is on the ground. The trigger hand does not wrap the stock, which allows the trigger hand to move forward to the right position to allow the trigger finger to be 90* to the bore when the shot breaks - hardly anybody picks up on this the first time around. The trigger elbow flops to where it's comfortable, but is not supporting my weight or keeping me from rolling over. If you're carrying a spare tire, it helps make room for that on the ground as well. It also puts a lot of weight on your support shoulder from laying into it like a hammock, something most of us aren't used to. This is what the tylonol is for. Begin your regimen before the pain starts. Adjusting your aim does not mean use your muscles to move the rifle. Move your hips forward and back for elevation, side to side for windage, using your support elbow for a pivot point. For those lucky enough to take an Appleseed shoot with Posterboy in attendance as an instructor, ask about his NPOA dance. 
Trigger leg is propped about nice an dhigh to the torso, ideally up into your armpit, but realistically about 90* to the torso, up nice and high. This lifts the diaphragm off of the ground, and limits how much the rifle moves when the shooter is breathing. Slight adjustments to the aiming of the rifle can sometimes be accomplished by moving the trigger foot. My hip hurts like hell if I'm at 90* and my groups disappear, so I put my leg at as high as I can get it without pain, about 60*. The support leg is in line with the spine, and though it isn't visible, the support foot is as FLAT to the ground as I can get it - to which side is irrelevant. The only important thing is to keep the foot off of verticle, which keeps your toe from digging into the ground and your foot wobbling - which will move the rifle. Your body should be about 30* to the target. What are the 6 steps to firing the shot? What are the 4 safety rules? Gotta go and get the Appleseed experience to find out |
|
|
|
[#4]
Sitting
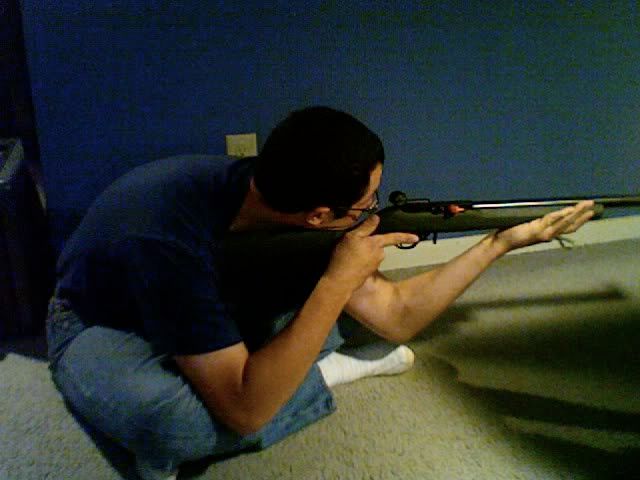
Sitting is second only to prone for stable shooting positions. Most people do it wrong, or haven't stretched in 30 years and can't get in this position. There are other positions that these folks can utilize, but it's best if you can get into this position. First, sit down cross legged Indian style with your trigger leg behind your support leg. Elevation is adjusted by pulling the feet closer or further away from you. Place the flats of the back of your elbow in FRONT of your knees, on the flat part of the shin. Don't put your elbows on your knees - two round surfaces pushed together have a strong tendancy to NOT stay stable. Turkey neck as always, and pivot around your support elbow/knee with the Ohio two-cheek-scootch to adjust your windage. Continue to utilize all techniques taught about sling usage and fire control, and remember to let your skeletal structure and the sling support the rifle, not your muscles. Your body should be about 45* to the target. The sling is not shown in this simply to make it easier to see how the body is placed. Utilize a loop sling of proper tension. What is step 4b of firing the shot? |
|
|
|
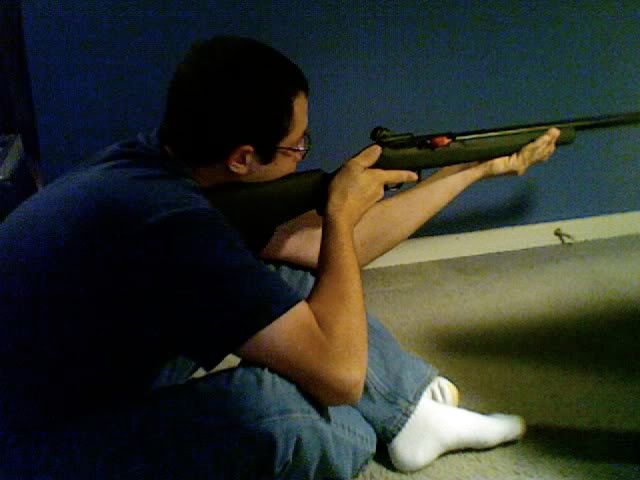
[#5]
Kneeling

Continue all proper sling usage and support arm/hand useage. Kneel with the trigger foot under your butt. Keep your foot off of vertical, and sit on it - yup, parallel to the ground. This eliminates a source of motion. If your body can't do that, look into laying it off slightly to the side. Put the flats of your elbow on the flattest part of your bent knee. Your body should be almost 45* to the target. The sling is not shown in this simply to make it easier to see how the body is placed. Utilize a loop sling of proper tension. What's step 6 of firing the shot? |
|
|
|
[#6]
Coss ankled, legs forward
We're essentially taking the seated position, and moving our feet forward. I really don't know what else to say other than that. The sling is not shown in this simply to make it easier to see how the body is placed. Utilize a loop sling of proper tension. 
Have you signed up for your Appleseed yet? |
|
|
|
[#7]
Thanks

Now to get a sling and practice |
|
|
|
[#8]
Awesome tutorial! It would be nice if the Appleseed organization put out a few pages manual that included this info and any other tips they had on how to shoot right. It would help a lot compared to the printed info I got from them years ago (maybe they've improved and I don't know it).
Link this thread to the instructors at the appleseed forum and see if they want to publish something like this there. I got my rifleman patch and am still learning every time I hit the range. |
|
|
|
[#9]
I did find this in the site after this was posted.
M1 Rifle tutorial Video |
|
|
|
[#10]
Quoted:
Awesome tutorial! It would be nice if the Appleseed organization put out a few pages manual that included this info and any other tips they had on how to shoot right. It would help a lot compared to the printed info I got from them years ago (maybe they've improved and I don't know it). Link this thread to the instructors at the appleseed forum and see if they want to publish something like this there. I got my rifleman patch and am still learning every time I hit the range. The only time I referenced the papers I was handed at my first Appleseed was after I got home - I was too busy learning and shooting to read at the Appleseeds. Being this is unsolicieted advice, and I am not speaking for Appleseed at all, and I'm simply an IIT, and that you need to GO TO AN APPLESEED SHOOT to really learn the fine points, I wouldn't look at publishing this on the Appleseed website at all. Their link on what to bring is more than comprehensive. Toss in the fact that many people think they are good shots (till we put a 1" square at 82 feet and say hit it), and us guys refuse to acknowledge that we may be wrong in technique naturally, it would only increase that stubborness and compound the problem. Or worse, people would thing "I've got it in pictures, I'm good to go" and they wouldn't even attend. So personally speaking, I would not encourage that they put something like this on their website. And yes, they have drastically changed and grown since I went to my first shoot, which was 09/2009. |
|
|
|
[#11]
Excellent post, OP!
|
|
|
 Win a FREE Membership!
Sign up for the ARFCOM weekly newsletter and be entered to win a free ARFCOM membership. One new winner* is announced every week!
You will receive an email every Friday morning featuring the latest chatter from the hottest topics, breaking news surrounding legislation, as well as exclusive deals only available to ARFCOM email subscribers.

AR15.COM is the world's largest firearm community and is a gathering place for firearm enthusiasts of all types.
From hunters and military members, to competition shooters and general firearm enthusiasts, we welcome anyone who values and respects the way of the firearm.

Subscribe to our monthly Newsletter to receive firearm news, product discounts from your favorite Industry Partners, and more.
Copyright © 1996-2024 AR15.COM LLC. All Rights Reserved.
Any use of this content without express written consent is prohibited.
AR15.Com reserves the right to overwrite or replace any affiliate, commercial, or monetizable links, posted by users, with our own.


